Airbrush 3d print
Best Airbrush & Paint for 3D Prints & Miniatures – 3D Printerly
When I first started learning about painting 3D prints and miniatures, it took me a while to become aware of the best options around for finishing models.
Apart from using spray paints and acrylics, I found out that you can also use an airbrush to finish 3D prints with great detail and top-notch color blending.
This is easier said than done because not all airbrushes or paints available for purchase can offer you high quality on a reliable basis.
Therefore, I decided to put together a guide of the best airbrushes and paints for 3D prints and miniatures to help you get started with airbrush painting and make your models look flat-out amazing.
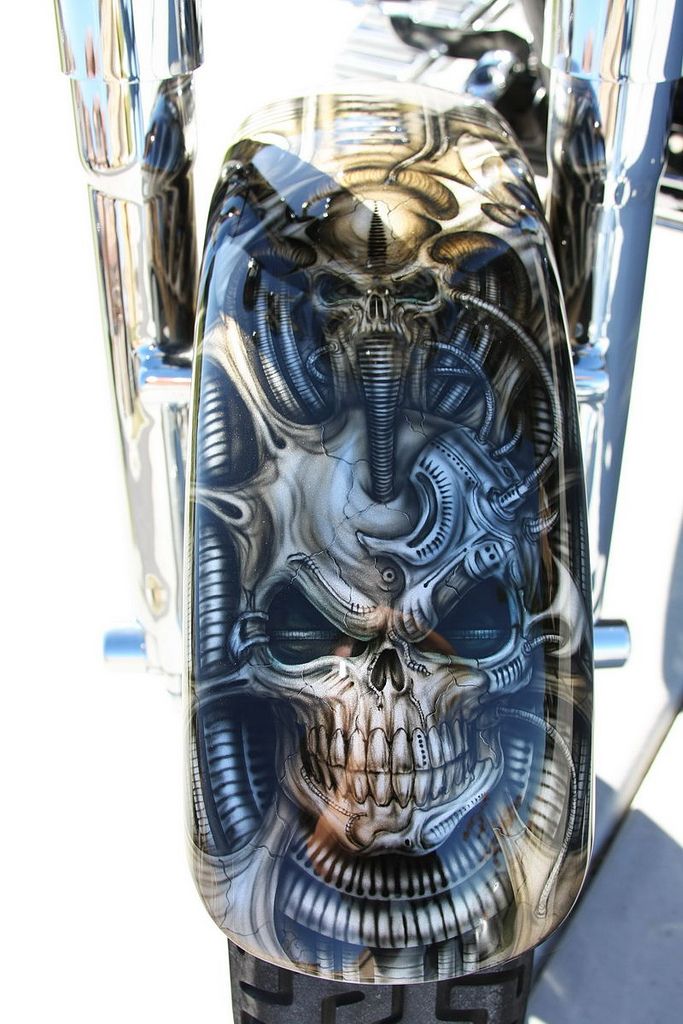
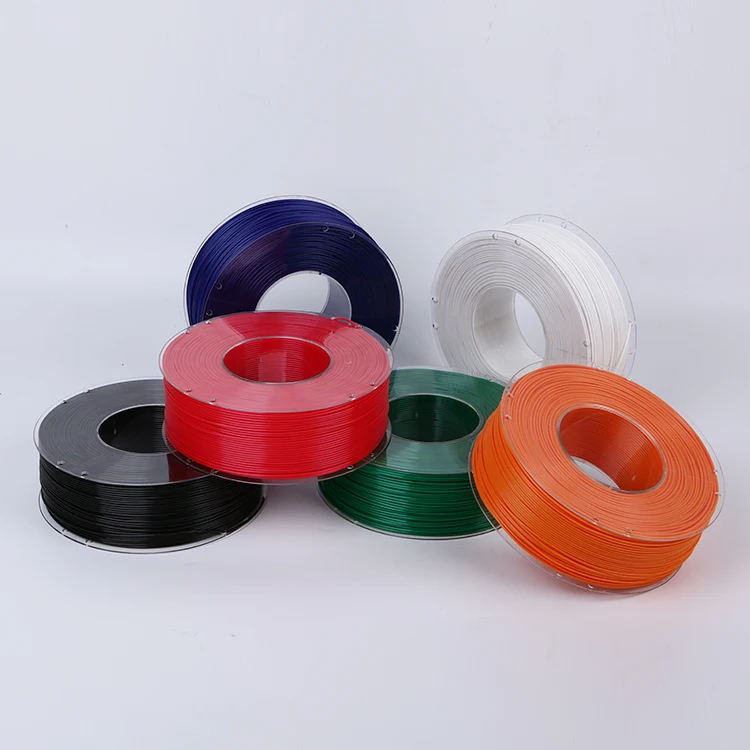
Check out this amazing comparison of a vase, the left being Rainbow Silk filament with a horizontal color change and a Gold Silk filament that was airbrushed with two colors (contoured) – created by Charlie Behre.
Best Airbrush for 3D Prints & Miniatures
Master Airbrush Cool Runner II Dual
The Master Airbrush Cool Runner II Dual is a complete airbrush kit that you can get from Amazon which sets you up with everything you need to start painting your 3D prints and models with precision and quality.
The following items are included in this kit:
- Master TC-320 Compressor
- Master Airbrush Model MAS G22
- Master Airbrush Model MAS G25
- Master Airbrush Model MAS E91
- Airbrush Cleaning Brush Set
- Compressor Mounted Airbrush Holder
- Airbrush Color Chart (How-To Guide)
- 6 Feet Air Hose
- 6-Bottle Primary Opaque Color Set (1oz Each)
As you can see, this kit has everything you need to get started with painting 3D prints and models. This is a reason why the Master Airbrush Cool Runner II Dual is called the best beginner airbrush kit for miniatures, which is priced around $150.
For someone who has no experience with airbrushes and compressors, this kit is fairly easy to put together with the help of clear instructions in the included how-to guide.
At the time of writing, the Master Airbrush Cool Runner II Dual has been received well on Amazon with a 4.7/5.0 overall rating where 79% of the customers have left a 5-star review.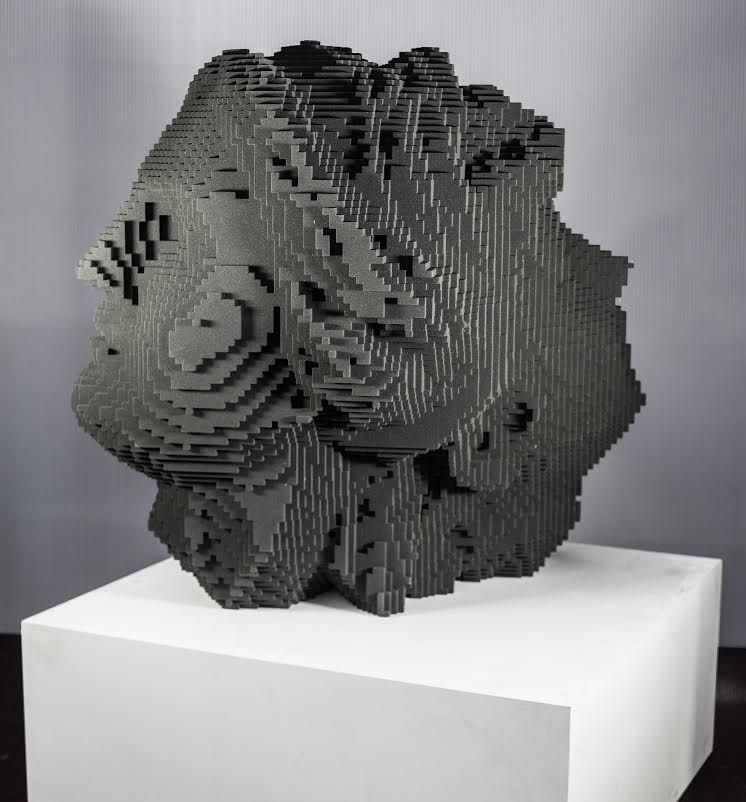
One person says that he has tried out multiple high-end airbrush brands in their 3D printing experience, so they were quite doubtful about the quality of the included airbrushes in this kit.
To their surprise, the Master Airbrush Model MAS G22, G25, and the E91 are all high-quality airbrushes that are user-friendly and simply on par with the products of premium manufacturers like Badger and Iwata.
The Master TC-320 Compressor also boasts sufficient quality and has a low-decibel operation. This means that it can be used when other people are sleeping in the house as well.
One user recommends using nothing else than the included cleaning brushes to clean the nozzle of the airbrush. They tried using something else and broke the brass threads inside.
Another experienced customer said that they were able to get into painting their 3D prints very quickly and easily with this setup. It’s definitely a worthy package if you’re looking for a whole airbrush kit that includes many items such as three high-quality airbrushes.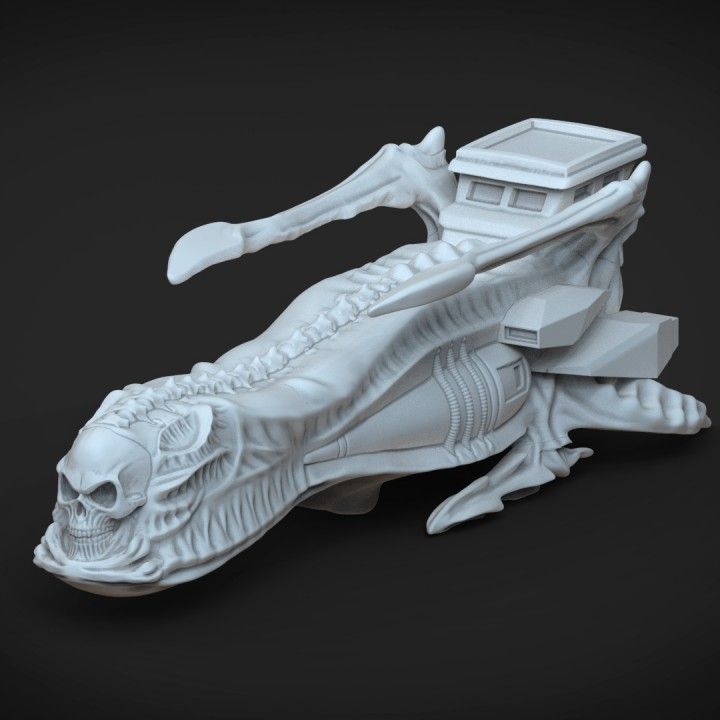
This specific airbrush kit is also featured in the following video by The 3D Print General, so do give it a watch if you want to see it in action.
Get yourself the Master Airbrush Cool Runner II Dual directly on Amazon today.
Iwata-Medea Revolution CR Dual Action
Another high-quality product that gets the job done nicely is the Iwata-Medea Revolution CR Dual Action Airbrush. It costs about $100 and packs great value for money as hundreds of customers have said in their reviews.
The Iwata-Medea Dual Action airbrush is considered one of the best airbrushes for miniatures because of its ergonomic handle design and smooth trigger mechanism.
It comes from a well-established brand that’s popular in the 3D printing community for its wide variety of high-performance airbrushes and airbrush compressor kits, so you’re definitely making the right choice with this product.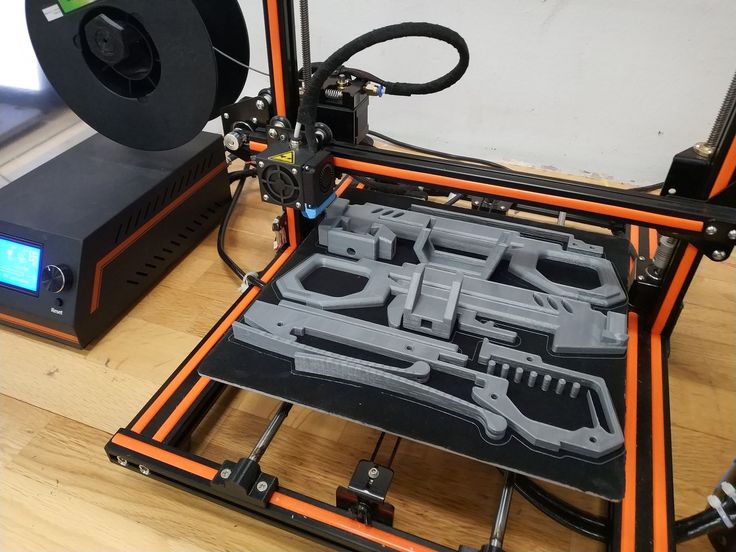
At the time of writing, the Iwata-Medea Dual Action airbrush enjoys a great reputation on Amazon with a 4.8/5.0 overall rating. Moreover, 87% of the people who bought it have left a 5-star review.
One experienced airbrush user says that many airbrushes in this price range come with inconsistent airflow and uncontrollable thick sprays of paint, but the Iwata-Medea Dual Action airbrush is nothing like those.
The customer says that they received the product fast with good packaging and they were quickly able to start painting their 3D printed objects because of the ease of use of this airbrush.
Another person says that you can use different thicknesses and air pressures, depending on your requirements, and spray paint your miniatures however you like. Rest assured as the quality will be just fantastic with this airbrush.
One user who had tried other airbrushes unsuccessfully read up on reviews about this particular model and was astonished by the difference in quality.
The Iwata-Medea Dual Action airbrush can also be used for painting your model railroad objects, as a reviewer has mentioned.
The price of this product is fairly reasonable. It’s easy to clean and even easier to work with and is a highly recommended option for 3D prints and miniatures.
Check out the Iwata-Medea Revolution CR Dual Action on Amazon for airbrushing your 3D prints today.
Master Airbrush Model G79
The Master Airbrush Model G79 is a competitively priced product that comes with multiple features to help you achieve high-quality paints on a consistent basis. It costs about $70, so fairly budget-friendly for what it’s worth.
This airbrush features unique self-centering drop-in nozzles and three screw-on gravity fluid cups: 1/16, 1/6 & 1/2oz. Therefore, it is very versatile that can be used for 3D prints, miniatures, crafts, nail arts, and even temporary tattoos.
Since you get three different tip sizes with the product, you can switch between fine detail, general detail, and wide spray patterns easily. This makes the airbrush fairly all-purpose.
At the time of writing, the Master Airbrush Model G79 boasts a 4.5/5.0 overall rating on Amazon. In addition, 72% of the customers who bought it have left a 5-star review.
One user writes that the ergonomic trigger action of this airbrush is smooth and reliable and that the 0.5mm fluid tip works great for miniatures.
In addition, the paint travels nicely as well, so you won’t get big blobs of paint coming out of the tip. You can comfortably use this airbrush on low, medium, and high viscosity materials and not just 3D printed objects.
Another customer says that they’ve been able to finish several projects quickly with this airbrush as compared to their previous devices. The Master Airbrush G79 is easy to clean and works just as intended.
A user of this airbrush who also owns the Iwata-Medea Dual Action airbrush says that this one performs better with acrylic paints and you get the added benefit of spraying in wide patterns, which is more suitable for large 3D prints.
For the price, this product is one of the best airbrushes for 3D printed models. It gives you features that many other higher-priced airbrushes do not, so you should definitely opt for it if you’re on a budget but still want high-quality paints.
You can find the Master Airbrush Model G79 directly from Amazon today as a cheaper airbrush option to paint your models.
Best Airbrush Paints for 3D Prints & Miniatures
TIMBERTECH Professional Airbrush Paint
The TIMBERTECH Professional Airbrush Paint is the product of choice for thousands of 3D printer users around the world. It is a set of 12 water-based acrylic paint bottles that are each 30ml in quantity.
The whole paint bottle set costs about $25, so it’s very nicely priced for consumers and 3D printing enthusiasts who are looking to paint their models with great finishing.
The following colors are included:
- Lemon (Yellow)
- Scarlet Red (Red)
- Lime (Green)
- Ultra-Marine Blue (Blue)
- Burnt Umber (Brown)
- Titanium White (White)
- Khaki
- Orange
- Purple
- Mars Black (Black)
- Neutral Gray
- Middle Green
Therefore, you get a lot of variety with this set of acrylic bottles.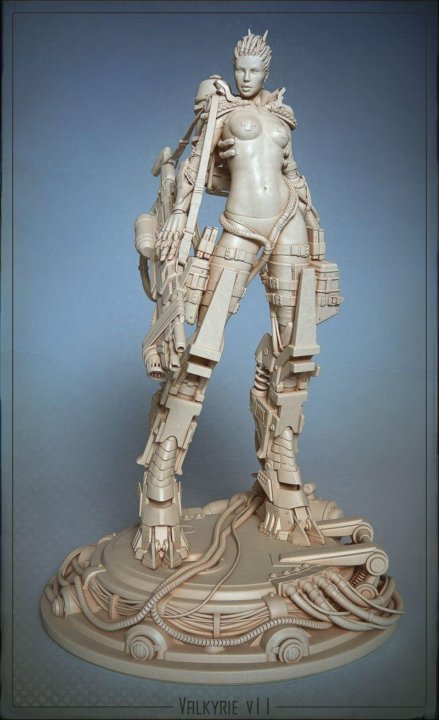 The colors look sharp, punchy, full of life, and are also gluten-free, so you can buy these paints with full confidence if you have a little one at home.
At the time of writing this article, the TIMBERTECH Professional Airbrush Paint has a 4.5/5.0 overall rating with 70% of the customers leaving a 5-star review lauded with praise.
One customer admires that you can use these paints with any airbrush. Another user says that they regularly use this product to paint their 3D printed miniatures and figures, and the results are just awesome.
Many people who use these paints say that the colors are easy to clean and that the pigment clarity is remarkable. One user recommends applying two coatings of paint when using this product to get the best results.
Apart from 3D prints and miniatures, you can also use these paints on paper, canvas, wood, fabric, leather, plastics, metallic, and ceramic surfaces and give them a professional look.
Several people worry about the durability of acrylic paints, but a customer who put this product to the test by painting a mechanical 3D print says that the TIMBERTECH Professional Airbrush Paint is fairly tough and resistant.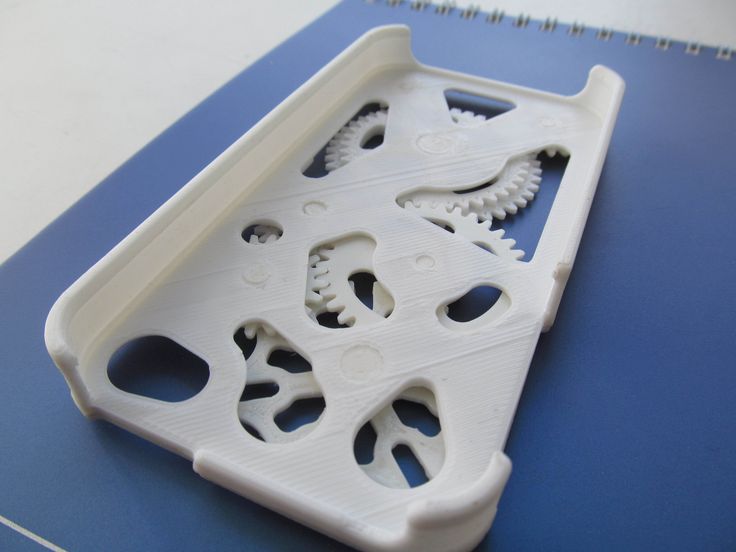
Get yourself the TIMBERTECH Professional Airbrush Paint Set directly from Amazon today.
Vallejo Acrylic 16 Airbrush Paint Set
The Vallejo Acrylic 16 Airbrush Paint Set is a premium option for you to go with. It is a bit expensive but is still picked up frequently and all of its customers regard it as an excellent choice of paints.
Make sure that you get the “Model Air” series of Vallejo’s acrylic paints as several customers have confused the listing and ended up with something that isn’t made for airbrushes.
Unlike the TIMBERTECH Professional Airbrush Paint, the Vallejo Acrylic 16 Airbrush Paint Set comes in 4 more colors which are mahogany, light blue, middle stone, and mud brown.
At the time of writing, this product has a terrific 4.7/5.0 overall rating on Amazon, and a cool 82% of the people who bought it have left a 5-star review. It costs around $55 to get yourself the set.
One expert 3D printer user says that these paints are easy to spray and there’s no need to thin them down after applying either. The dropper bottles are comfortable to handle and the paint dries very fast, making the whole paint job convenient and hassle-free.
Another customer recommends that you might need to use a sealer after applying the Vallejo paints for the best results. That can be done with a clear coat or something like epoxy resin easily, so your paint won’t chip off.
However, this is more recommended for large-format cases like painting the body of a car. For 3D printed models and miniatures, you’ll do just fine with regular coats as many people have remarked.
One user says that they had tried many other cheaper paints with their Iwata Airbrush but all of them clogged. Then they stumbled upon the Vallejo Acrylic Paint Set and they were surprised to see the smooth flow and consistent, high-quality spray.
The coverage of these paints is great and they really get you that terrific finishing on your miniatures and other 3D prints. Plenty of 3D printer users are enjoying their experience with these paints, and you should definitely try these out as well.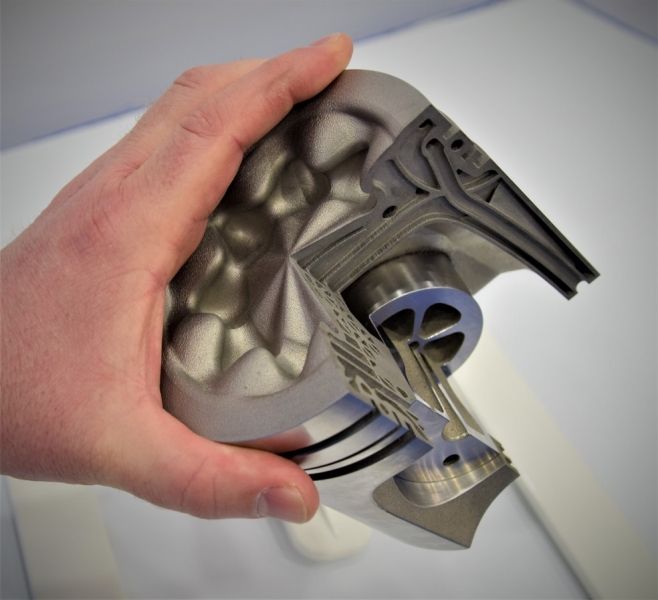
Check out the Vallejo Acrylic 16 Airbrush Paint Set on Amazon today for premium paints.
Arteza Acrylic Paint Set
The Arteza Acrylic Paint Set is a pack of 20 acrylic, water-based colors that can be used efficiently with airbrushes to paint 3D prints and miniatures. It is extremely popular and has more than 5,200 ratings on Amazon.
One of the biggest benefits of buying these acrylics is their cost-effectiveness and value for money. This pack contains 20 bottles that are each about 2oz or 59ml in quantity, and cost just about $24 in total.
Unlike Vallejo, the Arteza Acrylic Paint Set is definitely more affordable. It also provides a matte finish to your model which is considered as optimal coverage as compared to the Vallejo Acrylic 16 Airbrush Paint Set’s flat finish.
At the time of writing, this product has gathered quite the reputation on Amazon with a 4.8/5.0 overall rating. Furthermore, 87% of the customers have left a 5-star review that speaks volumes about this paint’s quality.
One user loves the fact that despite being many in number, each bottle is individually sealed with a foil. This prevents any potential leakage during transit and helps you store the bottles securely as well.
Another customer said that this is, by far, the best paint for 3D printed resins that they have come across. It works on multiple surfaces, including wood, rocks, glass, fabrics, ceramics, and paper, so you’re not limited to plastics only.
The Arteza Acrylic Paint Set uses a fast-drying formula so you can apply additional coats right away without waiting. The colors are high-quality, and they blend with the model effortlessly as well, as thousands of customers have said.
One person ran into a shipping problem with the manufacturer, but Arteza’s customer support service was fast to reply and very supportive to help them out. This makes this company stand out among other options.
Get yourself the Arteza Acrylic Paint Set directly on Amazon today.
If you are looking for some higher quality options, you can go with the Golden High Flow Acrylic 10-Color Transparent Set and the Golden Paint Acrylics High Flow Assorted Colors Bundle from Amazon.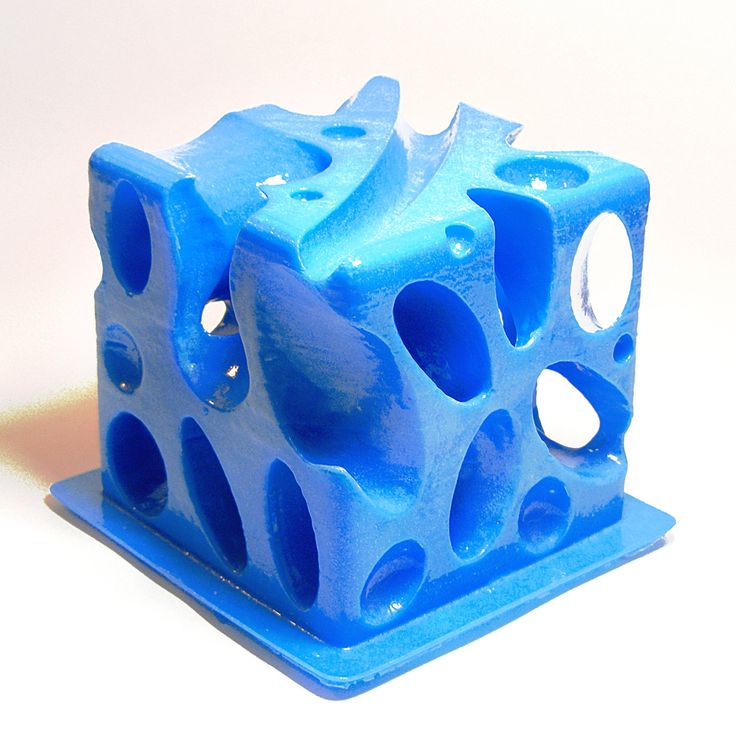 They do come at a higher price, but you get what you pay for.
Best Air Brush Compressor for Miniature Painting & 3D Prints
TIMBERTECH Upgraded Single-Piston Compressor
The TIMBERTECH Upgraded Single-Piston Compressor is a high-quality product that costs about $100 on Amazon right now. It’s compact, quiet, and exceedingly portable at 11.55 pounds, so you don’t have to worry about carrying it.
The best air compressors out there use either a water trap or tank to prevent water from condensing in the air hose. This TIMBERTECH Compressor has a 3-liter receiver tank that ensures a consistent flow of air.
Furthermore, it also has a pressure regulator with a gauge, a quality water trap mechanism, an air filter, and a pressure-relief safety valve, so the compressor is basically loaded with features.
At the time of writing this article, the TIMBERTECH Upgraded Single-Piston Compressor has a great status on Amazon with a 4.7/5.0 overall rating. Moreover, 82% of the customers who bought it have left a 5-star review.
One experienced user writes that they’ve tried out multiple types of air compressors for their airbrushes—both expensive and cheap—but this one turned out to be the best surprisingly.
The build quality scores the highest numbers here as it consists of a steel pipe and relevant fittings, and not low-cost copper or aluminum. The regulator holds the pressure nicely without any leaks at 0 psi.
Another customer writes that they expected the unit to be much louder but it’s very quiet, and they simply love that. They don’t have to worry about disturbing someone when working with it because it uses a low-decibel operation.
One person pointed out that the compressor does not come with a hose. If you don’t have a standard sized hose at home, consider buying the premium Fengda Airbrush Hose from Amazon that’s cheap and is made out of Nylon.
People love the fact that the unit is well-designed and that the head and the discharge pipes stay cool despite constant usage. This compressor is built much better than most of its competitors in the sub $100 price range.
Check out the TIMBERTECH Upgraded Single-Piston Compressor directly from Amazon today.
California Air Tools Compressor
The California Air Tools Compressor is another top-quality option that you can buy for your airbrush and get to painting 3D prints and miniatures smoothly.
California Air Tools is a well-respected brand that’s known for its high-quality array of powerful and reliable compressors, and this CAT-1P1060S compressor model is no different.
It costs about $120 and is a bit pricier than the TIMBERTECH Upgraded Single-Piston Compressor. However, the extra cost is justified due to the large and spacious 1 gallon steel tank of the California Air Tools product.
At the time of writing this article, this product has a terrific 4.7/5.0 overall rating on Amazon and 82% of the people who bought it have left a 5-star review.
It’s also fairly lightweight at 29 pounds, and many people dropping their reviews of this unit have said that they can easily move the compressor around without having to ask for help.
In addition to that, a customer has remarked that this compressor is amazingly quiet and keeps the noise level to somewhere around 56dB. Just make sure to put the muffler air filter on the compressor for an even quieter operation.
The California Air Tools Compressor is best used when paired with the aforementioned Iwata-Medea Revolution CR Dual Action Airbrush (Amazon), as many people have commented.
The combination works great for 3D prints, and lets you enjoy a terrific painting experience. One person has even said that the California Air Tools Compressor is the best airbrush compressor for miniature painting.
Another benefit of buying this compressor is that it uses an oil-free single piston pump design that pushes its life cycle beyond 3,000 hours.
Therefore, you’ll be set for a long time and won’t have to find another compressor anytime soon. That said, do bear in mind that this unit does not come with a hose, but it does fit all the standard sizes if you already have one at home.
One user said that he comfortably uses this FYPower 1/4 Inch Recoil Poly Air Hose Kit with the California Air Tools compressor and gets nothing but the best results, so it’s definitely worth looking into that air hose kit if you’re looking to get one for yourself.
Get yourself the California Air Tools Compressor directly from Amazon today.
Painting 3D-printed models
Jacky Wan5 March 2014
Applications
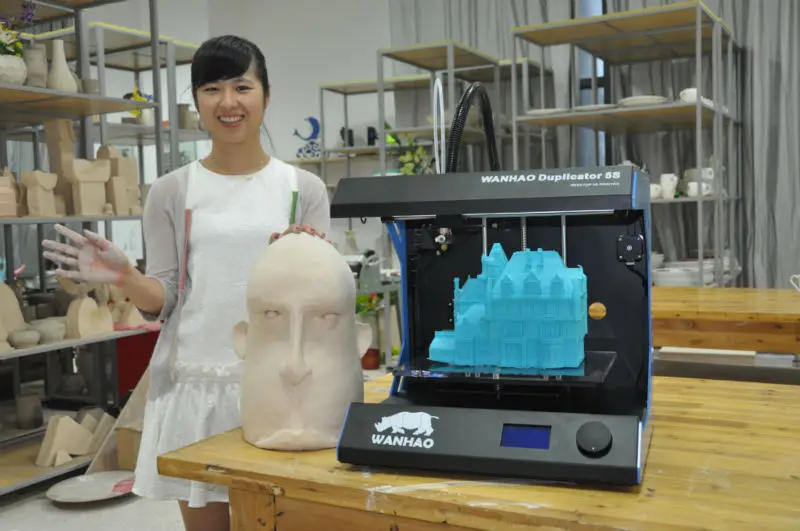
Jacky Wan (aka Valcrow) writes a guest-blog for us every month about his 3D printing adventures! This month's guest blogs is about painting 3D models. Painting 3D-printed models is a great way of adding detail and production value to your models. Often making the difference between a ‘cool print’ and a piece of art.
In last month’s blog I wrote about FFF 3D design, printing methods and philosophy. This month, I hope to share some experiences in painting them.
Raw print vs. Finished piece
Design Methodology
Each step of the process has a cascading effect on the whole. If your model is not designed well, it will not print well. If it is not printed well, cleaning and painting will be difficult and tedious.
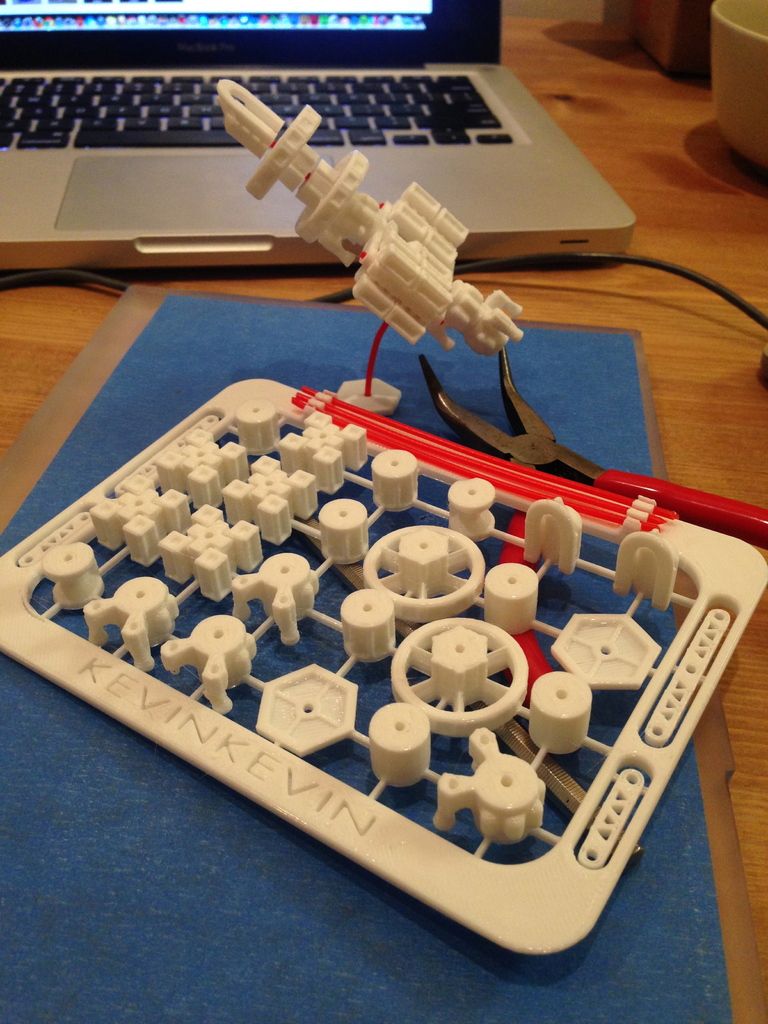
This lightsaber has been designed from the ground up with the intention of being painted, as a result, little cleanup was needed and all the parts were already separated so no masking was required. It is also important to consider the relief and surface details of your 3D design. The more surface relief, the easier it is to bring out details with paint via dry-brushing and washing. Sanding FFF prints is not a prerequisite for painting.
Tools
There is a vast array of painting supplies available online, at hobby stores, and even hardware stores. Paints are relatively inexpensive and surprisingly forgiving. So don’t be afraid to experiment.
The first decision to make is if you want to paint by brush, airbrush, or canned spray-paints. If you are unsure or have no experience painting, start with a brush. You can get everything you need for un- der 10$. Canned spray-paints are good for one-off solid colors, and an airbrush is good for a more consistent, cleaner finish at a high entry cost. I prefer an airbrush for versatility, speed and finish.
FFF exclusive painting issues
Notice how paint details tend to blur along the direction of the grain
Painting on printed parts has its quirks, unlike the perfectly smooth injection molded parts, you have to deal with print lines and stripey top surfaces. This can be both a blessing and a curse when it comes to painting.
If you do washes, or thin your paints down too much You will find that the paint will want to run along the grooves of the print lines rather than the surface. This is a huge problem in controlling precisely where you want your paint to go. Using an airbrush for shading will help you avoid this problem. Filling and sanding your prints also help.
On the plus side, you can use those grooves to your advantage. They tend to add a small impression of texture detail similar to how noise gives the impression of sharpness in images. If orientated correctly, the print lines can also be made to look like machining marks.
Paints
There are hundreds of different paints out there. Split into a few groups based on their solvent. Enamels, oils, acrylics, and lacquers are the most common. They require different thinners and generally do not mix. Fortunately, they all work on PLA. (at least the ones I’ve tested) So, experiment!
This is a cross section of the paints I use. Don’t be fooled by the brand loyalty. You don’t need to stick with one brand of paints, especially with acrylic. They all mix and work together. I have literally 1-2 bottles of every brand. Some work better than others, but they all work and mix.
I would highly recommend sticking with acrylics if you’re starting out. It thins and cleans with water, non-toxic and dries fast.
Painting is messy, as I’ve quickly discovered. There are a few things you can do to minimize the mess. I designed and built an airbrush station to keep all the ‘wet’ items in one place draining to a single reservoir. I also printed a paper holder as a backdrop for spraying. Painting can help your 3D prints, but your 3D prints can also help your painting.
Examples
3D printing is all about customization. Painting your prints can really bring it to life and add another layer of personalization. Some of the pieces I’ve done here shows the dramatic difference a coat of paint can make.
Dog Collar Barrels on redicubricks.com
Thor's Hammer Mjolnir on redicubricks.com
Sarah’s Jenner on redicubricks.com
Painting the Lightsaber
Want to try your hand at painting your prints? Download the lightsaber from YouMagine, and follow along our video tutorial. You can also check out our written tutorial.
Watch the videoPainting is not just the ‘extra’ step at the end. It is considered throughout from design, to print. And it helps to bring everything together at the end. Give it a shot! Let us know if the video has been helpful to you.
If you want to look at more examples of painted prints, check out our website at redicubricks./photo/2020/02/02/3861079877.jpg) com
com
Bulbulator for Chinese airbrush
Application
Subscribe to the author
Subscribe
Don't want
13
The model this time is very simple and very specific, but useful.
Back in November-December I printed a cap on my Harder&Steenbeck from Tingivers. There was no native detail in the store, even though it was in the catalog. Thanks to the 3D printer, we managed to get this part without leaving home.
https://www.thingiverse.com/thing:3778773
This cap is needed to plug the airbrush nozzle so that the air goes back into the tank. So you can flush the channel or mix the paint in the tank:
My model has a needle guard with holes that are difficult to close - somewhere it will still whistle. At first, I had to dodge with foil and a cotton pad - it’s more reliable, but it still breaks through and leaks.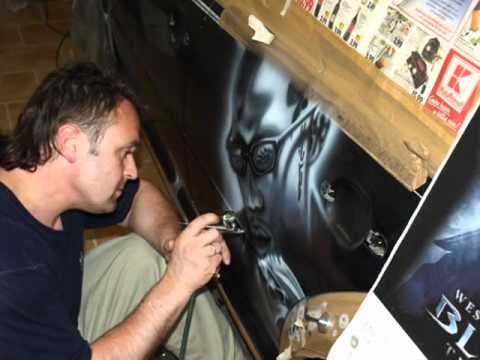 With a special bulbulator - a completely different matter.
The airbrush was constantly attacked by my little brother, who always has an idea, but has never been very careful with the tool. Even a German airbrush with a threadless nozzle does not have a sufficient margin of safety. And when an advertisement for a miracle product from the RiBO Airbrush Store appeared on alik, there was no doubt about choosing a birthday present. If only I could get there. And the time is summer, until November 11, as before China on foot, all parcels with lotions for a 3D printer arrived in 3 weeks ...
link to alik
I ordered on June 10, my birthday is on July 11. It should have been earlier, probably, but I hoped for a low load of mail. It comes at this time in 3 or even 2 weeks. As a result, they were sent not by mail, but by DPD, and it came more than 50 days after the order. The little brother managed to celebrate his birthday and even celebrate the wedding. And the day of the Airborne Forces passed, but there was no goods . .. The parcel was delivered already on August 3, and it has been in the city since July 19. Apparently, they delivered it to the wrong address, they didn’t send SMS (I would have had the opportunity to receive it there), then they kicked it to the warehouse and scored. I've been calling them almost every day and bugging them. "We will duplicate it in the transport department so that it will be delivered tomorrow" - tomorrow has come, tomorrow has not come. I even opened a dispute on alik, but then I managed to close it. The cost of the goods is completely non-Chinese, and it was dumb.
Parcel arrived, tried to paint something. It blows and works without an outlet - the little brother is glad, just in the car it was necessary to tint something. For the test, hemispheres and an epoxy egg were painted with random colors with model acrylic. Attention, a question for subscribers: which of the hemispheres has a layer height of 0.1 mm, and which one has 0.15?
Then I showed a life hack with a reverse stroke, in the same proven way with foil and cotton wool, and I sat down to model the cap myself. The catch is that the end at the needle protection (tip with holes) expands from 8.5 to 11 mm. All attempts to create a cap in shape ended unsuccessfully, the last one was photographed along with the protection. First thought: is the tip of the needle bent? Second: what if we make a needle protection with a narrowed tip, like my German?
And the third thing: you can immediately make a bulbulator for this base! Diameter 7 mm. The protection of the needle is exactly the size of the village with a slight backlash, I decided to make the bulbulator under 6.75. Fits very tight! I had to shoot with the trigger pressed - in order to pull the needle and again not damage it, and pick it up a little with tweezers.
Bulbulator works as it should. You don’t even have to put it on all the way, but just put it on or put it on for a couple of millimeters, it will be airtight:
The needle guard will need to be cleaned from the inside of the hairs - the paint has stuck to them and made them visible.
Does anyone have a similar airbrush? Put models of caps in the public domain?
Follow author
Follow
Don't want
13
More interesting articles
Hangu
Loading
01.10.2022
792
7
Follow author
Subscribe
Don't want
I welcome everyone!
Finally got around to writing a blog). Some time ago,...
Read more
0
Subscribe to the author
Subscribe
Don't want
Patient-specific anatomical models can help in modeling surgical operations...
Read more
146
Subscribe to the author
Subscribe
Don’t want
3D printing, as a type of activity, makes it possible to create not only decorative crafts and toys .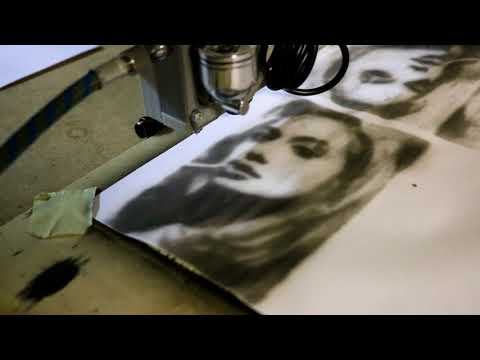 ..
..
Read more
You are determined to release your development to the mass market.
The first stumbling block that many people face is how to make a high-quality device case in small batches?
How to make a “candy” out of a 3D printed model, which will not be ashamed to be sold?
One option is processing and painting. About the intricacies of coloring polyamide - under the cut. Lots of photos!
Why polyamide?
Let's look at the comparison table from Can-touch (not advertising, but the guys know their business and it’s not a pity to mention them: at prices above the market, they are responsible for quality and solve problems without “freezing”).
- Polyamide parts are strong and well suited for use as a final product.
- Detail - better than plastic printing, but worse than resin printing.
- SLS printing with polyamide is quite inexpensive and, depending on the size of the part, costs even less than casting into silicone molds.

- In addition, casting is a rather labor-intensive process, and the productivity of the casting shop is rather limited, detailing also does not always allow ideas to be realized.
- Small parts (such as latches) may simply not cast.
- Polyamide can be machined well - sanded, sanded, etc.
These properties make it an excellent material for small series cases.
Next is a guide on how to get a “factory” soft-touch coated part.
Tools:
Airbrush / Airbrush:
I use IWATA Eclipse, but a smaller one will do. It is better to consult in shops involved in modeling. The key for us is the size of the paint spot and the size of the tank: you should not take a huge half-liter for painting fences. Almost everything is suitable for painting models.
Compressor with pressure reducer:
Look in the same shop for modellers.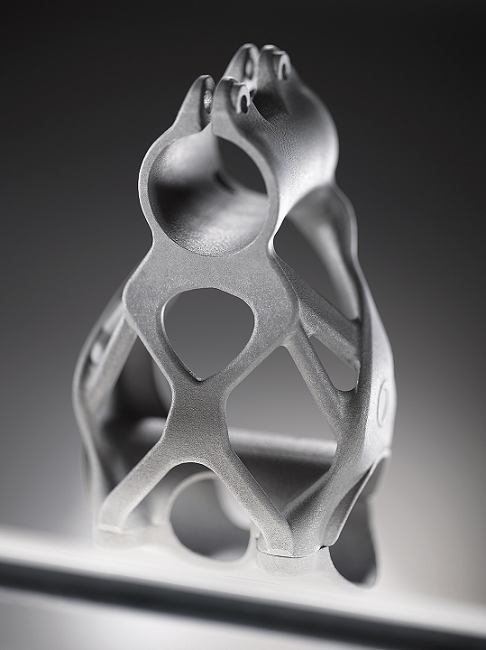
Scale:
Be sure (!) to mix the paint with the hardener accurately.
Primer, paint, varnish, film, thinner, etc.:
the order is done well, only here they are often loaded).
Paint preparation:
Polyamide is printed using selective laser sintering technology: the model is obtained with good detail along the horizontal axes and small “steps” along the vertical.
In addition, the surface is porous - it is necessary to carefully sand it to a perfectly smooth state.
This is the most important stage of the process - all the unevenness after painting will be visible!
Therefore, first use sandpaper grit P400-P500. Then we grind to a perfectly smooth surface with grit P700-P800.
Before:
After:
As you can see, the stairs didn't really disappear. At this stage, only the horizontal surface is well processed - it is not visible in the photo, but it is smooth to the touch.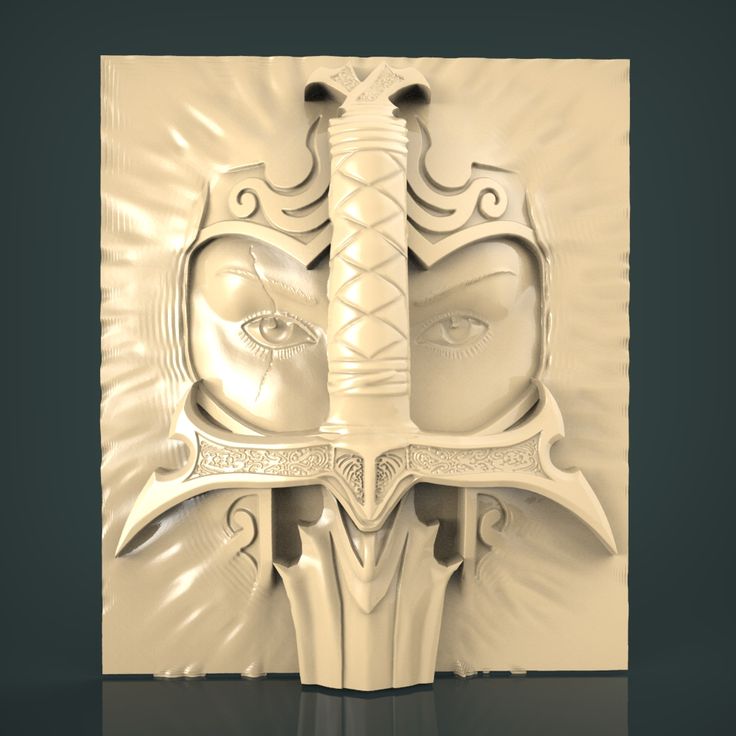 The ends are still rough. We remove the bulges with sandpaper, but to remove the pores, we will have to grind off half the wall - it’s not good.
Primer:
In order to ensure good adhesion between the paint and the material, a primer is used. In addition, the primer allows you to fill in the bumps and make the surface perfectly smooth. All proportions and drying parameters are in the attached specifications. For polyamide I used:
Important!
Apply the primer in a very thick layer until all irregularities are filled, remove the excess by sanding. The airbrush / airbrush blows the paint out to the sides, preventing it from laying down in a thick layer, so you need a second one, as thick as possible. To speed up the process, you can place the parts in the oven at a temperature of 50-70 degrees.
One coat:
After drying and processing:
One coat is not enough to get a good result! Not all pores are eliminated, the surface is not ideally smooth everywhere.
Don't paint until you get a perfectly smooth surface!
The paint won't cover it.
It may be necessary to apply a third coat of primer, dry and sand. We skin the same way: first with large sandpaper, then with fine sandpaper (it is better to use waterproof sandpaper, as it clogs rather quickly, and it is better to rinse it).
Two layers, smooth surface:
If islands appear somewhere, in principle, it's okay, as long as it feels smooth to the touch and all the pores in the plastic are closed.
Painting:
We thoroughly rinse the airbrush with a solvent after the previous use (at the end of painting it is recommended to pour the solvent into the tank and drive it through the nozzle - after that it will be easier to clean).
Mix paint to specification:
Apply evenly: it is better to apply paint less and move more by hand. We keep the airbrush away from the body so as not to accidentally leave smudges (it is better to practice on paper if you have never dealt with airbrushing).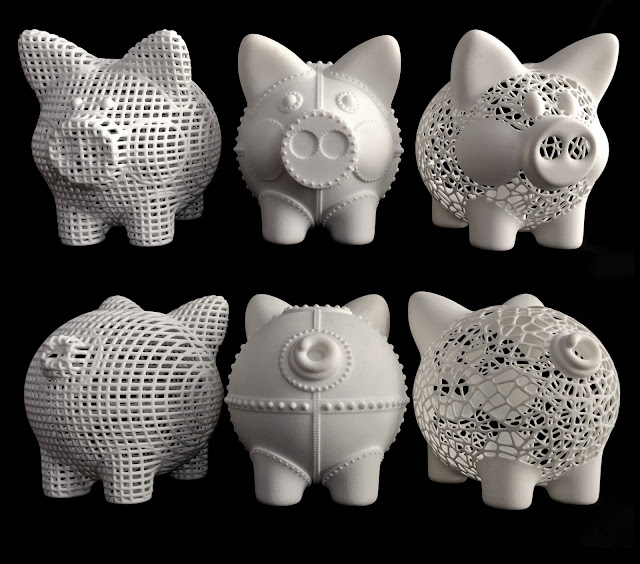
At this stage, it will become clear how well you primed / sanded the surface. If everything is done correctly, the magic of transformation into a perfect detail will take place before your eyes. You don't need a lot of paint - a couple of dense layers are enough. Then we dry it in the oven, and while it dries, we clean the airbrush for soft-touch varnish.
Soft touch varnish:
After painting, the part will already seem fantastic to you, but the same
will create a soft-touch coating "wow-effect", will hide small surface inhomogeneities, and also protect the paint from damage.
It is important to apply the lacquer on perfectly smooth dry paint. If surface roughness appears after painting, you can gently (VERY CAREFULLY) smooth the surface with light movements of the finest sandpaper.
Be sure to practice on different surfaces in applying varnish - you need to apply in 1-1.5 layers. We apply, after we have finished the work, it is recommended to immediately clean the tank from the varnish with a solvent.