3D print abs settings
Ultimate Materials Guide - Tips for 3D Printing with ABS
Overview
ABS (Acrylonitrile Butadiene Styrene) has a long history in the 3D printing world. This material was one of the first plastics to be used with industrial 3D printers. Many years later, ABS is still a very popular material thanks to its low cost and good mechanical properties. ABS is known for its toughness and impact resistance, allowing you to print durable parts that will hold up to extra usage and wear. LEGO building blocks are made from this material for that same reason! ABS also has a higher glass transition temperature, which means the material can withstand much higher temperatures before it begins to deform. This makes ABS a great choice for outdoor or high temperature applications. When printing with ABS, be sure to use an open space with good ventilation, as the material tends to have a slight odor. ABS also tends to contract quite a bit as it cools, so controlling the temperature of your build volume and the part inside can have major benefits.
- Low Cost
- Good impact and wear resistance
- Less oozing and stringing gives models smoother finish
- Good heat resistance
- Heavy warping
- Needs heated bed or heated chamber
- Produces a pungent odor while printing
- Parts tend to shrink leading to dimensional inaccuracy
Hardware Requirements
Before 3D printing with ABS make sure your 3D Printer meets the hardware requirements listed below to ensure the best print quality.
Bed
Temperature: 95-110 °C
Heated Bed Required
Enclosure Recommended
Build Surface
Kapton tape
ABS Slurry
Extruder
Temperature: 220-250 °C
No special hot-end required
Cooling
Part Cooling Fan Not Required
Best Practices
These tips will help you reduce the chances of common 3D printing issues associated with ABS such as warping and fumes.
Control Warping
One of the most common print quality issues with ABS is warping. As the plastic cools from its extrusion temperature down to the room temperature, this change in temperature causes the plastic to shrink and contract. This can be particularly troublesome for the first layer, as this change in size can frequently cause the part to separate from the bed, ruining the print. You can minimize this effect using a proper build surface heated to 110º C. The build platform will transfer some of its heat to the first few layers of your part, which will prevent them from shrinking and separating from the bed. It is also common to set the extruder temperature about 10 to 20 degrees higher for the first few layers of your print, which can also help reduce the risk of separation. Simplify3D gives you complete control over your bed and extruder temperatures, so you easily set the desired values on a per-layer basis using the Temperature tab of your process settings. While these changes can help with the bottom layers of your print, taller parts may have issues as the layers get further away from the bed.
 When printing larger parts, consider adding an enclosure around your printer to maintain a higher temperature around your print. The enclosure can also prevent wind drafts that could rapidly cool the part during printing. If you’ve followed these steps, but you’re still having trouble with warping and separation, our Print Quality Guide has an entire section dedicated to warping which can give you even more information on the topic: How to Prevent Warping.
Using Brims and Rafts
When printing large parts, or thin delicate parts, you may find that you still have trouble getting these parts to properly adhere to the bed. In these cases, adding a brim or a raft to your print can be a great way to anchor these part to the build platform and prevent warping. A brim will add several rings of plastic around your model on the first few layers, creating extra surface area to hold down the edges of your part. Using a raft will actually print an entirely new plastic structure underneath your print, which can be removed after the print is completed.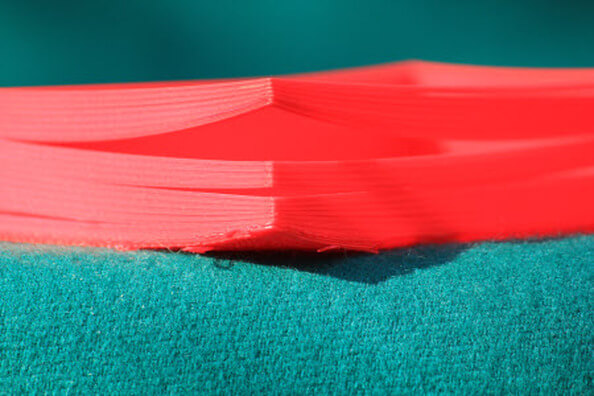 The rafts in Simplify3D were heavily optimized for Version 4.0 allowing them to print faster and use more material, but you may still find that a brim is faster for larger parts. If you want to learn more about these options, we have an in-depth article that explains all of the differences between rafts, skirts, and brims to help you get started.
Print In a Well Ventilated Area
Printing with ABS is known to produce a strong odor with fumes that could potentially be harmful if inhaled in large quantities. Avoid confined spaces and place your printer in a well-ventilated area to avoid these issues. Newer 3D printers may include a separate air-filtration system or HEPA filter that can deal with these fumes right from the source. If you printer doesn’t include these features or you’re limited in where you can place it, consider opening a window or using a flexible air duct from your local hardware store to help route the fumes outside.
Pro-Tips
- Bed adhesion can be improved by using an ABS slurry.
 You can make this slurry on your own by mixing small pieces of ABS filament with acetone and applying the mixture on the bed. There are also several pre-packaged versions of the product that can be purchased.
 - When doing a dual extrusion print, PLA can be a good break-away support material as it does not adhere strongly to ABS.
Get Started with ABS
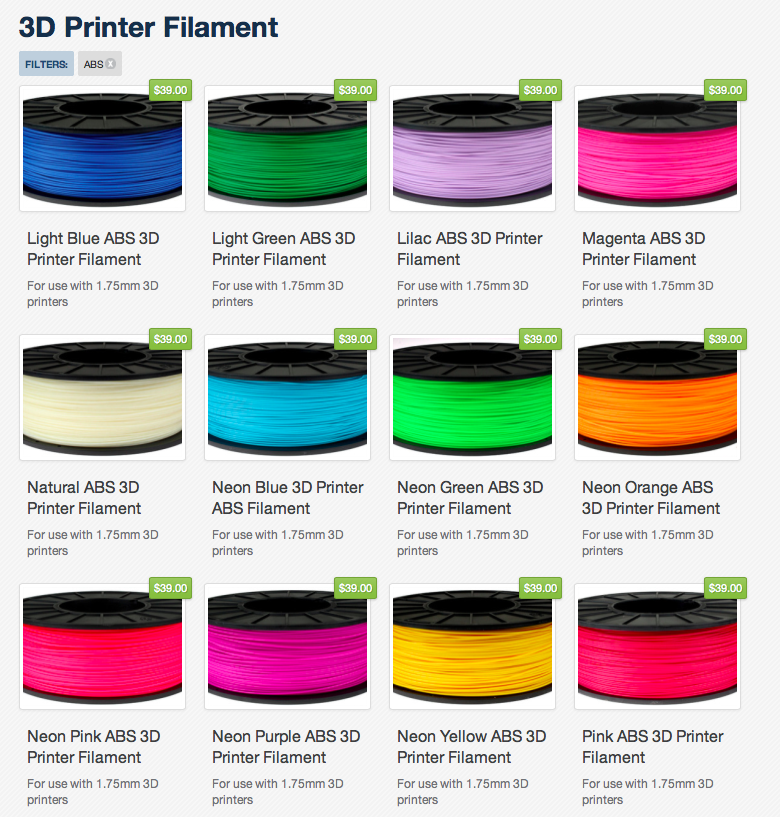
Here are a few tips to help you get started with ABS. You can view some common applications below, select from a typical sample project, or even view popular filament brands if you’re looking to stock up on this low cost material.
Common Applications
- Cases or Project Enclosures
- Toys or Action Figures
- Automotive hardware
Sample Projects
- Lego Bricks
- Door Catch
- Fidget Spinner
Popular Brands
- Hatchbox ABS
- FormFutura ABS pro, EasyFil ABS, TitanX
- eSun ABS, ABS+
- HobbyKing ABS
How to 3D Print ABS Filament Like a Pro – Ultimate Guide & FAQ – 3D Printerly
ABS filament is known to be fairly tricky to 3D print successfully mainly due to the material not sticking so well to the build plate. I decided to put together an article that will show people how to 3D print ABS filament like a pro, so you can create some high quality 3D models.
To 3D print ABS, you should use a printing temperature between 210-270°C and a bed temperature between 80-120°C depending on the brand for the best results. ABS should be printed with your cooling fan off, with a print speed of around 40mm/s. Using an enclosure is ideal to control heat, but not essential.
This article is going to be a simple, yet in-depth guide on how to 3D print ABS filament just like the pros do, so stick around to see how it’s done and get your questions answered.
What is ABS Filament for 3D Printing & What is it Made of?
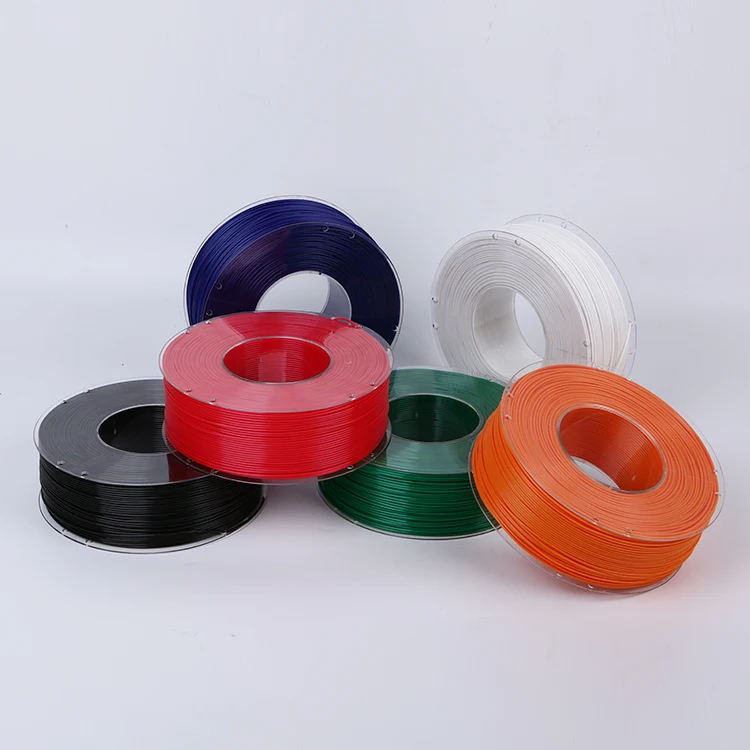
ABS or Acrylonitrile Butadiene Styrene is a popular and durable thermoplastic material that can be used for 3D printing in the form of a 1.75mm spool of filament. It has great mechanical and impact-resistant qualities, as well as great heat resistance.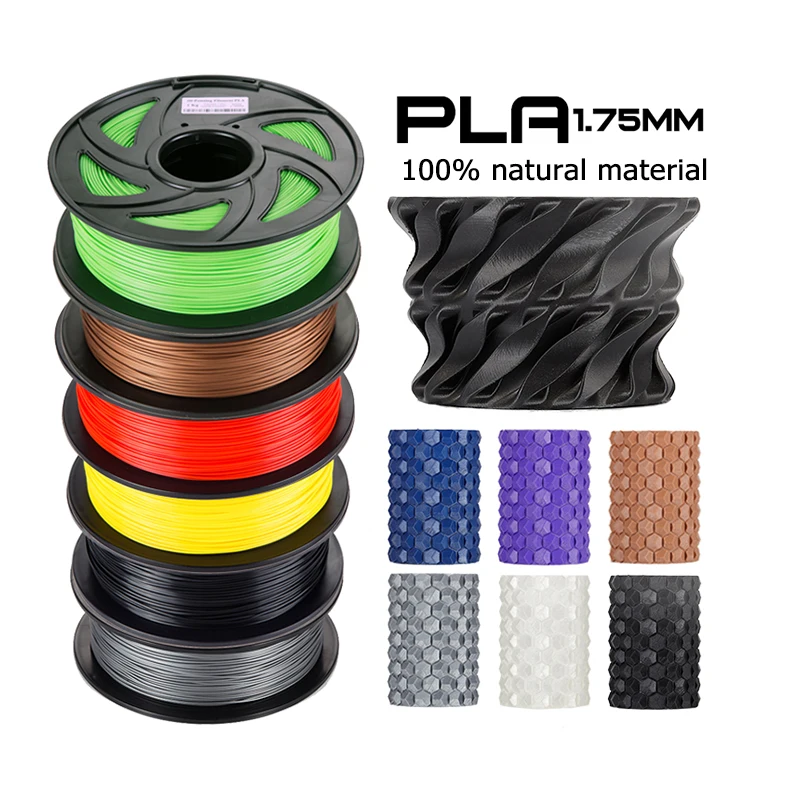 It used to be the most popular 3D printing material.
PLA has taken over ABS as the most popular 3D printed filament, though ABS definitely has properties that make it ideal such as being tougher and even lighter than PLA.
When looking at what ABS is actually made of, it is generally a combination of 50% styrene and the other 50% being butadiene and acrylonitrile, though it can still be made in different proportions. This combination of polymers is what gives ABS its properties and high levels of resistance.
What Printing & Bed Temperature Should You 3D Print ABS?
The best printing temperature you should use for ABS usually falls anywhere between 210-270°C. Filament brands will show you the temperature range for their specific spool of ABS. HATCHBOX ABS filament is 210-240°C, while OVERTURE filament is 245-265°C.
The best bed temperature for ABS falls anywhere between 80-120°C. You should use trial and error with different temperatures so you can figure out what works best for your brand of ABS and your specific 3D printer.
A bed temperature of 100°C worked great for one user who bought HATCHBOX ABS filament, while another user got great results using 85°C with the same filament. It will depend on your surrounding environment and how your 3D printer bed heats up.
Let’s check the printing and bed temperature of some of the most popular brands of ABS filament.
HATCHBOX ABS
Printing Temperature: 210-240°C
Bed Temperature: 85-110°C
SUNLU ABS
Printing Temperature: 230-240°C
Bed Temperature: 85°C
OVERTURE ABS
Printing Temperature: 245-265°C
Bed Temperature: 80-100°C
JAYO ABS
Printing Temperature: 230-260°C
Bed Temperature: 80-110°C
NovaMaker ABS
Printing Temperature: 220-250°C
Bed Temperature: 80-120°C
When it comes to leveling your 3D printer bed, it’s a good idea to make sure the bed is heated to the operating temperature since the heat causes it to expand and change shape slightly, resulting in differences in heights across the bed.
What Printing Speed Should You Use for ABS Filament?
For ABS filament, the recommended printing speed falls between 40-60mm/s to get high quality 3D prints. Going above 70mm/s for ABS filament is likely to decrease your printing quality gradually, though you can still get successful prints at higher speeds.
ABS can’t be 3D printed as fast as a material like PLA since it doesn’t flow as well.
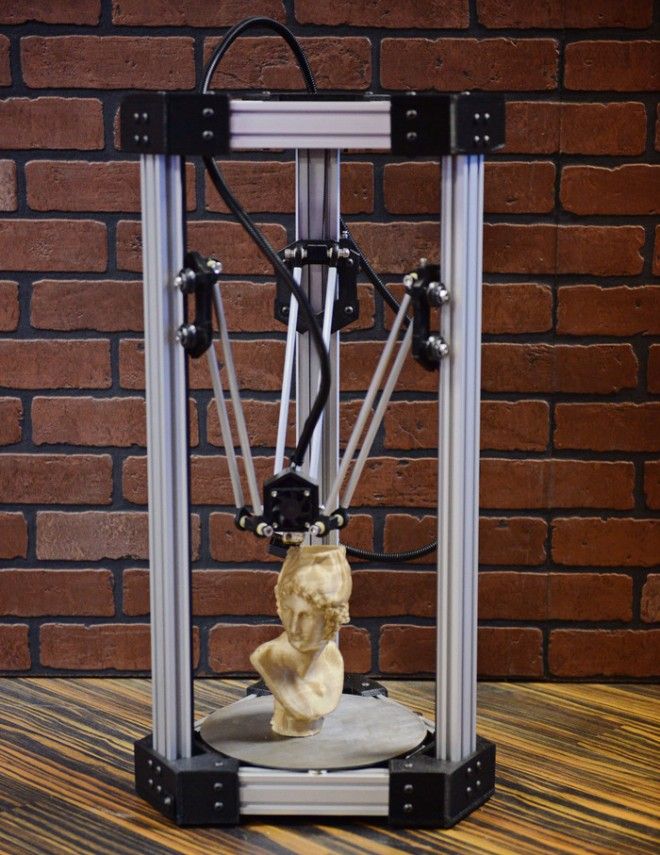
If you are wondering how fast you can 3D print ABS, you could reach speeds up t0 100mm/s and beyond with a 3D printer that is tuned for speed and stability. Delta 3D printers are built for speed
Does ABS Need a Fan? Can You Print ABS Without a Cooling Fan?
ABS filament doesn’t need a cooling fan to 3D print successfully. Using a low cooling fan setting can help with improving surface quality, but having it off usually leads to better strength. Enclosed 3D printers have a higher ambient temperature, so fans can be put on low settings and still work out great.
Sometimes, if sections of your ABS 3D prints have large overhangs, bridges, or short times per layer, turning on the fan for these layers can be very useful. This can be done by inserting scripts in your slicer to change fan settings on specific layers.
A minimum layer time of around 20-25 seconds should work well for ABS if you do have smaller layers that print a little too quickly, like the horn on a unicorn for example.
Shrinkage or warping is one of the key factors that people think about when it comes to using the cooling fans for ABS, but it is usually the surrounding temperature that has the biggest effect on warping or having the material shrink.
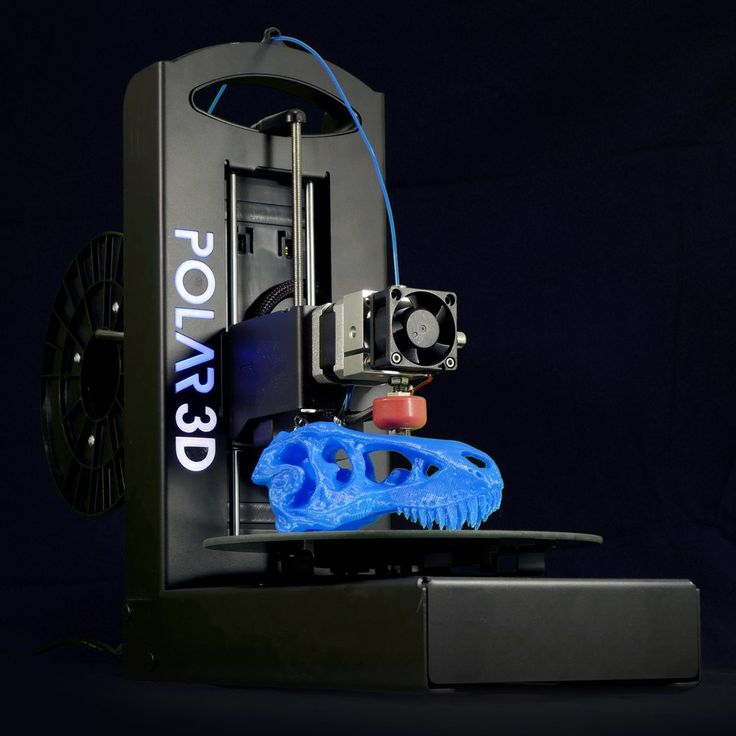
Many 3D printers that are optimized for 3D printing ABS do have cooling fans, like the Zortrax M200.
ABS Retraction Settings for 3D Printing
The best ABS retraction settings for 3D printing usually falls between a Retraction Distance of 3-7mm and a Retraction Speed of 30-45mm/s depending on whether you have a Bowden or Direct Drive setup. The default of 5mm distance and 45mm/s speed should work well enough, but you can test retraction for optimal results.
The video below shows you how you can dial in your retraction settings in Cura by using a Retraction Tower and seeing how the resulting prints come out. You test one setting at a time to see what works best for your specific printer and setup.
What Are Advantages of 3D Printing ABS?
- Very durable and impact resistant, so it can hold up well in load-bearing situations – great for functional objects.
- It doesn’t degrade as much as other filaments, so old prints keep their quality really well
- ABS has amazing heat-resistance, meaning you can use it in high temperature situations like outdoors or in a car.

- ABS has relatively good flexibility, definitely more so than PLA 3D prints.
- You can easily smooth ABS 3D prints using acetone, as well as weld parts together
- Has a good natural surface quality
- Great chemical resistance and mechanical properties
- ABS is good for functional objects that require strength and some level of flexibility or tensile strength.
What Are Disadvantages of 3D Printing ABS?
- ABS can be difficult to 3D print, especially for beginners due to warping issues
- Can release harmful gasses (ultrafine particles) when printed at high temperatures – known to be smelly
- Requires a heatbed unlike PLA filament
- Known to have trouble sticking to build platforms – Blue Painter’s Tape works well as a surface or glue stick
Best Things to 3D Print with ABS
ABS can print many things since it is quite a versatile material with great mechanical properties. The heat resistance and strength are the best aspects of ABS, so if those are the characteristics you are looking for, then you can print it with ABS.
Here are some popular items made from ABS:
- Lego toys
- Luggage cases
- Helmets
- Chairs
- Computer keyboards
- Wall sockets
- Containers
- Automotive parts
- Handles & holders
How Do You Smooth ABS 3D Prints?
Smoothing ABS 3D prints is done through a method called acetone smoothing, which is when you use acetone fumes to dissolve the outer surfaces of ABS, leaving a smooth behind. You simply pour acetone into an airtight container with the 3D print inside but separated from the liquid for 10-20 minutes.
Check out the video below by Josef Prusa to see how it is done, and the final results on your prints.
How to Paint 3D Printed ABS
The usual way to paint 3D printed ABS is to apply a primer to help the paint properly adhere to the object, sand and smooth the object by sanding, buffing, and polishing.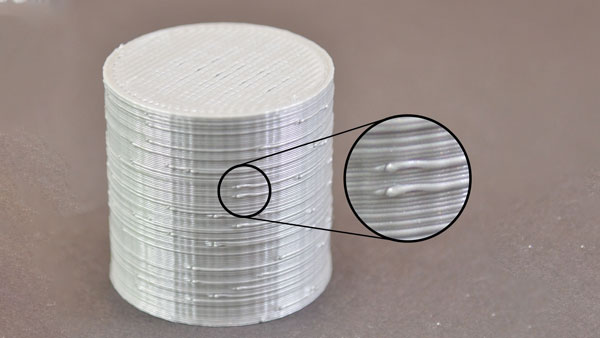 Then paint it either with spray paint, an airbrush, or a paint brush. It’s a good idea to use multiple undercoats to make it more even.
You can get the best results by polishing your 3D prints between each coat of paint to really bring out the gloss. I’d recommend using some fine sandpaper at a grit of around 500 to get some great results.
Make sure you are using the correct equipment such as a NIOSH-approved respirator, safety goggles, nitrile gloves, all in a well-ventilated area.
Formlabs created these really helpful videos to illustrate how to prime and paint your 3D printed objects successfully.
The first video is for priming.
The second video is for painting.
The materials you’ll need are as follows:
- Primer
- Spray paint
- Clear coat spray
- Masking tape
- Flush cutters
- Sandpaper
- Needle files
- Polishing sticks
- A toothbrush/cloth
- Water
- Gloves
- Respirator
- Safety googles
The first thing you need to do is clean up the model after it comes off the print bed with your flush cutters.
You want to use low-grit sandpaper (50-100) to sand down any obvious support marks or imperfections, then use a higher grit sandpaper (200-350) to smooth out the surfaces. Wet sanding usually provides the best results for smoothing surfaces.
Use the cloth or a toothbrush to remove dust from the model, as dust can remain even after wet sanding.
Once your model is cleaned up, we want to prime the model, making sure to shake the primer well before spraying. It’s a good idea to add a few layers of primer and sand in between that to really clean up and get the model smooth.
After priming, some people will add 2-3 layers of an undercoat spray to cover up the color of the primer, usually in black or white depending on whether you want darker or lighter tones. You’ll get the best results by polishing and buffing between each layer of paint.
We can now start to apply the final layers of spray paint to the model, after applying masking tape to the areas that you want to be a different color. You want to apply the top coat in layers, ensuring that you wait a few minutes after each coat to see if the color is to your liking.
When you have your colors properly done, it’s a good idea to add 1-2 thin layers of clear coat spray to give your model that extra gloss and shine. Make sure you let your models rest for 5-7 days, so the paint can properly harden.
How to Fix ABS Prints Not Sticking to Bed
Making sure to level your bed is the first step to fix your ABS print is not sticking to the bed. Ensure your bed temperature is high enough in line with the recommendations. Use blue painter’s tape as a surface which your ABS prints can successfully adhere to. Using a raft can help greatly.
Some people have had great results by using a substance called ABS slurry, which is a combination of acetone and small bit of ABS filament, which dissolves in the acetone, creating a kind of thick mixture.
Rubbing this mixture on the print bed before an ABS 3D print is a great way of getting ABS prints to stick to the bed. I would definitely try experimenting with a few of these options, and I’m sure you’ll get your ABS prints to finally adhere to the build plate.
Using an enclosure around your 3D printer is a great way to regulate the temperature, which can positively affect your first layer and subsequent layers.
If your ABS prints aren’t sticking to the bed, you may also be using a printing temperature too low for the ABS to soften enough.
ABS layer separation also has very similar fixes in terms of controlling the temperature properly. If you find that you are getting layer separation in your ABS prints, try to optimize your printing and bed temperatures, as well as the ambient temperature by using an enclosure.
How to Print ABS Without Warping
To keep ABS prints from warping, you should enclosure your build area, increase the temperature of your build plate, decrease your printing temperature, make sure your build plate is flat, use extra adhesion methods such as hairspray, ABS slurry, or blue painter’s tape, use a raft or brim.
The main reason for ABS warping is through rapid cooling which causes the material to shrink and curl/warp around the outer model. It also occurs due to a poor adhesion to the surface, so if you can control those two factors, you should be able to print ABS without warping.
You can stop your ABS from shrinking by making sure there isn’t rapid cooling in the environment from things like drafts or your cooling fan.
Is 3D Printing With ABS Dangerous? Smell & Fumes
3D printing with ABS filament is known to emit toxic and smelly gasses such as styrene which is known to be a carcinogen or a possibly cancer-causing chemical. ABS is an oil-based material, so heating it to high temperatures can be dangerous to the respiratory system if you don’t have good ventilation or an enclosure.
For the many people who wonder how toxic ABS filament is, ABS is known to be significantly more toxic than other filaments like PLA and PETG, and it’s important to know that different filament manufacturers have differing standards when it comes to safety.
People have described the smell and fumes of ABS to be similar to that of burnt plastic. That arises from being a petroleum-based plastic.
I think in modern times, safety is being looked at more closely with there even being the introduction to non-smelly ABS filament.
3D printing in general is known to release nanoparticles or ultrafine particles (UFPs) and volatile organic compounds (VOCs) into the environment, so having good ventilation and not printing in occupied areas is recommended, especially for ABS.
UFPs are defined as particles with a diameter less than 100nm (nanometers) which can actually get into your lungs and bloodstream. They can cause respiratory issues and even cardiovascular conditions with constant exposure.
Styrene and formaldehyde are the main culprits for toxicity with ABS filament, both dangerous to people.
In terms of printing ABS indoors, it is safe if you have the proper ventilation channels with an enclosure to stop particles and emissions from spreading around. Using something like an inline carbon filter fan system with vents that lead outside.
How Strong is ABS Filament?
ABS filament is known to be a high strength filament with great durability. It also has a medium level of flexibility so it shouldn’t snap so easily like PLA filament.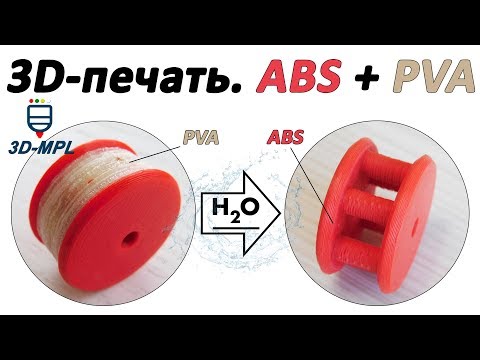 ABS can withstand a lot of impact and physical stresses. Legos are made of ABS plastic, as well as helmets and chairs.
ABS plastic won’t break easily due to its strong mechanical properties, as long as it is printed with a good amount of infill and wall thickness.
Does ABS Need to Be Dried?
ABS filament doesn’t need to be dried to 3D print successfully, but drying it thoroughly should improve the print quality and give you smoother surfaces. Many people have seen differences in quality after drying their filament at around 65°C for 3-4 hours.
Does ABS Filament Absorb Moisture?
ABS filament does absorb moisture as well as all thermoplastics out there. Filaments absorb different levels of moisture depending on how they were manufactured and by how much humidity and moisture is in the surrounding environment. ABS is not as sensitive to moisture absorption compared to PLA or Nylon filament.
You can purchase a professional filament dryer solution like the SUNLU Upgraded Filament Dryer from Amazon. You can efficiently remove excess moisture from your filament in a matter of hours, giving you more success and better quality 3D prints.
It’s very easy to set up since the filament dryer is fully assembled. You also have the added benefit of drying during 3D printing, for a moisture-free experience.
Can You 3D Print ABS Without a Heated Bed?
Some people wonder “does ABS need a heated bed” when it comes to getting a successful print.
ABS does usually need a heated bed to print properly, though some people have successfully printed it by using a strong adhesive on the bed. You can use blue painter’s tape and sand it with low grit sandpaper like 60 grit to improve the adhesion even without a heated bed.
The video below shows a user printing ABS without a heated bed. It looks like it can be a challenge, but definitely possible using the right methods.
Is ABS Easy or Hard to Print With?
ABS is known to be difficult to print with due to requiring a relatively high temperature and being prone to warping or shrinking. Beginners can have trouble with printing ABS successfully, but after dialing in your settings and having a good workstation, you can create some great ABS prints.
I would recommend beginners to start with PLA to understand how 3D printing works and how changing settings has an impact on the final print, then working up to printing with ABS.
Is ABS Filament UV Resistant?
ABS filament is not UV resistant and degrades under constant sun exposure. ABS 3D prints can still hold up well in the sun, but may become weaker and discolored after some time. It does have good heat resistance against the sun. I’d recommend getting ASA filament since it is a version of ABS that is UV resistant.
You can actually buy a UV-resistant varnish like the Krylon Clear Coatings Aerosol (11-Ounce) from Amazon. It not only dries in minutes, but is moisture-resistant and has a non-yellowing permanent coating.
The Complete Guide to 3D Printing [Part 2]
3D printing is used in a variety of industries, both for rapid prototyping and short-term production.
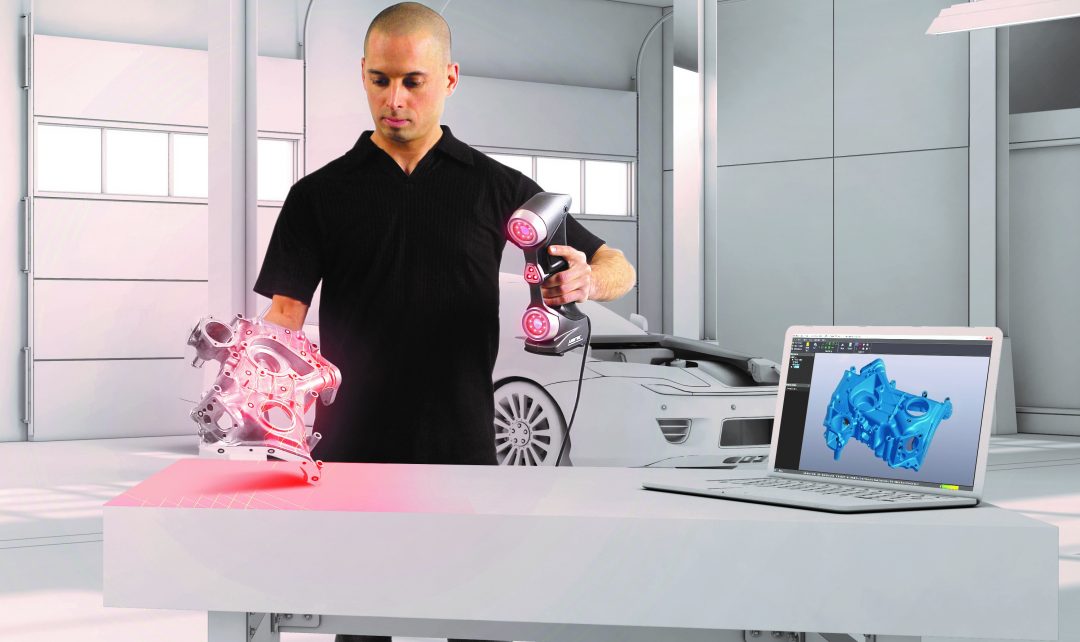
A key application of 3D printing in various industries is the rapid prototyping of new parts during R&D. No other technology has the capability to instantly produce plastic or metal parts - even in non-factory conditions.
3D printers can be used in-house by companies, while some businesses prefer to order 3D printed prototypes through service bureaus.
Medical
3D printing can be used to make medical components such as titanium implants and surgical guides (SLM), 3D printed prostheses (SLS, FDM) and even 3D bioprinted human tissues. Components for medical equipment and technology - X-ray machines, MRI, etc. - can also be made by 3D printing.
SLA and SLS technologies are also widely used in the dental industry for model making, prostheses and restorations.
Aerospace industry
The aerospace industry has become a major consumer of 3D printing technology because it can produce very light parts with an excellent strength-to-weight ratio.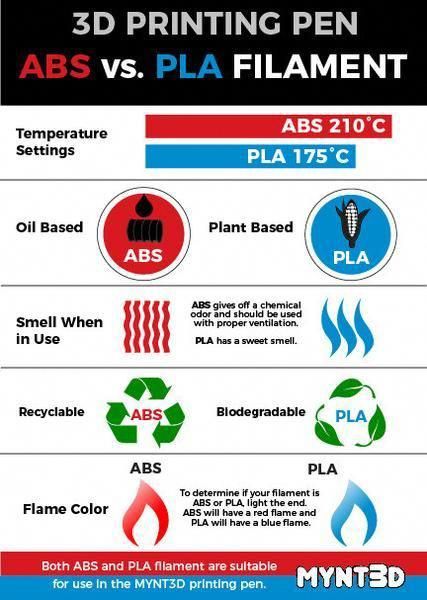 Examples include things as simple as cab bulkheads (SLS) and down to revolutionary engine components (SLM) such as the 3D printed fuel injector tip designed and manufactured by GE.
Cars
Automotive companies regularly use 3D printers to make one-off parts and repairs, as well as rapid prototypes. Common 3D printed automotive parts include brackets, dashboard components, and antennas (FDM).
More extreme examples include vehicles with large 3D printed metal structural components, such as early models from automotive startup Divergent.
Jewelry and art
3D printing technologies such as SLA are widely used (as an indirect fabrication process) in the production and repair of jewelry, while almost all types of 3D printers can be used to create art and sculpture.
Construction
Advances in additive manufacturing with high quality workmanship have expanded the scope of applications in construction and architecture.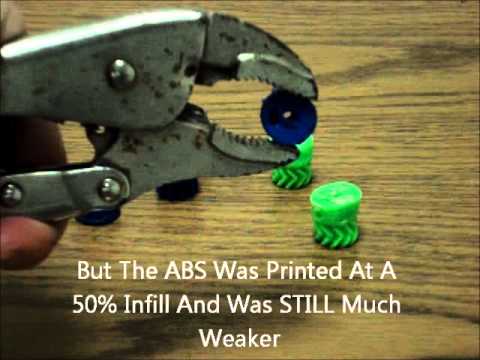 Concrete 3D printing, which is a bit like FDM but with very wide nozzle extruders, plays an important role in this industry, but more common 3D printing technologies such as SLM can be used for products such as bridge structures.
3D printing file formats:
3D printing parts can be designed with standard CAD software, but 3D printers can only read certain file formats. There are four main file formats for 3D printing.
STL: The most common file format for 3D printers, STL contains part geometry information in the form of tessellated triangles. It does not contain information such as color, material, or texture. The file size is proportional to the detail, which can be a problem.
OBJ: Less common than STL, the OBJ file format encodes the geometry of a 3D model and can include curves and free-form surfaces in addition to tessellation. It can also contain color, material, and texture information, making it useful for full color processes.
3MF: Invented by Microsoft, 3MF is an XML-based format with small file sizes and a good level of error prevention. It has not yet been widely adopted, but is supported by companies such as Stratasys, 3D Systems, Siemens, HP, and GE.
AMF: The successor to the STL format, AMF is much more compact and allows you to tessellate both curved and flat triangles, making it much easier to encode parts of various shapes. Since its inception, the format has been slowly adopted.
3D printing settings and specifications:
3D printing uses specific terminology that may not be clear to beginners. These terms refer to printer settings and/or specifications that can affect how 3D printed parts turn out.
Infill
When making 3D printed parts, it may be necessary to specify an infill percentage, which refers to the internal density of the part. A low infill percentage will result in a mostly hollow part with minimal material holding the mold together; a high infill percentage will result in a stronger, denser, and heavier part.
Layer Height
Layer height, sometimes referred to as z-resolution, is the distance between one 2D part layer and the next. A smaller layer height means finer resolution (and higher possible level of detail) along the z-axis, i.e. top down. A low layer height is an indication of a high quality printer, but users can set a higher layer height for faster, more economical printing.
Print speed
The printer's print speed, measured in millimeters per second, indicates the speed at which the machine can process the source material. Like the layer height, this value can either be a measure of the printer's maximum speed or be user-defined: slower print speeds usually result in more accurate prints.
Print temperature
When applied to processes such as FDM, print temperature usually refers to the temperature of the hot end, the part of the print head that heats the thermoplastic filament. Some FDM printers are also equipped with a heated print bed, the temperature of which is specified by the manufacturer. In both cases, the temperature is usually controlled by the user.
Resolution
In 3D printing, resolution almost always refers to the smallest possible movement along the X and Y axes (width and depth) of either the laser beam (SLA, SLM, etc.) or the print head (FDM). This value is more difficult to measure than the height of the layer, and it is not always proportional to it.
Shells
Like wall thickness in injection molding, shell (or shell thickness) refers to the outer wall thickness of the 3D printed part. When 3D printing, users usually have to choose the number of shells: one shell = outer walls as thick as a 3D printer nozzle; 2 shells = twice the thickness, etc.
Color 3D printing:
Since 3D printing is primarily used as a prototyping tool, single color prints are sufficient for most applications. However, there are several options for color 3D printing, including high-end material inkjet printers, multi-extruder FDM printers, and post-processing options.
Inkjet Printing Technologies
Major 3D printing companies such as Stratasys, 3D Systems and Mimaki have developed 3D inkjet printers for printing materials and binders that can print 3D models in full color as well as 2D inkjet printers. However, these machines are expensive and the parts do not always have excellent mechanical properties.
Multiextrusion
Several FDM 3D printers are equipped with two (or more) printheads, allowing you to simultaneously print on two spools of filament - different colors or even different materials - within the same print job. It's simple and affordable, but usually limited to two colors.
Filament replacement
Single extruder FDM 3D printer can produce multi-color prints. To do this, you need to pause printing at certain points and replace the spool of thread with a thread of a different color. This is a very slow method of applying color and does not allow precise control over where each color goes.
Adding color after printing
Many 3D printed parts can be dyed, tinted or painted after printing. While this adds another step to the process, it often strikes the best balance between quality and economy.
Post-Processing 3D Printed Parts:
Many 3D printed parts require at least some level of post-processing after leaving the print bed. This may include important processes such as the removal of supports, or additional cosmetic processes such as painting. Some processes apply to all or most 3D printing technologies, and some are specific to a particular technology.
Support Removal
3D printing technologies such as FDM and SLA require the installation of support structures (vertical struts between the printed layer and the part itself) to keep the printed object from breaking during the manufacturing process.
These supports must be removed when the part is finished. Some printers, such as dual-extrusion FDM machines, can print dissolvable support structures, allowing the support structures to be easily detached from the part using liquid chemicals.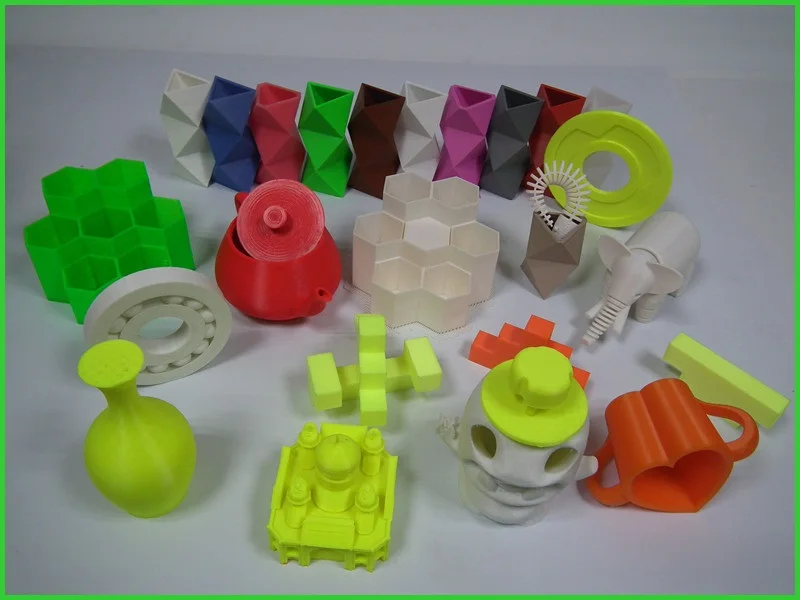 Insoluble supports must be manually cut from the part, leaving a mark that may need to be sanded down.
Washing and removing the powder
Some 3D printing technologies (such as SLA) leave sticky marks on parts, while others (SLM, SLS) may leave powder marks. In these cases, the parts must be washed - manually or with a special machine - or the powder removed with compressed air.
Heat treatment
Many of the key 3D printing technologies print parts from materials that are not yet in their final chemical state after leaving the printing mold. Such details are sometimes called "green".
Many 3D printed metal parts require heat treatment after printing to increase layer fusing and remove contaminants. And bonded inkjet 3D printers, for example, produce parts that need to be stripped and sintered after printing to remove resin bond layers from inside metal parts.
Some 3D printed resin parts require post-curing after printing to increase their hardness and make them usable.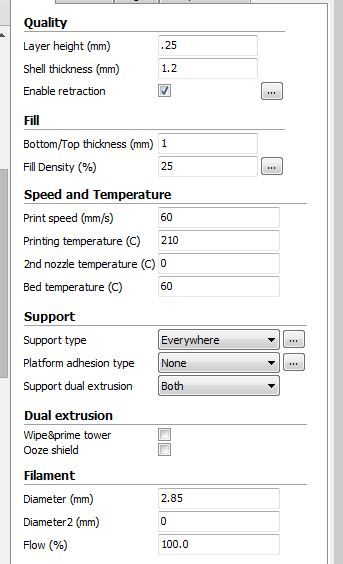
Surface Treatment
3D printed parts can be subjected to a wide range of surface treatments, from textural treatments such as sanding and smoothing, to visual treatments such as painting and toning. Some technologies, such as FDM, can create a rather rough surface that requires sanding, while others, such as SLA, produce a much smoother surface.
Combination of 3D printing with other technologies:
3D printing does not have to be used as a separate process. Rather than being seen as a competitor to CNC machining and injection molding, it can actually complement these and other manufacturing processes.
Combination examples include:
- 3D print the main body of the part and then CNC mill the thin parts to tighter tolerances;
- 3D printable master pattern for investment casting or vacuum casting;
- 3D print the part and then injection mold it using injection molding.
There are hybrid manufacturing systems that combine 3D printing with other technologies. For example, Mazak's INTEGREX i-400 AM and DMG MORI's Lasertec DED can perform both 3D printing and CNC milling.
Will 3D printing replace other manufacturing processes?
Analysts have long speculated about whether 3D printing could replace other manufacturing processes, including:
- Processing;
- Molding;
- Casting.
However, despite the desire of AM equipment manufacturers to position 3D printing as an end-to-end manufacturing technology, in practice, 3D printing is still limited to some specific manufacturing operations, especially low-volume production of specific materials.
In some areas, 3D printing has certainly overtaken other processes. For example, rapid prototyping with inexpensive plastics like ABS now dominates 3D printing, as ABS is cheaper to print than machined. 3D printing also seems to have established itself as the ideal tool for making objects such as patient-specific titanium medical implants: the speed and geometric flexibility of 3D printing is hard to beat in these specific situations.
In addition, 3D printing is an ideal tool for making objects such as patient-specific titanium medical implants.
Despite this, processes such as CNC machining currently remain the best for producing high quality parts and prototypes from engineering materials such as POM, PEI, PPS and PEEK, with surface finishes far superior to 3D printing. . In addition, processes such as injection molding are still infinitely faster for mass production of simple plastic parts.
In addition, although additive manufacturing is one of the most significant technological advances in manufacturing, which allows it to take a stronger position in manufacturing in general, more established processes such as CNC and injection molding are also being improved to produce higher quality parts. .
3D printing will continue to take an increasing share of manufacturing jobs, but it will not completely replace other technologies.
What did 3D printing look like 10 years ago?
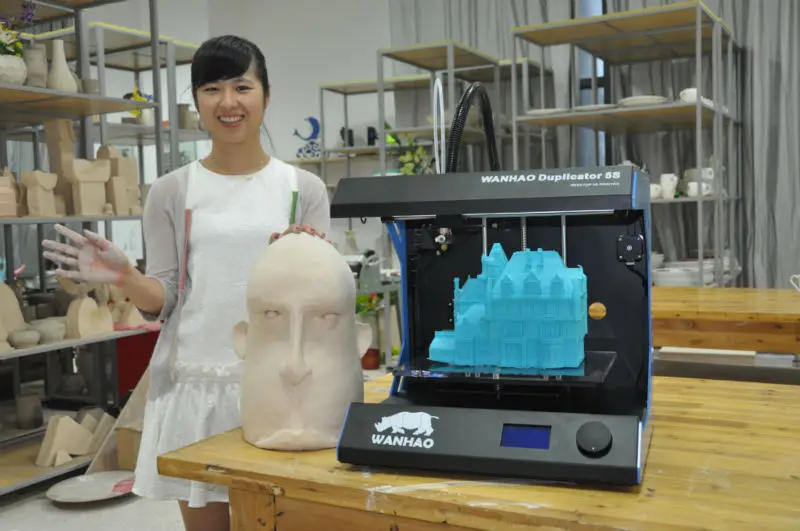
A decade ago, the nascent 3D printing industry was gearing up for what it believed would be a 3D printing revolution: a 3D printer in every home, allowing families to print new items they might need, such as a spare part for a refrigerator, a new toy for kids, or even components to build a second 3D printer.
In 2012-2014, FDM 3D printer manufacturers such as MakerBot actively promoted their 3D printers in the consumer market, trying to convince ordinary people that a 3D printer can improve their home life and work. However, it was clear that these companies were trying to exploit the novelty factor of 3D printing and that their products had no practical application; a 2012 MakerBot press release seems to prove it: Make an entire chess set at the touch of a button. Friends, classmates, colleagues and family members will see what you are doing and say "Wow!".
Just a few years later, this so-called 3D printing revolution clearly failed, and many 3D printer manufacturers began to rethink their goals, moving from consumer to professional and industrial markets, where there were more concrete (and profitable) applications of additive technology.
In addition, those who were already working in the professional and industrial fields - companies such as 3D Systems and Stratasys - began to try to destroy the idea of 3D printing as a prototyping technology, positioning it as a viable mass production tool (which, obviously, , could be more profitable for the 3D printing industry, as manufacturers would have to fill entire factories with 3D printers, buy 3D printer management software, and hire 3D printing consultants).
What will 3D printing look like in 10 years?
3D printing companies have abandoned the prospect of putting a 3D printer in every home. However, in 10 years, they can expect some form of additive manufacturing to appear in more factories.
Although there is less talk about 3D printing today than in 2012, the technology continues to gain momentum in the professional and industrial world.
According to a recent report, market research firm 3DPBM Research expects the value of additive metal manufacturing to rise from $1.6 billion in 2020 to $30 billion by 2030, and this is largely due to the repositioning of AM as a manufacturing tool and the development of more high-performance engineering materials. (That said, 3D printing will remain a valuable prototyping tool in many industries, and prototyping applications will benefit just as much from technological advances.)
However, not only metal AM is being developed. Technologies such as HP's Multi Jet Fusion have opened up new possibilities for plastic printing, and innovators such as Carbon have developed new high-speed processes in the photopolymerization category.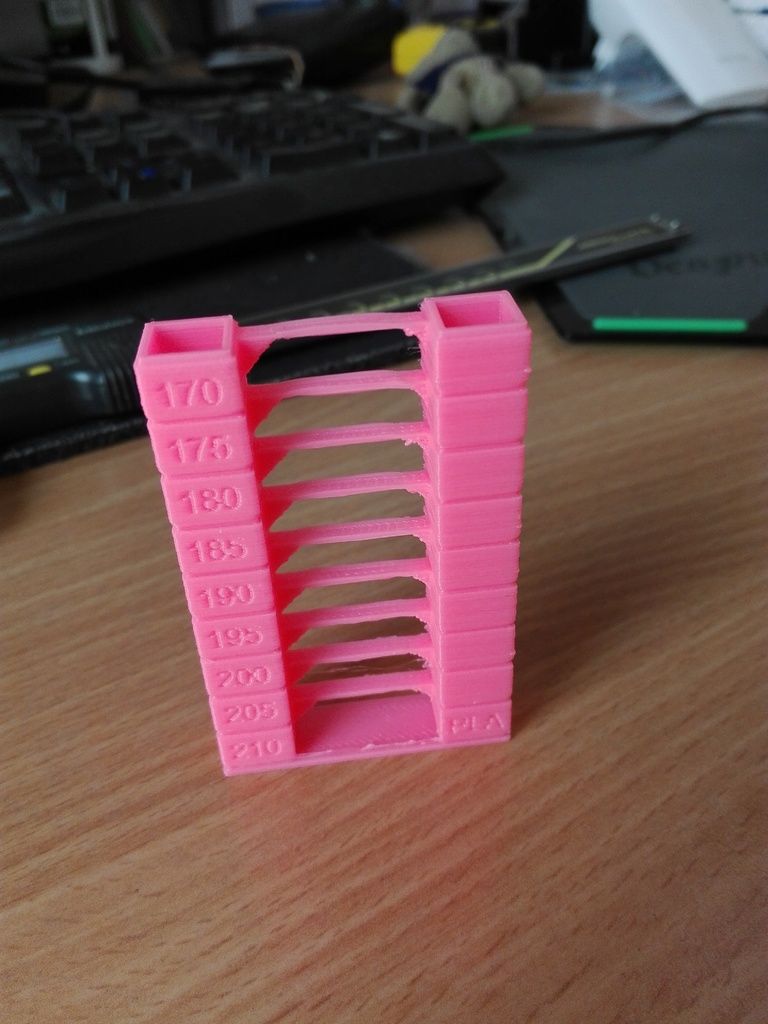 Niche areas such as 3D bioprinting and micro 3D printing are also regularly opening up new opportunities, and composite 3D printing (such as continuous carbon fiber 3D printing) is also on the rise: IDTechEX predicts that by 2030, the market size of composite 3D printing will be $1.7 billion
In short, 3D printing will gradually become a serious competitor to other manufacturing processes in many disciplines.
How to outsource 3D printing services?
Investments in 3D printing hardware and software are not suitable for all businesses, so many successful companies outsource their 3D printing needs to third parties, such as online 3D printing service bureaus (for one-time projects) or prototyping partners and production, such as 3ERP (for one-time projects or repeat orders).
When outsourcing 3D printing services, it is important to consider whether your business needs design and manufacturing services or just manufacturing services. (Keep in mind that a poorly executed 3D model may fail for 3D printing).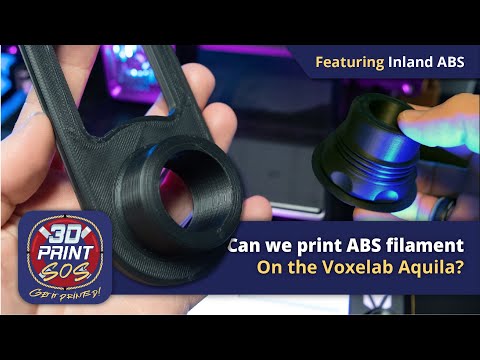
In general, though, ordering 3D printed parts from a third party is easier than ever. Many manufacturers can start 3D printing with just a digital 3D model, although more important projects may require a technical drawing to communicate additional information such as materials, colors, and tolerances. Some 3D printing service providers (including 3ERP) will offer advice on suitable 3D printing technologies and materials for your project.
Explore our full range of 3D printing services, including available technologies and materials, or request a quote for your 3D printing project.
Blood, pain and ... glass.
Personal diaries
Subscribe to the author
Subscribe
Don't want
5
3D Print #21: Blood, pain and ... glass.
Prologue.
If you're looking for big projects, legendary filaments and supersonic printers... no, that's not it, don't even read it.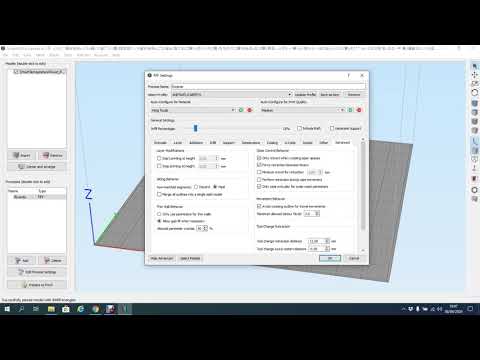
This story is about ordinary domestic violence against kitchen utensils by the recipient, and then about ordinary domestic violence with kitchen utensils against the recipient .
Prerequisites for printing.
Half a year before printing.
- Throw it away - said the wife, looking at her husband trying to wire the handle of the French press holder.
After a couple of weeks, the handle of the metal cup holder completely fell off, and the glass flask of the French press almost broke, but it almost doesn't count. The glass holder flew into the trash can, and the flask hid in the darkest corner of the cabinet... where Dark energy flowed in a stream, filling it with energy for revenge for its companion thrown into the landfill. And she didn't care that the coaster died due to its own weakness and vulnerability to rust. She made plans for revenge, because where there is Dark Energy, evil always accumulates...
Present.
A week ago, my husband received a package from Uncle Liao with nozzles for his brand new 3D Printer, and they lay quietly on the table, did not touch anyone. But one day, looking into the kitchen cabinet for some trifle, the husband was attracted by the unhealthy shine of the French Press Flask, until that day she stood in the Darkest Corner of the cabinet and did not shine. But the Dark Energy finally decided to show itself... 'I have a 3D Printer, and I can print a coaster for her!' - thought the husband. Moreover, ABS plastic gathers dust in the corner, and 1 mm nozzles just came for faster printing ...
The compass plunger in the teeth and go on howling 3D model ... for an experienced engineer and a novice 3D modeler, the creation of a cup holder model did not take much time, without artistic frills and the printer is already rustling on the table, evaporating toxins from ABS into the environment, and on it
designed to revive the French press...
But printing with a 1 mm nozzle had its own characteristics, the miel walls had an uneven structure, dips and roughness. In other places, strange snot appeared ... all this did not add attractiveness to the coaster, but the husband hoped that after processing with a file, acetone and such and such a mother, the model would take on a more elegant look ...
... and when everything ... almost all the defects were removed, it was time to try on a new glass holder for the old flask ... the clothes turned out to be the wrong size, and the flask barely fit into the glass holder by 15% and got stuck like Winnie the Pooh in a rabbit hole... just like in a cartoon... and not here and not here... It was decided to squeeze the flask from the bottom... the thumbs pressed on the bottom of the flask, and the rest pulled the cup holder up by the edges... at the husband's (idiot) another thought flashed that you could try to soften the plastic with boiling water ... and another thought that the bottom of the flask could crack due to its small thickness ... and at that moment the flask decided to avenge the long days of seclusion, it was not in vain that it saved up Dark power.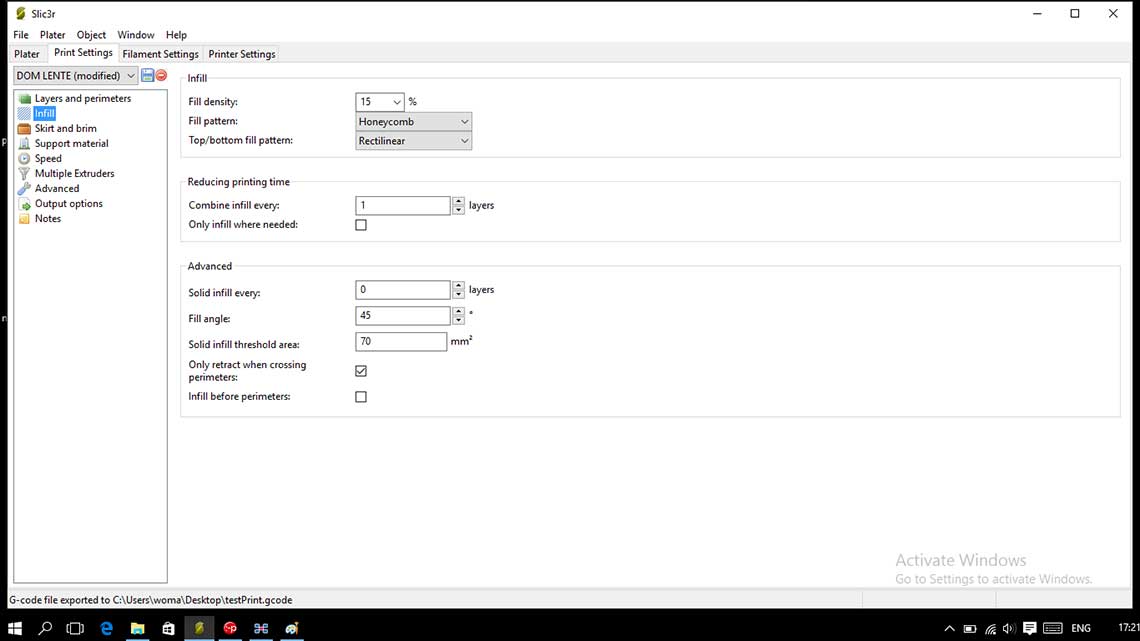 .. and its bottom cracked... the thumbs fell through, and the sharp edges of the bottom of the flask left deep wounds on the husband's thumbs... the First Blood was shed.
The Dark Flask's revenge was a success, and if the physical pain was not strong and quickly passed, a band-aid was put on the wounds... Then the moral pain haunted the husband for a long time, the pain of failure... but the biggest pain is the temporary inability to use one's own hands - if you can type and use a mouse without thumbs, then you can wash the dishes, fasten a button .... yes, even cutting off a piece of bread is quite difficult ... and the wife, as if evil, drove away for a week with her children to relatives.
This is how you make children... you do... and in the hour of need there is no one around and you clench your will into a fist in general, clench your teeth, wash the dishes, fasten the buttons and cut off a piece of bread performing miracles of balancing act with your hands trying not to use your thumbs , and in general you try not to strain your hands, because every careless movement can cause bleeding.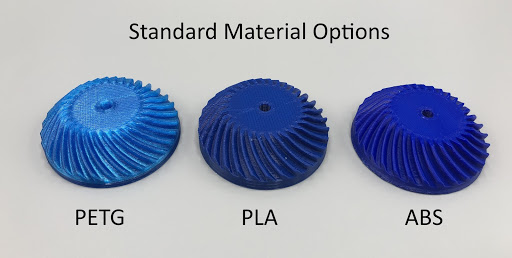 And without hands as without hands.
Results.
When working with glass, be very careful not to press too hard... better not to press at all.
For a 1 mm nozzle, you need to choose the optimal settings to improve print quality and print in 1 wall, because this is exactly what the nozzle was ordered for. Perhaps the Comrades will tell you why under-extrusion appears in one place and vertical snot in another.
ABS plastic, nozzle 1 mm, layer thickness 0.2, temperature 270, flow 100%. printing time 8-9 hours, sticking to the table on ABS juice.
Subscribe to the author
Subscribe
Don't want
5
More interesting articles
vetrock
Loading
09/22/2022
971
7
Subscribe to the author
Subscribe
Don't want to
In Van Helsing, Gabriel Van Helsing (Hugh Jackman) uses two custom revolvers.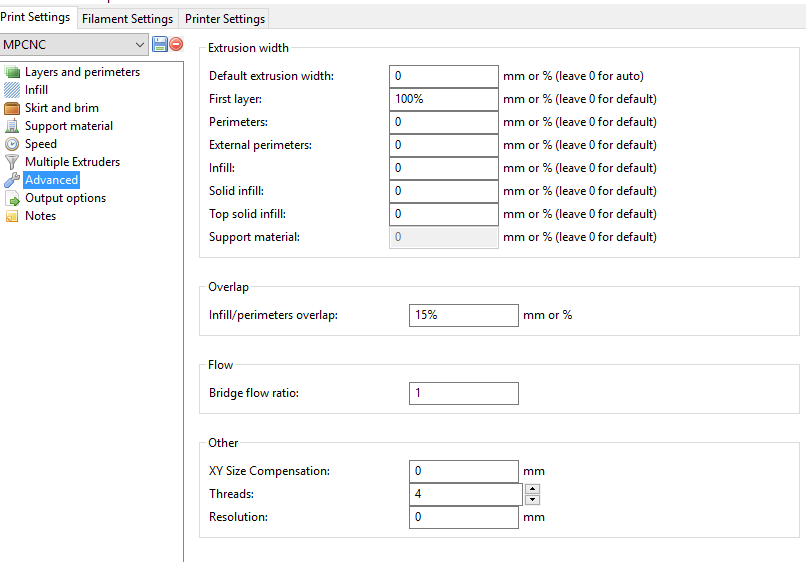 ..
..
Read more
one
Follow the author
Subscribe
Don't want
actually
actually my solution from "crooked" tables", "bumps in the center of the table...
Read more
wnn
Loading
02/06/2019
52706
97
Subscribe to the author
Subscribe
I don’t want to
I don’t really know how to model, but the idea came a long time ago, I modeled it as best I could, printed it, installed it, it works .