Where to 3d print yourself
How to 3D Scan & 3D Print Yourself Accurately (Head & Body) – 3D Printerly
3D printing is great in itself, but what if we could 3D scan ourselves and then 3D print ourselves. This is definitely possible when you know the right techniques. In this article, I will detail and guide you through how to 3D scan yourself the right way.
To 3D scan yourself, you should use a process called photogrammetry which is taking several pictures from a phone or normal camera, then uploading it to 3D reconstruction software, a great one being Meshroom. You can then clean imperfections of the model using the Blender app and 3D print it.
There are some real details and steps to perfect this process, so definitely keep reading to get a clear tutorial on how to 3D scan yourself.
What Do You Need to 3D Scan Yourself Properly?
People that have experience 3D scanning themselves tend to use either a phone or a professional 3D scanner.
You don’t need a bunch of complicated equipment or some specialized scanning apparatus, just a decent quality phone will suffice, as well as the correct software such as Blender and Meshroom.
Some 3D scanners are more suitable for small, detailed objects while others are great for 3D scanning your head and body so keep this in mind.
The 3D scanners capture the shape of your body through a series of data points. These data points are then combined to get a 3D model. 3D scanners use photo technology, such as:
- Structured-light Scanners
- Depth Sensors
- Stereoscopic Vision
This shows us that it uses various measurements to encompass different shapes and minute details of an object, or in this case, yourself.
All these data points are combines into a single data map, and a full 3D scan is fleshed out.
Basic Process of 3D Scanning
3D scanning may seem complex, which it is technologically speaking, but let me give you a simple explanation of the process of 3D scanning:
- You can either use a 3D scanner through your phone or can get a 3D scanner machine.
- The structured light lasers hover over an object to create data points.
- The software then combines these thousands of data points.
- All these data points help in getting a detailed, accurate, and realistic model within a specialized program
However, before moving towards 3D scanning yourself or others, you should know a few important points about it.
Type and Size of Objects
Some 3D scanners are more suitable for scanning smaller objects while there are also those scanners available, which you can use for scanning the whole body from head to toe.
You should be aware of the size of objects or yourself to select the right scanner for such purpose.
Accuracy
It would be best for you if you consider the extent of accuracy that you need for 3D scanning.
The maximum precision and accuracy which a group of 3D scanners can give lies between 30-100 microns.
Resolution
Focus on the resolution and get your values aligned before starting it.
Resolution is directly related to the accuracy; the better the resolution of your 3D scanner will be, the higher the accuracy.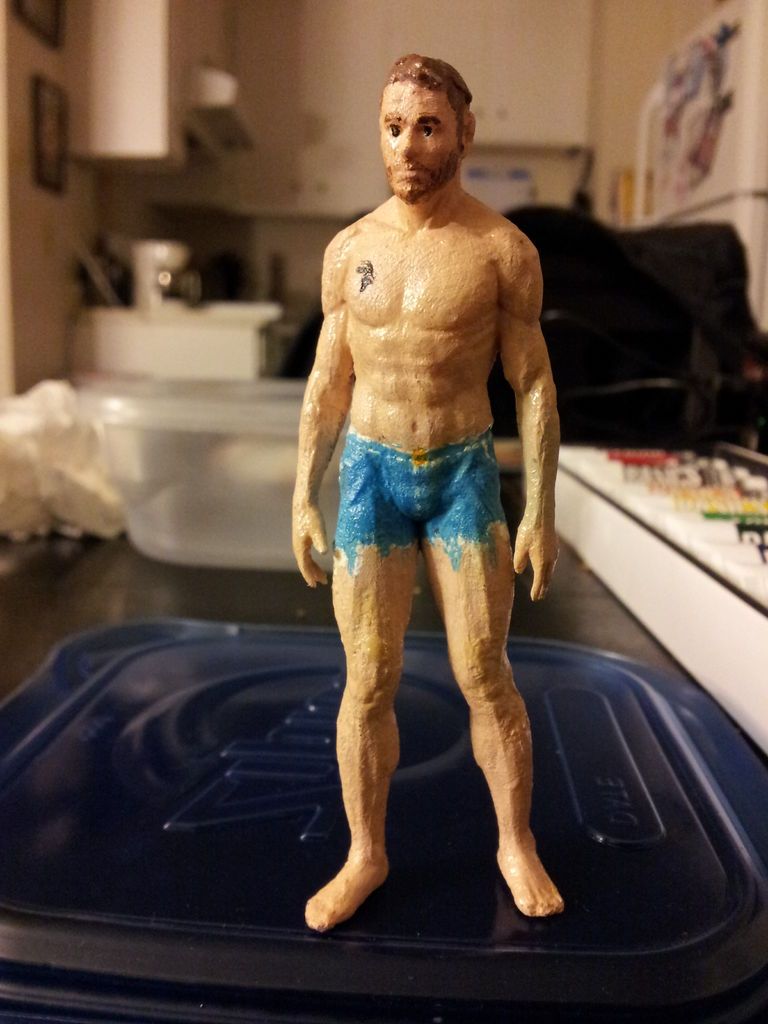
Speed of the Scanner
Static objects do not cause a problem with speed; it is the moving objects which require an adjusted level of speed. You can select and adjust the speed from the software settings and get things done with ease.
How to 3D Scan Yourself
There are different ways of 3D scanning yourself, and I will be listing them one by one. So keep on reading.
Photogrammetry with Camera
Josef Prusa goes into great detail on how to 3D scan with just a phone using photogrammetry. He has sweet, real-life examples and extra tips to help you get some good quality results.
Rather than needing a high-end camera, you can actually choose to use your phone to 3D scan yourself.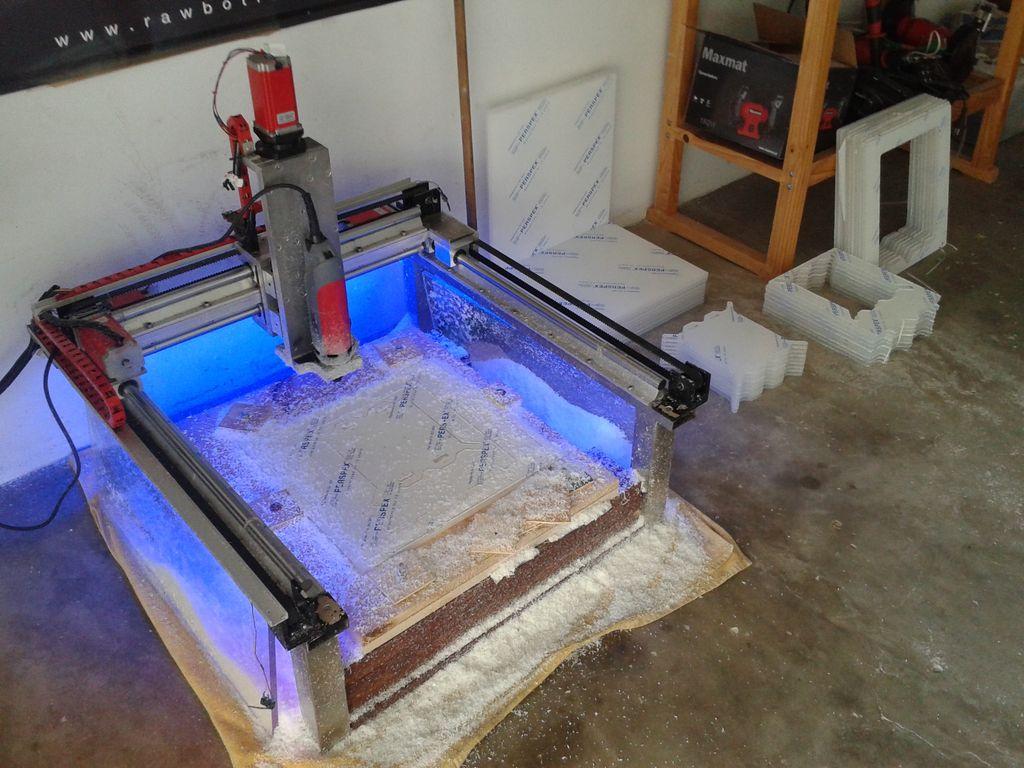
There are open-source softwares you can make use of for your photogrammetry needs. Meshroom/AliceVision is great for photogrammetry, Blender is great for editing, then Cura is a good choice for your slicing.
So the first step is using Meshroom, which is a free, open-source software that specializes in 3D reconstruction, photo and camera tracking to produce 3D models by using several photos as the source.
It has some amazing features that make it a lot easier to create some high quality meshes that can be used easily.
What you do is:
- Get your desired object and make sure the lighting is fairly even all-round
- Take several pictures (50-200) of your desired object, making sure it stays in one place
- Export those pictures to Meshroom to put them together and recreate the object as a 3D model
- Clean up the model in the Blender app to make 3D printing easier and more accurate, then export to slicer
- Slice & print the model as usual
The better your camera, the better your 3D models will be but you can still get excellent quality models with a decent quality phone camera. Josef Prusa uses a DSLR camera which is great for those extra details.
2. Mobile 3D Scanning App
This method requires no extra hardware and no extra hand to help in the scanning process. The process is simple and given below:
- Install the app which you want to for scanning.
- Take a picture of your face.
- Move your face to both sides to let the scanner capture the sides.
- Email the result to your desktop or laptop.
- Build your model easily from there.
Depending on the functionality of your phone’s scanning capabilities, you may have to export the file and change the file extension to .png, then open the .gltf file if it can’t be opened.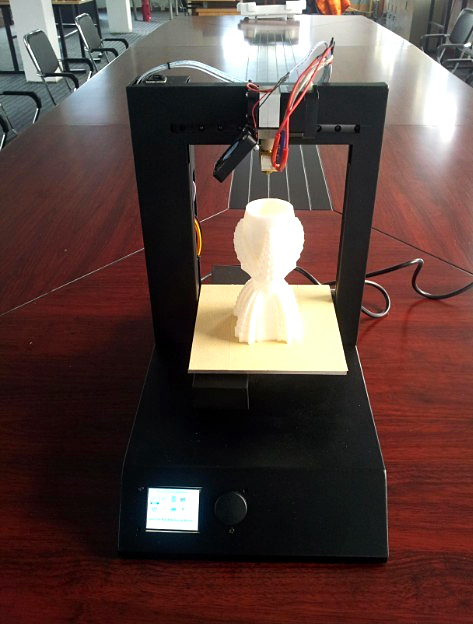
You can then open it in Blender and export it as an .obj file.
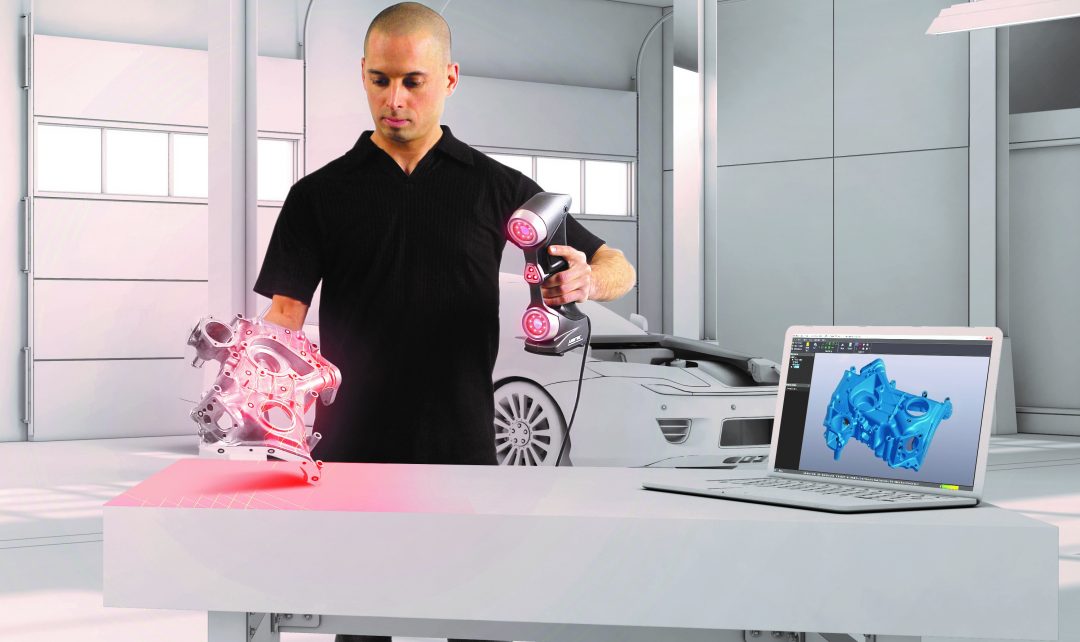
2. Handheld 3D Scanners
Handheld 3D scanners tend to be pretty expensive, especially if you want one with respectable quality. If you can access a 3D scanner locally for quick-use, then that would be perfect.
I did write an article about the Best 3D Scanners Under $1,000 which details some of the better cheap scanners out there.
If you want to scan yourself using a handheld 3D scanner, you’re going to need a second person to help out. The process is simpler than using the photogrammetry, but they are essentially doing the same concept.
They will require a second person to help you with scanning yourself. What is required to be done is as follows:
- Stand in a well-lit room that ideally has multiple light sources to reduce shadows
- Get the second person to move the 3D scanner slowly over the whole body or parts that you want to capture
- Similarly to the camera scanning, you’ll export these pictures to software to make a model out of it.

3. 3D Scanning Booths
iMakr are a great example of a 3D scanning booth that creates a ‘Mini-You’ using the latest technology to recreate your looks in a 3D-color infused sandstone composite.
The whole process doesn’t take too long, and can be done in around two weeks.
Here’s how the process works:
- You come in to iMakr, dressed to impress.
- We scan your full body image in our scanning booth.
- Your scans are processed on site into an initial print file.
- This file is transmitted to our design team for final preparation.
- We print a full color Mini-You in sandstone.
- We deliver your Mini-You or you can come into the shop to pick it up.
Doob is another 3D scanning service which makes replicas of you. Check out the cool video below for more details behind the process.
4. Xbox Kinect Scanner
Many people get excited when they figure out the capabilities of their Xbox Kinect to actually 3D scan themselves. The Kinect is quite outdated, but its still an option for some.
There isn’t too much stock of them around, although its possible to purchase one from Amazon, Ebay, or other e-commerce websites.
You can download the latest version KScan from a mirror, since it is no longer actively available.
How to Make a 3D Model Print of Yourself
Depending on the technique you used to get the 3D model ready, you should have been able to create a file which can be processed and sliced to finally print.
At first it can seem pretty complex, but with the right directions, it can be quite simple.
After you have taken all the photos which are required for generating a 3D model, the rest of the work is done in a system. The steps are listed below for your understanding.
As previously mentioned, you’re going to want to use the open-source Meshroom/AliceVision software to create the model for you to print.
Meshroom can be downloaded from their official website.
The video below is a great tutorial to make a 3D print model of objects and yourself if you have the images!
Best 3D Scanner Apps for 3D Printing
The application stores for both Android and iPhone are filled with 3D scanner apps.
You do not require any extra hardware in addition to your smartphone while installing these apps. The list of the apps is as follows:
- Qlone: It is a free application and works on both IOS and Android devices. You will require a special black and white paper mat, which can look like a QR code to scan something.
- Scandy Pro: This app is only for iPhone users, and it can turn the iPhone into a full-color 3D scanner. You can edit the scans within the app in real-time with various tools.
- Scann3D: Android users can use this app to scan photos of the object which they wish to 3D scan.
To get the scanning right, you should take photos in a continuous circle around the object.
- Sony 3D Creator: 3D Creator is Sony’s entry to smartphone scanning, and it is compatible with all Android devices. Through its selfie mode, you can even scan yourself.
3D Printing Yourself – How to Print a Mini You!
Self-portraiture has been an art form for as long as art has existed. Sketching, painting, and photography have all been used to capture the self from their inception.
This practice eventually came to the modern age with selfies, and the step beyond that is finally here: 3D printing yourself!
Making a 3D model of yourself for printing is a fun and exciting prospect, from making mini tableaus of your friends and family to even making workable 3D action figures of yourself. I guarantee even your best selfie won’t be as cool as having a mini model of you!
There are a few ways to get a little 3D you up and printing, and here we’re going to look over a few of the best ways to make a 3D model of you and your friends.
We’re also going to look at some of the coolest uses and ideas for 3D printing yourself to maximize the fun of being mini!
Why Make a 3D Model of Yourself?
Let’s be honest, all of us are at least a little vain, I know I am. This is why self-portraits have been a staple of just about any art form since time immemorial.
When it comes to 3D printing yourself, there are a few fun and creative uses for having a tiny plastic you.
Making a small scene of you and your family to decorate the mantlepiece is a simple yet novel way to keep treasured memories close. Think of it as a 3D family photo.
Wedding Cake Toppers
An even sweeter way to use a 3D model of yourself is on a wedding day or similar occasion.
Having the figures on top of the cake that are the actual likeness of the newlyweds is a really nice way to make the day a little bit more special.
Action Figures and Toys
For more fun reasons, you can even make 3D printed action figures of yourself. With a little extra work, you can print a 3D model of yourself with posable limbs like a real action figure.
With fun and games in mind, tabletop and board games that use figurines like Monopoly and Arkham Horror will be made all the more fun by using 3D printed models of you and your friends as the game pieces.
Before You Start Printing
There are a couple of ways to make a 3D model of yourself, and which method you choose will depend on both what equipment you have access to as well as just how artistically experienced you are.
The most common, easiest, and most accurate way to get a model of yourself to 3D print is through 3D scanning.
3D Scanning Yourself
We’ve already discussed 3D scanning and its uses, from dental practices to full-body 3D scanners and their uses. In the latter, we’ve even briefly discussed 3D selfies.
3D scanning is the process of using structured light or lasers to scan a 3D object ready for upload to rendering and modeling software. Think of it like scanning a document or photo onto a computer, but in full 3D.
Handheld scanners work great for this, but you will need another person to help you so you can get a good scan of your whole body.
How to Get a Scan of Yourself
The scanning process itself will require preparation.
Like taking a good photo, there are things to keep in mind to ensure top-quality results. Correct lighting, reduced background clutter, and stillness to avoid blurring are all crucial to getting an accurate model of yourself ready for 3D printing.
There are a few routes to take to get yourself 3D scanned.
Some scanners can be printed and made at home. Some are fairly cheap, while professional-grade scanners will set you back a little more.
To really get a sense of which scanner is right for you, you can check out our article on 3D printed scanners in all price ranges. And that’s not even mentioning the different kinds of 3D scanner software out there.
The Revopoint POP 2 is a good low-cost choice for home scanning. You can check out our review of it here.
Ensuring Scan Quality
For a really high-quality 3D model of yourself, your scan will need to be as clear as possible.
While the home-based scanning options mentioned above are handy, there are also professional scanning services that use high-end equipment in studios for the best results.
Which of these services are available to you will naturally depend on your area.
A quick search should get you in touch with professional 3D scanners so you can be confident you’ll end up with a 3D model of you that’s a perfect likeness.
All-in-all, it will take some time, research, and money to know exactly what hardware you’ll want and which software to use, but it will be worth it when you’re holding a tiny you in your hands.
Alternatively, you can always go hard mode and make an entire model of yourself from nothing.
Alternative Option: Model Yourself From Scratch
Of course, the most basic method is to simply make a 3D model of yourself from scratch.
Much like how painters will often have a photo of their subject matter by their easel, you can use differently-angled selfies to make a model of yourself using your preferred 3D modeling software.
Naturally, this requires a deft artistic hand and good experience in 3D modeling. But if you’ve got the skill, you might find it to be a worthwhile project that’s a lot of fun as well as rewarding.
3D Printing Yourself
Now that you’ve got your model, it’s time to 3D print yourself!
There’s not much point in making models of real people if they’re not as accurate and detailed as possible, so you’re going to need to have the right machine for the job.
No matter how good the scan or clear the model is, a lesser 3D printer will make your resulting model look generic.
With your model loaded into your preferred slicer, you’re ready to double-check the accuracy and resolution before sending it to be printed.
You can 3D print yourself in just about any material, but for the best results, we recommend resin.
Resin printers are known for more high-quality prints than their FDM counterparts, so it’s better to use one if you’re really going for accuracy in your models.
Particularly high-end or reliable resin printers are excellent for getting models that really look like a little you!
If you don’t have access to a resin printer, or any printer that you trust to get the results you want, it’s worth noting that many professional scanning services will also offer printing as an extra. These services may even be able to print in ceramic or metal.
After printing, it’s time to post-process.
How you’ll do this will depend on what materials you’ve used and how you want your model to look in the end.
If FDM printing with ABS filament, adding a sheen with acetone or carefully painting the model are both good ways to get your desired results.
Just be sure to have your materials ready. If painting, you’ll need the right colors to get your models exactly right, for example.
If you’re new to 3D printing or just want to make extra sure that your models turn out right, you can check out our guides on improving your finish and post-processing your 3D prints.
Make Yourself as an Action Figure
Making static 3D models of yourself may be cool enough as it is, but you don’t have to stop there if you don’t want to.
With a little extra engineering and time, you can even make yourself into a 3D printed action figure!
Once you’ve got a 3D model of yourself, you can use your preferred slicer or editing software to split the model into individual parts depending on where you want your points of articulation.
By modifying these parts with holes to fit together with hinges or screws, you can print them all separately and then combine them to make an articulated action figure that looks just like you.
Of course, this only needs to be as complicated as you want it to be.
If you only want the head to turn, it’s as easy as printing it separately with enough of a connection to hold steady but with enough space to turn.
Joints on the shoulders and elbows will make it so you can put yourself in different poses like a real action figure, same with joints at the hip and knees.
For the best results, make sure you get a scan of yourself standing straight. Different poses and leaning positions may make for cool 3D selfies, but they will limit how your action figure self can be manipulated.
The most important thing is to make sure the points of connection match.
Having CAD software that can run simulations of moving parts is useful for this, but making careful notes when measuring the holes will do.
If you’re feeling extra zany, you can size up the top of the model and attach it to a small spring to turn yourself into a fun bobblehead!
Hints and Tips
We’ve already gone over some of the more important things to keep in mind when 3D printing yourself as a model or action figure, but here are a few extra hints to make sure you’re satisfied with your tiny you.
Always Scan in an Ideal Environment
There are a lot of ways to make sure your 3D scan comes out as clear as possible. Professional scanning services will know what to do, but if you’re scanning yourself at home you’ll need to be mindful of a few things.
Correct lighting and good background colors will stop your scan from being too ‘noisy’. You should also be mindful of your clothing, posture, and chosen pose. All-in-all, just do what you would when taking a good photo and you should be fine.
Taking photos of yourself in the clothes and poses you have in mind makes for a good test run before scanning so you’ll know what looks and works best.
Get More Than One Scan
Again, this is a similar rule to photography. Getting scans of yourself in different poses or in different clothes will give you many more options when it comes to printing.
Even if you’ve got a good one, there’s no harm in getting the same again for safety, it could even end up being a better scan than the first.
Don’t Be Afraid to Experiment
Printing yourself out in different poses or testing out some scans as action figure material can take some trial and error. Considering the time and effort 3D printing yourself can take, you probably won’t want to settle for second-rate.
Experimenting with sizes, infills, materials, and post-processing methods is part of the fun of making a model of yourself.
It will not only help you get a better idea of what to do next time but also make for a good learning experience for getting great 3D printing results in the future.
3D Printing Yourself FAQs
Can I print a 3D model of myself?
Yes. With 3D scanning, you can upload a 3D image of yourself to your preferred slicer and 3D print a model of yourself with ease.
How much does it cost to make a 3D printed figure?
3D printing a figure is fairly cheap if you do it all yourself.
Renting a scanner can cost anywhere between $250 – $500 on average, while professional scanning services generally cost up to $1000, with an added cost for printing that varies depending on size, detail, and materials.
If you like, you can also buy and keep a good low-cost scanner like the Revopoint for around $500 – $700.
How do you 3D print a statue of yourself?
With either an accurate 3D scan of yourself or a model you’ve made from scratch, you can use any high-resolution printer to make a statue of yourself that looks as much like you as possible.
Other articles you may be interested in:
- The 34 coolest & most useful things to 3D print
- 30+ Easy and fun things to 3D print at home
- The 10 best free 3D printer models on Thingiverse
- 8 Big ideas for small 3D prints
- Paper 3D printing
- Top 7 3D printing tips for beginners
- 3D printed items that sell
- 7 Exciting 3D printed food projects
How to 3d print another 3d printer
Already have a 3D printer? Want another one?!
Why is this needed?
Well, let's say you have your own large printer and you can print fairly large objects. Do you believe in the idea of the reprap movement, the printer should be able to reproduce itself!
Or you want to challenge yourself and finally understand how the 3D printer works.
Or your current 3D printer is just sitting around gathering dust in the corner of the room, because you have already printed everything that came to mind, and the most difficult task that worries all 3d printing professionals is how to clone existing equipment on itself.
Step 1: Preface
Let's be honest... the is not the ultra cheap printer. This is not Chery 3D printer for $60. This not is a way to save money or time. This is not first printer.
Now let's talk about what is .
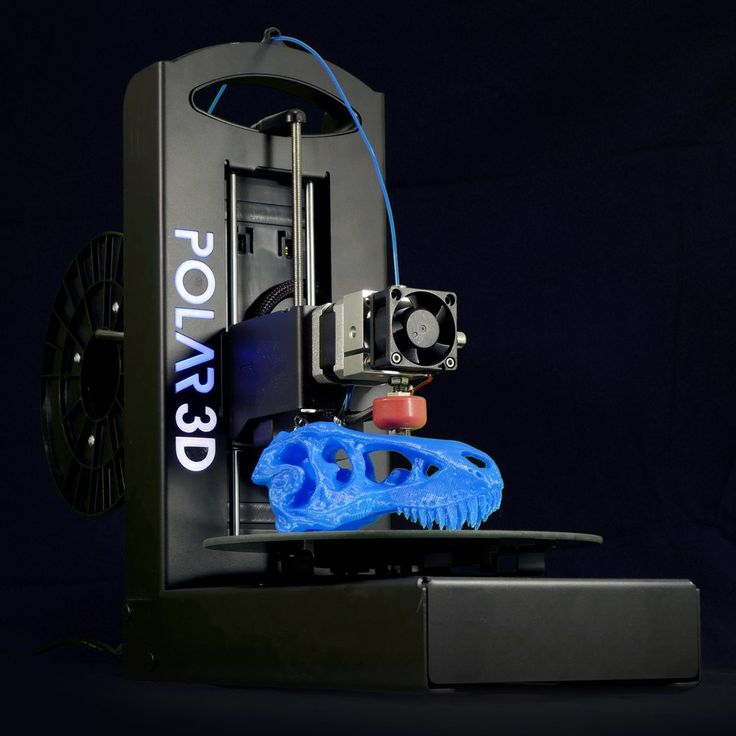
B 3Dtje mini 3D printer is:
- Damn easy to print
- Printed parts from PLA
- Everything fits within 200x200 print volume
- Most parts can be printed in 100x100 print volume
- Most parts are printed without supports , only in some cases they may be needed to improve quality
- Very few few needed tools
- Unlike most crafts that require a laser cutter, CNC
- You can probably get away with a drill and a hacksaw to prepare 2 rods of the required size
- No source of MDF, or wood, or acrylic sheets or aluminum profiles, which can be expensive
- A Prusa i3 Clone
- This design is not new, nothing revolutionary, but it is reliable, prints well and works with any slicer
- Open source
- All model files can be downloaded free of charge
- You can download them and modify them as you like
- You can even sell them if you need to!
- Simple and interesting printing
- 19 models
- All parts are different and look very interesting together
- Easy to assemble
- All parts are connected with M3 screws and nuts.
- Cutting 2 to 4 metal rails
- Some 3d printed parts are assembled intuitively , you can even ignore photo
- All parts are connected with M3 screws and nuts.
- Really fucking cool!
- Small, portable, low moving parts! This printer can print fast! (when properly configured)
- This 3D printer you will DIY , completely!!
Let's get started!
Step 2: Prerequisites
You will need a 3D printer , well, or find someone with this device.
- Printable area must be at least 200x200mm XY and maybe 200mm Z if you want to print with refills
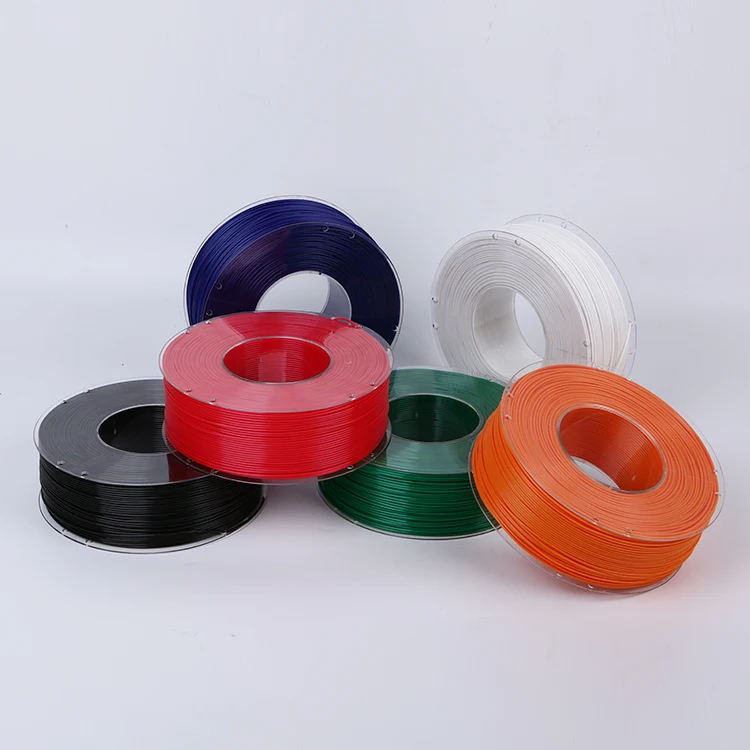
- PLA 1 kg, can be different, but this is the most convenient option
- I honestly don't know how much it will take. Likely 500g or so
- Tools
- Screwdrivers for screws
- Pliers, cleaning tools for printed objects (a clerical knife is sufficient)
- Metric drills for opening / cleaning the printed hole (you can also use a screwdriver)
- Knowledge on how to build a 3D printer from scratch
- These are not hard requirements, but knowing how to deal with common printer problems will reduce the amount of swearing when things aren't perfect the first time.
- If you understand firmware Marlin it would be very cool to talk about this, as there is a desire to improve some things.
- These are not hard requirements, but knowing how to deal with common printer problems will reduce the amount of swearing when things aren't perfect the first time.
Step 3: Parts
Right off the bat, I've made a list of exactly what you need and what you can buy to make the best possible quality. But it will be more expensive. Therefore, you choose which set to buy - in principle, they will not differ. In addition, you can order all this from China, it will be cheaper, but the wait will be longer. In any case, you need to look for all the components in English, so we take them from the table and, for example, insert in alliexexspress search .
The table is located at this link.
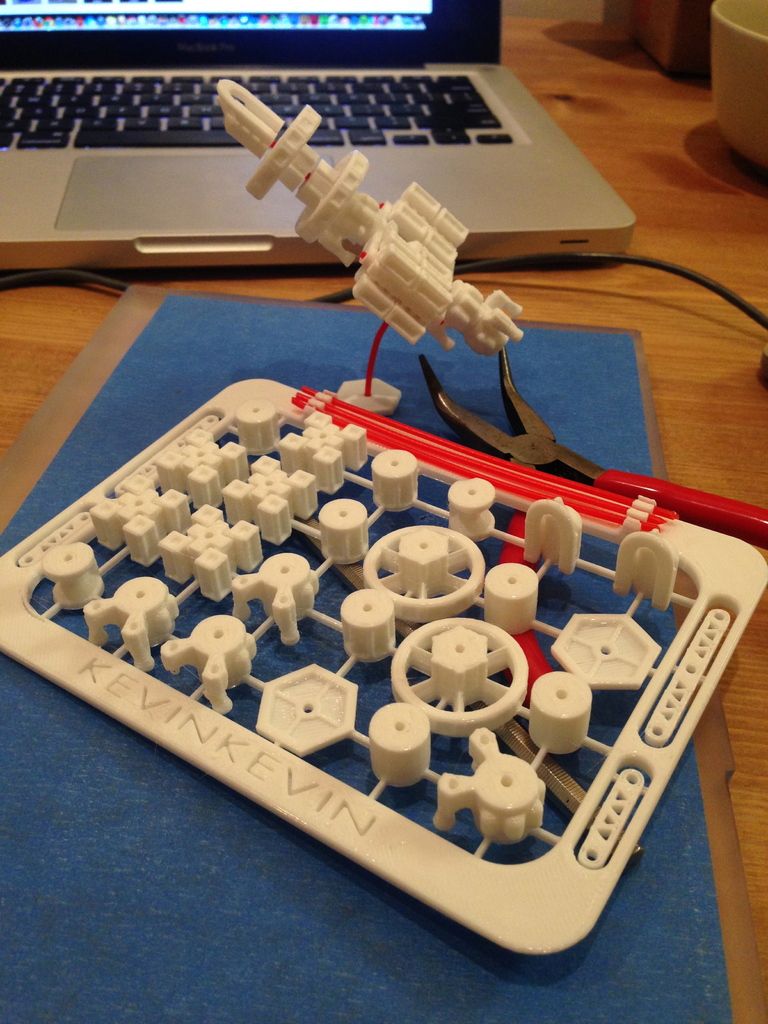
Step 4: Printing Parts
Now let's move on to the most interesting part, in my opinion - prototyping models. To be honest, I really like to print different things, you feel that you can handle any task when you have a 3d printer at hand. Okay, it's all lyrics.
Here is the project itself, where you can download 3d models for printer for free . Download and start preparing for printing.
The most important thing is to arrange the parts correctly on the table . The idea is to make the models have as few parts hanging in the air as possible. This will allow to drop support for . After all, they spoil the quality very much if you do slicing through Repetier Host with their auto-generation, and not draw them yourself.
You can watch a video showing the optimal arrangement of parts. Print settings I think you know how to do it, if not - there are articles about it with configuration files.
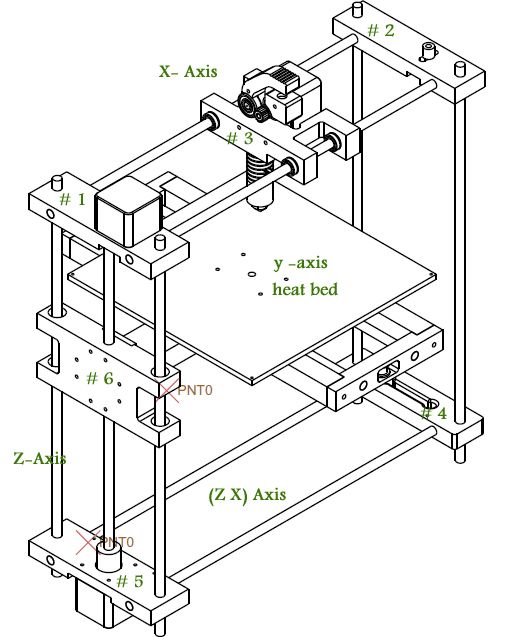
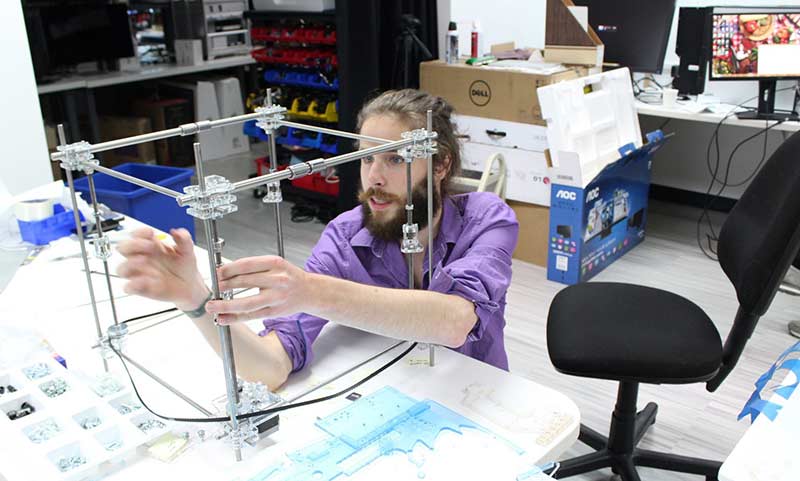
Step 5: Mounting
Let's assume that we have printed everything. Someone may have decided to use metal guides, buying them, for example, from IKEA, and cutting them into sections of the desired length.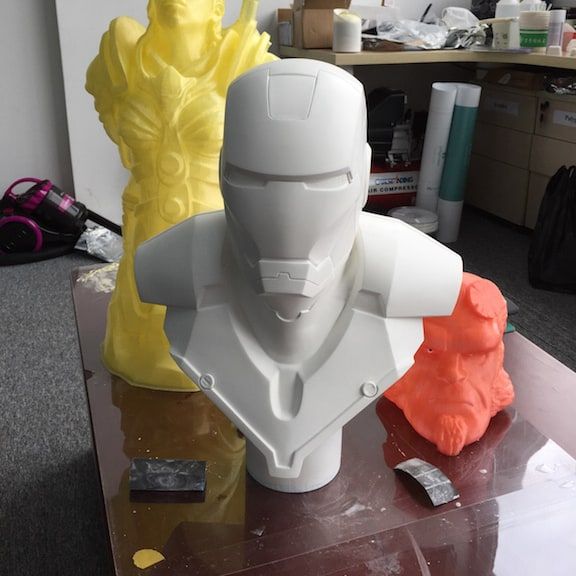 In any case, writing how to assemble this 3d printer does not make much sense, and it's too lazy, to be honest. In my opinion, there is nothing better than pictures!
Frame assembly
First, I'll lay out how our miracle should look like at the moment of medium readiness. Then we will see how the modules were assembled.
Assault Axis Y
This Axis drives The so -called bed . First we need to install the motor, put a pulley on it . Then we install a freely rotating pulley on the other side and measure 9 for them0003 belt .
And now we will install the bed itself, which will fasten the two ends of the belt to us. Just don't forget to tighten the pulleys and anything that isn't tight yet. The substrate will be massive and it will be inconvenient to crawl there already.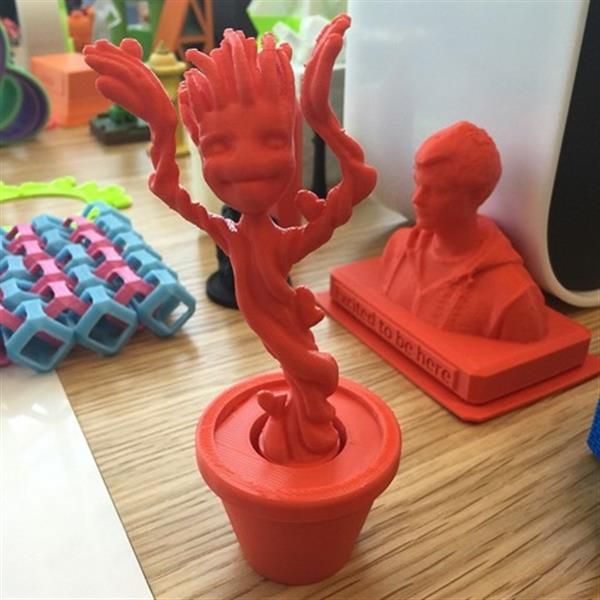 The connection will require 200mm x 6mm bolts, so have them ready right away.
It should be noted that the belt must be very tight . This will greatly affect the print quality of . If you cannot do this at the time of assembly, you can use special tensioner . It's basically a simple spring. As for the axes, in this case they are printed, although this is far from mandatory, just the name of the project obliges))
X-axis assembly
Depending on your printer, you may need to make a hole with a 3mm drill in the belt tensioner. This hole should be quite free.
- Attach the motor to the end of the x axis with the connector down
- Attach 20T gear
- Insert 6mm rods 6mm x 180mm into the holes on the motor side. You need to cut these rods if you bought 200mm.
- Assemble the x-axis tensioner with either your own or printed tensioner bearing.
 Make sure the m3 nut is in the tensioner before proceeding.
 - Pass the belt from the left side (engine side), through the gearbox, through the idler bearing to the right side
- At this point, install belt tensioner to the right of the x-axis on the rods
- If you are happy with the length (make sure the x-axis of the tensioner is recessed quite a bit) you can cut the belt. Don't forget to leave extra belt length
- Attach LM6UU bearings in bottom bracket x
- All assembled, attach the straps to the carriage x
- Then it remains to adjust everything a little to make sure that nothing touches each other
Assembling the Z axis
Now we assemble the Z axis. If you have not installed the engines in the course of past work, it's time to do it. As you understand, they should stand on the left and on the right. We will install adapters for screw rods on them, where we will put them, holding them with a hexagon.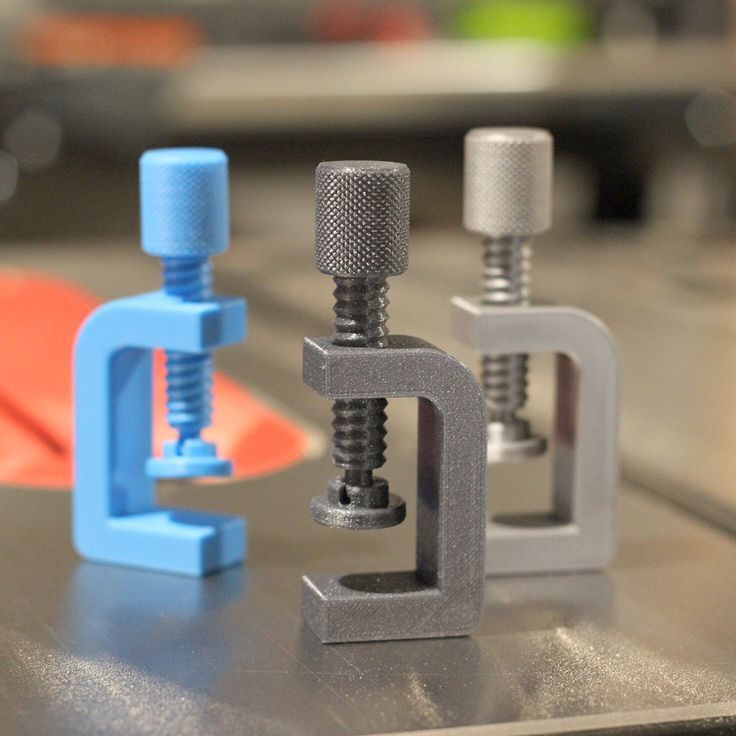
We stick the guides (parallel to the screw rods). We can say that we have finished assembling the case.
Step 6: Assembly of the electrical circuit.
How to lay the wiring is everyone's business. Here the options will be shown in the photo, but it's up to you to decide. The most important thing is to connect everything correctly. I'll also lay out the scheme, but it's better to see how this is done in ordinary 3d printers. For example, in order not to go far, you can go over the following articles directly on this site:
-
Exploring the features of a 3D printer
-
3D printer setup and calibration
-
Ramps 1.4 connection in 3d printer
It is not necessary to read everything - you can see the key places from the pictures and delve into their study.
The picture below shows the green power terminal. This is a very dangerous and unreliable thing that sometimes ignites - it is dangerous to leave a working 3d printer at home unattended. Therefore, in an article about Ramps, it is better to read how to be in this case.
Step 7: Firmware
Since you will (most likely) have an Arduino Mega as the brain of a 3d printer, uploading firmware to it will be quite simple. All you need is the Arduino IDE. The most standard firmware from Marlin. The main thing is to choose the correct configs for the board. I have not seen an article about the firmware on this resource, but it can be easily found on the Internet. Here are useful links:
- Firmware Marlin manual
- May be useful to someone info about reprap electronics, how is it functioning
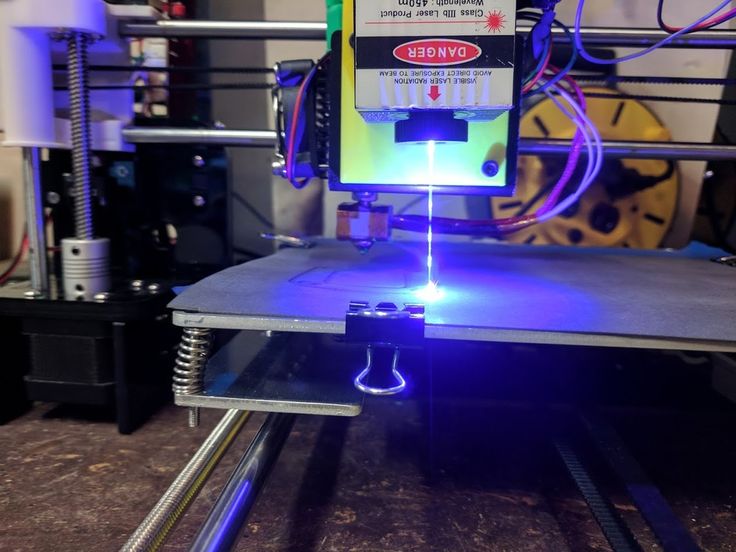
Step 8: Testing
Finally time to print something! We note right away that the table must be covered with molar tape or Kapton, since we have it without heating.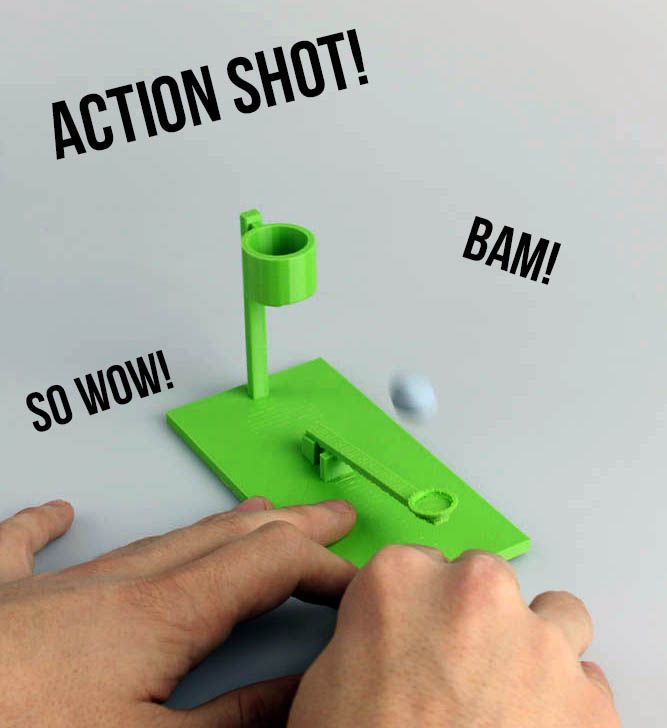 Otherwise there will be no adhesion. Also, before printing, be sure to correctly adjust the distance between the nozzle and the bed . How to do it correctly is discussed here. 3d printer calibration - our everything!!!
Since you were able to print parts for this printer, you can also slicing your own models for its small copy, assembled by yourself. Therefore, we will not talk about the slicer, just do not forget to reduce the print area!
And so that's what each of you can have at the end of this article!
3Dcrafter.ru — 3D printing in Moscow on high-precision 3D printers
Materializer 24/7
We accept applications by e-mail around the clock!
Order
We accept applications by e-mail around the clock!
Order
Engineering and art
3D modeling
We accept applications by e-mail around the clock!
Order
3D printing
Creating an object from your 3D model
You can send us a 3D model for a detailed study, during which we will select the best manufacturing option.
Our consultants...
Use of advanced technologies
Several 3D printing technologies (FDM, SLS, SLA, MJM, CJP, etc.) are currently available, each of which is designed for...
Finished product post-processing
Thanks to the experience and practical skills, our specialists can carry out a complex of physical changes to the printed model...
Applications
3D printing technologies are gaining more and more popularity year after year, showing their practical advantages in ...
Technologies
FDM technology
The most popular 3D printing technology at the moment is Fused Deposition Modeling (FDM) or multilayer fusing technology...
SLS technology
3D printing technology - Selective Laser Sintering (SLS), based on the sintering of polyamide layers by means of a laser beam...
SLA technology
The StereoLithography Apparatus (SLA) technology or stereolithography gives the models definitely new properties.
MJP technology
3D printing technology - Multi Jet Printing (MJP) - a multi-jet modeling method that closely resembles conventional inkjet printing...
BJ technology
3D printing technology - Binder Jetting (BJ) is based on sequential bonding layers of plastic powder with a special binder.
CJP Technology
Color Jet Printing (CJP) is the most popular full color 3D printing on the market right now. The technology is based on layer-by-layer bonding..
LaserCUSING technology
Additive manufacturing technology - LaserCUSING - is based on the method of selective laser melting of metal powder materials.
Case Studies
ABS, PLA, PVA, Carbon, Nylon (FDM)
Polyamide (SLS)
Photopolymer (SLA/MJP)
PMMA (BJ)
9 Plaster of Paris (CJP) 9043
3D printing cost
Material: ABS
Technology: FDM
Accuracy: 0.05-0.25 mm
Detail: +++
Strength: ++++
Price (cm3): from eight
Material: PLA
Technology: FDM
Accuracy: 0. 05-0.25 mm
Detail: +++
Strength: +++
Price (cm3): from eight
Material: Carbon
Technology: FDM
Accuracy: 0.15-0.25 mm
Detail: +++
Strength: +++++
Price (cm3): from fifteen
Material: Nylon
Technology: FDM
Accuracy: 0.15-0.25 mm
Detail: ++
Strength: +++++
Price (cm3): from fifteen
Material: ASA
Technology: FDM
Accuracy: 0.05-0.25 mm
Detail: +++
Strength: ++++
Price (cm3): from fifteen
Material: PETG
Technology: FDM
Accuracy: 0.05-0.25 mm
Detail: +++
Strength: ++++
Price (cm3): from ten
Material: FormaX
Technology: FDM
Accuracy: 0.15-0.25 mm
Detail: +++
Strength: +++++
Price (cm3): from twenty
Material: PC
Technology: FDM
Accuracy: 0.10-0.25 mm
Detail: +++
Strength: ++++
Price (cm3): from twenty
Material: Flex
Technology: FDM
Accuracy: 0. 20-0.25 mm
Detail: +
Durability: +++++
Price (cm3): from 25
Material: Ultran
Technology: FDM
Accuracy: 0.15-0.25 mm
Detail: ++
Strength: +++++
Price (cm3): from 25
Material: PP
Technology: FDM
Precision: 0.15-0.25 mm
Detail: +++
Strength: ++++
Price (cm3): from 25
Material: SBS
Technology: FDM
Accuracy: 0.15-0.25 mm
Detail: +++
Strength: ++++
Price (cm3): from fifteen
Material: Total CF-5
Technology: FDM
Accuracy: 0.15-0.25 mm
Detail: +++
Strength: ++++
Price (cm3): from fifteen
Material: PVA
Technology: FDM
Accuracy: 0.05-0.25 mm
Detail: +++
Strength: ++
Price (cm3): from 25
Material: HIPS
Technology: FDM
Accuracy: 0.05-0.25 mm
Detail: +++
Strength: ++++
Price (cm3): from eight
Material: Polyamide
Technology: SLS
Accuracy: 0. 08-0.1
Detail: ++++
Strength: ++++
Price (cm3): from 90
Material: Photopolymer
Technology: SLA
Accuracy: 0.01-0.05 mm
Detail: +++++
Strength: +++
Price (cm3): from 90
Material: Photopolymer
Technology: MJP(MJM)
Accuracy: 0.028-0.032 mm
+++++
Strength: +++
Price (cm3): from 350
Material: Wax
Technology: MJP(MJM)
Accuracy: 0.02 mm
+++++
Strength: +
Price (cm3): from 900
Material: PMMA
Technology: BJ
Accuracy: 0.15 mm
+++
Strength: +++
Price (cm3): from 70
Material: Gypsum polymer
Technology: CJP
Accuracy: 0.1 mm
+++
Strength: ++
Price (cm3): from 60
3D Modeling and 3D Scanning
3D Engineering and Art Modeling
3D modeling is a combination of creativity and logic.![]() What is perceived by the eyes as volume, texture and ...
What is perceived by the eyes as volume, texture and ...
Preparing a 3D model before printing
Sometimes our clients come to us with a ready-made 3D model that they have created themselves, downloaded from the Internet or received from.. .
3D scanning of any object
3D scanning is the process of transferring the shape properties of a physical object - a digital model. In fact, this is the next stage ...
Unlimited database of
3D models
Over the two years of our company's work, we have managed to collect a considerable number of 3D models that are widely used. In doing so, we can a little...
Case Studies
3D Engineering Modeling
3D Art Modeling
3D scan
Cost of 3D modeling and 3D scanning
Type: Engineering
File Format: *.stp, *.obj, *.stl
Price: from 1000
Note: ---
Type: Artistic
File Format: *.obj, *.stl
Price: from 1000
Note: ---
Type: 3D Scan
File Format: *.