Metal desk 3d printing
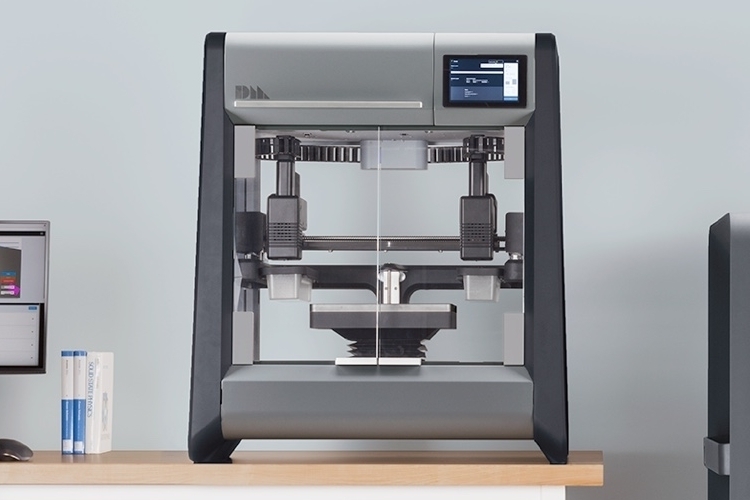
Studio System™ | Desktop Metal
_Studio System™ applications
Studio System™ applications span a variety of industries including manufacturing, tooling, automotive, consumer, electronics, and oil & gas.
-
Extrusion Die
h23This die is used in the manufacture of extruded plastic framing.
Extrusion Die
-
Size (mm) 74 x 74 x 56
Cost to print ($) 156.00
Cost to machine ($) 329.67
Cost reduction 52.68%
-
Metal 3D printing reduces lead times and costs - allowing for rapid iteration and refinement of the die design.
Furthermore, lower tooling costs and lead times makes low volume custom extrusion dies economically feasible.
-
Rook Chess Piece
316LOne of six types of movable objects used in the game of chess.
Rook Chess Piece
-
Size (mm) 46 x 46 x 72
Cost to print ($) 46.00
Cost to machine ($) 329.67
Cost reduction 52.68%
-
Unique chess piece designs can easily be 3D printed without the long lead times and costs associated with tooling.
 The Studio System’s high resolution print head produces small parts with fine features and surface finish.
-
YE6 Burner Tip
316LThis burner tip is used to shape the flame in industrial burners.
YE6 Burner Tip
-
Size (mm) 139 x 139 x 86
Cost to print ($) 193.46
Cost to machine ($) 694.00
Cost reduction 72.00%
-
This burner tip was originally cast in the 1950s, and the tooling has since been lost for it.
 When a customer needed a replacement, the quote for new tooling was in the tens of thousands of dollars.
With the Studio System, the company was able to recreate the part with properties similar to the original cast part, with no tooling cost or long lead times for the customer.
-
Putter
17-4 PHCustom designed golf putter is an example of the customization that is possible with 3D printing.
Putter
-
Size (mm) 135 x 92 x 38
Cost to print ($) 128.
 00
00Cost to machine ($) 2203.00
Cost reduction 94.00%
-
Golf clubs, especially putters, are typically cast or machined. With the Studio System, manufacturers can achieve excellent material properties without tooling or expensive CNC machining.
The Studio System allows for customization of parts like putters, so each player can have a design that is best suited to them. And when those designs go into mass production, they can be manufactured via binder jetting.
-
Flower Nozzle
316LThis flower nozzle is used to atomize fluid in industrial equipment.
Flower Nozzle
-
Size (mm) 123 x 123 x 45
Cost to print ($) 184.00
-
Due to its complex geometry, these parts would typically be cast followed by extensive secondary machining. With the Studio System, the nozzle can be 3D printed without the lead times and setup costs of casting, enabling one-off and small batch orders.
-
Impeller
316LThis impeller is used to control the pressure and flow of fluids in equipment like pumps and compressors.
Impeller
-
Size (mm) 82 x 82 x 28
Cost to print ($) 63.00
Cost to machine ($) 2138.00
Cost reduction 97.05%
-
Their complex vanes make impellers expensive and difficult to manufacture. When a custom impeller is needed metal 3D printing accelerates design optimization and product development by dramatically reducing lead time and cost.
-
Sheet Metal Embosser
4140This custom embosser is used in sheet metal fabrication.
Sheet Metal Embosser
-
Size (mm) 47 x 28 x 15
Cost to print ($) 14.00
-
Sheet metal tools are used for a broad range of fabrication operations, including stamping, bending, countersinking and embossing.
3D printing with the Studio System reduces tool fabrication costs, shortens production run lead time, and enables rapid iteration and refinement of the sheet metal designs and associated tooling.
-
Zipper Mold
h23This part is an Injection mold insert for manufacturing zinc zippers.
Zipper Mold
-
Size (mm) 46 x 27 x 18
Cost to print ($) 16.00
-
3D printing the mold inserts shortens production run lead time and allows rapid iteration and refinement of zipper designs. Using a high resolution printhead allows for smaller parts with finer features, requiring less post processing.
-
Skateboard Truck
17-4 PHThis part attaches wheels to a skateboard deck, and was optimized using generative design tools
Skateboard Truck
-
Size (mm) 201 x 76 x 52
Cost to print ($) 161.
 00
00Cost to DMLS ($) 1163.00
Cost reduction 86.00%
-
Generative design and 3D printing allows for the fabrication of innovative designs impossible with casting (the traditional production method for skateboard trucks).
The Studio System can print that previously impossible geometry, resulting in trucks that are more aesthetically pleasing, stronger, and lighter.
-
Master Drilling Sun Gear
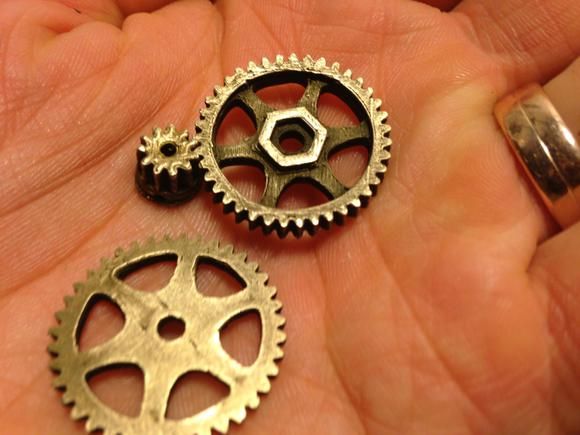
17-4 PHThis part is a sun gear used in a planetary gearbox for an earth-drilling machine.
Master Drilling Sun Gear
-
Size (mm) 118 x 118 x 118
Cost to print ($) 658.
 00
00Cost to machine ($) 916.00
Cost reduction 28.17%
-
After exploring a number of alternative manufacturing methods to produce the parts needed to keep crucial machinery up and running, Master Drilling chose 3D printing. The switch to 3D printing cut their lead time for replacement parts from about three months for off-shore castings, to just three weeks printing on-site, thereby reducing downtime for the earth drilling equipment.
-
Mouthpiece Mold
h23Mold insert is used to injection mold medical inhaler mouthpieces.

Mouthpiece Mold
-
Size (mm) 104 x 93 x 48
Cost to print ($) 345.00
Cost to machine ($) 716.77
Cost reduction 51.87%
-
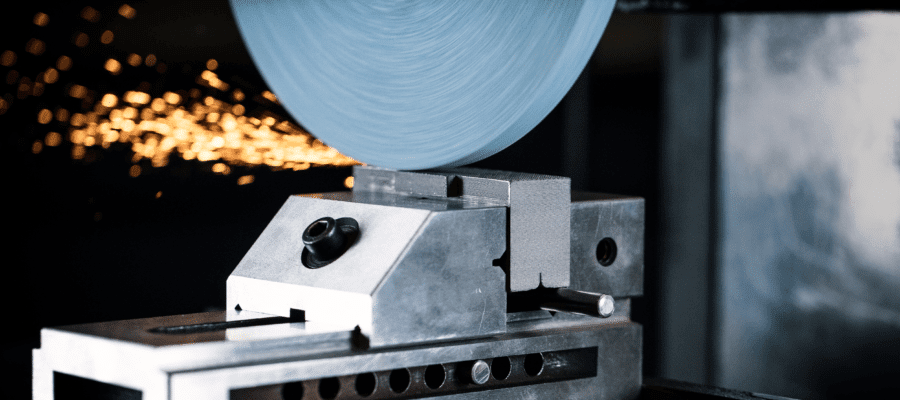
3D printing the hard steel insert to near-net shape eliminates 95% of the required CNC machining and associated tool wear.
Because cooling accounts for 95% of the mold cycle time, the ability to incorporate conformal cooling channels into the mold can reduce mold cycle time and increase throughput.
-
UMC End Effectors
17-4 PHThese grippers are used to fixture and move aerospace forgings on a manufacturing line.
UMC End Effectors
-
Size (mm) 55 x 32 x 16
Cost to print ($) 23.00
Cost to machine ($) 194.00
Cost reduction 88.14%
-
The complex geometry of end effectors requires extensive CNC machining, resulting in long lead times that occupy valuable CNC capacity.
 Using metal 3D printing allows for on-demand manufacturing of custom end effectors while lowering part cost and lead time.
-
APG Thread Checker Fixture
17-4 PHThis fixture pushes a thread checker into a part on a manufacturing line.
APG Thread Checker Fixture
-
Size (mm) 47 x 28 x 15
Cost to print ($) 14.00
-
This fixture pushes a thread checker into a part on a manufacturing line.
 As a wear item, it needs to stand up to repeated use, and must be easily produced to keep the manufacturing line up.
The fixture must be regularly replaced as it wears out. Printing the part with the Studio System eliminates CNC lead time and frees up the machine shop for more critical work.
-
BattleBots Bot Support
17-4 PHThis part is a structural member for use in the bot's robotic arm.
BattleBots Bot Support
-
Size (mm) 130 x 117 x 64
Cost to print ($) 106.
 00
00Cost to machine ($) 551.90
Cost reduction 81.00%
-
This support is designed to carry a heavy load and withstand punishment. Engineers working on a bot used on a Discovery Channel program BattleBots had less than a month to produce a custom structural element on robotic arm. Using the Studio system, they were able to print a bracket capable of resisting bending and lateral motion while providing the stiffness, strength, weldability and fire resistance required.
-
APG Chuck Jaws
h23This part is used to hold a workpiece in place during machining lathe operations.
APG Chuck Jaws
-
Size (mm) 84 x 78 x 42
Cost to print ($) 117.00
Cost to machine ($) 426.36
Cost reduction 72.56%
-
These chuck jaws closely match the geometry of the part being machined - making them complex to machine. Printing them using the Studio System eliminates CNC lead time and frees up the machine shop for more critical work.
-
O-Ring End Effector
17-4 PHThis end effector is used to stretch and install O-rings on a hydraulic fitting.
O-Ring End Effector
-
Size (mm) 42 x 13 x 17
Cost to print ($) 7.00
Cost to machine ($) 152.17
Cost reduction 95.40%
-
Small, detailed parts like these end effectors typically require expensive CNC machining and have long lead times. Using the Studio System’s high resolution (250μm) printhead allows manufacturers to print small parts with fine features which would be difficult to machine
-
APG Coining Fixture
h23This fixture is used to achieve critical tolerances on metal injection molded (MIM) parts.
APG Coining Fixture
-
Size (mm) 110 x 57 x 31
Cost to print ($) 92.00
Cost to machine ($) 392.00
Cost reduction 75.63%
-
Fixture like this require custom geometry for each application, as well as superior wear resistance. The faster these parts are manufactured, the quicker a company can get get manufacturing lines running.
Printing these parts with the Studio System eliminates CNC lead time and frees up the machine shop for more critical work.
-
Helical Heat Exchanger
CopperUsed in chemical processing to cool a hot gas as it flows through a pipe.
Helical Heat Exchanger
-
Size (mm) 78 x 64 x 58
Cost to print ($) 443.00
Cost to machine ($) 2138.00
Cost reduction 79.28%
-
This heat exchanger enables a much higher heat transfer rate than a traditionally manufactured part.
 Featuring thin external fins and a complex, internal helical cooling channel, this exchanger would not be manufacturable as one component via CNC machining.
 The Studio System allows for the complex geometry of the heat exchanger to easily be printed as a single component.
-
UHT Atomizer
316LThis part is a fuel atomizer for a steam boiler on a liquid natural gas (LNG) tanker.
UHT Atomizer
-
Size (mm) 74 x 74 x 71
Cost to print ($) 129.
 00
00Cost to DMLS ($) 1089.00
Cost reduction 88.00%
-
This 3D printed atomizer features complex internal channels and oblong shaped holes, which could not be manufactured with traditional methods. With the Studio System, the engineers were able to radically redesign their conventional atomizers for significantly better performance.
-
Octopus Ring
316LExample of the unique jewelry that can be customized and scaled for a tailored fit.
Octopus Ring
-
Size (mm) 38 x 38 x 30
Cost to print ($) 14.
 00
00 -
Unique jewelry pieces can be 3D printed without the design lock-in, long lead times and costs associated with tooling. The Studio System’s high resolution print head produces small parts with fine features and surface finish.
-
Lathe Gear
17-4 PHThis part is a replacement gear for vintage (circa 1940) lathe.
Lathe Gear
-
Size (mm) 82 x 82 x 27
Cost to print ($) 58.
 00
00Cost to machine ($) 260.67
Savings vs. machining 77.70%
-
In some cases, replacement parts are no longer available, either off the shelf or from the OEM. Fabricating custom gears via hobbing and broaching is often prohibitively expensive, but metal 3D printing allows for the fabrication of legacy parts at much lower cost.
-
Tri Manifold
Alloy 625This manifold is used to combine three flows into one common flow.
Tri Manifold
-
Size (mm) 108 x 101 x 98
Cost to print ($) 906.
 00
00Cost to DMLS ($) 4069.28
Savings vs. machining 77.74%
-
This part converges three flow paths into one via internal channels. These channels would be impossible to machine, and instead would need to be drilled as straight holes and plugged.
Printing on the Studio System allows these channels to be designed for their function rather than their manufacturing method. This part can be produced in just a few days with very little hands on work.
-
Generative Piston Head
4140Prototype piston head for a reciprocating engine, optimized with generative design.
Generative Piston Head
-
Size (mm) 105 x 105 x 54
Cost to print ($) 271.00
Cost to machine ($) 568.13
Savings vs. machining 52.30%
-
Typically CNC machined from aluminum alloy, pistons can be time consuming and difficult to rapidly prototype and test - often taking months or even years to move from design to production.
With the Studio System, various piston designs can be easily prototyped and tested—speeding up product development timelines, reducing time to market, and introducing new opportunities for optimization, including generative design—all while avoiding CNC backlog and lead times.

-
Pump Housing
17-4 PHThis is part of the housing for a hydraulic pump.
Pump Housing
-
Size (mm) 136 x 131 x 47
Cost to print ($) 243.00
Cost to machine ($) 708.68
Savings vs. machining 65.68%
-
This part would typically be cast, followed by secondary machining operations - resulting in long lead times and high costs.
By printing on the Studio System, the long lead time associated with casting can be avoided, and the cost to machine from scratch is greatly reduced - allowing the manufacturer to produce the part in-house and enabling cost-effective rapid design iteration and pilot runs.
-
Guitar tailpiece
17-4 PHThe guitar tailpiece anchors one end of the guitar strings.
Guitar tailpiece
-
Size (mm) 127 x 28 x 20
Cost to print ($) 36.00
Cost to machine ($) 343.
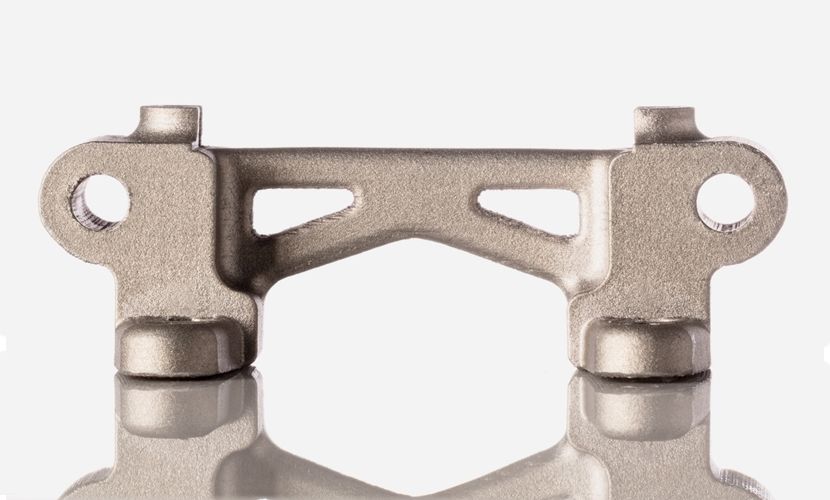 28
28Savings vs. machining 89.51%
-
The guitar tailpiece is typically cast from aluminum, and can be fairly expensive to customize for short manufacturing runs.
Printing in steel allows design freedom and part customization while eliminating tooling costs. Steel tailpieces also exhibit more pleasing resonance and sustain characteristics for some genres and playing styles.
-
Cuff Ring
316LExample of the unique jewelry that can be customized and scaled for a tailored fit.
Cuff Ring
-
Size (mm) 59 x 54 x 80
Cost to print ($) 43.
 00
00 -
Unique jewelry pieces can be 3D printed without the design lock-in, long lead times and costs associated with tooling. The Studio System’s high resolution print head produces small parts with fine features and surface finish.
Production System™ | Desktop Metal
-
Seat Belt Pulley
17-4 PHThis output pulley is an essential component of the reclining mechanism in a car seat.
Seat Belt Pulley
-
Size (mm) 48 x 29 x 9
Cost per part ($) 0.
 89
89Parts per build 2,740
Annual throughput 995,900
-
This part features an undercut radial groove that, without printing, would require advanced sliders during the press-and-sinter process. Printed on the Production System eliminates the cost and complexities associated with press and sinter.
-
Surgical Tool Nozzle
17-4 PHNozzle used during surgery; customized for each patient.
Surgical Tool Nozzle
-
Size (mm) 27 x 47 x 21
Cost per part ($) 1.
 91
91Parts per build 860
Annual throughput 400,140
-
This surgical nozzle features a customized internal channel designed specifically for each patient. The Production System allowed this part to be mass customized and produced without any tooling, allowing it to be fine-tuned for an array of patients.
The internal channel featured in this nozzle would require complex machining operations with multiple fixturing setups; printing on the Production System eliminates those steps, resulting in cost savings.
-
BMW Water Wheel
17-4 PHThe waterwheel is an integral part of the BMW’s engine cooling system.

BMW Water Wheel
-
Size (mm) 63 x 63 x 34
Cost per part ($) 9.74
Parts per build 170
Annual throughput 63,230
-
Initially made of several plastic parts, BMW redesigned this waterwheel for printing on a laser-based system, but found the process to slow and expensive for mass production.
The Production system unlocks higher throughput, allowing the part to be manufactured at a competitive price, bringing the race track to the road.

-
Audi Fixture
17-4 PHThis custom manufacturing fixture was created for use on an Audi production line.
Audi Fixture
-
Size (mm) 127 x 51 x 38
Cost per part ($) 19.18
Parts per build 110
Annual throughput 41,500
-
With complex internal conformal cooling channels that span the base and the wall, this fixture would normally be manufactured in multiple pieces and welded together.
 As production increases, this part would be too expensive and time-consuming to scale.
 Using the Production System, the fixture is printed as a single part with cooling channels intact—reducing part cost, lead time, and manufacturing complexity.
-
Parking Shift Bracket
17-4 PHThis bracket is used in the parking brake assembly of a continuously variable transmission.
Parking Shift Bracket
-
Size (mm) 93 x 44 x 12
Cost per part ($) 2.
 84
84Parts per build 680
Annual throughput 248,980
-
This part would require a complex die and multiple secondary operations to be produced via traditional powder metallurgy techniques.
The Production system eliminates the need for tooling, dramatically reducing lead times, reducing part costs and enables the redesign of this part to consolidate an assembly into a single part.
-
Watch Bezel
17-4 PHA watch bezel is the main component that houses the dial and movement.
Watch Bezel
-
Size (mm) 43 x 48 x 9.
 5
5Cost per part ($) 1.06
Parts per build 1,200
Annual throughput 497,950
-
Because it prints parts with no tooling, the Production System is capable of printing multiple different watch models in each run, greatly reducing manufacturing part cost and lead time.
-
Ntopology Gear
17-4 PHThis gear features a complex internal lattice structure only achievable via 3D printing.
Ntopology Gear
-
Size (mm) 63 x 63 x 12.
 5
5Cost per part ($) 6.09
Parts per build 460
Annual throughput 165,980
-
This part features a complex lattice structure used to lightweight the part while still providing strength.
The Production System allows for the manufacturing of complex geometries that cannot be manufactured any other way.
-
Power Steering Joint
17-4 PHThis joint is designed to power transfer in an electric power steering system.
Power Steering Joint
-
Size (mm) 36 x 36 x 22
Cost per part ($) 1.
 89
89Parts per build 1,140
Annual throughput 470,424
-
This joint is used for power transfer between an electric power steering motor and the steering shaft in an automobile. The production system allowed for this part to be produced with no tooling, allowing for accelerated lead time and flexible design.
-
Custom Bolt
17-4 PHThis custom-designed bolt is used in specific applications.
Custom Bolt
-
Size (mm) 70 x 16 x 12
Cost per part ($) 1.
 10
10Parts per build 2,280
Annual throughput 829,920
-
Due to the high cost of hard tooling, most bolts are manufactured in quantities of millions. For this bolt, however, only a few tens of thousands were needed. By printing on the Production System this bolt can be produced with no tooling at an dramatically reduced cost per part.
-
Spauger Bit
17-4 PHThis part is a drill bit used to quickly drill holes in clean wood.
Spauger Bit
-
Size (mm) 166 x 12 x 12
Cost per part ($) 1.
 95
95Parts per build 800
Annual throughput 280,470
-
Using traditional methods, this spauger bit required more than 20 manufacturing steps. With the Production System, that number is reduced to just four, with post processing only required to reach the desired hardness and surface finish. This greatly reduces the part cost and manufacturing lead time.
-
Stator
17-4 PHThis stator is designed for use in a small electric motor.
Stator
-
Size (mm) 60 x 60 x 16
Cost per part ($) 2.
 82
82Parts per build 460
Annual throughput 189,700
-
This stator is part of a small electric motor that was produced in low volume, making it difficult to justify the cost of hard tooling for metal injection molding (MIM). The entire run of parts could be produced in one run of the Production System at the desired part cost and greatly reduced manufacturing lead time.
-
Watch Case
17-4 PHThe case is the main component of a watch, and houses the dial and movement.
Watch Case
-
Size (mm) 47 x 38 x 7.
 7
7Cost per part ($) 1.96
Parts per build 1,170
Annual throughput 1,825,824
-
For each different watch model and size, different tooling is required. This makes doing smaller, more custom watch models prohibitively expensive. The Production system eliminates the need for tooling dramatically reducing part cost.
Watch producers can now manufacture on-demand, producing watch designs that never could have been justified before.
Types of tables for a 3D printer
Home / Blog / Useful / Choosing a table for a 3D printer. Calibration and adjustment
21. 04.2021
Contents
-
- Print platform materials
- Heated table
- Non-heated table.
- Table surface
- Calibration types
- Automatic calibration
- Manual calibration
- Cartesian kinematic 3D printer table calibration
- Delta printer table calibration
- Total
- Print platform materials
The correct calibration of the 3D printer bed, or as it is also called Hot Bed, is very important. The first layer is like a foundation for a house, if the foundation is fragile, then the house will not stand for a long time.
If the plane of the printed surface is uneven, then the model may be partially peeled off or deformed. The first layer may not stick to the printing platform at all, and the result of many hours of printing will not be a neat 3D model, but plastic noodles.
Print failure example
Therefore, it is very important to properly calibrate the table. Printing platforms can be conditionally divided into two types - adjustable and not.
The adjustable table is attached to the printer with spring-loaded screws. It is not rigidly fixed in height and with the help of screws it is possible to calibrate the plane and the gap between the 3D printer table and the nozzle.
Adjusting screw
Unregulated is a printing platform that is rigidly fixed to the printer body. This solution is used in delta printers. Calibrate them only programmatically.
Non-adjustable delta printer table
Print platform materials
The material from which the table is made may vary depending on whether the table is heated or not.
Heated table
There are several types of heating elements for a 3D printer platform - aluminum, textolite, silicone and kapton. Each of them has its pros and cons.
Textolite heater - inexpensive, but fragile and can be strongly bent when heated.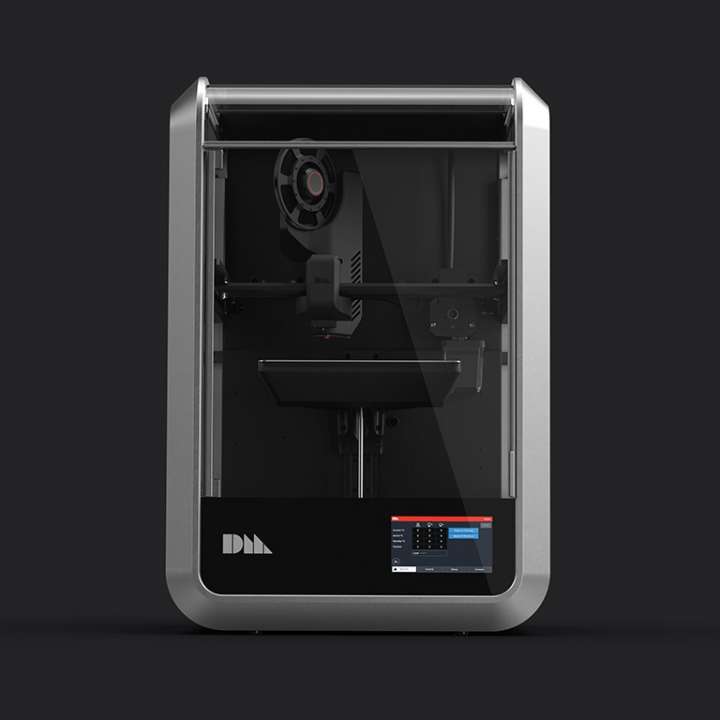
Silicone heater - can not be used alone. Usually used in conjunction with a metal base.
An aluminum table is expensive, but it heats up more evenly and is less subject to thermal deformation than other platforms.
The Kapton heater is very expensive and cannot be used on its own. Usually glued to a metal base. Can be heated up to 200 degrees.
Types of heated printing surfaces
Most often, an aluminum heating table or a silicone heating pad is used in conjunction with an aluminum plate. Low price, ease of processing and high thermal conductivity make aluminum the most popular material for the manufacture of heated printing tables.
The main advantage of heating the printed surface is to increase the adhesion (adhesion) of the first layer of plastic. If the printer is with a closed case and a heated platform, a “passive thermal chamber” is created inside. Due to this, plastics with high shrinkage do not crack in layers during printing, the adhesion of layers (interlayer adhesion) increases, and internal stress is more evenly distributed during cooling.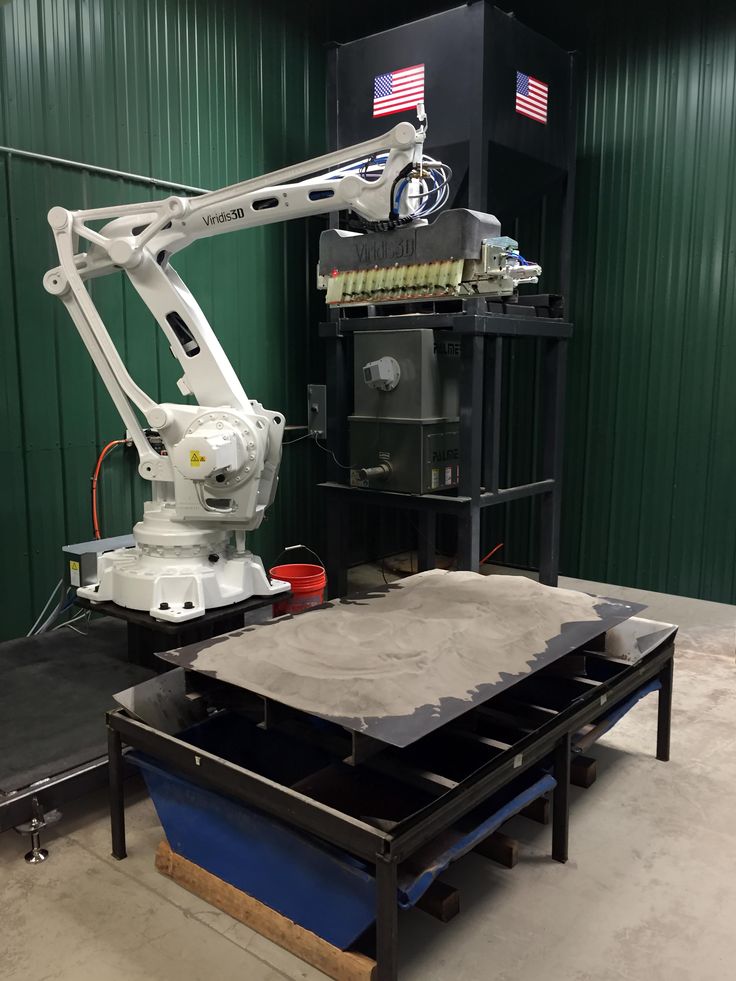
But there are also disadvantages - when heated, the metal table expands a little, and since it has nowhere to expand, it begins to bend. For a printing platform up to 200x200 in size, deformation will not be very critical, but for larger tables this becomes a tangible problem.
Each manufacturer of 3D printers with a large printable area solves the problem of deformation of the metal table in its own way. For example, in Raise 3D, the table is fixed along the entire plane with pins at 13 points.
Heated table fixing Raise 3D
Table without heating.
An unheated printable surface is often used in 3D printers designed to work only with PLA and other low temperature plastics. For example - printers for children or large printers with an open case.
An unheated printable surface is often used in 3D printers designed to work only with PLA and other low temperature plastics.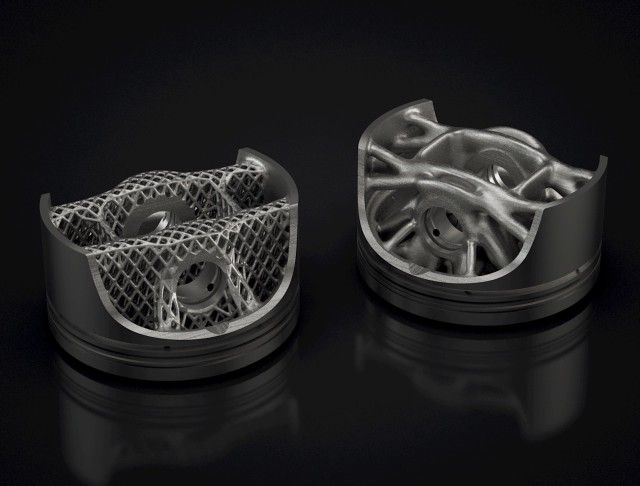 For example - printers for children or large printers with an open case.
Acrylic Printer for Children
Tables without heating are made of aluminum or acrylic. If the table is aluminum, then glass or any other coating should be used on top. Aluminum is a soft metal and even a brass nozzle can scratch or damage it if not properly adjusted.
Heating table with aluminum base and mirror
Acrylic tables are often used in inexpensive 3D printers designed for kids. Acrylic is difficult to damage or break. You can print on an acrylic table without glass or other coating.
Free Shipping
Add to compare
Product added to compare Go
| Manufacturer | Raise3D |
Add to compare
Product added to compare Go
| Manufacturer | Raise3D |
Add to compare
Product added to compare Go
| Manufacturer | Raise3D |
Free Shipping
Add to compare
Product added to compare Go
| Manufacturer | Flash Forge |
Table top
In order for the first layer to adhere to the table tightly, different surfaces are used that increase adhesion.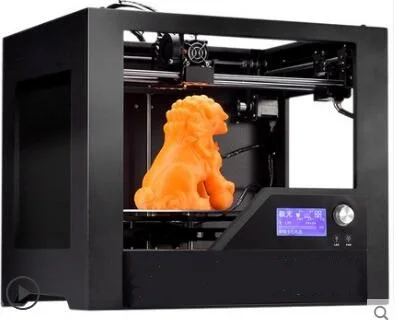 It is more convenient to remove the model from the removable surface. If you need to immediately start printing another model, you can simply quickly change from one removable surface to another.
The most popular table surface is the regular tempered glass or mirror. It is not expensive and available. It is believed that the accuracy class of the mirror is higher, but for small working areas (up to 200x200 mm), ordinary tempered glass is enough.
Glass itself does not hold the first layer well, so various adhesives or stickers are used to increase adhesion.
Ordinary glass can burst from a temperature difference or “crumble”, then the model comes off along with pieces of glass. Good thing it's easy to replace.
A piece of glass came off with model
Sitall glass - in fact, it is ordinary glass with the addition of boron oxide. This makes it stronger than ordinary glass and resistant to temperature changes.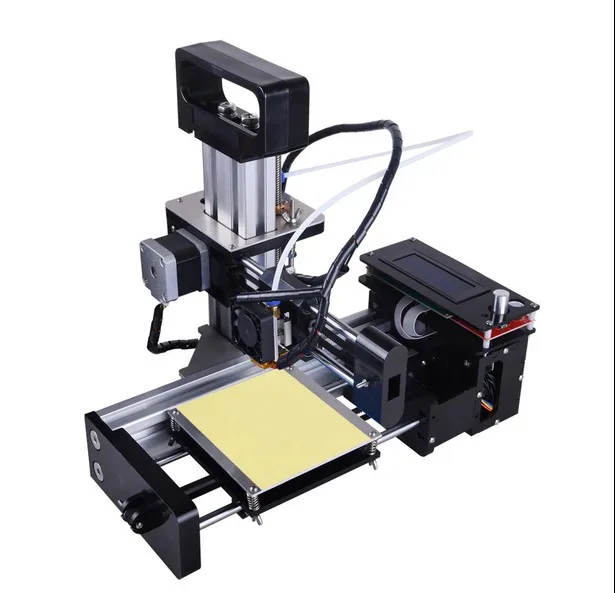 But the cost of such glass is much higher than ordinary or tempered glass.
Sitall glass
Perforated table - mainly used for printing ABS plastic. Thanks to the perforation, the plastic adheres firmly to the print platform. In order for the bottom of the model to turn out to be even in the slicer settings, you need to enable printing on a raft (substrate).
Perforated table used in UP printers!
Stickers - There is a huge variety of stickers for printing platforms. It can be either ordinary masking tape or a specialized surface (rough with an adhesive surface).
The finished model is easier to remove from a flexible substrate than, for example, from glass. With some substrates, the model can be easily removed after the printing platform has cooled down. For some, you need to heat the table and only then tear off the model.
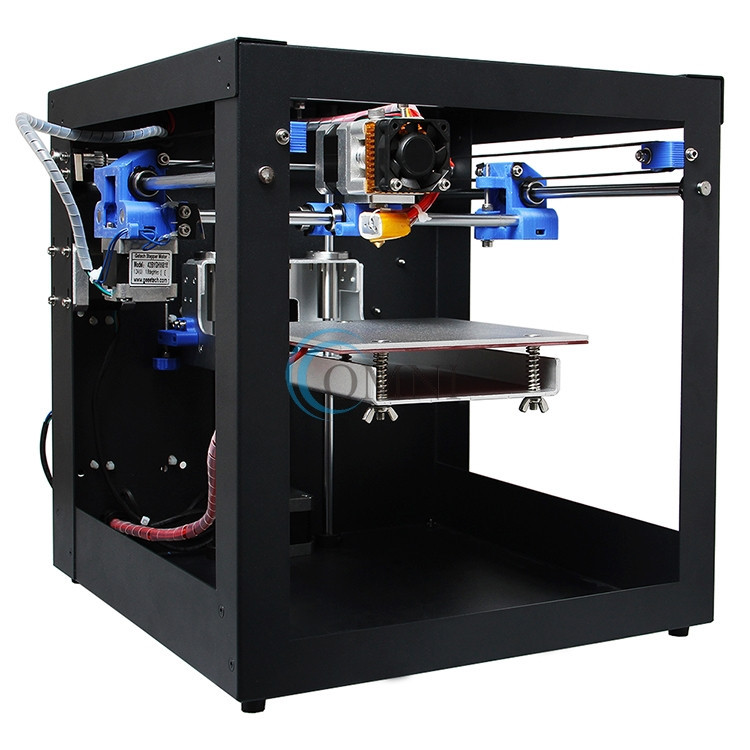
Separately, you can select a variety of compositions that are applied to the surface of the printing platform to increase the adhesion of the first layers. 3D varnishes, 3D adhesives, etc. Probably every 3D maker has his own special recipe for the same composition that almost everything sticks to. It can be BF glue mixed with a solvent or alcohol, ABS diluted in acetone, kvass with sugar, glue stick, etc.
Do not spray varnish or other sprays inside the printer. Glue particles can settle on mechanisms, fans, and even get on electronics. This can lead to damage to the 3D printer. Simply remove the platen surface from the printer and apply the adhesive.
Add to compare
Product added to compare Go
| Manufacturer | Raise3D |
Add to compare
Product added to compare Go
| Manufacturer | Flash Forge |
Add to compare
Product added to comparison Go
| Manufacturer | Flash Forge |
Calibrations
In addition to choosing the surface of the print platform, it is important to correctly level the plane of the table and set the correct gap between the table and the nozzle. Calibration can be automatic or manual.
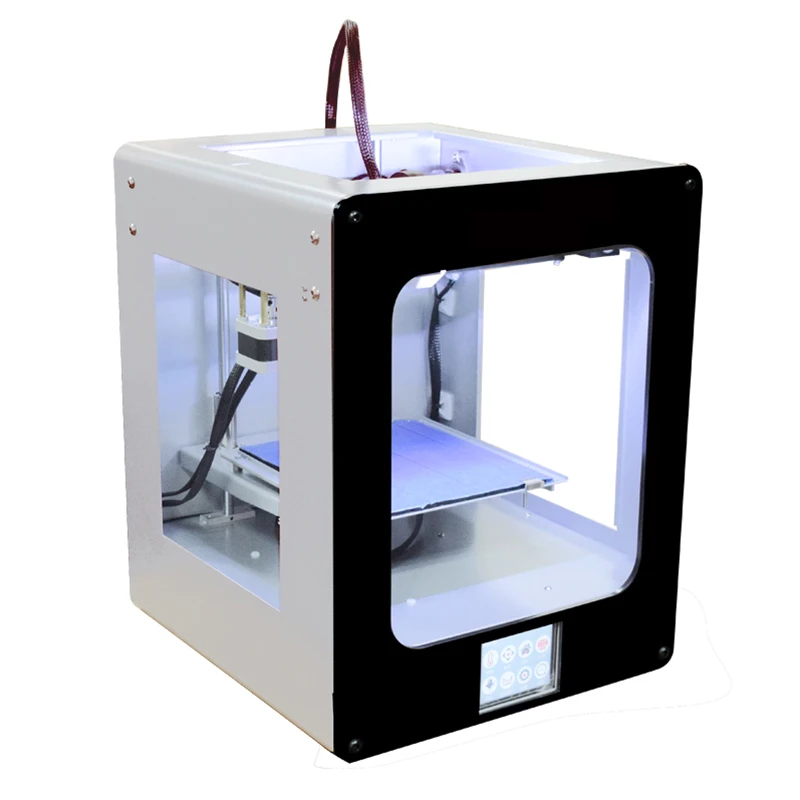
Printers with large print surfaces, such as the Raise 3D Pro 2 and Pro 2 Plus, are calibrated at the factory. The user only needs to check the gap between the table and the nozzle, because it may go astray during transportation.
Automatic calibration
Automatic calibration is performed using a sensor (optical or contact), which is mounted next to the extruder. The printer checks several points on the print platform one by one and remembers the values. The first layer will be printed correct for the curvature of the table.
You can meet the calibration using a conductive substrate that is placed instead of the printed surface. This method is rare, but still has a place to be. It is commonly used to calibrate 3D printers with delta or delta robot kinematics.
Automatic calibration allows you to quickly and effortlessly level the table. It becomes especially indispensable for printers with delta or delta robot kinematics. Optical sensors "do not see" glass, so for printers with an optical sensor, it is better to use other surfaces of the print platform.
Some printer models have a menu with hints to help you properly set the platform plane and gap. It is enough to launch the “assistant” and follow the instructions on the screen. This is not exactly automatic calibration, but with such help it becomes much easier for a beginner to correctly calibrate the table.
An example of a 3D printer with automatic calibration is Raise E2. The Raise E2 extruder has a contact sensor to determine the distance between the nozzle and the printed surface. The resulting values help to correct the print height of the first layer. You can calibrate not the entire table, but only the area on which the model will be located.
Manual calibration
Manual calibration is when the user sets the plane of the table and the gap between the table and the nozzle himself.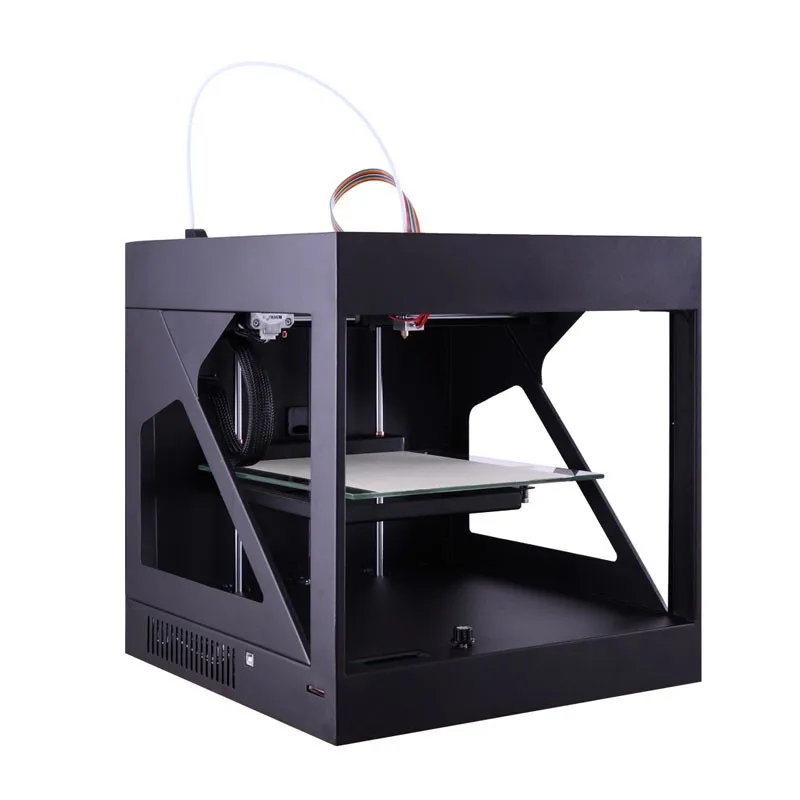 To do this, under the printing platform there are screws or winglets with which you can adjust the height of the printing platform.
Calibration screws
The standard gap between the platform and the nozzle, for most printers, should be - 0.1-0.2mm. If there is no set of probes at hand, a standard A4 sheet folded in half can replace it. Before calibration, the print surface (if it is heated) and the nozzle must be heated.
Sometimes manufacturers of 3D printers recommend a gap between the table and the nozzle - 0. Therefore, read the instructions before calibrating.
We will consider the calibration of the two most common kinematics - Cartesian and delta.
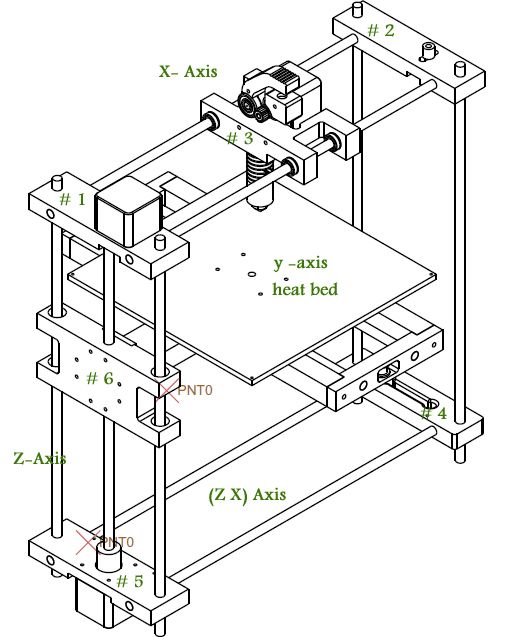
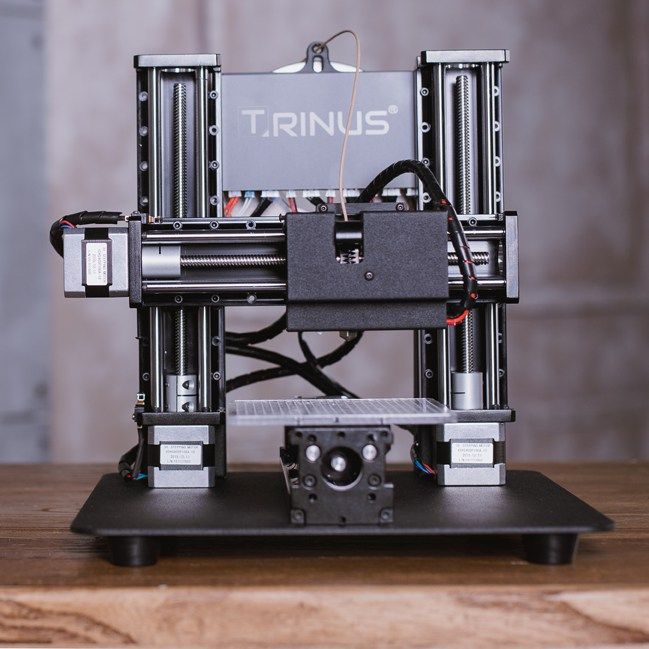
Cartesian kinematics is based on the Cartesian coordinate system and the movement of the 3D printer's head along the x, y, z axes.
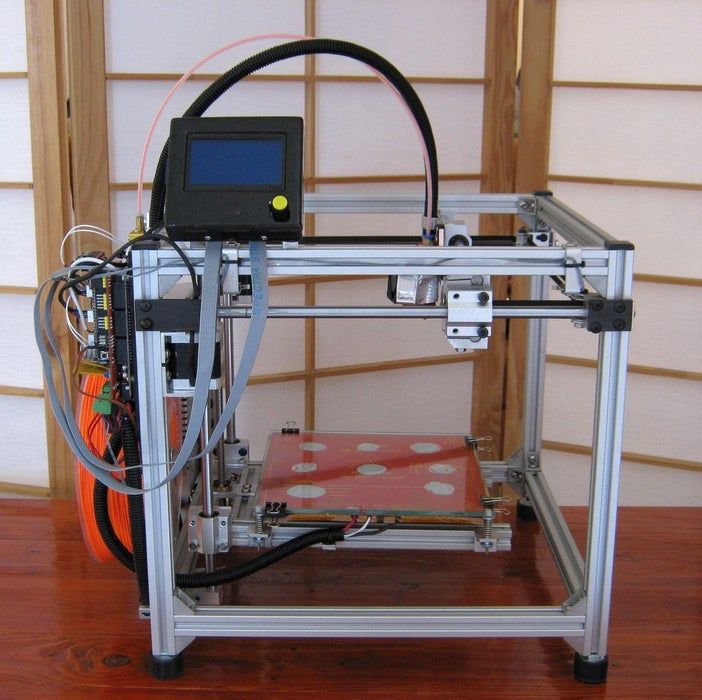
Printer example with Cartesian kinematics
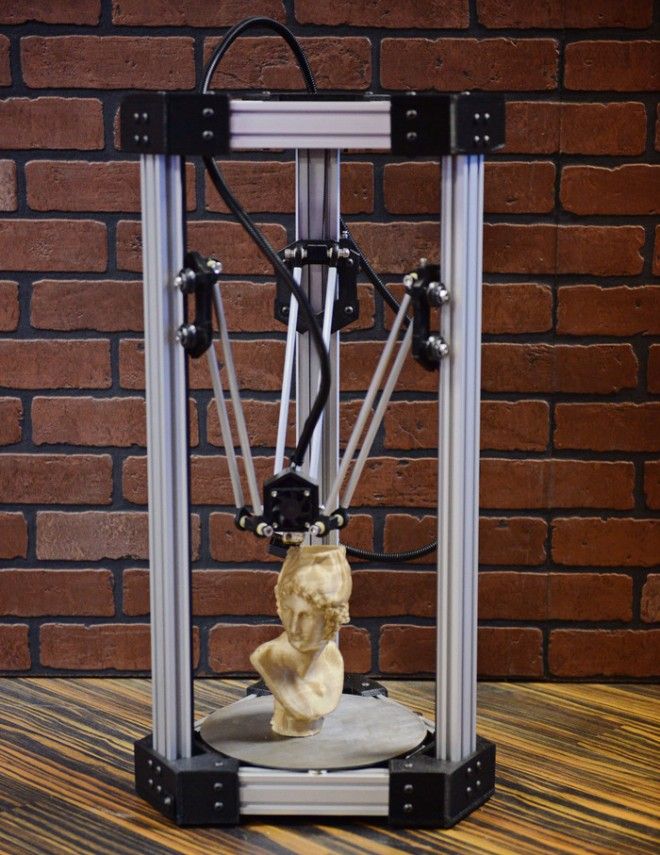
In deltas, the extruder moves along 3 identical axes using carriages moving along vertical guides. The delta printer can be called a simplified delta robot, but these are still two different kinematics.
Example of a printer with delta kinematics
3D printer table calibration with Cartesian kinematics
Different manufacturers may have slightly different calibration instructions. We will consider here the calibration of the printer with standard kinematics.
-
Heat up the table and nozzle. When heated, the metal expands slightly, so the gap between the printing platform and the nozzle may differ between the “hot” and “cold” ones.
-
Through the printer menu, send the table and extruder to the "home" or zero position in all axes. Usually the zero point is the near left corner of the extruder and the top position of the print platform. Be sure to make sure that the 3D printer does not rest the nozzle on the table and does not damage it. If this is the first calibration, use the nuts to lower the table as low as possible.

-
Through the printer menu or manually (for this you need to turn off the motors through the menu), move the extruder so that the nozzle is above the adjusting screw.
-
Use a feeler gauge and adjusting screw to set the gap between the print bed and the nozzle.
-
Repeat all steps for all calibration screws. Usually there are 3 or 4 screws.
-
After aligning the plane above the screws, move the extruder to the center and check the gap. If the gap matches the feeler gauge, then the table plane and platform distance are correctly calibrated.
Delta printer table calibration
Calibrating a delta printer is a very large topic, so here we will only describe the general principles.
The delta printer does not have the x, y and z axes we are used to. Instead, the delta printer has 3 towers - A, B, C, on which the carriages move.
Since the delta table is static, it is calibrated programmatically. The gap is calibrated by 3 points (at the columns) and the lens (center) of the table. The lens can be concave or convex.
Before calibration, check the mechanics of the printer - the belts must be tensioned evenly, there must be no play in the carriages and the effector (the plate to which the extruder is attached). If the belts are loose or uneven, it will be problematic to calibrate the printer.
Some 3D makers check belt tension with a tuner. Evenly tensioned belts will sound the same, but the correct “note” is found empirically.
There are a huge number of programs for delta calibration, but one of two is usually used - Pronterface or Repetier-Host. Using them, you can directly access the printer using special commands and change the values in the firmware.
As auxiliary programs, you can use a virtual calculator and from there transfer the values \u200b\u200binto the firmware or download the finished GCode. They need to specify the parameters of your printer - firmware (usually Marlin or Repetier), diagonal length, circumference, etc. These parameters can be taken from the firmware or measured with a caliper. It is important to specify all the parameters as accurately as possible, otherwise the printer will not be able to calibrate.
First, 3 points are aligned at towers A, B, C, and only then the lens in the center of the table is corrected.
Manual delta calibration is tricky, but it doesn't have to be repeated often. Typically, the printer only needs to be recalibrated after some mechanical parts, belts, or print bed cover have been replaced.
Totals
The calibration process may seem tedious and complicated, but in fact, once you do it yourself, the process will no longer seem so intimidating. In addition, most manufacturers try to help novice users and equip their printers with auto-calibration sensors or try to simplify this process as much as possible with detailed menu prompts.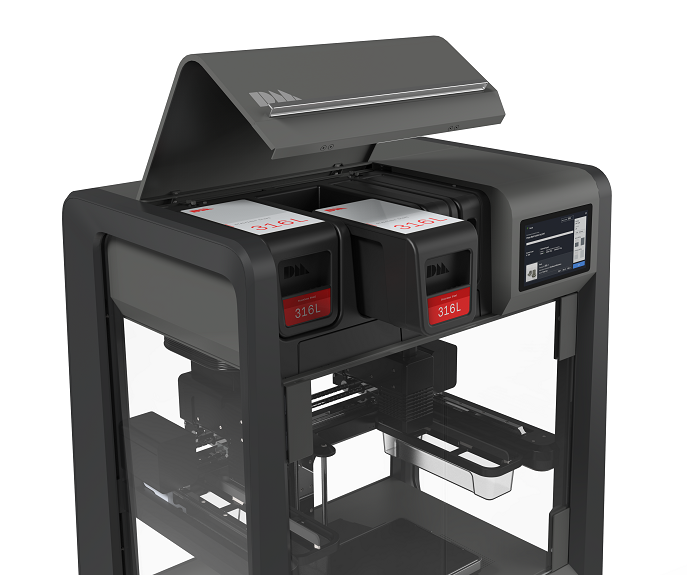
A variety of coatings for a printed table will help you find exactly the surface that suits your needs. As practice shows, every 3D maker, novice or experienced, has his own proven way to make the first layer stick tightly.
Don't be afraid to experiment and let every 3D print be successful.
#Useful
Expert in additive technologies and 3D printing with over 5 years of experience.
Share
all materials
Do you have any questions?
Our specialists will help you with the choice of 3D equipment or accessories, consult on any questions.
Metal 3D Printing - The Essential Guide
There is no hotter trend in 3D printing today than metal. We will talk about metal printing at home, how it is done on an industrial scale, about technologies, applications, printers, processes, prices and materials.
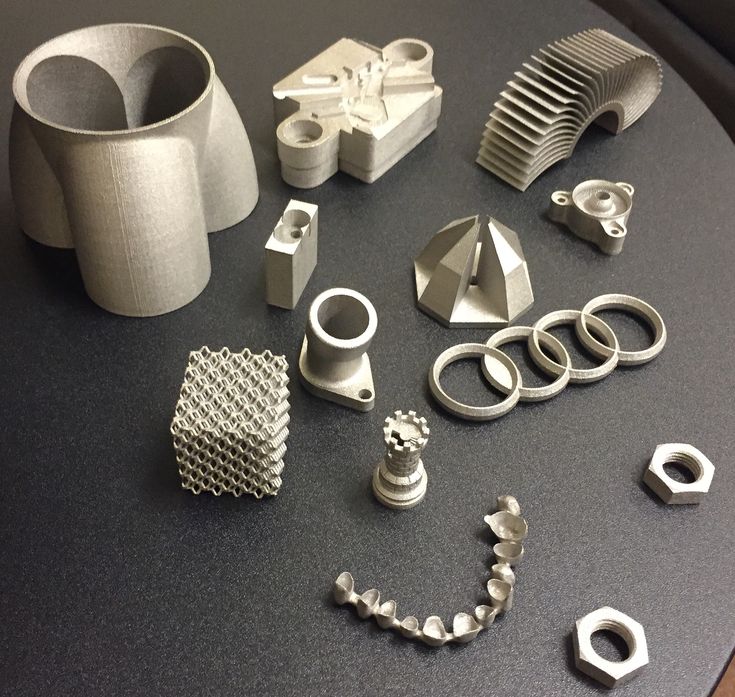
Metal 3D printing has grown in popularity over the past few years.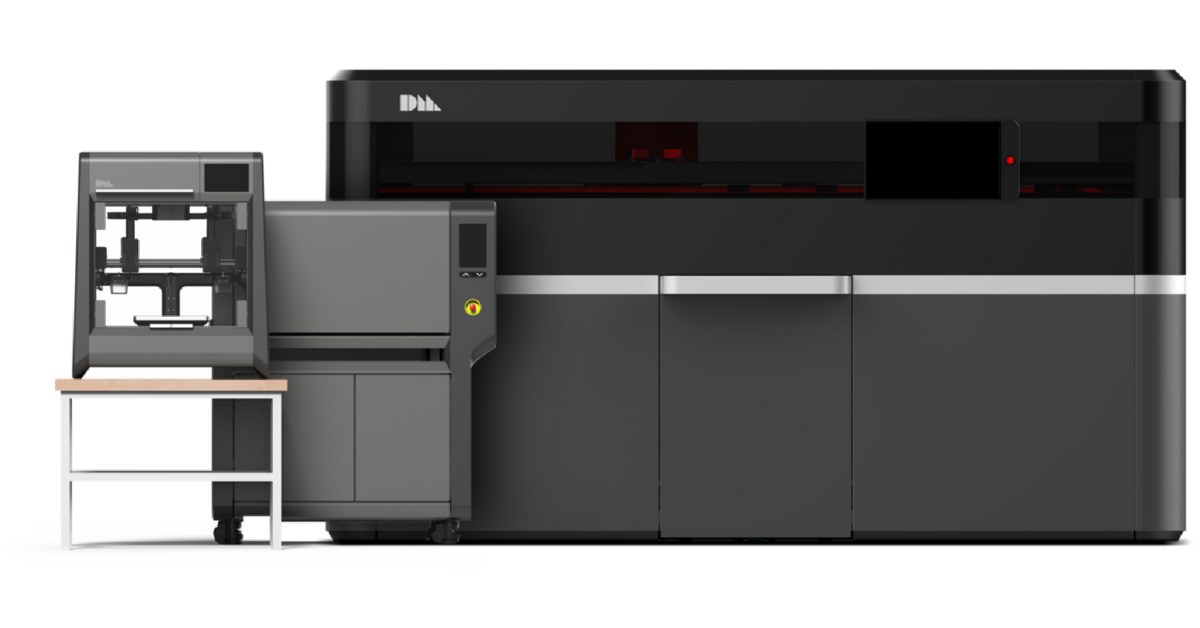 And this is quite natural: each material offers a unique combination of practical and aesthetic qualities, can be suitable for a wide range of products, prototypes, miniatures, decorations, functional details and even kitchen utensils.
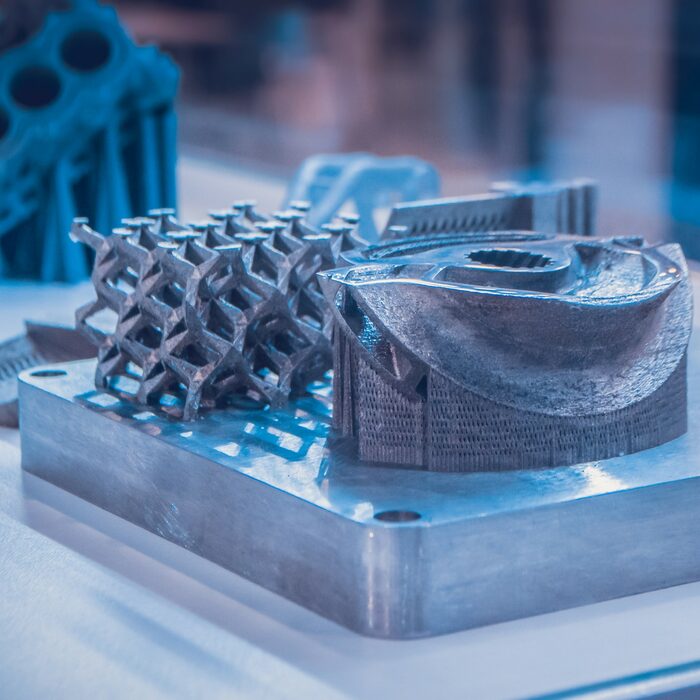
The reason metal 3D printing has become so popular is because the printed objects can be mass-produced. In fact, some of the printed parts are just as good (if not better) than those made with traditional methods.
In traditional production, working with plastic and metal can be quite wasteful - there is a lot of waste, a lot of excess material is used. When an aircraft manufacturer makes metal parts, up to 90% of the material is simply cut off. 3D printed metal parts require less energy and waste is reduced to a minimum. It is also important that the final 3D printed product is up to 60% lighter than a traditional part. Billions of dollars could be saved in the aviation industry alone—mainly through weight savings and fuel savings.
So, what do we need to know about metal 3D printing?
Metal 3D printing at home
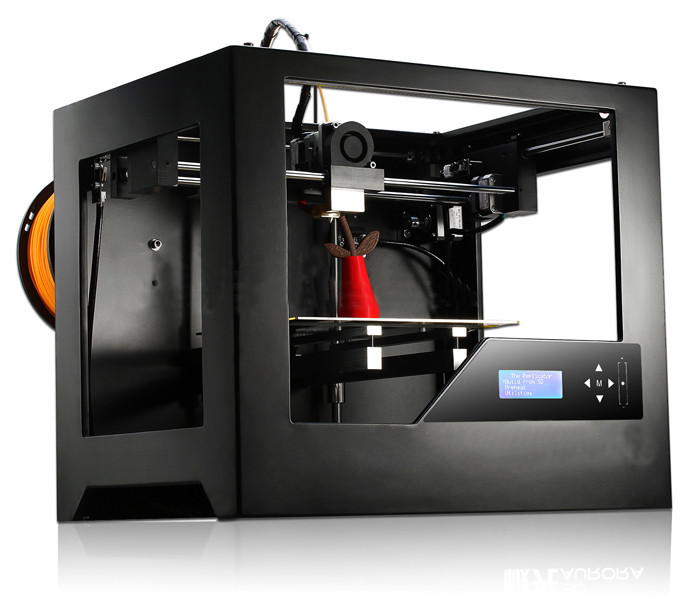
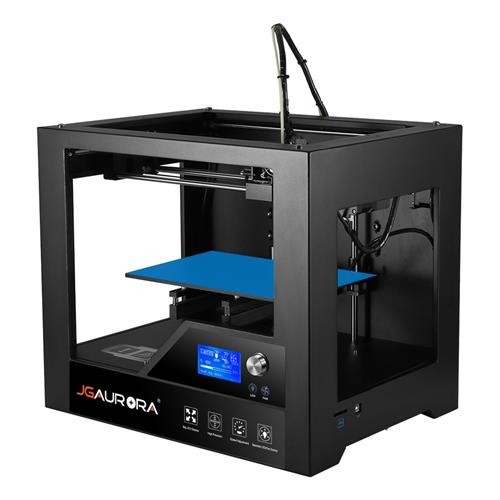
where to start if you want to print metal objects at home? Given the extreme heat required for true metal 3D printing, a conventional FDM 3D printer will not be able to do this.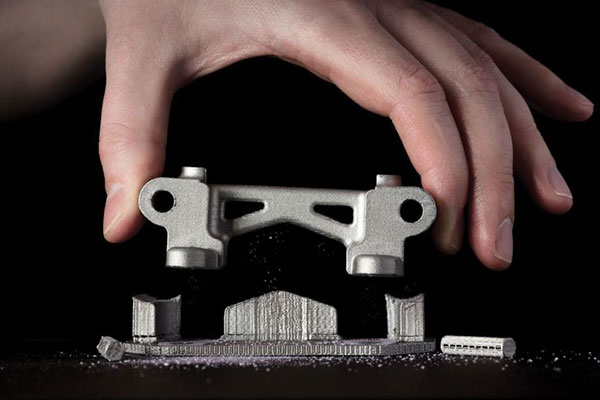
It is unlikely that in this decade it will be possible to print with liquid metal at home. Until 2020, you probably will not have a printer specialized for this purpose at home. But in a few years, as nanotechnology advances, we may see significant developments in new applications. This can be 3D printed with conductive silver, which will emit in much the same way as it does in 2D home printers. It will even be possible to mix different materials like plastic and metal in one object.
Materials for metal 3D printing at home
Even though you can't actually print metal objects at home, you can turn to plastic filament that has metal powders added to it. ColorFabb, ProtoPasta and TreeD Filaments all offer interesting metal-PLA composite filaments. These filaments, containing a significant percentage of metal powders, remain ductile enough to be printed at low temperatures (200 to 300 Celsius) on virtually any 3D printer. At the same time, they contain enough metal to make the final object look, feel, and even weigh like metal. Iron-based filaments even rust under certain conditions.
But you can go further. Typically, up to 50 percent metal powder is added to 3D printing filament. Dutch company Formfutura says they have achieved 85 percent metal powder with 15 percent PLA. These filaments are called MetalFil Ancient Bronze and Metalfil Classic Copper. They can be printed even at "moderate" temperatures from 190 to 200 degrees Celsius.
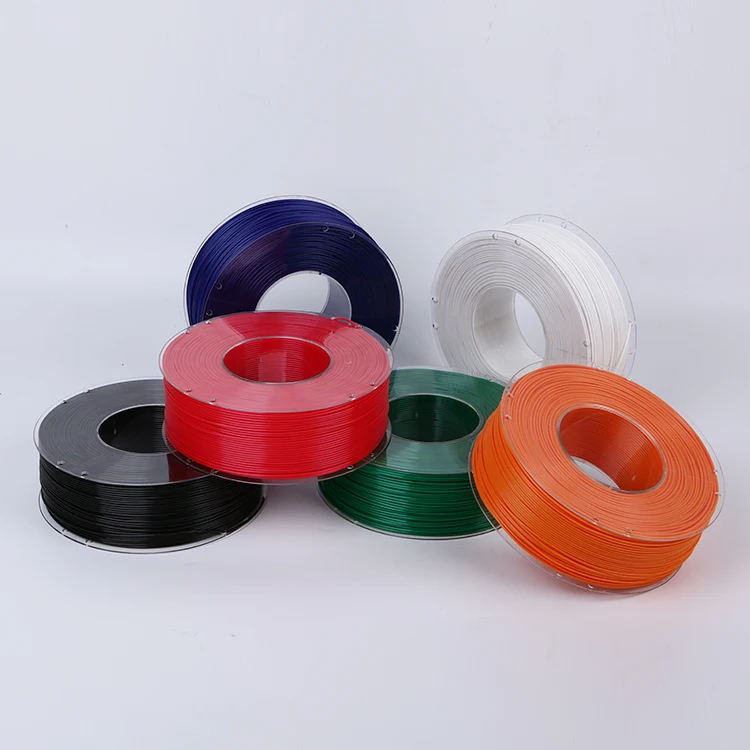
Metallic 3D Printing Filament Spools, in this case from SteelFill and CopperFill colorFabb (Steel and Bronze), Ancient Bronze (Ancient Bronze) from Formfutura
Here are the key points about metal printing at home
- Gets a unique metal surface and look
- Ideal for jewelry, figurines, housewares, replicas
- Durability
- Objects are not flexible (structure dependent)
- Objects do not dissolve
- Not considered food safe
- Typical print temperature: 195 - 220°C
- Extremely low shrinkage on cooling
- No table heating required
- Printing complexity is high, requires fine tuning of nozzle temperature, feed rate, post-processing
Preparing your home printer for metal 3D printing
Since getting metal 3D prints is more difficult than usual, you may need to upgrade your 3D printer nozzle, especially if you are an entry-level printer. The metal filament wears it out quickly. There are hard-wearing hot-ends (like the E3D V6) that are themselves made of metal. They can withstand high temperatures and fit most printers. Be prepared for the fact that the nozzles will have to be changed frequently, because the metal filament is very abrasive.
You will also need to take care of the final finishing of the surface (cleaning, grinding, oiling, waxing or priming) so that the printed metal object shines as it should.
How much does metal filament for 3D printing cost?
And what about metal filament for 3D printing? - you ask. Here are a few examples:
- ColorFabb's 750 gram Bronzefill spool is $56.36
- ColorFabb 750g Copperfill Coil $56.36
- Protopasta's Polishable Stainless Steel PLA Composite is $56 for 56 grams of
- Protopasta's Rustable Magnetic Iron PLA Composite is $34.99 for 500 grams of
Industrial metal 3D printing
But what if you want a better result or even full metal 3D printing? Should a real "metal" 3D printer be purchased for business needs? We wouldn't recommend it - unless you're going to be doing it every day. A professional metal 3D printer is expensive: EOS or Stratasys devices will cost you 100-500 thousand dollars. In addition, the costs will be even greater, since you will have to hire an operator, a worker to maintain the machine, as well as to finalize the printouts (polishing, for example). Just a note: In 2016, an affordable metal 3D printer didn't exist.
Lowering Metal 3D Printing Costs
In case you are not going to open a metal 3D printing business, but still need a professionally 3D printed metal part, it is better to contact the appropriate company that provides such services. 3D printing services like Shapeways, Sculpteo and iMaterialise offer direct metal printing.
They currently work with the following metal materials in 3D printing:
- aluminum
- steel
- brass
- copper
- bronze
- sterling silver
- gold
- platinum
- titanium
If you are a jeweler, you can also order wax models for casting in precious metals.
If we talk about wax models, then in most cases it is they (with subsequent melting) that are used when printing with metals (including gold and silver). Not all orders are carried out directly by these firms. They usually turn to other metal 3D printing companies to complete the order. However, the number of such services around the world is growing rapidly. In addition, metal 3D printing techniques are becoming more and more common in companies that offer such services.
The reason big companies love 3D printing so much is that it can be used to build fully automated lines that produce "topologically optimized" parts. This means that it is possible to fine-tune the raw materials and make the components thicker only if they must withstand heavy loads. In general, the mass of parts is significantly reduced, while their structural integrity is preserved. And this is not the only advantage of this technology. In some cases, the product turns out to be significantly cheaper and affordable for almost everyone.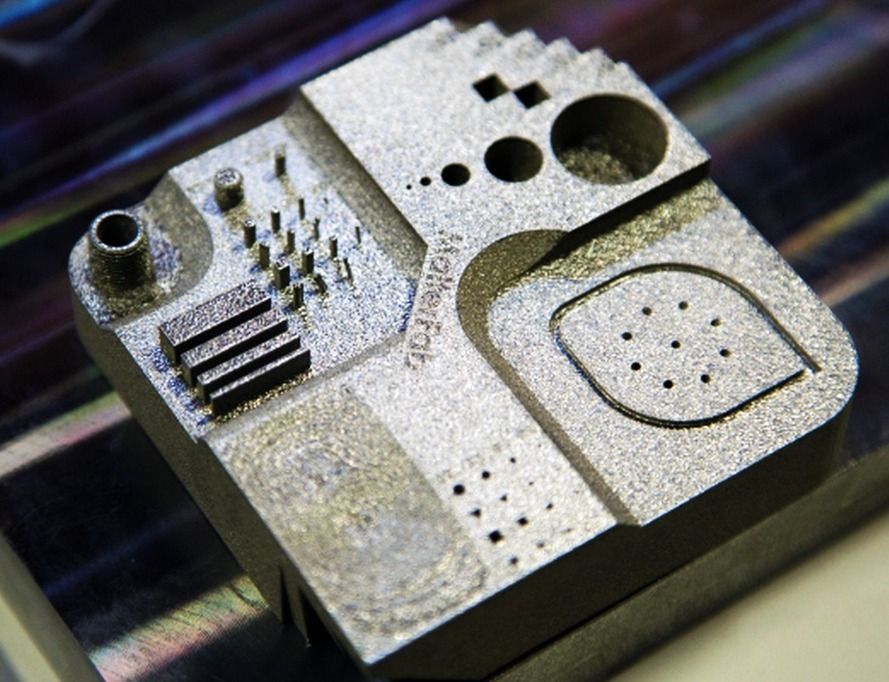
Please note that metal 3D printing requires special CAD programs for modeling. It is worth paying attention to the recommendations of Shapeways - 3D printing metal guidelines. To delve further into the topic, check out Statasys’ information on related 3D printers and the nuances of metal 3D printing.
Here are some examples of Benchy test model prices for metal 3D printing:
- Metal plastic: $22.44 (former alumide, PLA with aluminium)
- Stainless steel: $83.75 (plated, polished)
- Bronze: $299.91 (solid, polished)
- Silver: $713.47 (solid, mirror polished)
- Gold: $87.75 (gold plated, polished)
- Gold: $12,540 (solid, 18K gold)
- Platinum: $27,314 (solid, polished)
As you might expect, solid metal 3D printing prices are quite high.
Metal 3D printing. Applications
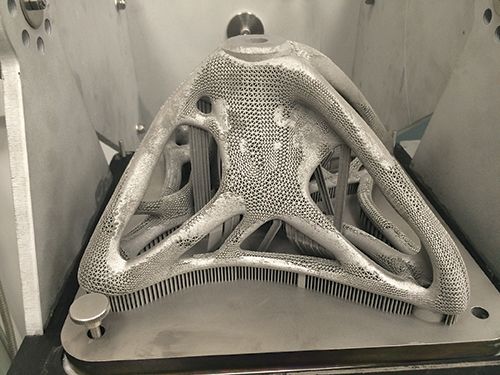
GE LEAP aircraft engine parts 3D printed at Avio Aero (Photo: GE)
There are several industries already using 3D printers to make everyday objects - you may not even know that these objects are printed.
- The most common case is surgical and dental implants, which are considered the best option for patients today. Reason: they can be tailored to individual needs.
- Another industry is jewelry. Here, most manufacturers have abandoned resin 3D printing and wax casting, switching directly to metal 3D printing.
- In addition, the aerospace industry is becoming more and more dependent on 3D printed metal objects. The Italian company Ge-AvioAero was the first to do all-metal 3D printing. It manufactures components for LEAP aircraft engines.
- Another industry targeting metal 3D printing is the automotive industry. BMW, Audi, FCA are seriously considering this technology, not only for prototyping (3D printing has been used for this for quite some time), but also for making real parts.

Before metal 3D printing really takes off, however, there are some hurdles to overcome. And first of all, this is a high price, which cannot be made lower than during molding. Another problem is the low production speed.
Metal 3D printing.
Technologies
Most metal 3D printing processes start with an “atomized” powder
You can talk a lot about “metal” 3D printers, but their main problems remain the same as any other 3D – printers: software and hardware limitations, material optimization and multimateriality. We won't talk too much about the software, we'll just say that most of the major specialized software companies, such as Autodesk, SolidWorks and solidThinking, try to emphasize as much as possible the fact that as a result of the 3D metal printing process, you can get any shape you want.
In general, printed metal parts can be as strong as parts made by traditional processes. Parts made using DMLS technology have mechanical properties equivalent to casting. In addition, the porosity of objects made on a good "metal" 3D printer can reach 99.5%. In fact, manufacturer Stratasys claims that 3D printed metal parts perform above industry standards when tested for density.
3D printed metal can have different resolutions. At the highest resolution, layer thickness is 0.0008 - 0.0012" and X/Y resolution is 0.012 - 0.016". The minimum hole diameter is 0.035 - 0.045". formed layer)
The metal 3D printing process used by most relevant large companies today is called Powder Bed Fusion. This name indicates that some source of energy (a laser or other energy beam) melts an "atomized" powder (i.e., a metal powder that is carefully ground into spherical particles), resulting in layers of a printed object.
There are eight major manufacturers of metal 3D printers in the world that already use this technology; while we are talking here, there are more and more such companies. Most of them are in Germany. Their technologies are called SLM (Selective Laser Melting - selective laser fusion) or DMLS (Direct Metal Laser Sintering - direct metal laser sintering).
Metal 3D PROTEMITION No. 2:
binder Jetting (spraying the binder)
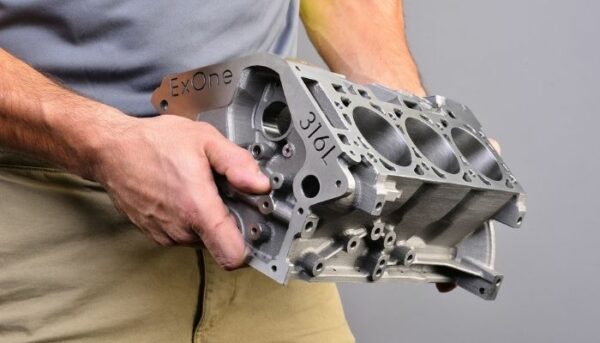
under 3DP-technology EXONE Metal objects are printed by binding of the powder in the mountain : ExOne)
Another professional approach that also uses a powder base is called Binder Jetting. In this case, the layers are formed by gluing metal particles together and then sintering (or fusing) them in a high-temperature furnace, just like it is done with ceramics.
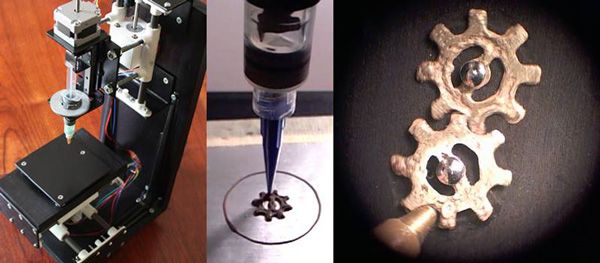
Another option, which is similar to working with ceramics, is mixing metal powder into metal paste. A pneumatically extruded 3D printer (similar to a syringe bioprinter or an inexpensive food printer) forms 3D objects. When the required shape is reached, the object is sent to the furnace, i.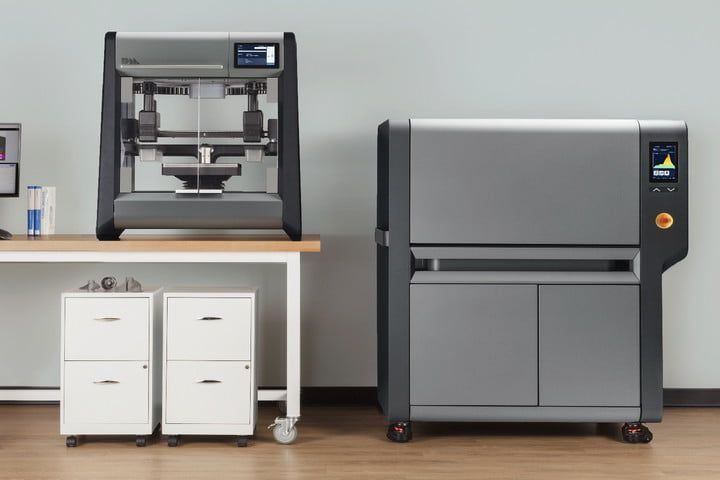 e. in the mountains
This approach is used in the Mini Metal Maker, apparently the only inexpensive "metal" 3D printer.
Metal 3D printing process #3: 9Metal Deposition This is not entirely true. Of course, on some desktop device, simply fusing metal threads onto the base will not work. However, very large steel companies can do it. And they do. There are two options for working with "metal surfacing".
One is called DED (Directed Energy Deposition) or Laser Cladding. Here, a laser beam is used to melt the metal powder, which is slowly released and solidifies as a layer, and the powder is fed using a robotic arm.
Normally the whole process takes place in a closed chamber, but the MX3D project used conventional 3D printing techniques to build a full-size bridge. Another option for metal fusion is called EBAM (Electron Beam Additive Manufacturing - additive electron beam technology), which is essentially soldering, in which a very powerful electron beam is used to melt 3 mm titanium wire, and the molten metal forms very large finished structures.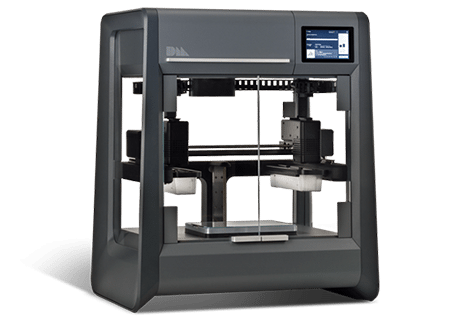 As for this technology, its details are known so far only to the military.
Metal 3D printing. Metals
3D Printing Metal #1: Titanium
Pure titanium (Ti64 or TiAl4V) is one of the most commonly used metals for 3D printing and is definitely one of the most versatile, strong and lightweight. Titanium is used both in the melting process in a preformed layer and in the process of spraying the binder and is used mainly in the medical industry (for the manufacture of personal prostheses), as well as in the aerospace industry, automotive and machine tools (for the manufacture of parts and prototypes). But there is one problem. Titanium is very reactive and explodes easily in powder form. Therefore, it is necessary that titanium 3D printing takes place in a vacuum or in an argon environment.
3D printing metal #2: Stainless steel
Stainless steel is one of the cheapest 3D printing metals. At the same time, it is very durable and can be used in a wide range of manufacturing and even artistic and design applications. The type of steel alloy used also contains cobalt and nickel, is very difficult to break, and has a very high elasticity. Stainless steel is used almost exclusively in industry.
3D Printing Metal #3: Inconel
Inconel is a superalloy manufactured by Special Metals Corporation and is a registered trademark. The alloy consists mainly of nickel and chromium and is very heat resistant. Therefore, it is used in the oil, chemical and aerospace (for black boxes) industries.
3D Printing Metal #4: Aluminum
Due to its lightness and versatility, aluminum is very popular in 3D printing. Aluminum alloys are commonly used.
3D Printing Metal #5: Cobalt Chrome
gap). It is most commonly used in the manufacture of turbines, dental and orthopedic implants, where 3D printing has become the dominant technology.
3D printing metal #5. Copper and bronze
With some exceptions, copper and bronze are used in wax melting processes, rarely in layer melting.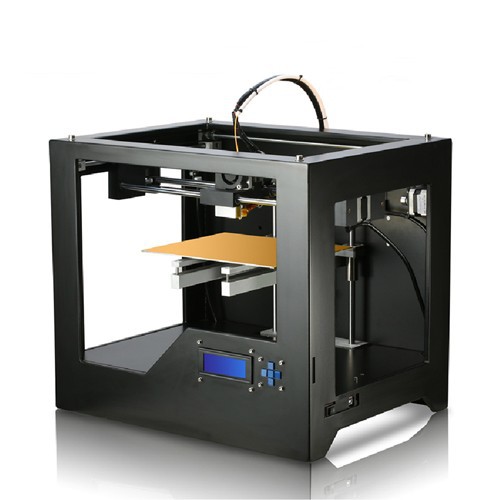 The fact is that these metals are not very suitable for industry, they are more often used in the manufacture of works of art and crafts. ColorFabb offers both metals as the basis for a special metal filament.
3D printing metal #6. Iron
Iron, incl. magnetic, also mainly used as an additive to PLA-based filaments, which are produced, for example, by ProtoPasta and TreeD.
3D printing metal #7. Gold, Silver and Other Precious Metals
Most preformed layer companies can 3D print precious metals such as gold, silver and platinum. Here, along with the preservation of the aesthetic properties of materials, it is important to achieve optimization of work with expensive starting powder. Precious metal 3D printing is required for jewelry, medical applications and electronics.
Metal 3D printing. Printers
Do not even hesitate - the purchase of a metal 3D printer will not pass without a trace on your budget.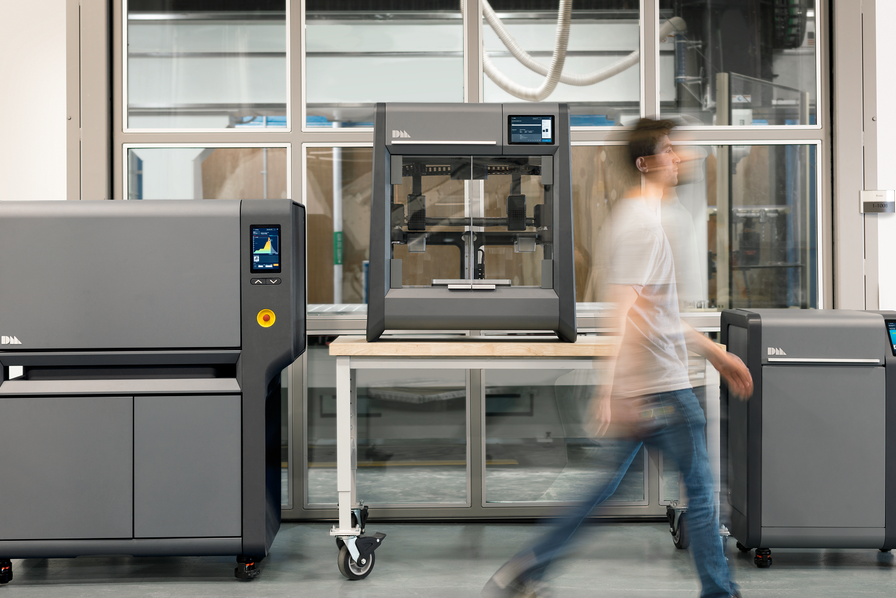 It will cost at least 100-250 thousand dollars. Here is a list of a variety of "metal" printers, some of which can be found in firms providing 3D printing services.
Metal 3D printer #1:
Sciaky EBAM 300 - metal filament printing
If you need to print really large metal structures, Sciaky's EBAM technology is your best bet. By order, the device can be built in almost any size. This technique is used mainly in the aerospace industry and the military.
Sciaky's largest production printer is the EBAM 300. It prints objects in a volume of 5791 x 1219 x 1219 mm.
The company claims the EBAM 300 is also one of the fastest industrial 3D printers on the market. A three-meter-sized titanium part for an aircraft is printed on it in 48 hours, while the material consumption is about 7 kg per hour. In general, forged parts that usually take 6-12 months to complete can be made in 2 days with this 3D printer.
The metal layers are first cut and then ultrasonically welded. The largest Fabrisonic 7200 printer operates in a volume of 2 x 2 x 1.5 m. The metal powder 3D printer is the Concept Laser XLine 1000. It has a modeling volume of 630 x 400 x 500 mm and is the size of a house.
Its German company, one of the main suppliers of 3D printers for aerospace giants like Airbus, recently introduced a new machine, the Xline 2000.
This machine uses two lasers and has a working volume of 800 x 400 x 500 mm. Laser technology LaserCUSING (selective laser fusion) from Concept Laser is used, which allows printing with alloys of steel, aluminum, nickel, titanium, precious metals and even some pure substances (titanium and stainless steel).
Metallic 3D printing. Services
There are more than 100 companies worldwide offering metal 3D printing services. We list the most popular services for consumer needs.
Metal 3D Printing Service #1: Shapeways
The world's most popular 3D printing service, Shapeways offers two types of services. As a consumer, you can choose from a wide range of professionally designed objects, customize them, and then have them printed to your specifications. Like other 3D printing services, Shapeways offers a platform for designers to sell and print their work. Shapeways is also a good place for rapid prototyping: customers benefit from industrial-grade printers (EOS, 3D Systems) and personal technical support.
3D printing metals: aluminium, brass, bronze, gold, platinum, precious metal plating, silver, steel. There are also wax molds for jewelry purposes.
Metal 3D Printing Service #2: Sculpteo
Like Shapeways and i.materialise, Sculpteo is an online 3D printing service that allows anyone to upload 3D models and send them to fabrication in a wide range of materials . Like its competitors, Sculpteo provides a platform for hobbyists and professionals to showcase and sell their designs. The stable of Sculpteo printers includes highly professional machines from 3D Systems, EOS, Stratasys and ZCorp. Extensive technical documentation will help identify design flaws and select the right material for the project.
3D printing metals: alumide (plastic with aluminum particles), brass, silver.
Metal 3D Printing Service #3: iMaterialise
Materialise is a company that works with industrial customers to prototype 3D printed products. For casual users and designers, Materialize offers an online 3D printing service called i.materialise. As with Shapeways, this service allows anyone to upload their 3D designs and print them out. Once an object has been uploaded and successfully printed, a designer can list it for sale either in the gallery of the i.materalise online store or by embedding some code into their site.
3D printing metals: alumide (plastic with aluminum powder), brass, bronze, copper, gold, silver, steel, titanium.
Metal 3D Printing Service #4: 3D Hubs
Through 3D Hubs, you can search for individuals and firms that offer 3D printing services in your area, upload STL files (which are immediately evaluated for defects ) and contact service providers directly to get the job done.