Affordable resin 3d printer
Best 10 Budget Resin 3D Printer in 2022
Table of Contents
Overview
On the past 5 years, it was probably a blast to most of us makers and hobbyist alike. We’ve seen some advancement of technology in the market for desktop machines, particularly laser engraver/cutter, 3D Printers both FDM and SLA.
In this fresh year that we’ve started, a lot of us might purchase or consider purchasing additional machines in our maker space. Or this might be your first purchase of your resin 3d printer.
Top 10 Best Budget Resin 3d Printer for 2022
There are a lot of 3D printers on the market these days. It can be tough to decide which one is the best for you. Here in Noveltymaker, we have listed down the 10 best budget resin 3d printer for 2022 together with its quick recap to guide you on what you should consider adding in the list of your next purchase.
Anycubic Mono 4kAnycubic is a well-known brand in the Resin printer field. The Anycubic Mono, released last Mid of November (2021), is the first 4K resolution resin printer released in its series. Priced at 289 USD with a decent print volume, this is a worth it purchase for your resin printer.
Anycubic Photon Mono 4K
$279.99
Pros:
- Very good print accuracy and print details (4k)
- Budget-friendly
- User friendly
Cons:
- Old software needs to be updated
- No power loss resume print
- Single Z linear rail
Buy On Amazon Official Website
10/06/2022 11:10 pm GMT
Specification
● Exposure screen: 6.23’’ monochrome
● Printing dimensions: 6. 5 x 5.2 x 3.1 in. / 16.5 x 13.2 x 8 cm (HWD)
● Light transmittance: 7%
● Contrast ratio: 400:1
● Light source: Parallel matrix (LED x 15)
● Power density: 3,500 – 4,000 μw/cm²/23,905 – 27,320 lux
● Printing accuracy: 3,840 x 2,400 px (4K)
● Horizontal resolution: 35 μm
● Printing speed: ≤ 5 cm/hr. / 1.97 in./hr.
● Control panel: 2.8’’ TFT touch-control
● Data input: USB-A 2.0
● Power supply: 45W
● Software: Photon Workshop
● Machine dimensions: 15.1 x 8.9 x 8.7 in./38.3 x 22.7 x 22.2 cm (HWD)
● Machine weight: 9.4 lb./4.3 kg
Elegoo Saturn is not a first timer as well when it comes to resin 3d printing. In fact, their Saturn is in series with their Elegoo Mars model. It has been raking up its reputation in the 3d printing market. In terms of 4k LCD Resin printers, Elegoo Saturn stands out with its print volume. Bigger than usual. Among our list, this is ranked as the second in terms of cost.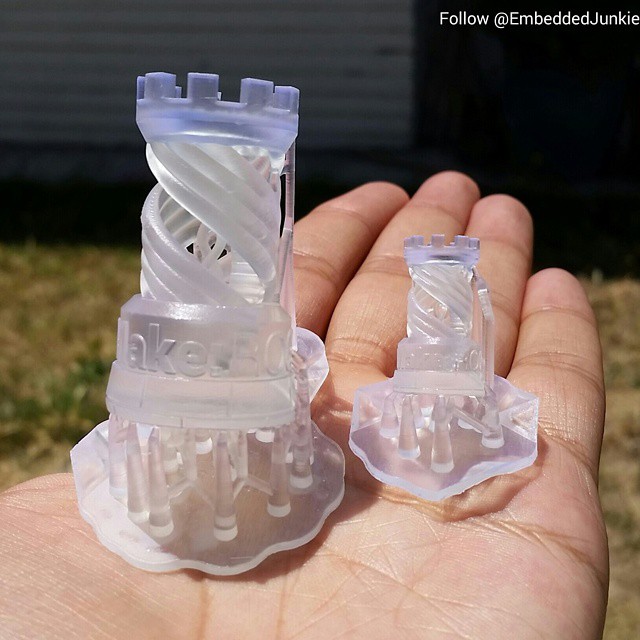
Editor Choice
ELEGOO Saturn 4k Mono
$379.99
Pros:
- -Big print volume
- -High definition print details (4k)
- -Fast print compared to other MSLA printers
- -Super user friendly
Cons:
- -Power switch accessibility(back)
- -No power loss resume print
Buy On Amazon
10/06/2022 09:56 pm GMT
Specification
- Build volume: 192 x 120 x 200 mm (7.55 x 4.72 x 7.87 in)
- Layer height: 10 microns
- Resolution: 3840 x 2400 pixels
- XY-axis resolution: 0.05 mm
- Z-axis positioning accuracy: 0.00125 mm
- Printing speed: 30 mm/h
- Bed leveling: Semi-automatic
- Display: 3.
 5-inch touchscreen
 - Third-party materials: Yes
- Materials: 405 nm UV resin
- Recommended slicer: ChiTuBox
- Operating system: Windows / Mac OS X
- File types: STL, SLC, OBJ
- Connectivity: USB, Ethernet
- Frame dimensions: 280 x 240 x 446 mm (11.02 x 9.44 x 17.55 in)
- Weight: 12.5 kg (27.56 lbs)
Predecessor to Elegoo Mars Saturn, this machine, Elegoo Mars 3 does have the most unique design among the machines in our list. It did not sport the standard rectangular design. Though, having a smaller print volume than the Elegoo Saturn, This machine still has the 4k resolution which will bring out that crisp in print quality you are looking for. Priced at 350 USD, this machine is recommended for your next purchase. Again, we have listed the Pros and Cons for this machine, listed below.
Best for Beginner
ELEGOO Mars 3
$258.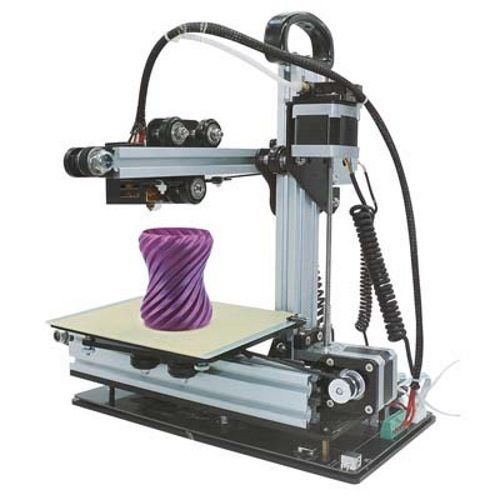 99
99
Pros:
- Includes 1 year pro experience from chitubox slicer
- High definition print output (4k)
- Best for beginners
- Slick design
Cons:
- Single z rail guide
- No power loss resume print
- Smaller than its successor
Buy On Amazon
10/07/2022 12:16 am GMT
Specification
- Build Volume: 143 x 90 x 165 mm
- Layer Height: 10 microns
- XY Resolution: 35 microns (4098 x 2560 pixels)
- Z-axis positioning accuracy: 0.00125 mm
- Printing Speed: 1.5-3s/layer
- Bed-Leveling: Manual
- Display: 3.5-inch touchscreen
- Third-Party Materials: Yes
- Materials: 405 nm UV resin
- Recommended Slicer: ChiTuBox (Pro)
- Operating system: Windows / macOS X / Linux
- File types: STL
- Connectivity: USB
- Frame dimensions: 227 x 227 x 440 mm
- Weight: 5.
 2 kg
2 kg
One of the champions of FDM 3D Printer, Creality, also has something to offer to the end users in terms of resin printers, Creality Halot One, was released last May 2021, and has been active in the resin 3d printing market. Knowing that it is subpar in resolution compared to other lists, it still is a good purchase, being it 2k compared to other which is 4k. So, what makes it special? First is its price, at 229 USD, and a decent but not so big print volume, it makes it worth it for a purchase. One more thing about Creality’s printer is that it for sure has an active support community you can got to whenever you need help in your product. It was said that they have a self-developed integral light source system, which is almost at 80% uniformity.
Hot Sell
Creality HALOT-ONE
$164.99
Pros:
- Very easy to use
- Placement of U-Disk slot in front makes it easier in file preparation
- Budget Friendly
Cons:
- Smaller print volume compared to others
- Only 2k resolution
- No power loss resume print
Buy On Amazon
10/07/2022 12:16 am GMT
Specification
- Build Volume: 130 x 82 x 160 mm
- Layer Height: 10 microns
- XY Resolution: 50 microns ( 2560 x 1620 pixels)
- Z-axis positioning accuracy: 0.01 mm
- Printing Speed: N/A
- Bed-Leveling: Manual
- Display: 5-inch color touchscreen
- Third-Party Materials: Yes
- Materials: 405 nm UV resin
- Recommended Slicer: Creality Box
- Operating system: Windows / macOS X / Linux
- File types: STL
- Connectivity: Wi-Fi, USB
- Frame dimensions: 230 x 230 x 415 mm
- Weight: 7.1 kg
- Boxed size: 295 x 295 x 545 mm
- Weight (packed): 8.8 kg
Elegoo Mars 2 Pro is a perfect machine for fast prototyping to any DIY project you can imagine. This machine makes resin printing a very affordable hobby. The design of Elegoo Mars basically looks like the predecessor, which looks very simple, and in an ok presentation.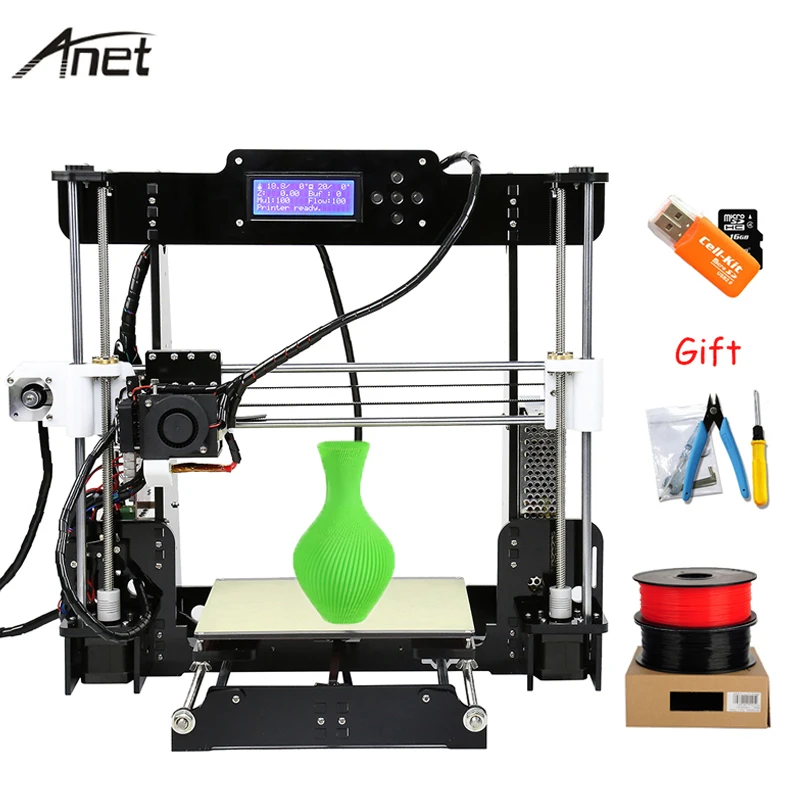
Editor Choice
ELEGOO Mars 2 Pro
$213.99
Pros:
- Small, and will not consume a lot in your maker space.
- Has a good filtration design (fumes)
Cons:
- Small print volume
- 2k resolution, though the quality is acceptable, higher resolution printers are better when it comes to this criteria
- Single Z rail guide
- No power loss resume print
Buy On Amazon
10/06/2022 06:03 pm GMT
Specification
- Build Volume: 130 x 82 x 160 mm (5,1 x 3,1 x 6,3 inches)
- Layer Height: 10+ microns
- XY Resolution: 50 Mircons (2560 x 1620 pixels)
- Z-Axis Accuracy: 0.
 00125 mm
 - Print Speed: 30-50 mm/h
- Bed-Leveling: Manual (assisted)
- Display: 3.5″ full-color touchscreen
- Built-in Camera: No
- Third-Party Materials: Yes
- Materials: 405nm UV resin
- Recommended slicer: ChiTuBox
- Operating system: Windows / Mac OS X
- File types: STL, SLC, OBJ
- Connectivity: USB
- Frame dimensions: 200 x 200 x 400 mm
- Weight: 6,2 kg
Anycubic Mono X is the bigger version of the Mono 4k, equipped with 3.5 in touch screen to navigate menu and print, this is one of the to go to purchase resin printer if you are looking for the size. The size to price ratio of this machine is outstanding, as you efficiently use the print size to maximize your project. Price of Mono X is 429 USD, quite decent for the volume you can do with this machine.
Popular Sell
Anycubic Photon Mono X
$449. 99 ($4.50 / Each Set)
Pros:
- Large print volume
- High Definition print (4k Resolution)
- Dual Z linear rail axis
- User-friendly
- Price to Print volume ratio
Cons:
- Bigger print bed made it quite hard to clean
- Removal of print on print bed
- No power loss resume print
Buy On Amazon Official Website
10/07/2022 02:40 am GMT
Specification
● Operation : 3.5 inch Touch Screen
● Software : ANYCUBIC Photon workshop
● Connectivity : USB
● Technology: LCD-based SLA
● Light-source: high-quality filament(wavelength 405nm)
● XY Res.: 0.050mm 3840*2400(4K)
● Z Axis Res.: 0.01mm
● Layer Res.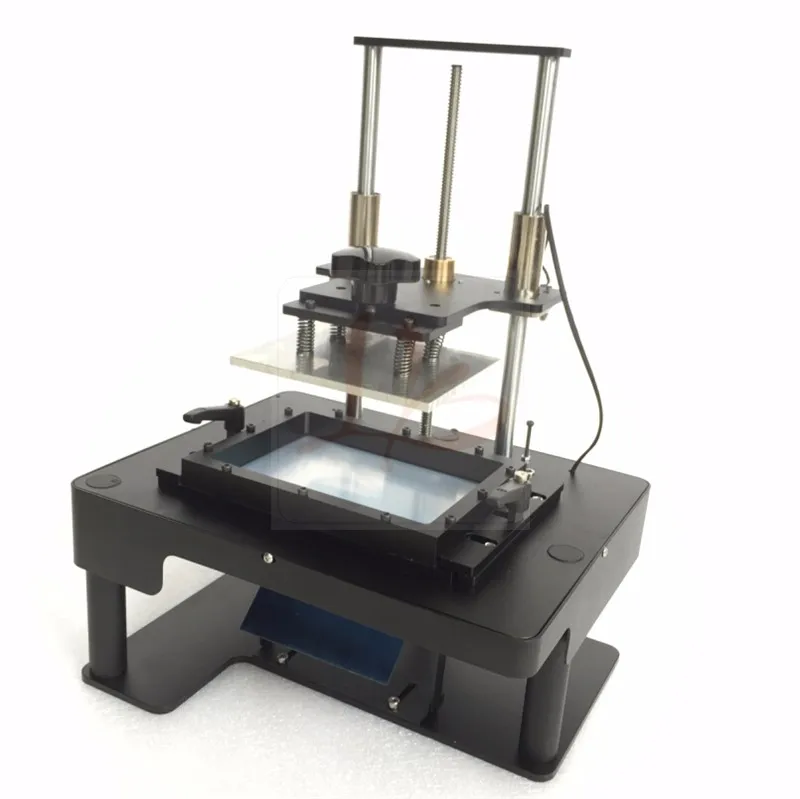 : 0.01-0.15mm
● Printing Speed: MAX 60mm/h
● Rated Power: 120W
● Printer Size : 270mm(L)*290mm(W)*475mm(H)
● Build Volume: 192mm(L)*120mm(W)*245mm(H)
● Material: 405nm UV Resin
● Net Weight: ~10.75kg
The larger version of the Voxelab Proxima series. This one is another one to look out for as this offers a big print volume. It has an uncommon file format for slicing (not ctb). They have their own slicer, but still needs to be polished. This looks like a replica of Elegoo Saturn, but this one is cheaper.
VOXELAB Proxima 8.9 Pro
Pros:
- High Definition print (4k resolution)
- Dual Z axis
- Large print volume
Cons:
- Not standard file format (since everyone uses .ctb)
- No power loss resume print
- Hard to clean print bed
Buy On Amazon
Specification
- Printing Speed: 25mm/h
- Build Volume: 192x120x200mm/7.
 56×4.72×7.87inch
 - Printer Size: 280x240x465mm/11.02×9.45×18.9inch
- Slicer Software: ChiTuBox & VoxelPrint
- Languages: Chinese /English
- Package Dimensions : 595x375x355mm/23.43×14.76×13.98inch
- Connectivity: USB Stick
- LCD Resolution:3840*2400
- Technology: UV Photocuring
- Layer Thickness: 0.01-0.2mm
- Lighting Sources:UV Matrix 405nm LED
- Touch Screen:3.5 Inch Color Touch Screen
- Printing Technology:LCD Stereolithography
- LCD Panel:8.9 inches 4K monchrome screen
- Input: AC100-240V, 50/60Hz, 2A; Output: DC24V 5A
This is one of the most budget-friendly 4k resolution resin printers in the list that offers a decent print speed. Priced at 349.99 USD. Though the size is quite small compared to the other printers in our list, we still consider this as one of the worthy of purchase resin printer for 2022. Below are the list of some Pros and Cons we’ve seen based on the machines performance.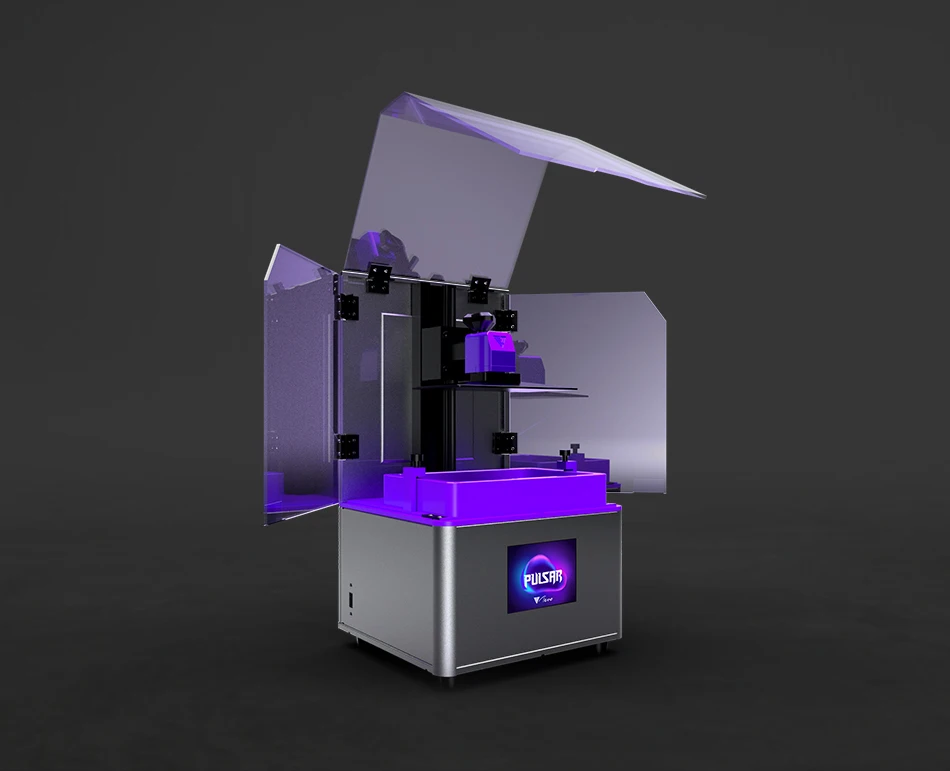
Popular Pick
Phrozen Sonic Mini 4K
$299.99
Pros:
- Competitive price
- 4K resolution (High definition printing) for resin application
- User-friendly
Cons:
- Single Z-rail guide
- Smaller compared to other 4k resin printer
- No power loss resume print
Buy On Amazon
10/07/2022 12:16 am GMT
Specification
- Build volume: 135 x 75 x 130 mm
- Layer height: 10+ microns
- XY resolution: 0.035 mm (3840 x 2160 pixels)
- Printing speed: 80 mm/h
- Bed-leveling: n/a
- Display: 2.8-inch touchscreen
- Third-party materials: Yes
- Materials: 405 nm UV resin
- Recommended slicer: ChiTuBox 1.
 6.5
6.5 - Operating system: Windows / Mac OSX
- File types: STL
- Connectivity: USB
- Frame dimensions: 248 x 248 x 327 mm
- Weight: ~5 kg
Followed by the cheapest in our list, The Nova 3d whale 2 is the most expensive one in our list. Not because it is the most expensive in our list, means it is not a recommendable printer. Released last April 2021, The price of this resin printer is 599 USD. Equipped with 4k resolution, 8.9 in LCD, Dual Z rail guide, sturdy print bed, you might want to add this to your next purchase.
NOVA3D Whale 2
Pros:
- Big print volume
- Sturdy/Stable design
- High Definition print quality (4k)
- Dual Z axis linear rail
Cons:
- Price is relatively high
- No power loss resume print
- Does not have a carbon filter for fumes
Buy On Amazon
Specification
- Layer Height: 0.
 02mm~0.15 mm
 - X/YPrinting Precision: 0.05mm
- Z Precision: 0.01mm
- Build Size: 192*120*250mm / 7.5*4.7*9.8inch
- Support: Auto/Manua
- Compatible Materials: 405nm 3D Resin
- Output Formats: cws
- Lighting Source: Para-LED
- Connection: USB/ WIFI,Cable,USB
- OS: Android
- Processor: Quad-core Cortex A7 1.5G
- RAM: 1G
- Printer Size: 279*296*455mm
Lastly, we have flashforge foto 8.9 in our list. If you are not new into 3D Printing, for sure, you might have already heard of the brand flashforge. They have been into 3D Printing for a long time, they are one of the firsts to be in the 3D Printing market. Anyway, let us proceed with their FOTO 8.9, considered of the best of its kind in the 4k resolution resin printer, FOTO 8.9 has been doing good in terms of print quality.
We gave this printer a high score in terms of price to print volume ratio. This resin printer has a dual z rail guide, which results to a more stable movement and excellent print quality. This too can print at high speed while having a big print volume. Below are the Pros and Cons of the flashforge foro 8.9.
Budget Friendly
Flashforge Foto 8.9
$359.00
Pros:
- High Definition print quality (4k)
- Big print volume
- Budget Friendly for its kind
- User-friendly
- Dual z linear rail
- Stable design
Cons:
- Hard to clean print bed (common for big volume)
- No power loss resume print
Buy On Amazon
10/07/2022 12:16 am GMT
Specification
- Layer Thickness: 0.025-0.2 mm (adjustable)
- Print Volume: 192*120*200 mm (7.6*4.7*7.9 IN)
- Print Precision: ±0.
 05 mm
05 mm - Print Speed: 10-50 mm/h
- Language: Chinese / English
- Printer Dimension: 280*240*465 mm (11*9.4*18.3 IN)
- Screen: 3.5-inch touch screen
- Net Weight: 12.5 kg (27.6 LBS)
- Gross Weight: 15kg (33.1 LBS)
- Power: 120W
- Connectivity: USB
- Software: FlashDLPrint
- File Input Format: 3MF/STL/OBJ/FPP/SLC files
- File Output Format: SVGX
6 Factors to consider before buying resin 3D printer in 2022
When looking to buy a resin 3d printer, there are several factors you need to consider. Each printer is different, so it’s important to find the one that fits your needs. These 6 factors will help you narrow down your search and find the perfect printer for you.
Product Price
In our list, this comes first, as this is the most important factor on purchasing something, be it the machine we are going to purchase, or anything else we need in our maker space. Whatever we want to have in our next machine, bigger print volume, extra features, etc. at the end of the day, it will still depend on the budget or product price.
Build volume
Next in our list is the build volume. This is one of the most confusing factors to consider with your next purchase. They say that it is better if it is bigger. Yes, but if we are going to consider properly the build volume with what we usually do, then this will make sense. If we tend to make an average of 1 cu.in. like for prototyping, better get smaller build volume.
The main reason is you might be able to utilize well the machine (even if it is smaller) plus, maintenance of bigger build volume is more complicated than the smaller machines. Think alone of the resin drips when we clean the print bed. But if you go for medium scale above mass production, then it might be better to get a bigger machine.
Print Speed
You should also consider this as a factor for your purchase, still this is beneficial for the needs of prototyping. In general, print speed is relative to your print quality, being in FDM or RESIN printing. The benefit of speed comes from prototyping, as final prints for projects should be speed conscious as it affects the print quality. The higher the resolution (better print outputs, the slower the print).
Machine Maintenance
This factor pertains more to the convenience to the end user. As we all know, mostly if you have an experience with FDM, Resin 3d printers do have high maintenance level, compared to FDM. From the draining of vat, post-processing of prints, cleaning of machine, to storage if the resin should almost be done properly. Unlike FDM, which you can just leave right after printing.
User-Friendliness
A lot of machines are becoming user-friendly now, as manufacturers do their best to serve all level of users, from beginner to expert. Thanks to the software/slicer which contribute to the user-friendliness of the file preparations for the machines now.
But we should still consider the hardware setup of the machine like; how it was built, how the vat is being locked in place, how the print bed can be removed, how to level the print bed, so on and so forth, even if resin printers have been in the market for several years, we all know we still want more from the current setup that the existing machines have.
Customer Support
Last but not the least, is customer support. Let’s admit it, there is no 100% or perfect machine, even those at the top tier price range, we should expect some glitches or problems which might need to be attended to. I personally would love to have direct communication with the manufacturer, for future claims for warranty (parts, etc.).
This factor mirrors the professionalism and the quality of the machine you have just purchased. For sure, there are now active communities, with some experts in it to help us. But remember, it will still be better if the initiative of support will come directly from the manufacturer.
Beginner Guide for Resin 3d Printer
Now, we know resin 3D printer is a great option for users looking to create high-quality prints with incredible detail. However, these printers can be somewhat difficult to operate, and there are certain things that you need to know to get the most out of them.
In this article, we will provide a comprehensive FAQ guide for resin 3D printers, answering all of the most common questions that people have about them.
We’ll cover everything from printing quality to post-processing tips so that you can be sure to get the most out of your printer! Thanks for reading!
What Is Resin 3D Printer?
A resin 3D printer uses ultraviolet light to harden the photosensitive resin, creating a three-dimensional object layer by layer.
The term “resin” can refer to both the liquid photosensitive material used in the printer and the printed object itself. There are many types of resins available, each with its own unique properties.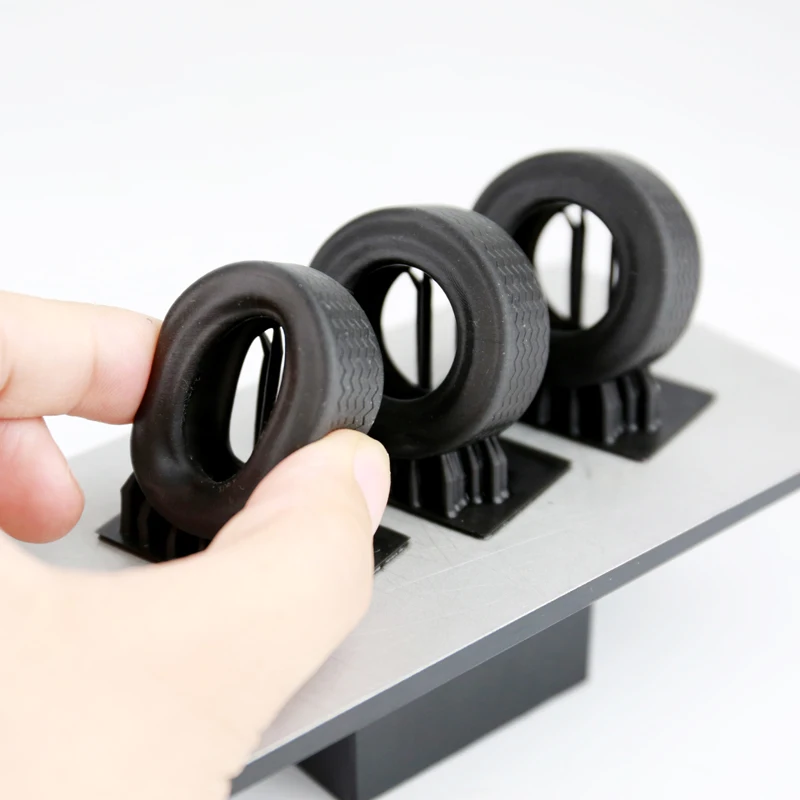
While most commonly used for small objects such as medical implants and jewelry, resin printers have also been used to create full-size cars and even human organs! In this post, we will take a closer look at what resin printers are, how they work, and some of their applications.
How Resin 3D Printer Works?
Resin 3D printers work by using a light source to cure resin into the desired shape. The light source is typically an LCD screen or a laser. Listed below are the steps a resin 3D printer follows to work.
- The bottom of a resin vat is filled with resin and the build platform is lowered into the resin.
- The LCD screen or laser projector projects an image of the first layer onto the bottom of the resin vat.
- The resin hardens where it is exposed to light and remains liquid elsewhere.
- The build platform is raised a small distance and the next layer is projected onto the resin.
- This process is repeated until the build is complete.

- The build platform is raised out of the resin vat and the build is removed.
- Any excess resin is washed away and the build is cured using ultraviolet light.
Resin 3D printers are typically very accurate and can produce high-quality results. However, they can be more expensive than other types of 3D printers and require more maintenance.
Resin 3D printers are also slower than other types of 3D printers, so they may not be the best option for large-scale projects.
What’s the benefit of Resin 3D Printer
There are many resin 3D printers on the market, but not all of them are created equal. Some are better than others, and some have more features than others.
However, there are a few benefits that all resin 3D printers share. Here are 5 benefits of resin 3D printers:
1. They Are Very Precise
Resin 3D printers can print with extremely high accuracy. This is because the resin is cured by a UV light, which allows for very precise printing. This means that you can create parts and products that are very accurate and have a very smooth finish.
2. They Are Fast
Resin 3D printers are also much faster than other types of 3D printers. This is because they do not have to wait for the resin to cure before they can start printing the next layer. This means that you can get your products faster and with less hassle.
3. They Have A Wide Range Of Materials
There are a wide range of materials that you can use with resin 3D printers. This means that you can print with different colors and finishes. You can also find resin that is made for specific purposes, such as food-safe resin or fire retardant resin.
4. They Are Easy To Use
Resin 3D printers are very easy to use, even for beginners. This is because they come with easy-to-use software that makes the printing process very simple. Additionally, most resin 3D printers come with a user manual that will help you get started with using the printer.
5. They Are Affordable
Since more and more brand is jumping into this industry, and competition in 3d printing is getting tough every day, so you can find resin 3D printers that are very affordable on the market now.
Consumables For Resin 3D Printing!
When it comes to 3D printing with resin, there are several consumables that you will need to get started.
- The first is a build platform. This can be either a dedicated build plate or a sacrificial build surface that can be replaced after each print.
- Next, you will need a curing station. This is necessary for post-processing your prints and ensuring that they are fully cured.
- Finally, you will need support. These are typically used for larger prints or prints with complex geometries and help to prevent the print from warping or collapsing during the printing process.
With these three items, you will be able to start printing with resin right away!
Are Resin 3D Printers Faster?
Resin printers can print much faster than FDM printers, thanks to their use of SLA or DLP printing technology.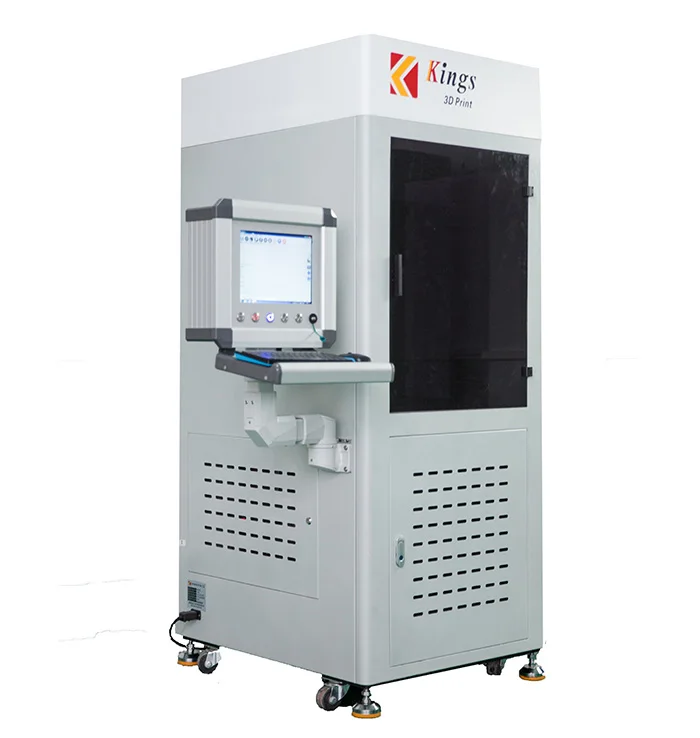
This makes them an ideal choice for businesses or individuals who need to produce large quantities of prints in a short amount of time.
In addition, resin prints tend to be more accurate and have a higher resolution than FDM prints. This makes them ideal for applications where precision is essential, such as in the medical field.
How Fast Is A Resin 3D Printer?
One of the benefits of 3D printing is speed. How fast a 3D printer can print depends on the technology being used as well as the size and complexity of the object being printed.
For instance, continuous liquid interface production (CLIP) is one of the fastest 3D printing technologies available. It can produce objects up to 100 times faster than other traditional methods. However, CLIP is best suited for small to medium-sized objects.
For larger objects, SLA printers are typically faster than FDM printers. SLA printers work by curing layers of resin with a laser, while FDM printers build up layers of filament. The advantage of SLA over FDM is that it generally has a higher resolution, which means that objects can be printed with more detail.
As a result, SLA is often used for applications where precision is key, such as in the medical and aerospace industries. When it comes to speed, however, both technologies have their pros and cons, so it really depends on what your specific needs are.
Are Resin 3D Printers Safe
Resin 3D printers are increasingly popular, due to their affordability and the high quality of the prints they produce.
However, there is some concern about the safety of these printers, as they use UV light to cure the resin. UV light is known to be harmful to human health, and it is unclear whether the levels emitted by these printers are safe for prolonged exposure.
In addition, the fumes produced by the curing process may also be harmful. Some manufacturers have addressed these concerns by developing safer resins that do not emit harmful fumes, and by enclosing the printing area to prevent exposure to UV light.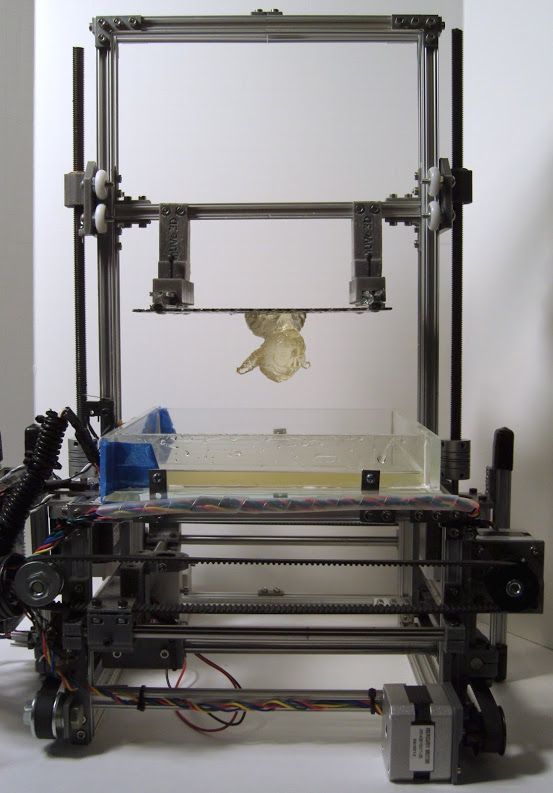
It is still important to take precautions when using these printers, such as wearing gloves and a mask to avoid contact with the resin.
Safety Precautions For Resin 3D Printing!
Some safety hazards to be aware of when working with Resin 3D Printers:
- Resin fumes can be dangerous if inhaled in large quantities, so it is important to work in a well-ventilated area.
- Resin can be harmful if it comes into contact with your skin, so it is important to wear gloves and protective clothing.
- Resin can be flammable, so it is important to keep it away from any sources of ignition.
- Resin 3D printers generate a lot of heat, so it is important to keep them away from combustible materials.
- It is important to clean up any spills immediately, as resin can be difficult to remove once it has hardened.
- Resin 3D printers should be kept in a dust-free environment, as dust can cause the Resin to harden prematurely.
- Resin 3D printers should be kept away from children and pets, as the Resin can be harmful if ingested.

- Always read the Resin manufacturer’s safety instructions before use.
- If you are unsure about anything, seek professional advice before using a Resin 3D printer.
- Remember, safety is always the highest priority when working with any type of 3D printer!
With these safety precautions in mind, you can enjoy all the benefits of Resin 3D printing without any worries!
Types Of Resin For Printing Miniatures!
There are two main types of resin that can be used for 3D printing miniatures: photopolymer and epoxy.
1. Photopolymer Resin
Photopolymer resin is the most common type of resin used for 3D printing. It is made from a photosensitive monomer that is cured by exposure to ultraviolet (UV) light. This type of resin is typically less expensive than epoxy resin and can be printed at higher resolutions.
2. Epoxy Resin
Epoxy resin is a more durable type of resin that is often used for industrial applications. It is made from a mixture of two substances: a polymer and an epoxide. This type of resin is typically more expensive than photopolymer resin but can be printed at lower resolutions.
When choosing a resin for 3D printing miniatures, it is important to consider the resolution and durability requirements of the project.
For example, if you need a very detailed and precise miniature, you will want to use a photopolymer resin. If you need a durable miniature that can withstand being handled or played with, you will want to use an epoxy resin.
What Are Resin 3D Printers Good For?
The Resin 3D printer is a technology that has become popular in recent years due to its ability to produce extremely detailed prints. The Resin 3D printers are good for a lot of different applications. Here are the top five applications of 3D printers.
1. Resin 3D Printers Are Great For Prototyping.
In prototyping, Resin 3D printers can create highly accurate models of products or parts. This is because Resin 3D printers use stereolithography (SLA) technology, which can produce very precise prints. This means that Resin 3D prints can be used to create prototypes that are very close to the final product.
2. Resin 3D Printers Are Also Great For Creating Molds And Patterns.
Molds and patterns are often used in the manufacturing process. Resin 3D printers can create molds and patterns that are very precise and accurate. This is because Resin 3D printers use stereolithography (SLA) technology, which can produce very precise prints.
3. Resin 3D Printers Are Also Great For Creating Models For Testing.
Models created with Resin 3D printers can be used for a variety of tests. For example, Resin 3D prints can be used to test the fit of parts or products. Resin 3D prints can also be used to test the strength of materials.
4. Resin 3D Printers Are Also Great For Creating End-Use Parts.
Resin 3D printers can create parts that are strong and durable. This is because Resin 3D printers use stereolithography (SLA) technology, which can produce very precise prints. This means that Resin 3D prints can be used for a variety of end-use applications.
5. Resin 3D Printers Are Also Great For Creating Investment Casting Patterns.
Investment casting is a process that is used to create metal parts. Resin 3D printers can create patterns that are used in investment casting. This is because Resin 3D printers use stereolithography (SLA) technology, which can produce very precise prints.
How Do You Use A Resin 3D Printer?
Using a resin 3D printer is a bit different than using a traditional 3D printer. Here are 10 tips to help you get the most out of your resin 3D printing experience:
- Choose the right resin. Not all resins are created equal and each type of resin has its own unique properties. Make sure you select the right type of resin for your project.
- Pre-treat your model.
 Resin can be tricky to work with and it can be very easy to mess up a print. Before you start printing, take the time to pre-treat your model. This will help ensure a successful print.
 - Level your build plate. A level build plate is essential for getting good prints from a resin 3D printer. Make sure your build plate is level before starting a print.
- Use supports wisely. Resin prints can be delicate and often require the use of supports. Be careful not to overuse supports, as too many can make a print difficult to remove from the build plate.
- Keep an eye on your print. Resin prints can take a long time to complete, so it is important to keep an eye on your print and make sure everything is going as planned.
- Post-process your print. Resin prints often require some post-processing, such as cleaning and curing, to be ready for use. Be sure to follow the instructions for your specific resin and post-processing needs.

- Store your resin properly. Resin should be stored in a cool, dark place to prolong its shelf life. Be sure to follow the storage instructions for your specific type of resin.
- Use safety equipment. Resin can be harmful to your skin and eyes, so it is important to always use safety equipment when working with it. Resin 3D printers often come with safety glasses and gloves, but you may want to consider investing in additional safety gear such as a respirator.
- Keep your workspace clean. Resin is very messy and can be difficult to clean up. It is important to keep your workspace clean and organized to avoid making a mess.
- Have fun! Resin 3D printing is a great way to create unique and interesting objects. Get creative and have fun with it!
Following video is additional basic information for resin 3d printing.
How To Calibrate Resin 3D Printer?
Calibrating a 3D printer is one of the most important things you can do to ensure that your prints come out looking great.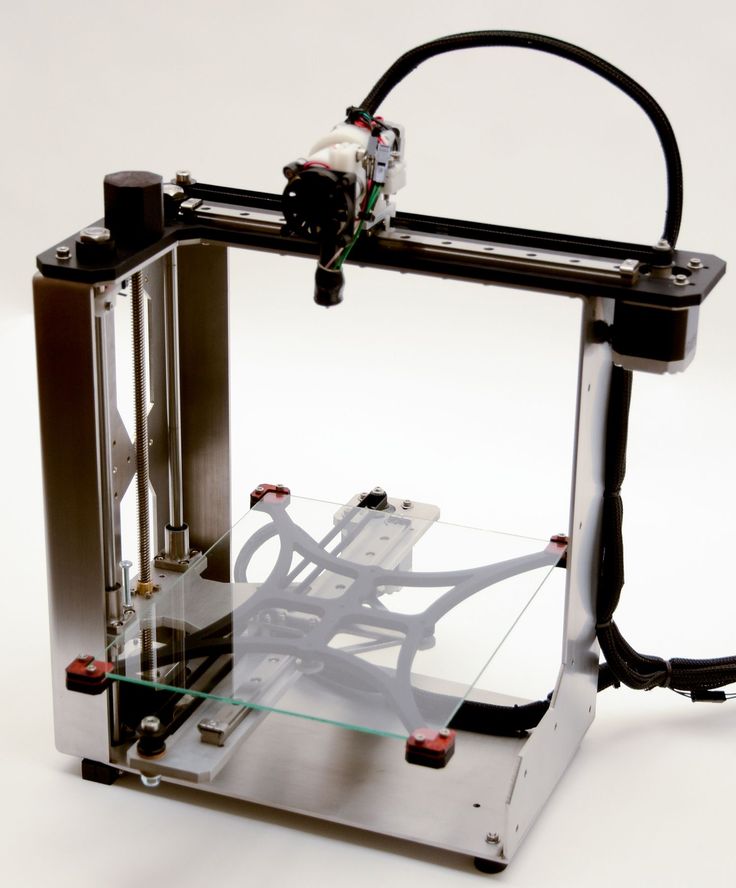
Resin printers, in particular, require a bit more care and attention when it comes to calibration. Here are 5 tips to help you get the best results from your resin 3D printer:
1. Clean The Build Platform
Before starting a print, it’s important to make sure that the build platform is clean. Any dust or debris on the platform can cause prints to fail or look uneven. To clean the platform, simply wipe it down with a lint-free cloth and isopropyl alcohol.
2. Level The Build Platform
If the build platform isn’t level, your prints may not adhere properly or they may come out warped. Resin printers typically have an auto-leveling feature that makes it easy to keep the platform level. Simply follow the instructions in your printer’s manual to activate this feature.
3. Use Supports
Resin prints can be delicate, so it’s important to use support when printing complex objects. Supports help to prevent prints from warping or collapsing during the printing process.
4. Calibrate The Printer
It’s important to calibrate your resin printer before each print job. This ensures that the print settings are accurate and that the printer can produce high-quality prints. To calibrate the printer, simply follow the instructions in your printer’s manual.
5. Use Quality Resin
Using quality resin is essential for getting great results from your resin 3D printer. There are many different types of resins available on the market, so it’s important to choose one that is compatible with your printer and that produces prints that meet your needs.
Below is video about exposure calibration testing from Uncle Jessy.
Do Resin 3D Printers Need Supports?
While resin 3D printers don’t necessarily require support, it’s generally recommended to use supports for best results. This is because resin can be very difficult to remove from delicate areas of a print, and supports can help to prevent warping and other distortions.
Resin printers typically use different types of supports than other 3D printers, so it’s important to consult your printer’s instructions before setting up your prints. In general, though, using supports will help you to get the best results from your resin printer.
How To Clean Resin 3D Printer Properly?
If you’ve just finished printing with resin, the first thing you’ll want to do is clean your 3D printer. Resin can be tricky to remove, so it’s important to know the best way to clean your machine.
Here are a few tips on how to clean resin 3D printer:
- Use gloves when handling resin. Resin can be messy and difficult to remove, so it’s important to use gloves when handling it. This will help keep your hands clean and free of resin.
- Use a cleaning solution. Resin can be stubborn, so it’s important to use a cleaning solution designed specifically for 3D printers. There are many different solutions available, so be sure to find one that works best for your machine.

- Be patient. Resin can be difficult to remove, so it’s important to be patient when cleaning your 3D printer. Resin can take some time to break down, so don’t be discouraged if it takes a few tries to get your machine clean.
We hope that you have gained some basic concpet about resin 3d printing from our guide. Though as tough as it seems, picking your next purchase will still depend on the factors we have listed above.
As we wrap up the stuff we have discussed, keep in mind that budget and machine build volume and print quality are the top priorities to look at for your next purchase, remember, not because a bigger print volume looks better, at the end of the day, it will still be more worth it having a less print volume but utilizing the machine to at most 100%.
P.S. We, in Noveltymaker, would like to thank you for taking time in reading our review article, we wish you all a prosperous and safe year ahead! Happy printing!
Elegoo Saturn 3D Printer Review: Large Volume, High Quality, Great Value
Tom's Hardware Verdict
The Elegoo Saturn impressed us with its high-quality output, impressive attention to detail with regards to machine design, and large build volume.
Pros
- +
+ Native integration with ChituBox slicer
- +
+ Exceptionally large build-volume-to-price ratio
- +
+ Rigid dual-Z linear rail system
- +
+ Leveling process is simple
Today's best Elegoo Saturn deals
$307.78
View
$415.99
$379.99
View
Reduced Price
The larger counterpart to the Elegoo Mars series of printers, the Elegoo Saturn is a large-volume resin MSLA 3D printer that has found a way to offer increased build volume without sacrificing part quality. By increasing both the size and the resolution of the masking Mono LCD, the Elegoo Saturn is able to offer the same XY resolution of the Mars 2 Pro while increasing the total build volume.
One of the best 3D printers, the Saturn impressed me with how easy it was to set up and use but the scarce availability of the typically $500 printer may be a source of frustration when searching for one to buy.
Elegoo Saturn Specifications
| Machine Footprint | 11.02" x 9.44" x 17.55" (28cm x 24cm x 44.6cm) |
| Build Volume | 7.55" x 4.72" x 7.87" (192mm x 120mm x 200mm) |
| Resin | DLP Photopolymer Resin |
| UV Light | 405nm UV LED Matrix |
| Masking LCD Resolution | 3840 x 2400 |
| Masking LCD Size | 8.9-inch |
| Interface | 3.5-inch LCD Touchscreen |
| XY Axis Resolution | .05mm |
Included in the Box of Elegoo Saturn
(Image credit: Tom's Hardware)The Elegoo Saturn ships in a well-packed box and includes all of the accessories you need to start printing as soon as the printer is out of the box.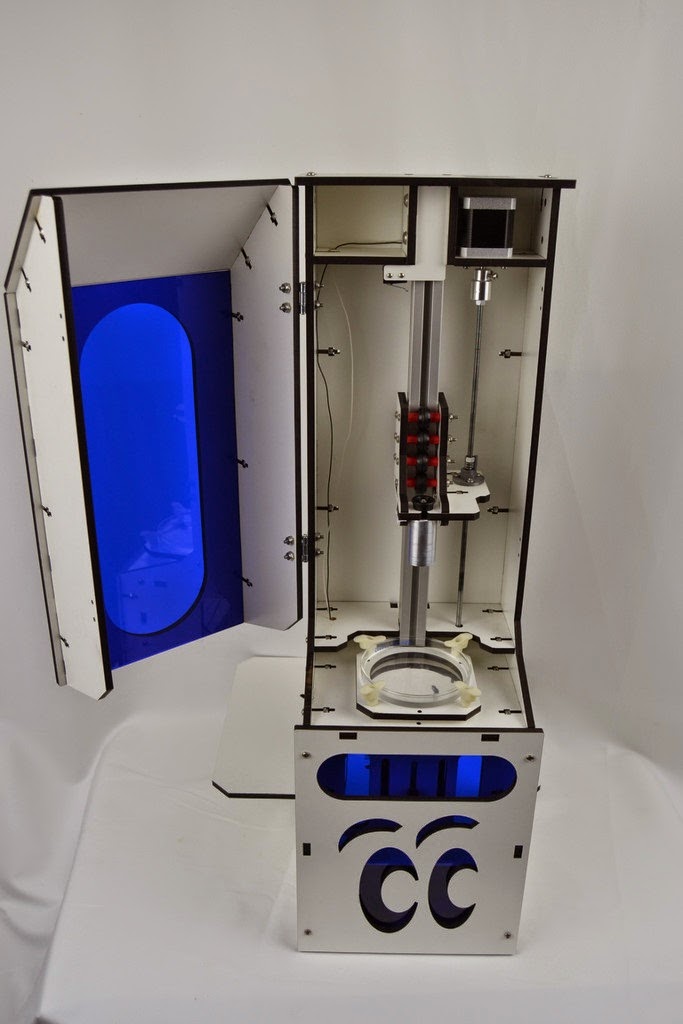 Included in the accessories box is a metal scraper (for removing parts from the build platform), a plastic scraper (for removing parts from the FEP sheet and stirring the resin), some paper funnels with a wire mesh (for filtering resin), wire cutters (for removing support material), latex gloves, and a healthy number of spare bolts, Allen keys, and other easy-to-lose parts. The included USB stick comes pre-loaded with a test print, the Chitubox slicer app, a digital copy of the user manual, and a few files from the 3D model repository site MyMiniFactory.
Elegoo shipped this Saturn with a ‘tomshardware.com’ sticker applied to the UV-resistant lid, which was a nice touch for a review unit. As far as I can tell, this is the only difference between this unit and a typical retail unit, so my experience with this printer should be similar to yours if you purchase it directly from Elegoo.
(Image credit: Tom's Hardware)The Saturn is a typical resin MSLA 3D printer which utilizes a vat of resin, a masking LCD, a UV light source, and a single axis of movement. It took me under five minutes to assemble this printer, and most of that time was removing foam and packaging from the box. The printer doesn’t require any mechanical or electrical assembly, and only needs to be calibrated before printing. The calibration process is almost effortless (more on that later), and the out-of-the-box experience felt quick and easy.
Image 1 of 2
(Image credit: Tom's Hardware)(Image credit: Tom's Hardware)The Saturn uses an 8.9-inch masking LCD with a resolution of 3840 x 2400, which gives it an effective XY resolution of .05mm. The masking LCD ships with a pair of protective stickers on it during shipping, and I had no problem removing them before printing. The black protective tape around the masking LCD needs to be left on the machine, and the manual makes sure to mention this first so a new user doesn’t accidentally remove it while removing the rest of the stickers.
Image 1 of 2
(Image credit: Tom's Hardware)(Image credit: Tom's Hardware)The resin vat on the Saturn uses four bolts that protrude from the bottom as locating posts which makes locking the vat into place a fast and repeatable process. One of the biggest problems I have when cleaning resin vats is that they typically sit with the delicate FEP film flush against the surface they are laid down on, so even a small bump in a table can possibly dent or deform them. The four posts on the corners of the Saturn’s vat keep the FEP film slightly elevated during cleaning, which is a small feature but a welcome change in design.
The resin vat also has a max fill line printed right on it which takes away the stress from potentially over-filling and spilling resin. This feature, along with the spout that is molded into the vat, indicates that Elegoo has put some thought into the needs of users who are frequently changing vats or draining and replacing resin.
Image 1 of 2
(Image credit: Tom's Hardware)(Image credit: Tom's Hardware)Unlike most resin MSLA 3D printers which use a single linear rail for the Z axis, the Saturn uses a threaded leadscrew and a pair of linear rails for added stability. The Saturn features a larger build volume than most MSLA 3D printers, which means more weight is suspended from the cantilevered build platform. Between these two rails and the solid machined bracket for the build platform, the Saturn is able to print without bending the build platform bracket during lift moves, and I was impressed with the rigidity of the system.
The Saturn uses a USB stick for transferring files to the printer, as well as an Ethernet connection for adding the machine to a network. If you’re interested in using the Saturn as part of a high volume print farm, the ability to network the machine means you can transfer files without the need for an external drive. The two fans on the back of the unit provide airflow for the controller board and UV LED light source, but don’t provide air filtration like the fan in the Elegoo Mars 2 Pro. Despite the lack of air filtration, the Saturn didn’t seem to emit an odor any worse than the Mars 2 Pro during printing, but if you’re concerned about air quality you’ll want to take this into account.
Leveling the Build Platform on Elegoo Saturn
(Image credit: Tom's Hardware)When printing on an MSLA resin 3D printer, you want the build platform to be perfectly level with the FEP film so the resin cures evenly across each layer.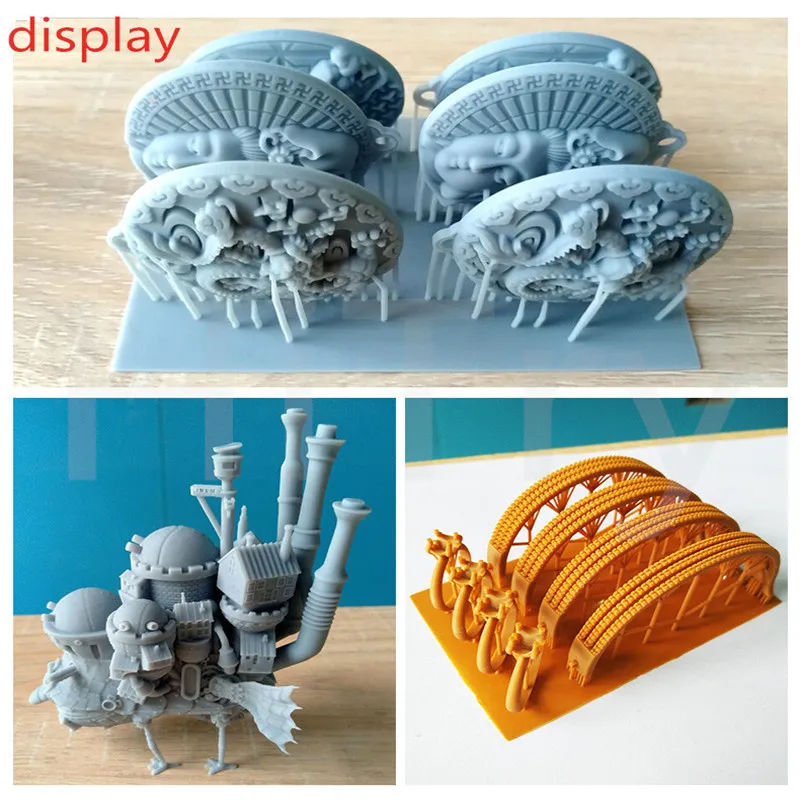 This leveling process can be a challenge for beginners and it can be frustrating to have failed prints due to poor bed leveling. Elegoo has addressed this problem by using a unique leveling process that is fast, simple, and easy to complete. The Elegoo Saturn uses a build platform held rigid by two bolts and includes simple step-by-step instructions for the leveling process.
Image 1 of 2
(Image credit: Tom's Hardware)(Image credit: Tom's Hardware)After loosening the two bolts on the build platform and placing the included piece of leveling paper over the masking LCD, I dropped the Z axis to the home position and watched as the build platform self-leveled and sat perfectly flush. Once the axis had come to a rest, I simply tightened the two screws in the order indicated and lifted the build platform up. Compared to the leveling process on a printer like the Longer Orange 10 that uses four screws that need to be tightened in a star pattern and tend to shift during tightening, the Saturn feels almost effortless to set up.
Printing Safety with Elegoo Saturn
(Image credit: Tom's Hardware)The Elegoo Saturn uses 405nm UV resin, a material that you need to handle safely when in an uncured state to avoid injury. The resin can be harmful when making contact with skin, so make sure to wear gloves when pouring, cleaning up, or handling uncured resin. I also make sure I’m wearing gloves when removing the build platform after a print, as the resin tends to pool on top of the platform and can drip off while the platform is being removed.
Make sure you use the Saturn in a well-ventilated room to minimize the danger from inhaling fumes. Any spills or uncured resin stuck to a surface should be cleaned using 99% Isopropyl Alcohol and the container for the resin should be kept closed and secured when not actively pouring material.
(Image credit: Tom's Hardware)The build platform on the Saturn is designed with a trapezoidal shape that allows uncured resin to drip off and prevents it from pooling on the top of platform during printing. Despite this shape, I noticed that resin had a tendency to collect at the very edge of the platform, and I couldn’t help but wonder if a more aggressive angle or a chamfered edge would help to allow more resin to drip back into the vat during printing. This is a relatively minor point, as the majority of resin will drip downwards during printing and cleaning the edge of the build platform doesn’t require much effort.
Printing the Included Test Prints on the Elegoo Saturn
Most 3D printers include a prepared test print as an opportunity for the manufacturer to demonstrate the strengths of their machine. Despite this relatively simple premise, I’ve found that test prints can be a source of frustration for first time users as they have a tendency to have issues that most first-time users won’t be expecting.
Image 1 of 2
(Image credit: Tom's Hardware)(Image credit: Tom's Hardware)Unfortunately, the Elegoo Saturn falls short in this category and my experience with the included test print was really the only major disappointment I had while writing this review. The Saturn includes a test print on the included USB drive called “_Rook_SATURN.ctb” that consists of two chess pieces with fine details on the interior and exterior of the model. This test print completes in a very reasonable 3 hours and 49 minutes, and I was impressed with the fine detail on the models once the print had completed. Unfortunately, this is where things took a bit of a turn.
The build platform on the Saturn has a sandblasted textured finish which helps cured resin adhere during printing and prevents parts from delaminating. When removing a part, a thin raft can be bent (as seen in the picture above), which allows the part to easily detach from the build platform without too much trouble. This is a delicate balance; too thin and the part won’t adhere to the plate, too thick and the part can’t be easily removed. I had no trouble with any of the parts I sliced in Chitubox, but as you’ll see below, the included test print was significantly more difficult to remove.
Once printed, the detail on the rooks was impressive, but the solid base of the model printed directly on to the build plate didn’t present an intuitive method of removal. After using the included metal scraper and attempting to gently pry the parts off, I wondered if this was a common problem or if the Elegoo Water Washable Ceramic Grey resin I was using simply wasn’t compatible with the settings provided. A quick Google search for “Elegoo Saturn Test Part Stuck To Plate” shows that this is not an uncommon problem, with some users resorting to using a rubber mallet to remove the parts from the build plate.
(Image credit: Tom's Hardware)I was eventually able to remove the prints from the bed, but it required significantly more effort than I was comfortable with and resulted in both parts being chipped along the bottom layer. This could have been avoided with a demo model that was suspended from a support structure or simply used a sacrificial raft during printing to prevent such a wide and thick model being printed directly on the build plate. It’s worth noting this was the only time I experienced this issue during this review. The rest of the parts I prepared using Chitubox for printing were easily removed and didn’t require excessive force to remove from the plate.
Preparing Files for Printing with Chitubox
(Image credit: Chitubox)The Elegoo Saturn uses Chitubox for slicing, preparing, and exporting files for 3D printing. Chitubox is a feature-rich program which reduces the need for secondary programs to generate supports, hollow models, or make other changes that would typically require a longer workflow. The general process for preparing a 3D model for resin 3D printing goes like this:
- Import 3D model
- Angle model for printing (avoiding wide per-layer cross-sections)
- Hollow model
- 4Add drain holes
- Generate support material
- Slicer
- Delete islands
- Export printable file
Chitubox makes this easy, as each step can be accomplished within the software without the need to export the file to various third-party softwares.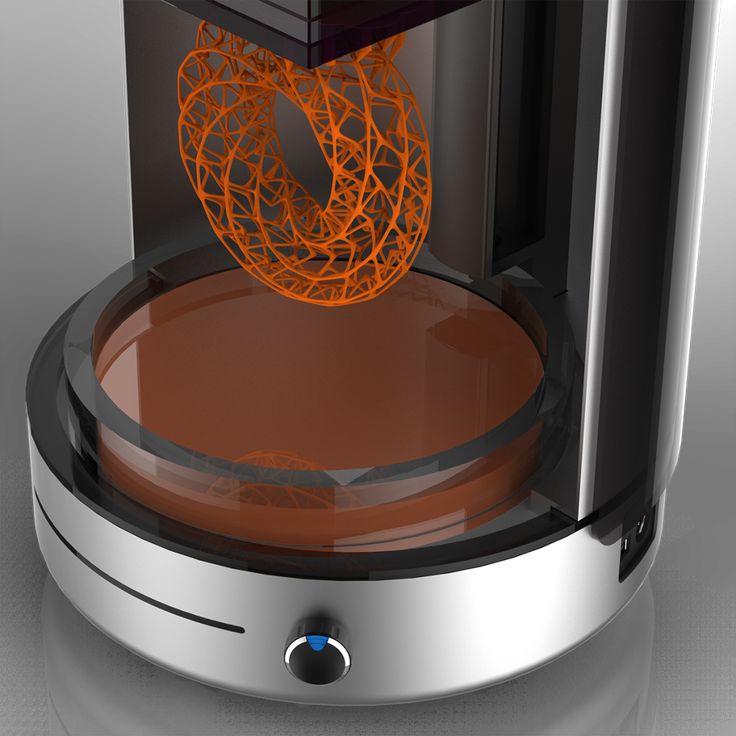 Chitubox also includes a built-in profile for the Elegoo Saturn which gives good quality results without any tweaking or modifications. I’ve been a fan of Chitubox since I started using it, and the ease-of-use and native support for the Saturn makes it a logical choice.
The profile for the Saturn that is included with Chitubox is what I would consider a good starting point for base settings. The Z resolution of .05mm is high enough to give a good quality print, but not so high as to cause an excessively long print time. The per-layer cure time of 2.5 seconds makes the Saturn a speedy printer when compared to machines with 9 second per-layer cure times like the Creality LD-002R.
(Image credit: Tom's Hardware)For a first test, I used the Ancient Statue model from Loot Studios and prepared it using the default settings in Chitubox without making any modifications. For resin, I used the Elegoo Water Washable Ceramic Grey , which has worked very well for me in the past on the Elegoo Mars 2 Pro. This model used about 28 grams of resin and printed out in just under 4 hours, which seems in line with what I would expect from a Mono LCD 3D printer.
Image 1 of 2
(Image credit: Tom's Hardware)(Image credit: Tom's Hardware)The Water Washable Ceramic Grey resin looked great after printing, and the support structure removal process is simplified by not requiring any isopropyl alcohol or other chemicals to remove the excess resin. A quick soak in a small tub of hot water dissolved the excess resin from the surface of the printer and also softened the support structure. After removing the support structure, I cured the model for a total of two minutes in 30 second increments to prevent it from warping.
(Image credit: Tom's Hardware)It’s worth taking a moment to reflect on the printing process so far before we really look at this model. The steps to create this model are all simple and straight-forward, and a beginner could easily follow along to calibrate the bed, fill the resin vat, and process the file for printing. The resulting print looks sharp and detailed, and even small details like the cracks in the stone of the statue resolve and don’t require any touch-up work. Putting aside the large format nature of the Elegoo Saturn, it’s easy to understand why this machine is in such demand; it’s easy to use, gives good quality results, and the native software doesn’t require tinkering or tweaking.
Print Size Comparison of the Elegoo Mars 2 Pro vs. Elegoo Saturn
Image 1 of 2
(Image credit: Tom's Hardware)(Image credit: Tom's Hardware)The Elegoo Saturn shares many design similarities with the Elegoo Mars 2 Pro, so it makes sense to compare the two 3D printers directly. The Saturn uses a higher resolution masking LCD, but the increased size of the LCD means the XY resolution (pixel size) is .05mm on both machines. This means a part printed on the Mars 2 Pro and Saturn, using the same settings, will result in two parts that should be indistinguishable from one another.
| Elegoo Mars 2 Pro | Elegoo Saturn | |
|---|---|---|
| Masking LCD Resolution | 1620 x 2560 | 3840 x 2400 |
| XY Resolution | . 05mm 05mm | .05mm |
| Build Dimensions | 5.08 x 3.15 x 6.3 inches | 7.55 x 4.72 x 7.87 inches |
| Build Volume | 100.81 cubic inches | 280.46 cubic inches |
| Printer Dimensions | 7.87 x 7.87 x 16.14 inches | 11.02 x 9.44 x 17.55 inches |
| Printer Volume | 999.66 cubic inches | 1825.70 cubic inches |
| Build / Footprint Ratio (higher is better) | 10.0% | 15.4% |
With a retail price of $500, the Saturn offers nearly 3 times the total build volume (280 cubic inches vs. 100 cubic inches) of the Mars 2 Pro, which retails for $330. If you’re interested in throughput and high-volume printing ability, the Saturn is able to produce a large batch of parts at the same resolution as Mars 2 Pro. However, if you’re looking for a higher resolution finished part and aren’t interested in a large build size, a 4K LCD printer like the Phrozen Sonic Mini 4K would be a better choice.
Image 1 of 2
(Image credit: Tom's Hardware)(Image credit: Tom's Hardware)Printing a Large Assembly on the Elegoo Saturn
(Image credit: Tom's Hardware)The large build volume and fast per-layer print time of the Elegoo Saturn make it ideal for printing models that would ordinarily be too large or time-consuming to print on a smaller MSLA resin printer like the Longer Orange 10. To test out the ability of the Saturn to print large models in multiple pieces simultaneously, I loaded up the Olympus Rider model from Loot Studios. This model of a winged Pegasus complete with rider armed with a spear prints in six individual pieces and a single large base.
(Image credit: Chitubox)Unfortunately, the auto-placement feature in Chitubox wasn’t able to automatically place all of these parts on the build platform in order to print them in a single piece. After manually rotating the parts myself, I was able to get everything except the base of the model onto a single tray. This would be an ambitious print under the best of circumstances, as it covered a large portion of the surface area of the build platform and would create a large amount of suction when moving the platform up and down. After slicing, Chitubox generated an estimated build time of 7 hours and 10 minutes as well as a material usage of 128 ml. I wasn’t sure if the Saturn could handle a print this ambitious, but I was eager to see if this hard-to-find machine could live up to its reputation.
Image 1 of 2
(Image credit: Tom's Hardware)(Image credit: Tom's Hardware)The Saturn printed every single part on the build platform without any defects, and I was genuinely surprised and impressed with how easily the Saturn could handle a large and complex build like this. The Elegoo Water Washable resin created a support structure that was easily removed and left minimal pockmarks on the finished model.
(Image credit: Tom's Hardware)After a rinse and cure in the Elegoo Mercury Plus Cure/Wash station, I laid out the parts and assembled the model using DAP RapidFuse CA glue, a favorite of mine for making strong bonds on resin prints like this one. The final result is a finely-detailed print that measures nine inches wide and six and a half inches tall, and it is one of the largest resin MSLA prints I’ve ever made. The 3D model to 3D print process was seamless and easy, and this model earned the Saturn a permanent place on my personal list of all-time favorite 3D printers.
Image 1 of 2
(Image credit: Tom's Hardware)(Image credit: Tom's Hardware)Printing Multiple Miniatures Simultaneously on the Elegoo Saturn
(Image credit: Tom's Hardware)One of the key abilities of a large build volume resin MSLA 3D printer like the Elegoo Saturn is the ability to print multiple parts simultaneously. The Saturn is a popular printer for users interested in tabletop gaming, and the large build volume is ideal for printing out multiple miniatures in a single print. Because the print speed is dictated by the number of layers and not the number of miniatures, printing a single miniature or a full build platform full of them takes the same amount of time.
As a test of the printer’s performance, I filled the build platform with some of the enemies from the Loot Studios Ghostly Odyssey release which features a mix of detailed creatures and human 32mm miniatures.
Image 1 of 2
(Image credit: Chitubox)(Image credit: Chitubox)After importing the models into Chitubox, I manually laid them out to prevent the support structure rafts from touching to reduce the overall total surface area of the bottom cross-section. Chitubox handled the slicing of this large tray without breaking a sweat, and I was easily able to fit a mix of models and bases for a total of 12 parts printing simultaneously. Chitubox gave an estimate of 3 hours and 51 minutes, which is an attractive print speed for such a large yield of parts.
The models have a support structure already generated, so after slicing all I had to do was detect and remove the islands (small, unconnected pixels that can cause floating bits of resin) and scroll through the layer view to check for any missing geometry.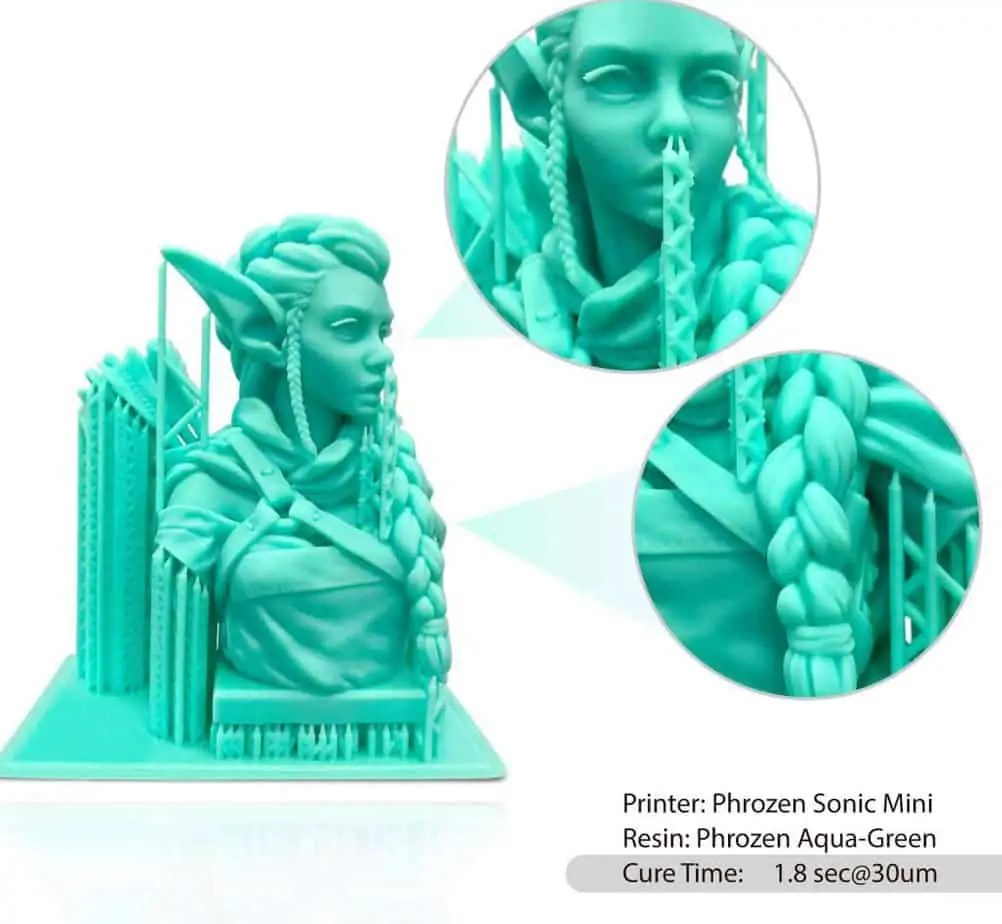 This is a quick and largely-automated process made possible by the Chitubox app, which I am grateful that Elegoo has internally decided to endorse as opposed to attempting to make their own slicer app which may lack some of this functionality.
As I expected, the print was completed without incident. Because of the large number of support structures, the first hour or so of the print is just hundreds of tiny cylinders (as seen in the Chitubox preview above). Every time the build platform lifted, it sounded like a Velcro strap being removed as each of the tiny support structures delaminated from the FEP sheet with a tiny pop sound. I couldn’t decide whether the sound was reassuring or not, but in the end, I’m grateful for each pop because it meant the printer was working correctly.
(Image credit: Tom's Hardware)The support structures were easy to remove after a quick soak in hot water, and the models all felt like they had been cured enough to be solid. In particular, the swords and wings on the smaller models were easy to free from the support structure, and I wasn’t concerned with them breaking off or shattering during the cleaning.
Image 1 of 2
(Image credit: Tom's Hardware)(Image credit: Tom's Hardware)Even on these 32mm miniatures, the details were crisp and features like the individual feathers on the harpy model resolved well and could be easily distinguished. If you’ve used a printer like the Anycubic Photon Mono or the Elegoo Mars Pro, this level of resolution (.05mm) is directly comparable with what you’re used to, so the big benefit of the Saturn is being able to increase your output without sacrificing quality.
The Elegoo Saturn is about as hard to find as a PlayStation 5 right now, and it tends to sell out immediately after each restock at Amazon and the Elegoo official store. After using it for this review, it’s clear to me why the printer is in such high demand: it’s fast, relatively inexpensive, and offers a build volume ideal for printing multiple parts simultaneously. The Saturn regularly sells for over $700 on second-hand sites like eBay, so finding one may prove to be a challenge for the foreseeable future.
I asked Elegoo to comment on the relative scarcity of the Saturn, and they indicated a combination of high demand and rigorous quality control were to blame for the shortages.
These two printers are too hot sale, so they always sold out. In fact, we have arranged more products for Amazon every week, but it sold out when available. In addition, our company will test the machine before selling, so it costs some time.
Elegoo
The high-yield nature of the Saturn makes it ideal for printing multiple miniatures simultaneously, so there’s no doubt this printer will be a hit among hobbyists who are interested in printing custom miniatures. The large build volume also offers the ability to print large parts in a single print, something that smaller machines like the Creality LD-002R aren’t able to accomplish.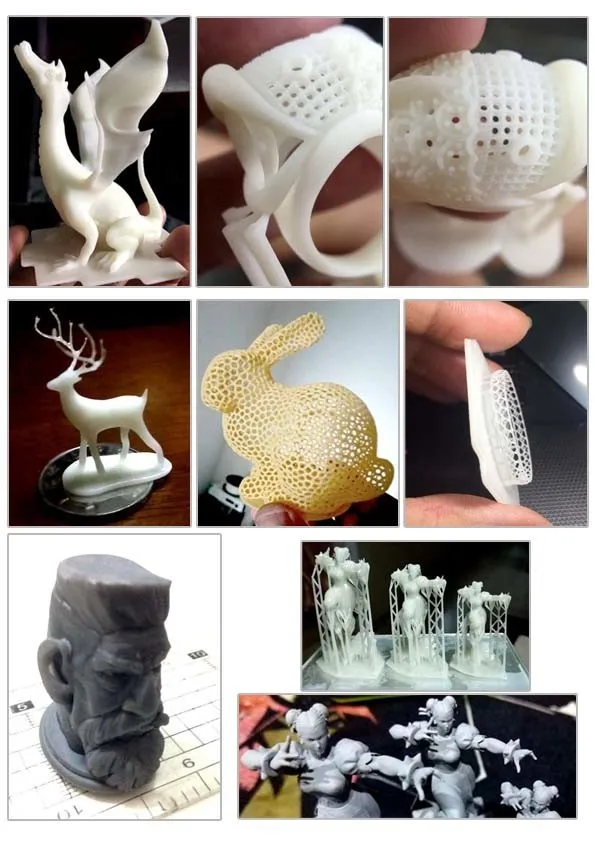
The overall trouble-free printing experience of the Saturn makes it appealing to beginners as well as more advanced users, but the $500 retail price (if you can even find it for that) might be a little high for a first printer. If you’re interested in a lower cost alternative, the Elegoo Mars Pro or the Anycubic Photon Mono both offer a similar printing experience at a lower price point.
(Image credit: Tom's Hardware)Andrew Sink first used a 3D printer in 2012, and has been enthusiastically involved in the 3D printing industry ever since. Having printed everything from a scan of his own brain to a peanut butter and jelly sandwich, he continues to dive ever more deeply into the endless applications of additive technology. He is always working on new experiments, designs, and reviews and sharing his results on Tom's Hardware, YouTube, and more.
the choice of a professional and a beginner / Selections of products from Aliexpress and not only / iXBT Live
So, I continue the topic of 3D printers, this time we will talk about budget and affordable photopolymer devices.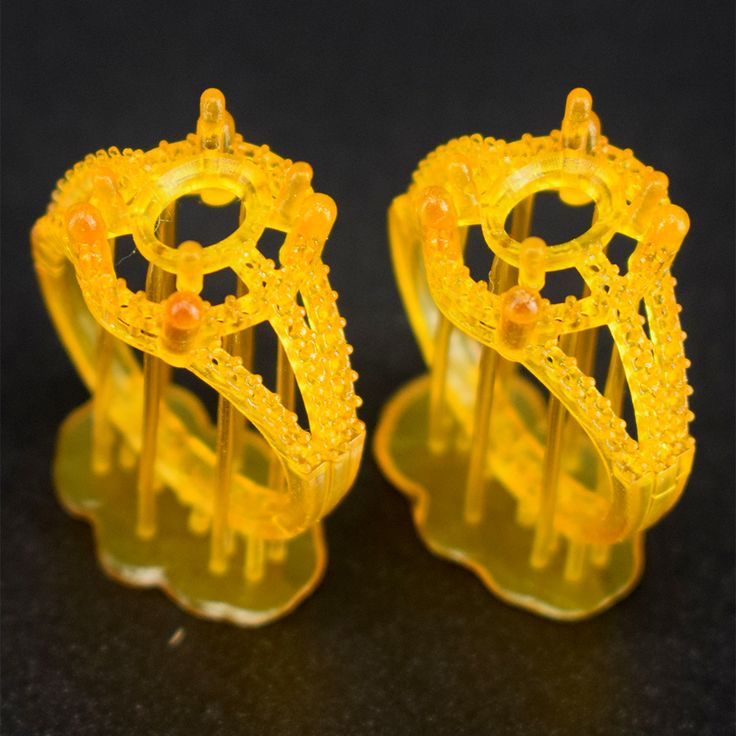 Photopolymer 3D printing is becoming cheaper and cheaper and is becoming available not only to professionals, but also to novice printers-makers-designers. The cost of a number of models has dropped significantly in recent years, especially budget startups in SLA printing, making affordable office models of compact printers such as Sparkmaker and Longer. Almost all models are available in a warehouse in the Moscow region, they are delivered quickly, it makes sense to add to the basket and compare, choose the best one for yourself in terms of cost and printing parameters.
Easy Printer for Beginners - Sparkmaker SLA
Sparkmaker SLA Printer
Sparkmaker SLA is the most affordable printer for beginners. One of the very first available models, the price is less than $200. At the moment, a number of upgrades are available, a lot of spare parts, ready-made models for printing. Print resolution: 845 x 480 dots, working area dimensions: 98 x 55 x 125 mm. Virtually no noise, works autonomously, height calibration is provided.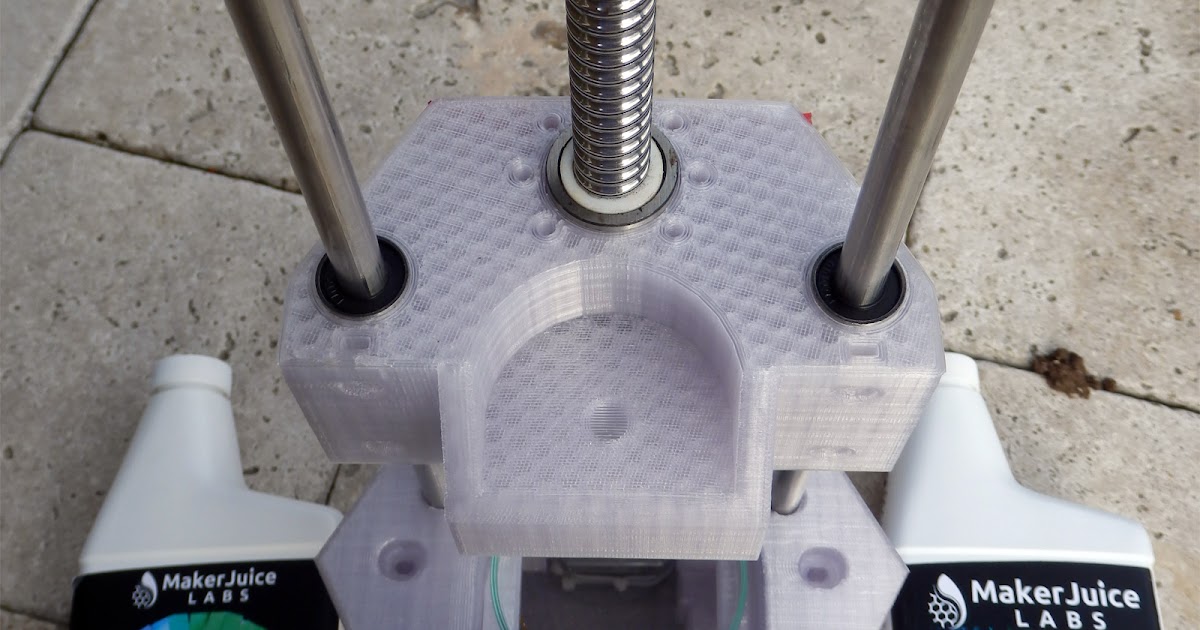 Printers and resin available in Moscow.
Professional photopolymer printer Longer ORANGE
Longer Orange 30 Longer Orange 10
One of the few 3D printers that I have appreciated. The Orange 10 and Orange 30 printers work literally out of the box and, unlike expensive models, are not capricious at all. It is easy to operate, if necessary, you can set the print height. A detailed review of the Longer Orange 30 model. All models and Longer Resin photopolymer are available in Moscow. Orange 10 has a print resolution: 854 x 480 dots, working area dimensions: 98 x 55 x 140 mm. Orange 30 has a print resolution: 2560 x 1440 dots, working area dimensions: 120 x 68 x 170 mm. Virtually no noise, works autonomously, height calibration is provided. Printers and resin available in Moscow.
Anycubic PHOTON excellent resin printer
Anycubic PHOTON Anycubic PHOTON-S
Anycubic's well-deserved large resin 3D printer. Two models are sold at the same time: PHOTON and PHOTON-S.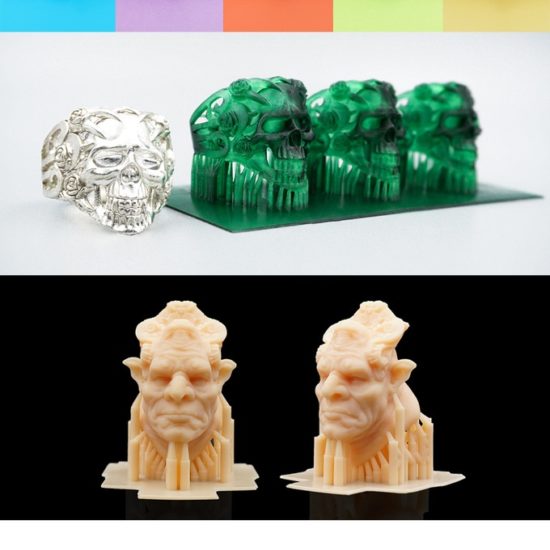 The latter is slightly more expensive, has design changes, but both print perfectly. Of the features, I will highlight the patented hinged mechanism for attaching the table, which facilitates alignment. Both PHOTON models have a print resolution: 2560 x 1440 dots, working area dimensions: 115 x 65 x 155 mm. All models are available in Moscow, at the same time do not forget to buy a fast Anycubic photopolymer - one of the cheapest.
Photopolymer printer Anet N4 LCD
3D printer Anet N4
An interesting model from Anet is a photopolymer printer of the “N4” model with a print resolution of 2560 x 1440 dots and a working area of 120 x 65 x 138 mm. But the price pleases - this is one of the most budget printers with 2K resolution. The minimum "pixel" size is 40 microns. Don't forget to bring Anet photopolymer resin for testing.
Interesting photopolymer 3D printer Nova
Printer Nova3D
An unusual 3D printer was released by Nova3D, a stylish office compact printer for photopolymer printing.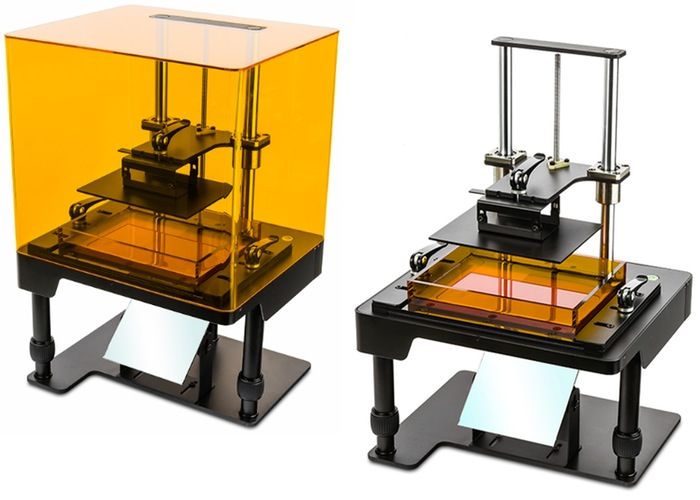 Of the features - an accurate T-rail rail was used, the table has an inclination adjustment for easy adjustment. The size of the print area is 130 x 70 x 150 mm. Print resolution 2K (2560 x 1440 dots). Attention: offline printing (from USB Drive) is provided, as well as connection via LAN and WiFi. Printers are available in Russia.
Wanhao Professional Printers
Wanhao Duplicator D11 CGR Wanhao Duplicator D8
One of the most thoughtful and best selling 3D printers from Wanhao. Two models of photopolymer printers are now available in the store - Duplicator D11 CGR (updated model) and Duplicator D8 (2019 model). Both models are deservedly considered the best for photopolymer printing, as for the new D8, I will single out a large print area (192 x 120 x 180 mm). Of the "chips" - WiFi connection.
Kelant 9 Large Resin 3D Printer0005
Kelant S400
Well, one of the inexpensive large-format office models is the Kelant S400. The size of the print area is 192 x 120 x 200 mm, the high power of the UV matrix (total power consumption is about 140 W) - all this makes it possible to print quickly and efficiently. The printer is available when ordering from Moscow, IML delivery (courier).
So, the selection includes the most popular, inexpensive and popular models of SLA printers. A number of models were left out of the article, I think I will make a continuation in the near future to cover everything, plus I will add photopolymer resin to the recommendations. By the way, most stores specializing in 3D printing, both on Aliexpress and locally, offer their own options for photopolymer, and there are inexpensive and good options. When choosing, consider the current store coupons, and also choose local delivery (from Russia / RU).
News
Publications
On March 2, 2022, the Steam online service stopped selling video games for users from Russia. Now it is impossible to buy games and in-game content with a Russian card. But I found...
Among the many models of e-readers, most of them have a screen diagonal of 6 or 8 inches. As practice shows, the first ones are very compact, but the screen size leaves much to be desired.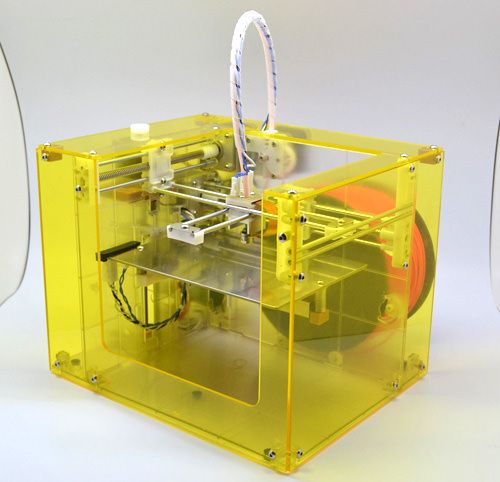 ...
...
Contents Beginning of cryptocurrency sanctions VIII package of EU sanctions against Russia What will happen to Binance and where to go? Are strikes possible, "from where they did not expect"? Can they block ...
This article will focus on the June novelty Genio Laser L700. This is a light version of the flagship Laser L800 with a light package and a cheaper battery (3200 instead of 5200 mAh). For...
Just after the announcement of the AK4493S, SMSL presented its new D-6 DAC based on two such converters. Then everyone was already a little tired of the abundance of decisions on ESS, so...
Have you ever noticed that the runway markings do not coincide with the usual car markings at all. On it, of course, there are parallel lines that ...
Photopolymer 3D printer
3D printers can be sorted not only by the printing technologies used, but also by the consumables used. In this section, we will look at devices that use photopolymer resins to build models.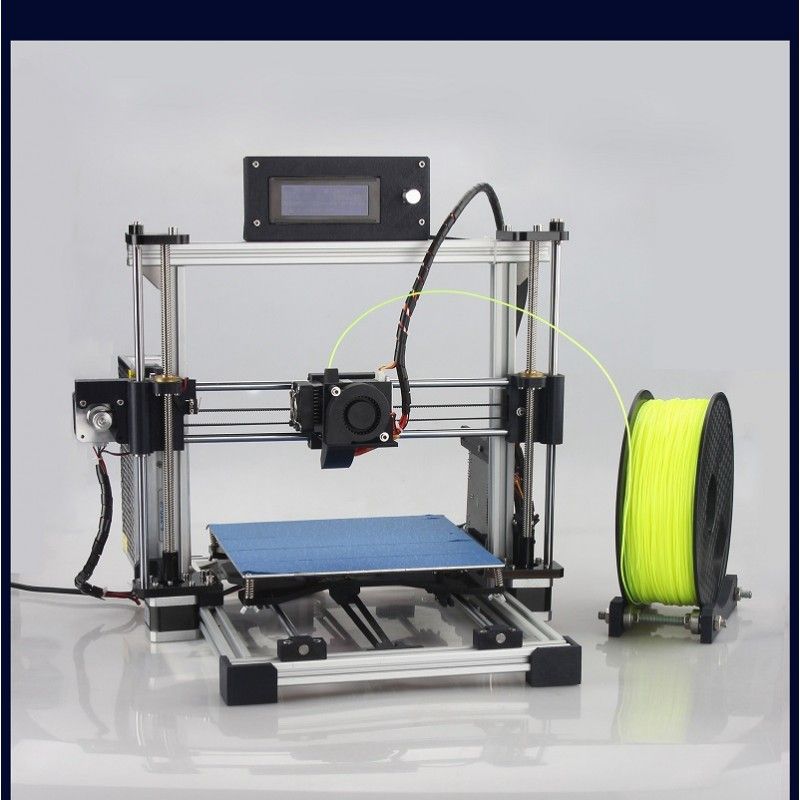
- 1 Consumables
- 2 Laser stereolithography (SLA)
- 3 Projector Stereolithography (DLP)
- 4 Multi-jet (MJM and PolyJet)
- 5 3D pens
- 6 Additional illumination
Consumables
Photopolymer resins are liquid polymers that harden when exposed to light. As a rule, such materials are sensitive to the ultraviolet range, which determines the design of photopolymer printers. One of the common design elements is a transparent colored cap or housing made of a material that filters ultraviolet radiation. This is done both to protect the user's eyes and to protect the supplies inside the printer from exposure to sunlight and background lighting.
Photopolymer resin loaded into Form 1 3D printer
The physical properties of resins after polymerization vary widely. Both rigid and flexible options are available, transparent and matte. A wide selection of colors is also available. Resin consistency and exposure times also vary, so a range of compatible media should be considered when choosing a printer.
The last aspect to consider when choosing a material is its toxicity. There are both quite toxic options and biologically safe ones.
The cost of consumables can be considered the Achilles' heel of photopolymer printing. The plants themselves are already reaching quite acceptable price levels, but it is still quite difficult to find inexpensive photopolymer resins. It is hoped that the proliferation of inexpensive photopolymer printers will lead to an increase in the production of consumables and lower prices.
Laser Stereolithography (SLA)
SLA Model
The firstborn of photopolymer printing and modern 3D printing in general. The technology was developed in 1984 by Charles Hall, who later founded 3D Systems.
SLA printers use laser emitters to cure the photopolymer supply.
A typical SLA printer consists of a consumable tray sitting under a build platform driven vertically by a raise/lower mechanism.
Alternatively, the cuvette itself can be driven - what matters is the relative movement of the platform and the container. Above the cuvette is a laser emitter and a mirror system for deflecting the laser beam.
During printing, the platform is immersed in the consumable for the thickness of one layer of the digital model.
Since photopolymer resins can be quite thick, a leveling mechanism is often used to speed up the process.
SLA printer operation scheme
After leveling, the process of illumination of the material begins. Illumination is produced by laser irradiation. Most photopolymer resins are designed to cure (polymerize) when exposed to ultraviolet light, which determines the choice of laser frequency. The movement of the beam along the X and Y axes is determined by the operation of the deflecting mirrors.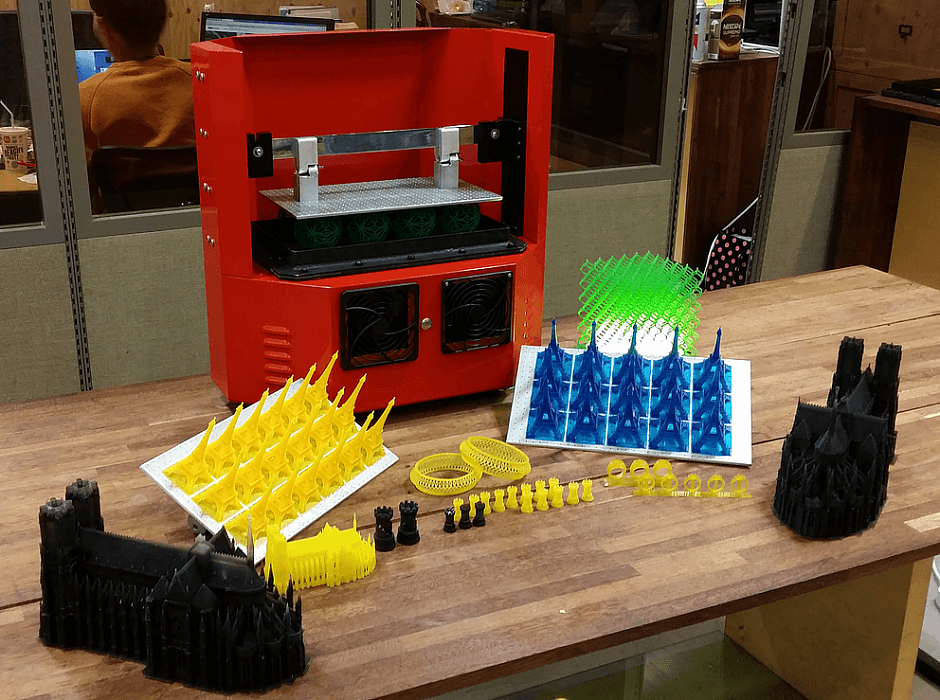
After the drawing of the layer is completed, the platform is immersed in the material for the thickness of one more layer, and the process is repeated with the drawing of the next layer of the digital model.
Model building animation
SLA printing takes quite a long time, and printers using this method tend to have relatively small build areas.
This is mainly due to the high cost of laser emitters: printing large objects with a single laser will take too much time, and installing additional emitters and mirrors will complicate the design, increase the dimensions of the installation and raise the price to an unacceptable level for most users.
Despite the success of this technology, projected stereolithography is considered to be a more promising, albeit very similar, method.
Projector Stereolithography (DLP)
Formlabs Form 1 Desktop DLP Printer
A close relative of laser stereolithography, this method uses digital LED projectors instead of laser machines with mirror deflection systems. The method became popular due to the development of technology for the production of low-cost high-resolution digital projectors by Texas Instruments.
Layers are illuminated using a digital projector that highlights the patterns of the entire layer, which distinguishes this method from SLA, where the “picture” emerges progressively using an ultraviolet laser.
A similar approach was previously used on SGC-type plants, but this technology used physical photomasks, making the process expensive, time consuming, slow and noisy.
FTI continues to exist, a development of SGC that is virtually indistinguishable from DLP printing, as it also uses digital LED projectors.
DLP printer design
Simultaneous illumination of an entire layer using projectors allows you to significantly speed up the printing process even compared to SLA printers that have a high scanning speed (ie beam movement).
In addition, these printers are less sensitive to rough physical impact due to the absence of delicate mirror systems.
The absence of mechanical mirror systems improves accuracy. Finally, the cost of projectors sets them apart from laser systems.
Projection size can be quite significant, reaching the average of popular FDM printers.
An interesting feature of DLP printers is the ability to "reverse" or "reverse" printing.
In this case, the projector is installed under a transparent (material choice for transparency in relation to ultraviolet light) cuvette, and the platform does not sink into the material, but gradually rises, pulling out the layers of exposed polymer.
This approach eliminates the alignment mechanism and achieves even higher Z resolution than SLA printers.
In addition, the size of models in height is not limited by the depth of the cuvette, which favorably affects the dimensions of the printer and the possibility of increasing the build area.
Multi-jet printing (MJM and PolyJet)
3D Systems ProJet 3500HDMax MJM printer
MJM and PolyJet technologies are almost indistinguishable from each other.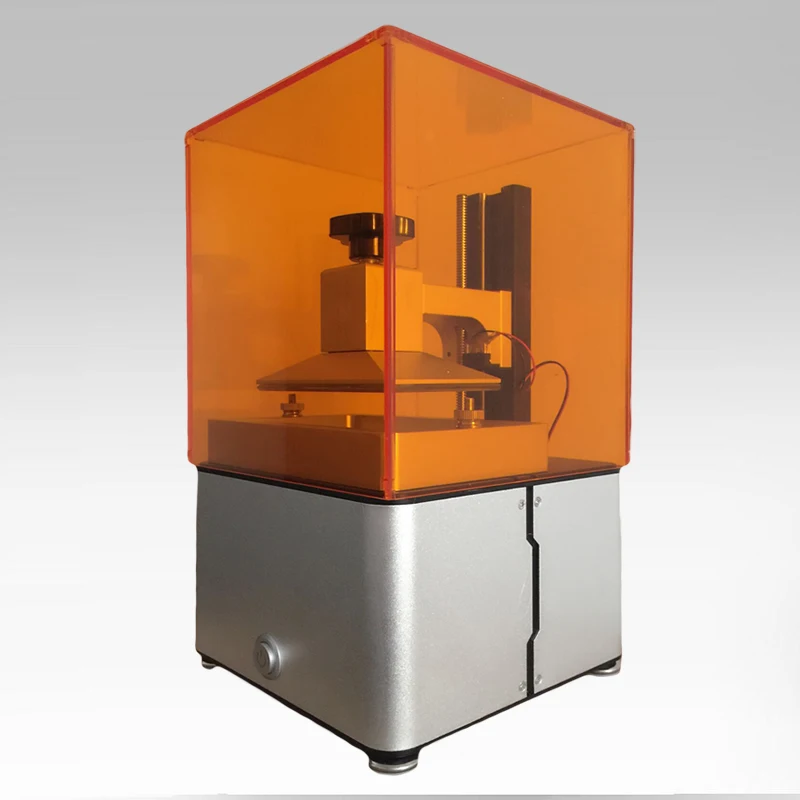 The name difference comes from the respective patents: Multi Jet Modeling is owned by 3D Systems, while PolyJet is owned by rival Stratasys.
The very principle of multi-jet polymer printing was developed by the Israeli company Objet, which eventually became a division of Stratasys.
Multi-jet printing technology combines features of 3D inkjet printing (3DP) and projection stereolithography (DLP).
How the MJM PolyJet printer works
Models are built by spraying photopolymer using linear arrays consisting of multiple nozzles.
The applied layer is immediately exposed to ultraviolet lamps - as a rule, two processes occur simultaneously.
By the time the array reaches the end of the build chamber, the previously deposited material is hard enough to print a new layer.
Composite models created on the ProJet 3500 DP dental printer
This approach allows to achieve very high printing speed, but is characterized by high design complexity, which negatively affects the cost of such installations and limits their distribution to professional use.
One of the advantages of MJM and PolyJet technologies is the ability to create composite structures from photopolymer resins with different physical characteristics.
It is thus possible to create models with easily removable supports, use several colors and use flexible and rigid materials in parallel within one model.
3D Pens
CreoPop 3D Resin 3D Pen
Recently, there has been a craze for hand-held printing devices called 3D pens. At the moment, there are three main options for such devices: drip-jet pens (DOD), called BioPen and used in the development of new methods for treating damaged tissues, FDM 3D pens, which are manual extruders (essentially similar to the usual hot glue guns, but using thermoplastics) and developments in 3D-drawing with photopolymer resins.
CreoPop 3D pen was the first "handheld resin printer". The design of this device is quite simple, because the most complex function, positioning, is performed by the user himself.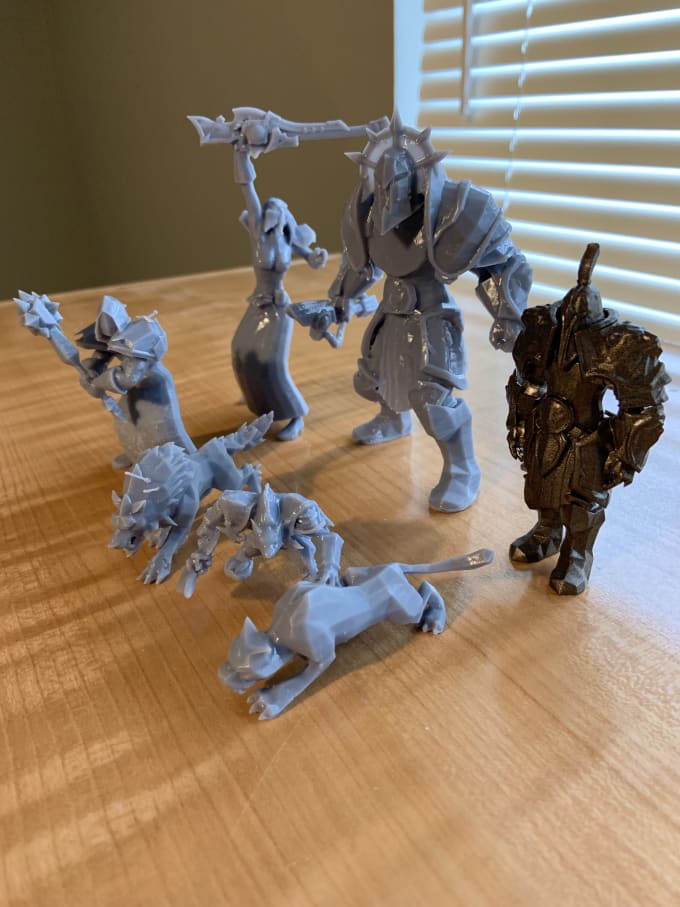 The pen only extrudes resin through the tip surrounded by LED emitters.
CreoPop 3D pen in action
This way the resin hardens immediately after application, allowing you to literally draw on air.
The advantage of such handles over FDM-analogues is the low operating temperature - there are no heating elements in the device. As a result, with such pens you can even draw on the skin.
In addition, a wide range of photopolymer resins with different physical properties can be used with such devices, which greatly expands the range of possible applications. At a minimum, this is a relatively inexpensive, but entertaining toy.
The only drawback is the relatively high cost of consumables, but such devices are unlikely to require large volumes of photopolymer resin for domestic use.
Additional Lighting
Final Lighting of Resin Models in a Homemade Camera
Full curing of models can take quite a long time, so models during SLA and DLP printing undergo only partial polymerization, sufficient to maintain the physical shape of the part.


