Corexy 3d printer build
Best CoreXY 3D Printers 2022
Best CoreXY 3D Printers 2022With so many 3d printer kits and open source build plans available, it can be a challenge to choose an option for your 3d printing needs. Every 3d printer design has different design goals for different needs as well as different compromises. Whether you’re building a new printer or just in need of a new 3d printer, there are many options to choose from with each of them having their own advantages and compromises.
In this article we review the corexy kinematics and discuss the advantages and disadvantages of each 3d printer option that uses the corexy motion system.
- DIY 3D Printer Kits
- Design and Build Plans
- Plug and Play- Ready to Print
- New Projects Soon To Be Released
- All Metal Parts
CoreXY Design Considerations
- Build Volume
- Print Quality
- Cost
- Print Speed
- Open Source
Build Volume
Build volume is an important consideration when deciding on a 3d printer. The size of the parts that you can print is usually one of the first limitations makers have.
BEST COREXY 3D PRINTERS 2022
SolidCore CoreXY Belt Path DiagramWhen you think about a good machine build you have to consider a few things. How developed is the design? Many common designs will have:
- Contributors designing fixes, mods and other spun off remixes.
- How many mods are there that could allow you to modify your printer for custom applications
- Is there a user group that you use as a resource to troubleshoot or upgrade and update your build. While there are many resources to draw upon User groups will keep you in the circle of news, updates and creative solutions.
see CoreXY Kinematics Explained
Researchgate Paper CoreXY vs Cartesian
BEST COREXY 3D PRINTERS 2022
- Jubilee
- SecKit
- Voron 3D Printer
- BLV MGN Cube
- Railcore
- HyperCube
- E3D ToolChanger
- VzBot
- CrazyCreatorCube
- HeVort DIY 3D Printer
- SolidCore CoreXY
BEST COREXY 3D PRINTERS 2022
Mechanical Arrangement
SolidCore CoreXY Mechanical ArrangementThe mechanical arrangement of components such as motor and idler mounts, linear rails, carriage and gantry may or may not allow for add-ons such as an enclosure or heated chamber.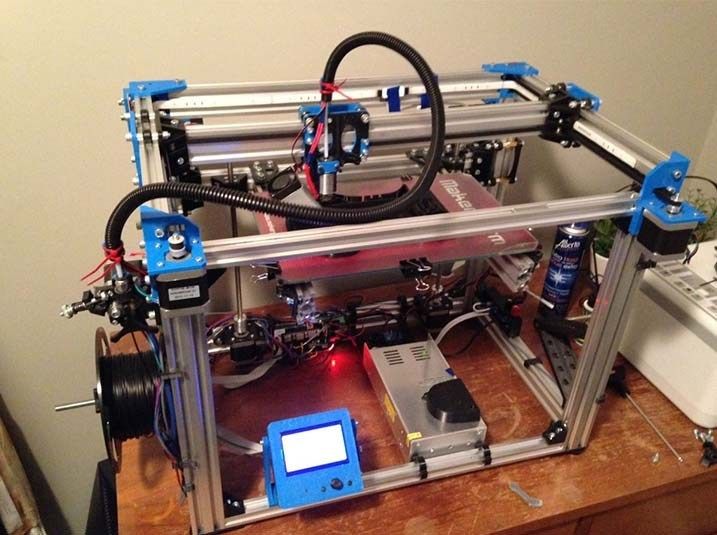 For example, motor and idler mounts placed on the inside corners of the frame gives the needed clearance to mount an enclosure. Each design has it’s own advantages and disadvantages. The configuration above eliminates any design constraints of scalability so the overall length and width of the 3d printer build can be completely scalable.
BEST COREXY 3D PRINTERS 2022
HeVort-Advanced DIY 3D Printer
HeVort-Advanced DIY 3D PrinterHeVort DIY 3D Printer: Non-Planer 3D Printing
The HeVort is a design that takes bed leveling to the next level. The Hevort 3-point bed tilt also changes the way parts need to be supported so for models with overhangs facing ‘uphill’ into the angle, supports aren’t needed. Although non-planar printing is not really widely implemented yet, there are new slicer post and processor components for printing at fixed angles other than 90. In the future, we may see more non-planar printing. This would allow you to print a part in vertical mode and add another component at an angle without need of support material or other mechanical aids.
With non-planar printing becoming more and more popular, it’s not surprising that slicer toolpaths are available. This means you can optimize how your layers are printed and reduce support needed thanks to angled orientation. One problem with 3D printing is that it can be difficult to support overhangs.
True 3-Point Bed Leveling
HeVort Z Axis DesignBEST COREXY 3D PRINTERS 2022
The HeVort uses a mechanical setup that consists of linear rails mounted to the bottom of the build plate along with 3-point bed leveling. It’s a concept called Non-planer 3d printing. Some refer to the setup as True Bed Leveling.
As slicer software advances, software will soon be able to generate optimized toolpaths for printing fixed angles. Combined with layer optimization, support material will no longer be needed.
HeVort 3D Printer Github
HeVort DIY 3D PrinterBEST COREXY 3D PRINTERS 2022
JUBILEE 3D PRINTER
Jubilee 3D Printer
Jubilee corexy is one of the most hackable 3d printers. If your looking for a highly customizable printer you’ll have to take a look at this. It’s a multi-tool motion platform that has made much progress in the last year. Out-of-the-box, Jubilee is configured for multimaterial 3D printing compatible with current E3D toolchanger parts. Jubilee is meant to be extended by the community through custom tools and applications.
- Modular Platform
- ToolChanger
- Customizable
- Awesome
The Jubilee toolchanging platform was quick to adopted as manufactures began to offer all-metal upgrades for the platform.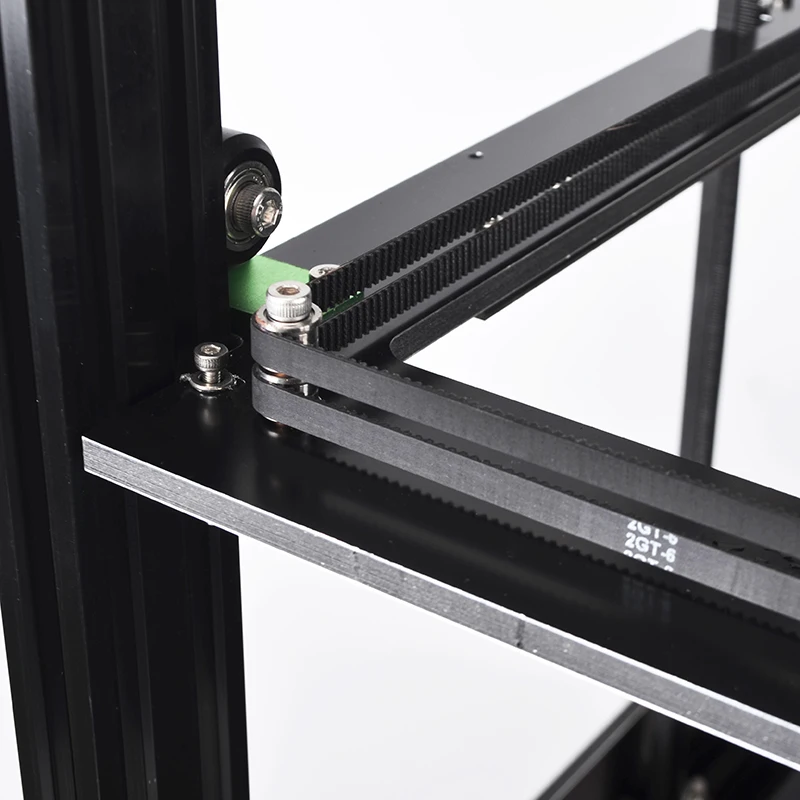 Mandala Rose Works offers a range of lightweight machined parts. The Tool changer platform has a big community on Discord.
- Jubilee GitHub Page
BEST COREXY 3D PRINTERS 2022
Rat-Rig V-Core 3
Rat-Rig V-Core 3The Ratrig V-Core 3 is a premium DIY kit for your CoreXY needs. The “Configurable” kit is simple for beginners but built with advanced users in mind. The Rat Rig V-Core is quickly getting traction with a growing community that’s pushing the limits of corexy scalability as many are diving into 3d printer builds as big as 500mm x 500mm x 500mm.
Rat-Rig V-Core 3The RatRig “Configurable kit” is as complete as possible with many choices of components, including aluminum frames, precision rails, linear bearings, stepper motors & belts. This complete and customizable DIY kit can be as simple or complex as you’d like it to be, with many choices of bits that will go into the printer when assembling your CoreXY 3D Printer. See Rat Rig V-Core 3
Related Content
Kinematic Bed Mounting
Kinematic Bed Setup
CoreXY
CoreXY Parts
Belt Routing
Discord Channel
BEST COREXY 3D PRINTERS 2022
CrazyCreatorCube
The CrazyCreatorCube is a new project that is the alpha state as it launches it’s new open source design.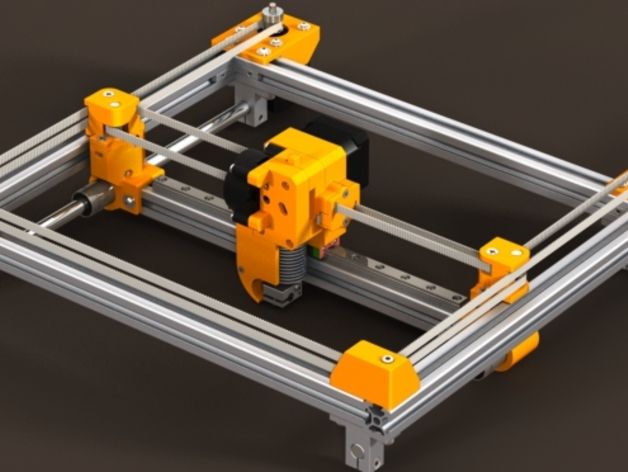 The tool-changing 3D printer can utilize up to four extruders at a time. The tool holder uses neodymium magnets to mount the tools into the tool stations with a mechanical, latching mechanism. The central fan unit and air duct is optimized air flow. The CrazyCreatorCube has a well designed carriage well suited for belt tensioning.
- Build volume: 350x330x400mm
- ToolChanger Mechanism: Magnetic
- Open-Source
- Electronics: Duet2 with Duex5 Expansion Board
See CrazyCreatorCube Website
CrazyCreatorCube Toolchanger
The CrazyCreatorCube Toolchanger was designed by Hendrik and Andy to develop a stable and efficient tool changer 3d printer. The main focus of this tool-changer project is to make a 3d printer tool changer with great 3d printing quality, easy maintenance, and cost efficiency.
E3D Tool Plate Compatible
The tool changinging 3d printer is 100% compatible with E3D tools and 99% of the CrazyCreatorCube parts can be found in stores or ordered online. Another goal of the 3d printer project is that the printer build should be possible for anyone with basic technical knowledge to build and assemble the CrazyCreatorCube.
Kinematic Bed System
The 350mm x 330mm bed or build plate uses a kinematic system to connect to the bed supports and the heated bed is moved along three axes and completely auto leveled.
Magnetic Tool-Changer
The magnetic ToolChanger uses a remote system which means the motor that rotates the safety bolt and holds the tool on the tool changer, sits on the frame and does not increase the weight of the print head.
Print-Head / Extruder
While a remote extruder is used in the classic CrazyCreatorCube version, a normal Direct drive extruder or Bowden extruder can also be used.
BEST COREXY 3D PRINTERS 2022
Voron 3D PrinterBEST COREXY 3D PRINTERS 2022
VORON 2.4
The Voron V2 by Voron Design is a well engineered printer with a very promising future. It has a huge community that loves their DIY builds and is very well documented.
- Build volume: Scalable
- Extruder: AfterBurner
- Enclosure: Open or Enclosed
- Moving Gantry
- Electronics: Duet3D / Klipper
The Voron V2.4 is a light weight and compact corexy motion system with a superior design. The printer has a moving gantry / fixed bed that utilizes four point z-axis belts which is very unique for a corexy. The design is easily enclosed and has a lighter moving mass which sets it up for high speed prints with beautiful parts. While the V2 is a great machine it’s probably not the best for first time builders but does have a build guide that some say is far superior.
Although the four Z-axis motors implementation and expansion board may be challenging for some there are many more builds much simpler to choose from that will produce great results. The Voron V2 has precision linear rails for the X- and Y-axes and dual-drive extruder. The design uses four independent z-axis stepper motors that are belt driven which eliminates z-wobble that most machines experience. The light-weight moving gantry design increases print quality with it’s belt driven system which makes this corexy 3d printer design a community favorite.
Voron Review
Voron 2.4 ReviewVoron 2.4 Specs
- Light-Weight Carriage Design
- High speed prints with fewer defects
- Better at printing tall thin things
- Great community support on Reddit
- Less moving mass of the extruder carriage
Voron 2.4 Build Volume
Voron 2.4 3d printer kits are available in three sizes:
- 250mm x 250mm x 250mm
- 300mm x 300mm x 300mm
- 350mm x 350mm x 350mm
BEST COREXY 3D PRINTERS 2022
The advantage the Voron’s fixed bed and belted z-axis that the moving mass isn’t at the top of the printer. While most 3d printers print objects at the top of the machine, the Voron’s fixed bed–Moving gantry travels down to the bed. This mechanical arrangement keeps the moving mass towards the center of the machine This configuration makes the design more stable allowing for faster movements and 3d printing.
Voron Tool Changer
Voron Tool ChangerVoron 2.4 Price
Voron 2.4 Price $1,000.00
Depending on build area and other options such as hotend and extruder, the Voron 2.4 is approximately $1,000.
Voron Website learn more
BEST COREXY 3D PRINTERS 2022
Triple Z
SolidCore CoreXY Triple ZThe advantage of triple z stepper motors allows an additional degree of freedom and bed leveling. Thermal expansion from the aluminum build plate can cause issues. The Hevort and Jubilee uses small springs on to fix the bed. The Maxwell coupling solution applied to the Z-axis by adding a third axis and mounting it with a Maxwell coupling. The Z-axis leveling algorithm is implemented by the RepRap firmware on a Duet Wifi or Duet 3 Mainboard.
See SolidCore CoreXY Triple Z
BEST COREXY 3D PRINTERS 2022
Blackbox Multi-Tool 3D Printer Toolchanger PlatformWhile there are many open source 3d printer designs available, most of them are limited to specific 3d printable plastics. The Blackbox was designed and created by Marc Schömann of Layershift.xyz, who has a different approach to 3d printing with multi-materials. The Blackbox is designed to be a flexible platform for multitool fabrication. The multitool / multimaterial manufacturing platform for printing highly exotic materials and integrated assemblies.
Water Cooled-Toolchanger
The Blackbox was designed to produce high-end parts that challenge most 3d printers. The Blackbox 3D printer is a fully open source design that uses water-cooled printheads and a direct drive toolchanging system. The water-cooled setup offers more precise thermal control that’s more reliable and consistent. These factors are the secret ingredient to high quality 3D printing.
Most common 3d printers are limited to printing single materials and colors. The blackbox has a different design goal. The Blackbox design aims to provide a machine that can produce high-end parts from a range of many different materials.
Blackbox Specs
- Build Volume: 300 mm x 300 mm x 275 mm
- Full enclosure
- Direct drive toolchanger
- Water-cooled toolheads
- Belted Z-axis
- Automated leveling and calibration
- Price: $2,900
BEST COREXY 3D PRINTERS 2022
Belt Drive Z-Axis
The belt-driven Z-axis has a 1:10 pulley reduction that allows the bed and layer height to precise movement The frame is made from 4040 t-slot profiles and can print up to five materials at a time with the toolchanger.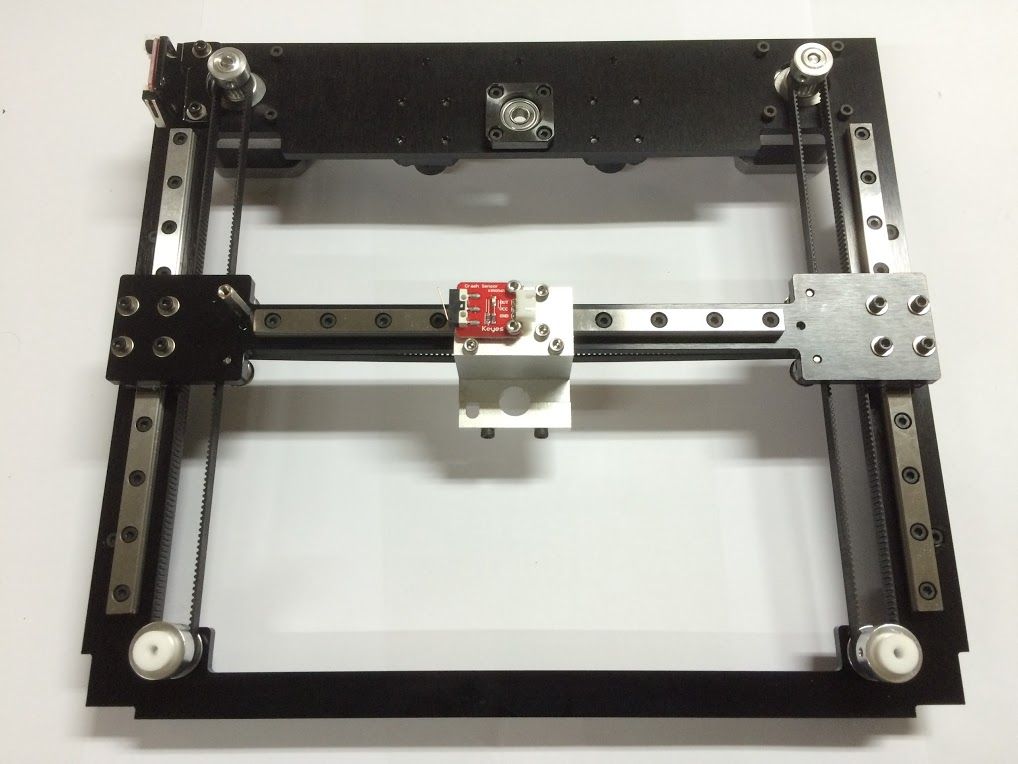
Water-Cooled Tool Heads
The water-cooled tool heads are exchangeable cooled passively by the tool bank or the x-axis. While the tools use Bowden tube setup, the X-Axis carries one direct driven Extruder for flexible materials and uses a laser to keep the print area warm. The XYZ-axis all use linear rails and the X-Axis uses a lightweight carbon support.
BEST COREXY 3D PRINTERS 2022
BlackBox 3D PrinterThe goal is to print complex composite parts with multiple materials. The idea is that the tools are cooled on the tool bank while they are inactive and on the X-axis after they are picked up by it. This eliminates the need for cooling hoses or fans which make the design more compact and lightweight.
The multi-material 3d printing platform is pushing the boundaries of 3d printing and has plans to open the door to multitool fabrication with integrated assemblies.
BlackBox Specs
- Open-Source
- 300mm x 300mm x 240mm Build Area
Interchangeable Printheads
BlackBox Price
The Blackbox 3d printer can be built for approximately $2,900.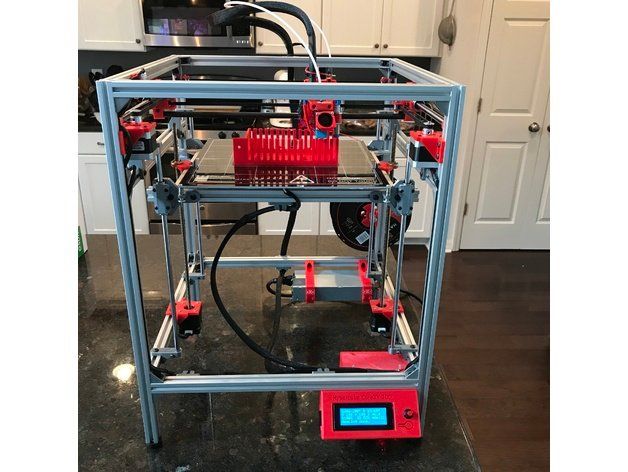 00
00
BlackBox 3D Printer Price
$2,900.00
See BlackBox 3D Printer
BEST COREXY 3D PRINTERS 2022
RailCore II 3D Printer
Railcore 3D PrinterThe Railcore 3D Printer by J. Steve White & Tony Akens of RailCore Labs is core xy design has some kick. Although this a new open source build has a strong and active community. The RailCore Printer is a customizable corexy design that successfully implements 3 point bed leveling. Designed to use X, Y and Z-axis linear rails, the RailCore also is available with machined aluminum parts. Three point bed leveling with automatic bed tramming using the Duet3d electronics allows for a perfect first layer.
BEST COREXY 3D PRINTERS 2022
RailCore Labs
Railcore 3D Printer at Midwest RepRap DIY 3D Printer FestivalWe first discovered RailCore Labs and the open-source corexy design at MRRF 2019. The Railcore 3d printer was designed while Tony Akens and J. Steve White were discussing an idea of a 3d printer with linear rails on the x,y and z-axis on Reprap IRC.
The Railcore uses 15mm frame extrusions and M3 hardware that brings down the cost. 15mm Extrusions use m3 hardware is much cheaper compared to m4 or m5 hardware. Although 15mm extrusions and m3 hardware may be less rigid the printer gains it’s rigidity from the reinforcement of the side panels. Many more design decisions were made to make the printer build as space efficient as possible while maximizing build volume. The printer build gains it’s rigidity
It is a well thought out design that has verity of CNC machined upgrades to pimp your printer. The prints that are made from the machine are absolutely beautiful. This 3d printer build is most commonly found using the Duet Wifi to power the system. The print quality is spectacular with it’s high precision 0.9 degree steppers. The pros of the Railcore corexy is:
- Linear Rails on X,Y and Z-axis
- Enclosure
- 15mm extrusions to reduce the price of BOM
- All-metal parts
- Space & Cost efficient
RailCore II 300ZL
The original Railcore printer is no longer available due to the updated 300 ZL and ZLT version. But here’s the details:
- Linear Rails XYZ Axis
- 300mm x 300mm x 330mm Build Area
- ZLT is 300m x 300mm x 600mm Build Area
- Auto Leveling
- Hotend: E3D V6 or Mosquito
- 0.9 Degree Steppers
- Hardware: 3D Printed Parts or Machined Aluminum Upgrades
BEST COREXY 3D PRINTERS 2022
RailCore Upgrades
The Railcore ecosystem consists of all aluminum machined parts. 713Maker and Mandala Rose Works manufactures a variety of CNC machined aluminum parts such as motor and idler mounts and aluminum heat bed plates. Upgrades such as a kinematic bed mount is also available. The upgrade kit gives you the option to mount the z-yoke and bed to a kinematic coupled system.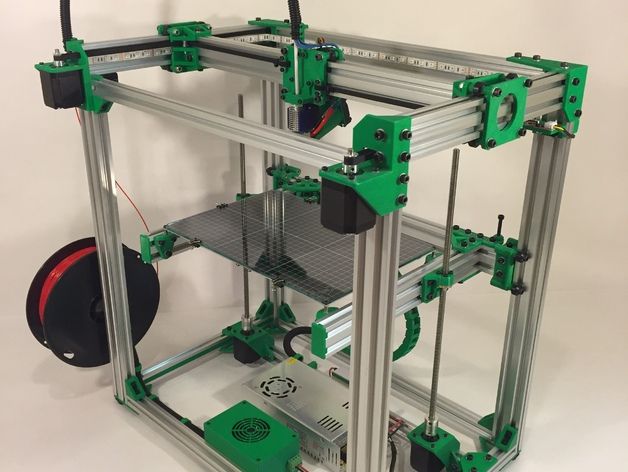 This setup is based on the Kelvin style kinematics and is better suited to handle the thermal expansion of your bed as it heats up.
- 713Maker
- Mandala Rose Works
The Railcore 3d printer’s ecosystem of parts also include a variety of CNC machined aluminum parts that can be found by 713Maker and Mandala Rose Works that can make your printer look like a hotrod.
RailCore Tool Changer
While a toolchanger option isn’t currently available you’ll probably see a design oneday. Tony Akens explained in a fb post that the Railcore wasn’t designed for a toolchanger. RailCore Labs plans to retro-fit the E3D Tool Plates but it’s not built for toolchanging. Tony goes on to suggest that one would have to modify the printer and change how the RailCore works. He explains that bolting on components is easy by design but may complicate the RailCore bed leveling. He suggests that the Jubilee is somewhere in between the RailCore and the E3D ASMBL but has future plans to work with Joshua Vasquez the creator of the Jubilee. 3 build volume
BEST COREXY 3D PRINTERS 2022
E3D TOOLCHANGERE3D ToolchangerIf you havn’t seen the E3D ToolChanger motion system , you’re missing out. The open source design is most likely the future of 3d printing… or at least the begining of true desktop manufacturing. While the motion system is somewhat in beta testing phase the new platform has a lot to promise and has inspired a wave of new printers exploring different tool changing methods.
E3D Toolchanger Specs
- E3D Toolchanger Price $2800
- Build Volume 200mm x 300mm x 300mm
- Extruder Bowden
- Electronics Board Duet 3
BEST COREXY 3D PRINTERS 2022
CROXY CROSSED GANTRY 3D PRINTER
Designed and built by Wes Cherry
CroXY is a fully enclosed 3D Quadrap printer with a crossed linear rail gantry design, direct drive extruder and a kinematically mounted bed that moves in Z with three ball screws. Although this printer isn’t exactly a corexy it does utilize the same kinematics.
BEST COREXY 3D PRINTERS 2022
WHAT IS A QUADRAP MOTION SYSTEM?
The Quadrap mechanism is similar to a corexy but one or two extra stepper motors. It’s a cross between a core-xy and the ultimaker’s XY mechanical arrangement.
- X- Axis
- Y-Axis
- X2-Axis or Y2-Axis / Both X2 abd Y2-Axis
The crossed members at the print head carriage allow low moving masses because none of the motors (X,Y or E) are moving with the extruder carriage.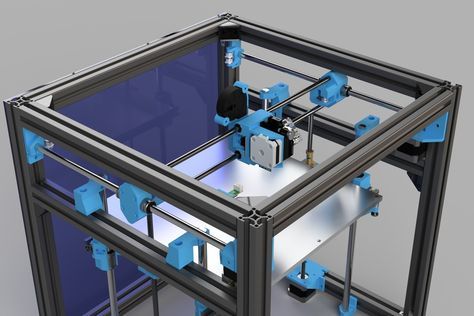 The corexy’s belt stretch issue is minimized when scaled up but resistance may increase.
- Minimized belt length
- Increased Resistance
learn more
BEST COREXY 3D PRINTERS 2022
RepRap 3.0
The CoreXY motion system is a good solution if you’re looking to print faster. The 3d printer kinematics has become more popular in the last couple of years as users and DIY builders agree on an increase in print quality. The motion system is more lightweight compared to other 3d printer kinematics such as cartesian 3d printer kinematics. A light-weight gantry is needed to increase print speed without affecting print quality. This is all important when attempting to get a smooth finish on 3d printed parts.
BEST COREXY 3D PRINTERS 2022
3D Distributed Folder
CoreXY Folder
All Metal Part Store
Buy 3D Printer Parts
- Triple Z- Firmware & Motor Movement
- Triple Z-Axis-Belted Z-Motors
- TripleZ Setup
- Dynamic Acceleration Control
- Kinematic Design Principles
- Kinematic Bed Mounting
- Belted Z-Axis Drive
- New Kinematic Bed Mount Design-SolidCore CoreXY 3D Printer
- SolidCore Kinematic Coupling Bed Mount
- Z-Wobble
- Large CoreXY Design – Hardware and Firmware Changes To Reduce Ringing
- X-Carriage
- Y-Carriage
- Is CoreXY better?
- What You Need to Know Before Buying a 3D Printer
- RepRap 3.
 0
0 - Belt Tensioning
BEST COREXY 3D PRINTERS 2022
Complete CoreXY Kits vs Self-Sourced BOM Part Lists
While many designs are available in complete corexy kits, some open source 3d printer designs are currently still self-sourced, meaning that builders will have to source individual 3d printer parts and get it all together which results in complexity as some parts may take long to receive and increases the chance that one might order the wrong part number. With that said, is the price still about the same depending on extruder options print size.
BEST COREXY 3D PRINTERS 2022
Exoslide Moving Gantry
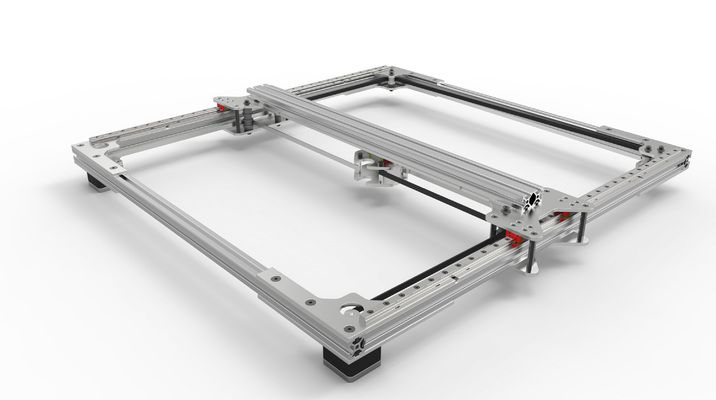
Exoslide CoreXY 3D Printer at MidWest RepRap FestivalThe Exoslide is a scalable core-xy design influenced by the Voron II. It has a moving gantry and custom injection molded carriages with 10mm bearings running along the extrusions. The modular linear carriage slides have an adjustable bearing preload and M4 nuts embedded throughout each face for mounting various components and bracketry.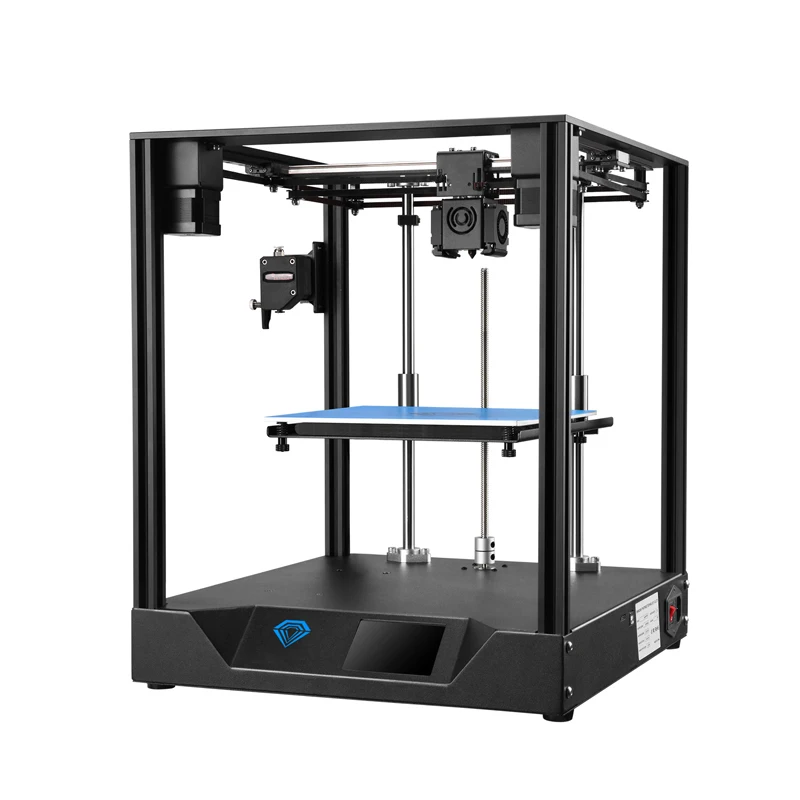
BEST COREXY 3D PRINTERS 2022
As more 3d printer mods and upgrades are increasingly announced in community groups and forums newly published designs that tend to be open-source and contributors announce their next printer designs such as anti-wobble lead screw nuts and belted z-axis drive mechanisms.
While some corexy designs are familiar to others it’s a great environment for the community as design options and functionality evolves. There’s more opportunity for designers and contributors to make their own mark or be the first to design their own unique versions of an idea from one printer applied to a newer 3d printer platform.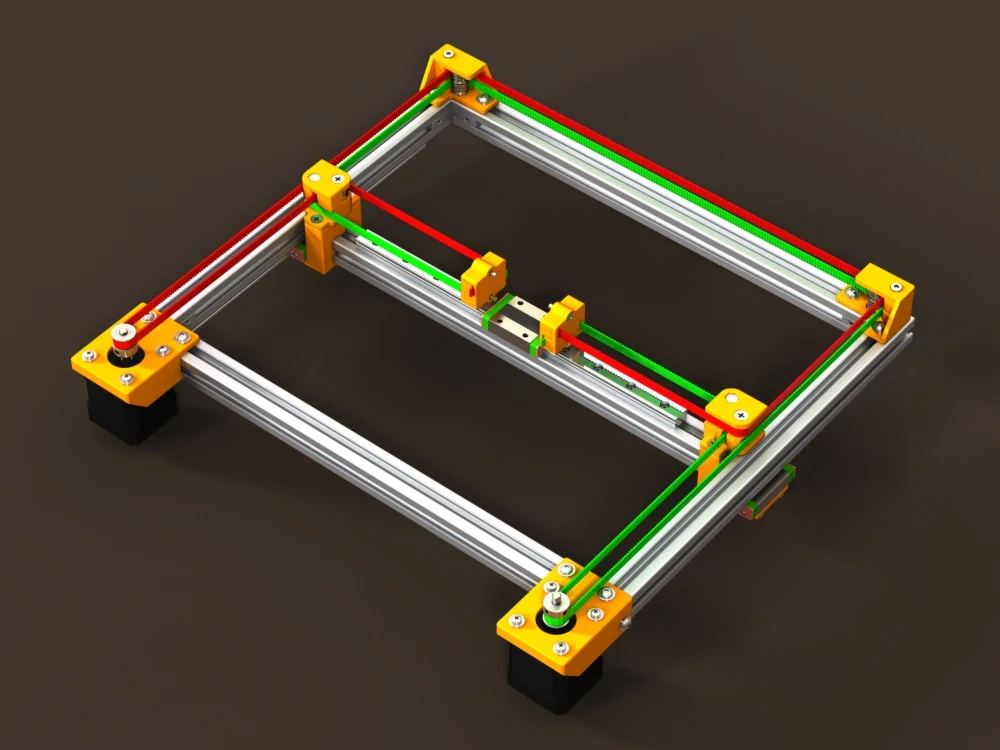 Design concepts and unique features inspire the development of open-source 3d printers.
BEST COREXY 3D PRINTERS 2022
Cantilever Bed vs 3-point Bed Leveling
While many of the original corexy printers used cantilever beds, carriage wheels or smooth rod the newer and better corexy published designs are now using linear rails and have adopted more functional mechanisms such as belted z-axis, toolchangers and non-planar 3d printing concepts such as 3-point bed leveling or triple z with kinematic coupling bed mounts for tilting print beds for perfect bed leveling.
Although the simplicity of older corexy reprap printers were less technical and easier for newbies, the increasing number of options and features can easily be adopted from corexy design platform to another, which has exponentially inspired contributors as they work to identify or fix potential issues or increase overall print volume.
3D printer designs such as the HyperCube use a cantilevered bed lifting mechanism which is fine for what is now considered a smaller print bed size. For example, most earlier designs have 200mm print beds but newer 3d printer options are available with larger bed sizes as many 3d printer platforms average around 300mm x 300mm beds and increasingly push the limits of build volume to 500mm if not larger.
Heated Bed- DC vs Mains Powered Beds
While older corexy designs used DC-powered heat beds newer machine platforms are implementing mains-powered heat beds which allow users heat build plates much faster, however there’s nothing to stop you using a DC bed on a Voron or a mains bed on a HyperCube. It’s just wiring.
Build Volume- Scalability vs Reliability
While some designs scale up well beyond 300mm and other print volume sizes most 3d printer designs are offered in standard bed size options many people have moved away from the common 200mm bed size. Although, a smaller bed size reduces issues such as bed leveling and simplifies printer movement of a machine’s motion system movement.
BEST COREXY 3D PRINTERS 2022
Dual Z vs Triple Z
While earlier corexy 3d printers used the more common cantilever bed lifting mechanism which utilized a single stepper motor 3d printer with a dual Z axis lead screw setup mechanical layout which also worked well. However, there are plenty of Hypercube and D-Bot mods that implement dual-Z or linear rails or other components that increase accuracy and repeatability.
BEST COREXY 3D PRINTERS 2022
Thingiverse vs Github
There may be more mods available for the HyperCube and D-Bot style designs, but staying current with mods and other design alterations can be messy as previous users downloaded or contributed on platforms such as Thingiverse which is increasingly becoming more and more outdated due to inadequate search results and depreciating usability. Designers and contributors have migrated to platforms such as Github to download or share files which results in a much more organized approach that keeps the community up-to-date with design revisions.
Rods vs Linear Rails
Many of the earlier 3d printers were designed around cheaper mechanical parts such as carbon rods or stainless steel smooth rods which were once commonly used and recommended. As the cost of linear rails become cheaper and cheaper due to the economy of scale and increasing number of buyers and large volume production of manufactures and suppliers.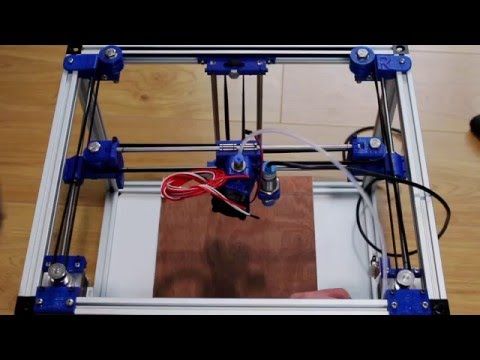 8mm steel rods and linear bearings are slowly being somewhat phased out but still used on cheap kits found on Aliexpress.
8-Bit vs 32-Bit Electronics
The 8-bit Marlin based boards such as the classic Ramps 1.4 have also been abandoned for more functional and customizable control boards and firmware that use 32-bit electronics with 24V Power Supplies and better stepper motor drivers like the Duet3d board. These control boards offer better documentation, support and large communities of technical users that share methods and firmware code to configure almost any 3d printer you could possibly design.
Customizability vs Availability
If you are looking for a cheap way to get started, building open source kits like the HyperCube and D-Bot is a good way to get started as you mod and upgrade your printer to a more functional machine. It’s much cheaper to build as you recycle or reuse parts like linear rods, lead screws and bearingsThe availability and access to mods miscellaneous parts with multiple design iterations.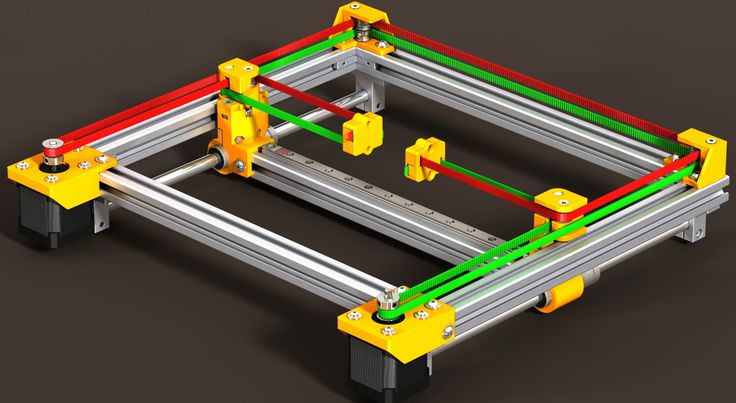
Building a HyperCube or HEVO (Hypercube Evolution) can be quickly built which will get you started 3d printing as quick as a week spending on experience and mechanical knowledge some 3d printer designs can take months with the large number of parts and unfamiliar mechanical parts which may need more skill to assemble correctly. For example, corexy design options such as the Voron 3d printer can be a steep learning curve as one adventures off assembling the large number of 3d printed parts that may or may not fit together depending on how components were printed or choice of filament.
BEST COREXY 3D PRINTERS 2022
SolidCore CoreXY GantryWe designed our own corexy 3d printer called the SolidCore CoreXY. Our long term goal is to is to build a modular platform, not just a printer. Think of it as an ecosystem of parts that can be arranged in different configurations and adapted for unique applications.
See SolidCore BOM
BEST COREXY 3D PRINTERS 2022
The SolidCore is designed to be a highspeed workhorse for repeated use. All-metal-parts and components will give us the durability and repeatability needed. But we want people to have the option to use 3d printed parts so they can upgrade later on. Solid all metal parts are durable and less likely to deflect at high printing speeds. The aluminum components are also less likely to breakdown over time when introduced to the forces and heat from repeated use.
BEST COREXY 3D PRINTERS 2022
RatRig vs Voron
The Voron 2.4 is a light-weight design, but complex design that’s well suited for higher print speeds. The corexy platform is well engineered but more complicated to build compared to other corexy 3d printer designs. New users and builders may struggle building this machine with the large number of parts and the four independent belt driven z-axis motor drive.
The Rat-Rig V-Core 3 is a much simpler core xy design with less parts and a straight forward build guide. While both the Voron 2. 4 and V-Core-3 have linear rails which new users maybe challenged to properly align the linear rails.
BEST COREXY 3D PRINTERS 2022
Hevort vs Rat Rig
The HeVort printer is currently available by self-sourcing parts from the BOM parts list. Many builders would prefer to buy a complete kit with all the components instead of sourcing everything on my own.
SecKit VS Voron
Recommended Print Settings PLA PLA / Polylactic acid is a biodegradable thermoplastic most commonly used in most FDM 3d printers. Easy to Print Durable and Relatively Strong Non-Toxic 3d printed parts from PLA are the most common and widely used in prototyping and product development or proof of concept parts. Parts printed from PLA are
The WorkHorse is a large scale machine platform for 3d printing.
Hello world! We’ve finally finished repairing the shop from the last years storm damage. The new shipping department is setup and a better system has been implemented. Just about everything is back online and we’ll be adding products to the store over the next few days. If you have any questions email us at [email protected]
Midwest Reprap Festival 2019 was wven more than the year before. There were so many more people attending and exhibiting. The venue was packed to seams with the coolest 3d printer builds you ever seen.
So you’re looking for the CAD download files…… Well E3D has finally released the files. You can find the files at their Github. https://github.com/e3donline/ToolChanger E3D ToolChanger Assembled The E3D tool changer files are published on github but if you’re looking for the assembled files or toolchanger assembly check out EJaworenko on Thingiverse here. “E3D released
How can you calculate the wire gauge and length for 3d printer wiring? Most 3D printers use either 12V or 24V. The hotend of a 3D printer may draw up to 4A, while a heated bed draws nearly 12A.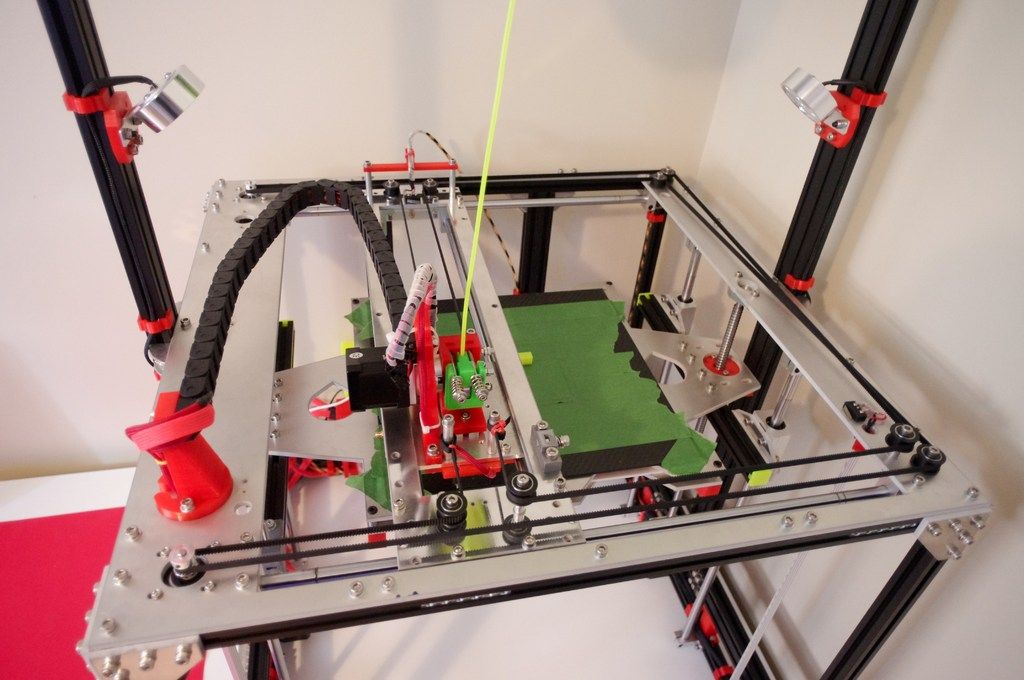 If the wire is not large enough or longer than needed, it will have more resistance
Stepper Motor Color Coding of Wires For any stepper motor to be wired up properly, we’ll need to determine which wires are “pairs” or connected to the ends of each coil. These are usually referred to as coil “A” and coil “B”. The exact order of the pairs Black/Green or Green/Black of pins does not
What Size Stepper Motor Should You Use? While the size of a stepper motor is just the footprint it’s the winding that determines torque. There are Nema 17’s with as much torque as a Nema 23. Most 3d printers use stepper motors to drive z-axis motion lead screws to raise or lower the bed or
While a Duet 3 won’t be replacing the Duet 2 anytime soon, it’s a much more professional electronics board that adds a range of options and functionality to your machine build. Although the Duet 3 may be overkill for most users, these options are not for everyone you do get much more out of Duet
How To Wire The Duet 3 Mainboard 6HC The Duet 3 is a great board for your 3d printer, but wiring it up can be confusing.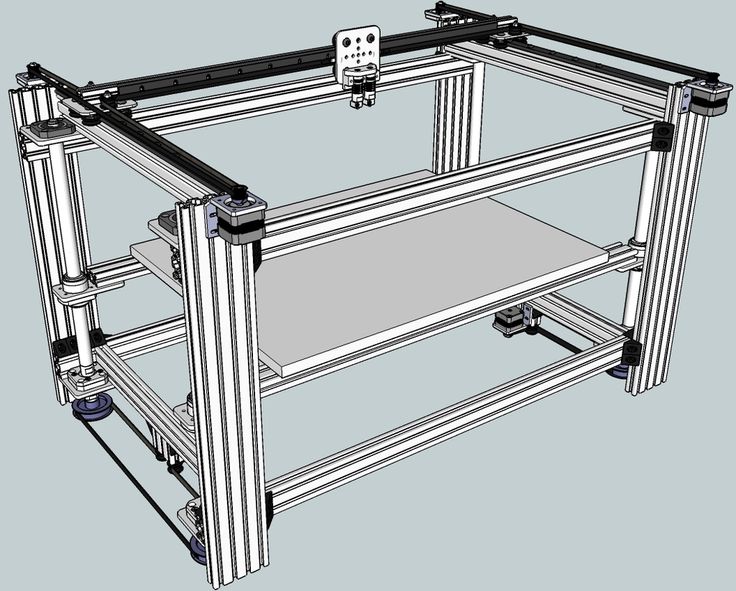 This tutorial will walk you through how to wire the Duet 3 mainboard 6hc to your Workhorse 3d printer. Duet Wiring Instructions This is a guide on how to
DuetWifi Expansion Board Wiring and Firmaware Configuration
The CoreXY motion system is a good solution if you’re looking to print faster. The 3d printer kinematics has become more popular in the last couple of years as users and DIY builders agree on an increase in print quality. The motion system is more lightweight compared to other 3d printer kinematics such as cartesian
The latest design update uses three Z-axis stepper motors. In this arrangement the belt routing to the stepper motor drive the lead screw. Each lead screw will be constrained by an MGN12 linear rail. This should also minimize vibrations that might be transferred from the motors to the z-axis. The belt to pulley ratio gives
Modular
Scalable
Linear Rails
Balanced Carriage Pull
Enclosure
BOM utilizes most available parts
All Metal Parts or 3D Printed
Z-Axis: Independent Driven or Shared Belt Routing
Although there are many 3d printing and additive manufacturing conventions, there is nothing better than Rapid Event. The RAPID + TCT conference, also known as Rapid Event; is a worldwide known 3d printing show / conference in North America. You can find some of the most influential additive manufacturing companies that attend each year ath
CoreXY Belt Routing One of the most important parts for corexy movement is belt routing. Here’s a guide to the mechanics of corexy belt routing pulley layout in order to get accuracy and constant belt tension. Belt Routing Methods There are two main ways to implement the corexy belt path. Either a stacked pulley arrangement
CoreXY Kinematics Explained? The corexy kinematics mechanical arrangement includes a unique motor movement where the X or Y motor move together or opposite of each other to move the carriage from left to right or towards or away . If you were to move just one motor you would see the print head move diagonal..
CoreXY Scalability The scalability of a core-xy printer can be an issue when it comes to hardware design and implementation.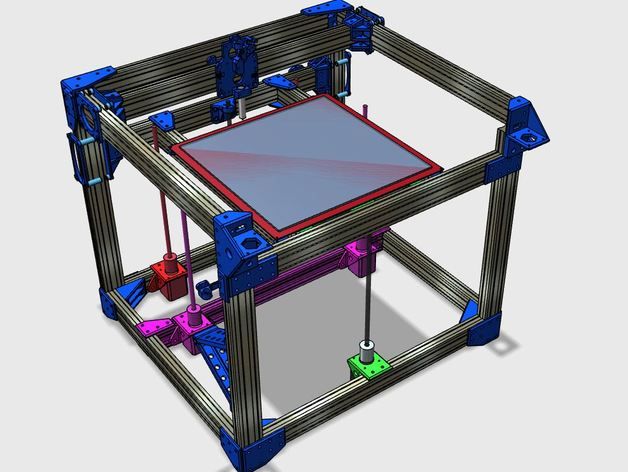 An increased belt path can also introduce problems resulting in artifacts in 3d printed parts. A rigid gantry setup is needed and proper binding is a must. 9mm and 12mm belts are available to account
The CoreXY motion system is a good solution if you’re looking to print faster. The 3d printer kinematics has become more popular in the last couple of years as users and DIY builders agree on an increase in print quality. The motion system is more lightweight compared to other 3d printer kinematics such as cartesian
Maker Faire is a interesting gathering of makers and creative people who enjoy learning and who love sharing what they can do with the maker communnity. If you enjoy technology and the DIY approach to life you’ll fit right in. Engineers Artists Scientists Crafters Re:3D Gigabot Large Scale 3D Printer re:3D showcase their new 3d
Layer Adhesion Layer and surface adhesion is a critical component of 3d printing.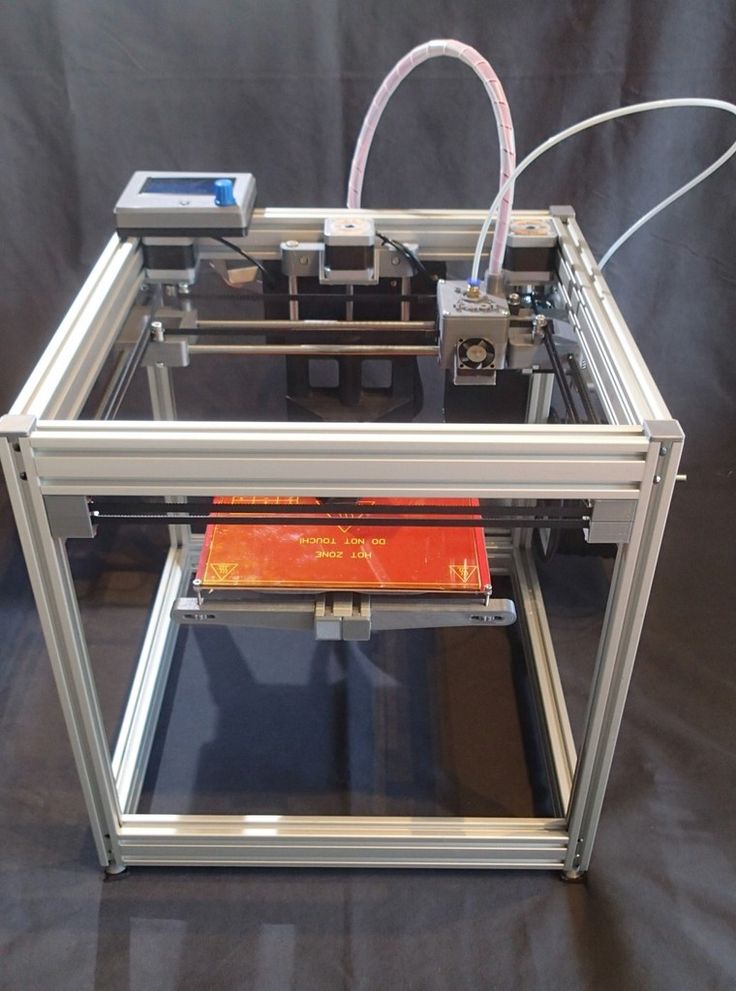 3d printing issues increase as object size increases. Large 3d printers can be more difficult when it comes to bed leveling. As the extruded layers bond together they are fused with heat. Proper surface adhesion decreases warping that can decrease part quality.
SolidCore CoreXY Z-Axis Bed Leveling We recently started working on the SolidCore 3d printer‘s bed leveling and mounting system. The z-axis uses a 3-point kinematic bed mounting with magnetic pivot spheres on each mount This properly constrains the bed at 3 points of contact. The original SolidCore Z-axis design was somewhat primitive because we only
Duet 3 Error- Failed To Get List Macros Not Found Failed To Get File List Directory 0:/macros not found Firmware Folders Insert sd card in computer and check for proper folders. Create a folder and name it “macros” if needed. Duet 3 running in standalone mode SD Card Folders The SD Card Folders must be
Loose belts are a common problem for users and cause a variety of issues. It may or may not be obvious that your 3d printer is experiencing issues. Belt tensioning defects can occur.
While there are many open source 3d printer designs to pick from on Thingiverse. And when it comes to corexy printer designs there are a few that raise the bar. Here are some of the best designs that we would like to talk about.
Prusa XL Update Prusa XL Review – 3D Printing Nerd 3/21/21 Unfortunately the picture above isn’t the new Prusa XL. It’s a clip from Joel Telling’s 3D Printing Nerd Youtube video. While there’s been much talk about the circulating screen shot from Joel Telling’s tour on the internet, Josef commented in a Reddit post that
BigRep has been an industry leader in professional large scale 3d printers for a while now, and we had the chance to see their new machines at Rapid Event + TCT additive manufacturing convention. They showed off two of their printers they had on display: BigRep Studio and the even larger version, the BigRep One.
We first discovered RailCore Labs and their beautiful corexy design at MRRF 2019. The Railcore 3d printer was designed by designed by Tony Akens and J. Steve White when discussing an idea of a core xy printer with linear rails on the x,y and z-axis on Reprap IRC.
Like this:
Like Loading...
SolidCore CoreXY 3D Printer - 3D Distributed
SolidCore CoreXY 3D PrinterWhile the SolidCore printer design is still a work in progress, the corexy build is slowly materializing. For now, we decided to go with a simple corexy design but have future plans for a toolchanger and a heated chamber. The design goal is to build a reliable high speed 3d printer with high quality aluminum parts for 3d printing high temperature materials such as PEEK.
Designed and Developed by 3D Distributed:
- Shane Hooper
- Øyvind Sætre Amundsen
- Modular / Scalable
- All Metal or 3d printed
- Linear Rails
- Balanced Carriage Pull
- Enclosed or Enclosure Option
- Triple Z-Axis: Independent Driven or Shared Belt Routing
- Kinematic Coupled Bed
- Simple but Compact Design
SolidCore Related Content
SolidCore DIY 3D Printer
SolidCore CoreXY BOM
SolidCore Documentation
SolidCore CoreXY Frame
SolidCore Thingiverse 3D Printer Build Plans
SolidCore Kinematic Bed Mounting System Setup
3D Distributed Documentation
SolidCore 3D Printer Kits & Parts
Modular Platform
SolidCore CoreXY MechanismBelt Path And Tensioning
If you want accurate motion, you need a CoreXY 3d printer design with straight and parallel belt paths. Belt tensioning can change when the belt length changes as the gantry moves. Otherwise racking or belt tensioning issues may occur. Belt segment that changes length must be parallel to the axis as it moves to avoid racking or other undesired motion that can occur. Belt thickness must be taken into account when laying out your pulleys.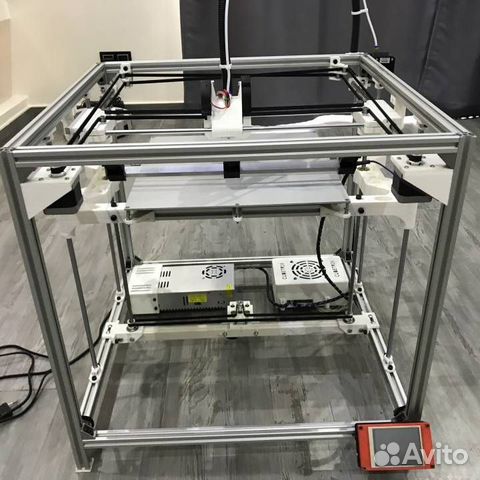 The belt sections between motor mounts and idler mounts need to be parallel with the axis as the gantry travels across.
Bowden vs Direct Drive
A Bowden setup will let you have higher acceleration but a direct drive extruder will give you higher feedrate. The difference in acceleration is in print time and can make a noticeable difference.
- Direct drive gives you more control over the extruders and better print for flexible materials .
- Bowden gives you a lightweight carriage design and is better for higher acceleration.
The moving mass from a direct drive extruder from the size or weight at higher print speeds. Reverberations that happen with fast accelerations and jerk rates. A heavier carriage also increases these artifacts. missing steps, that happen with fast accelerations and jerk rates and increases these artifacts.
3D Distributed Documentation
corexy-motor-mountsSolidCore CoreXY Mechanical ArrangementOur long term goal is to is to build a modular platform, not just a printer.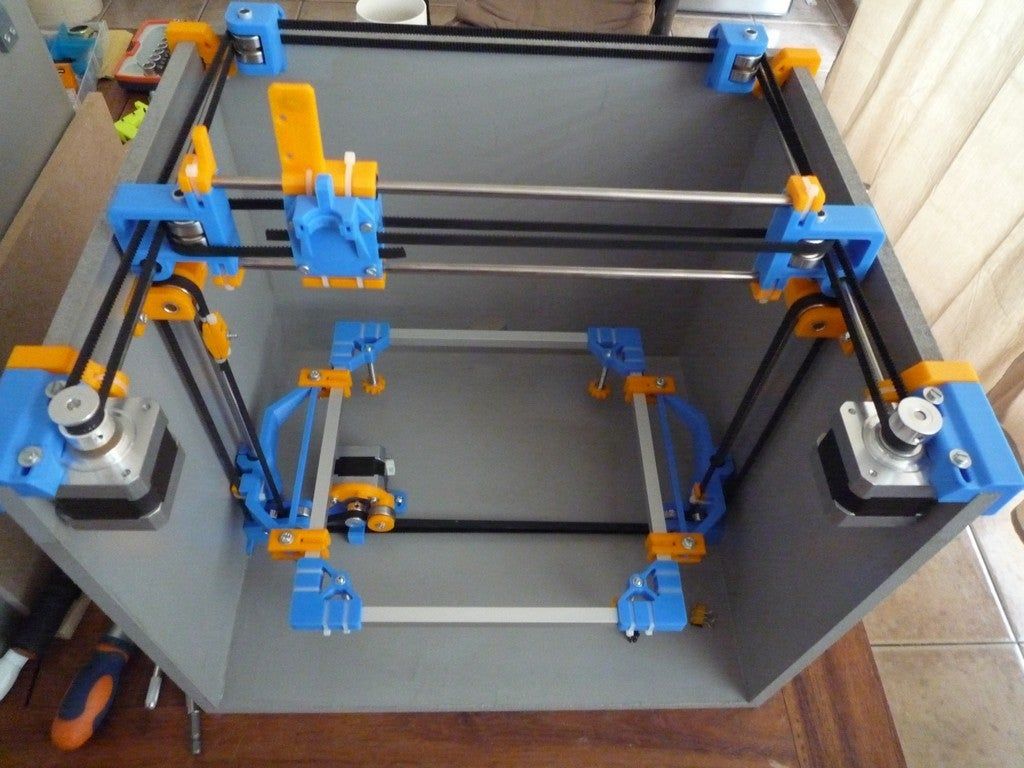 Think of it as an ecosystem of parts that can be arranged in different configurations and adapted for unique applications.
- Mods
- Upgrades
- Customized Parts
Build Volume – Scalability
SolidCore Carriage Belt PathThe SolidCore CoreXY design has the motor and idler parts assemble to the inside corners of the frame. This mechanical arrangement is better for adding an enclosure and scaling up the 3d printer size to a larger build area. Minimizing design constraints of overall 3d printer length and width makes the machine completely scalable and customizable.
Eventually we would like to have a spreadsheet or configuration tool that will allow you to input the current frame or linear rails that someone already owns and output length and rail options. Or if you’re aiming for a specific build area, you can input the data and it will output the frame and rail length options.
CoreXY Belt Path – Crossing BeltsAll Metal Parts
All Metal Parts KitThe SolidCore aluminum parts makes the printer into a highspeed workhorse for repeated use.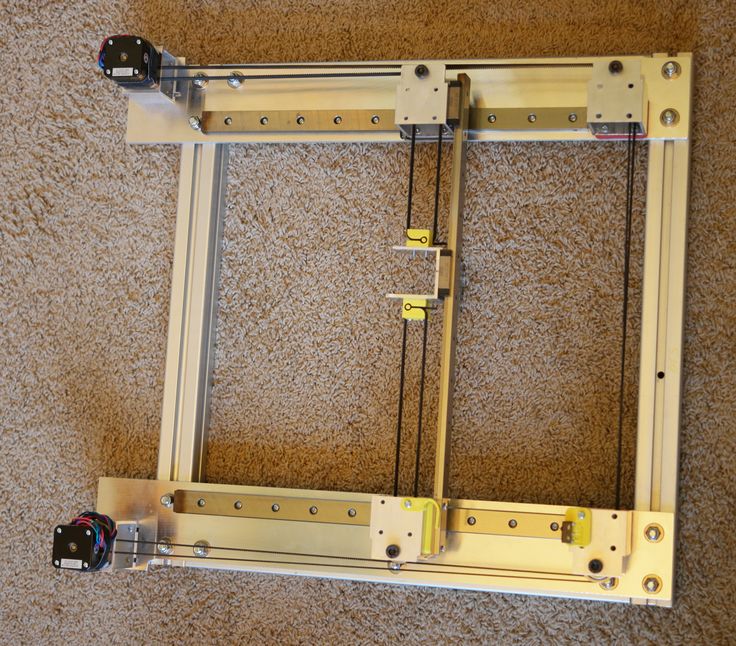 All-metal-parts and components will give us the durability and repeatablility needed. But we want people to have the option to use 3d printed parts so they can upgrade later on. Solid all metal parts are durable and less likely to deflect at high printing speeds. The aluminum components are also less likely to breakdown over time when introduced to the forces and heat from repeated use.
Belt Tensioning
Belt tensioning is done with the XY motor mounts. The XY mounts have slots to allow the belt tension to be applied by pulling the motors back.
SolidCore XY MechanismBuy All Metal Parts
- High Speed
- Durable
- Repeatable
Carriage / Gantry
SolidCore CoreXY 3D Printer CarriageThe carriage and gantry are designed to be light weight and strong. We currently use c-shaped aluminum stock because it reduces machining time.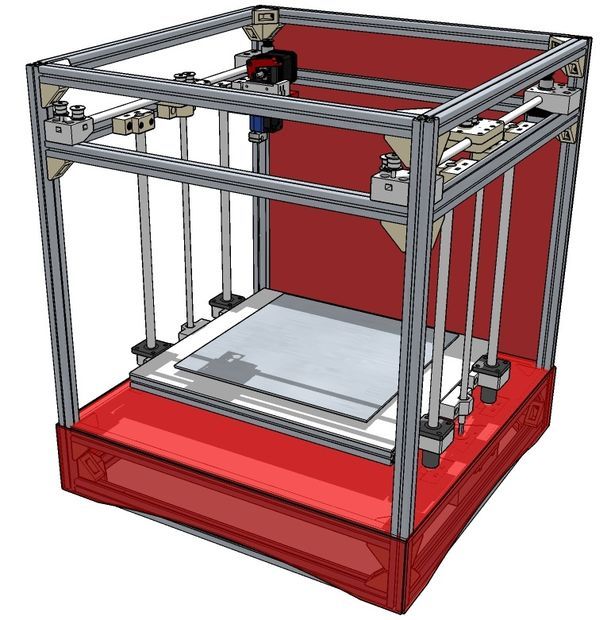 The reduced machining time and minimized waste helps but it’s a compromise. That’s going to change soon. We’ll probably make some changes such as reorienting the the y-axis linear rail into a vertical position similar to the RailCore but the current horizontal version will be easier to adapt an E3D Toolchanger.
X-Carriage
Metal X-Carriage PartsThe top plates or motor/belt mounting plates that mount the idler pulleys have recently changed as well. The motor/belt mounting plates shown position the z-axis motors on top vs the bottom of the machine. When I first designed the plates I thought it would look cool with the motors on top but after I machined everything I realized that moving the bed up and down could cause deflection in the main plates.
X-Carriage Parts List
SolidCore CoreXY X-Carriage Parts List DiagramSee X-Carriage Parts List-Assembly Guide PDF
X-Carriage Parts List – BOM Guide
2 x Carriages
2 x MGN12H Rail Clamps
2 x GT2 Toothed Idlers
2 x GT2 Smooth Idlers
4 x M5 x 35mm Long Button Head Cap Screw
8 x M3 x 6mm Long Button Head Cap Screw
12 x M5 Steel Washers 1mm Thick
8 x M5 Nylon Washers
2 x GT2 Idlers
4 x 10. 5mm Pulley Spacers
Aluminum X-Carriage Design Options
X-Carriage Design: Weight Reduction
SolidCore X-Carriage Set: Weight Reduced-Light Weight Upgrade
X-Carriage-Weight-Reduced-light-weight-gant…
$67.00
SolidCore X-Carriage and Gantry Assembly Install / AlignmentMotor Idler Plates
The left motor plates are going to be re-machined to give room for a tool changer setup.
The overall footprint of the machine relative to print volume is somewhat excessive. In order to have a solid enclosure design I had to move the motors inside the frame boundary. This sacrificed the overall printer size to print volume ratio.
We’re aiming to balance the pull to the center of carriage instead above it or below. It seems to be more rigid and minimize deflection. The belts are somewhat within the same plane of the three linear rails to avoid rocking cantilever loads that other designs may have with the belts up high or down low.
The original prototype was about 350mm x 350mm x 350mm print area but we now have a 200mm x 300mm and 400mm x 400mm build volume.
This design was inspired by the RailCore, HEVO, D-Bot, Mike Fisher’s QuadRod and Maarten van Lier’s corexy build.
SolidCore CoreXY Documentation
3D Distributed Documentation
CoreXY 3D Printer BuildExtruder Carriage
E3D Hotend MountCoreXY Carriage Diagram ExplainedDownload Carriage
SolidCore Y-Carriage Part List DiagramAluminum Y-Carriage DesignMetal Y-Axis Assembly Hotend MountAluminum Extruder Carriage DesignView this post on Instagram
A post shared by 3D Distributed (@3d_distributed)
Top Plates
All Metal CoreXY Parts KitDownload Motor Mount Plate
Triple Z-Axis: Independent Driven or Shared Belt Routing
Z-Axis Single Stepper Motor Belt RoutingWith the build plate removed the single z-axis stepper motor with shared belt routing is shown.
The SolidCore has two different z-axis designs to move the print bed. The SolidCore picture shown on this page has the z-axis motors at the top of frame.
- Independent Driven Z-Axis Motors
- Single Z-Axis Motor (Bottom)
Both z axis designs use 3-point bed leveling. The image below is of the prototype build which uses 12mm ball screw. The new design (yet to be shown) uses lead screw.
Z-Axis Single Stepper Motor Belt PathZ-axis Design Diagram ExplainedZ-Axis Bed Mounting BracketThree Point Kinematic Bed Mount
SolidCore CoreXY Z-Axis BracketAlthough the implementation of the kinematic bed coupling is till in progress, we are designing a mechanism that works for us. Three point bed leveling uses three independently driven lead screws to automatically level the bed and compensate for a bent bed plate or dips .The three z-axis lead screws are used as the three points that make up a triangle and define a plane. 3 points define a plain.
The advantage of a kinematic bed mount is that the defined plane of the bed can raise or lower without binding or twisting, keeping the bed flat. 3-points define a plane, therefore you will need to take into account the synchronization of the lead screws that raise and lower each point of the plane.
Build Plate
We’re using a mic6 tool plate for the bed. Cast Aluminum tool plate is a good solution because it has good thermal conductivity and heats up evenly without warp or twist. The bed needs to be flat and remain level. In three point bed leveling, the three z-axis lead screws are used as the three points that make up a triangle and define a plane.
Since 3 points define a plain 3 screws, evenly placed in a triangle will raise and lower that plain without imparting any twisting forces so the bed will stay flat. A mechanical bind can cause the bed to tilt over time. The advantage of a kinematic bed is that the aluminum plate can expand without causing anything to bend or flex.
Download 3D Model
Download
CoreXY Kit
SolidCore CoreXY Printer DIY Parts KitBuy Basic Parts Kit Now
SolidCore CoreXY Side PanelsSolidCore Side PanelsBelt LayoutThe corexy motion system uses crossed belts instead of offsetting the stepper motors giving the belt path a clean run. Simpily offsetting the motors may give a much better alignment path.
The belts don’t have to cross if the pulleys are at different z-levels, I always thought that was bv the difference between the hbot corexy was the corexy belts crossed at the m segment. But the difference between hbot and corexy is that hbot has a single belt on a single plane, corexy can have either 2 “non-intersecting planes” or a single plane + idlers on different levels to keep the belts from touching.
Hypercube for example doesn’t have that “x” because the belts are on different planes. The Railcore has the crossing belts but the belts are on different planes.
Motors at differing planes = straight belt paths
Motors at same plane = Crossing belts
Mechanical Arrangement
CoreXY DiagramOpen-Source
Steal our files! We encourage designers and builders of any diy 3d printer project to use our designs. You can download the open source STEP and STL files at:
- WikiFactory
- Thingiverse
SolidCore On InstagramSolidCore CoreXY Motor MountsView this post on Instagram
A post shared by 3D Distributed (@3d_distributed)
Download 3D Models
Download
Download 3D Models
Download
Check out the #BOM provided by Shane Hooper, machinist and designer at @3ddistributed to build your own Corexy 3D Printer ➡ https://t.co/8finMPwrGL pic.twitter.com/fwSuvuEBa3
— Wikifactory (@wikifactory) April 9, 2021
SolidCore Platform
Read More:
- Hackaday
- Build Hub
https://t.
— 3D Distributed #MRRF2020 (@3ddistributed) October 29, 2021co/BaBMARnzel pic.twitter.com/B3Bq7slGuz
Buy SolidCore DIY 3D Printer Kits & Parts
Also See
Like this:
Like Loading...
DIY 3D Printer Core XY 310*310 mm
Hi Everyone.
As you know, there are unfortunately no perfect printers in China.
Prush-like drygosts are cheap, but slow at the same time.
Core XY - more interesting, but low-quality components are also used.
Therefore, I decided to assemble my own printer and immediately say is not for sale.
I just wanted to prove to myself that even a humanist is able to develop and assemble a good enough apparatus.
And he started his journey with the purchase of quality components:
In the Autodesk Inventor program, he developed his version of the printer completely from scratch.
And then he used the services of a company for cutting machine profiles.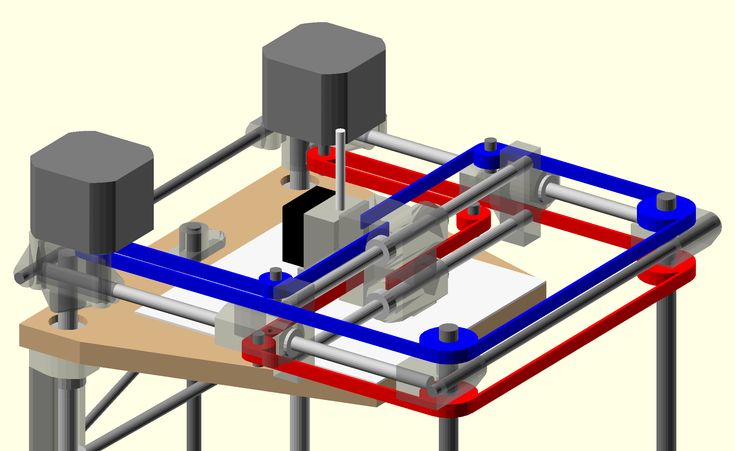
With the help of corners 2040, I fastened the profiles together and, by the way, very reliably and evenly
Next I decided to assemble the table on profiles and corners, but in the end I will abandon this idea in favor of the finished version.
I installed the sfu1204 ballscrew and the table itself on 12mm linear shafts with flange bearings, while the motor uses two 48x, which will eventually be synchronized with each other.
I abandoned the idea with profiles on the table in favor of the usual corners 2040, they turned out to be more convenient for installing the table and at the same time quite rigid due to the rib
This decision fully justified itself.
The motors along the z axis were mounted on aluminum plates 40mm wide and 8mm thick, and the shafts were fixed with shf clamps
The design turned out to be very successful and RELIABLE.
Moving on to the installation of Kinematics
From aluminum strips 40mm wide and 8mm thick, I cut out holders for motors of the XY axes, as well as holders for carriages and pulleys.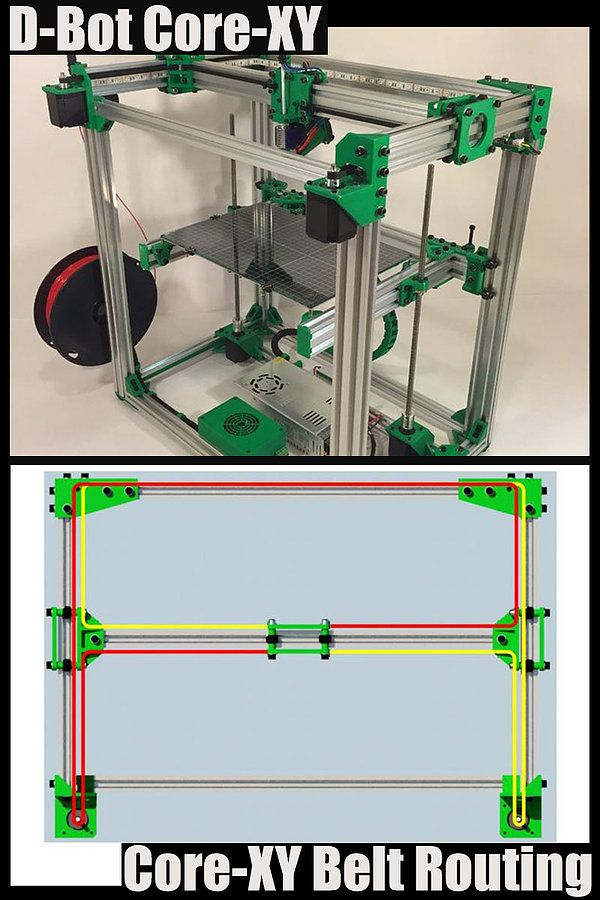
As a result, I had to drill, saw, cut, plan, grind and all this on the BALCONY of the apartment, which is not very good, so in the future I will leave this process in favor of the finished version
After all the manipulations and assembly, I measured the weight of the portal without the hot end, which was 650 grams, which is not much.
Then proceeded to installation on the frame
On the same corners of 2040, installed Mosquito hotend with airflow
Now it remains to connect the electronics, since I have two motors along the z axis, I decided to connect them Consistently:
I decided to test 8 liter bottle of water
Test passed without any problems
To control printers, I used an SKR1.3 motherboard with TMC2208 drivers and a TFT V2.0 screen, and this system will be powered by two Minvil 15 amp-24v power supplies.
One PSU is used for motherboard, hot end, fans and lighting.
And the second power supply through the mosfet supplies voltage to the heating table 310 * 310 for 24 volts0003
Initially I installed a Bowden system with a BMG feeder, but then I will replace it with a direct
I launched a test bench boat and I liked everything
I tested it with a Battle, with a speed of 120 mm / s, jerky 20, acceleration of 3000 mm / s2
3
I added a little more
I was satisfied with the print quality at different speeds, but at the maximum the airflow with the PLA could not cope anymore
EVEN COMPARED WITH THE ENDER))
On this it would be possible to complete the project, but as it turned out. Many viewers do not have the ability to saw and drill on their balcony, and this assembly option is completely unsuitable for the majority.
I decided to meet my viewers and subscribers of my YouTube channel ChuchaTV and designed Samosbor ALL INCLUSIVE, which does not require the use of improvised materials and special tools.
In other words, a full-fledged Kit Kit, like from China, but with high-quality components.
I prepared a package with a file for laser cutting, bending, painting and engraving and found companies that did all these operations for me.
Mounting axle carriages and motors made of 4mm steel with subsequent painting
Table and x-axis carriage made of the same metal but 2mm thick Body sheathed with 1 mm sheet with subsequent flexible, painting and engraving
9002 All holes and the cutouts fit just perfect during assembly, I did not regret the money spent on laser cutting.
The table frame turned out to be ideal both in geometry and in strength and rigidity
Direct weight with MGN carriage 12 amounted to 350 grams
Having figured out the mechanics, I decided to install all the panels and corresponding elements
on the sides of two fans of 80mm, since more in size in size.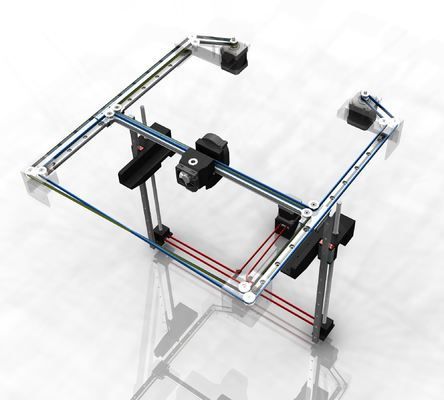 won't get in. On the one hand there is blowing in, and on the other hand blowing out, for ventilation of the block with electronics
I put two filament holders inside
From 5mm acrylic, I cut out the door and the lid exactly to size, and on the self-assembly I printed the curtains and the handle itself a small test of print quality and the result was satisfied
The printer turned out to be very nice)) and practical
Project cost $800, although I bought most of the parts on sale days in China.
I am very pleased with the build quality and operation of the printer, but most importantly, I was able to do it without outside help, despite criticism and negativity addressed to me.
DIY Vulcanus MAX - Matrix for homemade 3D printer with aluminum frame CoreXY UP
Also at this time, the CoreXY project was being worked on, and when we saw Vulcanus V1, we immediately decided to make it.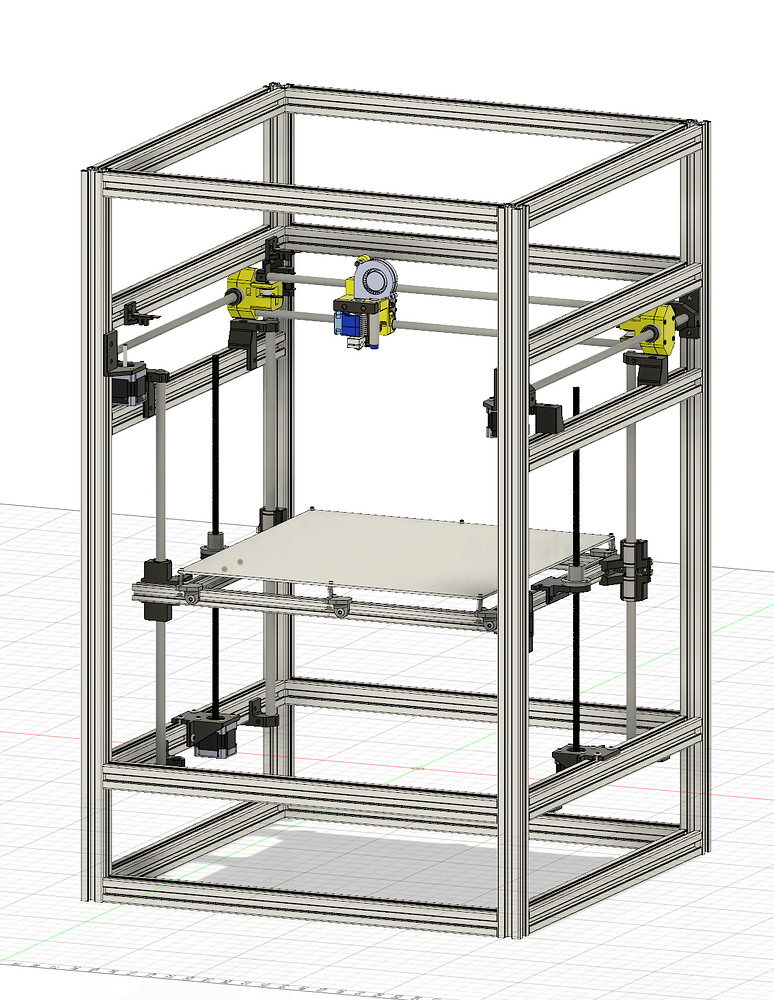
Show 3 more images
Through experience we have expanded the Prusa i3 (Mega Prusa i3), and redesigned parts of Vulcanus V1 to be able to make 32x32x32, 42x42x42 and 52x52x52 models (this latest version is still untested).
Vulcanus Max 30 is 32x32x32, E3D V6 lite extruder, auto bed leveling and MK8 direct drive system. The
Max 40 is 42x42x42, has an E3D V6 lite extruder, "auto bed leveling" and an MK8 direct drive system.
The Vulcanus Max is thus a larger version of the V1 with structural upgrades, metal direct drives, auto bed leveling, LM10UU and LMK12L Z bearings, and acrylic panels that create the visual effect of lava.
Watch the video of the V MAX in action at The Maker Faire Lisbon 2015:
Step 1: Open Blueprints - Vulcanus Max 30 and Max 40
RepRap 3D Large 3D Printer Blueprints are open, so please feel free to upload the file sketch.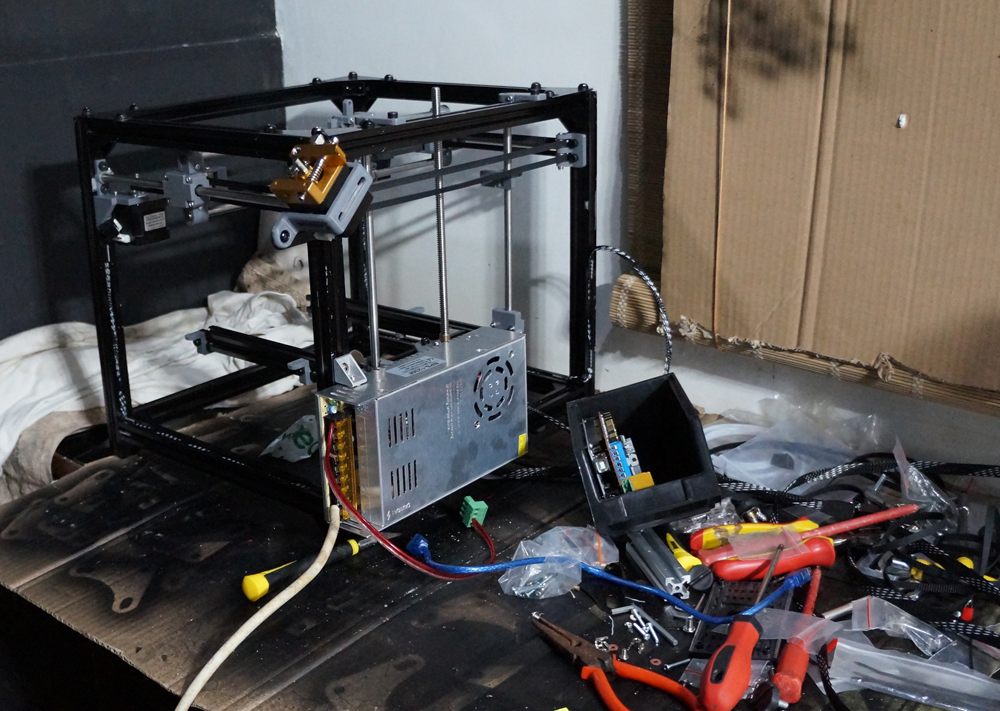 The scale of the sketches is one to one.
There are 2 versions we tested and they work 100%. Vulcanus MAX 30 and MAX 40.
Use the measurement sketch and Vulcanus V1 instructions to assemble your machine.
Files
- vulcanus_max.skp
Step 2: How to Build the Vulcanus MAX 30 and MAX 40
Start by opening the 3D sketch from the previous step. There you will find all sizes of smooth rods, aluminum profiles and acrylic panels. Use the sketch as fully as possible to get all the necessary information from it. The assembly process is the same as V1, using materials and parts from V MAX.
Step 3: List of different parts from Vulcanus V1
People building the device often have questions about the specification, so here is the document with it: [google doc] so most of the parts are different:
- The length of the Z-axis smooth rods is 12 mm instead of 8 mm (for rigidity).
- XY-axis smooth rods are 10 mm long instead of 8 mm (for rigidity).
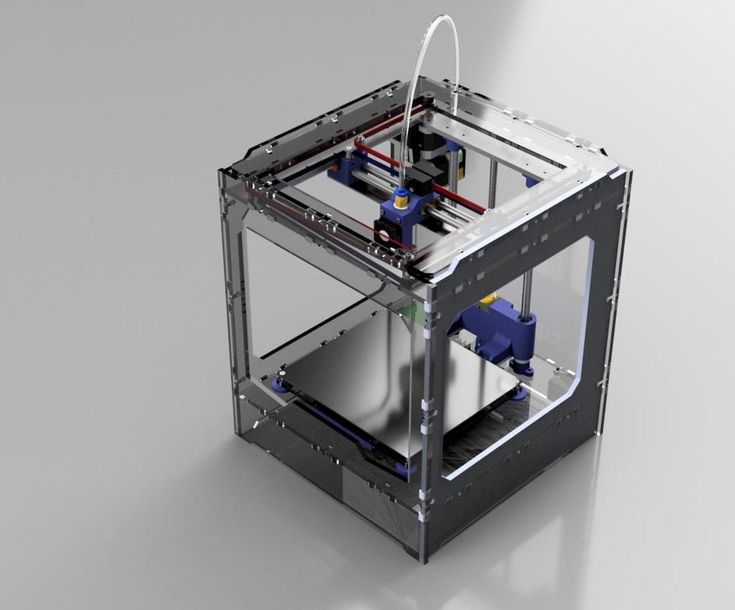
- XY axis will use LM10UU bearings instead of LM8UU.
- Z-axis will use LMK12L bearings instead of LM8UU.
- Extruder is MK8 Direct Drive instead of original Vulcanus V1 extruder.
- All parts redesigned to accommodate larger bearings and larger rods, except for corners and Z axis motor holders.
- The aluminum printing plate is 5 mm thick.
- Red acrylic panels instead of metal.
- LED strip on the top and bottom of the second base.
- V MAX inductive sensors are used for automatic leveling.
- Using repetier firmware instead of Marlin firmware (because I'm more used to repetier).
Step 4: Download all files from Thingiverse
All files available on thingiverse: All parts fit both Vulcanus MAX 30 and 40.
Step 5: Heated silicone platform 40×40 cm and 800 watts. The platform is attached to an aluminum plate using high temperature resistant silicone. After fixing the silicone on the plate, you need to connect the cables to the solid state relay.
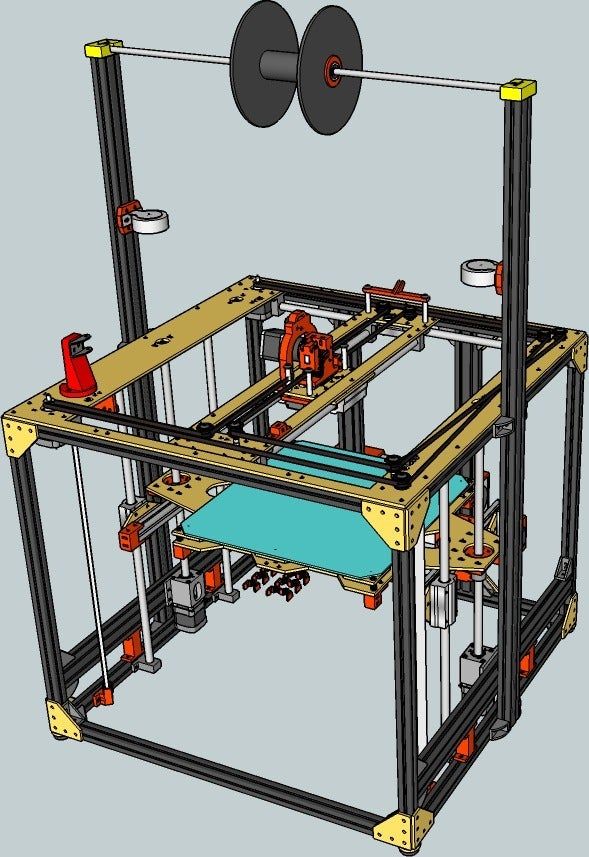
Step 6: Solid State Relay
The solid state relay on the homemade 3D printer should turn the silicone platform on and off.
Step 7: Dual Extruder
Show 7 more images
Still in the process of being tested.
Step 8: COREXY Bearing Updates
Vulcanus 1 uses 2 bearings in the XY axis, this solution allows the belts to move freely over the bearings, but due to this freedom the belts touch each other while the XY axis is running. In tackling this problem, we found that one bearing worked great and that allowed the system to avoid touching the belts.
Step 9: Some 3D printed parts
Show 10 more images
Here are some photos of the first parts.
Step 10: More Photos of Devices
Show 4 More Pictures of
Step 11: Firmware Update for Arduino Mega
Download firmware for VMAX 30 or VMAX 40 according to your device. The firmware is the Repetier firmware.
Files


