Master chief armor 3d print files
▷ master chief armor 3d models 【 STLFinder 】
master chief armor
myminifactory
armor great for halloween
Halo 3 - Mark 6 - Master Chief Armor Set - No Helmet
thingiverse
The reason for uploading the armor set like this is that it gives the end-user a chance to resize the armor to their body and split it up to their 3d print bed. I will do another upload in the future of this armor set cut up for a print bed of 8"...
Halo 4 Master Chief Hand Armor
thingiverse
Continuing my project to turn a whole master chief suit into printable models, I present the armor for the hands. Might have to scale the knuckles up to about 125% but it's all pretty close. Suggestions on scaling, modeling, modifying, etc...
Chopped up for 8x10x8 Printer-Halo 3-Mark 6-Master Chief Armor Set(No Helmet)
thingiverse
This is an armor set remixed from a Pepakura armor set created by Art Andrews on the 405th.com forum. 3 things to note: 1) It is currently scaled close to 5'10" 185lb. person. 2) It is split up into smaller print files to fit on an 8x10x8...
Halo 4 Master Chief Glove Armor Piece (For Cosplay)
thingiverse
This is a glove armor piece that I drew up quickly for my Master Chief cosplay I'm working on.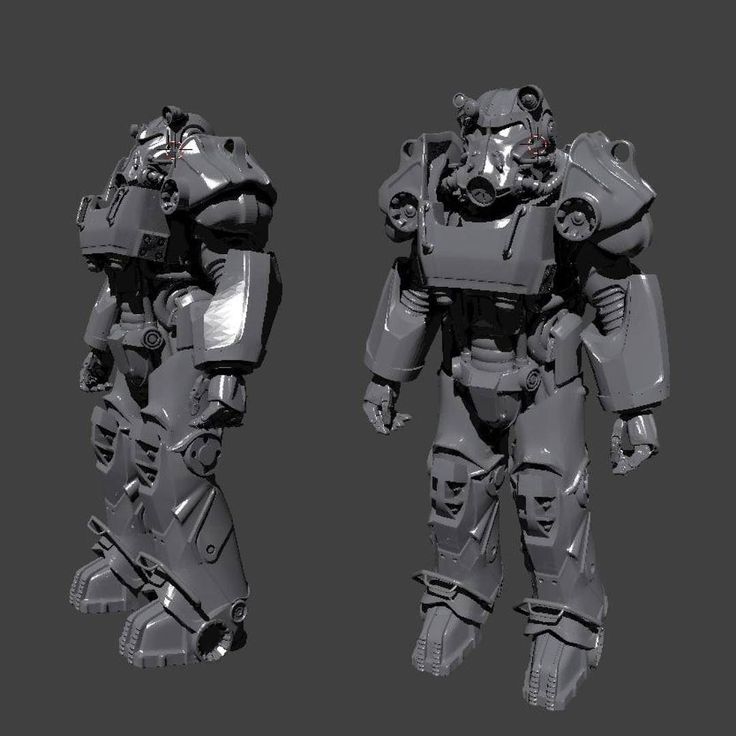 I saw no others on here, so I figured I'd make my own. It's made to be glued onto a glove, and should be form fitting to your hand. I'm not sure if the...
Halo 4 Master Chief Gauntlet/Forearm Armor
thingiverse
Not reinventing the wheel here- I just want to make a fully printable Halo armor set available for the public and I think I have a decent process in doing so. Suggestions on scaling, fasteners, etc are welcome as I am relatively new to this. ...
MASTER CHIEF HALO 4
thingiverse
Halo 4 style Master Chief armor
Master Gnome Chief
thingiverse
I've dressed the MakerBot Gnome scan up in my Master Chief Armor from my how to print video game armor "Thing". Instructions Scale to your printer size. ...Supports needed for helmet brim.
Halo Master Chief Full Boddy Armour
prusaprinters
Cheers Jace http://www.3ders.org/articles/20151102-maker-creates-an-amazing-full-size-3d-printed-master-chief-armor-from-halo.html Other great links to try http://www.405th.com/showthread.php?t=47387&highlight=armor+3d+printeble Check out...
Halo Master Chief Full Boddy Armour
thingiverse
Cheers Jace http://www.3ders.org/articles/20151102-maker-creates-an-amazing-full-size-3d-printed-master-chief-armor-from-halo. html https://www.youtube.com/watch?v=naxAA4giDe4 Other great links to...
Master Chief
sketchfab
halo 3 master chief helmet
Master Chief
thingiverse
this is Master Chief droppin down to teabag stance. ...you are welcome
Master Chief
thingiverse
Master Chief from Halo: Combat Evolved on PC. ...3D in game model
Master Chief
thingiverse
This is a scan of a 6 inch Master Chief action figure using 123 Catch.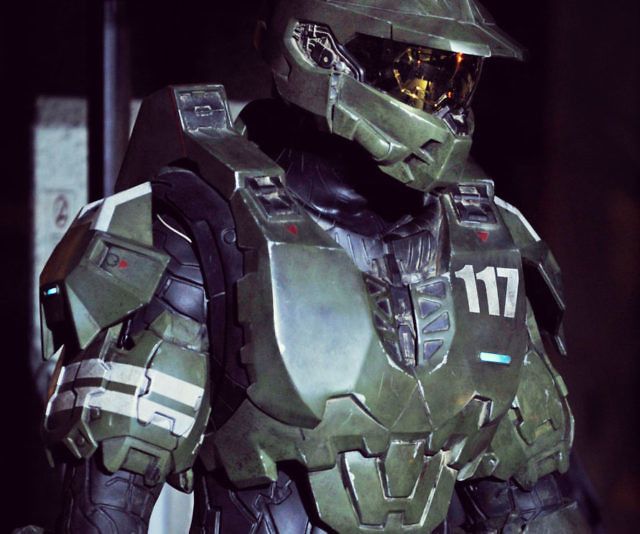
Master Chief
thingiverse
This is the Master Chief John-117 he has in his hand a rapid fire gun and also he has an energy sword. He is wearing a molinark 5. ... Credit to Robert Campbellhttps://www.tinkercad.com/things/75zJTq1wpSp-halo
Master Chief
cults3d
Master Chief (fan art). Model made for the October Patreon bundle. Upon purchase, you will receive a split version (the model is cut into smaller parts for easier printing) and a merge version, as well as a pre-supported version. ... You can support me...
Halo Master Chief Plaque
thingiverse
Master Chief!
Master Chief Figurine
pinshape
Master Chief Figurine
Halo Master Chief stencil
thingiverse
Halo Master Chief stencil
Master Chief Egg Holder
thingiverse
Master chief egg holder Enjoy
Master Chief Bust
thingiverse
Master Chief Bust with stand
Master Chief LEGO
sketchfab
Master Chief LEGO model digitized for DIG500
Master Chief Halo
thingiverse
Master Chief from the Halo series.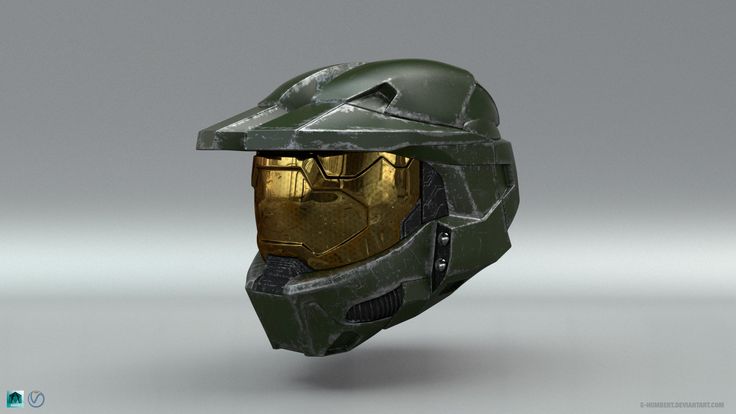
Master Chief Mask (Halo)
sketchfab
Scan of Master Chief Mask (Halo)
Master Chief (Halo 3)
sketchfab
This is my take on an HD version of Master Chief from Halo 3. Its seperated into 3 parts(Armor, Helmet, and Undersuit), and all textures are 2048x2048. ...It also comes fully rigged.
Master Chief Keycap
thingiverse
A low poly master chief 20th anniversary keycap Enjoy!
Master Chief Helmet Silhouette
thingiverse
the outline of Master Chiefs helmet from a side view
halo master chief diorama
thingiverse
Halo master chief diorama Presupported stl. ...for resin printer
Master Chief Bookmark
thingiverse
Remix of a bookmark with master chief's helmet
Halo Master Chief Helmet
grabcad
Helmet of Master Chief from the game Halo.
How to 3D Print Armor and Costumes for Cosplay – Clever Creations
3D printing has made it easier than ever to create detailed and accurate cosplay props and costumes to wear. A set of armor for cosplay used to take days to craft by hand, but with a 3D printer, you can create the base for your armor pieces in a matter of hours.
With the wide selection of affordable 3D printers for cosplay available right now, it’s a hobby that almost anyone can pick up. To get you started, we’ll show you how to design or find 3D models of armor, how to 3D print armor, and how to make your finished prints look like professional cosplay props.
How to 3D Print Armor: A Comprehensive Guide
Get a 3D model of armor
Before you can 3D print your cosplay armor, you will understandably need a 3D model of a wearable armor set.
Designing armor yourself
The most reliable way to get a set of 3D models of armor is to design them yourself. This will ensure the files are sized properly to your body and look the way you want them to.
Designing 3D models for an armor set requires you to properly size them to your (or the intended wearer’s) body measurements and contour the pieces to your body parts. At the same time, it is key to stay accurate to what you’re trying to represent. No matter if you are trying to design Batman, Stormtrooper, Mandalorian, or other Star Wars cosplay armor, you typically want to make sure it resembles that from the show, movie, or video game.
The overall difficulty of such a project depends on your 3D modeling skills and how much detail your armor needs. Luckily there are plenty of learning resources available to help, no matter what (free) 3D modeling software you choose.
Here are a few of our favorite tutorials to get you started, if you choose to design your own 3D printed armor!
Download a 3D model
Downloading a 3D model of armor is much easier than designing it yourself, but it offers you less reliable results.
Since most of the free files uploaded online are from hobbyists trying to share their own projects, the armor pieces are likely sized to their body proportions. You will need to scale them up or down to fit your measurements, which can take some experimentation to get it right.
This Youtube has some great tips for getting a good fit:
There are many websites where you can download free 3D models, but some of our favorites include:
- Thingiverse
- MyMiniMaker
- PrusaPrinters
All models on these sites are submitted by other users.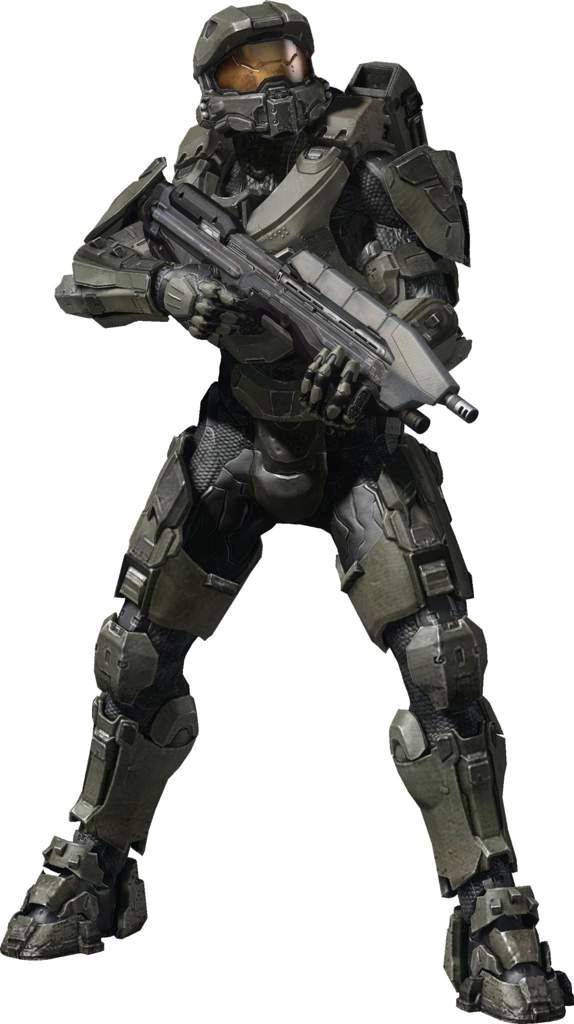 While that does lead to some less-than-stellar designs sometimes, other users will often step in and fix or redesign models that don’t work properly.
Our favorite 3D printed armor models
There are countless options for armor sets available on popular 3D model sharing sites. You can find everything, from generic to historical to recreations from pop culture. Here are some of our favorites:
Mandalorian Beskar Armor
For an easy Mandalorian costume, this simple version of the Beskar armor is one of the best options available. This 3D printed armor attaches to your shirt and pants, so there is no need for buckles or straps. It also doesn’t need much fine detail painting, so you can finish the armor off fairly quickly by painting it with a can of spray paint.
- Found on: Thingiverse
- Designed by: Maurice Sizzlac
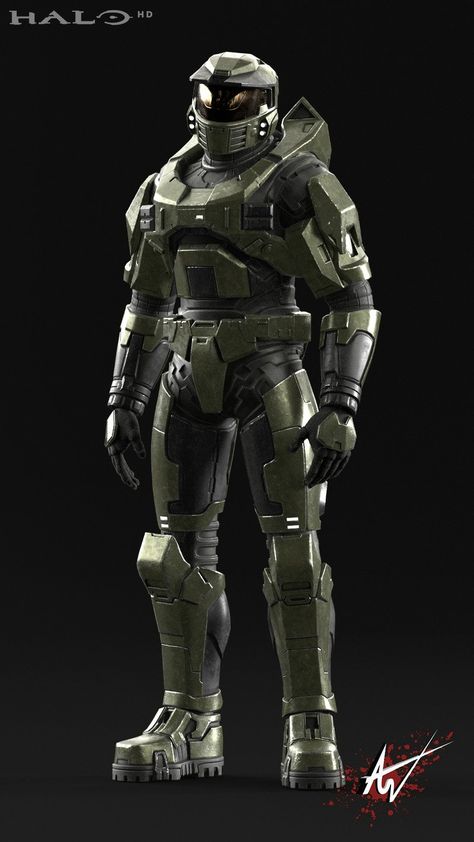
Halo Master Chief Full-Body Armor
As a full-sized version of Master Chief’s suit from Halo, this 3d printed armor is extra bulky. You will need to use a lot more filament for this project than some of the others we have listed and some of the larger pieces will need to be split to fit on your build plate (even with a bigger 3D printer), but the finished look is worth it!
- Found on: Thingiverse
- Designed by: Jason McLachlan
Storm Trooper Armor
You’d be hard-pressed to find a more iconic full-body suit than a Storm Trooper armor, and this particular set pays close attention to detail. As with any Storm Trooper costume, this one will take quite some time to 3D print and finish since it has full-body coverage. You can expedite the process by using faster 3D print settings, as the armor does not have many fine details.
- Found on: Thingiverse
- Designed by: Matthew Snow
Iron Man Mk 6 Suit
With two sets of files to print either War Machine or the MK 6 Iron Man suit, these 3D printed armor sets are versatile and stunningly detailed.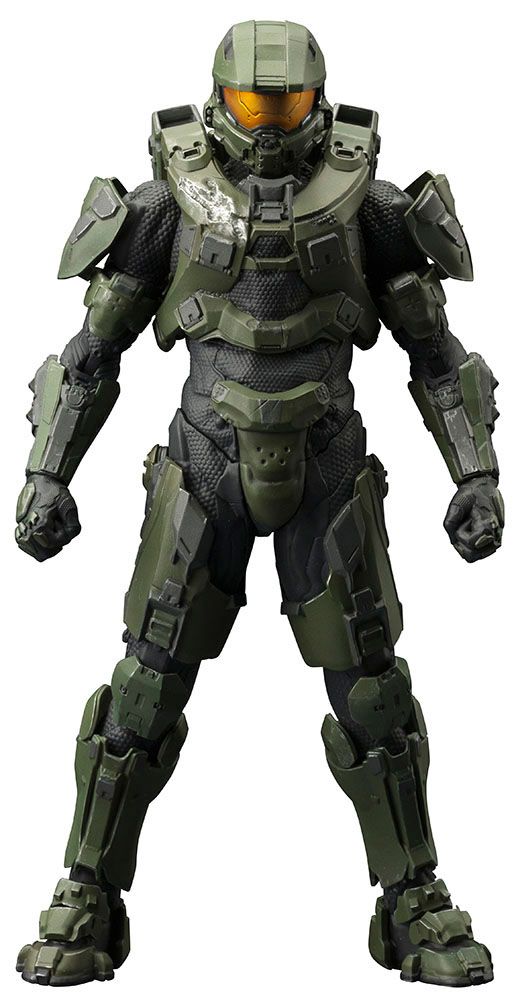 The armor sets are a labor of love to make, especially when you add in the wiring and lighting for the repulsors, but the results speak for themselves.
- Found on: Thingiverse
- Designed by: Steffan Scholtes
Cat Armor
No one should ride into battle without their cat, and thanks to this 3D model, you won’t have to! Designed specifically for your furry companion(s) to wear, this set of armor is made up of several articulated pieces that strap to the cat’s back. This makes it easier to size and fit the armor to different body types and sizes, so you won’t need to worry about measuring or scaling with this project.
- Found on: Cults3D
- Designed by: PrintThatThing
Preparing your armor for 3D printing
Before you can 3D print your armor pieces, there are a few things you’ll need to do first.
Splitting your models
If your armor pieces are too large for your print bed, you will need to split them into multiple pieces and glue them together once they are finished 3D printing. The easiest way to do this is to use the plane cut tool in your favorite 3D printing software. If you are unsure which software to use for this, Autodesk’s MeshMixer, Slic3r, or Netfabb all support the plane cut feature.
For step-by-step instructions for splitting models, we find this video to be of great help:
Generating your GCode
What settings you need to use for your 3D printed armor depends heavily on what 3D printer you have and how you plan to use your finished armor. A few things to consider are:
- Infill: How much infill you use can determine how heavy your finished armor will be (especially with larger models) and how much filament your 3D printer will use to print your armor. Less infill means a lighter finished model and less filament used but your armor will be more fragile. More infill means heavier armor and more durability.
For most uses, you can usually get away with a low percentage of infill (10-20%), but it all depends on what type of movements and stress each piece will be under when worn. If you want to optimize for strength, you can also look at using some of the strongest infill patterns.
 - Wall thickness: Remember that you will most likely have to sand away some of your outer material, so adding an extra outer layer or two can ensure you have extra material to sand away.
- Supports: You may need to use support material to 3D print your armor depending on the shape of the armor pieces. You can also use a raft or skirt on your 3D printer bed for better adhesion to the build plate. Those tools are especially useful if the object you are 3D printing is asymmetrical or has narrow first layers.
- Layer height: Adjusting the layer height will change how quickly your 3D printer prints your armor pieces, but it will also affect your final print resolution. A smaller layer height means your 3D printer will make shorter (and therefore more) layers to make the model, which means greater detail and less visible layer lines.
 A taller layer height means the opposite, so you will lose detail but spend less time 3D printing. Tall layers are better for large, simple models that you plan to fill in with putty or primer in post-processing (more on that later).
 - Temperature/flow/speed: Things like bed and extruder temperature, material flow, and nozzle speed all depend on your 3D printer. Go with the settings you know work well with your machine.
If you’re using models you downloaded from a model-sharing website, the designer sometimes lists what 3D printer, slicer, and settings they used. In those cases, it’s best to at least consider their recommendations when generating GCode in your slicer software.
Print your armor
Once your GCode is generated, you can move on to 3D printing your armor. This can be done on almost any 3D printer, but some are better suited to the task than others.
The Prusa i3 MK3S+ is our top choice in printers for creating armor and other cosplay items. It has a large bed, is highly accurate, has advanced mesh auto-leveling, and offers you a choice between purchasing a fully assembled machine or building it from a kit.
If you want to learn more about the Prusa i3 MK3S+ or see our picks for the best 3D printers for cosplay, we have an entire article that you can check out.
Recommended:
The 6 Best 3D Printers for Cosplay
Finish your armor
Your printed armor pieces are most likely going to need a lot of post-processing work. This is especially true if you are using them to cosplay and want them to look as realistic as possible.
Removing supports
If any of your armor pieces needed supports or rafts to print, you’ll need to remove them before you can do anything else. If this is a step you absolutely dread, it may be worth it to invest in a dual extruder 3D printer that supports PVA. It dissolves in water, so you can just run your model under the faucet to break off the supports.
Assembling the pieces
If you split any models to make them fit on a smaller build plate, you will need to assemble them into one piece by gluing them together with super glue, two-part epoxy, or other strong plastic glues.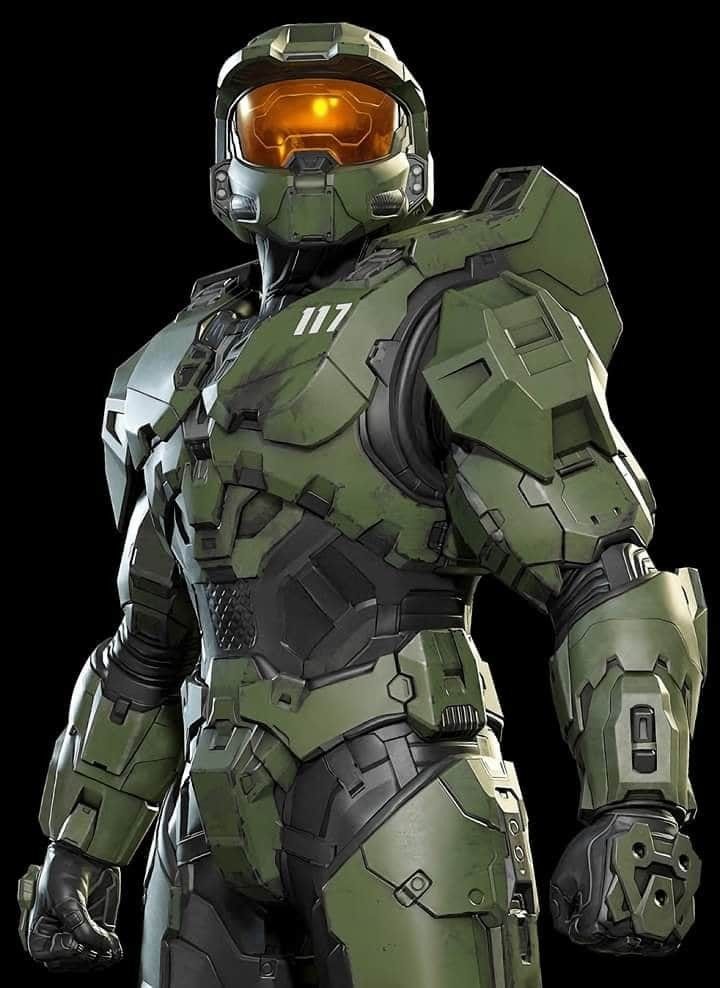 These are a variety of ways to glue 3D prints, and the adhesive you use will depend on the type of filament that you 3D printed in. For more information you can check out our dedicated article on the subject.
Recommended:
How to Glue 3D Prints: The Best Glue for PLA, PETG & ABS
Image: DaDave via Thingiverse
Armor pieces during assemblySanding
Let’s talk about everyone’s least favorite part of post-processing: sanding. It takes a long time and a lot of elbow grease, but sanding is pretty much a requirement of you want a smooth finish on your armor.
The best way to sand a model is to start with a rough-grit paper like 200 to quickly remove the layer lines, and progressively work your way up to using a fine-grit paper like 2000.
You can cut out some of the initial sanding using something like bondo, wood putty, even resin to fill in the layer lines. Then you just have to sand the filler smooth instead of the actual 3D printed surface.
Recommended:
PLA Smoothing: How to Get Perfectly Smooth PLA 3D Prints
Priming
While some people skip this step, we think it’s a pretty important one. Priming your armor pieces before you paint ensures that you have a good foundation layer for your paint, so you can use less coats to cover your model. You can use a paint and primer combination to ignore this step, but the results vary.
Painting
Once your pieces are smoothed out and primed, you can finally move on to painting them. How involved this process is depends on the armor set you’re making and how detailed you want to be.
If your armor doesn’t have any fine details to recreate, you can usually get away with using a can of spray paint to quickly cover your pieces in an even coat. Filigree and other fine detailing has to be done by hand.
You can also use the painting process to make the armor look damaged, rusted, or otherwise less than perfect. This is good if you want to recreate a look from a certain point (like after a specific fight) in a movie, show, or other type of medium.
Conclusion
3D printing a set of armor takes a lot of time and effort, but it is one of the coolest 3D printing projects you can try.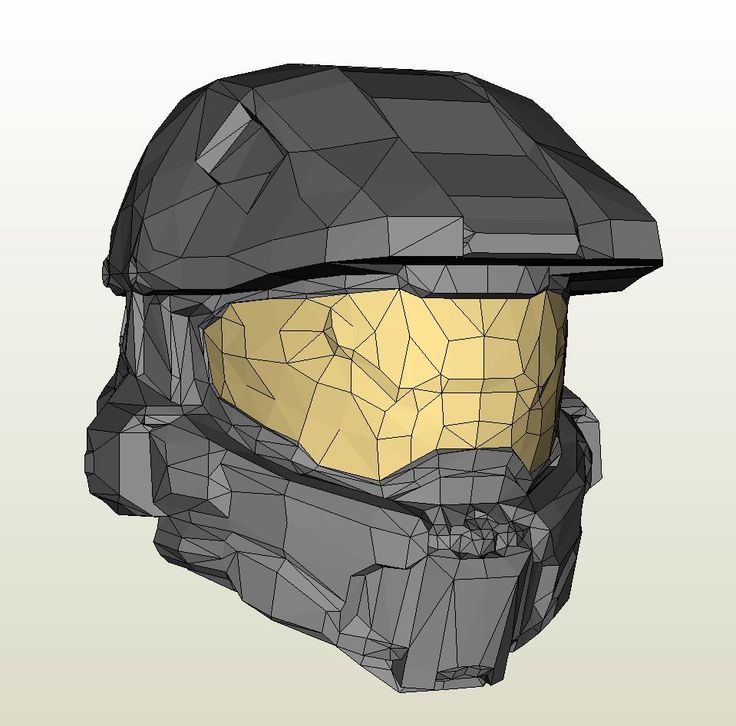 If you are thinking of giving it a shot, you might also want to 3D print a helmet to go with it.
Are you planning to design or print your own armor or costume? What questions do you still have about the process? Let us know in the comments.
Best 3D Printable Models Halo・Cults
OREOL SHREDDER WEED CHOPPER HALE WEED SHREDDER TUBE 40 MM
3 €
Ghost Halo
0.66 €
HALO AIRSOFT- BR85 KIT HI CAPA 5.1
14,50 €
Sci-Fi Alien Ship Launcher 7
9.22 €
Sci-fi launcher for alien ships 6
9.22 €
Sci-Fi Alien Ship Launcher 5
11.52 €
Sci-Fi Alien Cargo Ship 2
9.22 €
Sci-Fi Alien Cargo Ship 1
10.37 €
Sci-fi Alien Freighter Launcher 3
16. 13 €
13 €
Sci-fi Alien Freighter Launcher 2
10.37 €
Sci-fi rocket to launch an alien cargo ship
12.68 €
Covenant CPV Heavy Destroyer
2.55 €
Halo SPI Inspired Mirage Helmet (3D MODEL - STL)
23.04 €
Halo SPI Inspired Mirage Armor (3D MODEL - STL)
46.08 €
Covenant CAR class frigate
1.27 €
Precursor database object
5.09 €
Predecessor of the OpenLock Set
6.11 €
Marathon Class Heavy Cruiser (Halo Fleet Battles)
Free
UNSC MAC Station (Halo Fleet Battles)
Free
Halo ring
22 €
Halo ring 10x8
18 €
Halo ring 12x9
18 €
Bust of the leader of the Halo tribe
1. 72 €
72 €
WORK HELMET SF WEARABLE
12,50 €
UNSC Logo
Free
Key holder for Master Chef
1.52 €
Halo CPV Heavy Destroyer (Halo Fleet Battles Redux)
10.17 €
Halo Covenant support xbox , play
1 €
Housekeeper Halo Killjoy
1.52 €
MK3 V2 SPARTAN 10 - HALO REACH / INFINITE MINIATURE (3D PRINT READY)
1.44 €
MK3 V2 SPARTAN 9 - HALO REACH / INFINITE MINIATURE (3D PRINT READY)
1.44 €
MK3 V2 SPARTAN 8 - HALO REACH / INFINITE MINIATURE (3D PRINT READY)
1.44 €
MK3 V2 SPARTAN 7 - HALO REACH / INFINITE MINIATURE (3D PRINT READY)
1.44 €
MK3 V2 SPARTAN 6 - HALO REACH / INFINITE MINIATURE (3D PRINT READY)
Free
MK3 V2 SPARTAN 5 - HALO REACH / INFINITE MINIATURE (3D PRINT READY)
1. 44 €
44 €
MK3 V2 SPARTAN 4 - HALO REACH / INFINITE MINIATURE (3D PRINT READY)
1.44 €
MK3 V2 SPARTAN 3 - HALO REACH / INFINITE MINIATURE (3D PRINT READY)
1.44 €
MK3 V2 SPARTAN 2 - HALO REACH / INFINITE MINIATURE (3D PRINT READY)
1.44 €
MK3 V2 SPARTAN 1 - HALO REACH / INFINITE MINIATURE (3D PRINT READY)
1.44 €
Ender 3 Pro Halo stepper cover
5.09 €
Halo Infinite: Mark V Zeta Helmet
Free
Spartan halo
1.75 €
Halo 2 anniversary: Small Grunt 1/33 Scale (SLA support)
5 €
Halo 1/33° Grognar Ghost Pilot (SLA supported)
5 €
Halo - 1/33° scale set base for Ghost
2 €
Halo - 1/33° scale Grognar Ghost Pilot
2 €
Halo - 1/33° Ghost
Free
Halo 2 anniversary : Small ground (Grunt) scale 1/33
1 €
3D printer cosplay application examples
07. 10.2021
Content
-
- 3D print 3D for the manufacture of costumes
- elements
- 3D printer for cosplay
- Printing costumes entirely
- Production Master of models
- FDM printers
- Resin printers
- Totals
Probably everyone wanted to feel at least for a while in the shoes of their favorite hero. Or briefly be in a fantasy world. Cosplay allows, at least for a while, to plunge into a fictional world with its own laws.
Cosplay should not be confused with role-playing, because cosplay does not imply the development of the character or history of the character. It focuses on the detailed reproduction of the image of the character to the smallest detail.
Some people think that cosplay is limited only to curvy girls in skimpy outfits, but this is far from the case. The skill of some cosplayers is amazing.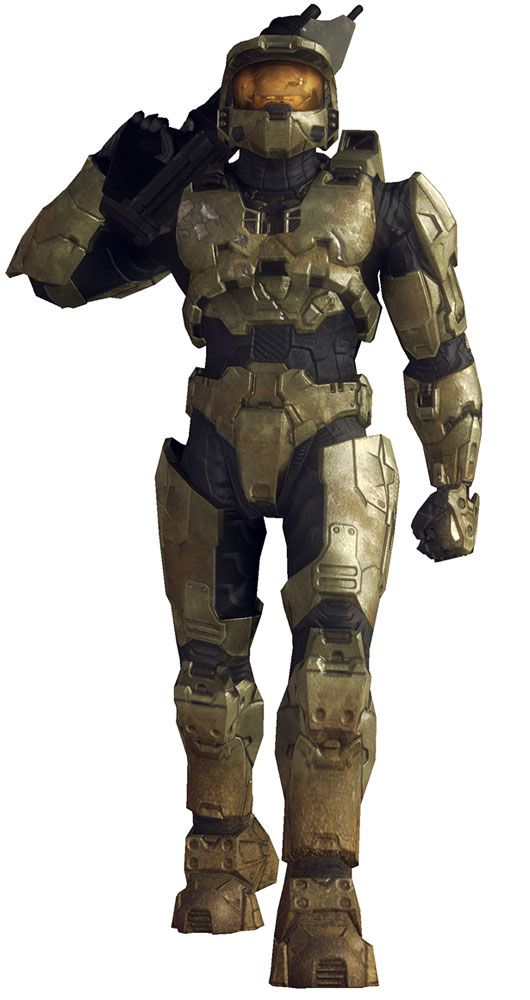 They manage to single-handedly create amazing things with precision and detail that many workshops cannot reproduce.
Terminator suit from Warhammer 40k
A good cosplay is not only an external correspondence to the appearance of the selected character, it is the ability to convey the character and other features of the character (for example, characteristic movements, facial expressions, etc.). At photo shoots, with the help of Photoshop, they try to add the atmosphere of the world to better convey the nuances of the character.
It is believed that the term Cosplay was coined by Japanese journalist Nobuyuki Takahashi. The word itself is a combination of the initial letters of the word costume (costume) and play (play).
Warhammer 40k universe photo shoot
The advantage of 3D printing for costume parts
Previously, a cosplay costume was literally made from improvised materials.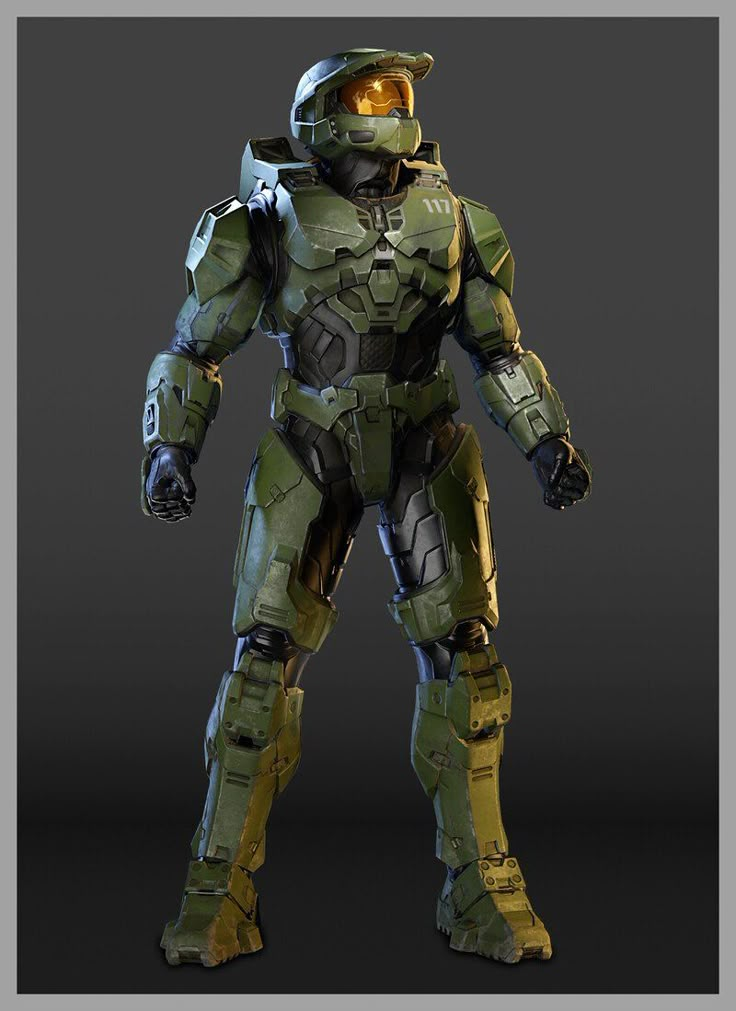 Each, to the best of his skills, available tools and ingenuity, used various, mainly construction, materials to assemble the costume - isolon, glue gun, tourist rugs, etc.
Now available special materials for the manufacture of parts. The most popular of them is Eva foam.
Eva
Eva is a very convenient material for making a variety of armor. The biggest advantage over other materials is thermoplasticity. When heated, eva easily bends, and after cooling, it keeps its shape. On sale you can find eva foam of various hardness and thickness.
Making armor from eva
But there are certain nuances - for the correct cutting of eva, patterns are needed (there are special patterns or patterns for pepakura are redone). When cutting, it is necessary to take into account the location of the edges and make the cut not straight, but at an angle. Sections, after gluing, must be further processed with sandpaper.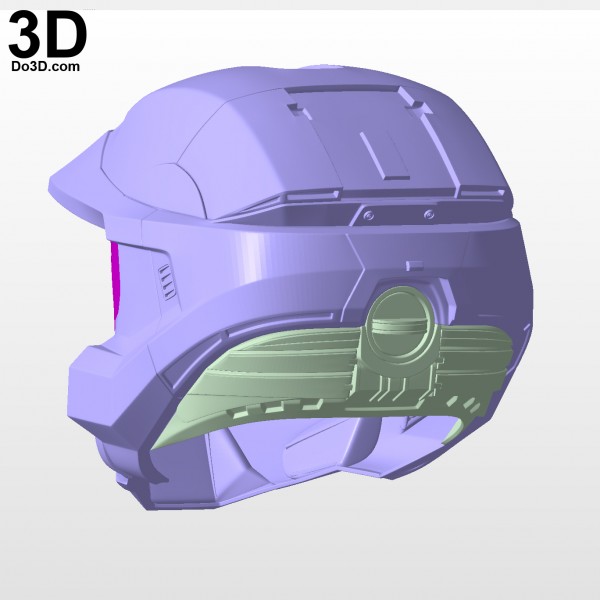 The surface of eva is porous, so it is advisable to treat the surface with latex before painting to obtain a smooth surface. For painting and putty, it is desirable to use elastic materials, because eva still remains a little flexible.
Pepakura
Papercraft - this is the name of patterns (reamers) for the manufacture of various elements from paper.
Not only cosplayers are addicted to papercraft, for some it is enough to glue a paper model for a collection.
Usually pepakura is used as an inexpensive and easy way to make massive armor when there is no way to get eva foam.
First, the paper model is glued together. Paper is usually chosen with a high density to minimize the risk of deformation of the model during further work.
Finished paper model
After gluing, the model must be strengthened. For this, fiberglass and epoxy resin are usually used. When impregnating a paper model, it is very important to ensure that the geometry of the model does not "lead". Usually epoxy and fiberglass are applied in several layers. Before applying a new layer, it is necessary to wait for the polymerization of the old one, usually it takes 24 hours.
The resulting model is strong, but too angular. Models in papercraft are high-poly and it is necessary to manually smooth out the angularity with putty and sandpaper. After painstakingly removing the surface of the model, it can be painted.
Left paper model, right after strengthening, processing and painting
Models made by this method are very heavy due to epoxy and putty. And the manufacture of one product takes a lot of time, but this method remains popular because of its availability and low cost. Epoxy can be found in any building market, and fiberglass is easily interchangeable with other materials.
Modeling and casting
This method is suitable when you need to quickly produce many identical parts. A master model is made (for example, from plasticine) and a mold is removed from it using special silicone, into which epoxy, special two-component plastics or polyurethanes can then be poured, depending on what characteristics you need to get in the finished product.
Two-component plastic purity print with metallic powder
To color the finished casting, you can knead the dye into liquid plastic or rub the mold with special powders.
It makes sense to make silicone molds if you need to make many identical elements, it is not advisable to remove the silicone mold for one casting. Silicone is still not cheap and not everywhere you can buy it. In addition, it is necessary to have some skills in silicone and plastic/resin casting in order to minimize the amount of air bubbles and get a quality casting.
Handy materials
And of course, masters know how to use the most unexpected things for cosplay.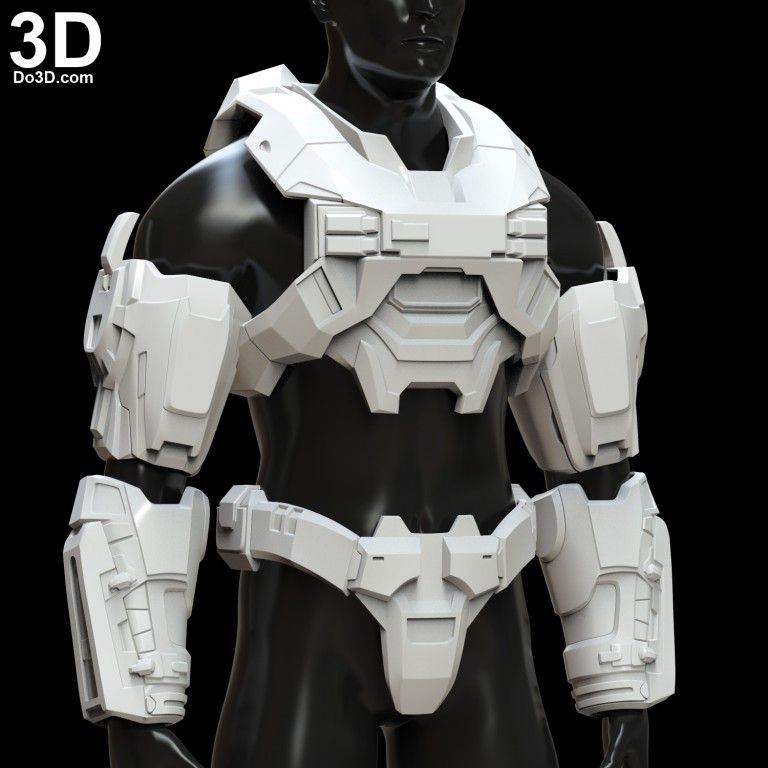 For example, PVC pipes are often used to make frames for fantasy weapons. Izolon for making feathers for wings, etc.
Acrylic folding knife
Using PVC pipes as a sword frame
3D printing
Using a 3D printer to make a complete costume may not always be advisable due to the high cost. But in the manufacture of elements with complex geometry, small elements or high detail, it can greatly facilitate the task and save a lot of time. A 3D printer becomes indispensable for printing engineering, moving elements. This is very convenient when a seat for all wiring and electronics is immediately included in the model and you don’t have to puzzle over where to place everything after assembly.
But 3D printing also has its drawbacks. When fabricated on an FDM printer, models must be further processed to obtain a smooth surface. If you print on a photopolymer printer, then the cost of the finished product will be quite high.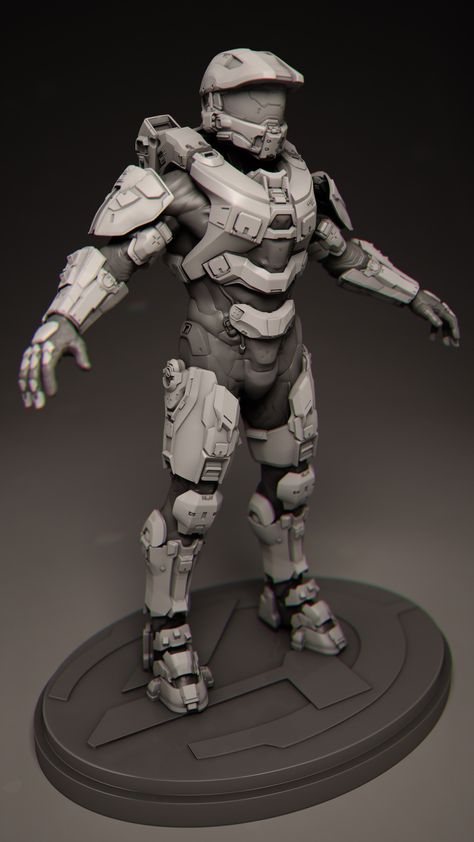 Large elements of the costume will have to be printed in parts and then glued together.
Cosplay 3D printer application examples
Whole costume printing
A 3D printer is becoming an indispensable tool for manufacturing geometrically complex suits or, for example, functional elements of armor.
Iron Man Armor.
Emily Yarid has been modeling, building and refining Iron Man armor since 2013. She initially took it up out of boredom, deciding to upgrade the costume she had.
In the Tony Stark suit, the reactor glows, the helmet automatically closes and opens. On the back there are functional "wings" that open and close.
One of Emily's ready-made costumes
The girl uses a 3D printer to make armor elements. After printing, she processes and paints the details herself.
Printed Armor
Tony Stark Mask
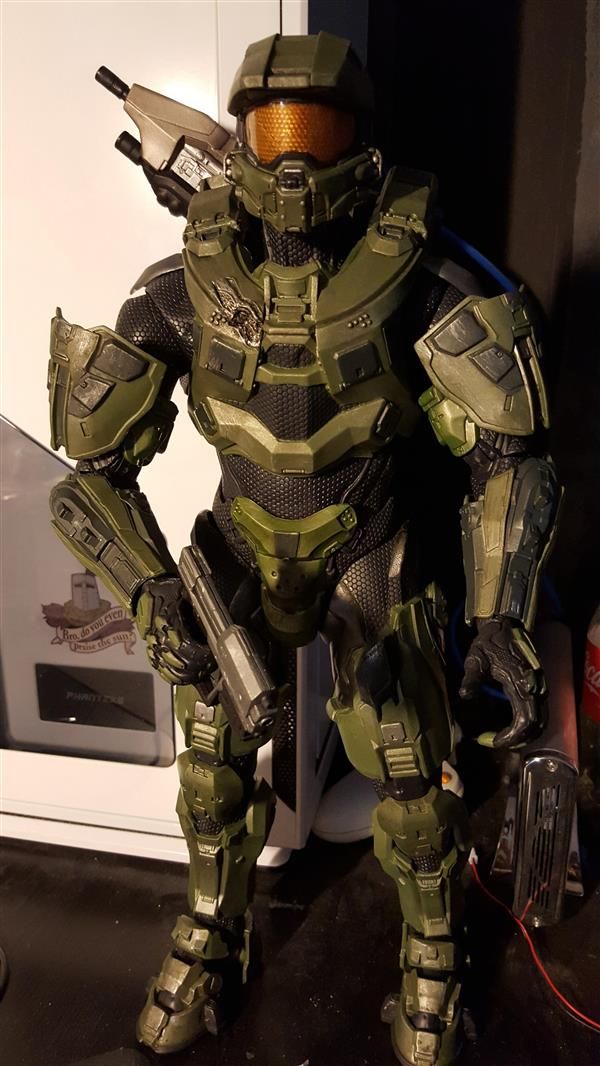
HALO
A user with the nickname mosquitobandito collects full-fledged armor from the HALO universe.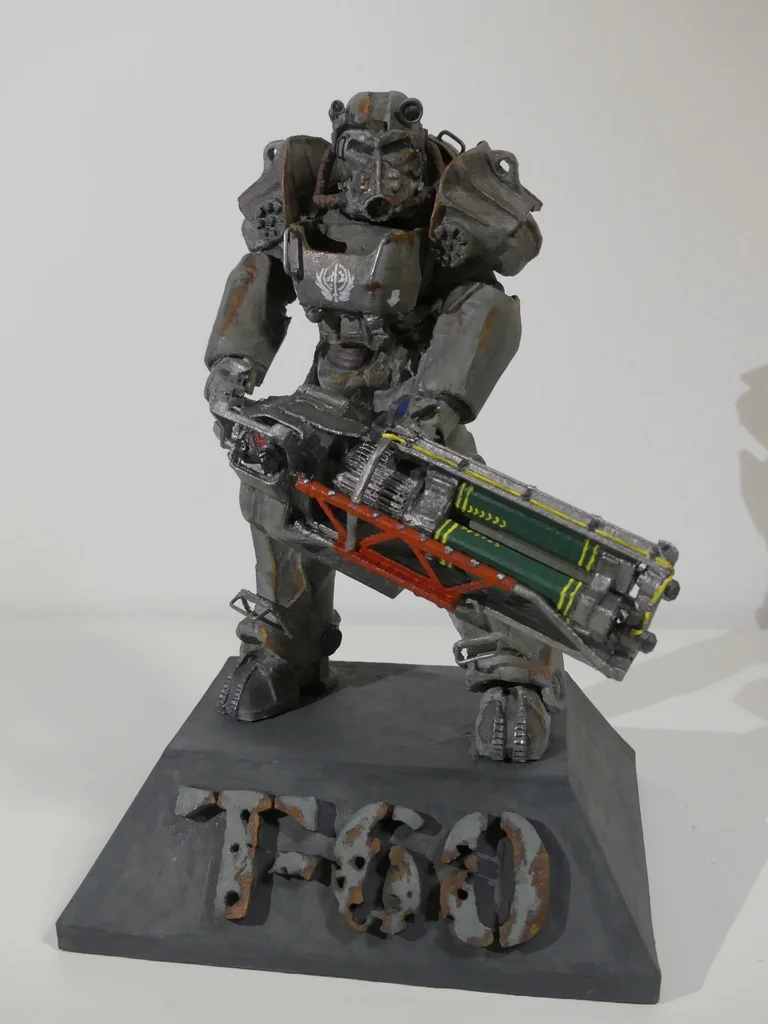
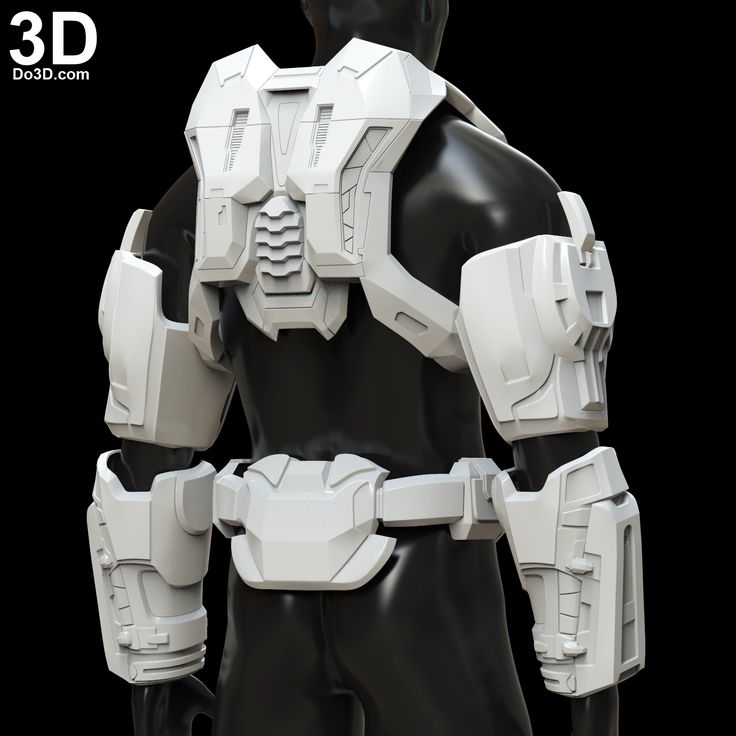
Armor 3D model
Armor is almost entirely 3D printed. There are a lot of issues that need to be addressed when modeling to keep the armor as mobile as it is in the game.
Shoe cover
Pre-assembly of the upper part of the armor before gluing and processing.
The armor part is pre-cut into several parts and printed in parts on an FDM printer. After printing, be sure to check how the parts fit together, as the plastic may shrink unevenly.
Treated and painted hand protection
Costume printing
Making a full-fledged costume using 3D printing is not always justified. Simple shapes are much faster and cheaper to make from other materials such as eva.
But complex parts such as helmets, weapons, armor elements are much more accurate if they are made using 3D printing.
Steam Punk Star Wars Helmet
Hand making all the patterns would take much longer, and it is important to make all the patterns symmetrical.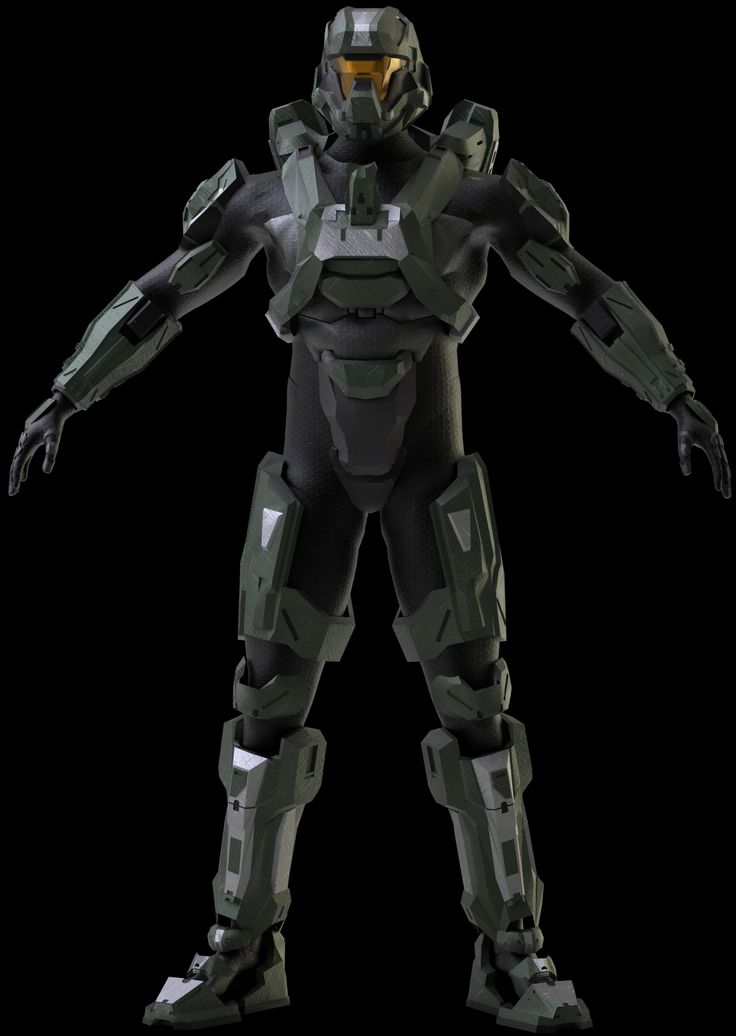 This is a very painstaking work that requires a lot of patience, perseverance and experience.
Iron Man Steampunk Helmet
Composite weapon
Some elements seem quite simple to manufacture, but it can be very difficult, even with a template, to make symmetrical and smooth bends.
Wolverine's Buildable Helmet
Master model making
Sometimes the material with the desired properties is found only among foundry resins and plastics. But to remove the form, you still need a master model.
Epoxy sword casting
It was necessary to make a transparent sword. Epoxy resin is well suited for manufacturing. The master model (except for the rose) was printed on a 3D printer.
Prepared master model
The sword was printed in half - it is much easier to get a high-quality casting without bubbles.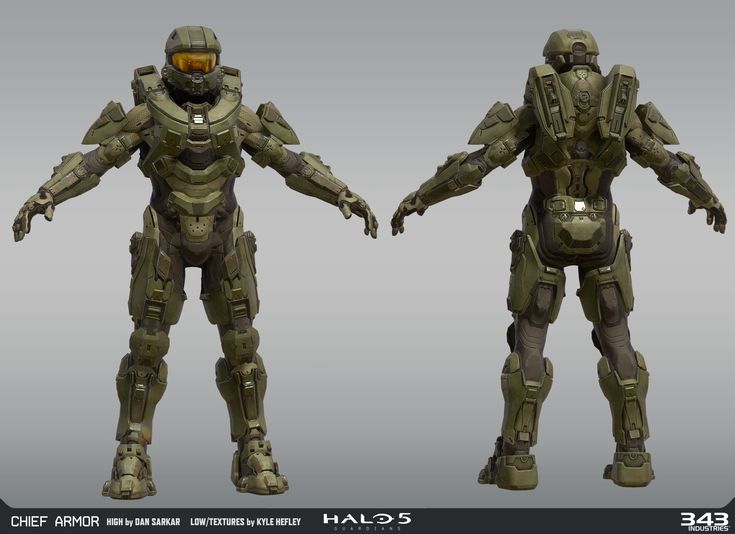 The halves of the sword are still the same and can be glued together. After printing, the surface of the master model was brought to perfect smoothness and primed.
Formwork is being prepared from improvised materials for pouring silicone molds
Preparing the master model for pouring with silicone
A slightly tinted epoxy resin is poured into the resulting mold to give an icy blue tint. After casting, 2 halves can be glued together with the same epoxy.
The result is a stunning sword, as if carved from ice. Such an effect would be difficult to achieve using other materials.
Finished casting
Finished Epoxy Sword
Rating of the best cosplay printers
FDM printers
FDM technology for making cosplay has its pros and cons.
Pros:
-
Large build area. Some printer models can print an entire full-size helmet.
-
Inexpensive consumables. The cost of a plastic thread (filament) is still much cheaper than consumables for other technologies.
-
A wide selection of different materials. You can find a filament for any task - from engineering to decorative.
Minuses:
Creality3D Ender 6 (build kit)
Creality3D Ender 6
Characteristics:
Print technology: FDM/FFF
Working area size: 250x250x400mm
Number of extruders: 1
Closed Camera: Yes
Heated table: Yes
Plastic type: ABS, ABS+, PLA, PLA+, PETG, Flex, Nylon (Nylon), ASA, Carbon, Decorative plastics, others
Inexpensive printer for a beginner who knows how to handle tools. Supplied as an assembly kit. A large build area will allow you to print large parts in their entirety, and the version with a closed body can print with any, even engineering, plastics.
FlyingBear Ghost 5 3D printer (assembly kit)
Flying Bear Ghost 5
Characteristics:
Print technology: FDM/FFF
Working area size: 255x210x200 mm
Number of extruders: 1
Closed chamber: No (but there is an option to purchase)
Heated table: Yes
Plastic type: ABS, ABS+, PLA, PLA+, PETG, Flex, Nylon (Nylon), ASA, Carbon, Decorative plastics, others
A very popular device due to its affordable price. It is sold as a kit kit (for self-assembly), but thanks to the detailed instructions and a huge number of video guides, assembly should not be a problem.
The huge fan base of FlyingBear Ghost 5 makes it easy to find ready-made upgrades and add-ons for the printer. This device is perfect for those who like to experiment and learn something new.
Wanhao Duplicator 6 Plus
Characteristics:
Print technology: FDM/FFF
Working area size: 200*200*180mm
Number of extruders: 1
Max.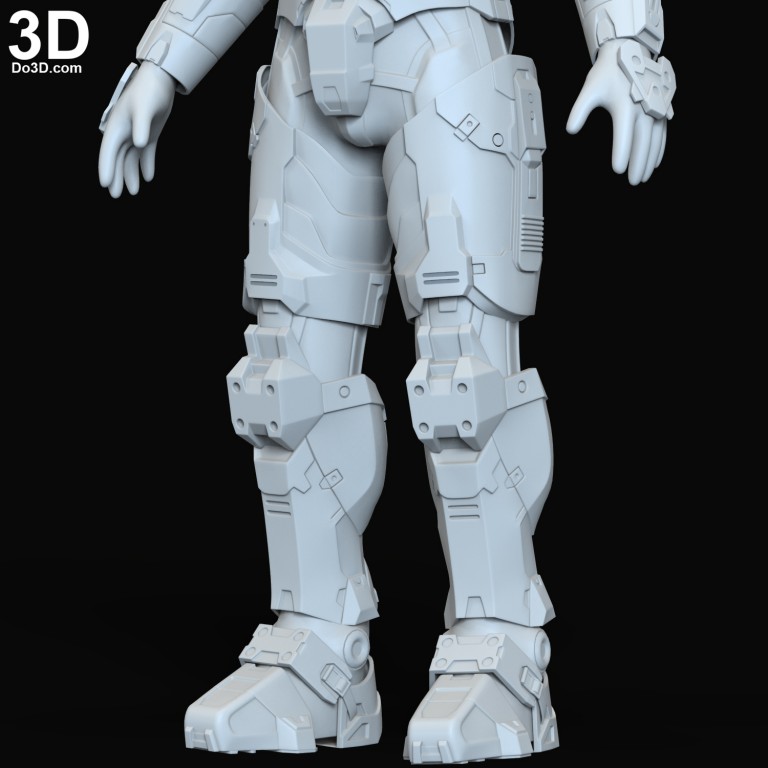 extruder temperature: 260 degrees
Closed Camera: Yes
Heated table: Yes
Plastic type: ABS, ABS+, PLA, PLA+, PETG, Flex, Nylon (Nylon), ASA, Carbon, Decorative plastics, others
Wanhao Duplicator 6 Plus is a reliable workhorse for those who do not want to delve into all the nuances of a 3D printer. Available in 2 versions - with a closed case and not. It is better to immediately purchase a printer with a closed housing so that there are no problems with printing engineering plastics such as ABS, Nylon, etc.
Raise3D Pro2
Raise3D Pro2
Characteristics:
Print technology: FDM/FFF
Working area size: 305x305x300 mm - when printing with the 1st extruder;
280x305x300 mm - when printing with 2 extruders
Number of extruders: 2
Max. extruder temperature: 300 degrees
Closed Camera: Yes
Heated table: Yes
Plastic type: ABS, ABS+, PLA, PLA+, PETG, Flex, Nylon (Nylon), ASA, Carbon, Decorative plastics, others
This is already a serious device with a large print area and 2 extruders for printing complex models.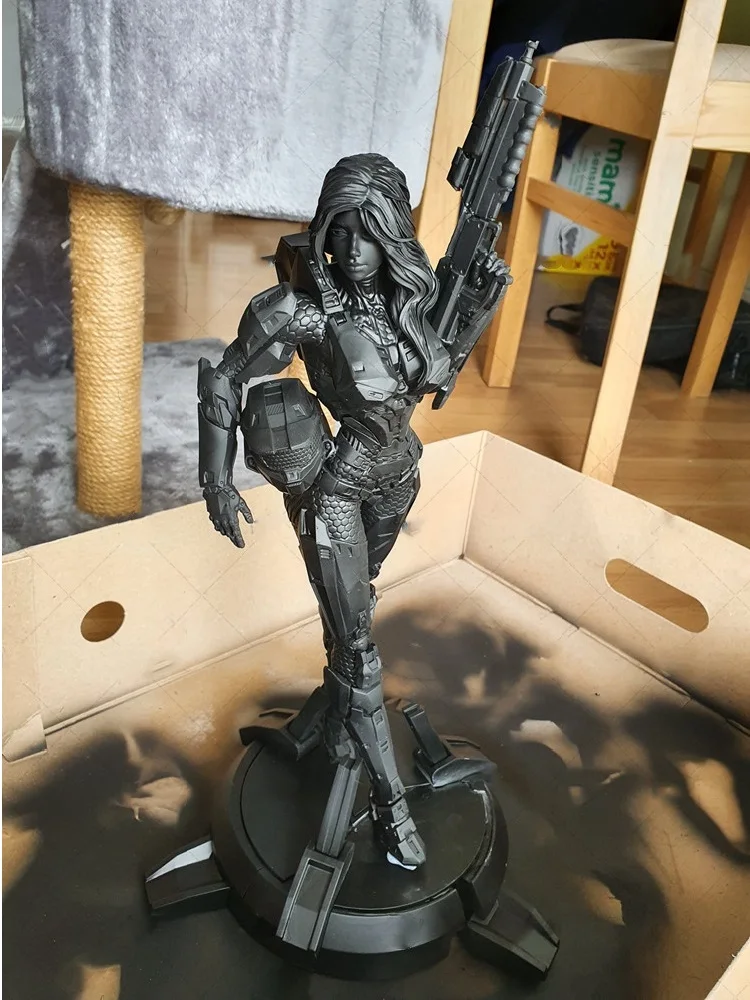 Raise3D Pro2 can be a great help in a small workshop for making decorations and cosplay.
Photopolymer printers
Photopolymer printing is not yet so common for making large items due to expensive consumables, but Western cosplayers have already appreciated the advantages of photopolymer printers for printing small items.
Pros:
-
The ideal surface of the finished model.
-
Amazing detail that is impossible to get on FDM printers.
-
Large selection of resins. You can get an optically transparent model.
Minuses:
Anycubic Photon Mono
Anycubic Photon Mono
Characteristics:
LCD display resolution: 2560x1620 (2K)
XY Positioning Accuracy: 0.051mm
UV wavelength: 405 nm
Working area size: 130x80x165 mm
Layer thickness: 0.01-0.15mm
Affordable photopolymer machine with a small print area.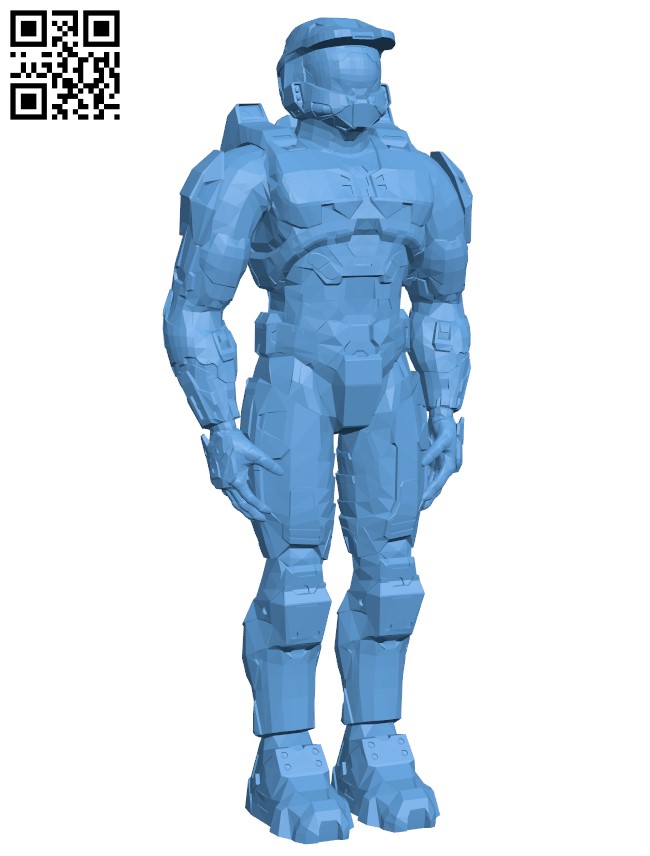 Suitable for making small items.
Phrozen Sonic Mighty 4K
Phrozen Sonic Mighty 4K
Characteristics:
LCD resolution: 9.3" 4K Mono LCD
XY positioning accuracy: 52 microns
UV wavelength: 405 nm
Working area size: 200x125x220 mm
Layer thickness: 0.01-0.3mm
The Phrozen Sonic Mighty 4K is a professional 3D printer with a large print area and a 4k monochrome sensor. This allows you to quickly receive finished products with amazing accuracy.
Phrozen Sonic MEGA 8K
Phrozen Sonic MEGA 8K
Characteristics:
LCD resolution: 15" 8K Mono LCD
XY Positioning Accuracy: 43 µm
UV wavelength: 405 nm
Working area size: 330 x 185 x 400 mm
Layer thickness: 0.01-0.3mm
A professional 3D printer with a huge (by the standards of photopolymer printers) printable area.