Adding laser to 3d printer
Converting your 3D Printer into a Laser Engraver
By replacing your printer hotend (or CNC toolhead) with a laser, you can make use of the XY motion to control the path of the laser to engrave metals and cut other materials.
Florida-based Endurance Lasers have been manufacturing their plug-and-play laser systems for CNC systems and 3D printers since 2015. The lasers are very easy to set up, and do not require any extra software or skills to install.
You can see how easy it is to wire up the laser to the most common 3D printer boards at this link.
Starting at 4 Watt systems for metal marking, and going up to 15 Watts with the dual beam DUOS laser, there are a range of lasers of various types and power levels to suit a range of budgets and needs, accordingly.
Let’s start by looking at the 4 Watt system and work our way up.
4W DPSS laser
The 4 Watt DPSS (diode pumped solid state) laser module is a great place to start for those wishing to dip their toes into metal marking with their existing CNC/printer hardware. Its 1064nm YAG laser is ideal for jewelry marking, and for color engraving on a variety of metals including gold, silver, copper, aluminum, iron, and steel, and can even be used on ceramics such as sapphire glass.
It also works well on plastics such as plastic film and is suitable for use on plastic packaging. You can see an example of the multi-color marking on a sheet of titanium in the image below.
Color marking on titanium is a cinch (Image credit: Endurance Lasers)The kit includes the following items:
- – DPSS laser module (1064 nm) with 4 watt optical power.
- – AC/DC 12V 25A (PSU).
- – An advanced mounting bracket.
You can read more about the 4W marking laser right here.
10W Delux laser
The 10 Watt Delux model laser offers the best combination of cost and power, which is why this is the top selling laser from Endurance Lasers. Featuring a Nichia diode type laser with a 445 nm wavelength, the Delux is suitable for engraving materials such as polished and anodized aluminum, steel, stainless steel without needing to use engraving paste. With engraving paste, engraving on both copper & brass can be achieved easily.
The 10W laser makes light work of cutting certain materials too, and can cut 3.8mm thick plywood in a single pass, as you can see in the image below.
Easy laser cutting on your 3D printer (Image credit: Endurance Lasers)Plastics such as dark acrylic can be precisely cut up to 8mm thick with just a couple of passes of the laser, and thicker woods and plywoods up to 5mm can also similarly be cut with 2 or 3 passes.
This kit comes with the following items:
- – 10W diode laser module 445 nm.
- – Laser box (laser driver) with Mo1 PWM.
- – PSU (12V 5-6A)
- – 3 fixation laser lens rings.
- – Air nozzle ver 1.0 with a tube
You can read more details about the Delux laser at this link.
10W PLUS PRO laser
The 10 Watt PLUS PRO offers the most powerful single beam diode laser 445 nm module for laser cutting and laser engraving with an advanced laser control box.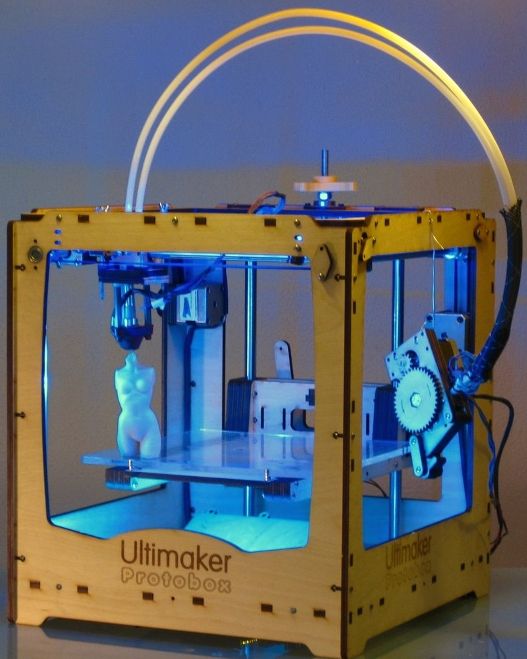 It has the most advanced electronics in the range and features double TEC cooling systems to keep the laser diode cold all the time.
In addition, it comes equipped with an air nozzle and an air compressor for effective laser cutting as soon as you mount it to your 3D printer or CNC machine. The PLUS PRO can cut through 5mm of plywood without hassle and is great for cutting soft materials such as leather and even sail material.
PLUS PRO Laser module and controller (Image credit: Endurance Lasers)This laser module kit comes with the following:
- – 10W PLUS PRO Laser module
- – Laser box ver. 2.0
- – Regular 3 element lens
- – Bigger focusing rings x 3PCS
- – 2 x 12V 8A AC DC (PSU) power supply
- – Air compressor and air nozzle (ver 1.0)
- – 2x DC/DC for TEC cooling
For more details about the 10W PLUS PRO laser kit, visit this link.
15W DUOS laser
The DUOS model is the most powerful diode laser on the market with combined 2 beams, and is capable of cutting a wider range of materials and at high speeds of up to 500mm per minute.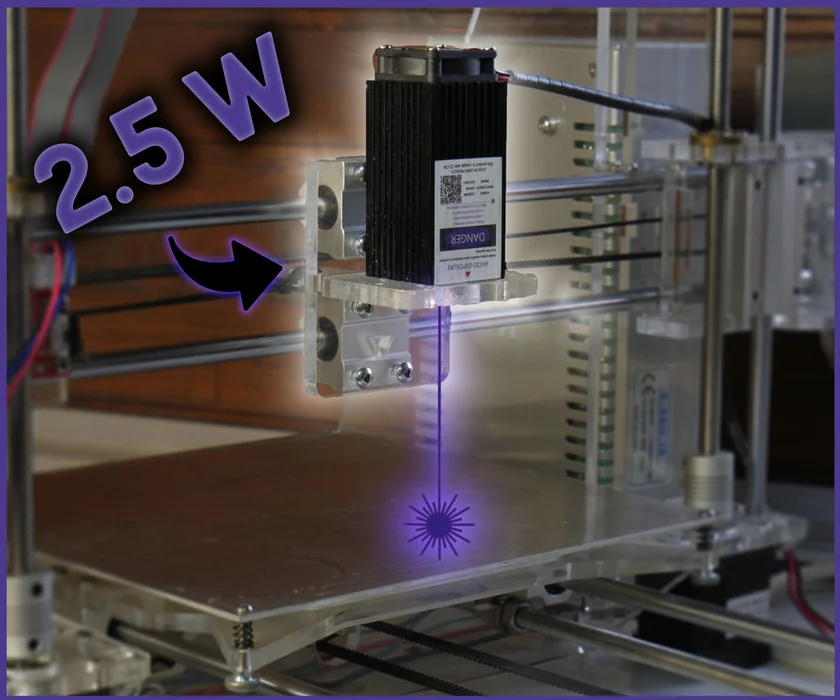 Naturally, the DUOS comes with two nozzles for your air supply also, as you can see in the image below.
For example, the 445 nm wavelength DUOS can slice through 3.5mm thick cedarwood with just two passes of the dual laser.
The video below shows how the 15W DUOS compares to a 10W laser.
The kit includes:
- – 15W “Duos” laser beam system. ver 1.1.
- – A big single laser box with Mo2 PCB.
- – DC/DC converters for TEC cooling
- – 2 x PSU (12V 8A AC/DC).
- – 2 x air nozzle ver 1.0.
- – 1 x an advanced mounting bracket.
Further details of the DUOS are available over at this link.
Extras and Discounts
In addition to the included components listed for each model, each purchase also comes with focussing plates, laser connectors, protective gloves, and goggles specific to each laser’s wavelength. You also get some stickers too.
There are some big discounts currently available on the site right now also, with savings of several hundreds of dollars being available on most models.
If you’d like to see their range in full, then head over to the Endurance Lasers website.
A list of compatible 3D printers / CNC for adding the laser.
Endurance lasers are very compatible units and can fit into almost any 3D printer / CNC machine / XY plotter or laser engraving (cutting) chassis.
Endurance lasers are controlled via PWM signal 3-24V and analog inputs 0-10V (all PRO versions)
Best 3D printer of 2021: top choices for work and home use. How to connect the Endurance lasers.
A quick video about PWM and how does it work
Everything you need to know about TTL / PWM (the most-watched video on our channel)
Got a question? Ask our experts and we will help you!
Contact us! 👆
- _(required)
- What is a name of the machine that you own(required)
- Your name(required)
- Your email(please, enter a valid email)
- If you have any issues with it, describe them here or simply share your thoughts
Explore detailed wiring diagrams:
Wiring Endurance lasers to TOP popular boards (3D Printers)
Wiring Endurance lasers to TOP popular CNC boards
Here is a partial list of compatible 3D printers and CNC machines where our lasers were tested and work perfect!
Proceed with a fast and secure checkout. Free DHL shipment worldwide. Get your laser in 3-5 days.
Compatible and tested 3D printers
Compatible 3D printers and CNC machines for adding the laser head / add-on
Endurance keeps working and update the list of compatible 3D printers. Here is a tested and verified list. We state that Endurance lasers can be installed on any 2 or 3 axes machine if it has enough space near or by replacing the extruder or the spindle.
Endurance lasers can be connected to FAN / Spindle output pins.
TTL wire connects to PWM output if necessary.
If you have limited space in your 3D printer – please let us know so we can make a custom design for your machine.
We provide detailed guidance of how to connect the laser to your 3D printer or CNC machine.
Usually, it takes 5-30 minutes, depending on your skills.
If you need a special custom mount – let us know when you place an order and add “laser mount pack”.
We provide with all types of aluminum mounts: L, П type of aluminum mounts.
Electronics, connectors, are compatible and easy to connect.
We provide detailed guidance about laser connection to different controller boards such as GRBL (0.9, 1.1), Marlin (RAMPS compatible), etc.
Full list of 3D printers and CNC machines that are fully compatible with Endurance lasers
3D Botic – MendelBot MM152 DIY Kit
3D Kits – Status 3D printer
3D Stuffmaker – CREATOR Fully Assembled
3D Stuffmaker – EVOLUTION Gen2 kit
3DKreator – Kreator Motion
3ntr – A4 printer
5AXISMAKER
Active 3D – Active-X1
Actuity Design – Acuity MendelMax 3D-printer
Actuity Design – Helix – 3D Printer
Afinia – Afinia H-Series
Afinia – h500
AIO Robotics Zeus
AIO Robotics – ZEUS All-In-One 3D Printer
Airwolf 3D – AW3 HDX
Airwolf 3D – AW3D HD
Airwolf 3D – AW3D HD2x
Airwolf 3D – AW3D XL
Airwolf 3D – AW3D XL Assembled
Aleph Objects – LulzBot
Aleph Objects – LulzBot Mini
Aleph Objects – Lulzbot Taz 5
Aleph Objects – Lulzbot Taz 6
AOD – AOD-Artist
Artillery Sidewinder X1
Asiga – Freeform Pico
Asiga – Freeform Pico Plus27
Asiga – Freeform Pico Plus33
Asiga – Freeform Pico Plus39
ATOM 2. 5 EX
5 EX
ATOM 3dp – Atom 3D-printer
Autodesk – Autodesk 3D Printer
Autodesk – Ember
B9 Creations – B9 Creator
B9Creations – B9Creator 3D printer
B9Creations – B9Creator 3D printer KIT
Backho (White Tiger) company – Willybot 1.3
be3D – DeeGreen
Beeverycreative – BEETHEFIRST
Big Rep – BigRep ONE
Blue Eagle Labs – Kossel Clear ABS Kit
Blue Eagle Labs – Kossel Clear PLA Kit
Blue Printer – SHS 3D Printer
Boots Industries – BI V2.5 3D Printer
botobjects – ProDesk 3D
BoXZY Complete
BQPrusa i3 Hephestos
Builder – Big Builder
Carbon – Carbon M1
CB-Printer – 3D Printer CB-printer KIT
CB-Printer – 3D Printer CB-printer.com
CELCEL – Robox
Cetus 3D – Cetus
Cetus 3D – Cetus Extended
Choc Edge – Chocolate Choc Creator V1
Cobblebot – Cobblebot 3D Printer
COBOT – Desktop 3D Printer
Code-p – Builder
Conrad – Velleman K8200
CraftUnique – CraftBot
CraftUnique – CraftBot 2
CraftUnique – CraftBot 3D Printer
CraftUnique – CraftBot PLUS
CraftUnique – CraftBot XL
Creality – Creality CR-10
Creality – Ender 2, 3, 4, 5, 6
CTC LTDCTC-3D
Cubify – Cube 3D printer
Cubify – CubeX 3D printer
Deezmaker – Bukito Portable Mini Printer Kit
Deezmaker – Bukobot 8 v2 Duo Kit (Dual Extruders)
Deezmaker – Bukobot 8 v2 Kit X3
Delta Tower – Delta Tower
Dreammaker – dreammaker
Dreammaker – dreammaker max
DWS Lab – XFab 3D Laser Printer
Eckertech – ecksbot 2014 DIY kit
Eckertech – ecksbot 2014 fully assembled
Ecrewvis – ECV-One
eMotion Tech – Prusa Mendel I3
envisionTEC – Perfactory Micro
EOS – EOS P 396
EOSEOSINT P 760
Essential Dynamics – Imagine 3D Printer
Eventorbot – Eventorbot 3D printer
EZ 3D printers – EZ 3D Printer-200
EZ 3D printers – EZ 3D Printer-200H
Fabbster – Fabbster kit
Fablicator – Fablicator
FABtotum Core
Febtop Tech Optimus 3-in-1
Felix Printers – 3d Felix 3. 0 Kit
0 Kit
Felix Printers – Felix 3.0
Flashforge Finder 3D Printer
Flashforge – Creator
Flashforge – Creator 2
FlashForge – FlashForge Creator
FlashForge – FlashForge Creator Pro
FlashForge – FlashForge Dreamer
FlashForge – FlashForge Finder
FLUX BEAMO
Flying Bear 4S
Formbot – Formbot T-Rex 2
Futura Electronica – 3Drag
GADGETS3D – RepRap G3D
Hardcotton – Hardcotton SLA 3D printer
Hot Proceed – Blade-1
HP – HP Jet Fusion 3D 4200
Hyrel 3D – Apprentice E3
Hyrel 3D – Hobbyist E2
Hyrel 3D – Journeyman E4
Hyrel 3D – Professional E5
Hyrel 3D – System 30
Hyrel 3D – Tinkerer E1
Hyvision – Cubicon Single
Hyvision – Cubicon Single Plus
Illios 3D – Ilios Photon 2
inDimension3 – Glacier Peak – Dual Head Printer
inDimension3 – Glacier Steel – Dual Head Printer
InDimension3 – Glacier Summit Plus
inDimension3 – Glacier Summit – Dual Head Printer
Intelligent Machine Inc. – Metalbot Metal RepRap compatible 3D printer
Invent Apart – RigidBot
Invent Apart – RigidBot Big
IonCoreLtd – Zinter PRO 3D Printer
iRapid – IRAPID BLACK 3D-PRINTER
Isis3D – Isis One – Dual Extruder
IT IS 3D – Maxit
Jelwek – Mark34
KAST – Kast3dp
Kentstrapper – KENTSTRAPPER VOLTA BETA
Kentstrapper- Kentstrapper Zero
Kikai labs – T125
kudo3D – Titan 1 DLP
Kühling&Kühling – RepRap Industrial 3D printer
Leapfrog – Creatr
Leapfrog – Creatr Hs
Leapfrog – Creatr XL
Leapfrog – Leapfrog Creatr
Leapfrog – Xeed
LulzBot – Mini 3D Printer
Lulzbot – AO-101 3D Printer
Lulzbot – TAZ 3D-printer
M3DM3D – The Micro
Makemendel – RapidBot 3. 0 Kit
0 Kit
Makerbot – MakerBot Replicator 2
Makerbot – MakerBot Replicator 2X
MakerBot – Makerbot Replicator 5th Gen
MakerBot – Makerbot Replicator Original
MakerBot – Makerbot Replicator+
Makerbot – Replicator
Makerbot – Replicator Mini
Makerbot – Replicator Z18
MakerDreams – iNvent One – Black
Makerfarm – Prusa 8 “i3v Kit
Makergear – M2 3DPrinter-Assembled
Makergear – Makergear M2
Makerqear – M2 3D Printer- Kit
Makex – Makex M-Ohe
MakeX – Migo Basic with Laser Engraver option
MakeX – Migo L with Laser Engraver option
MakeX – Migo with Laser Engraver option
Mankati – Mankati Fullscale XT
Marcha technology – Witbox Helios
Marcha technology – Witbox Prusa
MarkForged – Mark One
MarkForged – Mark One Developer Kit
Markforged – Mark Two
Markforged – Mark X
Markforged – Onyx One
Matsuura Machinery – LUMEX Avance-25
MaukCC – Cartesio M V0.9
MaukCC – CartesioW V0.9
Mbot-3D – MBot Cube 3D printer
Mbot-3D – MBot Cube 3D Printer Kit
Mbot-3D – MBot Grid II
Mcor Technologies – Matrix 300+
Mcor Technologies – Mcor IRIS
Mendel Parts – Orca v0. 44 Unassembled
MendelMax – MendelMax 2.0 Beta Kit
Metamáquina – Metamáquina 2
Micromake – Micromake D1
MindKits – DiamondMind 3D Printer V2
miniFactory – miniFactory 3D printer
Mixshop – Mix G1 Plus Kit
Mixshop – Prusa Mendel Kit
Mojreprap – Profabb GATE LE
Mojreprap – Profabb GATE LE DIY Kit
Monoprice – Maker Ultimate
Monoprice – Monoprice MP Select Mini
mostfun – MostFun Sail 3D
MOTA – MOTA 3D Printe
Multistation – Extru3D V2
Multistation – Extru3D V2 Assembled
mUVe 3D LLC – mUVe 1 3D Printer Classic
mUVe – mUVe 1
mUVe – mUVe 1 DLP
MyMatics – Mamba3D
Natural Machines – Foodini
New Matter MOD-t 3D Printer
New Matter – MOD-T
New Matter – MOD-t 3D printe
NW RepRap – Prusa i3 Complete Kit
Old World Laboratories – OWL Nano
Omni3d – Architect
Omni3d – Factory 1.0
Omni3d – RapCraft 1.3
Omni3d – RapCraft 1.3 Kit
ORD solutions inc – Mh4000 – 3D Printer Fully assembled
ORD solutions inc – Mh4000 – 5 Color/Material 3D
PEARL – FreeSculpt 3D-Drucker EX1-Basic
PEARL – FreeSculpt 3D-Drucker EX1-Plus
Phenix Systems – PXM 200
Piecemake – Piecemake
Pirate 3D – Buccaneer 3D printer
Pirx – Pirx
Plastic Scribbler – Asterid Model 1000S
Portabee – Portabee Go
Portabee – Portabee Kit
pp3dp – UP Mini
PP3DP – UP! mini
PP3DP – UP! Plus 2
Printrbot – Assembled Printrbot PLUS
Printrbot – Assembled Simple
Printrbot – New Simple Maker’s Kit
Printrbot – Printrbot
Printrbot – Printrbot Simple Maker
PrintrbotPrintrbot Simple Metal
PrintSpace – 3DAltair 3 Pro
Prusa Research – Original Prusa i3 MK2
Prusa ResearchOriginal Prusa i3 MK2S
Pryntech – OpenSL v1. 0
0
QSQM Corporation – New Uncia
Raise3D – Raise3D N2
Rays Opitcs – MiiCraft 3D printer
rdGizmo For You LTD – Ilios HD SLA 3D Printer Kit
re.3d.org – Gigabot
RepRap – Kossel
RepRap – Kossel Mini
RepRap – Mendel Prusa
RepRap – Mendel90
RepRap – MendelMax
RepRap – Prusa i2
RepRap – Prusa i3
RepRap – Prusa Steel
RepRap – Rostock
RepRapPro – Huxley Full Kit
RepRapPro – Ormerod Kit 2
RepRapPro – Tricolour Mendel
Reprapsource – Prusa i3 Kit
Reprapsource – Prusa i3 Kit Single Frame Version
Robo 3D R1 +Plus
Robo 3D – Robo 3D C2
Robo 3D – Robo 3D R1 +Plus
Robo 3D – Robo 3D R2
RoBo 3D – RoBo 3D “ABS+PLA Model” Fully Assembled
Robo 3DRoBo 3D R1
Robot Factory – 3D-One
Robot Factory – 3DLPrinter
ROKIT – 3DISON Plus
Sasan Seyedi – Cyrus 3D printer
Sedgwick – 3D DLP Printer v2.0
SeeMeCNC – ORION Delta 3D-printer
SeeMeCNC – Rostock MAX
SeeMeCNC – Rostock MAX v2 3D Printer Kit
Sharebot Sharebot NG
Sharebot – Mounting Kit Pro
Sharebot – NG Next Generation
Sharebot – Sharebot Pro
Shark – Shark
Solido – Solido SD300 Pro 3D Printer
Solidoodle – Solidoodle 3D Printer, 3nd Generation
Solidoodle – Solidoodle 4
Solidoodle – Solidoodle G4
Solidoodle – Solidoodle Original
Solidscape – 3Z Studio
Something 3D – Something3D1D
Spiderbot – SpiderBot Eco Kit v1. 2
2
Spiderbot – SpiderBot Full Kit v1.2
Stalactite – Stalactite 102
Stellamove – Rapy 3D Printer
Stepcraft – 2/600
Store Open Electronics – 3Drag-3D-printer-kit
Stratasys – Dimension 1200
Stratasys – Dimension Elite
Stratasys – Mojo
Stratasys – Objet Alaris30
Stratasys – Objet500 Connex3
Stratasys – uPrint SE
Stratasys – uPrint SE Plus
StratasysObjet Eden260
Stratasysu – Print SE
Sumpod – Sumpod Aluminium
Sumpod – Sumpod Mega
Tevo – Tevo Black Widow
Tevo – Tevo Tarantula
TevoTevo Little Monster
Tinkerine Studio – Ditto Plus 3D printer
Tinkerine Studio – Ditto Plus 3D printer Assembled
Tinkerine Studio – Litto 3D printer
Tinkerine Studio – Litto 3D printer Assembled
Tinkerine – Dittopro
TPM – Elite P3600
Trimaker – Trimaker element 3D
TripodMaker – TripodMaker 3D printer
Type A Machines – 2014 Series 1 3D printer
Ultimaker Shop – The Ultimaker 2
Ultimaker Shop – Ultimaker Original
Ultimaker – Ultimaker 2 Extended
Ultimaker – Ultimaker 2+
Ultimaker – Ultimaker 2+ Extended
Ultimaker – Ultimaker 3
Ultimaker – Ultimaker 3 Extended
Ultimaker – Ultimaker Original
Ultimaker – Ultimaker Original Plus
UP3D – UP Plus
VAGLER – V-811
VAGLER – V-821
VAGLER – V-822
Velleman – Velleman K8200
Velleman – Velleman K8400
Wanhao – Wanhao Duplicator 4
Wanhao – Wanhao Duplicator i3 V2
WASP – DeltaWASP
WASP – DeltaWASP 20 40 (option: clay kit)
WASP – DeltaWASP 20 40 Turbo2 (standard version and with Zen dual extruder)
WASP – DeltaWASP 3MT Industrial Multitools (Spitfire extrusion system and Pellet extrusion system)
WASP – DeltaWASP 3MT Multitools (pellet extruder, Clay Extruder, Spitfire and milling machine)
WASP – DeltaWASP 40 70 Industrial (standard version and with Zen dual extruder)
WASP – DeltaWASP 40 70 PRO (option: clay kit)
WASP – DeltaWASP Clay Kit
WASP – PowerWASP
WASPDelta – WASP 3MT
Weistek – IdeaWerk
Weistek – IdeaWerk Assembled
Winbo Super Helper Sh255L
XYZprinting – Da Vinci Jr.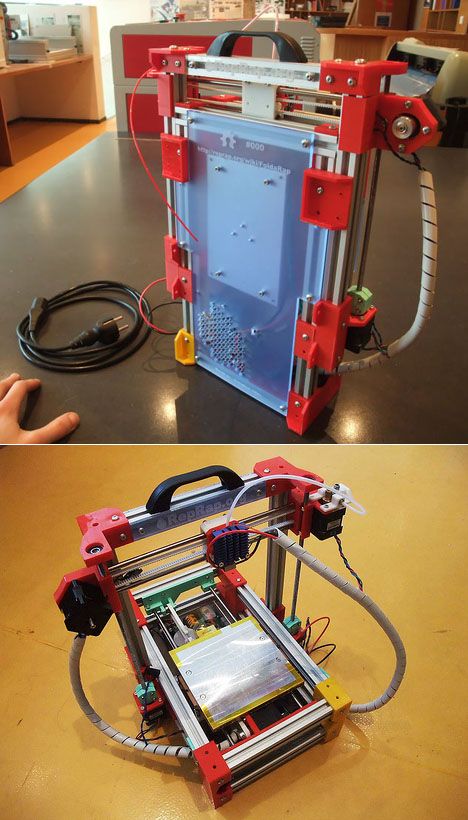 2.0 Mix
XYZprinting – Da Vinci Mini
XYZprinting – Da Vinci 1.0 PRO 3-in-1
XYZprinting – DA VINCI 2.0 Duo
XYZprinting – XYZprinting da Vinci 1.0
York 3D Printers – Buildabot ‘Revolution’ 3d Printer Kit
York 3D Printers – Buildabot ‘Revolution’ 3d Printer – Fully Built
Zbot.cc – Zbot
zegorobotics – Zego Classic Assembly kit
Zion3D – Zion 16
Zion3D – Zion 8
ZMorph – ZMorph 2.0 SX
ZMorph – ZMorph4d
Zortrax – Zortrax M200
Zortrax – Zortrax M300
Any example of installing the laser on Anycubic 3D printer
Very easy steps.
Endurance lasers work with all types of CNC machines: JFT 3040 3-Axis CNC Router, MillRight CNC Power Router, BobsCNC E3 CNC Router Engraver Kit, Genmitsu CNC 3018-Pro Router Kit, MY SWEETY 1610 CNC Machine, Carbide 3D Shapeoko 4, Ooznest Workbee, Onefinity Woodworker, Inventables X-Carve, The MPCNC – V1, Shark (NextWave), Stepcraft 420 – 840
All compatible CNC machines where Endurance lasers have been tested
EggBot
GoodEnoughCNC
MPCNC
OpenBuilds OX CNC Machine
Maslow
MillRight CNC
Next 3D
Ooznest OX
Scan2CAD and CNC
Shapeoko
WhittleCNC
X-Carve
Zen Toolworks CNC DIY Kit
Our Facebook community can always help you with hooking and wiring the laser:
Dedicated, driven & helpful!
Tomasz Matuszewski: 4x Ender 3 PRO 2xBorn 2x Alfawise 2x Anet A8 1x Anet A10 1x Anet ET 4 1x Anet ET5 1x Tevo Tarantula Pro 2x Mendel 90 I think that’s all, I did not forget something 😀
Александр Федоров: Voron 2.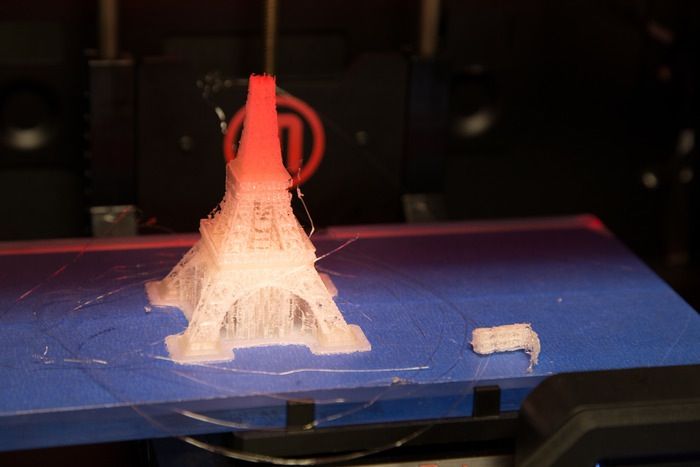 4 #108, Voron 0 #24 http://www.vorondesign.com if interested 😉 self build from scratch 😉
John Tivet: Folgertech Ft5 and Geeetech A30 Pro.
Dan Churchill: Creality CR10s looking at a resin one now
Guillaume Tremblay: My 3 expensive babies. 1kg/5h
Alex Pristenskiy: Yes, I also have 2 Anet A8 clones (the classic frame Prusa i3 in fact), both do an excellent job.
Sean Isensee: A Sunlu S8 and an Ender3 pro. Used to have two modified XYZ davinci 1.0a’s.
Those lasted quite a while!
Michello Cancellara: 2 Ender 5pro and plus, thinking going to build a white Knight 😜
Thor Corgard: Started with a rapman 3.1 in 2012, then a MakerBot replicator, then a replicator 2x. Now I just have an Anycubic Photon
Gary Castle: A8 solid easy to fix, A6 better but a bit smaller but better gantry physics. Flashforge Creator pro, CR10, A2 enlarged but could be turned into a laser printer soon. Aloha George.
David Rawsthorne: Aurarum Wombot, Flashforge Dreamer, creality CR10, Creality CR10 S5 and Tevo Little Monster.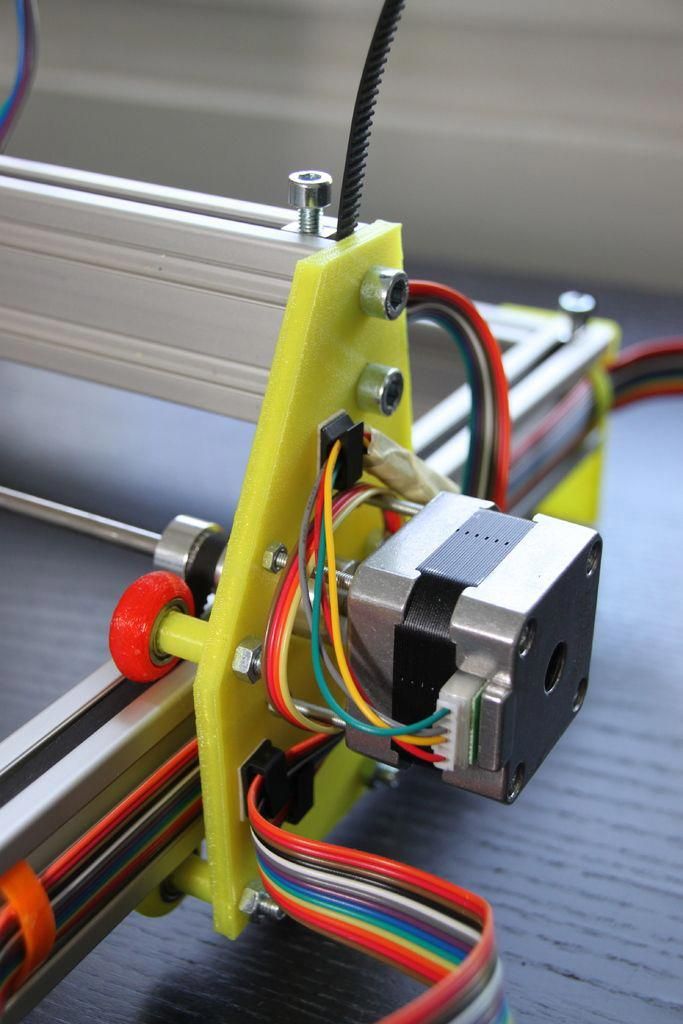
Matt Thomas: A tevo tornado and an awesome anet a8 with 32 bit board
William Lewis Durham Jr.: Wanhao Duplicator i3 v1 and a i3 Plus.
Did not find your 3D printer or CNC machine, please follow us on social media to be updated.
Compatible 3D printers and CNC machines for adding the laser head / add-on
[text-blocks]
Upgrade your stopend terminals on your 3D printer.
Our customers make & share.
How to install an Endurance 10 watt laser on an Ultimaker 3D printer
Learn more in our facebook community >>>
Personal experience with 8 watt laser (by Graham Ham)
Proceed with a fast and secure checkout.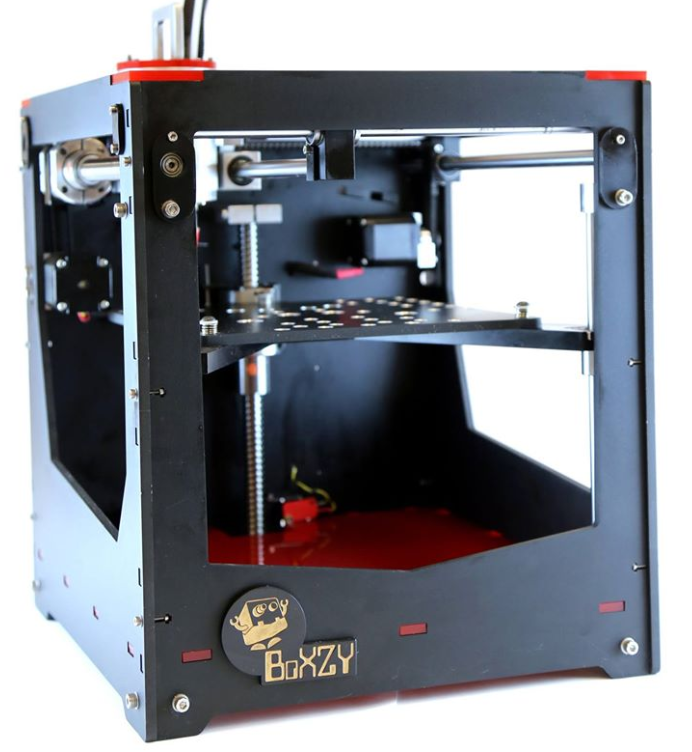 10 watt DPSS 1064 nm Nd:YAG laser module. FREE DHL express delivery worldwide!
Proceed with a fast and secure checkout. An Endurance “PRO” laser modules. Ultra reliable.
Laser cutting and laser engraving for home and for business
Advantages of Endurance lasers
High-quality standard
Multi-level testing system.
Industrial components.
Ultra reliable
The guaranteed duration of the continuous operation ~48-72 hours.
True continuous power output
Our products have the rated power output as advertised – unlike Chinese analogues.
TTL mode
Can be turned on and off with 3.5-24V.
Variable power output.
Plug and play
Universal and compatible mount.
Compatible with most 3D printers and CNC machines.
Friendly return policy
Do not like the laser?
Simply return within 30 days and get a full refund.
Laser attachments and laser engraving (marking) machines
Why do our customers buy lasers and engraving machines from Endurance?
Real-time advice
We assist and give advice by Phone / Email / Facebook messenger / Telegram / Whatsapp / Viber.
Professional support
We help to install and tune the laser. We offer qualified after-sales support.
Everything you need
We ship everything you need in one parcel to get started.
Immediate delivery
We ship all units within 4-24 hours. DHL express delivery allows you to get the package in 3-5 days.
Lifetime warranty
All our lasers are tested and could work up to 10000 hours.
Upgrade option
Do you have an old model? Upgrade your unit with more powerful one.
How to turn your 3D printer into a laser engraver/cutter
3DPrintStory Reviews How to turn your 3D printer into a laser engraver/cutter
If you want to create something more than just 3D printed parts, or simply expand the range of materials you work with, laser cutting and engraving is a great choice. It allows you to work with other materials and does not require special experience.
But perhaps the best part is that this technology can be easily used by upgrading your 3D printer. The motion system of 3D printers far exceeds the requirements for laser cutting, and laser diode modules can be as small as hot end nodes.
Converting a 3D printer into a laser cutter and engraver is a pretty big deal. In this article, we'll talk about laser technology in general, and then we'll discuss the main steps involved in converting your 3D printer.
What is laser cutting and engraving?
Laser cutting is a process in which a laser beam selectively removes material along a specific path by vaporizing it. Engraving is basically the same, but instead of removing material, it marks the surface, changing its appearance through oxidation.
Two laser technologies are mainly used for the manufacture of tabletop machines: CO2 and diode. CO2 lasers are powerful enough to cut most materials, including some metals, and are widely used in industry.
However, CO2 laser machines are bulky and require rather expensive and fragile equipment such as CO2 tubes, mirrors and lenses. On the other hand, diode lasers are lightweight and relatively cheap, since they consist mainly of one small module.
Diode lasers are much less powerful than CO2 and are best suited for engraving and cutting thin sheets of balsa and plywood. In comparison, a CO2 laser can deliver up to 400W, while diode lasers can only deliver 10W maximum.
Do you need to convert your 3D printer to a laser engraver?
Converting a 3D printer to a CO2 laser machine can be quite a challenge given the size of the tubes and the complex system of mirrors. For this reason, it is much better to use diode lasers.
However, please note that these lasers can only cut certain materials such as paper, cardboard, balsa and plywood with a thickness of 3 to 5 mm. Due to the wavelength of the laser, it cannot cut or engrave transparent materials such as acrylic.
Also be aware of the safety requirements when using lasers. Class 4 lasers are dangerous to the eyes, so the use of safety goggles is mandatory. In addition, the products of combustion emitted during the operation of the laser can be harmful to our health, so enclosure and proper ventilation are required.
Take all of this into account before deciding to convert your 3D printer to a laser machine. Given the risks involved, it is especially important to take precautions.
How to turn a 3D printer into a laser cutter/engraver?
The process of converting a 3D printer to a laser machine varies but usually involves the same steps.
First of all, we need to choose the laser module that best suits our requirements (eg functionality and price). Next, we need to figure out how to adapt it to the electronics and physical interface of the 3D printer.
Laser module
Powerful solid state lasers are a relatively recent development, but the market has quickly caught up with demand for diode laser modules.
The laser power is always between 1 and 10 W. Some white label lasers you see online are listed as 30W or even 40W, but that is definitely not optical power output.
Power will determine which materials can be engraved and whether materials such as wood (and how thick) can be cut. Laser manufacturers usually provide a list of materials that can be engraved and cut, so be sure to check it out.
Variable focal length, which you sometimes see as an advertised feature, is not really important here, as the 3D printer's Z-axis can raise or lower the module to fit a fixed distance.
The air blower is an interesting feature as it blows air directly onto the surface to disperse particles that interfere with the laser, resulting in cleaner cuts. Some lasers have this feature built in.
Compatibility and connection
Most laser modules can be connected directly to the 3D printer control board. The partial cooling fan on a 3D printer requires an adjustable power output to control its speed, and it is this port that can power and drive the laser.
Some lasers require a special 12V power input. This is usually via a separate driver board, which can be powered by either the printer's power supply or an external power supply. This setup also requires a connection to the printer through the fan port.
Refer to the laser manufacturer's documentation for correct connection instructions.
Installation
Installation and mounting of the laser module is perhaps the only major equipment change in the entire conversion process. Although some lasers come with non-standard brackets, some adaptation will always be required.
Fortunately, you already have a 3D printer, so anything is possible. You may be able to find suitable designs on sites like Thingiverse. Otherwise, it might be time to try some 3D modeling software like Tinkercad or similar. The model doesn't have to be fancy, just a joint between holes and screws that will be used to hold the hot end.
Once you've attached the laser module to your 3D printer, you're done! However, in order to start engraving or cutting, you may need a new firmware.
Next steps
The laser cutter and engraver is one of the coolest machines we can have at home because it allows us to make things from a wider range of materials than extruded plastic filament. Converting a 3D printer to a laser printer is an inexpensive option, and you can always go back to 3D printing in the end.
By the way, for Ender and CR-10 users, Creality offers special laser kits to add (not replace) laser modules to these printers.
Be sure to check out some step-by-step guides online. For example, Instructables user Goss Adema has documented converting the Anet A8 to a laser cutter and engraver, and the TeachingTech YouTube channel has great step-by-step instructions on how to do it on any 3D printer.
Installing a laser on 3D printers, an example of such an option for printers of the ENDER family
Personal diaries
Subscribe to the author
Subscribe
Don't want
6
They asked me to explain the installation of a kit for a laser engraver on common printers of the ENDER / Creality family.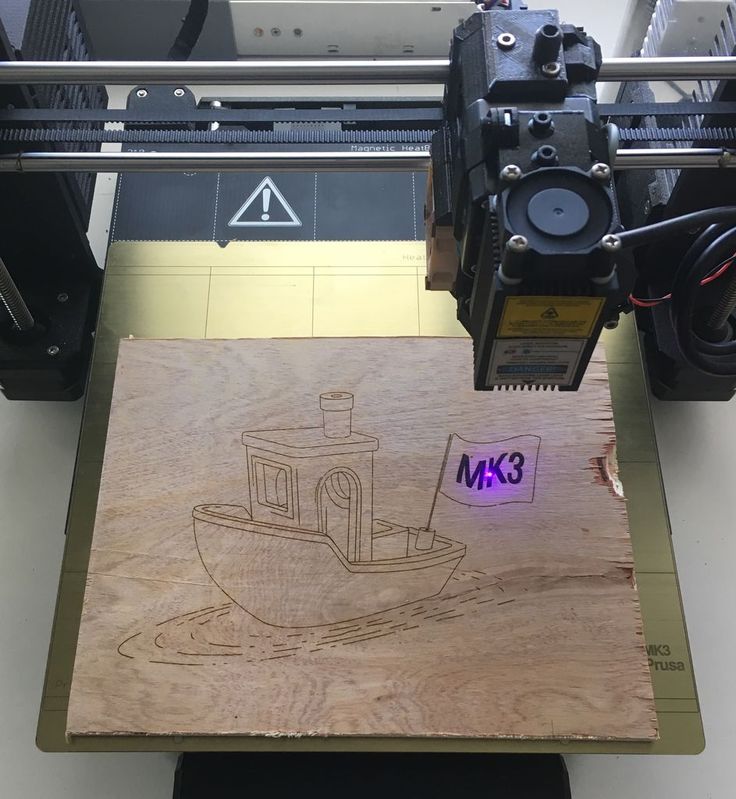 I liked this way - installing an additional laser engraver option on a 3D printer. I think it will be of interest to many.
This post is based on a video clip. I myself do not have such a printer, but this technology is suitable for any printer that uses standard G-codes and has a standard connection to standard slicers via a USB port on which COM-port is emulated. These are standard firmware on Marlin, Repeater Host and other similar firmware.
In short, the essence of the technology is this - the laser unit is mounted on magnets to the metal case of the HOT-END. Ordinary round neodymium magnets with a hole for fastening with a screw in the pot. They are screwed into the standard M3 hole on the laser block housing in the amount of 4 pieces.
Controlled by M106/M107 commands - these are commands to turn on/off the blower for the model located on the HOT-end. The whole alteration comes down to installing a tee cord to power the blower fan.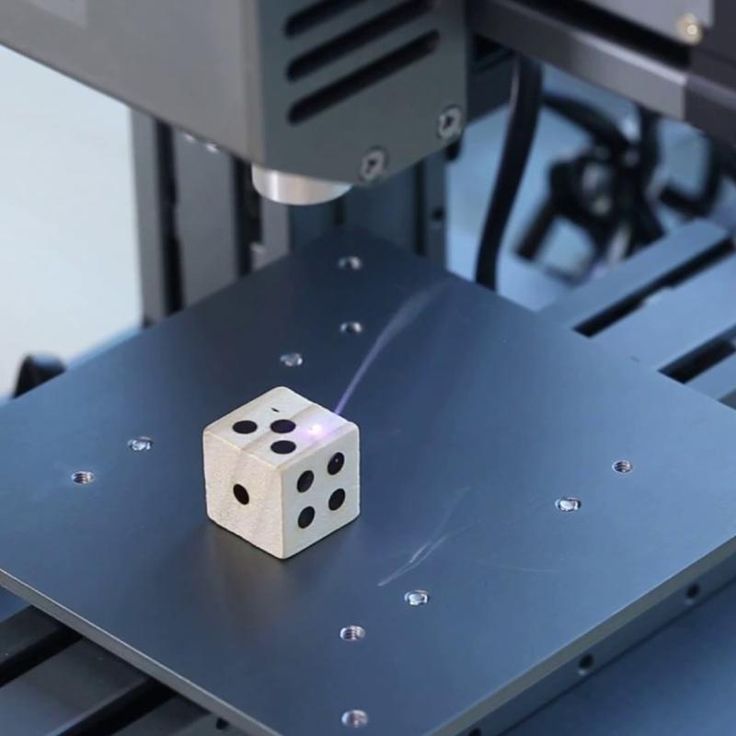 Using this tee, a diode laser driver unit is connected. That is, the entire connection is reduced to a two-wire connection of a controlled power supply of 12 volts. Since blowers are usually controlled through a powerful transistor, it can easily withstand an additional current of up to 5 A, if only the power supply of the printer would be enough.
The original video contains links to Chinese and Polish online stores.
In a Chinese store, such a kit on April 22, 2019 costs 3,662 rubles including delivery, and the Poles ask for 75 euros (and you may need to pay additional postage - I'm not strong in Polish).
Here is a set offered
The technical characteristics of the laser module are as follows:
Also in the original video there is a link to the free version of the LaserGRBL program, where the M3 / M5 laser control codes are replaced.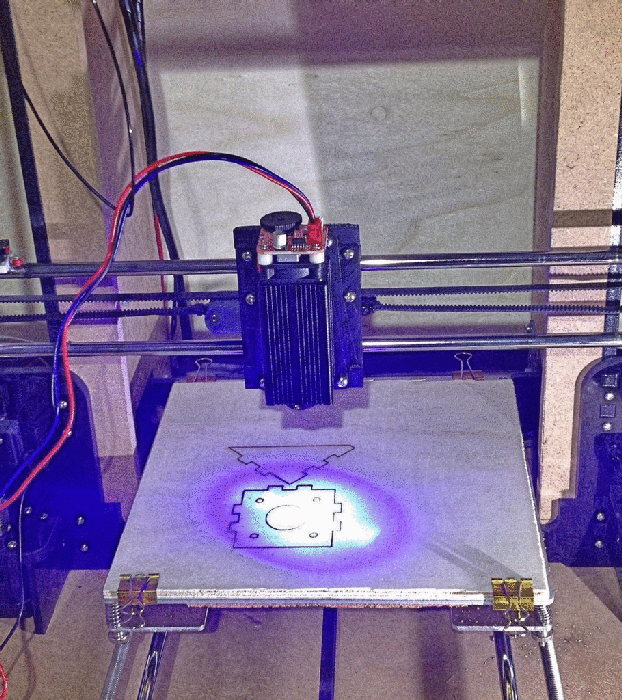 In this version of the program, turning on / off the laser is done by commands M106 / M107 - turning the fan on / off.
https://drive.google.com/file/d/1PpPj3VxC8kbaGqC0Yb7yBUAglPPLm4B1/view That is, a 0.5 watt laser, which has a metal case for the driver and 4 plywood in the kit, is offered at a price of 2.5 watt laser. The video shows the installation procedure - unscrew the two screws, insert the splitter cable. If suddenly they forgot to put it, then solder it yourself. And that's it.
Next 5 minutes it is told that it is necessary to put it carefully and not to shine in the eyes, otherwise you will lose your sight.
Then the work on preparing the codes and adjusting the focus of the laser is shown. Through the printer screen, you must first set the height in Z and determine '0' - make auto-parking along the X and Y axes. Then start engraving using the LaserGRBL program. Or all the same can be done using the REPETER-HOST slicer, but you only need to manually insert the codes to turn the laser on and off. This is done in any editor, for example in notepad using the 'find/replace' commands.
In short, the cunningly wise Poles want to make some euros off the technically illiterate European owners of ENDER-3, pushing a cheap laser at a price three times more expensive than it can be bought on its own - not as part of a whale. Moreover, the laser of the cheapest configuration - without TTL and without PWM, which is simply controlled by power on and power off.
In principle, everything is clear. The most valuable thing is the availability of information about the existence of a version of the LaserGRBL program, which can control the laser by turning the fan on or off.
By the way, the use of a low power laser in this whale is technically justified. A more powerful laser consumes up to 5 amperes and the power supply may not be enough. If you do everything yourself, then you can buy a more powerful laser, with TTL and PWM control, but you will have to use an additional power supply for the laser unit. A Use the outputs from the printer control board only as control signals without power supply to the laser module.
Link to original video
I hope you find this information useful.
Good luck and good mood to everyone.
Follow author
Follow
Don't want
6
More interesting articles
6
Subscribe to the author
Subscribe
Don't want
https://lider-3d.ru/blog/stati/top-10-nedorogikh-printerov/
so article 29Apr 2021...
Read more
6
Subscribe author
Subscribe
Don't want
Received the first feedback on the performance test of developer kits.