3D resin printing for beginners
Resin 3D Printing For Beginners: From Zero To Hero
Resin 3D printing is quite different from regular FDM printing, and it requires a lot more post processing when the print is finished.
In this guide, I will share some information about resin 3D printing which should help beginners start their journey. Without further ado, let’s get started.
What are Resin 3D Printers?
A resin 3D printer uses ultraviolet light to cure photosensitive resin, layer by layer. The ultraviolet light is partially blocked by a screen, and the exposed resin layer hardens.
Compared to a regular FDM 3D printer, where the plastic filament gets extruded trough a nozzle, a resin printer cures an entire layer at once, allowing for faster 3D printing in some cases.
The main benefit of using a resin 3D printer is the print quality you can get.
With a resin printer, you print layers as thin as 0.05 mm, while on a regular FDM 3D printer, it’s a bit hard to go under 0.1 mm.
Unfortunately, there’s also a few drawbacks when dealing with resin 3D printers. The main drawback for me is the need to clean the printed models from the remaining resin, which requires chemicals like Isopropyl alcohol or acetone, and protective gear. After cleaning the models, you also need to cure the models further with UV light
All these extra steps can be cumbersome, compared to a regular FDM 3D printer where most of the prints can be used right off the build plate, without too much post-processing.
Safety Precautions for Resin 3D Printing
Resin 3D printing is more dangerous compared to regular FDM 3D printing and should be treated with the respect it needs when it comes to safety.
Avoid contact with uncured resin
Every time you handle uncured resin, it’s imperative to use protective gloves. Avoid touching uncured resin, and always handle resin bottles with care.
Uncured resin can cause burns or irritations to your skin, so if you happen to touch uncured resin, use soap and water to clean the affected area as soon as possible.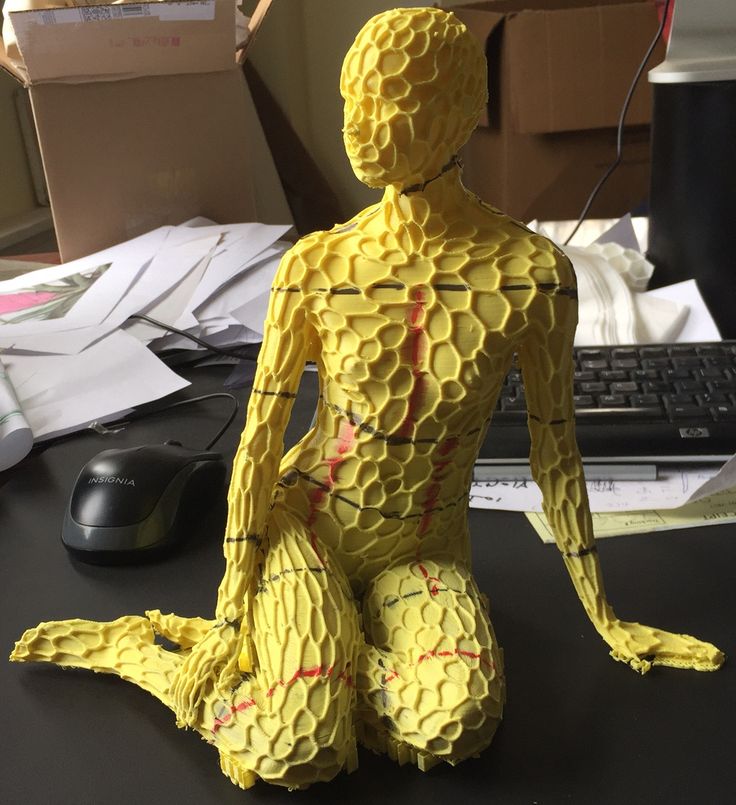
Use a well-ventilated space
When printing with resin, it’s important to have a well-ventilated space. Fumes from resin and cleaning chemicals are harmful and should not be inhaled. Using a face mask will help you minimize the effects of any remaining vapors.
Even though some resin 3D printers have carbon filters, or good insulation, it’s not a clever idea to use a resin printer in the same space where you live/work. If possible, try to use your resin printer in a separate room with good ventilation.
If this is not possible, I recommend printing when you are not in the same room. I usually print overnight when I’m not in my office. This way, in the morning I can simply remove the finished print and post process it, while properly ventilating the room. I also take extra precautions of adding another insulation layer to my resin printer so most of the smell stays inside the enclosure.
Deciding what Resin 3D Printer to buy
If you have decided to purchase a resin 3D printer, you need to think about what kind of models you are looking to print, then chose the appropriate machine for your needs.
Small format resin 3D printers
A small format resin 3D printer is excellent if you plan to print small objects, like miniatures or jewelry and you don’t plan to print a high number of models at the same time.
These printers are excellent for hobbyists or people who just want to get started with resin 3D printing. By choosing a small format resin 3D printer you save money and space.
Phrozen Sonic Mini 4K
The Phrozen Sonic Mini was my first monochrome resin 3D printer, and I was quite happy with it. Now, the mini has been upgraded with a 4K screen and currently it’s probably the most capable small format resin printer out there.
It has a high-resolution 4K resin screen which produces excellent details while still keeping the cost of purchase reasonable. I haven’t had the time to try it out, but there are a lot of happy owners.
You can purchase the Phrozen Sonic Mini 4K from the following websites:
Phrozen
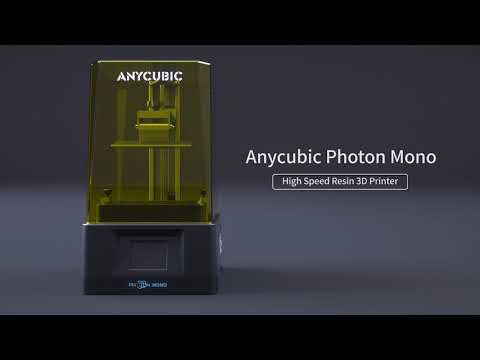
Anycubic Photon Mono 2K
I haven’t had the chance to test the Photon Mono 2K from Anycubic but in my experience, most of their printers are ok. This is the updated version of the old Anycubic Photon, which has a monochrome 2K screen that is more than enough for its print volume.
You can purchase the Anycubic Photon Mono 2K from the following websites:
AliExpress
Amazon
Banggood
Creality LD-002H
The Creality LD-002H is excellent for a beginner. It’s basically the same printer as the Creality LD-002R I reviewed a few months ago but with a monochrome screen which will print about 2 times faster, while it lasts 4 times longer. The price is quite good for a machine of this size, and it also looks great in my opinion.
You can purchase the Creality LD-002H from the following websites:
AliExpress
Amazon
Banggood
Large format resin 3D printers
A large format resin 3D printer is great when you need to scale up production or print bigger models which wouldn’t fit on a small printer.
These printers have a larger build plate which allow you to print a larger number of small models increasing the yield and production capacity.
They’re also great for people wo are looking to print big models in a single piece, without needing to split them in multiple parts.
Because of the higher price, most of the large format 3D printers are bought by people who use them as a production machine for their business, or by 3D printing enthusiasts who are looking to up their resin printing game.
Anycubic Photon Mono X
The Anycubic Photon Mono X is my biggest resin printer currently. It performed admirably during my review period and I strongly recommend getting one, if you need the volume.
Read more about it in my Anycubic Photon Mono X review, where you can also check out a few printed models to judge the quality.
You can purchase the Anycubic Photon Mono X from the following websites:
AliExpress
Banggood
Amazon
ELEGOO Saturn
The ELEGOO Saturn was the first on my list when it comes to large format resin 3D printers, because it promised a huge print volume for a small price.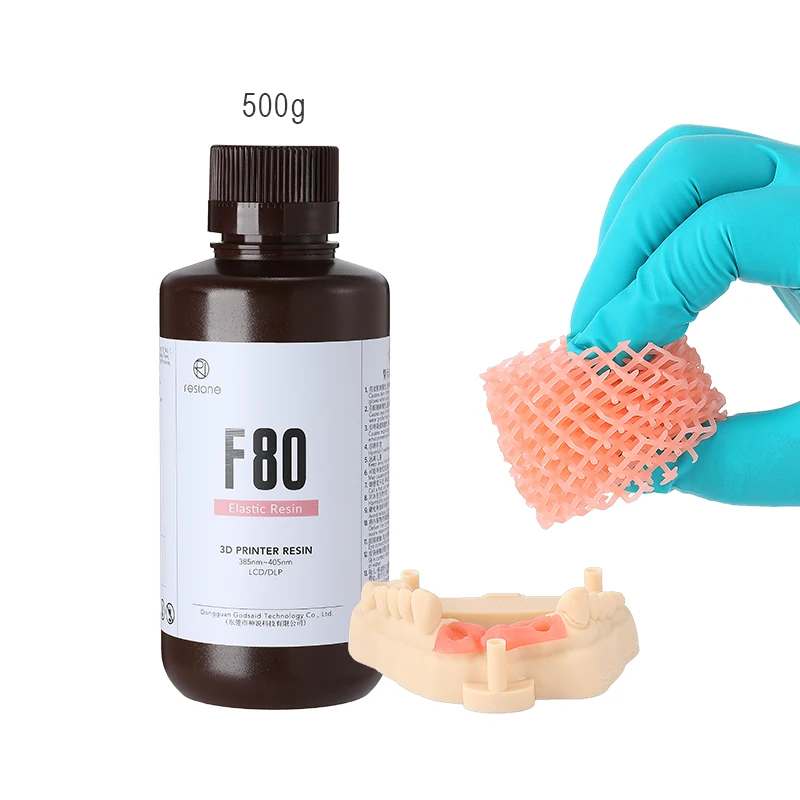 I liked it so much that I also wrote a preview at the time when it was announced.
Unfortunately, they were not able to keep up with the demand, and at the time of writing this article, the Saturn is still hard to get. From time to time, it shows up on Amazon in limited quantities.
If you are lucky enough to snatch one, then I don’t think you can go wrong with it. Price is good, and it mostly has the same features as other large format resin printers.
You can purchase the ELEGOO Saturn from the following websites:
Amazon
Phrozen Sonic Mighty 4K
Another popular option when it comes to large format resin 3d printers is the Phrozen Sonic Mighty 4K. It’s the “big brother” for the Sonic Mini 4K but it’s not as popular.
Unfortunately, Phrozen doesn’t have local warehouses to send their printers from, so most of the time you need to pay extra for shipping and customs. This increases the price, making it a less attractive product, compared to the Mono X.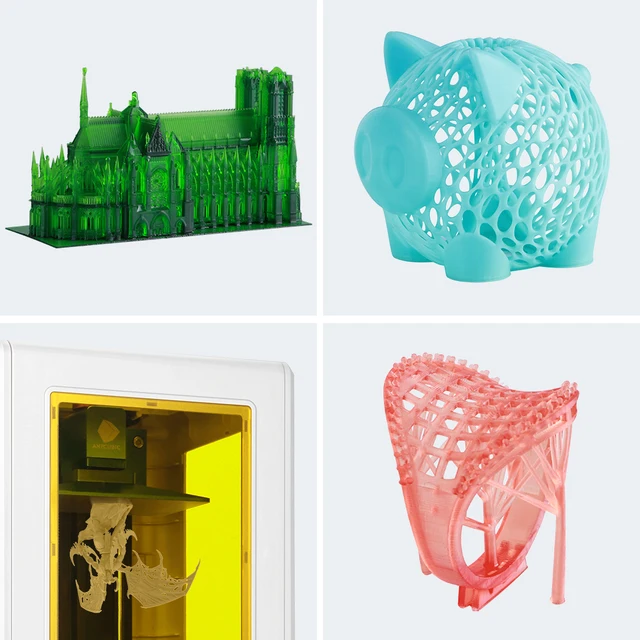
You can purchase the Prozen Sonic Mighty 4K from the following websites:
Phrozen
Post Processing Tools
Wash and cure stations
Buying a wash and cure station is strongly recommended because it will make the whole post-processing work a lot easier. One of the most annoying things for me when printing with resin printers is cleaning up the models. It’s such a messy process, and without a dedicated solution, it also takes a lot of space.
Most of the models available for purchase are two-in-one machines, which besides washing your models, are also capable of curing them after cleanup. Really, there’s no reason not to buy one.
For small format 3D printers, one of the most popular wash and cure stations is the Anycubic Wash and Cure, which works best with Anycubic resin printers.
The ELEGOO Mercury Plus is similar to Anycubic’s offering with the same wash and cure features in a single machine, but mostly made for Elegoo resin printers in mind.
Creality also has the UW-01 machine that works with their line of printers.
You might think that these wash and cure stations are made specifically to be used for the same brand resin printers, but this is not completely true. By pairing your resin printer with a same-brand wash station, you get the possibility of also attaching the model directly from the build plate.
Keep in mind that these wash and cure stations are best suited for smaller resin printers. For large format resin printers, we are still waiting for a few models to become available for purchase.
Required Consumables for Resin 3D Printing
Resin
As the name suggests, resin 3D printers use photosensitive resin as a build material. Resin is available in a wide range of colors and each type of resin has different proprieties.
For example, there’s regular resin like the Anycubic Basic resin which is mostly used for miniatures and generic resin objects. It doesn’t have any kind of “special ability”.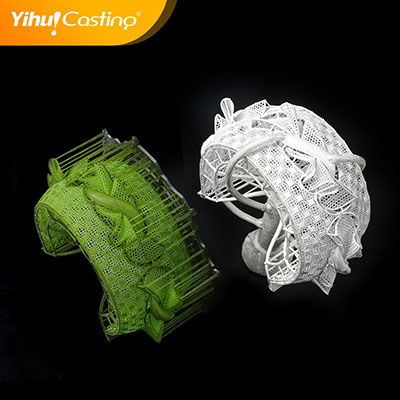 It’s just a resin good for day-to-day prints.
Recently, water washable resin is starting to get popular because it’s marketed as a resin that can be post processed only with water, eliminating the need of IPA or other chemicals. In my tests, this type of resin performed quite bad, and I don’t really like it.
Besides that, it also gives people the impression that this resin can be washed under running water, but this is not the case. Water washable resin should be treated like any other resin and should be properly disposed.
We also have resins with special proprieties, like the Siraya Tech Tenacious which is a flexible resin. This is mostly use as an additive for other resins to improve their strength, but it can also be used “as is” for specific projects.
Siraya Tech also makes one of the strongest resins available, in the form of the Siraya Tech BLU. Some people used this kind of resin to print gun silencers, which is quite impressive.
Finally, there’s also casting resin which can be used to print negatives of models which will be later casted in other materials.
FEP films
The FEP film is the transparent sheet from the bottom of your resin printer’s vat. This is considered a consumable because after a while, it can get damaged or worn out. It’s a good idea to check the FEP integrity after each print, to avoid leaks.
I strongly recommend in buying a few FEP sheets as a backup, because most of the resin 3D printers don’t come with spares and it’s better to have them at hand when you need them, instead of waiting for them to be delivered.
You can purchase pre-cut FEP sheets specifically for your machine, or you can buy larger sheets then cut them to size.
Resin printer screens
Monochrome resin 3D printers require less maintenance because the screen will last a lot longer compared to the old screens. But sometimes you might need to replace it if it failed, or if the FEP film was damaged and resin cured on your screen.
I don’t have spare screens because I think this risk is quite low, but if you are using your printers for production then it might be worth it having one at hand, ready to be replaced.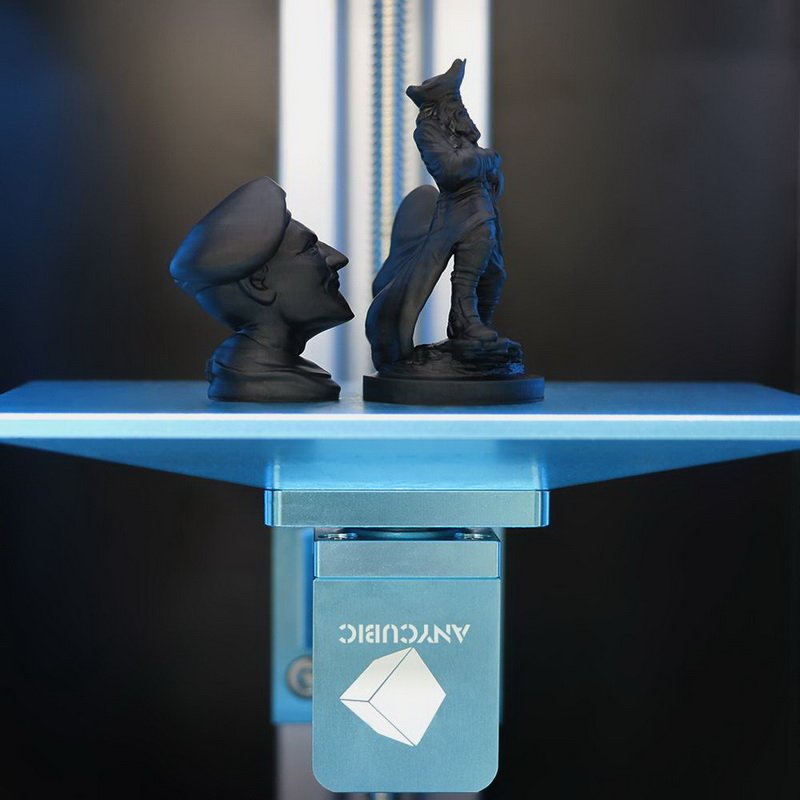
Cleaning solutions
Isopropyl Alcohol
One of the most common solutions for post processing resin 3D prints is Isopropyl Alcohol also known as IPA. This chemical is great because it’s mostly safe (with the proper precautions and protection) and can be used with other cleaning tools without affecting them.
IPA can be reused if you keep it in a enclosed transparent container. The used IPA needs to be exposed to UV light and in a few weeks, the uncured resin will start to cure and drop on the bottom of the container while the IPA starts to clear.
Acetone
Another chemical which can be used to clean resin prints is acetone. Using acetone is a bit more dangerous compared to IPA because it evaporates much faster and it’s also more flamable.
You cannot use acetone with wash stations because it starts melting most of the plastic containers in just a few minutes so it’s only good for manual washing.
Cleaning your finished prints with acetone is much faster compared to IPA, but long exposure of finished models to acetone can make them brittle.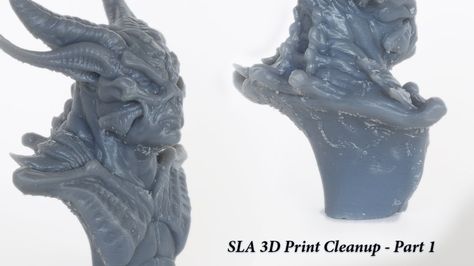 It’s recommended not to expose the models for more than 45 seconds to 1 minute.
Printed upgrades for resin 3D printers
After you receive your resin 3D printer, I recommend you look for some upgrades you can print to make your resin 3D printer a bit better.
Dripping mount for the vat
If your printer doesn’t already have a way to mount the build plate onto the printer and leave the model to drip all the resin, then I recommend you look for one online and print it.
This will allow you to attach the build plate in an angled position, and then leave it for 10 to 20 minutes for all the resin to start dripping from the top of the plate, and from the model.
Doing this will help you save a bit of resin and will also make the cleaning process a bit easier.
Vat cover
Adding a vat cover is also important because it will help trap most of the resin smell right in the vat, and you will also protect the resin from UV light and dust.
You need a vat cover if you do a print, and then leave the remaining resin inside the vat for the next time.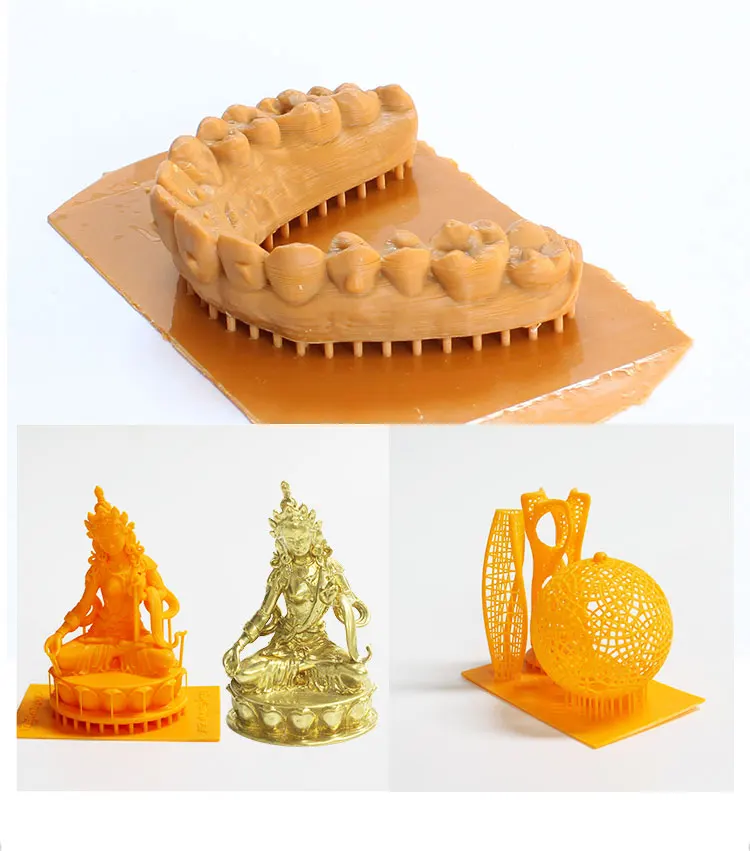
Usually, it’s not a big issue to keep the unused resin in the vat for a short period of time (~1 month) but if you don’t use the printer for longer periods, it’s always a good idea to empty the vat and clean it.
Remember to always stir your resin before starting a new print, to make sure it’s properly mixed. After sitting for a while, you will notice that the resin starts to separate so don’t skip this step.
Vat dripping holder
Emptying the vat from resin is a process I sort of hate because it’s always messy. But you can ease this pain by printing a vat dripping holder which will allow you to mount the vat in an angled position over your resin bottle.
That way, you can empty the vat completely and clean it with much less effort.
Find the best settings for your resin
A good trick about resin 3D printing is to look for resin spreadsheets on groups where people are talking about the specific printer you are using.
For example, I found this resin spreadsheet for the Anycubic Photon Mono X where people contributed with their resin settings. You can then pick the settings used by others for the same resin you are using and start from there.
Most of the times, the settings are ready to go, but from time to time you will need to perform some small adjustments to get everything just right.
Preparations before printing
Level the build plate
To ensure good adhesion for the model on the build plate, it’s crucial to have it properly leveled. This translates into having the build plate parallel to the screen, so an even amount of resin is between them.
Different resin 3D printers have different solutions for leveling the build plate, but most of the times, it’s an easy process which will be described in the user manual of the printer.
To do this on my printer, I need to loosen the four screws holding the build plate. I place a piece of A4 paper between the bed and the screen then carefully lower it.
While the build plate is laying on the screen, you need to press the build plate on the screen then start tightening the screws to hold it in place.
Elegoo has a good video about this, but this process will be different from printer to printer.
Fill the vat with resin
Before starting your resin print, you need to fill the vat with resin. Every resin 3D printer has a maximum volume of resin, and you should never overfill the vat. Always consider the displaced resin when it will lower itself to print.
If you do this for the first time, and your build plate doesn’t have a marking to indicate the fill limit, I recommend you home the printer then pour resin in the vat.
Print Process for Resin 3D Printing
Decide what model you want to print
This step is probably the easiest when it comes to resin 3D printing. Most of the people who are looking to get into resin 3D printing already have a few models which they want to print with high detail.
The best places for finding models are Myminifactory, Thingiverse, and Cults. On these websites, you can find models specifically made for resin 3D printers. Some of them are free, some are paid but there’s a wide variety from where to choose.
Besides these websites, a lot of Patreon pages showed up which offer premium 3D models for resin printing, for a monthly fee. Most of the times these premium models also come with pre-made support making your resin printing a lot easier.
Slice the model
After getting the model, we need to first slice it with a dedicated program. Chitubox is probably the most popular slicing software, but Lichee Slicer and even Prusa Slicer are good alternatives.
I used Lychee Slicer a lot lately and it never produced a failure. It’s also quite easy to use and there’s a free version which is more than capable to slice your resin files. I will cover it in a dedicated article soon.
The automated support feature in Lychee slicer allowed me to improve my success rate to ~90% since I started using it, compared to the ~70% success rate with other slicers. It makes the whole slicing process much better.
There’s also the possibility of using the slicer software included with your 3D printer, like Anycubic Workshop or Creality Slicer but these are usually lacking features compared to the previously mentioned slicers.
Print the model
Printing the model is the easiest part of the whole process. Just copy the exported file from your slicer to a USB drive, then insert it on your printer.
Next, take your resin bottle and shake it for about a minute to make sure it’s properly mixed, then pour some of it in the resin vat.
Finally, start your print and wait for it to be completed. Easy, right?
It’s also important to note that resin doesn’t print that great with low environment temperatures so make sure your printer sits in a place where the temperature doesn’t go under ~20C. If the temperature is higher, then the resin will print better.
Wash the finished model
If you don’t have a wash and cure station, the post processing task will be the most annoying task when it comes to resin 3D printing (at least for me).
But you can make this task a bit easier if you have a few containers where you add IPA to do the cleaning process in stages.
First, you do the first wash in the first container to clean most of the resin present on the model. You can use a brush, but I had great results with a toothbrush too.
After you thoroughly clean the model, you move to the second container where the IPA is cleaner to start removing the remaining resin off the model.
Finally, you can move to a third container to repeat the process and ensure your model is thoroughly cleaned and there’s no more uncured resin on the model.
Remove the supports
Some people like to remove the supports after curing the model, but I found out that removing them in advance produces better results and less scarring on the model. There’s also a trick to do this.
After I thoroughly clean the model, I submerge it for a few minutes in hot water (~60C-70C). This will allow you to easily remove the supports with next to no damage to the model.
Please note that if the water is too hot, or you leave the model in hot water for a prolonged period of time, you can damage the small features of the model, so don’t keep it submerged more than 2 minutes.
Cure the washed model
Finally, the model is now cleaned, supports are removed so we can move on the last step, which is curing.
Depending on what curing solution you choose, and the intensity of your UV lights, the final curing time might vary.
I use the Phrozen Cure V2, and I cure the models for around 2 minutes. This amount of cure time works best for me, but you need to do some testing for various resin types. For example, the Siraya Tech BLU resin needs to be cured for around 6 to 8 minutes for it to keep its proprieties.
Please note that if you over-cure your models, you risk making them more brittles and “burn” your resin, causing it to become less transparent (for translucent resin) or to darken (for white resin).
It’s a matter of trial and error, but you can also check out the resin printing groups to see what curing times other people use, so you don’t start from scratch.
Wrapping up
Hopefully, the information in this article will make your resin 3D printing a bit easier. I would love to hear from you if this article helped you, and don’t be shy of showing off your print results in the comment section. Sharing this article with others also helps.
If you find some missing information, please let me know and I will update the article accordingly, to make it easier for beginners to start printing with resin.
If you have questions, feel free to leave a comment or join the 3DPrintBeginner Forum where there’s a dedicated category for Resin 3D printers.
Liked it?Consider supporting 3DPrintBeginner if this content helped. You can also join Patreon for exclusive perks! |
How To Use a Resin 3D Printer – A Simple Guide for Beginners – 3D Printerly
Resin 3D printers can seem like a confusing machine at first, especially if you have never used a 3D printer before. Many people who have used a filament 3D printer can feel intimidated by the new style of printing, but it’s a lot simpler than most think.
I went from filament 3D printing to begin with, over to resin 3D printing and it wasn’t so complex. This is why I decided to write an article about how to use a resin 3D printer, going through the step-by-step process on how to create resin 3D prints.
Keep on reading through this article to get better knowledge of how to use a resin 3D printer. Let’s start off what what a resin 3D printer is.
What is a Resin 3D Printer?
A resin 3D printer is a machine which uses wavelengths of UV light from an LCD to cure and harden photosensitive liquid resin from a resin vat below onto a build plate above in small layers. There are a few types of resin 3D printers such as DLP, SLA, and the more popular MSLA machine.
Most resin 3D printers that are sold to the average user tends to use the MSLA technology which cures whole layers in one flash of the light, leading to a much quicker printing process.
This is a pretty large difference compared to filament or FDM 3D printers that extrude melted plastic filament through a nozzle. You can get much better accuracy and detail when using a resin 3D printer which is why they are so popular.
You can get an excellent level of quality at just 0.01mm or 10 microns when using a resin 3D printer, compared to 0.05mm for some of the best filament 3D printers out there.
Prices of filament 3D printers used to be much cheaper than resin 3D printers, but nowadays, the prices are almost matched, with there being resin printers as cheap as $150.
The costs of resin 3D printing are known to be a little more than filament 3D printing because of the extra accessories and consumables that are needed. For example, you need to purchase a UV light and a cleaning liquid to clean up your resin prints.
As time has progressed though, we are getting new innovations such as the water-washable resin, so you no longer need these cleaning liquids, leading to a cheaper resin printing experience.
Many people recommend getting a Wash & Cure machine along with your resin 3D printer so you can streamline the processing of each resin 3D print.
If you want to do less work for each print, you’ll want a filament 3D printer, but if you don’t mind doing additional work for amazing quality, then resin printing is a great choice.
Resin 3D printing is also known to be quite messy and more dangerous since you don’t want to get resin directly on your skin.
There are many things you’ll want to have along with your resin 3D printer.
What Do You Need for Resin 3D Printing?
Resin 3D Printer
As we all know, resin 3D printing cannot be done without a proper resin 3D printer.
There are plenty of options from good to great 3D printers and you want to choose the one that can fulfill your requirements. I’ll give you two popular recommendations below.
ELEGOO Mars 2 ProThe Elegoo Mars 2 Pro (Amazon) is a well-known machine and is appreciated by thousands of users because of its amazing features and specifications that can be purchased with a short budget.
Many users have said in their reviews that if we have to mention a star feature of this 3D printer, high-quality prints with fine details would be the one. Other features that come with the machine include:
- 8” 2K Monochrome LCD
- Multi-Language Interface
- ChiTuBox Slicer
- CNC-Machined Aluminium Body
- Sanded Aluminium Build Plate
- COB UV-LED Light Source
- Light and Compact Resin Vat
- Built-In Active Carbon
The Anycubic Photon Mono X (Amazon) is a premium option used for advanced and professional resin 3D printings. It has a hugely positive reputation among the users and has high ratings on many selling platforms.
Many users have mentioned different features and qualities of this 3D printer as their favorite and some of the best include build volume, model quality, printing speed, and ease of operation. Some of the best features that are included in this 3D printer are:
- 9” 4K Monochrome LCD
- New Upgraded LED Array
- Dual Linear Z-Axis
- UV Cooling System
- App Remote Control
- Wi-Fi Functionality
- High-Quality Power Supply
- Large Build Size
- Fast printing Speed
- Sturdy Resin Vat
You can also get the Anycubic Photon Mono X from Anycubic’s official website. They sometimes have sales.
Resin
The photosensitive resin is used as a 3D printing material that comes in various colors and has different chemical and mechanical properties. For example, Anycubic Basic Resin is used for miniatures and generic resin objects, Siraya Tech Tenacious is a flexible resin, and Siraya Tech Blu is a strong resin.
There is an eco-friendly resin named Anycubic Eco Resin, which is considered the safest resin as it contains no VOCs or any other harmful chemicals.
Nitrile Gloves
A pair of nitrile gloves is one of the leading picks in resin 3D printing. Uncured resin can cause irritations if it comes in contact with your skin, therefore you need something that can protect you from this.
Nitrile gloves can protect you from chemical burns to a great extent. Usually, these gloves are not disposable but can be cleaned or washed using isopropyl alcohol (IPA). You should purchase Nitrile Gloves for your safety on Amazing today.
FEP Film
The FEP film is a transparent sheet that is placed at the bottom of the resin vat. FEP film can get damaged after a few prints and need to be replaced.
You can get the FEP Film from Amazon today. The FEP film is suitable for almost all types of LCD/SLA 3D Printers under the print size of 200 x 140mm such as Anycubic Photon, Anycubic Photon S, Creality LD-001, ELEGOO Mars, etc.
Wash and Cure Station
The Wash and Cure Station is used for post-processing purposes. Cleaning, washing, and curing resin models is a bit messy job and this accessory makes this process easy and efficient.
Although you can make your own Wash and Cure Station as a DIY Project, the Anycubic Wash and Cure Station is one of the best options if you need a professional one which can make your resin process more seamless.
This is a 2-in-1 wash and cure station with benefits like convenience, wide compatibility, effectiveness, diverse washing modes, and comes with an anti-UV light hood to protect your eyes from direct UV rays.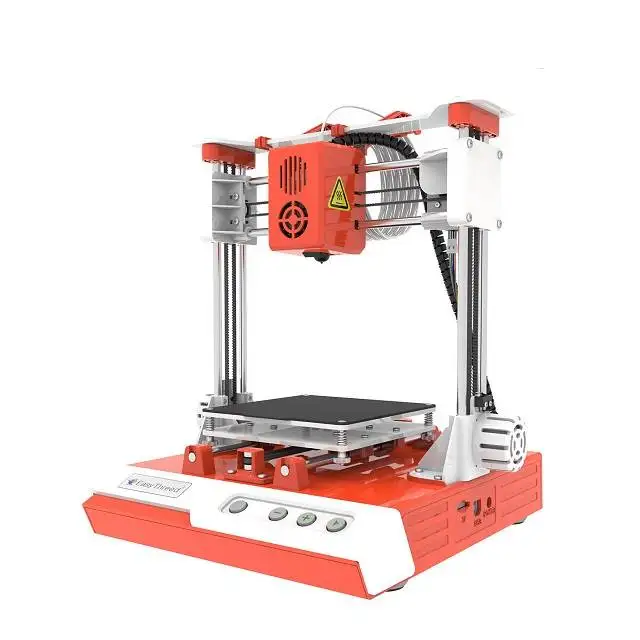
Isopropyl Alcohol
Isopropyl Alcohol is also known as IPA which is a well-known solution used for cleaning and washing the resin 3D prints. This solution is safe and can be used for cleaning with different types of tools without affecting them.
You can get a bottle of Vaxxen Labs Isopropyl Alcohol (99%) from Amazon.
Silicone Funnel
The silicone funnel with filters is used to clear your resin vat and pour resin into the bottle. When pouring resin back into the bottle, you want to make sure that no residue or hardened resin gets poured back in, since this can ruin future prints if it is poured into the resin vat.
I’d recommend going with the Jeteven Strainer Silicone Funnel with 100 Disposable Filters from Amazon.
It comes with Nylon paper which is durable, waterproof, and solvent resistant making it perfect for resin 3D printing and is suitable for almost all types of resin printing materials.
Slicer Software
You need to slice your 3D designs with the help of some programs, these programs are known as slicer software in the resin 3D printing industry.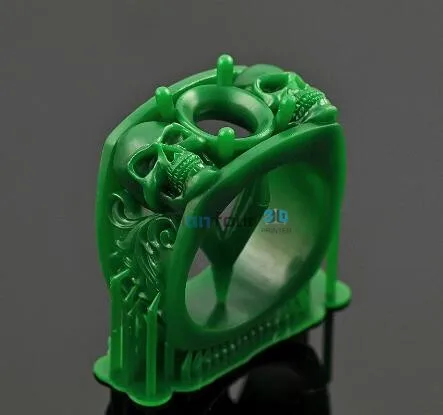
ChiTuBox is considered a respectable slicer software for resin 3D printing, but I’d recommend going with Lychee Slicer. Many people also have success with the Prusa Slicer for their resin 3D printing.
Paper Towels
Cleaning is an essential factor in resin 3D printing and you need something that can help you out in the most efficient and easiest manner. You may not find anything better than paper towels when it comes to cleaning messy resin and 3D printers.
Paper towels that you may find in drug stores are not so absorbent and you need high quality so that they can better absorb resin to make cleaning easier for you.
Bounty Quick-Size Paper Towels is considered a good product for this purpose.
Now that we know what we need, let’s see how we go about using the 3D printer and creating 3D prints.
How Do You Use a Resin 3D Printer?
The video below by Nerdtronic goes into some great depth about how to use a resin 3D printer, made especially for beginners.
Set Up the 3D Printer
Setting up your resin 3D printer means to assure that all the components are in place, power is coming to your machine and it is totally ready to start the printing process.
Depending on what resin printer you have, this can be done in as quick as 5 minutes.
Pour in Resin
Pour your liquid resin into the resin vat. The vat has a transparent bottom which is placed over a screen that lets UV lights pass and reach the resin to cure or make it hard while forming your designed 3D model onto the build plate.
Get STL File
You can find a whole host of great files on Thingiverse or MyMiniFactory for resin 3D printing. Make use of the search bar or explore features to find some of the most popular models out there.
Import into Slicer
Using Lychee Slicer, you can easily drag and drop your STL file into the program and begin creating the file needed for your 3D printer. Slicers all do the same thing, but they have different user interfaces and slight changes in how they process files.
Put In Settings
With Lychee Slicer you can easily apply settings automatically for things like supports, bracings, orientation, placement and more. Simply click the automatic buttons to let your slicer do the work.
If you are happy with what it done, then you can move onto the next step. Some settings require manual adjustments such as normal exposure, bottom exposure, number of bottom layers, and so on, but generally speaking, the default values can still produce a decent model.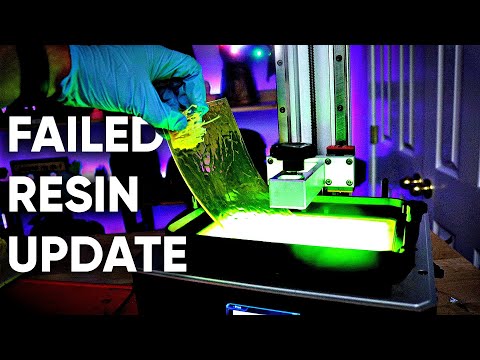
I’d definitely recommend adding a raft to all your resin 3D prints to help it adhere to the build plate better.
Save the File
After completing all the steps in your slicer, you will have an exact design of the model. Save the file to your USB or MicroSD card so that you can use it on your 3D printer.
Insert the USB into Resin 3D Printer
Eject your memory stick then simply insert your USB or SD card into the 3D printer. Select the STL file that you need to print from the USB drive, this will be done using your 3D printer’s LCD screen.
Start your Printing Process
Your 3D printer will load up your design within a few seconds and now you only have to click on the Print option to start your printing process.
Drain Resin from Print
Once your printing process is completed, it is recommended to let your print stay for some time so that excess resin can be drained out from your print. You can use paper towels or some types of sheets for this purpose as well.
You can also make some upgrades to your 3D printer to make this process easier and more efficient. The draining arm is one of the best techniques to be used for draining resin from your 3D print.
I personally use this a different model on my Anycubic Photon Mono X and it works very well.
Remove Print from the Build Plate
You need to remove your model from the build plate, once it is completed. You want to be gentle as removing the print from a resin 3D printer is quite different from FDM 3D printers.
If you do use a metal spatula to remove prints from your build plate, you want to be very gentle so you don’t damage your print or the build plate.
- Wear nitrile gloves to protect your hands from uncured resin.
- Gently remove your build plate from the printer. Make sure that you don’t bump the model in any component of the printer as it can damage your print or may break off some parts of it.
- Resin 3D printers usually come with their own spatula, lift your print from the raft or edge.

- Slightly slide your print removal tool under the print and wiggle it side to side until it lifts, then continue until the model is removed.
Wash Resin Off
Every resin print will have some uncured resin on it which needs to be cleaned off before curing your model.
If that extra resin becomes hard, either it will ruin all the shine and beauty of your model or it will remain sticky even after curing your model, resulting in a part that doesn’t look feel or look the best, as well as attracting dust and debris on your model.
In order to wash off your resin 3D prints, you have a few options
- Use an ultrasonic cleaner with a cleaning liquid
- Denatured alcohol, isopropyl alcohol, mean green, or methylated spirits are choices many people use
- You want to make sure your print is clean all over, ensuring that the part is submerged and scrubbed nicely
- If you are doing a manual wash, you can use a toothbrush or soft but slightly rough cloth to get all the grit off the part
- You can check whether your part is clean enough by rubbing it with your finger through gloves of course! It should have a squeaky clean feel to it.
- Let your part air dry after it has been properly cleaned
Nerdtronic created a great video about how to clean a part without an ultrasonic cleaner or professional machine like the Anycubic Wash & Cure.
Remove Supports
Some people like to remove supports after the print is cured, but experts suggest removing supports before the curing process. If you remove supports after curing your model, it can also cause you to remove important parts of your model.
- Use a flush cutter to snip off supports from your resin 3D prints – or manually removing them can be good enough depending on your support settings
- Make sure you are cutting off supports as close to the surface of the print
- Take good care when removing supports.
 It’s better to be patient and careful rather than quick and careless.
Cure the Print
Curing your resin 3D prints is essential as it will not only make your model stronger, but will also make it safe for you to touch and use. Curing is the process of exposing your resin prints to direct UV lights which can be done in various forms.
- Using a professional UV Curing Station is one of the best options as it is specifically designed for this purpose. It usually takes 3 to 6 minutes to get the job done but you can give more time if needed.
- If you need to save money, you can build your own UV Curing Station instead of buying it. There are plenty of videos on YouTube that will guide you to get this done.
- The sun is a natural source of UV light which can be used for curing as well. This option will take a bit longer but can bring you efficient results. For small prints, it takes about 20 to 30 minutes but you should keep on checking your print’s quality after a few minutes to analyze this factor.

Post-Process with Sanding
Sanding is the best technique that is widely used to make your 3D prints smooth, shiny and to get rid of supports’ marks and extra uncured resin attached to your print.
You can sand 3D models with your hands but you can also use an electronic sander while working with less complex parts.
Using different grits or roughness of sandpaper is what allows you to easily remove any layer lines and bumps from supports, which then progress into finer sanding which gives a more polished and smooth look afterwards.
You can go really high in sandpaper grit if you want a very shiny and clean look, with grits even going up to 10,000 grits and above. Those kind of numbers are if you want a glass-like finish.
A good set of sandpaper you can get from Amazon is the YXYL 60 Pcs 120 to 5,000 Grit Assorted Sandpaper. You can either dry sand or wet sand your resin prints, with easy identifying of each grit with the numbers written on the back.
It comes with a 100% satisfaction guarantee, so you know you’ll be happy with the results, like many of other users.
Post-Process with Painting
As its name suggests, this is the process of painting your resin prints in different colors to make them attractive and look perfect. You have the option to:
- Print directly with a dyed resin. It is usually done by mixing white or clear resin with a suitable dye ink to create new colors
I’d recommend going with a diverse set of colors like the Limino Epoxy Resin Pigment Dye – 18 Colors from Amazon.
- You can spray paint or paint your resin 3D prints after they are completed and cured.
A staple primer that is used throughout the 3D printing community is the Rust-Oleum Painter’s Touch 2X Ultra-Cover Primer in gray. It provides your models with a Double Cover Technology that enhances not only the quality, but the speed of your projects.
The Krylon Fusion All-In-One Spray Paint from Amazon is a great option for spray-painting your 3D models because it mixes primer and paint, all into one effective solution.
It provides amazing adhesion, durability, and even rust protection for other types of surfaces. Although you’ll be using it for your 3D models, it has real versatility, being able to be used on surfaces like wood, ceramic, glass, tile and so on.
- You can paint with acrylic but it is normally recommended for more complex 3D prints.
Tons of 3D printer users choose the Crafts 4 All Acrylic Paint Set of 24 Colors on Amazon. It provides you with a whole host of colors and visuals for you to get creative on your 3D models.
What Are Resin 3D Printers Good For?
Resin 3D printers are good for printing highly accurate 3D prints with a wide range of colors. If you need a 3D printing technique that can print quickly while offering extremely high quality, resin printing is the option for you.
You even now have tough resins that can compare to some of the stronger filaments that are used in FDM 3D printing. There are also flexible resins that have similar properties to TPU, but not as flexible.
If you want to print models that have remarkable dimensional accuracy, a resin 3D printer is a great choice. Several users are making high quality miniatures, figures, busts, statues and more.
3D printing for "dummies" or "what is a 3D printer?"
- 1 3D printing term
- 2 3D printing methods
- 2.1 Extrusion printing
- 2.2 Melting, sintering or gluing
- 2.3 Stereolithography
- 2.4 Lamination
- 3 Fused Deposition Printing (FDM)
- 3.1 Consumables
- 3.
-kupit-v-SOIN-STORE-4.png) 2 Extruder
2 Extruder - 3.3 Working platform
- 3.4 Positioners
- 3.5 Control
- 3.6 Varieties of FDM printers
- 4 Laser stereolithography (SLA)
- 4.1 Lasers and projectors
- 4.2 Cuvette and resin
- 4.3 Types of stereolithographic printers
3D printing term
The term 3D printing has several synonyms, one of which quite briefly and accurately characterizes the essence of the process - "additive manufacturing", that is, production by adding material. The term was not coined by chance, because this is the main difference between multiple 3D printing technologies and the usual methods of industrial production, which in turn received the name "subtractive technologies", that is, "subtractive". If during milling, grinding, cutting and other similar procedures, excess material is removed from the workpiece, then in the case of additive manufacturing, material is gradually added until a solid model is obtained.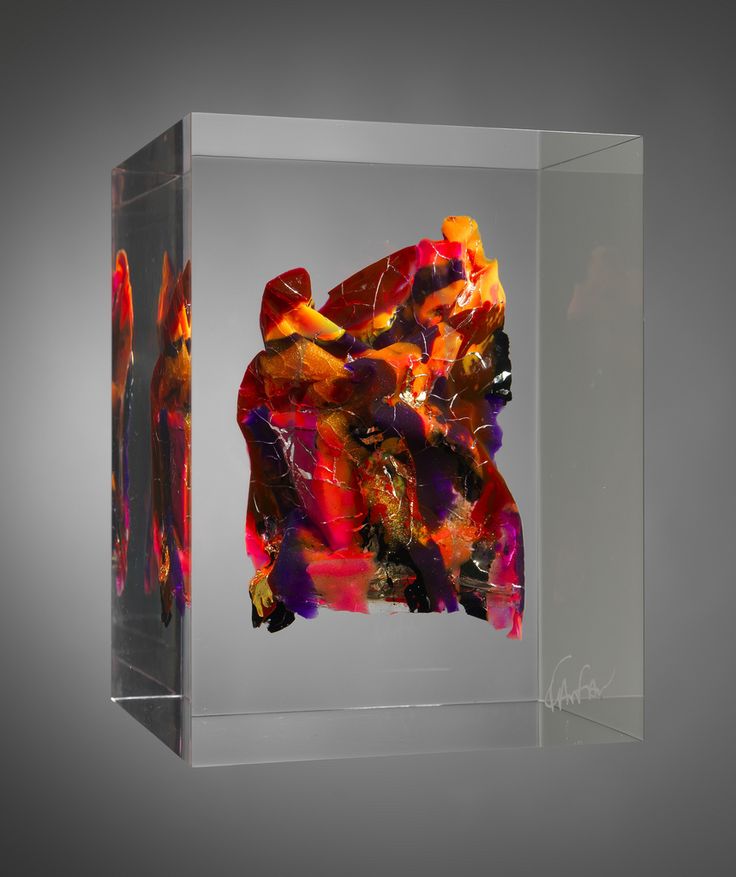
Soon 3D printing will even be tested on the International Space Station
Strictly speaking, many traditional methods could be classified as "additive" in the broad sense of the word - for example, casting or riveting. However, it should be borne in mind that in these cases, either the consumption of materials is required for the manufacture of specific tools used in the production of specific parts (as in the case of casting), or the whole process is reduced to joining ready-made parts (welding, riveting, etc.). In order for the technology to be classified as “3D printing”, it is necessary to build the final product from raw materials, not blanks, and the formation of objects must be arbitrary - that is, without the use of forms. The latter means that additive manufacturing requires a software component. Roughly speaking, additive manufacturing requires computer control so that the shape of final products can be determined by building digital models. It was this factor that delayed the widespread adoption of 3D printing until the moment when numerical control and 3D design became widely available and highly productive.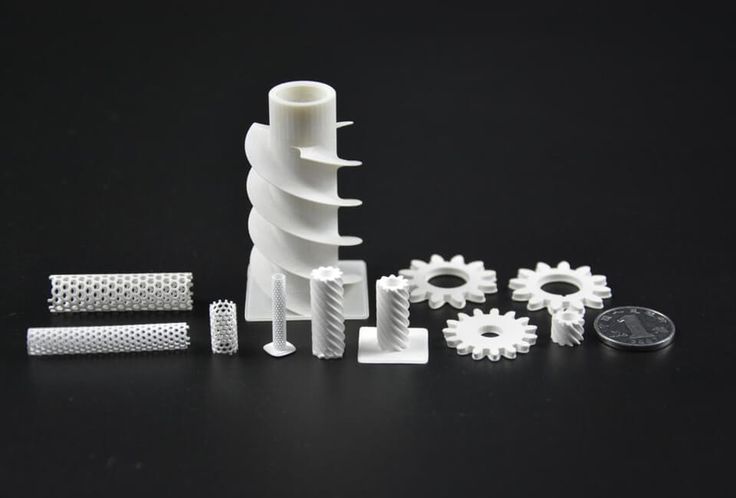
3D printing techniques
3D printing technologies are numerous, and there are even more names for them due to patent restrictions. However, you can try to divide technologies into main areas:
Extrusion printing
This includes methods such as deposition deposition (FDM) and multi-jet printing (MJM). This method is based on the extrusion (extrusion) of consumables with the sequential formation of the finished product. As a rule, consumables consist of thermoplastics or composite materials based on them.
Melting, sintering or bonding
This approach is based on bonding powdered material together. Formation is done in different ways. The simplest is gluing, as is the case with 3D inkjet printing (3DP). Such printers deposit thin layers of powder onto the build platform, which are then selectively bonded with a binder. Powders can be made up of just about any material that can be ground to powder—plastic, wood, metal.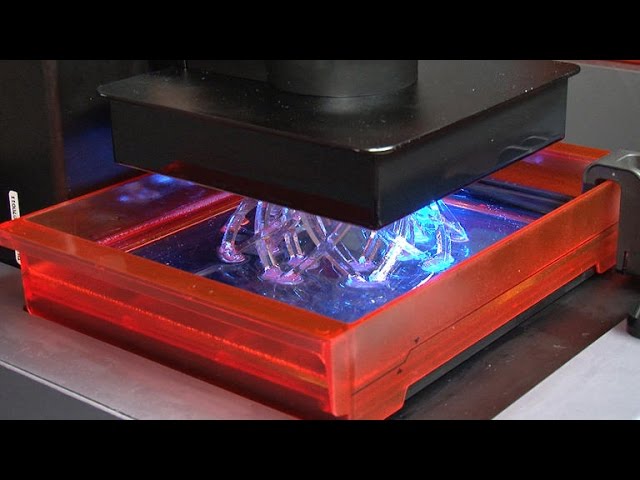
This model of James Bond's Aston Martin was successfully printed on Voxeljet's SLS printer and blown up just as successfully during the filming of Skyfall instead of the expensive original
sintering (SLS and DMLS) and smelting (SLM), which allow you to create all-metal parts. As with 3D inkjet printing, these devices apply thin layers of powder, but the material is not glued together, but sintered or melted using a laser. Laser sintering (SLS) is used to work with both plastic and metal powders, although metal pellets usually have a more fusible shell, and after printing they are additionally sintered in special ovens. DMLS is a variant of SLS installations with more powerful lasers that allow sintering metal powders directly without additives. SLM printers provide not just sintering of particles, but their complete melting, which allows you to create monolithic models that do not suffer from the relative fragility caused by the porosity of the structure. As a rule, printers for working with metal powders are equipped with vacuum working chambers, or they replace air with inert gases. Such a complication of the design is caused by the need to work with metals and alloys subject to oxidation - for example, with titanium.
Stereolithography
How an SLA printer works
Stereolithography printers use special liquid materials called "photopolymer resins". The term "photopolymerization" refers to the ability of a material to harden when exposed to light. As a rule, such materials react to ultraviolet irradiation.
Resin is poured into a special container with a movable platform, which is installed in a position near the surface of the liquid. The layer of resin covering the platform corresponds to one layer of the digital model. Then a thin layer of resin is processed by a laser beam, hardening at the points of contact. At the end of illumination, the platform together with the finished layer is immersed to the thickness of the next layer, and illumination is performed again.
Lamination
Laminating (LOM) 3D printers workflow
Some 3D printers build models using sheet materials - paper, foil, plastic film.
Layers of material are glued on top of each other and cut to the contours of the digital model using a laser or a blade.
These machines are well suited for prototyping and can use very cheap consumables, including regular office paper. However, the complexity and noise of these printers, coupled with the limitations of the models they produce, limit their popularity.
Fused Deposition Modeling (FDM) and Laser Stereolithography (SLA) are the most popular 3D printing methods used in the home and office.
Let's take a closer look at these technologies.
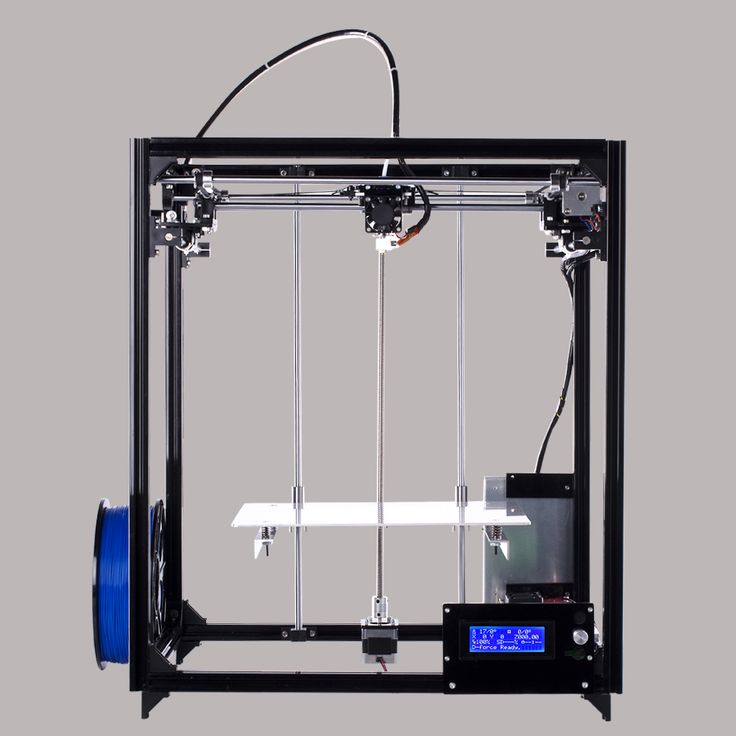
Fused Deposition Printing (FDM)
FDM is perhaps the simplest and most affordable 3D construction method, which makes it very popular.
High demand for FDM printers is driving device and consumable prices down rapidly, along with technology advances towards ease of use and improved reliability.
Consumables
ABS filament spool and finished model
FDM printers are designed to print with thermoplastics, which are usually supplied as thin filaments wound on spools. The range of "clean" plastics is very wide. One of the most popular materials is polylactide or "PLA plastic". This material is made from corn or sugar cane, which makes it non-toxic and environmentally friendly, but makes it relatively short-lived. ABS plastic, on the other hand, is very durable and wear-resistant, although it is susceptible to direct sunlight and can release small amounts of harmful fumes when heated. Many plastic items that we use on a daily basis are made from this material: housings for household appliances, plumbing fixtures, plastic cards, toys, etc.
In addition to PLA and ABS, printing is possible with nylon, polycarbonate, polyethylene and many other thermoplastics that are widely used in modern industry.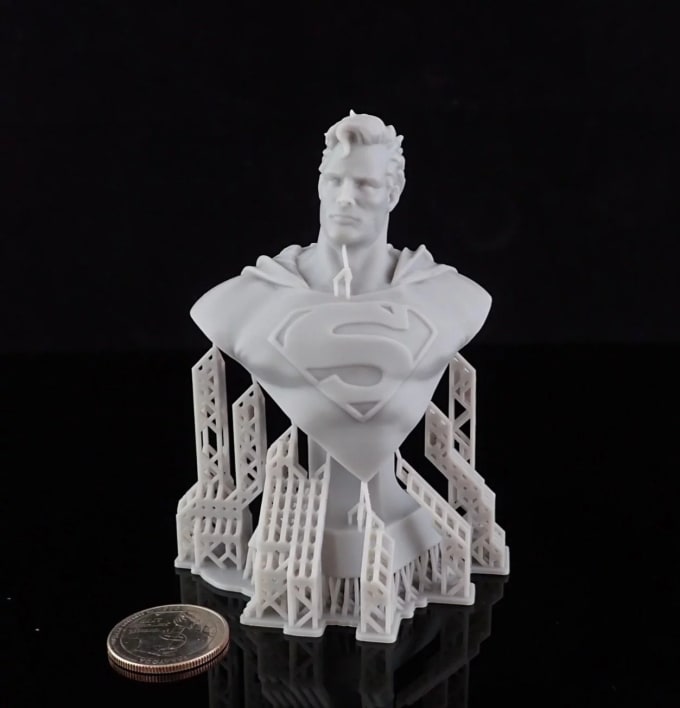 More exotic materials are also possible, such as polyvinyl alcohol, known as "PVA plastic". This material dissolves in water, which makes it very useful for printing complex geometric patterns. But more on that below.
Model made from Laywoo-D3. Changing the extrusion temperature allows you to achieve different shades and simulate annual rings
It is not necessary to print with homogeneous plastics. It is also possible to use composite materials imitating wood, metals, stone. Such materials use all the same thermoplastics, but with impurities of non-plastic materials.
So, Laywoo-D3 consists partly of natural wood dust, which allows you to print "wooden" products, including furniture.
The material called BronzeFill is filled with real bronze, and models made from it can be ground and polished, achieving a high similarity to products made from pure bronze.
One has only to remember that thermoplastics serve as a binding element in composite materials - they determine the thresholds of strength, thermal stability and other physical and chemical properties of finished models.
Extruder
Extruder - FDM print head. Strictly speaking, this is not entirely true, because the head consists of several parts, of which only the feed mechanism is directly "extruder". However, by tradition, the term "extruder" is commonly used as a synonym for the entire print assembly.
FDM extruder general design
The extruder is designed for melting and applying thermoplastic thread. The first component is the thread feed mechanism, which consists of rollers and gears driven by an electric motor. The mechanism feeds the thread into a special heated metal tube with a small diameter nozzle, called a "hot end" or simply a "nozzle". The same mechanism is used to remove the thread if a change of material is needed.
The hot end is used to heat and melt the thread fed by the threader. As a rule, nozzles are made of brass or aluminum, although more heat-resistant, but also more expensive materials can be used.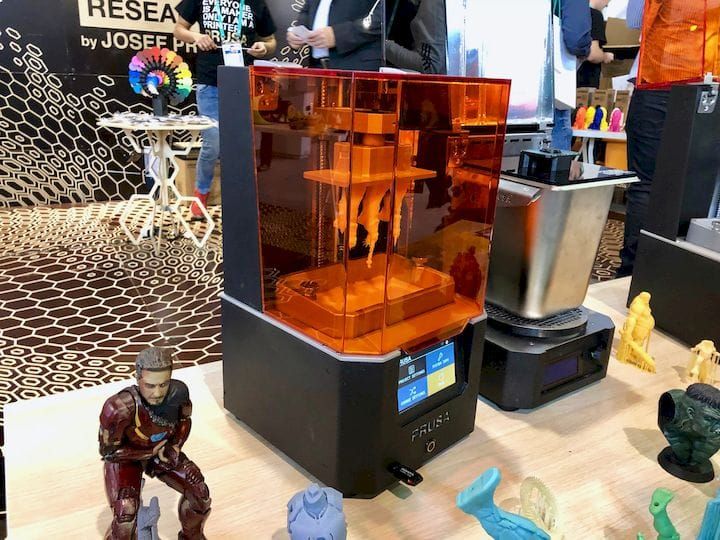 For printing with the most popular plastics, a brass nozzle is quite enough. The “nozzle” itself is attached to the end of the tube with a threaded connection and can be replaced with a new one in case of wear or if a change in diameter is necessary. The nozzle diameter determines the thickness of the molten filament and, as a result, affects the print resolution. The heating of the hot end is controlled by a thermistor. Temperature control is very important, because when the material is overheated, pyrolysis can occur, that is, the decomposition of plastic, which contributes both to the loss of the properties of the material itself and to clogging of the nozzle.
PrintBox3D One FDM Printer Extruder
To prevent the filament from melting too early, the top of the hot end is cooled by heatsinks and fans. This point is of great importance, since thermoplastics that pass the glass transition temperature significantly expand in volume and increase the friction of the material with the walls of the hot end. If the length of such a section is too long, the pulling mechanism may not have enough strength to push the thread.
The number of extruders may vary depending on the purpose of the 3D printer. The simplest options use a single printhead. The dual extruder greatly expands the capabilities of the device, allowing you to print one model in two different colors, as well as using different materials. The last point is important when building complex models with overhanging structural elements: FDM printers cannot print “over the air”, since the applied layers require support. In the case of hinged elements, temporary support structures have to be printed, which are removed after printing is completed. The removal process is fraught with damage to the model itself and requires accuracy. In addition, if the model has a complex structure with internal cavities that are difficult to access, building conventional supports may not be practical due to the difficulty in removing excess material.
Finished model with PVA supports (white) before and after washing
In such cases, the same water-soluble polyvinyl alcohol (PVA) comes in handy. Using a dual extruder, you can build a model from waterproof thermoplastic using PVA to create supports.
After printing, PVA can be simply dissolved in water and a complex product of perfect quality can be obtained.
Some FDM printers can use three or even four extruders.
Working platform
Heated platform covered with removable glass work table
Models are built on a special platform, often equipped with heating elements. Preheating is required for a wide range of plastics, including the popular ABS, which are subject to a high degree of shrinkage when cooled. The rapid loss of volume by cold coats compared to freshly applied material can lead to model distortion or delamination. The heating of the platform makes it possible to significantly equalize the temperature gradient between the upper and lower layers.
Heating is not recommended for some materials. A typical example is PLA plastic, which requires a fairly long time to harden. Heating PLA can lead to deformation of the lower layers under the weight of the upper ones. When working with PLA, measures are usually taken not to heat up, but to cool the model. Such printers have characteristic open cases and additional fans blowing fresh layers of the model.
Calibration screw for work platform covered with blue masking tape
The platform needs to be calibrated before printing to ensure that the nozzle does not hit the applied layers and move too far causing air-to-air printing resulting in plastic vermicelli. The calibration process can be either manual or automatic. In manual mode, calibration is performed by positioning the nozzle at different points on the platform and adjusting the platform inclination using the support screws to achieve the optimal distance between the surface and the nozzle.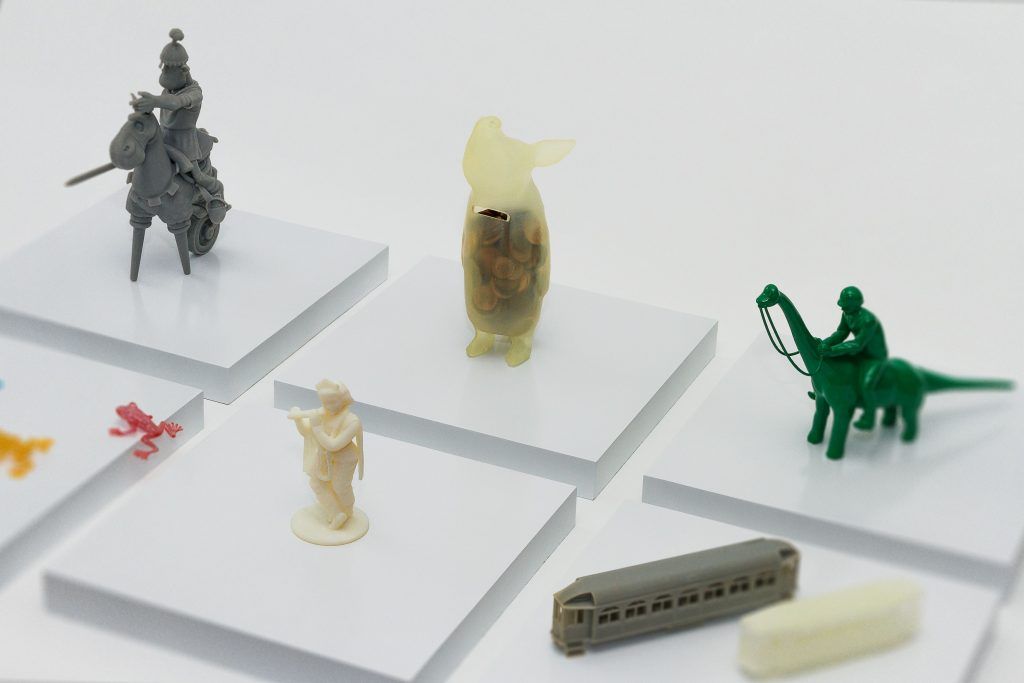
As a rule, platforms are equipped with an additional element - a removable table. This design simplifies the cleaning of the working surface and facilitates the removal of the finished model. Stages are made from various materials, including aluminum, acrylic, glass, etc. The choice of material for the manufacture of the stage depends on the presence of heating and consumables for which the printer is optimized.
For a better adhesion of the first layer of the model to the surface of the table, additional tools are often used, including polyimide film, glue and even hairspray! But the most popular tool is inexpensive, but effective masking tape. Some manufacturers make perforated tables that hold the model well but are difficult to clean. In general, the expediency of applying additional funds to the table depends on the consumable material and the material of the table itself.
Positioning mechanisms
Scheme of operation of positioning mechanisms
Of course, the print head must move relative to the working platform, and unlike conventional office printers, positioning must be carried out not in two, but in three planes, including height adjustment.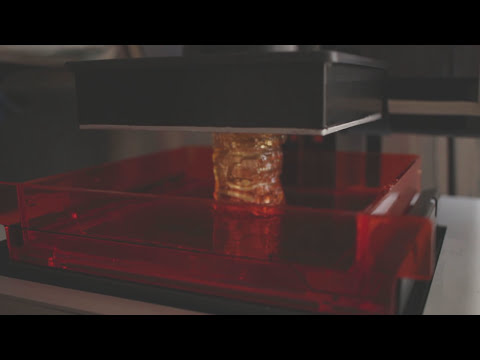
Positioning pattern may vary. The simplest and most common option involves mounting the print head on perpendicular guides driven by stepper motors and providing positioning along the X and Y axes.
Vertical positioning is carried out by moving the working platform.
On the other hand, it is possible to move the extruder in one plane and the platforms in two.
SeemeCNC ORION Delta Printer
One option that is gaining popularity is the delta coordinate system.
Such devices are called "delta robots" in the industry.
In delta printers, the print head is suspended on three manipulators, each of which moves along a vertical rail.
The synchronous symmetrical movement of the manipulators allows you to change the height of the extruder above the platform, and the asymmetric movement causes the head to move in the horizontal plane.
A variant of this system is the reverse delta design, where the extruder is fixed to the ceiling of the working chamber, and the platform moves on three support arms.
Delta printers have a cylindrical build area, and their design makes it easy to increase the height of the working area with minimal design changes by extending the rails.
In the end, everything depends on the decision of the designers, but the fundamental principle does not change.
Control
Typical Arduino-based controller with add-on modules
The operation of the FDM printer, including nozzle and platform temperature, filament feed rate, and stepper motors for positioning the extruder, is controlled by fairly simple electronic controllers. Most controllers are based on the Arduino platform, which has an open architecture.
The programming language used by the printers is called G-code (G-Code) and consists of a list of commands executed in turn by the 3D printer systems. G-code is compiled by programs called "slicers" - standard 3D printer software that combines some of the features of graphics editors with the ability to set print options through a graphical interface. The choice of slicer depends on the printer model. RepRap printers use open source slicers such as Skeinforge, Replicator G and Repetier-Host. Some companies make printers that require proprietary software.
Program code for printing is generated using slicers
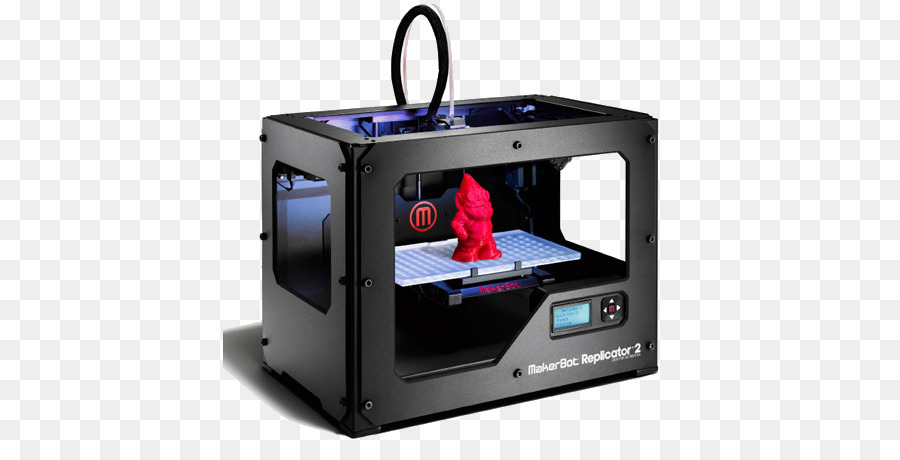
As an example, we can mention Cube printers from 3D Systems. There are companies that offer proprietary software but allow third-party software, as is the case with the latest generation of MakerBot 3D printers.
Slicers are not intended for 3D design per se. This task is done with CAD editors and requires some 3D design skills. Although beginners should not despair: digital models of a wide variety of designs are offered on many sites, often even for free. Finally, some companies and individuals offer 3D design services for custom printing.
Finally, 3D printers can be used in conjunction with 3D scanners to automate the process of digitizing objects. Many of these devices are designed specifically to work with 3D printers. Notable examples include the 3D Systems Sense handheld scanner and the MakerBot Digitizer handheld desktop scanner.
MakerBot Replicator 5th Generation FDM Printer with built-in control module on the top of the frame
The user interface of a 3D printer can consist of a simple USB port for connecting to a personal computer. In such cases, the device is actually controlled by the slicer.
The disadvantage of this simplification is a rather high probability of printing failure when the computer freezes or slows down.
A more advanced option includes an internal memory or memory card interface to make the process standalone.
These models are equipped with control modules that allow you to adjust many print parameters (such as print speed or extrusion temperature). The module may include a small LCD display or even a mini-tablet.
Varieties of FDM printers
Professional Stratasys Fortus 360mc FDM printer that allows printing with nylon
FDM printers are very, very diverse, ranging from the simplest homemade RepRap printers to industrial installations capable of printing large-sized objects.
Stratasys, founded by Scott Crump, the inventor of FDM technology, is a leader in the production of industrial installations.
You can build the simplest FDM printers yourself. Such devices are called RepRap, where "Rep" indicates the possibility of "replication", that is, self-reproduction.
RepRap printers can be used to print custom built plastic parts.
Controller, rails, belts, motors and other components can be easily purchased separately.
Of course, assembling such a device on your own requires serious technical and even engineering skills.
Some manufacturers make it easy by selling DIY kits, but these kits still require a good understanding of the technology. RepRap Printers
And, despite their "homemade nature", RepRap printers are quite capable of producing models with quality at the level of expensive branded counterparts.
Ordinary users who do not want to delve into the intricacies of the process, but require only a convenient device for household use, can purchase a ready-made FDM printer.
Many companies are focusing on the development of the consumer market segment, offering 3D printers for sale that are ready to print “right out of the box” and do not require serious computer skills.
3D Systems Cube consumer 3D printer
The most famous example of a consumer 3D printer is the 3D Systems Cube.
While it doesn't boast a huge build area, ultra-fast print speed, or unsurpassed model build quality, it's easy to use, affordable, and safe: This printer has received the necessary certification to be used even by children.
Mankati FDM printer demonstration: http://youtu.be/51rypJIK4y0
Laser Stereolithography (SLA)
Stereolithographic 3D printers are widely used in dental prosthetics
Stereolithographic printers are the second most popular and widespread after FDM printers.
These units deliver exceptional print quality.
The resolution of some SLA printers is measured in a matter of microns - it is not surprising that these devices quickly won the love of jewelers and dentists.
The software side of laser stereolithography is almost identical to FDM printing, so we will not repeat ourselves and will only touch on the distinctive features of the technology.
Lasers and projectors
Projector illumination of a photopolymer model using Kudo3D Titan DLP printer as an example
The cost of stereolithography printers is rapidly declining due to growing competition due to high demand and the use of new technologies that reduce the cost of construction.
Although the technology is generically referred to as "laser" stereolithography, most recent developments use UV LED projectors for the most part.
Projectors are cheaper and more reliable than lasers, do not require the use of delicate mirrors to deflect the laser beam, and have higher performance. The latter is explained by the fact that the contour of the whole layer is illuminated as a whole, and not sequentially, point by point, as is the case with laser options. This variant of the technology is called projection stereolithography, "DLP-SLA" or simply "DLP". However, both options are currently common - both laser and projector versions.
Cuvette and resin
Photopolymer resin is poured into a cuvette
A photopolymer resin that looks like epoxy is used as consumables for stereolithography printers. Resins can have a variety of characteristics, but they all share one key feature for 3D printing applications: these materials harden when exposed to ultraviolet light. Hence, in fact, the name "photopolymer".
When polymerized, resins can have a wide variety of physical characteristics. Some resins are like rubber, others are hard plastics like ABS. You can choose different colors and degrees of transparency. The main disadvantage of resins and SLA printing in general is the cost of consumables, which significantly exceeds the cost of thermoplastics.
On the other hand, stereolithography printers are mainly used by jewelers and dentists who do not need to build large parts but appreciate the savings from fast and accurate prototyping.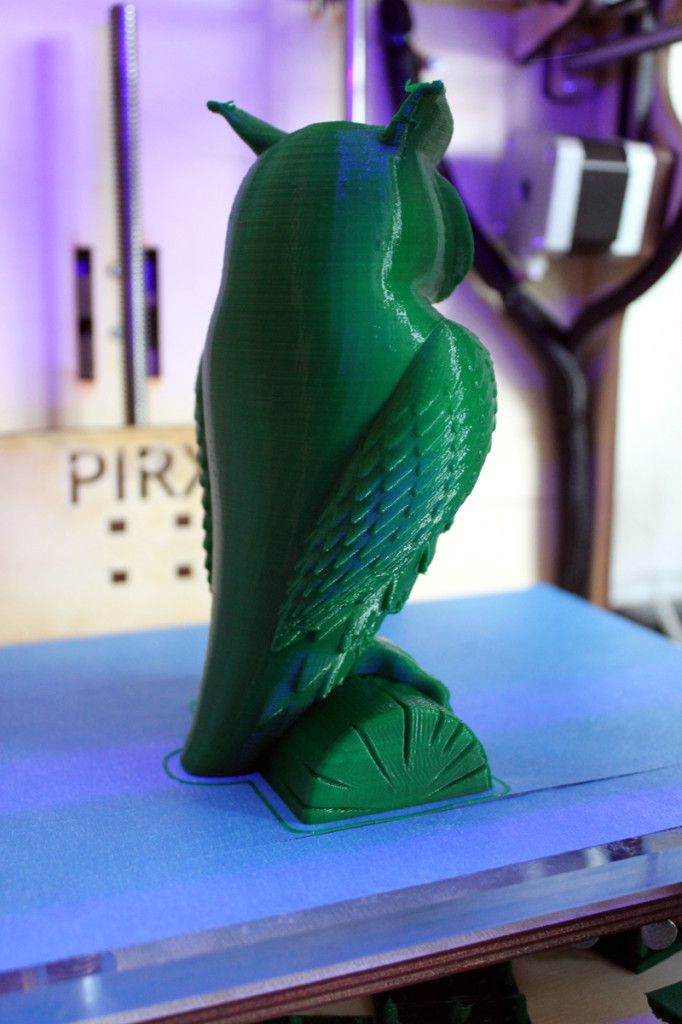 Thus, SLA printers and consumables pay for themselves very quickly.
Example of a model printed on a laser stereolithographic 3D printer
Resin is poured into a cuvette, which can be equipped with a lowering platform. In this case, the printer uses a leveling device to flatten the thin layer of resin covering the platform just prior to irradiation. As the model is being made, the platform, together with the finished layers, is “embedded” in the resin. Upon completion of printing, the model is removed from the cuvette, treated with a special solution to remove liquid resin residues and placed in an ultraviolet oven, where the final illumination of the model is performed.
Some SLA and DLP printers work in an "inverted" scheme: the model is not immersed in the consumable, but "pulled" out of it, while the laser or projector is placed under the cuvette, and not above it. This approach eliminates the need to level the surface after each exposure, but requires the use of a cuvette made of a material transparent to ultraviolet light, such as quartz glass.
The accuracy of stereolithographic printers is extremely high. For comparison, the standard for vertical resolution for FDM printers is considered to be 100 microns, and some variants of SLA printers allow you to apply layers as thin as 15 microns. But this is not the limit. The problem, rather, is not so much in the accuracy of lasers, but in the speed of the process: the higher the resolution, the lower the print speed. The use of digital projectors allows you to significantly speed up the process, because each layer is illuminated entirely. As a result, some DLP printer manufacturers claim to be able to print with a vertical resolution of one micron!
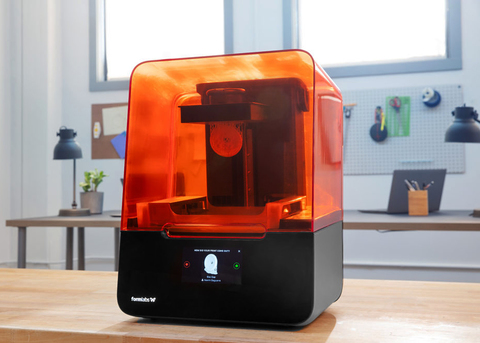
Video from CES 2013 showing Formlabs Form1 stereolithography 3D printer in action: http://youtu.be/IjaUasw64VE
Stereolithography Printer Options
Formlabs Form1 Desktop Stereolithography Printer
As with FDM printers, SLA printers come in a wide range in terms of size, features and cost. Professional installations can cost tens if not hundreds of thousands of dollars and weigh a couple of tons, but the rapid development of desktop SLA and DLP printers is gradually reducing the cost of equipment without compromising print quality.
Models such as the Titan 1 promise to make stereolithographic 3D printing affordable for small businesses and even home use at around $1,000. Formlabs' Form 1 is available now for a factory selling price of $3,299.
The developer of the DLP printer Peachy generally intends to overcome the lower price barrier of $100.
At the same time, the cost of photopolymer resins remains quite high, although the average price has fallen from $150 to $50 per liter over the past couple of years.
Of course, the growing demand for stereolithographic printers will stimulate the growth in the production of consumables, which will lead to further price reductions.
Go to the main page of the Encyclopedia of 3D printing
Choosing a liquid photopolymer for a 3D printer.
 Classification of materials for SLA/DLP 3D printing.
 Contents:
- Introduction
- SLA Overview
- SLA 9 Standard Resins0004
- Standard photopolymer resin - Standard
- Clear Photopolymer Resin - Clear
- Engineering photopolymer resins
- Rigid photopolymer resin - Tough (like ABS)
- Durable photopolymer resin - Durable (PP-like)
- Heat resistant photopolymer resin - Heat resistant
- Rubber-like photopolymer resin - Rubber-like
- Ceramic photopolymer resin - Ceramic filled (Hard)
- How to choose the right resin for your application
- Dental and medical SLA resins
- Medical Device Photopolymer Resin - Custom Medical Appliances (Class I Biocompatibility)
- Dental Long Term Biocompatible Resin (Class IIa biocompatible)
- Biocompatibility class I vs biocompatibility class IIa
- Cast SLA resins
- Cast resin for jewelry making
- Generalized rules
Hello everyone, Friends! With you 3DTool!
This article compares photopolymer resins using Formlabs SLA 3D printing products - standard ( standard ) , tough ( tough ) ,
Photopolymers from FormLabs
Detailed review of the Formlabs Form 3 3D printer
Introduction
The stereolithography prints plastic parts with high resolution, good fine detail, and a smooth surface. Due to the variety of photopolymer resins available for SLA, this technology is used in many different industries:
-
"Standard" photopolymers are used for prototyping
-
Engineering photopolymers have certain mechanical and thermal properties
-
Dental and medical photopolymers have biocompatibility certificates.
-
Cast photopolymers have a zero ash content after burning.
SLA 3D printing resin overview
SLA uses a laser to cure a liquid photopolymer resin. This process is called photopolymerization. Various combinations of polymers and other additives that are part of the resin allow you to get different material properties.
The main advantages and limitations that are common to all resins in SLA 3D printing are:
Benefits:
Weaknesses:
Base Resins for SLA
Post-Processing SLA/DLP 3D Printing Article
Standard photopolymer resin - Standard
Standard resins produce parts with high stiffness, detail and a smooth surface. The low cost of resins, from $250 per liter, makes them ideal for prototypes.
The color of the resin also affects its properties. For example, in FormLabs products, gray resin is suitable for models with fine details, and white resin for parts that require the smoothest possible surface.
Benefits of using Standard resins:
Cons Standard:
Also included in the class of "Standard" photopolymer resins from FormLabs is the Color KIT - a set of special dyes and "Color Base" photopolymer resin for mixing and obtaining a variety of color solutions. This eliminates the need for painting parts after 3D printing.
FormLabs Engineering Photopolymer Resins
Engineering resins have a range of properties for injection molded plastics.
All engineering resins require additional UV curing, such as using the Form Cure, to achieve their maximum properties.
Tough photopolymer resin - Tough (similar to ABS)
Tough resin was developed for models that need to withstand high loads and be durable.
This material produces strong, shatter-resistant parts and functional prototypes such as snap-on housings.
Pros:
Cons:
Ideal for: functional prototypes, mechanical parts
Durable photopolymer resin - Durable
Durable resin is a wear-resistant and flexible material with mechanical properties similar to polypropylene.
Durable photopolymer produces models with a smooth glossy surface and high resistance to deformation.
Durable Resin is ideal for:
- Bushings and bearings;
- Various functional compounds
Pros:
Cons:
-
Not suitable for thin wall parts (recommended minimum wall thickness 1mm)
-
Low heat distortion temperature
-
Low flexural strength (lower than hard resin)
Ideal for: functional prototypes.
Refractory Photopolymer Resin - Formlabs High Temp Resin
The heat resistant resin is ideal for parts that require high temperature resistance and operate at high temperatures.
Formlabs High Temp Resin provides the highest melting point (HDT): 238°C at 0.45 MPa.
The resin should be used to print detailed, accurate prototypes with high heat resistance.
Pros:
Cons:
Flexible Resin
Rubber-like resin allows flexible parts to be made. This material has a low tensile strength and high elongation at break and is well suited for parts that will be bent or compressed.
It can also be used to add ergonomic features to multi-material assemblies such as: dies, wearable prototypes, handles, pads and grips.
Pros:
-
High flexibility (high elongation at break)
-
Low hardness (simulates 80A durometer rubber)
-
High impact resistance
Cons:
-
Doesn't have all the properties of real rubber
-
Requires extensive support structures
-
Material properties deteriorate over time as the part is exposed to ultraviolet radiation (sunlight)
-
Not suitable for thin wall parts (recommended minimum wall thickness 1mm)
Ideal for flexible prototyping.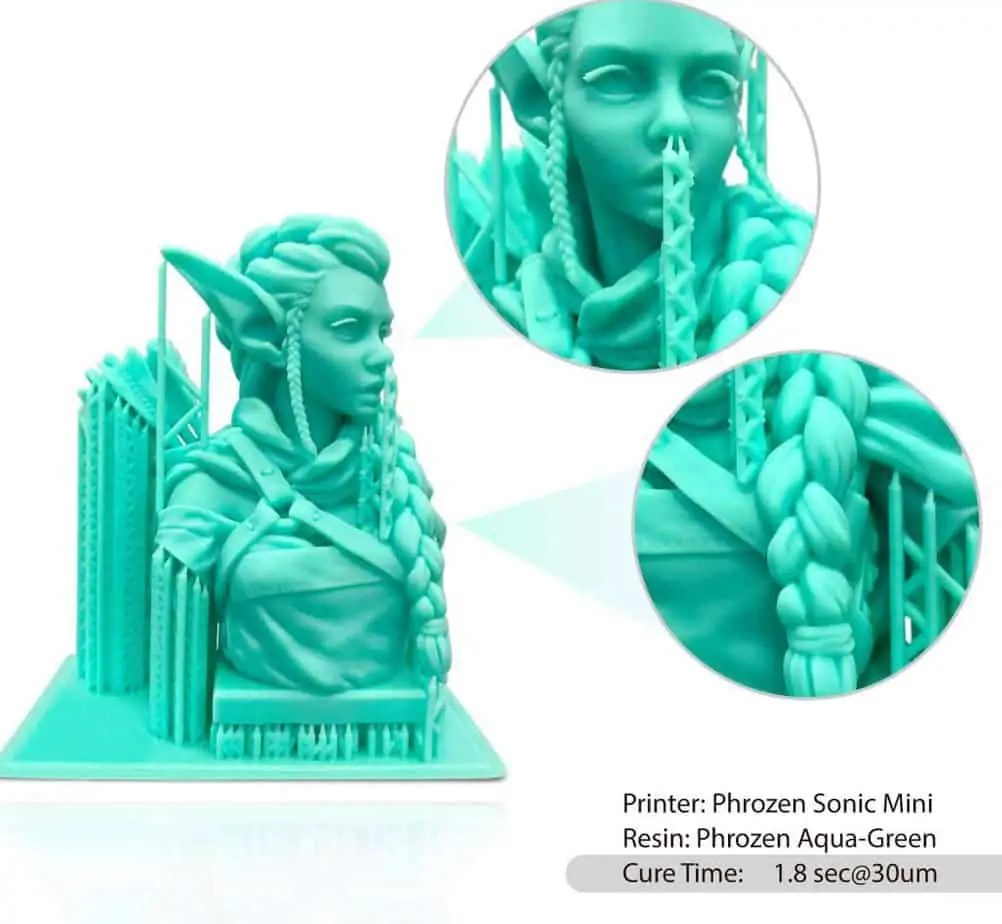
Ceramic photopolymer resin - Rigid Resin
This resin is reinforced with glass, which provides very high rigidity and a polished surface. The polymer is very resistant to deformation and is excellent for 3D printing thin elements.
Ideal for: molds and tooling, jigs, manifolds, retainers, electrical and automotive fixture housings
Thermal management components printed with SLA ceramic (hard) resin. Image credit: Formlabs
How to choose the right resin for your application
The table below shows the main mechanical properties of photopolymers for SLA:
Source: Formlabs
Standard resin ( standart ) has high tensile strength but is very brittle (very low elongation at break) so it is not suitable for functional parts. The ability to create a good part surface makes it ideal for visual prototypes and art models.
durable ( durable ) resin has the highest impact strength and elongation at break of any other SLA material. Best suited for prototyping parts with moving parts and latches. It lacks, however, the strength of thermoplastic 3D printing materials such as SLA nylon.
tough ( tough ) resin is a compromise between the material properties of tough and standard resin. It has a high tensile strength, so it is best suited for rigid parts that require high hardness.
heat resistant resin ( heat resistant ) can withstand temperatures above 200 o o C, but has poor toughness and is even more brittle than standard resin.
ceramic ( ceramic reinforce ) resin has the highest tensile strength and flexural modulus, but is brittle (poor elongation at break and toughness). This resin is preferred for thin wall parts that require increased rigidity.
The graphs below compare the mechanical properties of the most common SLA materials visually:
Comparison chart for elongation at break and toughness for common SLA printing specifications and standard media. Image courtesy of Formlabs.
Stress-strain curves for conventional SLA technologies and standard materials. Image credit: Formlabs
Comparative chart of material properties of various technical resins. Image credit: Formlabs.
Dental and medical resins
Photopolymer resin for medical devices - Custom Medical Appliances (Bios Class 1 biocompatible resins can be used to make medical equipment such as surgical guides. Parts printed on this resin can be steam sterilized in an autoclave for direct use in the operating room.
Pros:
Cons:
- Moderate wear and tear resistance
Ideal for: Surgical aids and appliances
Dental Long Term Biocompatible Resin - Dental Long Term (Class 2A biocompatible) 0464
These resins are specially formulated for long term dental fixtures. Class 2A biocompatible resins can come into contact with the human body for up to a year.
High resistance to breakage and wear make this resin ideal for making rigid cotter pins or retainers.
Pros:
Cons:
-
High price
Ideal for: durable dental instruments, fracture and wear resistant medical parts, rigid cotter pins, retainers
What is the difference between class 1 and class 2a biocompatibility?
Class 1 biocompatibility rules apply to materials that are allowed to be used for:
-
non-invasive devices that come into contact with intact skin
-
devices for temporary use or short-term use in the mouth or ear canal or in the nasal cavity
-
reusable surgical instruments
Class 2a biocompatibility rules apply to materials that are allowed to be used for:
-
devices that come into contact with bodily fluids or open wounds
-
devices used to introduce substances into or remove substances from the human body
-
invasive short-term devices such as invasive surgical items
-
long-term implantable devices placed in the teeth
Photopolymer resins in SLA 3D printing for jewelers
Jewelry resins
This material allows you to print models with fine details and a smooth surface without leaving ash or residue after burning.