3D printing without layer lines
8 Ways How to 3D Print Without Getting Layer Lines – 3D Printerly
3D print quality is one of the most important aspects of 3D printing, especially when creating objects for aesthetic looks. Learning how to 3D print without getting layer lines is an important skill to have in your 3D printing journey.
To 3D print without getting layer lines, you should reduce your layer height to around the 0.1mm mark. You can really smooth surfaces with layer heights of 0.1mm or below. You should calibrate your temperature, speed, and e-steps to make sure your 3D printer is optimized for 3D print quality.
Unfortunately, it can be pretty difficult to get 3D prints that don’t show layer lines. I decided to do some research to 3D print without layer lines for the highest quality prints.
Keep on reading through this article for some great tips, tricks, and pointers to achieving this useful ability.
Why Do 3D Prints Get Layer Lines?
Some of the many reasons which can cause layer lines are listed below. I will be explaining all these reasons in the next section of the articles so, keep on reading.
- Using a large layer height
- Using a large nozzle diameter
- Looseness or slack in 3D printer parts
- Incorrect printing temperature
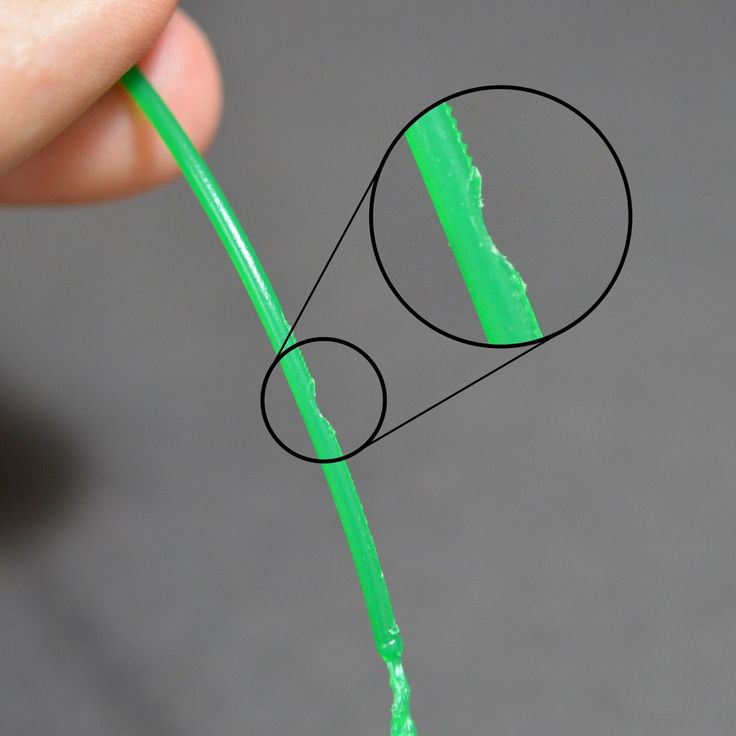
- Low quality filament
- Bad model orientation
- Printing in a cold room
- Over-extrusion
How to 3D Print Without Getting Layer Lines?
1. Reducing the Layer Height
One of the best things that you can do to 3D print without getting layer lines comes down to your layer height. There aren’t really many ways around this in terms of improving your print quality to the point where you are getting a smooth exterior surface.
When you are 3D printing an object, you see that they are built up of several layers. The larger the layer, the rougher the feel and more visual the layer lines become.
You can think of it as a staircase. If you have very large steps, that’s a rough surface in terms of 3D printing.
If you have tiny steps, it’s going to be a smooth surface. The smaller the ‘steps’ or layer height in your objects the smoother it will be, up to the point where you can’t see the layer lines.
What you should do is:
- Reduce the layer height in your slicer
- Use the ‘Magic Numbers‘ which are now default in Cura (e.g. 0.04mm increments for the Ender 3)
- Run several test prints and see which layer height produces the least visible layer lines
- You may have to adjust your nozzle diameter and temperature to account for the reduction in layer height
I’ve written a detailed post about the ‘Best Layer Height for 3D Printing‘ which goes into how reducing your layer height makes the most significant difference in 3D printing without layer lines.
2. Adjust Nozzle Diameter
Following on from the previous method, if you want to reduce your layer height small enough, you may need to change your nozzle diameter to account for that change.
The general rule for nozzle diameter and layer height is that your layer height should be no larger than 80% of your nozzle diameter. It also works the other way where your layer height should, at minimum be 25% of your nozzle diameter.
I’ve been able to 3D print with my 0.4mm nozzle and get some great Benchy prints at a 0.12mm layer height, which presented a print which barely had any layer lines showing and was very smooth to the touch.
You’ll want to use a smaller nozzle if you are printing miniatures or just small objects in general which have a lot of detail. You can do an amazing job of 3D printing without layer lines with a small nozzle, which I’ve seen go down to 0.1mm.
- Adjust your nozzle diameter relative to your layer height
- Try out many nozzle diameters and see which one works best for your projects
- You can purchase a set of nozzles which range from 0.
 1mm to 1mm in nozzle diameter
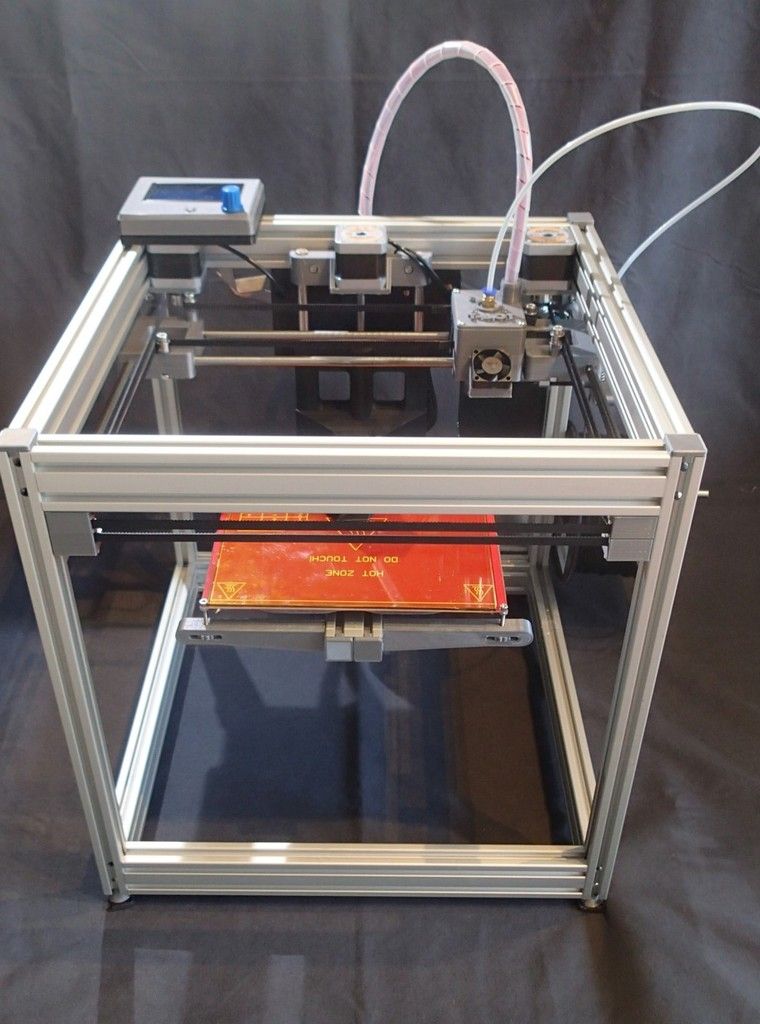
3. Fix Mechanical Issues
Even after reducing your layer height there are other factors which may hold you back from creating 3D prints without layer lines, one of these factors is mechanical issues which relates to the physical parts of your 3D printer.
Mechanical issues also include the surface in which you are printing on, any slack within the moving parts and so on. Many imperfects and defects in 3D prints arise from this factor, especially with vibrations from the movements of your printer.
I actually wrote an article about How to Fix Ghosting/Ringing in 3D Prints, which are wavy lines throughout your print exterior.
- First, I would put my 3D printer on a sturdy surface
- Implement anti-vibration mounts and pads to reduce these movements
- Make sure there aren’t any loose screws, bolts or nuts throughout your 3D printer
- Keep your lead screw lubricated with a light oil such as sewing machine oil
- Make sure your lead screw isn’t bent, by removing it and rolling it on a flat surface
- Ensure your filament is being fed through the extruder smoothly, and without obstructions
- Use Capricorn PTFE Tubing which gives a smooth, tight grip on extruded filament
4.
 Find Your Optimal Printing Temperature
If you’ve ever printed a temperature tower, you can see how small differences in temperature makes a significant difference. Having the wrong temperature can easily contribute to creating 3D prints that show layer lines.
Higher temperatures melt your filament quicker and make it less viscous (more runny) which can give you print imperfections. You want to avoid these imperfections if you are after some good print quality.
- Download and 3D print a temperature tower to find the optimal printing temperature for your filament.
- Each time you change filament, you should calibrate the optimal temperature
- Keep your surrounding environment in mind in terms of temperature, as you don’t want to 3D print in a cold room.
5. Use High Quality Filament
You’d be surprised how much the quality of your filament can make a difference in your final print quality. There are many users who have changed filament to a reliable, trusted brand, and seen their 3D printing experience really turn positive.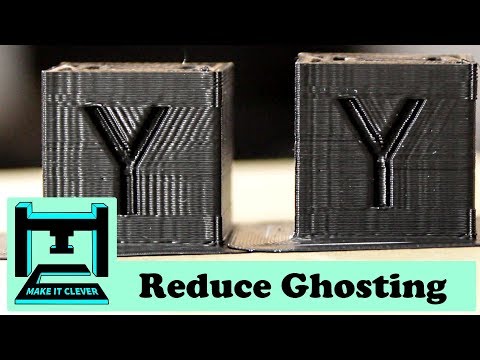
- Purchase some high quality filament, don’t be afraid to spend a little extra
- Order a number of highly rated filament and find the one which works best for your projects
- Get filament which has a rough texture like marble, or wood which hides layer lines better
The smooth filament will actually make the surface smooth, which will reduce the appearance of lines.
6. Adjust Model Orientation
Model orientation is another key factor that can help you in reducing the layer line in 3D printing. If you don’t know the optimal orientation for your models, this can result in layer lines showing up a lot more visibly.
It’s not as effective as reducing your layer height or nozzle diameter, but once you have implemented the previous factors, this one can give you that extra push for 3D prints without layer lines.
Another thing to keep in mind is the best resolution we can get in certain directions, whether it is the XY plane or the Z axis. The resolution in the XY plane is determined by your nozzle diameter because material is extruded in lines from that opening.
On the Z-axis, we are looking at each layer, or the layer height, which can go down as far as 0.07mm in most home-owned 3D printers, so that resolution is a lot finer than in the XY plane.
This means that if you want to reduce layer lines as best as you can, you want to orient your model in a way where the finer details are going to print along the vertical (Z) axis.
- You want to try to use an orientation which creates the most level planes rather than arching shapes
- The less angles in your model orientation, the less layer lines should show up
- It can be quite difficult to balance optimal orientation factors since there are conflicting orientations
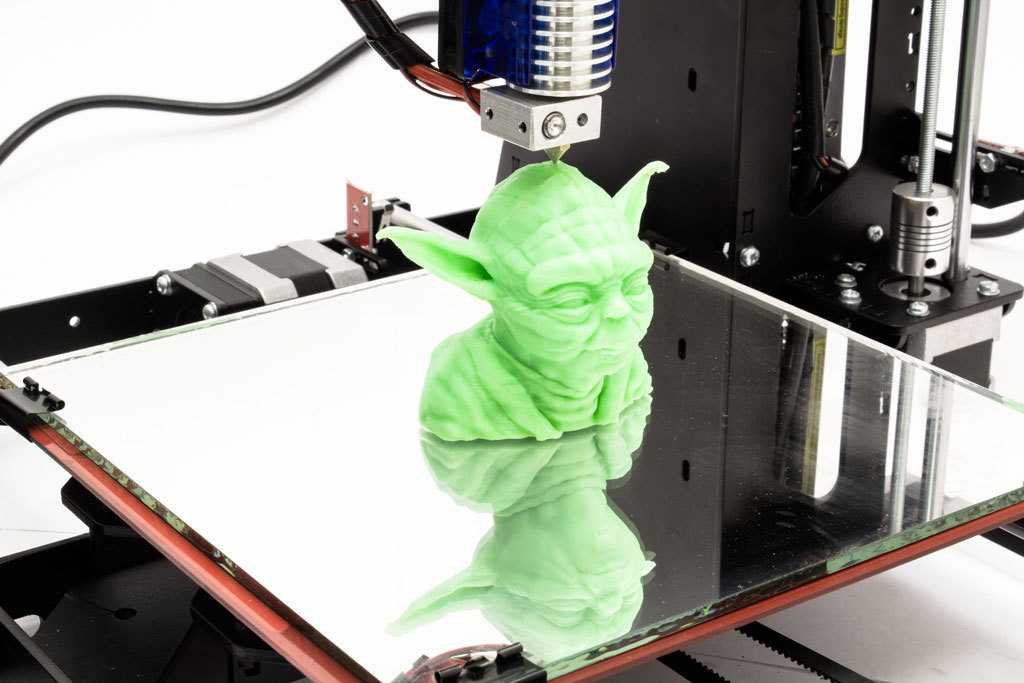
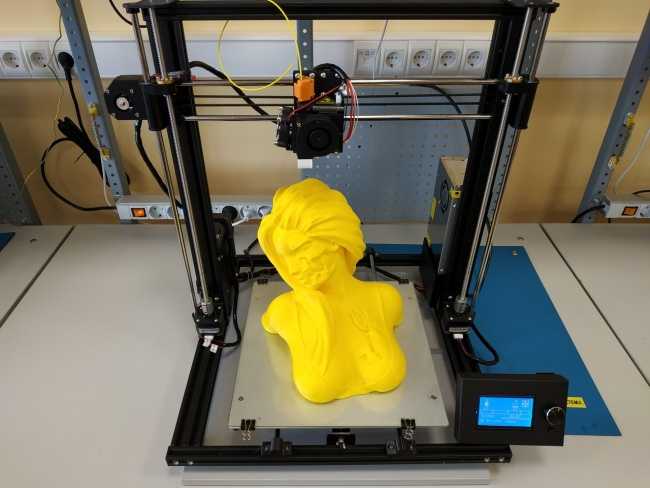
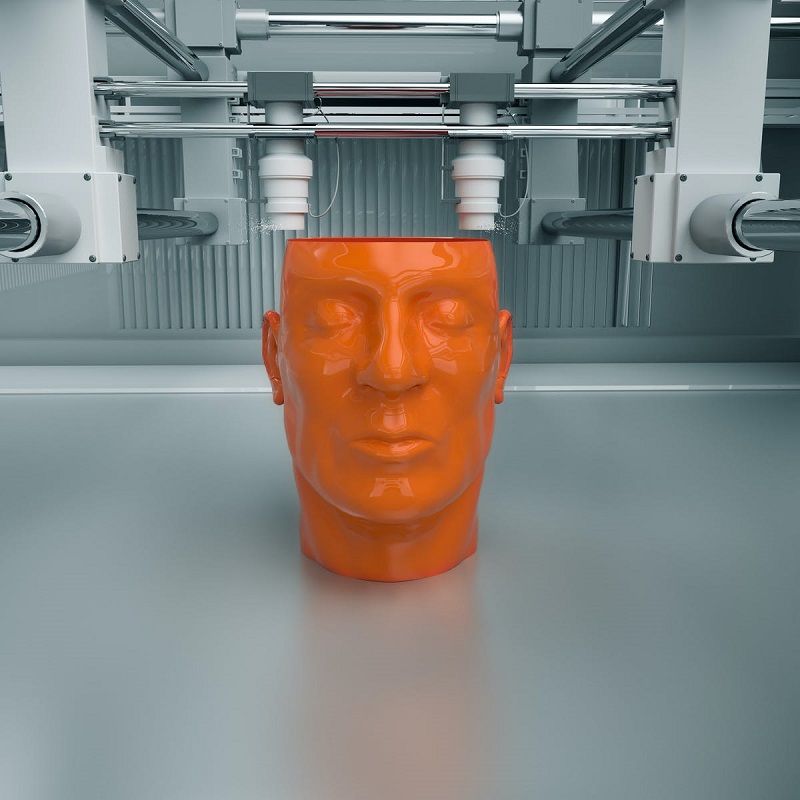
An example would be a model of a sculpture, with facial features. You would want to print this vertically because the facial features require serious detail.
If you 3D printed this diagonally or horizontally, you would find it hard to get that same level of detail.
7. Avoid Temperature Fluctuations
Avoiding temperature fluctuations is another important factor, especially when printing materials like ABS.
Filament reacts to heat by expanding and shrinking, so if you have wide enough temperature fluctuations, you can reduce your print quality, where layer lines may be more visible.
As they would not be getting the right temperature to cool down, and the surface would stay rough with visible lines.
- As mentioned previously, ensure your printing environment has a steady running temperature that isn’t too cold.
- Check that your PID controller is working, which controls temperature fluctuations (shown in the video below)
If the temperature fluctuation problem gets solved, you will start to see more smooth prints with less visible line patterns.
8. Correct Over-Extrusion
This can happen when the temperature is too high and the filament is melting more than usual. Another cause is from your extrusion multiplier or flow rate being changed, at a higher value than normal.
Anything that can cause your filament to be pushed faster, or more liquid can lead to over-extrusion which doesn’t fare too well for your 3D print quality, and especially 3D printing with no layer lines.
This over-extrusion will start depositing more filament on the print surface.
You can start to see more visible layers as your layers won’t have enough time to cool down before the next layer is extruded.
What you need to do is follow the following steps:
- Reduce your extruder temperature gradually until you have the optimal printing temperature
- You can implement a temperature tower to test different temperatures with your filament
- Make sure your cooling fans are working properly
- Speed & temperature are closely related, so if your temperature is high, you can also increase the speed
Other Methods to Remove Layer Lines
Post-processing is a great method of removing layer lines from your 3D prints. When you see those seriously smooth 3D print models on YouTube or just around the internet, they are usually smoothed other using various techniques.
Those techniques usually boil down to:
- Sanding Your Prints: This does an amazing job at getting rid of layer lines and just making your parts very smooth. There are many different levels of sanding paper to give you a finer finish. You can also use a wet sanding method for extra shine.
- Covering it Polish: You can polish the 3D print to make it look smooth. One of the most widely used polish sprays is Rustoleum, which you can get from any hardware stores.
Just to bring the article together, the best method to reduce your layer lines is to decrease your layer height and use a smaller nozzle diameter.
After that you want to dial in your temperature settings, control your overall temperature settings in the room, and use some high quality filament.
Make sure your 3D printer is well-tuned and maintained so mechanical issues don’t contribute to bad print quality.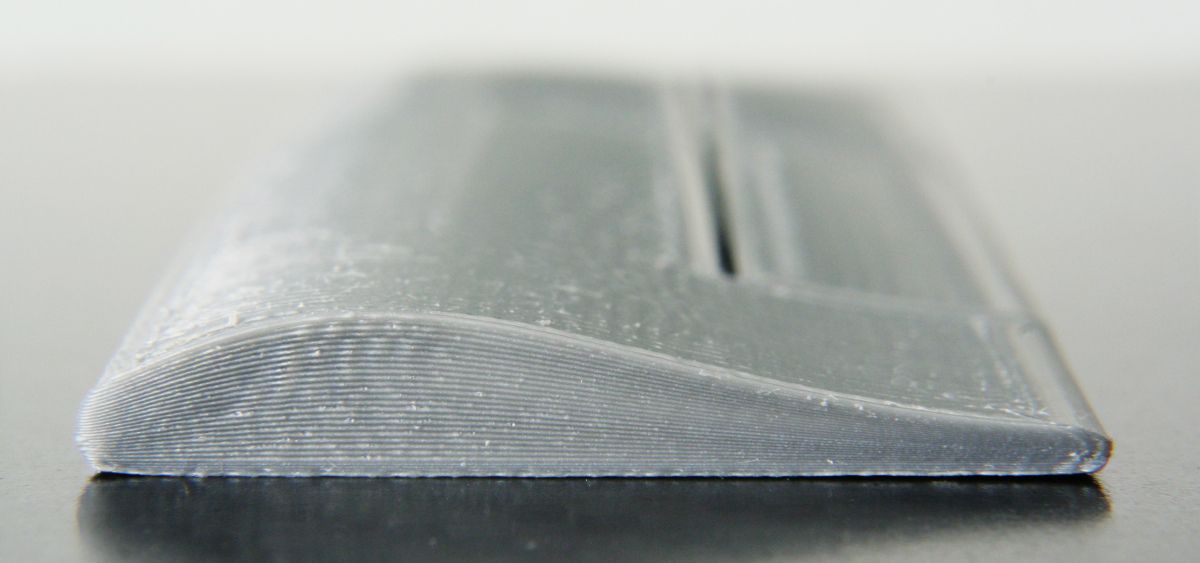 For that extra push, you can implement post-processing methods to really smooth your prints over.
Once you follow the action points in this article, you should be well on your way to 3D printing without layers.
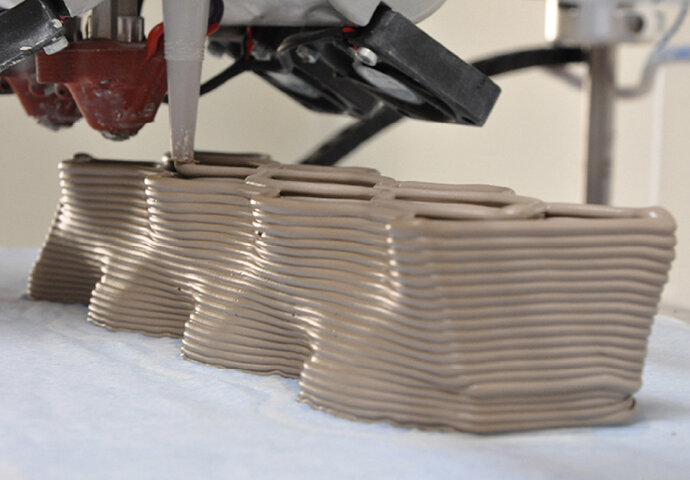
No Layer Lines With Non-Planar FDM 3D Printing
The surface quality of FDM (fused deposition modeling) 3D prints has improved drastically in the last few years, mostly thanks to improved slicing software that extrudes / retracts more consistently and machine firmware that better handles acceleration. It’s also easier than ever to find high-quality, affordable filament that’s free of impurities and has only minor deviations in diameter. All of that leads to smoother walls on prints. Still, there’s no way around those pesky layer lines on every part. Or is there?
Is 3D Printing Actually 2.5D Printing?
Michael Laws of the Youtube channel Teaching Tech recently released a video demonstrating non-planar 3D printing on a desktop 3D printer, or what he calls “true 3D printing. ” He points out that, technically, all desktop printers use only 2.5 dimensions to make objects, even though they can move in three dimensions. That’s because anytime there’s Z motion, there’s no X or Y motion; if there’s X and Y motion, there’s no Z motion. 3D printed objects are just many planar layers stacked on top of each other and the Z axis is only used to move up to the next plane. This leads to the infamous layer lines on the walls of parts as well as the stair-step effect that becomes more noticeable on objects that have shallow angles and contours on the top.
How to Achieve Non-Planar 3D Printing With Your 3D Printer at Home
If the printer could be told to follow those contours with the extruder, both of those problems go away. So Michael dove in deep to make his printer function that way, real deep. Daniel Ahlers of the University of Hamburg did a Masters Thesis on non-planar 3D printing and provided a custom version of Slic3r on GitHub; unfortunately, it needed to be run on a Linux machine, which Michael did not have. After a few hours of installing a virtual Linux machine on his Windows computer and copy/pasting hundreds of lines of code to build the Slic3r, he was finally able to start non-planar 3D printer. Well, not quite. He still had to modify the toolhead of his 3D printer to ensure no cooling shrouds or probes were near the hotend nozzle, otherwise they could collide with the printed part. I tell you all this so you understand why this feature isn’t already available as an option in all slicing software and probably won’t be any time soon.
It was a long journey but Michael finally achieved non-planar 3D printing and, oh boy, is it cool! The surface quality goes through the roof. Even geometry is improved as he printed a wing to show off how aerodynamics change with non-planar printing. While he didn’t test this, parts printed this way would also be stronger because they have material that’s crossing the Z plane, the weakest dimension of FDM printed objects due to the layered effect.
There are, however, several limitations to non-planar 3D printing. For one, the 3D printed object can’t have valleys that are deeper than the nozzle length or angles that are steeper than the nozzle clearance or the nozzle will collide with the object. This is the biggest issue because it means that commercial non-planar 3D printing will likely only come about in a 3D printer that has been specifically engineered for the task. Slicing software distributors can’t account for all the different shapes of hotends to build this feature into the software alone. Part cooling is another issue as cooling shrouds have to be moved to allow for clearance, though that’s an easier problem to solve. Finally, as Kerry Stevenson over at Fabbaloo notes, Autodesk may have patented non-planar 3D printing in 2015, meaning these individual efforts to harness the technology may soon be squashed.
The 20 Most Common 3D Printing Problems (Part 1)
Good afternoon dear 3D Today community! I would like to present you a translation of the article Troubleshooting Guide to 20 Common 3D Printing Problems, which will be divided into 2 parts.
Everyone has problems with printing. We had enough of them to analyze and find solutions for the 20 most common 3D printing problems. In this article, we share our experience and hope that now you do not have to spend extra time diagnosing and solving problems that have arisen.
If you cannot determine what the problem is, compare it with the description.
3D Printing Issue #1: Warp - First Layer Peeling
Issue Description
The print is lifting up on the base of the model and does not stick to the platform. This problem can also cause horizontal cracks in the top sections of the printout.
Why did the problem occur?
Deformation of the print base is due to the nature of the plastic. ABS and PLA plastic cools very quickly and this is what can cause the first layer to come off.
Solve 3D printing problem: Printout warped
1. Use heated bed. The easiest solution to this problem is to use a heatbed and set the temperature just below the melting temperature of the plastic. If you set the temperature correctly, the first layer will not come off the platform. The printer bed temperature is often set automatically by the slicer. The recommended temperature for your plastic is listed on the side of the package or reel.
2. Use adhesive . If your printout is lifting around the edges, apply a thin layer of glue (or hairspray) to the platform to increase adhesion.
3. Try another platform. Change the platform to a platform with more adhesion. Manufacturers like Lulzbot use a PEI (Polyetherimide) coating that provides a good grip even without the use of glue. XYZPrinting Some printers include a few pieces of thermal tape for the liner. This is a good solution for cool platforms. Zortrax 3D choose a different solution - a perforated backing to which the printout adheres, thereby relieving the user of the problem of deformation at the base.
4. Calibrate the platform. Improper platform calibration can also affect the print quality of the first layer. Check the level of the platform and correct the height if necessary.
5. Increase contact between printout and platform. Often this problem also occurs due to insufficient contact between the model and the substrate. It can be easily corrected using the printer software by adding a skirt or backing.
6. Optimize temperature settings. If none of the methods worked, check the advanced settings of the printer software and the printer itself. Try increasing the platform temperature by 5 degrees.
7. Pay attention to the fan settings. As a general rule, the fans should switch to full power as soon as the print reaches a height of 0. 5 millimeters, but you can increase the height to 0.75 millimeters to allow the layers to cool naturally.
8. Even if your printer has a heated bed, it is recommended that you use glue (or varnish) and constantly adjust the bed level.
3D Print Warping: Checklist to Avoid Problems
- Use Heated Platform
- Use Glue (Varnish) for More Adhesion
- Instead of Glass Platform, Use Kapton/Heat Tape/Adhesive/Varnish
- Calibrate Platform or substrate
- Adjust temperature and fan settings
3D printing issue #2: First layer misalignment (Elephant foot)
Problem description
The base of the model is slightly off.
Why did the problem occur?
Typically, the base of the model shifts due to the weight of the print, which puts pressure on the first layer when the lower layers have not yet had time to cool. Often happens with heated bed printers.
3D Printing Solution: First Layer Offset
1. Correct balance. To get rid of the problem of first layer displacement, the printed models must be cooled enough to support the weight of the entire structure. Here you should be careful: excessive hypothermia can lead to deformation of the first layer. Finding a balance is hard enough. Start by lowering the platform temperature 5 degrees (but no more than 20 degrees below the recommended temperature). If Bottom / Top Thickness is set to 0.6 millimeters, turn on the fan immediately at a height slightly lower.
2. Platform level. Most 3D printing problems are related to the wrong platform level. For each printer, there is a specific approach for platform level calibration. Check the manufacturer's recommendations to determine what you need. Print out a calibration cube and look at the quality of the plastic feed. The calibration cube will help you determine if the plastic has been laid flat, and if the nozzle is too close to the platform and scrapes the melted plastic, or too high causing the plastic to bubble.
3. Raise the nozzle. Raising the nozzle a little can often help. The main thing is not to raise it too high.
4. Smoothen the corners of the model. If all else fails, try chamfering the corners of the model base. Of course, this is only possible if you created the model yourself or if you have access to the source file. Start with 5mm and 45º bevel and experiment to get the best result.
First Layer Offset in 3D Printing: Checklist to Avoid Problems
- Balance Platform Temperature and Fan Speed
- Raise Printer Platform
- Check Floor Height
- Make model corners smoother : Other problems with the first layer
- Check the level of platform
- Check the height of the nozzle
- Clean the platform
- Use the adhesive 4: Offset layers in model
Problem Description
Layers shift in the middle of the printout.
The printer straps are not tight enough. The top plate is not attached and moves independently of the bottom plate. One of the rods in the Z-axis is not perfectly aligned
3D printing solution: Layers misalignment in the model
1.
 Check the belts. First of all, check how tight the straps are: they shouldn't hang loose, but they shouldn't be too tight either. If you pull on the straps, you should feel a slight resistance. If you feel that the top strap is tighter than the bottom strap, this is a sure sign that they are not tight enough.
 2. Check the cover. Check the cover, rods and other parts on top of the printer (if you have coreXY). Make sure all parts are properly fastened.
3. Check the z-axis screws. Many printer manufacturers use threaded studs more often than trapezoid screws, and while both do the job, the studs tend to bend over time. No need to disassemble the printer to check if the rods are straight. Simply use software such as Printrun to move the print head up and down. If one of the Z axis bars is bent, you will definitely notice it. Unfortunately, it is almost impossible to straighten a bent stud, but on the other hand, this is a great reason to replace old threaded rods with trapezoidal screws.
Supreme displacement: Checklist
- Check belts tension
- Check if the upper cover is moving
- Evil that the stilettos of the zis are even
description problems
Gaps in the model appear due to the fact that some layers are missing (partially or completely).
The printer was unable to produce the required amount of plastic to print the missing layers. In 3D printing, this problem is also known as under-extruding. The essence of the problem may lie in the plastic itself (for example, a different diameter of the material), in the coil, in the feed mechanism (extruder) or in a clogged nozzle.
Friction can cause plastic to get stuck. It could also be that the z-axis screws (studs) are not properly aligned with the linear bearings.
There may also be a problem with the screws (studs) in the Z axis and with the bearings themselves.

3D Printing Solution: Missing Layers
1. Mechanical Check . If suddenly you find missing layers in the print - it's time to take a little care of your printer. Start by checking the screws (studs) and make sure they are firmly attached to the bearings or clamps.
2. Check rod alignment. Check that all screws (studs) are aligned and not misaligned. Turn off the power and gently move the print head along the X and Y axes. If there is any resistance, then there is some problem. It is easy enough to understand what exactly the problem lies in - a slightly bent rod or bearings.
3. Worn bearings. Worn bearings make noise. You may also feel the rattle of the print head, while the printer vibrates slightly. In this case, turn off the power and move the print head along the X and Y axes to find out where the worn bearing is.
4. Check the oil. Remember to regularly lubricate the moving parts of the printer. Sewing machine oil is ideal for lubrication - you can buy it at any hardware store at an affordable price.
 Before applying oil, make sure the studs (screws) are clean. If the studs(screws) have dirt or print material residue, clean them.
 Then connect to the printer via a program (eg Pronterface) to move the print head in the X and Y axes and check that the studs are evenly lubricated. If you apply a little more oil, just wipe off the excess.
5. Underextruded . The last cause of the problem may be insufficient extrusion. There can be many solutions to this problem, and all of them are described in Section 9.
Checklist
- Check the printer mechanism to make sure the moving parts are tight.
- Recheck printer design and alignment
- Check for worn bearings and bent pins
- Use some oil to lubricate parts
3D printing issue #6: Cracks in tall objects
Problem description
Cracks on the sides of the model, most commonly in tall models.

The problem can occur unexpectedly, and most often occurs in large printers, especially if you do not monitor their work.
The material cools faster on the upper layers, because the heat from the platform does not reach the required height. Because of this, the adhesion of the upper layers is lower.
3D Printing Solution: Cracks in Tall Objects
1. Extruder Temperature . Start by increasing the extruder temperature - 5-10ºC is best. On the side of the plastic box you will find the highest temperature for plastic, try not to raise the temperature to this value.
2. Fan direction and speed . Double check your fans and make sure they are pointed at the model. If the direction is correct, reduce their speed.
Checklist
- Check the maximum possible temperature of the extruder and increase the current temperature by 10ºC in one attempt.
- Check the direction and speed of the cooling fans.

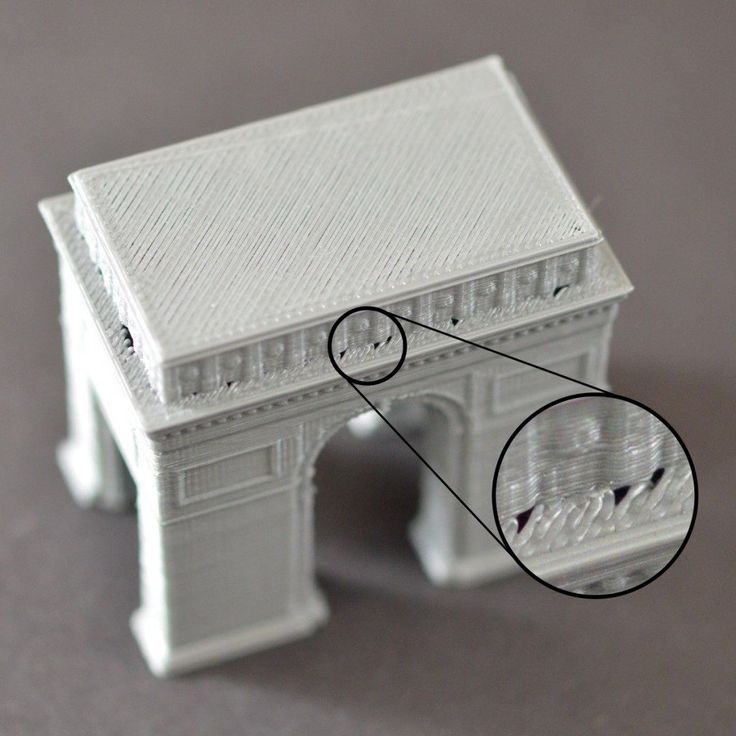
3D Printing Issue #7: Holes in the top layer
Description of the issue
Holes and gaps in the top surface of the printout.
The two most common causes of this problem are improper top coat cooling and top coat not thick enough.
Solution to 3D printing problem: Holes on the top layer
1. Thread (filament) diameter . Often the problem happens with plastic with a diameter of 1.75 mm. Holes in the top layer are a problem with all 3D printers, but they happen more often with printers that use 1.75mm filament than with printers that print with filament larger than 2.85mm.
2. Check the location of the fan . Cooling can cause this problem, so check the fans first. When the printer starts printing, the fans are at their lowest speed or off. After printing the first layer, the fans start to work. Check if they start working and also check if they continue working when printing is finished.
 If all is well, double-check if the direction of the fan is set correctly - they should blow over the model.
 3. Set fan speed in G-Code. Another cooling issue is related to excessive plastic in the top layer. It must cool quickly so as not to fall between the already printed supporting elements. The fan speed can be adjusted with G-Code ( is usually G-Code for Fan On is M106 and M107 Fan Off ). Also set the fan speed to maximum for the upper layers.
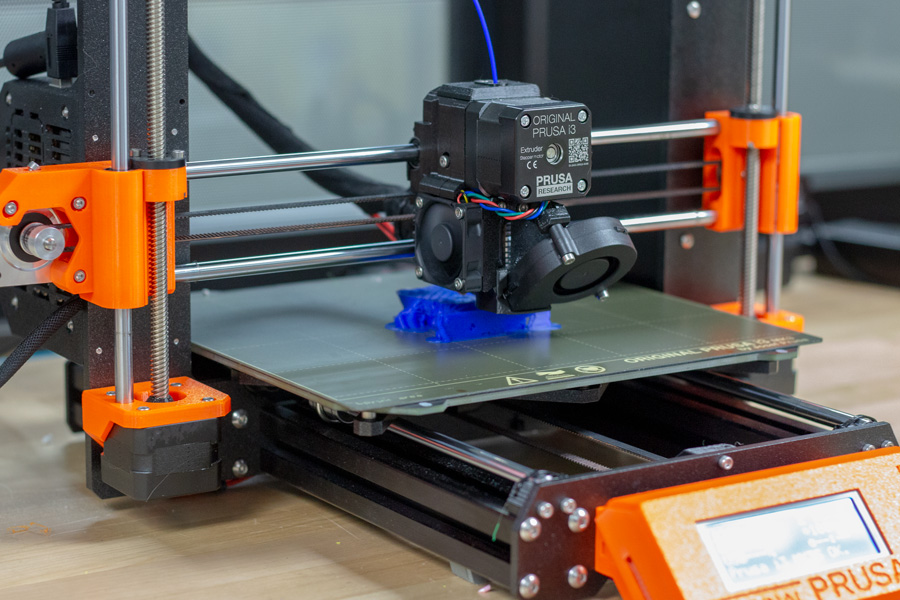
For example, for a 1cm x 1cm cube, the height of the top layer would be 0.1mm. In this case, when generating a G-code through CURA for Prusa i3, the G-code indicates that the number of layers for the cube is 100. Considering that we specified heights of 0.6 mm for the top and bottom layers, it is worth editing the value to LAYER: 94
4. Increase the thickness of the top layer . One of the simplest solutions to the problem is to increase the thickness of the top layer.
 In most applications, you will be able to adjust the thickness using the ‘Bottom / Top Thickness setting’ advanced settings. You need to increase the thickness of the top and bottom layers up to 6 times the other layers and up to 8 times for smaller nozzles and plastics. If the layer height is 0.1mm, then the height of the top and bottom layers should be 0.6mm. If there are still holes and bald spots in the top layer, increase the thickness to 0.8mm.
 Cheklist:
- Use a larger diameter
- Mrive that the direction and speed of the fans are correct
- manually set the speed of fans
- increase the thickness of the upper layer
Description of the problem
Cobwebs or hairs appear between model elements when printing.
When the printer head moves across an open surface (without extrusion), i.e. from one object to another, the plastic flows out of the nozzle.
3D printing solution: Hairs, webs
1. Turn on retract . Retraction is an important factor for the quality of the finished model and can be enabled in the slicer. It functions quite simply and works by pulling the filament back into the nozzle before the head starts to move. The bottom line is that it prevents plastic from flowing out of the nozzle, which creates a "spider web" between objects.
2. Retraction activation in settings . Most apps like Cura offer pull activation in settings and this is set by default. However, if you want more options, you can customize them further. For example, you can set the minimum head path before activating retraction.
3. Minimum distance (mm) . If retraction is not working correctly, the easiest way to fix this is to reduce the minimum distance. Reduce it by 0.5mm until hairiness disappears. Activate retraction (retract) to increase the speed of printing.
4. Just cut them off.
 Not the most sophisticated solution, but it has the right to life. Carefully cut the web.
 Cheklist:
- Turn on pulling
- Set up the minimum distance before pulling
- Cut with a scalpel
Problem with 3D extruding
description of the problem. Description the extruder cannot extrude enough material (or cannot do it fast enough). This leads to the fact that the layers are too thin, unwanted bald spots appear in the layers or the layers are completely absent).
This problem has several causes. First of all, the thread diameter may not match the diameter set in the slicer. Also, the amount of extruded material may be lower due to incorrectly configured firmware. Another problem is that the nozzle can become clogged and this will cause under extrusion.
3D Printing Solution: Underextruding
1. Check filament diameter .
 Start with the simplest solution - check the filament diameter settings in your slicer. If you are not sure about the filament diameter and the recommended temperature, check the information on the packaging.
 2. Measure thread . If you still can't get the desired result and filament separation remains a problem, use a caliper to check the filament diameter. After measurement, adjust the settings of the slicing software. ( author's note - if you have a bowden hotend, then you need to unscrew the fitting from the hotend, enter the command (for example, in Pronterface) M302 : Allow cold extrudes and extrude a meter of plastic. If more or less is extruded, then you have an incorrect number steps per mm for the extruder If you have a direct hotend, then you need to unscrew the nozzle ( the nozzle can only be unscrewed when it is hot! ). It is also worth noting that even with the correctly set steps per mm value, when retracting, the distance traveled will be less than when extruding.
 This is because more resistance is experienced when retracting )
 3. Check print head . After starting printing, most printers lift the print head off the model base. Check if the nozzle is clean.
4. Set the extrusion factor to . If there is no difference between the actual extrusion diameter and the software settings, check the extrusion multiplier settings (or flow rate or flow compensation), they may be too low. Each slicing application solves the problem differently, but try increasing the ratio by 5% and restarting the print process.
5. Open the Edit Process Settings window in Simplify3D and go to the Extruder tab - the extrusion factor should be set to 1.0 which corresponds to 100%. Open the Material tab in Cura and increase the Flow settings (you may need to enable Flow in the Preferences window).
Cheklist:
- Check the diameter of the Philiment
- Use the caliper to double -check the diameter of the Philament
- Check whether
- EXTRICATION CLEADICTION by 5%
Description of the problem
Excessive extrusion means that the printer is supplying more material than needed.
 This affects the fact that the printout has excess filament.
 Solution to 3D printing problem: Overextruding
This problem is usually caused by the slicer's extrusion or flow ratio being too high.
1. Extrusion ratio . Open the slicer and check that you have selected the correct extrusion ratio.
2. Flow settings. If everything is correct with the extrusion ratio, reduce the Flow parameter in your printer software settings.
Checklist :
- Check if the extrusion factor is set correctly
- Reduce the flow settings of the filament
We are waiting for your comments on the translation.
Happy New Year everyone!
3D printing defects - Let's try to introduce classification
Good afternoon, dear visitors of the portal.
Today I decided to go not to the artistic part of our work, but again to the scientific one.
By coincidence, I graduated from the university with a degree in foundry engineering. Why am I mentioning this: firstly, for the last 10 years, the foundry has been threatened that it will die due to stamping and 3D printing. Secondly, foundry uses a lot of its own terminology. Today I want to try to describe the main defects in 3D printing, possible names and ways to deal with them (defects, not names). Of course, within the framework of one article on one portal, we will not introduce our own terminology, but at least there will be something to discuss. I invite you to read and adequately comment.
Defect : Warp
Commonly used description: Peel off platform, bend
Description : Geometry distortion. Due to the transition of plastic from one state to another (liquid - solid-liquid - solid) and temperature changes, the plastic begins to decrease in volume. This process is uneven - first the edges cool down, and then only the central part.
 Because of this, internal stresses arise that tear off the edges or break the part.
 Now some physics and explanation. It is IMPOSSIBLE to get rid of thermal shrinkage or shrinkage. This is a physical process - you can only compensate for it. In addition, remember - shrinkage of 0.5 -0.9% is mentioned everywhere. But this is only linear, which means you will have more volume.
How to fight:
- Reduce fill - less plastic, less to shrink - less tear force.
- Use a hot table - you heat the underlying layers, which gives an even distribution of stresses inside the part.
- Outline - you can print an outer layer around the part. This creates a kind of thermal barrier around the part, thereby maintaining the temperature throughout the volume, resulting in an even distribution of stresses throughout the part. An alternative is a closed build chamber, serving in the same way
- Use construction elements - First, check that your part is lying well on the table - if your flat side of the part is not flat at all (in art it's easy - to move a couple of polygons or vertices to the wrong place on a couple of mm), then it will easily come off.
 Secondly, if you understand the physics of the process, you can either add material somewhere, or make a hole in the part, etc. In this way, you will artificially cause stress redistribution in the part, however, this method is extremely complicated.
 - Increase grip strength - you don't have to fight stress, just provide the required grip strength. However, this option does not seem very good to me - these stresses will remain and your part can then be easily broken in this place.
Defect : Skewed
Frequently used description: Layers floated, vertical is not respected, layers do not lay flat on each other
Description : Several variants of this defect are possible. Either the layers just lie unevenly, or the model is printed somehow in pieces, or just a slight skew. This defect is usually associated with the mechanical part of the printer. Due to friction, the actual path of the print head does not match the one that was loaded into the machine.

How to fight:
- Check the belts. Since there are many designs, it is difficult to give a universal answer here. Check that they lie normally at the points of contact and are not frayed anywhere. Look at the printer's instructions or some tips on the Internet - it is quite possible that the problem has already been sorted out before you.
- If the printer simply shifts the layers relative to each other, then it is possible that the pulleys are not properly secured. With a black marker, you can mark the position, and after printing, compare and tweak this place if necessary.
- Move the print head without power - it should move without significant problems. If this is not so, then maybe it is worth finally lubricating the shafts?
- Squareness not ensured - again, due to poor mounting, the X and Y axes may not be perpendicular. This can lead to this defect, which means it's time to climb into the printer again and twist.
- Check the print platform - the glass may start to slide on your printer.
 And just like that, in the same direction. In this case, it is necessary to ensure its fixation in some way.
 - Electronics problem. Rare case, but possible.
Defect : Boiling, Puffiness (?)
Common Description: Holes in the top layer, problem with the outer layer.
Description : Protrusions on the upper layer of the part - can be either open or closed. In fact, this is due to the sagging of the plastic, which does not have time to cool when printed in the air without supports. Considering that there can be several such layers and all of them are of poor quality, we get this defect.
How to fight:
- Provide cooling - your plastic should cool well on the top layer. According to the recommendations, at this stage, cooling should go as much as possible.
- Ensure sufficient layer and wall thickness - In addition to sufficient cooling, you must have the required number of layers.
 Again, according to the recommendations, your wall should consist of at least 6 layers of your thickness. Thus, when printing with a layer of 0.1 mm, you want your wall to be at least 0.6 mm. But remember - too thin base layers will not work either - they simply will not hold themselves and other layers.
 - Try changing the occupancy - some slicers change the occupancy configuration at a certain percentage of infill, so the difference can be even between 24% and 25%. In addition, with a larger fill, the distance that is printed in the air is smaller, which can also remove this defect.
Defect : Lack of layer (?)
Commonly used description: Round things do not come out round, parallel straight things do not come out parallel
Description : Sometimes the geometry of the layers is not observed - this can manifest itself in circles, when the circle is not perfect, as well as in parallel lines.
 For example, parallel lines first diverge a little, and then, on the contrary, slightly overlap. This is due to the belts going to the stepper motors - most likely they are not fastened tightly enough.
 How to deal:
- Tighten the straps near the print head - how to do this is best to look at the 3dtoday portal or ask your 3d printer supplier.
- Check that all fasteners are tight - use the tool that most likely came with your kit to do this
- Lubricate the guides - literally add one drop of light lubricant to your guides.
Defect: Elephant Leg
Commonly Used Description: Thick bottom layers, uneven layers at base.
Description : The effect when the bottom layers of your part are larger in area than they should be. Due to the fact that the nozzle at the beginning of printing is firmly pressed against the printing table at the beginning of printing, the layer begins to smear a little, thereby decreasing in thickness, but increasing in area.
 Then the print is evened out, because there is no longer a tight pressure
 How to fight:
- Adjust the table - your nozzle should not rest against the print platform - there should be a slight, but still gap.
- Reduce the table temperature - a slight decrease in the table temperature can also reduce this defect. Do not get carried away with these methods too much - this may degrade the overall print quality.
- Structural model improvements - add small chamfers or fillets. You will have to play around with the settings a bit, but thanks to such a design improvement in the model, your model will be smooth and beautiful. However, it is impossible to say for sure which chamfer to make. Start with a 0.5 x 45 bevel, and then empirically find the best option.
Defect : External slack (?)
Common description: Snot, plastic between two parts part to another, a long, thin layer of plastic is created that spoils the outer shape of the part(s).
 This is due to the fact that the plastic that remains at the tip of the nozzle under the influence of gravity and friction is caught on one part and begins to drag through the air. Depending on the fluidity parameter and the hardening time, different plastics exhibit this defect in different ways.
 How to fight:
- Use the retract function - thanks to it, the print head will slightly return the plastic, thus removing it from the tip of the nozzle. This setting is activated directly in the slicer (if it supports it). In the Cura slicer, the retract is drawn with thin blue lines and you can check this moment at the level of the finished task.
- Increase your print speed - the physics is simple - by increasing your print speed, you reduce the amount of time the plastic can catch on your part. However, increasing the print speed is not always possible and may cause other defects.
- Change the print temperature - print temperature has a direct effect on fluidity, especially with PLA.
 Reducing the temperature even by 10 degrees significantly reduces the effect of external sagging.
Defect : Waviness
Commonly used description: Discoloration at the edges of the part, defects along the edges
Description : This defect appears as darkening and slight waviness around the sharp ends. If you start typing the text, it will look like a slight shadow effect on it. This is due to the inertia that is imparted to the liquid plastic during printing. Regarding plastic, the print head has a large mass and during a sharp change in direction, liquid plastic is not able to sharply repeat the trajectory, which causes slight waviness in the corners.
How to deal with:
- Decrease print speed - Decreases print speed, reduces sharpness at corners, thereby smoothing the effect.
- Decrease print head acceleration - these settings are not available in all slicers, however, this will eliminate the defect without reducing the print speed.

- Change the print temperature - as we mentioned earlier, temperature affects fluidity, so lowering the print temperature can help get rid of the defect.
Defect : Looseness, Sagging (?)
Frequently used description: Snot on the part, sagging plastic on the part
Description : One of the most common and basic defects in plastic is due to printing in the air sags instead of getting a flat horizontal surface. This is due to the fact that the plastic does not have time to cool down and is printed without support where they are needed. Sagging can occur for many reasons, although the physical nature of the defect is practically unchanged. Because of this, the elimination of this defect may not be obvious.
How to fight:
- Cooling - Depending on the plastic, you may or may not need cooling. If it is necessary - provide it as much as possible.
- Print more than one part - for small parts, printing more than one part will help a lot.
 This will remove the heat source and give your part time to cool.
 - Work with the thickness of the layer - it is not possible to make a recommendation whether it is better to increase the layer or reduce it. Each situation must be decided, however, changing the thickness of the layer can improve or worsen the effect of sagging.
- Reduce the print speed - very often reducing the print speed can improve the quality of your part.
- Reduce temperature - if you decrease the temperature, the plastic will cool faster to a solid state. However, do not lower the temperature too low, otherwise the print quality may drop.
- Change the position of the part - if possible without loss of quality, try to position the part differently. Stop, think, or use auto-positioning (like Meshmixer). Instead of fighting a defect, you can often simply eliminate it.
Defect : Layering of the bottom layer
Commonly used description: Clearly defined bottom layer, thick lines of the bottom layer
Description : Printing the bottom layer is one of the most crucial moments in printing.
 If we print too close, we will get an elephant leg defect. In the case of a large gap, we can get excessive layering of the lower layer.
 How to deal with:
- Decrease the thickness of the first layer - many slicers have the ability to change the first layers of printing. Try to make it smaller to achieve a result that suits you.
- Recalibration - many problems with the bottom layers can be solved by recalibrating the table. Set the distance a little less and you might get the desired result.
Defect : Underextrusion
Common Description: Holes in Print, Layer Problems, Surface Defects
Description : Underextrusion is a defect worthy of its own article with a description. It can occur as a result of a huge number of factors, both related to the printer and plastic. It is very easy to observe it - the surface of the part comes out not even, but with all sorts of inclusions, or vice versa, the absence of plastic where it is needed.
 To eliminate this defect, an integrated approach may be required.
 How to fight:
- Change the speed - your printer may not technically be able to print at this speed. You may need to lubricate it or change the plastic, but first try printing at a slower speed. In addition, not all parts and not all plastics, the printer can print at maximum speed
- Change the temperature - all plastics have recommended temperatures for printing. If you print at the wrong temperature, then you do not provide the required fluidity parameters for working with this plastic and you will not print correctly with it.
- Check plastic - plastic may be damp, dirty or of poor quality. All this can lead to under extrusion, or that you will not print at all. In addition, plastic can break due to the feed mechanism and its strength properties. You may not be able to print with this plastic. Or maybe his diameter is walking .. As you understand, changing the plastic to another will allow you to quickly understand the problem in the printer or consumable.
- Check the paper feed mechanism - if you are working with soft plastic, the plastic may wrinkle too much and prevent you from printing properly. Then, most likely, it will be necessary to loosen the grip of the bar, however, this should be done only after contacting those. support if you are doing this for the first time.
- Check the bar - during printing, sometimes your bar may become knotted or something is preventing it from entering the extruder. Be sure to check it out right now.
- Change or clean the nozzle - your nozzle will not last forever. In the course of work, it will become dirty - both from the soot of plastic, and from the dust that you allowed. Always have a pair of replacement nozzles available to help you understand this problem. In addition, when you refill plastic with a lower printing temperature, print at a high temperature so that the remnants of the old plastic completely come out and do not interfere with work.
- Check slicer settings - some slicers may use nozzle retraction and nozzle cleaning to get rid of external slack.
 Because of this, when you return the print head, you do not immediately start feeding plastic. This can lead to underextrusion in some parts of the model.
 - Check the Teflon tube - due to dirt allowed in the printing area, the Teflon tube may become contaminated. Because of this, the rod will experience friction, which will lead to underextrusion.
- Check the gears - if the gears that pick up the bar do not work properly, then it will be problematic to exit the nozzle. If simpler measures do not suit you, check that this mechanism works correctly.
Defect : Notches (?)
Common description: Walls do not sinter together. Hollows in the walls.
Description: Mechanical problem. Due to the limited path of the printing part, there are voids and inconsistencies between the walls. Contact may be partial or absent entirely.
How to deal:
- Tighten the straps near the print head - how to do this is best to look at the 3dtoday portal or ask your 3d printer supplier.
 This option is best used in case of partial contact.
 - Reduce the print speed - plastic may not fit well at this speed. A slight increase in temperature may also help.
- Change the wall settings - this problem may arise due to the principle of laying this very wall. If you have a 0.3 nozzle, then it is impossible to lay a 1 mm wall in ideal layers of 0.3 mm. So the program can either represent the wall as 0.9mm and lay 3 layers, or somehow compensate for this. Try changing the wall thickness and maybe you can get rid of the defect.
Defect : Scratches
Commonly used description: Surface scratches and color unevenness
Description : When the print head moves, the printhead leaves a mark on the plastic due to close contact with the plastic. This can be either grazing old plastic or smearing new plastic that flows out of the nozzle due to contact.
How to deal with:
- Increasing speed and decreasing temperature - as in other similar defects, when plastic leaves a mark, increasing speed and decreasing temperature can reduce the effect of this problem.
- Slicer setting change - To a large extent, this defect can be controlled by the slicer. Using Cura as an example, you can use the z-hop function (raises the nozzle). In addition, you can work on the retract.
- Change in geometry - this defect can still appear on complex surfaces. Try adding an even layer to your model or simplifying the geometry altogether if you're having this problem and it's making your life worse.
Defect : Underfill
Common Description: Part prints strangely. Incorrect entry of the part. Print supports where they shouldn't be
Description : The type of defects associated with the electronic model - can be associated with many things. If the polygons have incorrectly directed normals, if the model is not fully stitched (there are holes) or consists of several elements - all this can lead to this type of defects, when the slicer will misunderstand what they want from it.

How to fight:
- Check the model in Netfabb/Meshmixer - with specialized products you can check the model and see what errors it has. These programs eliminate many of the problems that were made before printing. However, these programs may distort your geometry.
- Fix the electronic model - if you have the skills and the ability to use the functionality of 3d programs to fix the mesh. Sew the meshes, close the gaps, reverse the normals, then check the resulting g-code. In it you will see how your model will be printed and whether everything suits you.
Defect : Fluffiness
Commonly used description: Model as in hair. Snot. Sagging.
Description : Reduced external sag. Small hairs stick out on the model, which remain from the printing nozzle. The physics of the phenomenon is the same, but the amount of plastic is much less. However, this defect can occur even if the nozzle does not move from one object to another.
How to fight:
- Check the plastic - your plastic may be dirty or poorly made. Try a different plastic and you may be able to get rid of the
- Check the nozzle - this fluffiness may be the first sign that something is wrong with the nozzle. Check the outside of the nozzle to make sure nothing is sticking out or try a different nozzle
- Remove the defect after work - this is the rare type of defect that is quite easy to get rid of by post-processing. Use a sandpaper, needle file or other handy tool.
Defect: Skipped layer
Common description: The layer is different from the other layers in the model. The model is flaking into pieces
Description: The case when one or more layers differ from the others. Then comes stable printing and the defect may recur. May be due to underextrusion or machine problems.
How to deal with:
- Familiarize yourself with underextrusion - you may see more similar defects and you will know how to proceed.
- Lubricate the Z-track - as the table moves in the Z direction, it is possible that in some areas you have accumulated dirt or lack of lubrication. Lubricate the guide as recommended by the manufacturer and check operation.
- Bearing problem - it is possible that the problem is not in the guide, but in another element of the lifting mechanism. In this case, you need to check the bearing adjustment or return the printer for service. Look for additional information on the portal 3dtoday
- Too much lubrication - too much lubricant - does not mean better. It can start to easily accumulate dirt and again begin to cause this effect. Wipe the shafts and lubricate with the necessary amount of material.
- Electronic problem - it is possible that the problem is not with the mechanical, but with the electronic part of the movement. If other methods do not help, then most likely the printer may need to be returned for repair.
- Defective parts - unfortunately this happens.
 It is possible that everything is done well, but some part of the mechanism is out of order. Again, this cannot be solved without disassembling the printer.
Defect: Misalignment of axes
Commonly used description: No right angle.
Description: Cases where the mating parts of the mechanism do not fit into the grooves due to misalignment. Another way to identify a problem is that the printer head moves with force.
How to fight:
- Editing axes - the defect is eliminated only mechanically. Ask the supplier or manufacturer for information on how to correct the axes and then reconfigure the printer.
I do not claim to be the final authority. For my part, I would like an adequate discussion and proposals in order to supplement and develop this article and formulate it into a finished version. Icons? mean that I still do not consider this name final and I expect other proposals for names from you.

Learn more
Description of the problem
The first layer does not look right, some fragments are missing. There are unnecessary lines at the bottom.
Why did the problem occur?
Such 3D printing problems usually indicate that the platform level has not been set correctly. If the nozzle is too far from the platform, unnecessary lines often appear at the bottom of the printout or the first layer does not stick. If the nozzle is too close to the platform, this can cause formation bubbling.
Also note that the platform must be clean. Fingerprints on the platform may cause the first layer to not adhere to the platform.
3D printing problem solution: Other first layer problems
1. Set the platform level. Each printer has its own platform level configuration process. For example, the latest Lulzbots use auto-calibration, while Ultimaker offers step-by-step manual calibration. But to set up the Prusa i3 platform level, you will need to spend a lot of time studying the issue.
2. Set nozzle height. If the nozzle is too high, the plastic will not stick to the platform, if too low, the nozzle will scrape the printout.
3. Clean the platform. Be sure to clean the printer platform regularly, especially if you are using adhesive. Fingerprints, dust and adhesive residue affect how well the model sticks to the platform.
4. Use glue (varnish). Apply a thin layer of adhesive to the platform to increase the adhesion of the model to the platform. Remember to clean the platform regularly as excess glue can cause the opposite effect.
5. Use textured underlay for non-heated printer platforms.
Other problems with 3D seal: Cheklist to avoid problems