3D printing webbing
Stringing or Oozing
Stringing or Oozing
Stringing (otherwise known as oozing, whiskers, or “hairy” prints) occurs when small strings of plastic are left behind on a 3D printed model. This is typically due to plastic oozing out of the nozzle while the extruder is moving to a new location. Thankfully, there are several settings within Simplify3D that can help with this issue. The most common setting that is used to combat excessive stringing is something that is known as retraction. If retraction is enabled, when the extruder is done printing one section of your model, the filament will be pulled backwards into the nozzle to act as a countermeasure against oozing. When it is time to begin printing again, the filament will be pushed back into the nozzle so that plastic once again begins extruding from the tip. To ensure retraction is enabled, click “Edit Process Settings” and click on the Extruder tab. Ensure that the retraction option is enabled for each of your extruders. In the sections below, we will discuss the important retraction settings as well as several other settings that can be used to combat stringing, such as the extruder temperature settings.
Common Solutions
Retraction distance
The most important retraction setting is the retraction distance. This determines how much plastic is pulled out of the nozzle. In general, the more plastic that is retracted from the nozzle, the less likely the nozzle is to ooze while moving. Most direct-drive extruders only require a retraction distance of 0.5-2.0mm, while some Bowden extruders may require a retraction distance as high as 15mm due to the longer distance between the extruder drive gear and the heated nozzle. If you encounter stringing with your prints, try increasing the retraction distance by 1mm and test again to see if the performance improves.
Retraction speed
The next retraction setting that you should check is the retraction speed. This determines how fast the filament is retracted from the nozzle. If you retract too slowly, the plastic will slowly ooze down through the nozzle and may start leaking before the extruder is done moving to its new destination. If you retract too quickly, the filament may separate from the hot plastic inside the nozzle, or the quick movement of the drive gear may even grind away pieces of your filament. There is usually a sweet spot somewhere between 1200-6000 mm/min (20-100 mm/s) where retraction performs best. Thankfully, Simplify3D has already provided many pre-configured profiles that can give you a starting point for what retraction speed works best, but the ideal value can vary depending on the material that you are using, so you may want to experiment to see if different speeds decrease the amount of stringing that you see.
Temperature is too high
Once you have checked your retraction settings, the next most common cause for excessive stringing is the extruder temperature. If the temperature is too high, the plastic inside the nozzle will become less viscous and will leak out of the nozzle much more easily. However, if the temperature is too low, the plastic will still be somewhat solid and will have difficulty extruding from the nozzle. If you feel you have the correct retraction settings, but you are still encountering these issues, try decreasing your extruder temperature by 5-10 degrees. This can have a significant impact on the final print quality. You can adjust these settings by clicking “Edit Process Settings” and selecting the Temperature tab. Select your extruder from the list on the left, and then double-click on the temperature setpoint you wish to edit.
Long movements over open spaces
As we discussed above, stringing occurs when the extruder is moving between two different locations, and during that move, plastic starts to ooze out of the nozzle. The length of this movement can have a large impact on how much oozing takes place. Short moves may be quick enough that the plastic does not have time to ooze out of the nozzle. However, long movements are much more likely to create strings. Thankfully, Simplify3D includes an extremely useful feature that can help minimize the length of these movements. The software is smart enough that it can automatically adjust the travel path to make sure that nozzle has a very short distance to travel over an open space. In fact, in many cases, the software may be able to find a travel path that avoids crossing an open space all together! This means that there is no possibility to create a string, because the nozzle will always be on top of the solid plastic and will never travel outside the part. To use this feature, click on the Advanced tab and enable the “Avoid crossing outline for travel movement” option.
Movement Speed
Finally, you may also find that increasing the movement speed of your machine can also reduce the amount of time that the extruder can ooze when moving between parts. You can verify what movement speeds your machine is using by clicking on the Speeds tab of your process settings. The X/Y Axis Movement Speed represents the side-to-side travel speed, and is frequently directly related to the amount of time your extruder spends moving over open air. If your machine can handle moving at higher speeds, you may find that increasing this settings can also reduce stringing between parts.
Related Topics
5 Ways How to Fix Stringing & Oozing in Your 3D Prints – 3D Printerly
If you’re in the field of 3D printing, you might have come across an issue of strings of melted plastic or plastic oozing from your 3D prints. This is called stringing and oozing, which fits perfectly.
Fixing stringing and oozing is best done by having good retraction settings, where a good retraction length is 3mm and a good retraction speed is 50mm/s. You can also decrease your printing temperature to help filament be less runny, which reduces the instance of stringing and oozing.
It’s a fairly common problem that people experience which leads to poor quality prints, so you definitely want to get this fixed.
There are more details to know about so keep on reading the article to find out why this happens in the first place, and how to fix it once and for all.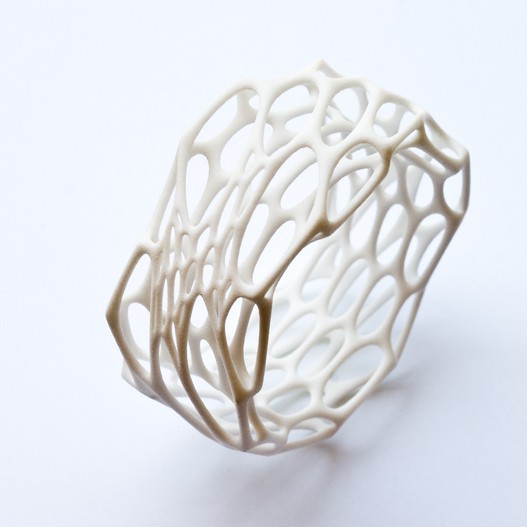
What Causes 3D Prints to Have Stringing & Oozing?
Sometimes users try to print an object in which the nozzle has to move through an open area to reach the next point.
Stringing and oozing is the problem in which the nozzle extrudes the melted plastic while moving from an open space.
The melted plastic sticks between two points and look like attached strings or threads. To prevent or solve the problem, the first step is to find out the actual cause of the issue.
Some of the major causes behind the stringing and oozing problem include:
- Retraction settings not being used
- Retraction speed or distance too low
- Printing with a temperature too high
- Using filament which has absorbed too much moisture
- Using a clogged or jammed nozzle without cleaning
Knowing the causes is a good way to start before getting into the solutions. The section below will take you through a number of ways how to fix stringing & oozing in your 3D prints.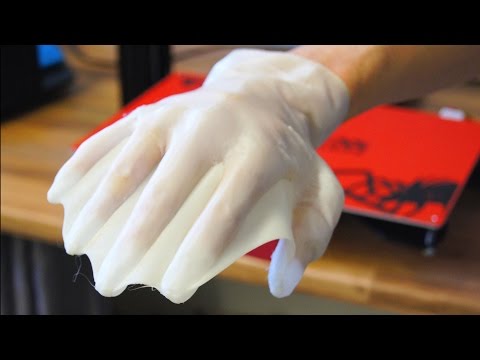
Once you’ve gone through the list and tried them out, your problem should hopefully be solved.
How to Fix Stringing and Oozing in 3D Prints
Just like there are various reasons that cause stringing and oozing problems, there are also plenty of solutions that can help you fix and avoid it.
Most of the time this type of problem can be fixed just by changing some settings in the 3D printer such as extruder speed, temperature, distance, etc. It’s not ideal when your 3D prints are stringy so you want to get this sorted out quickly.
Below are some of the simplest and easiest solutions that can be implemented without requiring any major tools or techniques.
The methods that will help you to get rid of the problem for once and for all includes:
1. Print at a Lower Temperature
The chances of stringing and oozing increase if you are printing at a high temperature.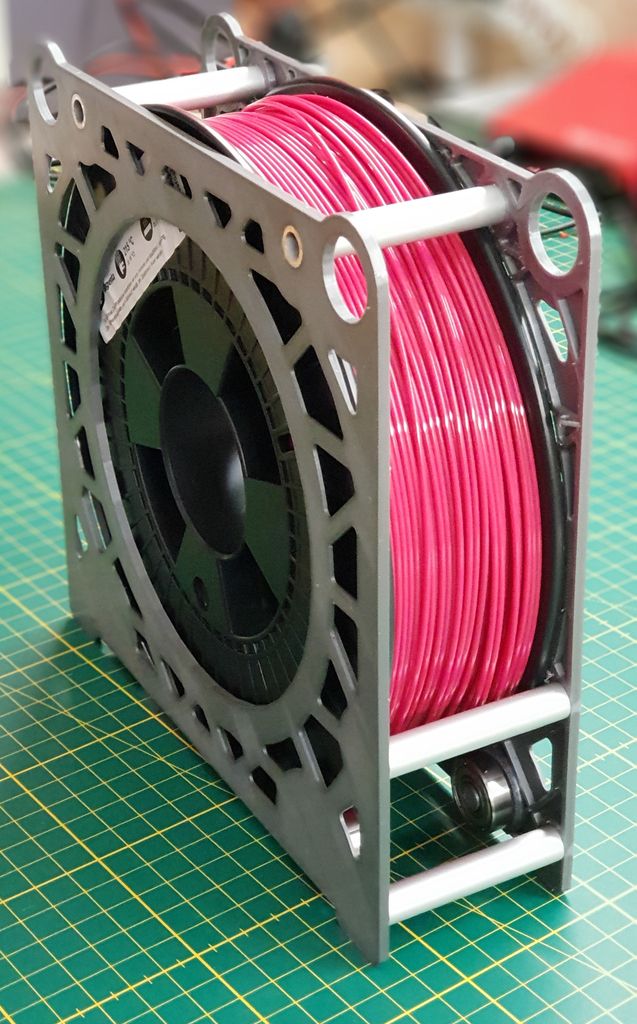 The very first thing that you should do is to reduce the temperature and check for the results.
Reducing the temperature will help you because it will extrude less liquid material reducing the chances of stinging and oozing.
Those higher temperature materials are more prone to stringing because of the effects of higher heat on the viscosity or liquidity of filament.
Although PLA is a relatively low temperature material, it doesn’t mean it’s safe from stringing and oozing.
- Reduce the temperature step by step and check if there are any improvements.
- Make sure that the temperature is within the range required for the type of filament being used (should be on the filament packaging)
- Try to use a filament that melts at lower temperatures efficiently like PLA
- While reducing the printing temperature, you may have to lower down the extrusion speed because the filament material will take time to melt at low temperatures.
- Do test prints of little objects to get an idea about the perfect temperature because different materials print well on different temperatures.
- Some people will print their first layer 10°C hotter for good adhesion, then lower the printing temperature for the rest of the print.
2. Activate or Increase Retraction Settings
3D printers include a mechanism that works as a pullback gear called retraction, as explained in the video above. Enable retraction settings to pull back the semi-solid filament that is pushing the liquid to extrude from the nozzle.
According to experts, activating the retraction settings usually work to fix the stringing problems. What it does is relieve the pressure of the melted filament so it will not drip while moving from one point to another.
- Retraction settings are activated by default but check for the settings if you are experiencing stringing or oozing.
- Enable the retraction settings so that the filament can be pulled back every time the nozzle reaches an open space where printing is not designed or required.
- A good retraction setting start-point is a retraction speed of 50mm/s (adjust in 5-10mm/s adjustments until good) and retraction distance of 3mm (1mm adjustments until good).
- You can also implement a setting called ‘Combing Mode’ so it only travels where you have already printed, rather than in the middle of your 3D print.
I’d advise you to download and use this Retraction Test on Thingiverse, created by deltapenguin. It’s a great way to quickly test out how well in-tune your retraction settings are dialed in.
It really is hit or miss, high retraction settings of 70mm/s retraction speed and 7mm retraction distance works well, while others get good results with much lower.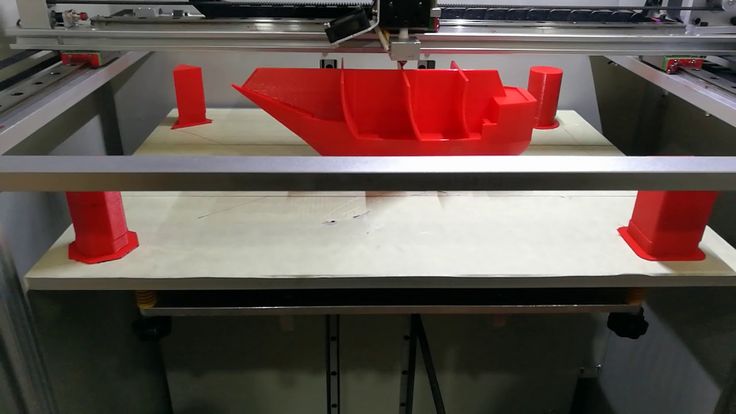
3. Adjust Print Speed
Adjusting the print speed is a common factor to fix stringing, especially if you have reduced the printing temperature.
Reducing speed is necessary because with the reduced temperature the nozzle can start under extruding. After all, the filament will take more time to melt and become ready to extrude since it’s less runny.
If the nozzle is moving at a high speed, with a high temperature, and no retraction settings, you can bet you’ll experience stringing and oozing at the end of your 3D print.
- Reduce the printing speed because this will mitigate the chances of leaking filament and causing stringing.
- A good starting speed ranges from 40-60mm/s
- A good travel speed setting is anywhere from 150-200mm/s
- As different filaments take different time periods to melt, you should test the material by reducing the speed before starting your printing process.
- Make sure that the printing speed is optimal because both too fast and too slow speed can cause problems.
4. Prevent your Filament from Moisture
Most 3D printer users knows that moisture affects the filament badly. Filaments absorb moisture in the open air and this moisture turns into bubbles when heated.
The bubbles usually keep on bursting and this process forces the dripping of the filament from the nozzle causing stringing and oozing problems.
The moisture can also become steam and will increase the chances of the stringing problems when mixed with the plastic material.
Some filaments are worse than others such as Nylon and HIPS.
- Keep your filament stored and protected in a box or something that is totally airtight, with desiccant and has the ability to stop moisture from reaching the filament.
- If suitable, try to use a filament which absorbs less moisture like PLA
I’d recommend going for something like the SUNLU Upgraded Filament Dryer from Amazon. You can even dry filament while you’re 3D printing since it has a hole that can feed through. It has an adjustable temperature range of 35-55°C and a timer that goes up to 24 hours.
5. Clean the Printing Nozzle
Whenever you print an object some particles of the plastic are left behind in the nozzle and with time get stuck in it.
This happens more so when you print with a high temperature material, then switch to a lower temperature material like from ABS to PLA.
You don’t want any kind of blockage in the way of your nozzle, since this is a very significant area for creating successful prints without imperfections.
- Clean your nozzle thoroughly before printing to make it free from the residues and dirt particles.
- Use a brush with metal wires to clean the nozzle, sometimes the common brush can also work well.
- It will be better if you clean the nozzle every time you complete a print because it becomes easier to remove the heated liquid residues.
- Clean your nozzle using acetone if you are printing after a long time.

- Keep in mind that cleaning the nozzle is considered essential whenever you switch from one material to another.
After going through the above solutions, you should be in the clear for getting rid of that stringing and oozing problem that you have been experiencing.
It may be a quick fix, or it can require some trial and testing, but at the end of it, you know you’ll come out with some print quality you can be proud of.
Happy printing!
STL file Backpack webbing buckle・3D printed design for download・Cults
Smartphone Support Magnetic Bike
0,50 €
Support de Smartphone pour jouer aux échecs
€0.50
Sailing boat with 2 benches
2 €
Santa's sleigh
2 €
Puzzle Labyrinth
2 €
Mosquito and insect protection mat
0,50 €
Children's wall hanger 3 sockets / 2 hooks
1,30 €
Handle with two fasteners
Free
The best files for 3D printers in the Tools category
CNC Machine
Free
FDM Printer de Kleine Reus 300x300x900
Free
Arduino Humidity Sensor Holder
Free
Bench Vise - Forming Lathe
Free
The Air Blower V2 for DeWalt, Makita & Milwaukee 18V-20V batteries
3 €
Pegboard Holder for Mini Sanding Wedges
Free
Case for Chill Buddy lighter
1. 01 €
01 €
Two-Way Communication with LoRa - Sensor & Base Unit
Free
Bestsellers in the Tools category
Ender 3, 3 V2, 3 pro, 3 max, dual 40mm axial fan hot end duct / fang. CR-10, Micro Swiss direct drive and bowden compatible. No support required for printing
1.68 €
Business card embossing system
3 €
Scissor Paint Rack (Citadel)
5.66 €
PRECISE DIAL INDICATOR 3D PRINT DIY
1,85 €
INDICATOR FOR BETTER BED LEVELING FOR ENDER 3 PRO
3.19 €
well designed: Hemera fan duct
2.50 €
Filamentmeter
2,80 €
NASA BOX
2.05 €
Case for Chill Buddy lighter
1. 01 €
01 €
Paint stand with scissors
5.62 €
NEW GENERATION CAR PHONE HOLDER
2,50 €
Filament shielding
2.95 €
FAST PRINT STACKING STORAGE BOXES STACKING CONTAINERS
€1.50 -fifty% 0.75 €
Housing FLSUN SR
8,50 €
Ratchet holders - magnetic - holders for tool box organization
2,89 €
AIR DUCT 5015 ENDER 3 S1/PRO V3
2.46 €
Do you want to support Cults?
Do you like Cults and want to help us continue our journey on our own ? Please note that we are a small team of 3 people, so it is very easy to support us in maintaining activities and creating future developments.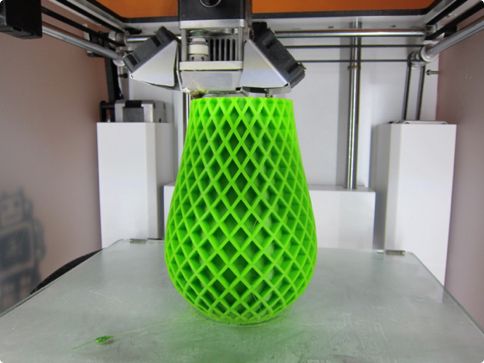 Here are 4 solutions available to everyone:
-
ADVERTISING: Disable the AdBlock banner blocker and click on our banner ads.
-
AFFILIATION: Shop online with our affiliate links here Amazon.
-
DONATIONS: If you want, you can donate via PayPal here.
-
* INVITE FRIENDS: * Invite your friends, discover the platform and great 3D files shared by the community!
3D printing buckles
3D printing buckles
We often buy a backpack that looks secure at first glance, but when we load it, the buckles and clips fail. Or maybe you want to get a personalized belt buckle. Here is a selection of improved clasps and buckles specially adapted for 3D printing.
A very simple but sometimes necessary buckle. The adjustable tri-glide generator allows you to change the size depending on the width of the tape being threaded, you can also increase the height and wall thickness for a better fit.
https://www.thingiverse.com/thing:44017#instructions
This model was designed to be an exact replica of the buckles on a backpack, and it was also adapted specifically for 3D printing, for this it was necessary to slightly change the functional design.
https://www.thingiverse.com/thing:2137647
These buckles are made in two versions, one with teeth and one without, I personally like it better with teeth, they prevent the belt from slipping. The buckle is self-tightening, the more you pull, the more the locking mechanism snaps into place. When connecting the two parts, you will hear a characteristic click, which means that the buckle is fixed and will not open when loaded. There are two sizes for each option, they can also be used as a belt buckle.
https://www.thingiverse.com/thing:2814683#summary
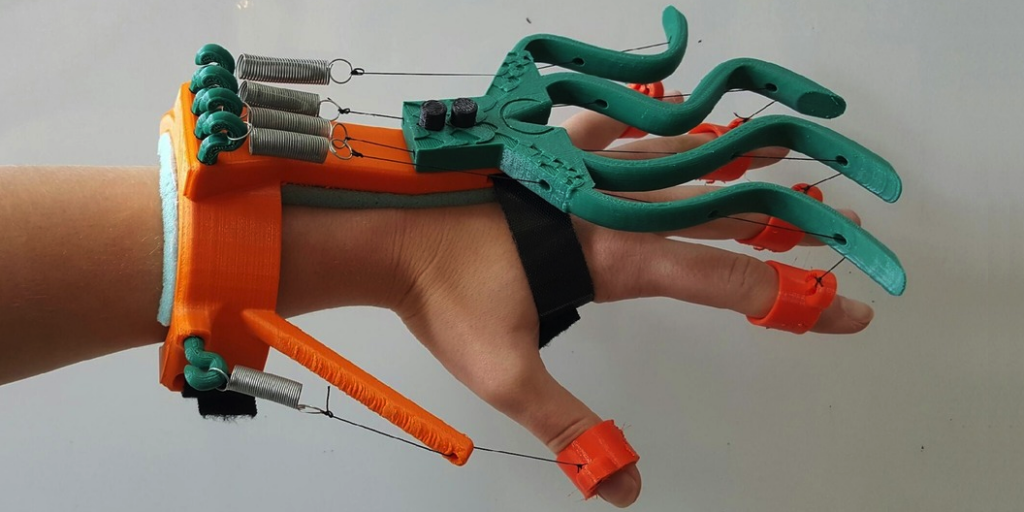
Survival bracelets for yourself or as a gift, with a 3D printer you can make them yourself. A bracelet with this buckle gives you over two meters of paracord right on your wrist. The buckle comes in two styles which are remixes of the designs used for the nylon webbing. Paracord is available in many colors and costs next to nothing. The total cost to make a survival bracelet is less than $1. Whether you're a beginner or an advanced 3D printer user, this is a fun and rewarding project that can be done in less than an hour.
There are two buckle styles to choose from. Be sure to use stands for the side latches. For the side latch, print the inside with the internal supports, otherwise printing will fail. After printing, remove the supports with a small screwdriver and remove excess plastic with a knife.
https://www.thingiverse.com/thing:1614456#summary
Another simple snap buckle that has already been designed and adapted for 3D printing, just download and print and the buckle is ready.
https://www.thingiverse.com/thing:227635#summary
A simplified buckle with a basic design. Designed in OpenSCAD and printed with a variety of filaments including wood plastic, PLA and ABS.
You need to make at least two, and ideally three stripes. Three rods fit well in the holder.
https://www.thingiverse.com/thing:1277670
And this is another paracord belt buckle, this belt will hold a lot more rope, and the plastic buckle will not work on a metal detector. The model consists of only one item. There is also room for engraving if you want to personalize it for a gift.
https://www.thingiverse.com/thing:23999#summary
This buckle is for making belts from synthetic straps. The model is designed for a belt 3 cm wide with a fabric thickness of 2 mm. Such material is sold in a wide variety of colors, so you have a lot of room to experiment with design.
https://www.thingiverse.com/thing:2934177#summary
Somehow I saw these clips and I liked the design, after printing them I saw that the buckles need improvement and now the side lock has become more reliable (the lateral ends of the pin now look like arrows, which are even better fixed when stretched), when squeezing the back parts of the buckle, it turns out to make a larger loop angle. The model can also be scaled. Thanks to these improvements, the buckle is now very strong and comfortable.
https://www.thingiverse.com/thing:3415522#summary
This strap clip will be the strongest part of your bag. Print it out and reinforce it with two 36mm M3 rods, there are special holes in it for this. But even without metal rods, it is strong enough for most applications.
Available in two versions: easy to redesign and ergonomic to print.
https://www.thingiverse.com/thing:1602237#summary
As much as I love 3D printing, I still don't quite believe it can handle a 15kg backpack. So for all those who load their backpack, here is an indestructible buckle.
New and improved adjustable backpack buckle. Works with flat belts up to 26mm wide.
This uses a 5mm Delrin strap, but other materials can be used.
https://www.thingiverse.com/thing:193720#summary
Many people will like this stylish buckle, and even nicer that you can make it yourself, just take your 3D printer and print.