3D printing slicer for chromebook
Can You 3D Print With a Chromebook? – 3D Printerly
Many people who have a Chromebook wonder whether they can actually 3D print with it. I decided to write this article to help people figure out if this is something you can actually achieve without running into issues.
Keep on reading through this article for more information related to 3D printing with a Chromebook that you should find useful.
Can You 3D Print With a Chromebook?
Yes, you can 3D print with a Chromebook laptop by downloading slicer software such as Cura and slicing files which can be put onto a memory and transferred to your 3D printer. You can also use a browser-based service like AstroPrint or OctoPrint to slice STL files online and feed them to your 3D printer.
Chromebooks rely heavily on the Chrome browser for most of their functionality. You’ll be needing web-based applications and extensions from the Chrome Web Store to help you 3D print.
People who own a Chromebook usually use AstroPrint for 3D printing. This is a method that doesn’t require any downloads or anything complicated. It’s free to use and has a highly intuitive, user-friendly interface that makes printing a breeze on Chrome OS.
Other than AstroPrint, there’s another option called SliceCrafter that also gets the job done on Chromebooks. You simply load an STL file from your local storage and use the web application’s simply designed interface to tweak your model’s settings.
The following video briefly describes how to work easily with SliceCrafter on a Chromebook.
Most Chromebooks have a good port selection, so connectivity shouldn’t be a problem for people looking to 3D print with them.
The major concern used to be slicing STL files using these devices since they are incompatible with popular Windows-based software such as Cura or Simplify3D.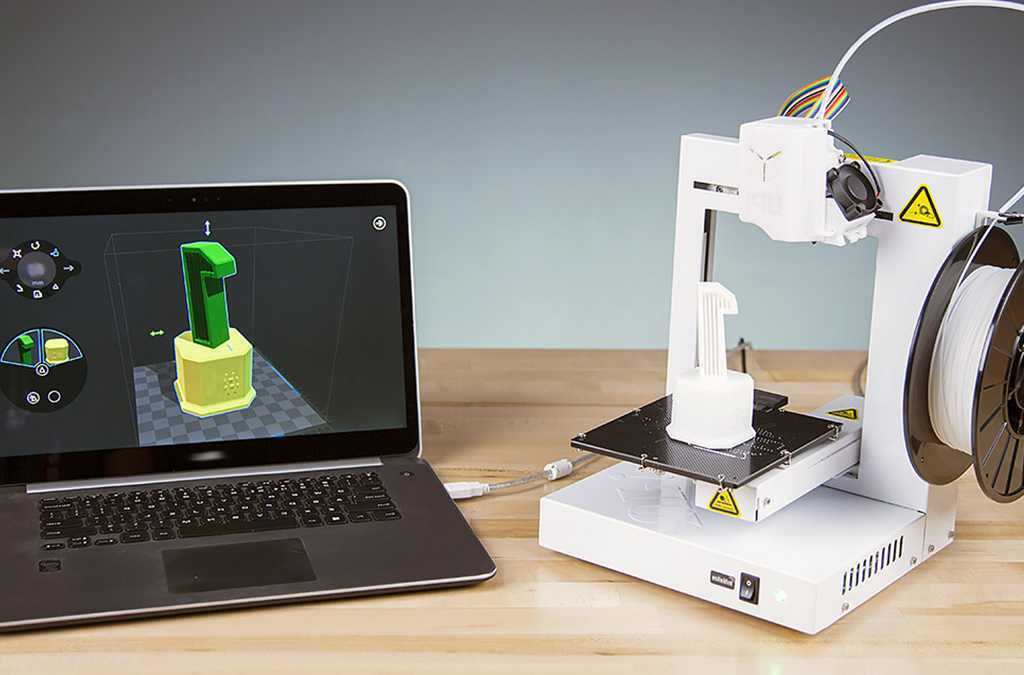
That isn’t the case anymore as you can now actually download Cura on a Chromebook. Though the process is lengthy, it’s definitely possible, and we’ll be getting to it in-depth later on in the article.
Another way to connect your 3D printer and Chromebook together is by using a USB connection.
Basically, instead of inserting the memory card in the printer, you can have the file on your Chromebook and have a USB connection to transfer the information to 3D print. Take a look at the video below to understand this method better.
However, not many people print this way since it has its limitations and is not recommended in cases where the Chromebook goes to sleep or runs into a bug that could stop your 3D printer from operating.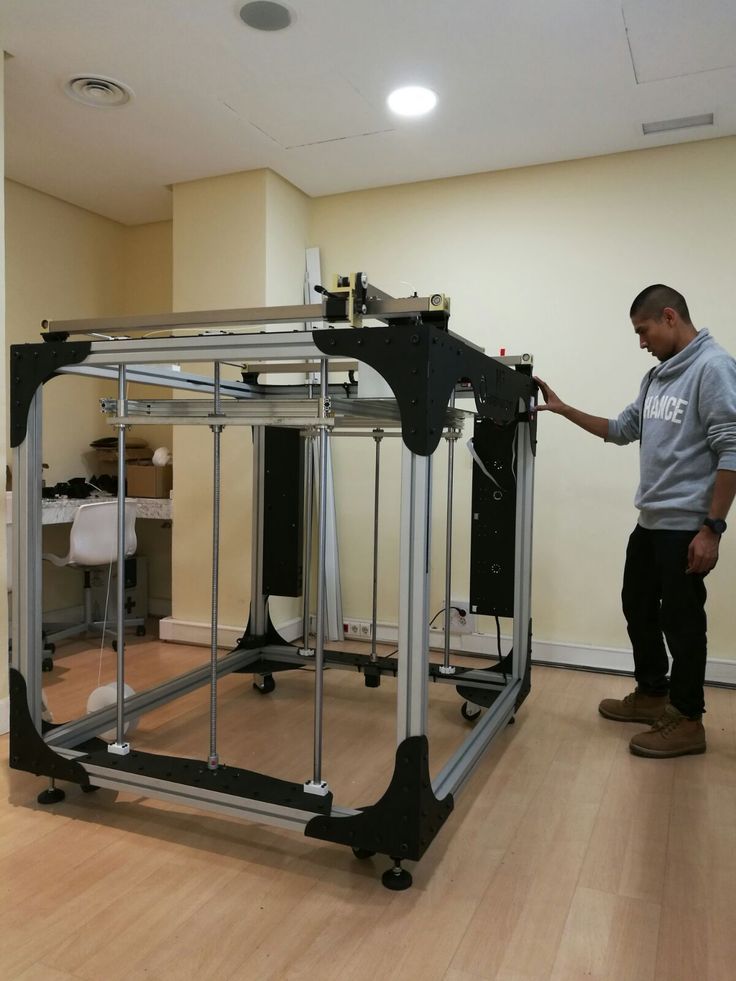
If you consider yourself mechanically inclined, there is another way to make your Chromebook more approachable for 3D printing.
You can take out the hard drive and flash Zorin operating system on it that can easily download slicers such as Cura, Blender, and OpenSCAD.
What 3D Printer is Compatible with a Chromebook?
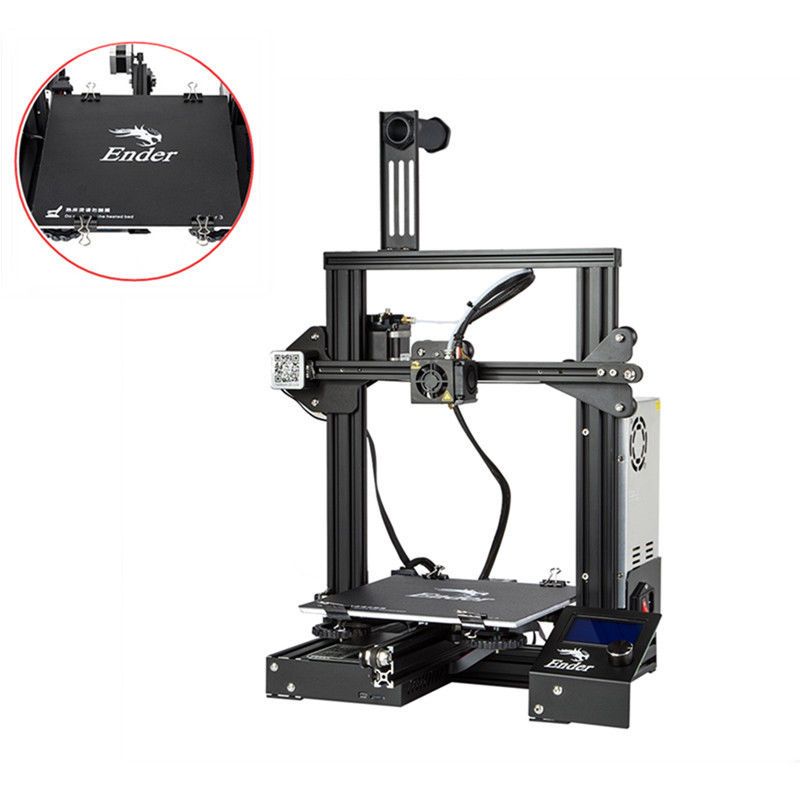
Most 3D printers such as the Creality Ender 3 and Monoprice Select Mini V2 are compatible with a Chromebook if you operate them through the Cura slicer software or AstroPrint.
The following is a list of some of the popular 3D printers that can be used with a Chromebook.
- Creality Ender CR-10
- Creality Ender 5
- Ultimaker 2
- Flashforge Creator Pro
- BIBO 2 Touch
- Qidi Tech X-Plus
- Wanhao Duplicator 10
- Monoprice Ultimate
- GEEETECH A20M
- Longer LK4 Pro
- LulzBot Mini
- Makerbot Replicator 2
You can comfortably use a memory card to transfer the sliced models from your Chromebook to your 3D printer. That is, of course, after you’ve sliced the STL file and converted it into G-Code format that your printer can easily read and understand.
Chromebooks usually have a decent amount of I/O ports, and some even have a MicroSD card slot. You’re going to have no issues in transferring files from one device to the other.
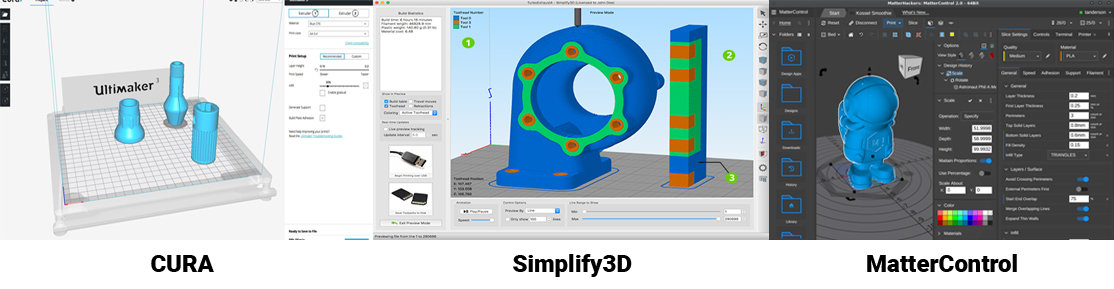
Best 3D Printer Slicer for Chromebooks
The best 3D printer slicer that works with Chromebooks is Cura. You can also download PrusaSlicer on Chrome OS along with the Lychee Slicer for resin 3D printing. Both of these work great and have many settings for you to tweak and make quality 3D models with.
Cura is the people’s favorite when it comes to choosing a slicer software that works reliably. It is made and developed by Ultimaker which is one of the leading 3D printer companies, so you’re backed up by someone highly credible here.
The software is free to use and has a wide variety of features that can help you make stunning 3D prints.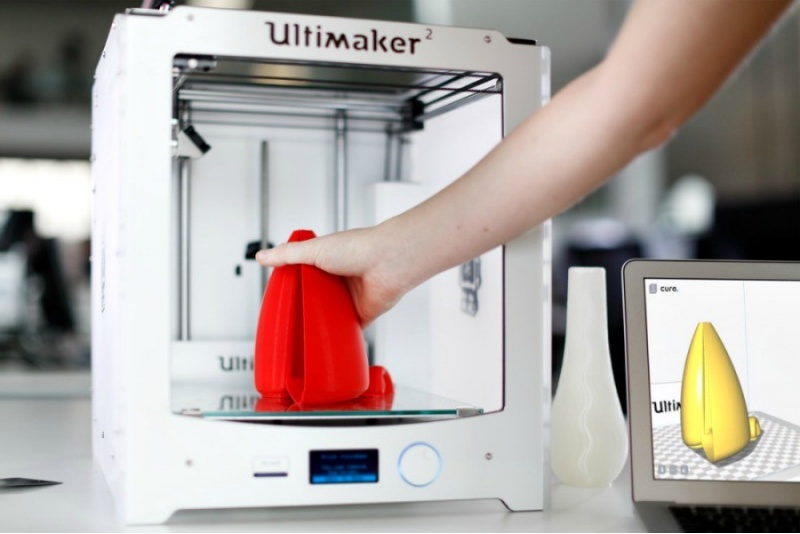 The same can be said about PrusaSlicer which is also a frequently updated, feature-rich, and open-source slicer.
If you have a resin 3D printer, you need a similar slicer as well that handles SLA 3D printers. For this purpose, Lychee Slicer is an excellent choice that can be easily downloaded on Chromebooks through the Linux Terminal.
Linux is an operating system on its own. A small-scale version of it is built-in on every Chromebook.
It can be enabled and installed on these devices so you can get powerful desktop-based software like Lychee Slicer that wouldn’t be available otherwise on Chrome OS.
Can I Use TinkerCAD on a Chromebook?
Yes, you can easily use TinkerCAD on a Chromebook by downloading it from the Chrome Web Store which is available across all devices that use the Google Chrome browser.
TinkerCAD lets you design models in 3D without having to go through the tedious process of downloading any software. It uses the latest WebGL technology and works in the Chrome or Firefox browser effortlessly.
The interface is intuitive and it all operates seamlessly with Chromebooks. TinkerCAD also features game-like lessons that teach you 3D printing in a fun and creative way.
You can visit this link (Chrome Web Store) and simply download it to your Chrome browser on your Chromebook.
Downloading TinkerCAD From the Chrome Web StoreHow Do I Download Cura on a Chromebook?
To download Cura on a Chromebook, you first have to get the Cura AppImage and run it using the Linux Terminal of Chrome OS.
Before we proceed any further, beware that this process works only on those Chromebooks that have either an Intel or an x86 processor. The following tutorial won’t work if you have an ARM-based chipset.
- Unsure what type of CPU you have in your Chromebook? Download Cog to view important system information such as this.
With the initial disclaimer out of the way, let’s get into this in-depth guide on downloading Cura on your Chromebook.
1) The first step is to make sure that you have the Linux Terminal enabled on your Chrome OS. You can do that by heading to your Chromebook’s “Settings” and finding “Linux development environment” under the “Developers” section.
Making Sure That Linux Is Installed2) If you don’t have Linux installed, you’re going to see an option to install it right away. Follow the easy on-screen instructions to get through the process.
Installing Linux on Chromebook3) Once you’re done, go to your Chromebook Launcher where all applications can be accessed from. Find the “Linux apps” folder and click on “Linux Terminal” to continue.
Opening the Linux Terminal4) After clicking on “Terminal,” a window will open up. Here, you’ll be able to run commands and use them to install applications. The first thing you’ll do is update your Terminal to make any potential problems are eliminated from the get-go.
Use the following command to update your Linux:
sudo apt-get updateUpdating the Linux Terminal
5) With the Terminal all ready and set, it’s time to download the Cura AppImage.![]() You can do that by going to this Ultimaker Cura and clicking on the largely apparent “Download for free” button.
You can do that by going to this Ultimaker Cura and clicking on the largely apparent “Download for free” button.
6) As soon as you do that, you’ll be asked to choose the operating system for the Cura AppImage. Select “Linux” here to proceed.
Selecting Linux7) The download is going to take a while as it’s about 200 MB. After it’s done, you’ll have to rename the file to something simpler. At the time of writing, the latest version of Cura is 4.9.1 so it’s better to change your AppImage’s name to “Cura4.9.1.AppImage” so you can have an easier time incorporating it in the Terminal.
8) Next, you’ll move this newly-named file to the “Linux files” folder in your Chromebook’s “Files” app. This will allow the Terminal to run the AppImage.
Moving the AppImage to the Linux Files Folder9) Next, simply copy and paste the following command in the Terminal to allow Linux to make modifications to the Cura installer.
chmod a+x Cura4.9.1.AppImage
10) If nothing happens after this step and you see your Linux username appearing again, it means that the operation was successful. Now, you’ll have to execute the Cura AppImage to finally install it on your Chromebook.
The following command should do the trick for you. You’ll have to be patient here since the installation will take a while.
./Cura4.9.1.AppImage
11) Shortly, Cura will be installed on your Chromebook and it’s going to launch as soon as it does. It’s going to have the same interface as you would remember from using it on Windows or macOS X.
One important thing to note is that you’ll always have to input the following command whenever you want to launch Cura again. Unfortunately, there’s no app icon in the Linux apps folder for Cura yet, but perhaps, the developers do something about this hiccup down the road.
./Cura4.9.1AppImageCura Installed on Chromebook
Downloading Cura on a Chromebook can get tricky and requires a decent amount of attention. If you happen to get stuck somewhere, the video below can help you out.
Slice your 3D model in 7 simple steps using a Chromebook (Step by Step guide)
When you want to start 3D printing, you need CAD software to build your 3D model and slicing software to place the instructions on how your printer shall place the layers of your model doing the printing process.
Earlier, this has been problematic to do on a Chromebook as CAD software like Blender and slicer software like CURA and Prusaslicer requires that you download a client and use your computer’s hardware to do the 3D slicing.
This is not possible on a Chromebook, and therefore you will need to use software that runs online in your browser.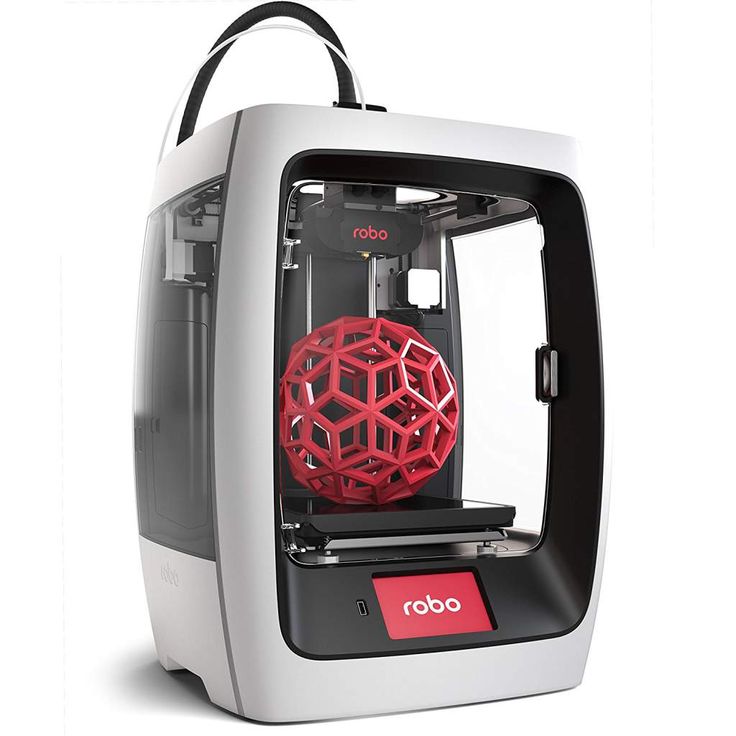 REALvision Online is an online 3D print slicer software, running in your browser, and therefore it is perfect for 3D printing using your Chromebook.
In this article, I will show you how to convert your 3D model stl file into a G-code that your printer can understand. All in 8 simple steps using a Chromebook.
1. Choose your printer
When you first land on REALvisiononline.com, click the “Get started for free” button.
Visit REALvision Online
Next, you will see a pop-up asking you to choose your printer. Pick your printer and click next. Currently, 22 printers are available, and new printers are regularly added. If your printer is not available, you can request it from the link at the bottom of the pop-up.
2. Create a free account
The next step is to create a free account. You can use your Google account or create an account using your email.
3. Start your first print
When you have created an account your land on your dashboard. REALvision Online is a slicing platform, where you can store your latest slices, and get inspiration for what to print next.
To enter the workspace, where you can slice your object, click “start” in the new print box.
4. Pick your 3D model
You will now see a print bed similar to the one on your printer. Click the large plus to pick the STL file you would like to print or drag your object onto the bed.
You can rotate around your object by clicking the right mouse button. Spin the mouse well to zoom in and out.
If your object isn’t placed correctly on the bed, you can rotate it by double-clicking on the object, to enter the rotation menu. It is also from here, you can scale the size up or down.
5. Set support and printer settings
The purpose of a slicer is that you add can add directions on how your printer shall print your object. In many cases, you will not need to change the settings, as the recommended mostly are the best choice.
However, if you need to add supporting layers to hold your object while printing, you can add support from the workspace menu.
You can also make your object stronger, by adding more infill texture inside the object. You do so by clicking “settings” in the top right corner and choosing strong. In this article you can read more about choosing the right infill level
6. Slice your object to g-code
When ready, you click the “Print” button in the right button corner to start converting your stl. file to a G-code that your 3D printer can use.
You will now see a circle progress bar telling you how far your file is from being ready to download.
When the slicing is done you can download your file by clicking the “download” button in the upper right corner. In the box, you can also see the expected print time, filament need, and weight of the object.
7.
 Put your G-code into your printer
Your G-code file will automatically be placed in the downloads folder with the name of your object and ended with .gcode
To put your file in most 3D printers you first need to put it on either an SD or MiniSD card. As Chromebooks usually don’t come with a built-in connector for these cards, you will need a converter.
I use a USB-C adopter from Dolock but they are pretty standard, so you can find one at your local IT store.
Recommended CAD software for 3D print on a Chromebook
When starting with 3D printing, I recommend that you download models that others have designed. You can find a lot of good ones at Thingiverse. When printing other designers’ designs, you only need an online slicer to 3D print on a Chromebook.
However, you will need online CAD software when you have become experienced and would like to create your own designs. I recommend ThinkerCAD for beginners and Vectary for more advanced users. ThinkerCad is especially good for children who would like to learn and create their own 3D models, as there is a large backlog of premade models and tutorials to learn from.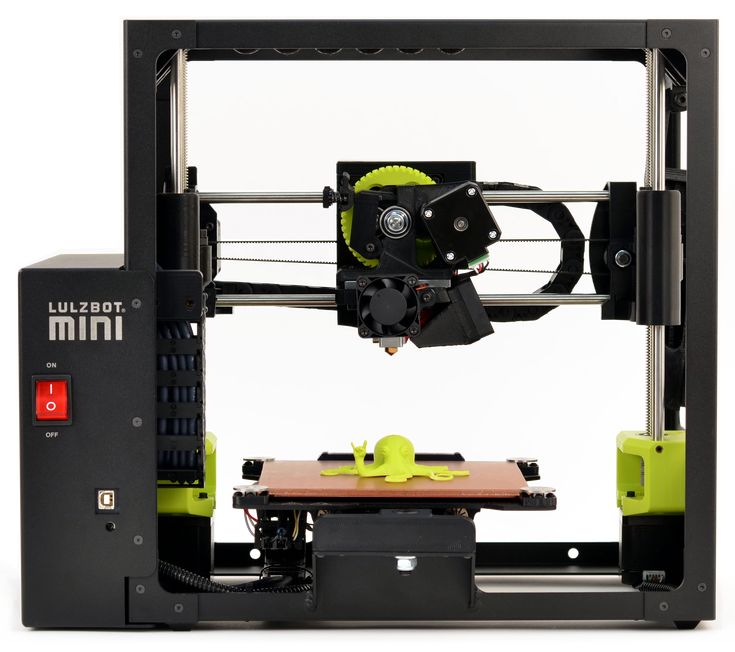
Which 3D printer is compatible with a Chromebook
In most printers, you will need to insert an SD Card or a MiniSD card with your G-code file on it to start your print. Therefore all printers are compatible with Chromebook, as you only use your Chromebook for 3D modeling and slicing.
Now it is time to start your first slice
I hope this article has answered all your questions about getting started with 3D printing on your Chromebook. If you haven’t already done it, your next step will be to create an account on REALvision Online. Remember that you can click the small conversation button on this page to ask me further questions.
Visit REALvision Online
Best 3D Slicers for 3D Printers (2021)・Cults
3D printing is possible thanks to three main elements: 3D printer, 3D model and 3D cutting software. The latter, known as a "slicer", is the intermediary that prepares your chosen model before sending it to the 3D printer. There are many free and paid 3D programs on the market for users. This selection of the best slicers is designed to help you choose the one that best suits your needs.
Cura is the most widely used slicer on the market. The software was developed by Ultimaker, a leading manufacturer of FDM 3D printers. Its advantage is that it is open source, free and compatible with the vast majority of desktop 3D printers and with a computer running Windows, Mac or Linux systems.
Cura slicer works with many 3D formats such as STL, X2D, 3MF, OBJ as well as image formats such as BMP, PNG, GIF, JPG. Its accessible interface is suitable for both beginners and professionals. Its features include: outline display, material usage, and print time calculation. For more advanced users, there are third-party plugins.
3DPrinterOS is a full-featured 3D slicer that can be accessed not only through a browser, but also through Windows or Mac. It is a cloud-based platform that has a slicing application, as well as a number of other functions required for 3D printing, such as repair.
Slicer gives you the ability to manage machine files in your company in a very simple way. The 3DPrintersOS platform includes three slicing apps: Cloud Slicer, Slicer 2, and Marketbot Slicer. It is also compatible with a wide range of printers.
IdeaMaker is a free 3D slicer that is often preferred for its convenience. It was released by Raise3D, a manufacturer of 3D printers. It is quite easy to use, just 4 clicks to start preparing various 3MF, OBJ and STL files. You can also customize the software to get much more advanced functionality.
IdeaMaker works with most FDM printers and with Windows, Mac or Linux operating systems. The software can also be used as a 3D printer control platform. For example, it gives you the ability to monitor different print profiles, remotely manage a running print, and easily switch between print settings.
Keep it Simple Slicer or KISSlicer is a fast, cross-platform application that you can have on Windows, Mac, Linux or Raspberry Pi. Depending on the version you choose, its interface may be more complex.
You will find a free version, which is probably suitable for beginners, as well as a paid professional version. The latter has additional features such as dual extrusion 3D printing.
Compatible with Windows, Mac and Linux operating systems, Repetier-Host is a free and open source 3D cutting software widely used in the RepRap community. Slicer offers a complete solution. It supports up to 16 extruders and can work with multiple filaments and colors at the same time to give you an idea of the result before you start printing.
Repetier-Host includes 4 slicers (Skeinforge, CuraEngine, Slice3r, Slic3r Prusa Edition) but allows you to add the solution of your choice. Thus, the slicer is compatible with almost all FDM 3D printers. It has an interesting feature built in that allows you to download or duplicate all models that match your print tray and print them at the same time.
Free and open source, OctoPrint is a 3D slicer and web interface for your 3D printer. It is compatible with Raspberry Pi, Windows, Mac, Linux operating systems and allows you to control all actions through a web browser or from other portable devices. Based on CuraEngine, OctoPrint cuts your files directly.
Astroprint is designed in a similar concept to OctoPrint. It is used in the browser and with Raspberry Pi and pcDuino systems. You have 3D cutting software and the ability to control your 3D printer from any device connected to the internet.
The 3D printing software has two modes. An easy mode where you can choose the material and quality before sending it to the 3D printer. In advanced mode, you can improve the settings for better results.
Simplify 3D is specially designed for professional users. The software is compatible with Windows, Mac and almost all 3D printers. Through partnerships with 3D printing companies in over 30 countries, Simplify 3D supports over 100 printers. Your device can also be easily added if it is not listed. This means that the same 3D slicer can be used when printing on a new machine.
Another advantage of this 3D cutting program is the simulation before printing, which allows you to test. This is a very realistic feature that allows you to check prints in advance and identify any problems. In addition, the slicer is able to automatically suggest where the supporting material should be improved.
This page has been translated using machine translation. Suggest the best translation
Previous
ShareNext
Top 20 Free 3D Printing and 3D Printing Software
Looking for a 3D printing software? We've rounded up the top 20 software tools for beginners and professionals alike. Most slicers are free.
What is a slicer? This is a program for preparing a digital model for printing. Models for 3D printing are usually distributed in STL files. To turn an STL file into G-code (a language that a 3D printer understands), a slicer program is required. It is called a slicer because it cuts (to slice - English) a 3D model into many flat two-dimensional layers, from which a 3D printer will add a physical object.
Which slicer should I choose? In this article, we will tell you which slicer is best for 3D printing for each stage of your work. Which one is better for preparing a 3D model for printing? But what if you need to create a 3D model from scratch? And if you are only taking the first steps in 3D?
Don't be afraid: we've answered all of these questions, including the required skill level for each program and where you can download it. The great thing is that most of these programs are completely free and open source.
- Cura
- CraftWare
- 123D Catch
- 3D Slash
- TinkerCAD
- 3DTin
- Sculptris
- ViewSTL
- Netfabb Basic
- Repetier
- FreeCAD
- SketchUp
- 3D Tool
- Meshfix
- Simplify3D
- Slic3r
- Blender
- MeshLab
- Meshmixer
- OctoPrint
#1: Cura
For beginners who need a slicer to prepare STL files for 3D printing
Cura is the standard slicer software for all Ultimaker 3D printers, but can be used with most others , including RepRap, Makerbot, Printrbot, Lulzbot and Witbox. The program is completely open source, its capabilities can be extended using plugins.
This program is very easy to use and allows you to manage the most important 3D printing settings through a clear interface. Start in Basic mode to quickly get up to speed and change print quality settings. If finer control is required, switch to Expert mode.
Cura can also be used to directly control the printer, but then the printer and computer must be connected to each other.
Download: Cura
Price: Free
Systems: PC, Mac, Linux
#2: CraftWare
For beginners to prepare STL files for 3D printing 3D printers by the Hungarian startup CraftUnique to support their CraftBot crowdfunding machine. However, the program works with other printers.
Like Cura, CraftWare allows you to switch from "Easy" to "Expert" mode, depending on how confident you feel. It's a colorful app that features a visual G-code visualization with each function represented by a different color. But the most outstanding feature is the individual support service. As far as we know, only the paid program Simplify3D has this.
Please note, however, that this program is still in beta, so bugs may occur.
Download: CraftWare
Price: Free
Systems: PC, Mac
#3: 123D Catch
-systems, smartphones and tablets, which allows you to convert images of objects into a 3D model. Pictures can be taken with a smartphone/tablet or digital camera.
You need many photos of the object from different angles - the more the better - after which they will be compiled into a 3D model.
123D Catch is more of a fun app than a professional 3D printing tool, but after some tambourine dancing, you can get good results, especially when paired with an STL editor like MeshLab or Meshmixer.
Price: Free
Systems: PC, Android, iOS, Windows Phone
#4: 3D Slash
and surprisingly simple, and refreshingly new. With 3D Slash, you can design 3D models using your dice skills.
You can start with a large block and, like a virtual sculptor, remove small cups from it with tools such as a hammer or drill, or start from empty space and build a model from cubes and other shapes. You can paint with flowers or use template pictures.
Other features worth mentioning are tools for creating logos and 3D text. The Logo Wizard imports an image and creates a 3D model, while the Text Wizard allows you to enter and format text, and then turn it into 3D.
Recommended!
Download: 3dslash.net
Price: Free
Systems: PC, Mac, Linux, Browser
#5: TinkerCAD
- A computer-aided design (CAD) system for 3D printing, which is a good starting point for beginners. Since its capabilities are limited compared to Blender, FreeCAD and SketchUp, many users switch to more powerful tools after some time.
As in 3D Slash, here you can build models from basic shapes. At the same time, unlike 3D Slash, TinkerCAD allows you to create vector shapes in 2D and convert them into three-dimensional models.
Come in: Autodesk TinkerCAD
Price: Free
Systems: Browser
#6: 3DTin
For beginners who want to create 3D printable models
another easy and intuitive online tool choice for beginners in 3D modeling. All you need is a Chrome or Firefox browser with WebGL enabled.
Choose from a huge library of 3D shapes and add them to your sketch. All sketches are stored in the cloud, access to them is free if you honor the Creative Commons license. Everything can be exported to STL or OBJ formats.
Enter: 3DTin
Price: Free
Systems: Browser
#7: Sculptris
For beginners who want to create 3D printable models
clay. This is a fantastic 3D modeling program if figurines are your main task. For example, you can make a bust of your favorite video game or comic book character. Sculptris is completely free and bills itself as a stepping stone to the more complex (and expensive) ZBrush tool.
Download: Pixologic Sculptris
Price: Free
Systems: PC, Mac
#8: ViewSTL
For beginners who want to view STL files
Using ViewSTL is the easiest way to view STL files . Simply open a web page and drag the STL onto the dotted box.
The STL online viewer allows you to display the model in one of three views: flat shading (for a quick view), smooth shading (for a high-quality image), and wireframe.
Enter: ViewSTL
Price: Free
Systems: Browser
#9: Netfabb Basic
some nice features that allow you to analyze, "repair" and edit STL files before moving on to the model cutting stage.
A good choice if you need more than just a slicer and want to be able to quickly fix STL files without having to learn programs like MeshLab or Meshmixer.
Don't let the 'Basic' in the name fool you, Netfabb Basic is actually a very powerful 3D printing tool. It's "basic" only in the sense that it doesn't cost €1,500 like Netfabb Professional!
Download: netfabb.de
Price: Free
Systems: PC, Mac, Linux
No. 10: Repetier
For advanced to prepare STL files for 3D printing
9002 the next level of 3D printer slicer software, but if you want to stay open source, you should look into Repetier. It is the great grandfather of 3D printing software and a favorite of the RepRap community.Today the program is moving by leaps and bounds from the level for beginners to advanced users. Packaged in an all-in-one configuration, it supports up to 16 extruders, multi-slicing via plug-ins, and virtually every fusing 3D printer on the market. Get ready to tinker!
What's more, Repetier Host works remotely via Repetier Server, so that the 3D printer can be controlled via a browser, tablet or smartphone.
Download: Repetier
Price: Free
Systems: PC, Mac, Linux
#11: FreeCAD
The program is a great option for developing your design skills. More technically, this parametric 3D modeling program allows you to easily change the design by rolling back through the history of the model and editing the parameters.
Download: freecadweb.org
Price: Free
Systems: PC, Mac, Linux
#12: SketchUp
For beginners who want to create 3D printable models
SketchUp is the perfect combination of simplicity and the perfect combination functionality, with a user-friendly interface and a relatively flat learning curve (i.e., as experience grows with the time spent), the ideal program for developing three-dimensional models.
The Make SketchUp version is free and will have everything you need for 3D modeling if you also download and install the free STL exporter. There is also a professional edition for architects, interior designers and engineers.
Download: sketchup.com
Price: Free (SketchUp Make), $695 (SketchUp Pro)
Systems: PC, Mac, Linux
#13: 3D-Tool Free Viewer
view and check STL files
3D-Tool Free Viewer is a sophisticated tool that, among other things, allows you to check the structural integrity and printability of your file. With the Cross-Section function, for example, you can look at the model from the inside and check the wall thickness. Very useful if you want to check your STL file for killer errors before printing.
Download: 3D-Tool
Price: Free
Systems: PC
#14: Meshfix
your model for errors.
Price: Free
Systems: Browser
#15: Simplify3D
For professionals to prepare STL files for 3D printing print. A flexible algorithm checks the model for problems, fixes them, shows a preview of the printing process (ideal for identifying potential problems), and then slices it.
This slicer offers the best infill pattern options in the competition. For models that require supports, Simplify3D will create the appropriate structures on its own and give you full control over their placement. For printers with a dual extruder, when printing with different materials, the Dual Extrusion wizard will help, as a result of which, for example, it will be easier to remove the dissolving filament.
Simplify3D supports 90% of today's commercially available desktop 3D printers and is compatible with Marlin, Sprinter, Repetier, XYZprinting, FlashForge, Sailfish and MakerBot firmware. Simplify3D can also be used to directly control the printer, but then the printer and computer must be connected to each other.
Download: simplify3d.com
Price: $149
Systems: PC, Mac, Linux
#16: Slic3r
source code, which has a reputation as a carrier of super new functionality, which you will not find anywhere else. The current version of the program is able to show the model from multiple angles, so that the user gets a better preview experience.
There's also an incredible 3D honeycomb infill, the first of its kind that can extend over multiple layers rather than repeating itself like a stamp. This significantly increases the strength of the internal filling of the model and the final printout.
Another option is direct integration with Octoprint. Once the files on the user's desktop are sliced, they can be directly uploaded to Octoprint with one click.
Download: Slic3r
Price: Free
Systems: PC, Mac, Linux
#17: Blender
For professionals who want to create 3D printable models
Blender is a popular computer-aided design (CAD) system with a steep learning curve. Not at all the best choice for beginners, but what you need if you are quite experienced and need something more complex for modeling and printing.
In short, Blender is one of the most powerful tools in existence. Its community is always ready to help, there are a lot of educational materials. It's also open source, so enthusiasts often write extensions to make it even better and more powerful.
Download: blender.org
Price: Free
Systems: PC, Mac, Linux
#18: MeshLab
For professionals to prepare STL files for 3D printing
MeshLab - advanced editor. It allows you to remove parts of a 3D model, merge two models into one, patch holes. If you need a program to modify models for 3D printing or some kind of "repair" work, MeshLab is the right choice.
Price: Free
Systems: PC, Mac, Linux
#19: Meshmixer
For professionals to prepare STL files for 3D printing files. It's especially good for identifying potential problems and fixing them automatically. For example, it will show paper-thin walls that can lead to problems with 3D printing. Meshmixer is part of the Autodesk family of 3D printer software, so it should work well with tools like TinkerCAD.
Price: Free
Systems: PC, Mac
#20: OctoPrint
start, pause or interrupt 3D print jobs. Combined with Wi-Fi capable devices, it makes for a great monitor for remotely monitoring the 3D printing process.
Octoprint understands the G-codes of almost all 3D printers and slicers and includes a gCodeVisualizer to visualize this code before or during printing.