3D printing model design
Software for 3D Printing - 3D Modeling Software/Slicers/3D Printer Hosts
An Overview Of The Best 3D Printing Software Tools
Every 3D print begins as a 3D model generated in a modeling program. Years ago, we had to spend lots of money and time to acquire and learn modeling software. Now, there are many easy-to-use modeling software options available, many of which are free. This list includes some of the best options and is sorted by price, with the free ones sorted alphabetically.
The list also indicates whether the software uses solid modeling, a type of 3D modeling that always generates models that are “manifold” or “water tight.” A manifold model is one in which all walls of the model have some thickness, which is necessary for 3D printing. By contrast, software that uses polygon modeling can generate walls that have zero thickness; that’s fine for creating computer graphics for games and movies but not useful when 3D printing the models. Manifold models can be created with polygon modeling software, it just takes more steps and experience. All the software in this list can create 3D printable models, but every model that comes out of solid modeling software is 3D printable.
Additionally, we’ve noted what skill-level of user each software is designed for: beginners, amateurs, advanced users, and professionals. In general, the easiest to use options are near the top and the most powerful options tend to be near the bottom, though there are some outliers found throughout. Most of these software can be tried for free and there are free tutorial videos available for all of them.
Quick jump to:
3D Modeling Software
- Shapr3D
- Tinkercad
- Blender
- BRL-CAD
- DesignSpark Mechanical
- FreeCAD
- OpenSCAD
- Wings3D
- 3D Slash
- SketchUP
- Fusion 360
- MoI 3D
- Rhino3D
- Modo
- Cinema 4D
- SolidWorks
- Maya
- 3DS Max
- Inventor
Slicers & 3D Printer Hosts
- Ultimaker Cura
- Simplify3D
- Slic3r
- Repetier
- KISSlicer
- ideaMaker
- OctoPrint
- 3DPrinterOS
3D Modeling Software
These tools are all about creating models for 3D printing. Some of them are pretty easy to use while other programs are only suitable for professional users with years of experience.
Shapr3D CAD Modeling
- Price: Free, $239/year for professional
- Solid modeling: Yes
- Intended for: Beginners and Professional
- What makes it special: An intuitive multi-device CAD experience allows you to design anywhere with ease.
Shapr3D is superb for professionals and hobbyists alike. It has an extremely intuitive and innovative user interface which will allow you to create models faster with the same high level of precision.
With their Visualization feature you’ll also be able to preview models in AR to ensure that your print will be perfect in its intended location.
Shapr3D is available on iPad, Windows, and Mac – and it will keep your files synced between them! I would 100% recommend checking them out.
Tinkercad
- Price: Free
- Solid modeling: Yes
- Intended for: Beginners
- What makes it special: It’s designed to allow anyone to create 3D printable models and serves as an introduction to solid modeling.

This is a browser-based 3D design app geared towards beginners. The software features an intuitive block-building concept, allowing you to develop models from a set of basic shapes. Tinkercad is full of tutorials and guides to aid any aspiring novices get the designs they’re looking for. It even allows you to share and export files with ease.
With a library of literally millions of files, users can find shapes that suit them best and manipulate them as they wish. It also has a direct integration with 3rd party printing services, allowing you to print and have your print at your door-step at the press of a button. Even though it can be a bit too simple to the point of limitation, it serves as a great way to learn about 3D modeling.
Blender
- Price: Free
- Solid modeling: No
- Intended for: Amateurs and advanced users
- What makes it special: It’s open source, feature-rich, and includes tools for sculpting, animation, simulation, rendering, motion tracking, and video editing.
In essence, Blender covers many facets of 3D creation, including modeling, animation, and simulation amongst others. This open-source software has a steep learning curve and is ideal for users who feel ready to transition to designing complex 3D models. Check out our Blender tutorials for 3D Printing page.
Blender is actually a free 3D modeling software which was originally for 3D animation and rendering using polygonal modeling techniques. Despite its origins as a software for artists, it is considered quite accessible. One of the software’s interesting features is the photorealistic rendering option. This gives the models an air of realism that few free software can achieve.
BRL-CAD
- Price: Free
- Solid modeling: Yes
- Intended for: Advanced users
- What makes it special: Developed and used by the US Army to support ballistic and electromagnetic analyses.
 Also includes ray tracing and geometric analysis tools.
This open-source software is an advanced solid modeling system with interactive geometry editing. It is apparently used by the U.S. military to model weapons systems, showing that it is quite dependable but also very advanced. BRL-CAD offers a high level of precision due to its use of specific coordinates to arrange geometric shapes.
It offers a large library of simple and complex shapes users can implement into their own designs. They can take multiple shapes and combine them at their leisure, as well. The software used to be quite costly, however it was converted to open source a few years ago. It includes over 400 tools in its arsenal. It also runs at great speeds, especially considering how dense its features are.
DesignSpark Mechanical
- Price: Free
- Solid modeling: Yes
- Intended for: Amateurs and advanced users
- What makes it special: A library of 3D models from industrial suppliers and the ability to generate a bill-of-materials for designs.
 Electrical and PCB CAD tools are also available.
This nifty and free CAD software is ideal for professionals and advanced hobbyists alike. The user interface is relatively straightforward and the software runs quickly, meaning efficient designing. You also have the capability to generate a bill-of-materials that calculates the cost of printing potential 3D design projects.
DesignSpark Mechanical allows users to utilise an in-built library to mix with own drawings. Another feature that new users might find useful is the pull feature that allows users to create 3D models from only a surface. It is feature-rich for a free software and quite beginner-friendly.
FreeCAD
- Price: Free
- Solid modeling: Yes
- Intended for: Amateurs and advanced users
- What makes it special: Models are fully parametric and recalculated on demand with an undo/redo stack. Other features include robotic simulation, architectural tools, and a path module for CAM (Computer Aided Manufacturing).
A parametric 3D modeling tool that is open-source and enables you to design real-life objects of any size. The parametric component makes editing your design a piece of cake. Simply go to your model history and change the parameters, and you’ll have a different model. As the name suggest, it is in fact totally free. The upside of this is that none of the tools are blocked behind a pay wall, so you can tweak your models to your heart’s desire.
It’s not the best for professional purposes, but it’s a great training tool. Despite it’s basic options and design elements it’s worth a try if you’re new and don’t want to have to invest in something before you dip your toe in the water.
OpenSCAD
- Price: Free
- Solid modeling: Yes
- Intended for: Amateurs and advanced users
- What makes it special: Designed for programmers, models are generated through typing scripts.
OpenSCAD is a free software with a ton of features and a unique way of creating models. This software takes a programming approach to 3D modeling, making it a unique addition to this list of 3d printing software tools. Instead of the traditional interactive modeling interface, users write code in a script file that describes the parameters of the 3D object. Once you’ve entered your code, you can view the shapes you’ve created by clicking a “compile” button.
Another great feature that OpenSCAD has is the ability to import 2D drawings and extrude them as 3-dimensional. It uses a part profile from drawings made in a standard sketching software and use the SXF file to do this. With its stronger focus on programming, OpenSCAD may appeal to some while alienating others. Regardless, it is still a powerful tool.
Wings3D
- Price: Free
- Solid modeling: No
- Intended for: Amateurs and advanced users
- What makes it special: Polygon modeling enables the creation of more organic shapes.
 Standard tools can be accessed through a right-click menu.
Wings3D is another open-source polygon model tool. Despite being freeware, it comes with a wide range of mesh and selection tools. Tools like mirror make symmetrical modeling a breeze. Seeing as it is a program for beginners, it is very user-friendly and the learning curve is quite steady. Features like the customisable hotkeys and easy to use interface are indicative of its status as an ideal tool for starters.
Despite the ease of use, it has no shortage of useful features such as plane cut, intersect, inset, bend, sweep, circularize, and sheer, making it capable of some very impressive models. It also supports a very wide range of file formats for both import and export. Despite its simple and plain looks, it is definitely worth checking out if you’re just starting out.
3D Slash
- Price: Free web version; Premium license is $24/year and a Commercial license is $240/year
- Solid modeling: Yes
- Intended for: Beginners and amateurs
- What makes it special: Models are created through “slashing” 3D blocks away to shape them as desired.
3D Slash focuses on providing design software with a uniquely fun user interface and enough advanced features to work with a high level of precision. You can also make logos and 3D text with this software. 3D Slash is free to use and ideal for beginners, however there a range of price packages that add in features for cooperative use or commercial use depending on the needs of the consumer. Additionally, the free versions has limitations in terms of functions, higher resolutions and colours you can apply. It’s intuitive interface with a block cutting style to create shapes makes it simple enough for anyone to use.
Even if you can’t find the creative spark to start a design from scratch, there are a multitude of files available for download that you can import and then cut apart into something new. Novel features like the cursor mode that makes interior designing much easier are great additions. Aside from its ability to run on standard mode, it an can also be used with VR head sets. While the blockish style can be limiting in terms of range of shapes one can make and less pleasing to the eyes, it is nonetheless efficient and practical. There are few software that are as quick from concept to finish as 3D slash.
SketchUp
- Price: Free web version; Pro version is $299/year
- Solid modeling: No
- Intended for: Beginners to advanced users
- What makes it special: Intuitive and powerful, with a library of user-generated and manufacturer-produced models.
SketchUp is another good modeling software because it maintains that balance between usability and functionality, making it ideal for most skill levels. The software has an easy learning curve and there are advanced features available for professionals at an extra cost. It is especially good for designing interior and exterior architectural projects but also has tools for a diverse range of other purposes.
Anything complex can take quite a while, but simpler designs aren’t too time-consuming. A freeware version, SketchUp Make, and a paid version with additional functionality, SketchUp Pro, are also available.
Fusion 360
- Price: Free for personal use and startups, $595/year for commercial license
- Solid modeling: Yes
- Intended for: Amateurs to professionals
- What makes it special: Lots of features, such as tools modeling and sculpting, generative design, simulation, assemblies, collaboration, 3D printing, and CAM.
This is a unique addition to the list of 3d printing software tools. Fusion 360 is a cloud-based 3D CAD program that utilizes the power of the cloud to bring design teams together and collaborate on complex projects. Another advantage of the cloud platform is that Fusion stores the entire history of the model including the changes to it. Numerous design options are available, including freeform, solid, and mesh modeling.
Fusion 360 operates on a monthly payment subscription basis. The developers also regularly update the features, making it better as new instalments come along. It runs on multiple platforms and allows users to access their information wherever they want.
MoI 3D
- Price: $295
- Solid modeling: Yes
- Intended for: Amateurs to advanced users
- What makes it special: Can create smooth meshes from CAD models and is pen-tablet friendly.
Short for Moment of Inspiration, MoI offers a sleek UI and powerful range of CAD tools for users specializing in polygonal modeling. The program comes with advanced boolean functions that enable quick design of “hard surface” models. It is a user-friendly software that uses the NURBS modeling system.
While it isn’t free, it is cheaper than some of its competitors. It has a good amount of functions in it, yet avoids being too cluttered with pointless features. The system which uses curves and booleans makes workflow quicker as well.
Rhino3D
- Price: $995
- Solid modeling: No
- Intended for: Advanced users and professionals
- What makes it special: Very powerful and full of features for modeling, analysis, rendering, 3D capture, CAM, and 3D printing.
The company behind this software markets it as the world’s most versatile 3D-modeler. The software is available for download in a variety of bundles on their website at various prices. The program uses a precise and mathematical model known as NURB, allowing you to manipulate points, curves, meshes, surfaces, solids, and more in all sorts of ways. Ultimately, given the range of design features available with Rhino3D, it’s hard to argue against its claims about unrivaled versatility in creating complex 3D models.
Users have commented on how the software can be very difficult to learn. This is a natural trade-off between capabilities and user friendly many designers have to make when creating a detailed software. While it is not the most accurate software at capturing user intent, it is one of the best on the market.
Modo
- Price: $599/year or $1,799 for Perpetual license
- Solid modeling: No
- Intended for: Amateurs to professionals
- What makes it special: Procedural modeling and artist-friendly tools for modeling, animation, texturing, and rendering.
Modo provides creative 3D polygon and subdivision surface modeling tools with a lot of flexibility, allowing you to create both freeform organic models and precision meshes using the same software. This is a professional-grade program with a range of features designed for advanced 3D designers, and the price reflects this.
Even though it isn’t the most user-friendly software, it hosts a large set of features while running smoothly. The speed of the software is particularly evident in terms of baking textures. It also works with partner software and extensions as additional customisations.
Cinema 4D
- Price: $720/year or $3,945 for Perpetual license
- Solid modeling: No
- Intended for: Amateurs to professionals
- What makes it special: An intuitive interface, parametric modeling, and procedural workflow.
This is an extremely powerful 3D modeling tool that lets you create complex 3D designs. Cinema 4D’s quite flat learning curve makes it approachable for beginners intimidated by software with advanced features. The program is regularly updated with free service packs, which help to optimize how it runs on various operating systems.
The user friendly options present the prints in very accessible ways. Scaling and shading options make modeling far easier. It’s sculpting tool is a great example of why this software is ideal for editing models and pre-existing files.
SolidWorks
- Price: $1,295/year or $3,995 for Perpetual license
- Solid modeling: Yes
- Intended for: Amateurs to professionals
- What makes it special: Powerful editing tree and tools for manufacturing, assemblies, simulation, cost estimates, CAM, and 3D printing.
Now we move on to SolidWorks. This is a CAD program often used by professional 3D designers. There are a plethora of advanced features included, such as design validation tools and reverse engineering. Solidworks comes in three distinct packages, depending on the exact features you need.
Solidworks tends towards the industrial side of things. It is practical and detailed. While most software, mimic curves through gently inclining flat structures, Solidworks uses a system of nurbs that create averages of the edges to produce fantastically detailed curvatures. It only does away with polygonal modeling, opting instead for dimensional sketching.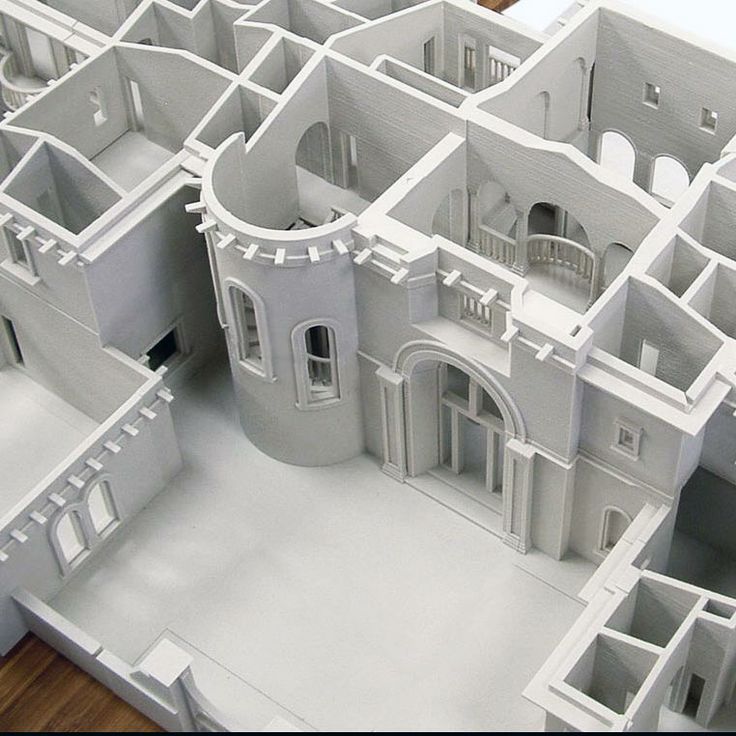 As a result, resizing becomes far less of a hassle.
Maya
- Price: $1,545/year
- Solid modeling: No
- Intended for: Advanced users and professionals
- What makes it special: Procedural effects and powerful world and character creation tools.
Primarily marketed at animation professionals, Maya is useful for many aspects of 3D modeling, especially in terms of mathematically smooth surfaces and shapes. Maya was originally slated as a 3D animation software, but is very useful in 3D printing as well. Thus, a lot of the interface options are more reminiscent of sculpting and animation.
Maya is more applicable to artistic printing requirements. It has a fast rendering engine and is best for highly detailed models with many intricacies. The downside is that it is very expensive (it is, after all, the same software used for high-budget movie CGI|). Nonetheless, it allows for realistic representations of reflection and colour on a software with smooth operation.
3DS Max
- Price: $1,545/year
- Solid modeling: No
- Intended for: Advanced users and professionals
- What makes it special: Advanced users and professionals
Another program that focuses on animation, 3DS Max offers some great 3D modeling features such as shading tools, parametric mesh modeling, and polygon modeling. This Windows only software is a favourite among video game developers, many TV commercial studios and architectural visualization studios.
Inventor
- Price: $1985/year
- Solid modeling: Yes
- Intended for: Advanced users and professionals
- What makes it special: Tailored specifically for product design and engineering applications and loaded with tools for simulation and manufacturing.
Inventor 3D CAD software offers professional-level 3D mechanical design. The program comes with freeform, direct, and parametric modeling choices. Furthermore, you also get automation and simulation tools.
Developed by Autodesk, Inventor comes in different packages depending on level of proficiency (student, professional etc.). One of the great things about Inventor is how they improve the software with user feedback. New versions include improvements to visual data representation and the ability to easily reference 3rd party designs without the need to convert file formats.
Slicers & 3D Printer Hosts
The second section of this list of the best 3D printing software tools focuses on programs that help you to execute a 3D print. Slicers are the easiest way to go from a 3D model to a printed part because they take a CAD model, slice it into layers and turn the model into G-code. The slicer software also includes 3D printer settings like temperature, layer height, print speed, etc. to the G-code. The 3D printer can read this G-code and make the model layer by layer following the instructions set in the G-code.
Ultimaker Cura
Despite its name, Cura can be used with almost any 3D printer because it is an open-source slicer. The program is ideal for beginners because it is intuitive and fast. Most of all, it’s easy to use. More advanced users can access a further 200 settings to refine their prints.
Simplify3D
Simplify3D is an extremely powerful premium slicing tool that helps you drastically improve the quality of 3D prints. Not only does Simplify3D slice your CAD into layers, it also corrects any problems with your models and allows you to preview the end result, helping to further identify any other issues. Advanced users will need to decide if the premium features are worth paying for compared to open-source slicers.
Slic3r
This open-source software includes real-time incremental slicing, 3D preview, and more. It is one of the most widely used 3D printing software tools. The incremental real-time slicing ensures that when you change a setting, the slicing doesn’t need to start from scratch.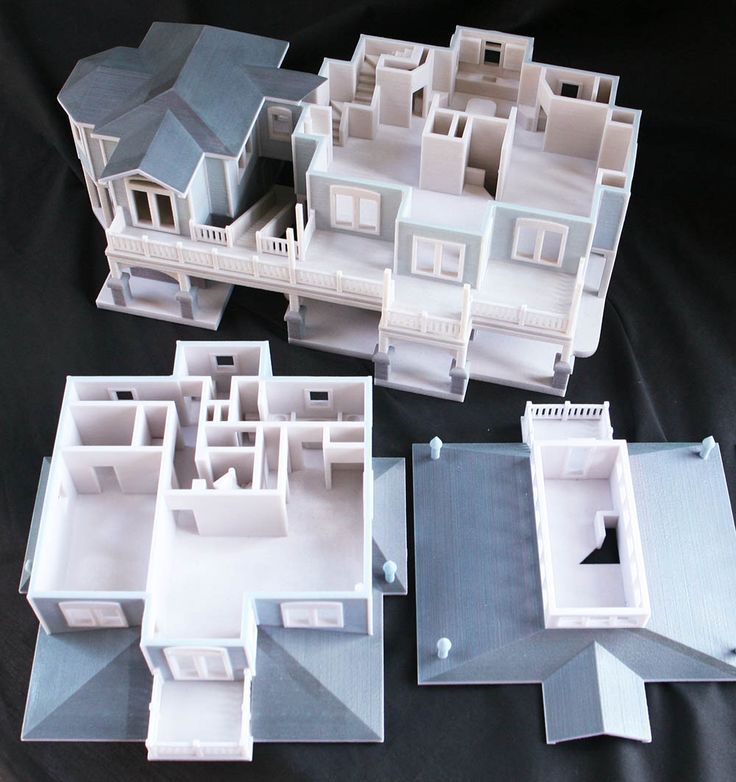 Only the G-code for affected parts is recalculated. The end result is a fast, flexible, and precise slicing program.
Repetier
This open-source slicer software supports three different slicing engines; Slic3r, CuraEngine, and Skeinforge. Repetier can also handle up to 16 extruders with different filament types and colors simultaneously, and you can visualize your end result before printing. There is a lot of customization and a lot of tinkering involved, making Repetier ideal for more advanced users. You also get remote access to your printers with Repetier host.
KISSlicer
This slicing software does its job well, although the user interface is somewhat basic. Still, if you just need a slicer that delivers great results, use KISSlicer. Note that the basic version is for single-head machines only. You’ll need a PRO version for multi-head machines.
ideaMaker
This free slicer is distributed by Raise3D and provides fast, simple slicing for most 3D printers.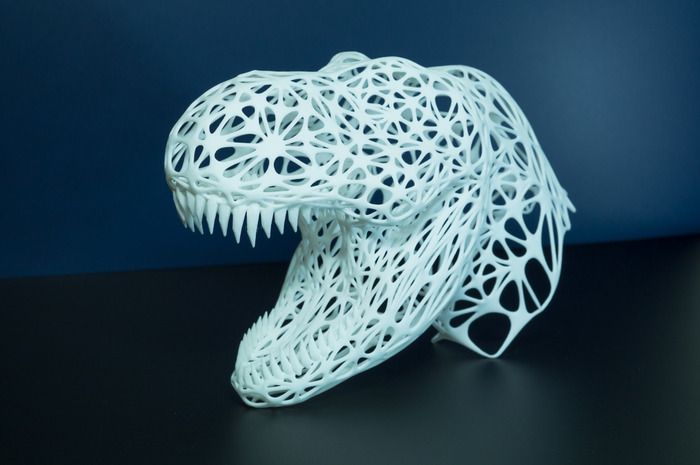 Team members can share print profiles and supports can be automatically or manually placed. The adaptive layer height tool allows the software to adjust layer height depending on the level of detail in the model, maximizing print quality while minimizing print time. Remote monitoring and control is also available.
OctoPrint
A free open-source web-interface that allows for remote control and monitoring of 3D printers. It’s compatible with most 3D printers and allows users to watch their prints with an embedded webcam feed. Prints can be started, paused, and stopped remotely, and plugins are available to track print statistics and send push notifications on job progress.
3DPrinterOS
This nifty cloud 3D printer management software comes at a cost. The essential idea is the management of the entire 3D printing process with one platform. Users can edit and repair designs, slice STL files from the cloud, and even send files for printing from anywhere in the world. The software also features the capability to share CAD files.
Modeling for 3D Printing: Tips by Jeremy Ortiz
_We invited designer and digital sculptor Jeremy Ortiz (@zbrushninja) to share his top tips on modeling for the Form 1+ 3D printer.
I come from a traditional sculpting background using clay and wax. For me, using ZBrush simulates sculpting in these traditional materials so well that nearly of my traditional skills and techniques were directly translated into the digital medium. I was instantly hooked on this new medium of digital clay.
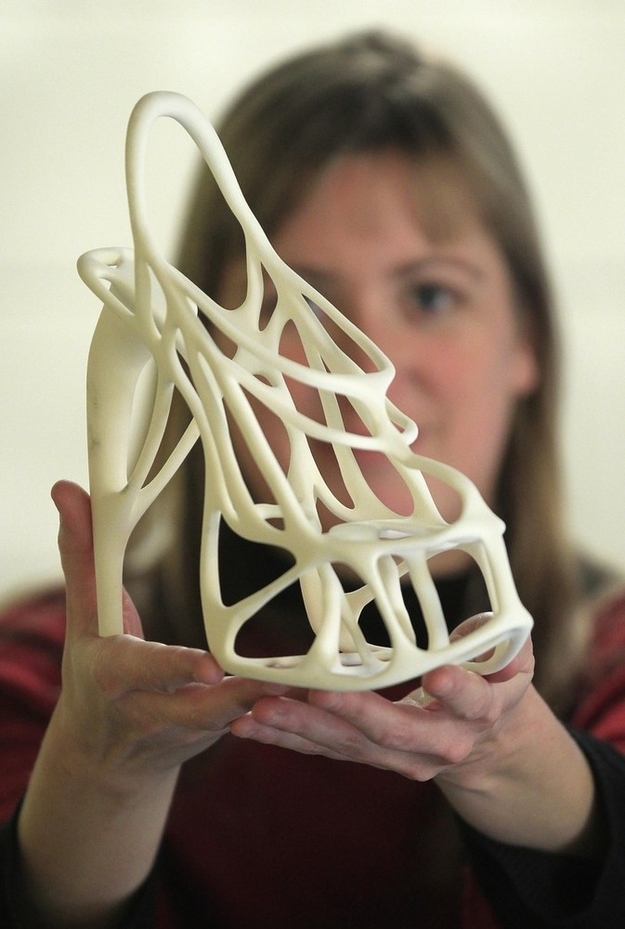
As a digital designer, I knew if I wanted to be able to take my ZBrush sculptures into the real world, I needed a high resolution printer that could capture the fine details of my sculpts so I could use my prints as masters for molding or directly as one-off production prototypes. The Form 1+ is the only desktop 3D printer that offers a level of detail that could effectively and accurately reproduce my sculptures with a superior level of detail and quality that was on par with industrial stereolithography printers. All of that with a cost that was within my budget.
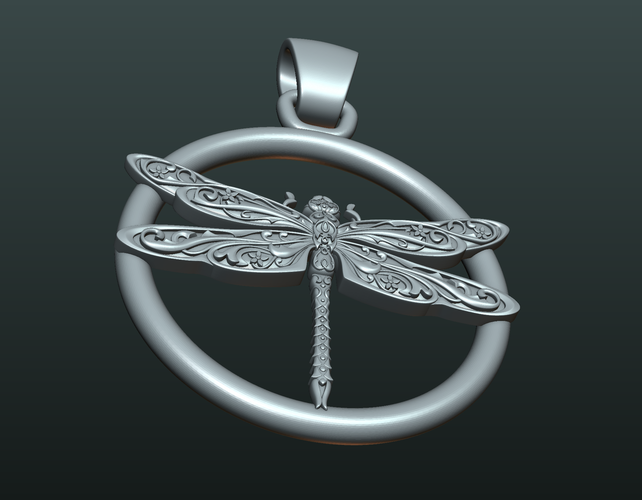
Dragon Bust by Jeremy Ortiz, 3D printed in Grey Resin on the Form 1 +.
It wasn’t until I was holding a 20mm tall dragon head print in my hand, with details so fine that it made pencil points, X-acto blades and fingerprints seems huge that it hit me just how powerful of a tool I had in my possession.
Here are 7 tips I have found helpful when designing and modeling for 3D prints. I personally use ZBrush and Maya for my work, but these tips should work on most 3D modeling software.
1. Keep Your Parts Manifold
For modelers coming from animation, illustration, or gaming backgrounds, one important thing to remember is that your 3D prints must be composed of watertight manifold volume parts. Always check your model for artifacts, loose faces or unwelding edges and verts.
That means:
- No one dimensional planes,shells or extruded edges
- No double sided faces
- No self intersecting faces
- No open faced holes
- No unwelded verts or edges
PreForm, Formlabs’ free downloadable 3D printing software, has automatic tools that ensures your model is watertight.
2. Multi-object Prints
Does my part need to be one continuous mesh? This is a question that many new modelers have when creating for 3D printing. The simple answer is that a continuous mesh is not required. You can design prints from overlapping or intersecting objects so long as all components involved are manifold parts.
3. Know Your Build Area
When designing your part, keep in mind your build area. However, your printer’s build volume does not have to limit the size of your final model. Be creative! Clever layout in your build area can help you get larger prints. For instance, the diagonal space from top to bottom in your build area will give you the longest build size of your printer.
4. Small prints and exaggerated details
When sculpting small parts, it’s often very helpful to slightly exaggerate details. This means making your surface details with slightly deeper cuts and more pronounced surface texture. If possible, making slender parts slightly thicker will help ensure that they will print clean.
5. Save Material
Making your model hollow using shell and boolean functions available in your modeling software will save you resin material. Be sure to make a large enough “vent hole” that connects to your hollowed area to the outside of your model this will allow uncured material to flow out.
6. Clean Up Well
After your print is finished you have to soak your finished print in IPA for 12-15 minutes. I find that towards the end of the soak you can give your part a gentle rubdown with your gloved hand to help break down and remove any resin stuck to the surface of your print. Using a soft brush also helps to reach area that you can’t reach with your hand, this added step this helps get a quality finish to your print.
7. Remove Supports Carefully
Take your time when removing your support material. Rushing this process could ruin an otherwise flawless print. Using an X-acto knife to score a line at the connection point will give a cleaner break. Give thicker supports a gentle wiggle, don’t pull or use excessive force.
3D printing for exhibition layouts
Exhibitions in their modern form have existed for about 250 years and, despite the widespread introduction of the Internet, play a huge role in international trade. Today, exhibitions have spawned an entire industry with a multibillion-dollar turnover - the exhibition business. Anyone who has taken part in or organized the participation of his company in the exhibition understands how important it is to attract visitors to your stand. After all, dozens of companies often present similar products at the exhibition, and making your exposition as visually attractive as possible is a difficult task, especially in a situation of limited budget, especially considering that at major international exhibitions, the stand construction budget can reach numbers with 6 zeros. nine0004
How can 3D printing help in this case? For the most part, many companies want to present their developments, projects or new products at the exhibition, but for a number of reasons they cannot do it. Large real dimensions of equipment, complexity and high cost of transportation, assembly, installation, etc. make this task impossible. In this case, the creation of layouts comes to the rescue. This is where 3D printing comes to the rescue. Its advantages over traditional methods of making models are obvious, first of all, it is a significant reduction in manual labor when creating models. nine0004
What kind of layouts are we talking about? Even from the number of categories into which the layouts are divided, eyes run wide. Landscape models, urban planning models, models of ships and aircraft, nuclear power plants, hydroelectric power plants, highways, launch vehicles, launchers, turbines and much, much more. Each layout, in addition to high-precision technical implementation, strictly calculated dimensions, is also a work of art! nine0004
In addition, the reduction of time costs, and hence, ultimately, financial costs, is affected by the lack of the need to create drawings for the subsequent manufacture of layout elements.
For 3D printing, you first need to create a 3D model. This can be done in any popular software package for working with 3D graphics, such as SolidWorks, AutoCad, ZBrush and others, in this case, the choice of software will depend on the layout object. nine0004
By creating a 3D model of the layout even before the production stage, you will be able to agree with the customer on all the details, test all hypotheses and reduce costs for possible alterations. You will need a skilled person to complete this task, although today all engineers, architects, sculptors and artists are trained to work with such software packages.
Thus, the process of working on an exhibition layout should be divided into several parts: nine0004
1) Determination of the task by the customer: what kind of layout is needed, what size, and also an important point, whether the layout will be partially or fully functional or it will perform a purely decorative function.
2) Creation of a 3D model of the layout, coordination with the customer of the layout according to the 3D model.
3) Determining the budget for creating a layout, taking into account the use of materials to implement the necessary functionality. This item requires a particularly high-quality study, because 3D printing is only a general name for the technology, but there are many ways to 3D print, from 3D printing with concrete houses to 3D printing figures with chocolate. And therefore, it is important to choose the right technology that suits your specific task, taking into account how much time and what budget you have. nine0004
I will give a simple example of such a choice. You need to print the layout of the building in color, there are two ways to achieve this, print it on a plaster 3D printer right away in the form you need it, or print it with one-color plastic, prime and paint by hand. The first option immediately gives you the desired result, but printing will be very expensive, because. the cost of plaster and the cost of the printer itself, working on this technology is very high, which will eventually affect the cost of the model. The cost of the plastic is very low, but you will need to manually prime and paint the model, which is labor intensive and time consuming but potentially saves a lot of money. nine0004
Plaster 3D printing
Painting and post-processing after 3D printing
Another important factor in determining the material for printing is the need for the layout to perform some function, again we will give a simple example. You have an architectural layout, it has an illuminated object, for example, a lantern, it must be lit on your layout, which means that there will be a certain heating from a light source, a light bulb or an LED. Based on this, it will be necessary to select such a material for printing that can withstand such a heating temperature and does not deform.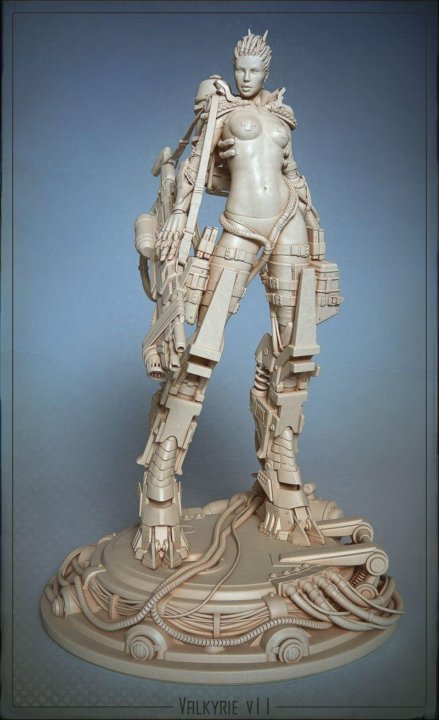 Sometimes in such tasks it is more appropriate to use other technologies to create some elements. nine0004
4) After determining the budget, the last question remains - to understand how long it will take to create a layout and whether the customer will be satisfied with the production time. In this case, I would recommend adding at least 20% extra time to account for possible failed print attempts and possible hardware failure. If there is no such margin of time, then 3D printing allows you to divide the printing of large objects between several printers and the subsequent gluing of the finished object, this will practically not affect the quality of the final object, but can significantly reduce manufacturing time. It is also important to correctly consider the time required for post-processing and finishing of models. nine0004
What is the best 3D equipment for creating exhibition layouts?
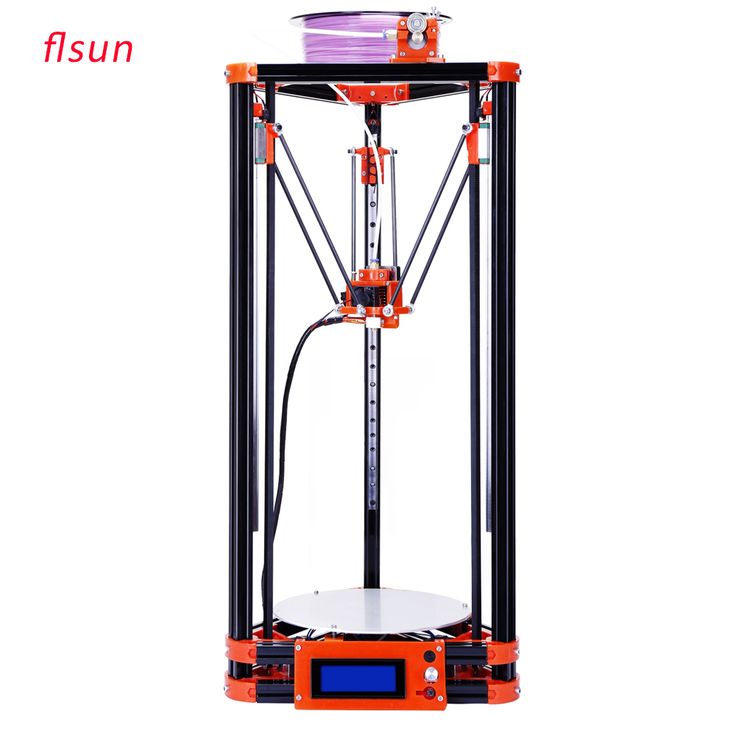
For this task, you need a whole set of 3D printers working on different technologies, but, of course, an FDM 3D printer that prints with plastic filament can become the base one. In this case, I would recommend a printer with two extruders and a fairly large, but not huge chamber. This will make it possible to print moderately complex models using soluble support materials. Raise3D Pro2 series printers can be an excellent option in this case. With a large enough chamber, these printers are equipped with two extruders and the ability to print any plastic with a melting temperature of up to 300C, this gives a wide range of possible materials to use, and in turn expands the functionality of the layouts you plan to create. nine0004
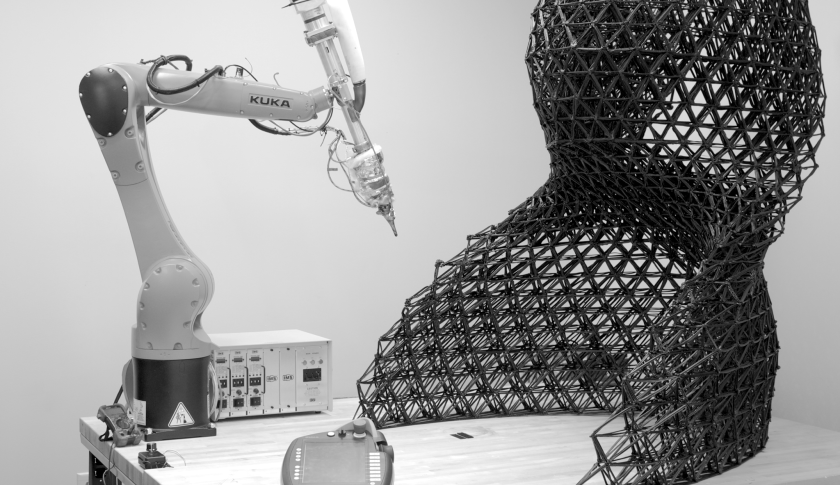
For example, the architect of Atelier Naval, a Brazilian ship and yacht manufacturer, uses Raise3D printers to design new boat models. Moreover, the complexity of creating prototypes of yachts and ships lies in the fact that the models must accurately convey the final product, taking into account the complex geometry and design features that will further ensure the safety of the finished ship. Previously, the company used CNC machines, which is a complex and slow process. The hull and deck were made from polyurethane resin, the windows were laser cut, and the rest of the structure was made from brass or stainless steel. 3D printing has allowed the architect to create complex and much more accurate models easier and more economically. nine0004
It is also important to have a 3D printer that prints with photopolymer resin to create detailed models, figures of people, small parts of ships and aircraft. For example, when a ship model is created, the main elements of the hull are printed on an FDM printer, but photopolymer 3D printers, such as the novelty of recent weeks, the Phrozen Sonic XL 4K, are perfect for creating elements such as rigging, weapons, deck equipment, etc. This printer combines a fairly large camera, a 4K display that allows you to create the most detailed models, as well as ParaLed 3.0 technology, which provides high speed printing, and this ultimately affects the cost of the finished model. nine0004
Photopolymer 3D printing requires post-processing of models by washing in technical alcohol and additional illumination in a UV camera, so you should buy the necessary equipment for this purpose, for example, the UNIZ UC-4120 ultrasonic cleaner and the Wanhao Boxman-1 UV camera.
Also a great solution is the FormLabs Equipment Kit, consisting of the Form 3 Printer, Form Wash and Form Cure UV Chamber. The Form 3 photopolymer 3D printer from the American company FormLabs is a high-end tool for layout tasks, but, unfortunately, the high cost of materials will increase the cost of finished products. nine0004
With tools such as Raise3D Pro2 and Phrozen Sonic XL 4K printers in hand, you will be able to solve about 80% of the tasks that usually stand during the creation of exhibition layouts, and for the rest you can always use third-party equipment, among which I would single out 3D plaster printing Systems ProJet 660.
With it, you can get a full-color model that will not require post-processing and painting. nine0004
Also, to create functional layouts, you may need a printer that uses SLS technology, which forms a model from industrial polyamide that can withstand high loads, friction and heat. The HP JetFusion 500 printer is worth mentioning here.
To create large objects in a short time, you need a professional SLA 3D printer, such as the PrismLab RP600. Such equipment will make it possible to create models of huge sizes in a relatively short time. nine0004
The specialists of our company are always ready to advise you when choosing 3D equipment, as well as make a test print to determine the most suitable equipment for you.
Alexander Kornweitz
3D Equipment Market Expert
Free shipping
Add to compare
Product added to compare Go
| Manufacturer | Raise3D |
Free Shipping
Add to compare
Product added to compare Go
| Manufacturer | Prismlab |
Add to Compare
Product added to compare Go
| Manufacturer | Uniz |
Free Shipping
Add to compare
Product added to compare Go
| Manufacturer | Phrozen |
Custom 3D printing.
 Urgent production of models in Moscow
 A layout is an exact copy of an object. It can be a reduced copy of a future building, park, car, or an enlarged model of a part. At the same time, all proportions are preserved. Thus, layout, in fact, is a high-quality visualization of the project.
Creating a layout is a very complex process. However, thanks to 3D technologies, this process can be reduced in time, made more accurate and efficient. And 3D modeling and 3D printing will help in this.
3D printing of layouts is a service that you can use in our company. We are ready to take on a project of any scale and complexity. We guarantee you the shortest terms of performance and high quality.
Types of 3D layouts
3D layouts are different, depending on the purpose of the layout itself and what it renders. The choice of material, detailing and other characteristics will also depend on the type of layout. The most common types of 3D layouts are:
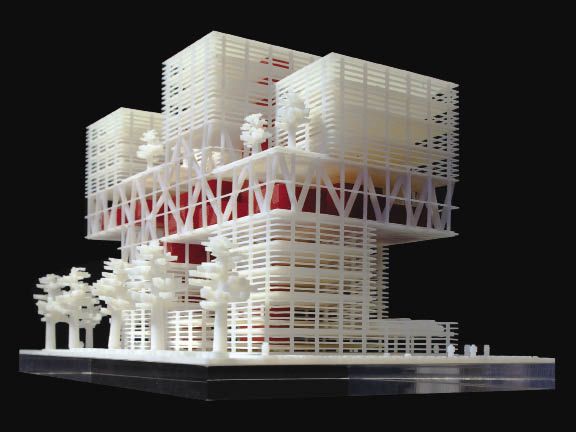
- architectural - models of future buildings and structures for various purposes, while all proportions are observed, and the finished model allows the architect and investors to evaluate the appearance of the architectural ensemble;
- conceptual - layouts that visualize the main idea;
- educational - models created by students and schoolchildren to solve various problems, as well as models used for the educational process;
- exhibition - models used as exhibition samples; nine0210
- presentation and advertising and marketing - layouts with a maximum image component, used for advertising purposes;
- industrial - models that visualize a production line, factory, plant or other production area, process or finished product that will be produced industrially;
- interior - layouts that visualize the design idea for interior decoration, as well as the internal layout of the object, the position of utilities, etc.
 , and the degree of detail may vary; nine0210
 - urban planning - large-scale models that visualize complexes of buildings, structures and infrastructure, these can be individual districts and parts of the city or even the entire city.
Benefits of 3D printing in creating layouts
3D printing has become an indispensable tool for creating layouts. In fact, 3D printing has a number of advantages compared to traditional layout methods:
- the use of modern materials, presented in a wide range; nine0210
- high precision and detail;
- manufacturing speed;
- the ability to quickly make changes;
- possibility, including full-color printing using PolyJet technology or 3D lamination;
- the ability to print full-featured, including moving parts.
There are, of course, some limitations. Most of them are due to the size of the working chamber of a 3D printer. The problem is solved by dividing the layout into parts, which are then glued together.