3D printing jobs bay area
531 3d Printing jobs in San Francisco Bay Area (16 new)
Skip to main content
-
Past 24 hours (16)
Past Week (68)
Past Month (284)
Any Time (531)
-
Apple (19)
Sciton (3)
Holo, Inc. (3)
Insight Global (2)
Optopax (2)
-
$40,000+ (105)
$60,000+ (98)
$80,000+ (79)
$100,000+ (58)
$120,000+ (38)
-
Palo Alto, CA (53)
San Jose, CA (51)
Fremont, CA (38)
Cupertino, CA (38)
Sunnyvale, CA (32)
-
Full-time (490)
Part-time (6)
Contract (27)
Temporary (1)
Volunteer (1)
-
Internship (10)
Entry level (136)
Associate (9)
Mid-Senior level (312)
Director (4)
-
On-site (473)
Hybrid (55)
Remote (3)
Get notified about new 3d Printing jobs in San Francisco Bay Area.
Sign in to create job alert
You've viewed all jobs for this search
Error page | Dice.
 com
com404 - The page you're looking for couldn't be found or it may have expired.
WHAT ARE COOKIES?
A cookie is a small file of letters and numbers that we store on your browser or the hard drive of your computer if you agree. Cookies contain information that is transferred to your computer's hard drive.
WHAT TYPES OF COOKIES DO WE USE?
We use two types of cookies on our website:
'Session Cookies'
These are temporary cookies,
which only exist in the period you access the website (or more
strictly, until you close the browser after accessing the website).
Session cookies help our website remember what you chose on the
previous page, therefore avoiding having to re-enter information. On
our website, these cookies do not contain personal information, and
cannot be used to identify you.
'Persistent Cookies'
These are cookies remain on
your device after you have visited our website. These cookies help
us to identify you as a unique visitor (by storing a randomly
generated number).
These cookies help
us to identify you as a unique visitor (by storing a randomly
generated number).
WHY DO WE USE COOKIES?
To tailor our website so that it meets your specific needs, we use different technologies, including cookies, which allow us to distinguish you from other users of our website.
We use cookies: To recognise and count the number of
visitors and pages or various parts of a page they have visited on
our site;To see how visitors move around the site when they are
using it, for example, we use Google Analytics, a popular web
analytics service provided by Google Inc. Google Analytics uses
cookies to help us to analyse how visitors use our site. This helps
us to improve the way our website works, for example, by ensuring
that visitors are finding what they are looking for easily. Find our
more about how these cookies are used on
Google's Privacy site. To improve and monitor the advertisement we offer to
our visitors. We also use Google's DoubleClick, which is one of the
worlds leading provider for ad management and ad serving solutions.
Like most websites and search engines, Google uses cookies in order
to provide a better user experience and to serve relevant ads. Find
out more about how these cookies are used click here. To
present our visitors with the most appropriate advertising banners
and content, based on our visitor's interest and activity, we, for
example use Yahoo! Search Marketing, search marketing tool of Yahoo!
(including Overture Search Services (Ireland) Limited). On behalf of
Dice Careers Limited, Yahoo! Search Marketing will use this
information to help us monitor the performance of our online
marketing campaigns. For more information about how Yahoo! uses
information supplied on Yahoo! Advertising Solutions web sites,
please read the Yahoo! Advertising Solutions Privacy Policy.
To improve and monitor the advertisement we offer to
our visitors. We also use Google's DoubleClick, which is one of the
worlds leading provider for ad management and ad serving solutions.
Like most websites and search engines, Google uses cookies in order
to provide a better user experience and to serve relevant ads. Find
out more about how these cookies are used click here. To
present our visitors with the most appropriate advertising banners
and content, based on our visitor's interest and activity, we, for
example use Yahoo! Search Marketing, search marketing tool of Yahoo!
(including Overture Search Services (Ireland) Limited). On behalf of
Dice Careers Limited, Yahoo! Search Marketing will use this
information to help us monitor the performance of our online
marketing campaigns. For more information about how Yahoo! uses
information supplied on Yahoo! Advertising Solutions web sites,
please read the Yahoo! Advertising Solutions Privacy Policy.
In summary, by using cookies we are able to improve your experience
when you browse our website and enable us to continually improve our
site and our services for you. Our cookies have been set in our
browser and we will assume you are ok with them via your continuous
use of our website. You can disable certain cookies as set out
below. If you disable these cookies we cannot guarantee how the site
will perform for you.
MANAGING YOUR COOKIES
Enabling cookies will ensure you receive the optimum user experience from our website.
Most browsers automatically accept cookies, but you can deactivate this function at any time and set your browser to notify you whenever a cookie is sent. You can use your browser settings to block all or some cookies. Please note that if you do block all cookies you may not be able to access all or parts of our site.
Most browsers automatically accept cookies, but you can
deactivate this function at any time and set your browser to notify
you whenever a cookie is sent. You can use your browser settings to
block all or some cookies. Please note that if you do block all
cookies you may not be able to access all or parts of our site.
You can use your browser settings to
block all or some cookies. Please note that if you do block all
cookies you may not be able to access all or parts of our site.
Amending your cookie settings is different in different browsers, for ease, we've included instructions on amending your settings in the most popular browsers below:
OPT-OUT FROM GOOGLE'S DOUBLECLICK
Anyone who prefers not use Google's DoubleClick cookie can opt out. This opt-out will be specific only to the browser that you are using when you click the "Opt out" button.http://www.google.co.uk/policies/privacy/ads/
OPT-OUT YAHOO! SEARCH MARKETING
If you choose, you may opt-out from Yahoo! Search Marketing using information collected with web beacons and cookies outside of the Yahoo! network of web sites. Cookies will need to be enabled for the opt-out to function.
Note: This opt-out applies to a specific browser rather
than a specific user. Therefore you will need to opt-out separately
from each computer or browser that you use. Additionally, the
opt-out only applies to cookies used by perf.overture.com and not
all cookies set by overture.com.
Therefore you will need to opt-out separately
from each computer or browser that you use. Additionally, the
opt-out only applies to cookies used by perf.overture.com and not
all cookies set by overture.com.
How to check cookies are enabled on windows platforms
Microsoft Internet Explorer 7, 8 & 9
1.
Select 'Tools' from the top menu of your browser and then select
'Internet options', then click on the 'Privacy' tab 2. Ensure that
your Privacy level is set to Medium or below, which will enable
cookies in your browser 3. Settings above Medium will disable
cookies
Mozilla Firefox
1. Select 'Tools' from the top
menu of your browser and then select 'Options' 2. Then select the
Privacy icon 3. Click on Cookies, then select 'allow sites to set
cookies'
Google Chrome
1. Select 'Tools' from the top menu
of your browser and then select 'Options' 2. Click the 'Under the
Hood' tab, locate the 'Privacy' section, and select the 'Content
settings' button 3. Now select 'Allow local data to be set'
Safari
1. Select the cog icon' from the top menu
of your browser and then select 'Preferences' 2. Select 'Security
and, check the option that says 'Block third-party and advertising
cookies' 3. Click 'Save' How to check cookies are enabled for apple
platforms Microsoft Internet Explorer 5.0 on OSX 1. Select
'Explorer' from the top menu of your browser and select
'Preferences' options 2 Scroll to the 'Cookies' option under
Receiving Files 2. Select the 'Never Ask' option
Safari on OSX
1. Select 'Safari' from the top
menu of your browser and select the 'Preferences' option 2. Click on
'Security' then 'Accept cookies' 3. Select the 'Only from site you
navigate to'
You are a registered Dice member on a different regional site. To offer you the best localized experience, please create a new account to apply for jobs in this region. Alternatively, you can continue with your existing account on the site you originally registered on.
Proper storage of 3D printing plastic
Curious? Great, let's move on!
Moisture and dampness. Absolutely everyone involved in 3D printing, from these words, shudders. However, there are still people who leave their filament unprotected, leaving it at the mercy of all weather misfortunes. Keeping your filament dry means you can achieve high quality 3D printing, high precision, and a host of other benefits.
After reading the introduction of the article, you might wonder: “Why is it necessary to keep the 3d printer filament dry?”...
Imagine: you have been printing for 15 hours, everything looks great. You just have to wait a couple of hours and the model will be ready, but suddenly everything starts to blur. The print is distorted, the adhesion between the layers deteriorates, resulting in a poor-quality model. You might start blaming wrong slicer settings or even the 3D printer itself, or even doubt your own abilities.
This is a 3D printer problem, or is it something else?
Very likely, that the root of the problem lies in a rather banal thing - that the filament you are using is saturated with moisture. Moreover, such moisture, which is not visible to the naked human eye.
Why protect the filament?
The question is quite reasonable. After all, it's plastic, and plastic doesn't absorb water. Yes, it's plastic, but most thermoplastics that are used for 3D printing are hygroscopic, meaning they absorb water from the air if left unprotected. In other words, if you just leave the plastic in the open air, the results of printing with it after some time will turn out to be of poor quality. nine0003
Why is moisture dangerous when printing, you ask. And the fact that moisture affects the adhesion of plastic to the walls of the extruder and indirectly on sticking between layers. And the most unpleasant thing is that moisture boils, and as we know, steam is very unpleasant when it is enclosed in closed volumes, and in a certain sense it has an explosive effect. In our case, the explosion effect is an excessive extrusion and a pause immediately following it, in other words, a blob of plastic and a missing piece of the layer immediately after this blamba. Not to mention the change in the properties of the filament itself (further in the article, the hydrolysis process and its negative results for the filament are described). nine0003
The results of printing with a damaged filament will be quite unfortunate, because when exposed to moisture, the following can happen to it: higher temperature
The severity of these problems depends greatly on the type of filament, some plastic filaments are more susceptible to moisture, some less. For example, PET hardly absorbs moisture, while nylon can begin to absorb moisture after just 18 hours of exposure to air. With special filaments like PVA , which is used to create support elements, things are even worse. PVA is a highly hygroscopic material that must be stored in an airtight container. Otherwise, it will absorb so much moisture that it will become completely useless.
PLA and ABS can also absorb moisture ( PLA is larger than ABS ). Moisture can damage not only the filament, but also your 3D printer, because swollen PLA filament can clog the printer's nozzle to such an extent that the nozzle even has to be replaced.
Let's take a closer look
All plastics, including thermoplastic filaments for 3D printing, are polymers. Polymer science is a vast and complex field. But to understand what a polymer is is quite easy. A polymer is a material composed of several repeating monomers. This probably doesn't sound very clear, so let's look at stuff that many people are familiar with - this is PVC .
Basics: what is a polymer?
PVC (short for polyvinyl chloride - PVC - poly vinil chloride in foreign sources) is a material consisting of several vinyl chloride molecules connected together in a chain. Vinyl chloride is a monomer, and if there are many monomers, we get a polymer. Easy, right?
A large number of polymers are obtained synthetically from the simplest compounds of elements of natural origin through polymerization, polycondensation and chemical transformations. The names of polymers are formed from the name of the monomer with the prefix poly: poly ethylene, poly propylene, poly vinyl acetate, etc.
Often “ P ” in a material abbreviation will mean “Poly”.
General examples:
- Pet - polyethyleneterftalat, usually known as polyester
- PLA - polymolic acid (also called polylactide)
- PP - polypropylene or Poli (propen)
- - polyethylene - polyethylene - polyethys
- PS - Polystyrene
- PA - Polyamide, commonly known as nylon
You've probably come across the terms copolymers or copolyesters when choosing a filament for your printer.
Let's deal with these concepts.
A copolymer is simply a polymer composed of more than one monomer. ABS is probably the best known copolymer. It consists of 3 monomers - acrylonitrile, butadiene and styrene. In particular, ABS is a terpolymer because it is made up of 3 monomers, but the term "copolymer" covers anything that is made up of more than 1 monomer. Other examples are the Taulman 618, 645, Bridge and Alloy 910 nylon copolymer lines. Polyester copolymers have gained popularity as filaments recently - PETG , PET+ , Colorfabb XT , nVent , nGen and T-Glase are all copolyesters.
Hydrolysis - Sounds weird, how does it affect plastic?
Now that we have a basic understanding of what a polymer is - a long chain of monomers - it's time to talk about water and the process called hydrolysis.
When monomers join together, this is called polymerization. However, this is not a one-way process. Polymer chains can and do break down - or depolymerize - in a variety of ways. One such method is hydrolysis. Hydrolysis is when a water molecule breaks down a polymer chain. All complex chemicals are formed when polymers are hydrolyzed. We will not go into details, the main thing is that the properties of the material change during hydrolysis (in fact, they change whenever the length of the polymer chain decreases or increases) - there is a loss of tensile strength, a change in transparency, etc.
When a thread that has absorbed water is extruded, the water in the material evaporates and creates air bubbles and voids. This can break polymer chains (reducing them), create voids, weakening the material.
You may not know this, but you have probably already experienced the effects of hydrolysis on your 3D printed parts.
Moisture effect on nylon. The left one was dried before printing, the right one was not. Both samples were printed with material from the same reel. nine0024
Before printing, the coil on the left was dried in a vacuum oven, and the right one just lay about two weeks in the air.
Dry nylon is quite transparent. Wet nylon is almost opaque. It may not be clear in the image, but dried nylon has a smooth, glossy finish, while wet nylon has a rough, textured finish. Both objects are stiff, but wet nylon is much easier to pull apart in layers (you can also see that nylon tends to warp - no matter wet or dry). nine0003
Effect of moisture on PETG. The left one was also dried before printing in an oven, but the right one was not.
As you can see there is a distinct difference in surface finish and texture. The dried model is glossy and uniform, while the second model is textured with a matte finish. The texture droops due to voids formed by air bubbles. A model made of wet material is much more brittle, and interlayer adhesion (approx. adhesion of surfaces of dissimilar solids) is significantly reduced. nine0003
Moisture effect on ABS. The right one was dried before printing, the left one was not.
Everything is obvious, comments are superfluous!
Fortunately, most filaments are not very susceptible to hydrolysis at room temperature without the presence of an acid or base. However, they are very sensitive to hydrolysis when heated to extrusion temperature. This means we don't have to worry at the start of printing, but we do need to take steps to prevent hydrolysis when printing. nine0003
Since many of the common filaments are hygroscopic (they readily absorb moisture from the air), it is worth taking steps to prevent the plastic from getting wet and to keep it dry.
Nylon, polycarbonate and copolyester filaments are all very hygroscopic and susceptible to hydrolysis when printed in the presence of water. Nylon and polycarbonate can absorb enough water in 48 hours to destroy prints.
How do we know if the filament is wet and needs to be dried?
The easiest way is to extrude a small amount of filament and see how it comes out of the nozzle. If you see bubbles, hear any hiss/pop, or see steam, then it is definitely damp and needs to be dried.
If you have nylon, polycarbonate or PETG and the spool has been idle for more than a day or so, you may need to dry it out. PLA and ABS are also susceptible, but take longer to absorb the amount of water that could cause printing problems.
How can we dry the filament and keep it that way?
There are several ways.
First, it is important to dispel a popular myth. You cannot effectively dry the filament by storing it in an airtight container with a desiccant.
The easiest way to dry the filament is in the oven. Convection ovens work very well because they constantly circulate hot air around the coil. nine0003
There is only one important thing to know before drying your filament like this. You must preheat the oven and allow it to reach the set temperature. Furnaces operate much like hot ends on 3D printers - with PID temperature control - and the furnaces sometimes experience a slight overshoot of the set temperature. It doesn't affect food, but it can definitely ruin your filament by fusing the filaments together or melting the spool they're wound on.
So, the basic rules for drying the filament:
1) Preheat the oven to 70-80°C
preferably with a desiccant.
Filaments with lower glass transition temperatures (Tg) like PLA use lower drying temperatures. Lower temperatures also require more time for thorough drying.
That's all it takes to dry the material for optimum performance and surface finish.
So if you have a few spools that haven't been used in a while and aren't printing as well as they used to, dry them out and try again. Most likely, they will be like new.
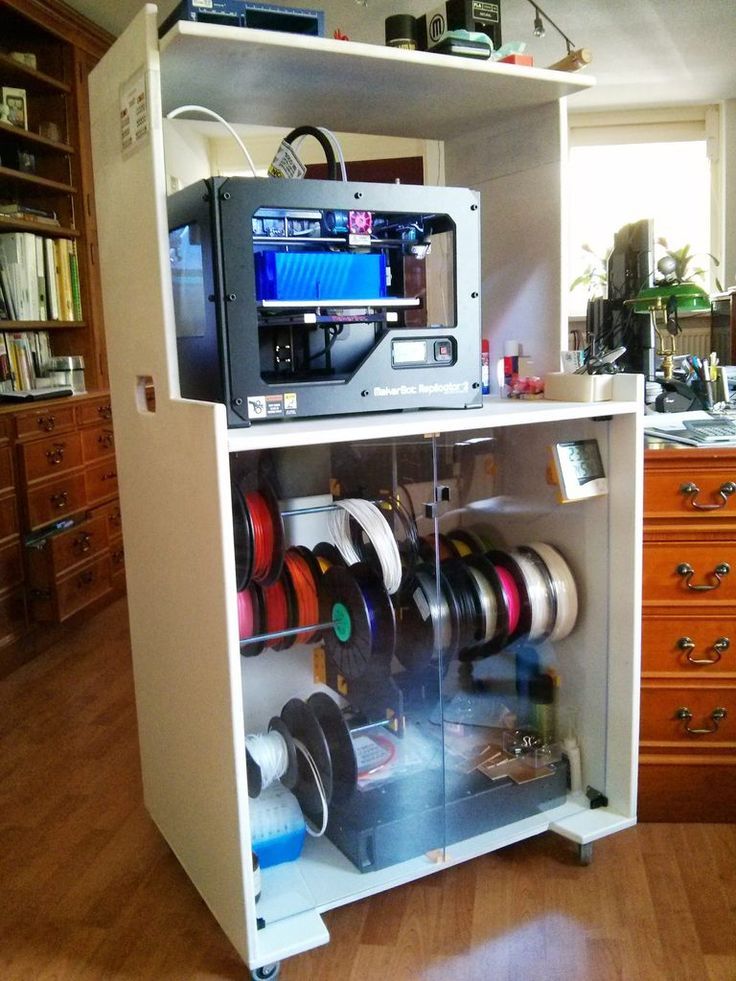
The best filament storage solution.
Vacuum bags.
Get any vacuum bags you have at home or buy one if you don't have one. These bags are characterized by the presence of one-way vacuum valves, through which all the air, the main cause of all troubles, can be removed with a vacuum cleaner. These bags are used in homes to save space, they can store clothes, fabrics, bedding. What are these vacuum bags good for? They will protect your sensitive filament from any moisture, odors, mold and insects. Before placing your thread in your storage bag, use a thread clip to prevent the spool from untangling. nine0003
A few thread clamp ideas.
1. Thingiverse
2. Thingiverse
3. Thingiverse
4. PinShape
In addition, there should be two fasteners on the packages, and not one vacuum is better preserved. We recommend buying the highest quality bags, because. their valves are better and the plastic is thicker (less likely to puncture) and less prone to cracking.
As for the size, the choice is yours, but we personally prefer 9 packs0007 50 x 60 cm - they are more comfortable and easier to handle. As a rule, these bags are made of transparent plastic, which makes it easy to determine which filament is in them. It also does not interfere with gluing identification stickers to the coils.
Tip: Once the bags have been deflated, they can be stacked on top of each other and take up very little space. They can also be stored vertically, such as in a box or cabinet.
So the idea is to store the filament spools in a vacuum, i.e. in a space in which there is no air - thanks to this, the filament will not be able to absorb moisture, because it simply will not be around the filament. Almost. The vacuum in the bag is not ideal, so you will still need to put some kind of desiccant in the company with the filament, and we recommend using silica gel beads for this. They can be bought, for example, in the form of ready-to-use kits, and they can be dried in a drying oven, and then reused. However, this solution has a drawback - the silica gel is in a closed bag, so it is impossible to find out if the balls are filled with moisture. In addition, they are sometimes difficult to obtain in small quantities and at a reasonable price. nine0003
However, this option and others like it are not always the best because you can't tell when the silica gel becomes saturated. If you want to get serious about keeping your filament dry, packs of silica gel with a moisture indicator may be your best bet. These are amorphous, highly porous, synthetic balls that, when saturated with moisture, change color from yellow or orange to green or blue, depending on the humidity of the surrounding air. nine0003
There are several types of silica gels with a moisture indicator. Beware and don't buy cheap ones that change from dark blue (dry) to pink (rich) as they usually contain cobalt chloride, a product that may contain carcinogens and is not used in some countries due to its danger to human health. We are not chemists, but apparently the color indicator in orange-green silica gel balls is a kind of composite colorant and is much safer to use. nine0003
Many people ask if rice can be used instead of silica gel? Can. Rice is cheap and readily available, and has hygroscopic properties, but we do not recommend using rice as a desiccant, as its adsorption properties cannot match those of industrial silica gel.
Finally, it remains to deal with the container where the silica gel will be stored. Any transparent container with small holes, slots or some other holes is suitable for this - they are needed so that the silica gel can attract moisture remaining in the vacuum bag. nine0003
You can buy boxes like this one (although they are only sold with silica gel) or you can make one yourself. A 3D printed model for it can be downloaded from here, and in the future you will only have to fit it to the desired size and print it.
Another option is polypropylene containers (those with slightly soft sides) with a screw-top lid, which are often used in laboratories and for storing coins, screws, etc. You can also use small plastic jars with lids / caps (see photo below). However, the factory look of these containers and jars will need some modification - take a drill (I use a 2mm wood drill; it is very sharp and great for this task) and make many holes in the container / jar. Now it remains to fill the container with balls and - voila! – an effective moisture absorption system with color indication is at your disposal! nine0003
When the balls turn from orange to green, simply take them out of the container, put them on a baking sheet and put them in the oven - for 3 hours at 120°C . Some ovens work like a microwave, but we do not recommend using them. When the balls turn orange again, they are dry and ready to be used again.
Filament storage during printing.
A sealed container with a desiccant is suitable for this purpose. nine0003
1. Thingiverse
2 . Thingiverse
As a bonus
Dampness is a very serious problem, but not the only one.
If there are animals or dusty at home, then the coil can take on a lot of garbage in a day.
It is worth printing out such a filter and constantly using it. Then your printed models will be of higher quality and the chance of clogging the extruder will decrease.
1. Thingiverse
It is clear that there are small things in a big business, but 3D printing is not the case, and the fact that the filament turned out to be of poor quality cannot justify a mediocre result. The tricks listed in this article, used alone or in combination, will definitely help you get amazing and high quality 3D prints. Something may seem a little extreme, but in the end it will help save time and money. As well as furniture - so that it is not turned over in a fit of disappointment. nine0003
Happy Printing
Best regards, Zona-3d.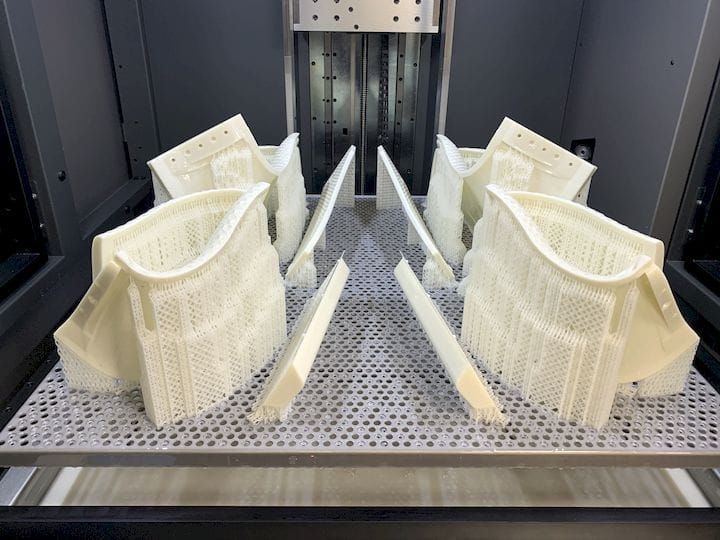 ru team
3D Modeling Basics for 3D Printing / Habr
KolianM
Working with 3D graphics *Prototyping *DIY or DIY 3D printers
casting or milling. This is due to the technical features of the 3D printer, from which you need to either squeeze the maximum benefit, or adjust to the disadvantages of printing. nine0003
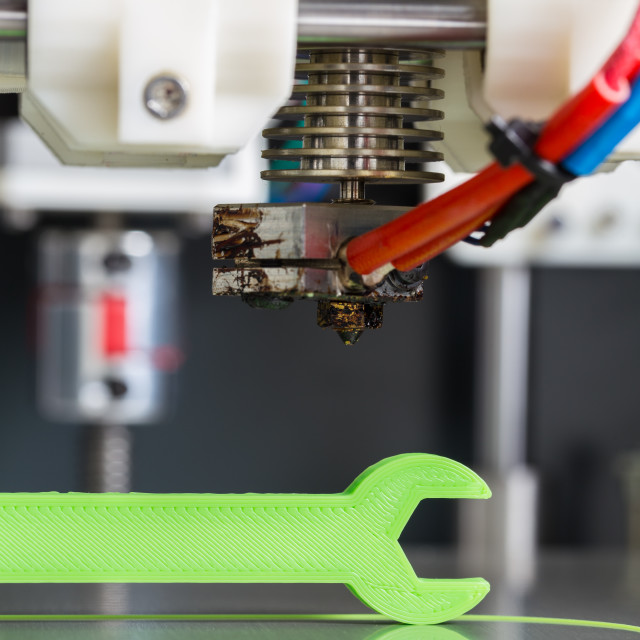
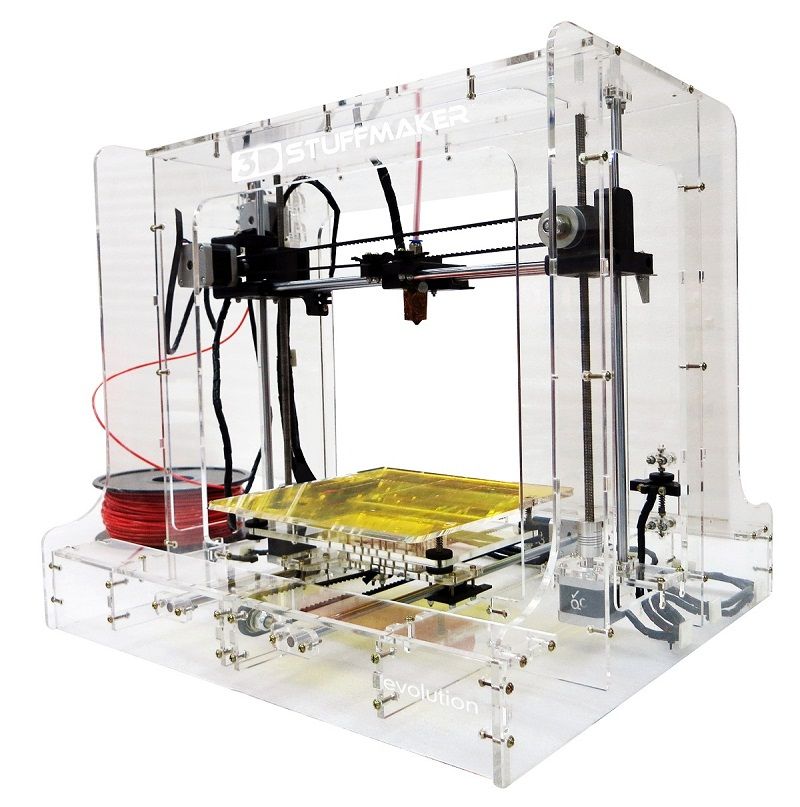
As a caveat, I note that these recommendations relate mainly to the FDM (FFF) 3D printing method, in which a plastic rod is heated by a moving extruder that forms the part layer by layer.
3D model development starts with a sketch. It can be a drawing on paper, a material prototype, a mental image, etc. What is important to pay attention to when creating such a sketch and the model itself, we will analyze in detail.
Part strength
Here and further down the text there are several sub-points that must be taken into account at the same time, kept in mind from the very beginning.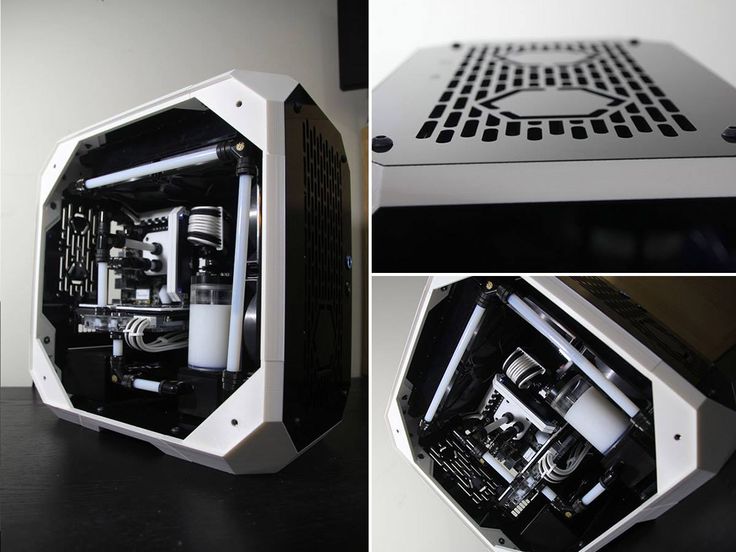 nine0003
- Be aware of the layering or anisotropy of the material: it is much easier to break a part in layers than across. This must be taken into account in advance, given the location of the 3D model on the 3D printer table.
- Add fillets. The leg of the stool and the tabletop at the junction should have a rounded corner. At the same time, the larger the radius of curvature, the stronger the leg will be fixed on the table top. Similarly for various body parts. Modeling a box All right angles are rounded. It doesn't matter what plane they are in. Even where a right angle is needed, we make a radius of 0.5 mm. The printer will pass through such a section more easily than an unrounded one, there will be no impact from a sharp stop of the extruder, the part will not sway, and other pluses. nine0351
- Wall thickness and filling. The maximum strength at 100% infill is a fact, but if you need to lighten the part or save plastic, you can make a much larger wall thickness in the print settings, while setting the infill much lower.
 This works with parts that have holes for fasteners. When creating machine code for a printer, absolutely all the outer walls are thick, so the fastener will be surrounded by a reliable thick layer of plastic of your part.
- Support. This element affects the strength in that the layers supported by the support are not always ideal in structure. This can be solved by increasing the wall thickness, filling, but it is better not to do support at all. Support is added by the slicer depending on the angle between the part wall and the table plane. Often the default is 60 degrees, sometimes 45. This setting is selected experimentally for each 3D printer. You can check this with the help of special test parts. For example, https://www.thingiverse.com/thing:2806295 - do not forget to turn off support to check the real quality of 3D printing in its absence. For example, you need to print a T-piece for tubes. Cast products are made in a T-shape. 3D printing makes the product L or even Λ-shaped.
 In the second case, support can even be avoided, and the part will be stronger due to the layers located at an angle of 45 degrees to the tubes. We, in the workshop, set up slicers for each machine and ask the client about the strength requirements, and, depending on this, choose a 3D printer to print. nine0351
Geometric restrictions
- The wall thickness is limited from below by the size of the 3D printer nozzle. Its diameter is constant and in the vast majority of cases it is 0.4 mm. Smaller thickness - long 3D printing for most parts. The larger the nozzle, the bonds between the layers are less strong, the steps between the layers are more visible. And in general, the wall thickness should be a multiple of 0.4 mm, then the 3D printer will be able to accurately make the wall in two passes (0.8 mm), in 3 passes (1.2 mm), etc. Other thicknesses will cause the 3D printer to leave a gap or overflow, which negatively affects the strength and appearance of the printed part.
 nine0351
- 3D printing of thin cylinders and "needles". For 3D printing of such products, special 3D printer settings are needed: low 3D printing speed, allow time for cooling, otherwise such a structure will bend. Vertically standing thin elements are best avoided at all costs. Even if they are printed, they will be very fragile. It makes sense to leave them only for decorative purposes, but you must be prepared that their quality will be worse than the quality of other elements of the 3D part.
- 3D printed holes. I note that if the hole is straight and through, then it can be drilled, if it is curved and requires support, then it may turn out that it will be impossible to get support.
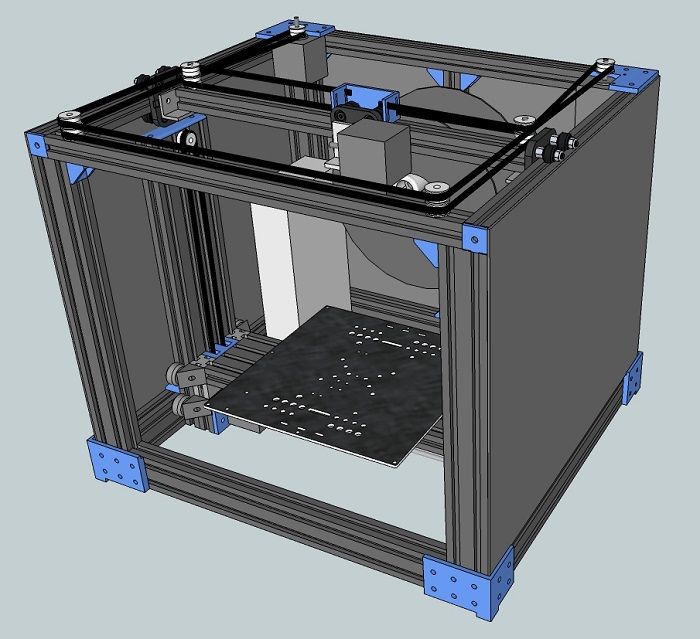
- When 3D modeling, it is important to consider the overall dimensions of the 3D printer. We use convenient 3D printers, table 250x250 mm, diagonal 353 mm. This is where you need to enter the dimensions, if possible. Otherwise, you need to order either an industrial 3D printer with a large print area, or use gluing, but assembly is better, so the assembly process will be controlled by the developer, and not by the 3D printing master.
 nine0351
- Large footprint can cause edges to peel off the table. We use special glue, but this does not always help. We are periodically approached with a complaint about colleagues in the shop that for them such “minor” defects as a folded edge are not a reason to restart 3D printing, take it as it is. But an engineer who 3D models a part can take this into account in his work and make either assemblies or thin-walled flat 3D parts that “do not have enough strength” to compress the outer contour and, as a result, raise the edge. nine0351
- Tall and thin "towers" may not work well due to vibrations that occur when the 3D printer is running closer to the top, layer shifts are also possible.
Dimensional stability, accuracy
- Precise 3D printing is quite rare. I don’t want to speak in engineering terms here, but the likelihood that a complex composite structure will assemble the first time is very low. Here, rather, you need to take into account the fact that you can then mechanically refine the details.
 nine0351
- Holes for fasteners are best done with a margin of 0.5 mm in diameter. This will not reduce strength, the fasteners will also not dangle due to tightening forces, but if you do it without a margin, you will definitely have to drill it out. Reducing the size of a large shaft, >10mm sandpaper is much easier than making a hole, which requires a huge drill that cuts into the plastic walls and breaks the part, or gets stuck in it. It is also important to consider that when drilling, the plastic melts and the drill can melt into it so that it cannot be removed. There have been cases. nine0351
- Heat shrinkage is not always compensated, more precisely, it is very difficult to catch it, it is not the same in different directions, so it is extremely difficult to take it into account. It's easier to print a test version, and then make adjustments.
When appearance matters
- Think about how the craftsman will orient the part on the 3D printer table.
 3D printing proceeds in layers, which is clearly manifested when printing surfaces that are at a small angle from the horizontal of the table. Skinning will be long and painful, because you will have to cut this "ladder" to the deepest depressions of the "steps". It is better to place such surfaces either horizontally, for example, put on a table, or increase the angle. In some cases, even adding support that spoils the wrong side of the wrong side saves time and effort on post-processing. nine0351
- Support. First, the surface it supports has significantly more defects than without it. Secondly, thin and high support is weak, wobbly, which leads to the fact that the supporting part may have serious defects, or not work at all.
- First layer quality improvement. You need to add a bevel. Even where a sharp corner is not needed, I recommend adding a chamfer of 0.5 mm. It will not be clearly visible, but the edge will be neat. nine0351
What you need to know in order not to make a mistake when ordering 3D printing
When appearance is important
- Location of the part on the table.
 Remember about anisotropy.
- Wall thickness and filling. What you can run into here: the filling is 20% cells, which are either visible through a thin outer wall, or the filling slightly tightens the outer wall during shrinkage, but at the same time it is visually easy to determine that there is support inside. Here, first of all, an increase in the thickness of the outer wall, or an increase in the filling density, helps. Please take this into account when ordering. nine0351
Postprocessing
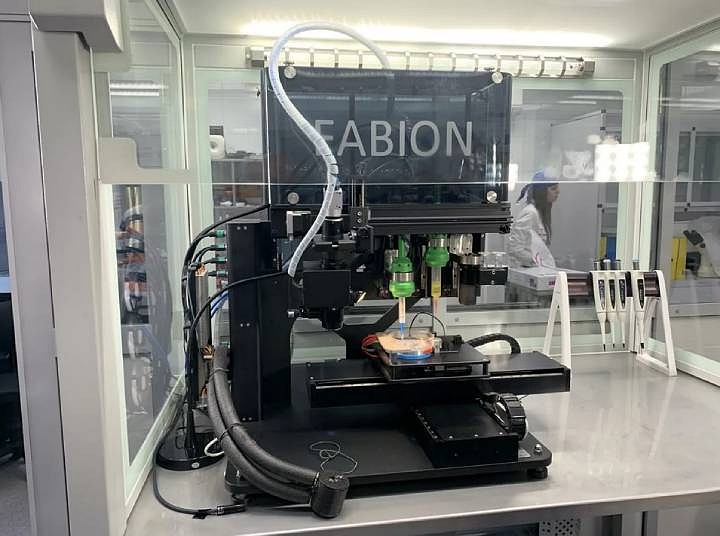
The elimination of stepping is achieved by mechanical and chemical methods. It is possible to use putty. Acrylic paint available. If the part has a complex color structure, then we use the ProJet 4500 printer, which works on a different technology. He glues the powder particles together with colored ink glue. It turns out well.
Morality
In conclusion, I would like to note that these recommendations and the accumulated experience will make it possible to produce parts by 3D printing, which in their properties will not be inferior to cast ones, which makes it possible to save significant funds in the presence of a customized printer and small production volumes.
/cdn.vox-cdn.com/uploads/chorus_asset/file/24096810/AirBell_Shopify4_2048x.jpg)