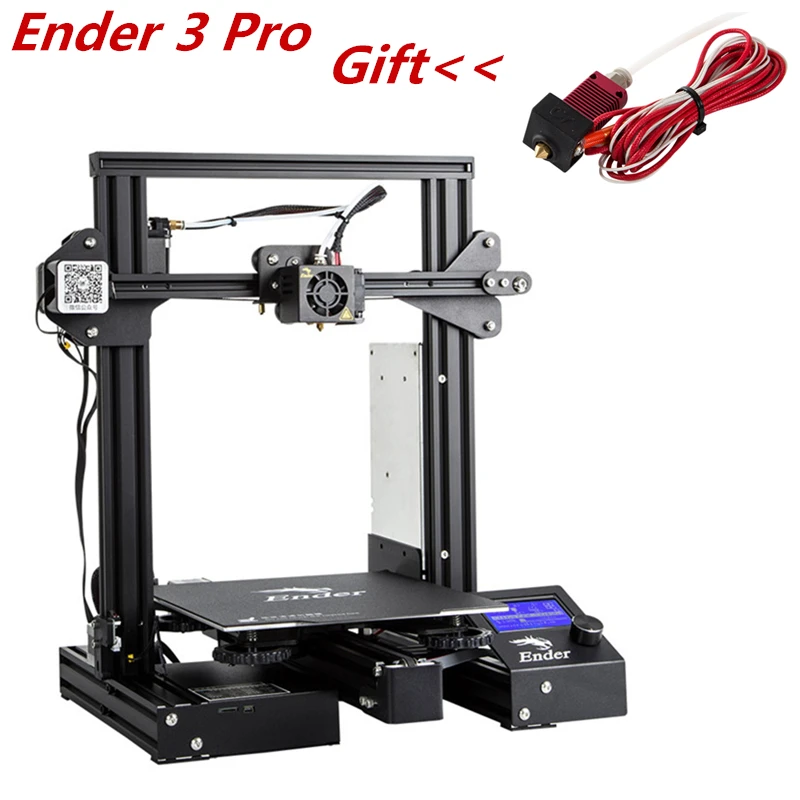
3D printing intake manifold
Printing an intake for my car - Materials - Talk Manufacturing
juanmedina
#1
I been playing with the idea of making a 3d printed intake for my car. So far I finished with the design and printed a test fit piece in PLA. Now is time to pick a material that can take the under hood temperatures. Under hood temperature under heavy load will be around 210-220F. What do you guys suggest to print the final intake? Someone suggested Nylon. I did some research and Nylon 66 or PE 66 is used extensively in intake manifolds but I do t think is the same exact material that we can 3d print.
2 Likes
SOC3D
#2
Polycarbonate or high temp nylon. Are you sure that temp range is correct for under the hood on the intake? I have no idea it just seems high to me.
1 Like
Enza3D
#3
Polycarbonate is probably the most heat-resistant filament that can be printed on consumer printers; it prints at a little more than 300degC, but it may start getting soft at lower temps and I don’t think it would last as long as you’d like it to.
You could consider making a mold with the PLA print, and just casting the manifold with a resin specifically designed for this application (or any high temperature resin really). It’s more work on your end, but the end result will be very nice. This may not be the best option if you have no experience with casting though; it’s not hard but will take a bit of learning to get to work nicely.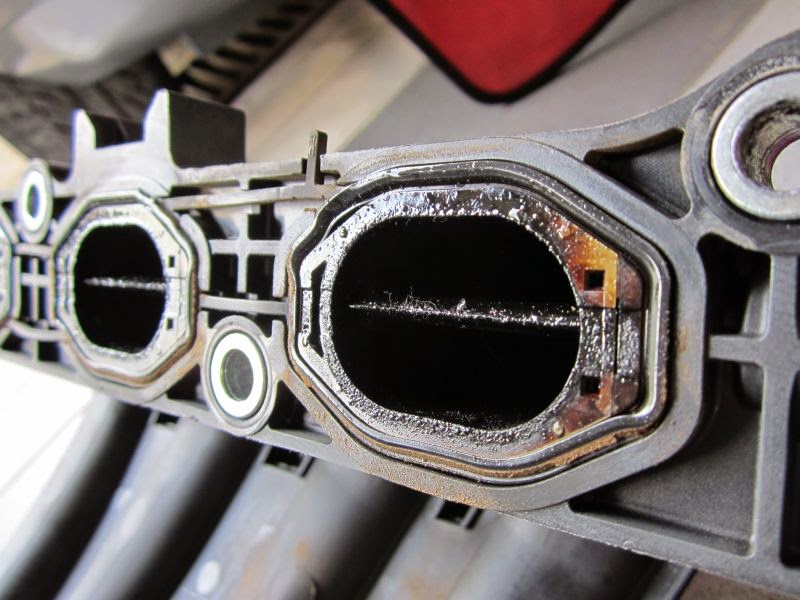
juanmedina
#4
Sorry I put Celsius by mistake. The temperature range is 210-220 Fahrenheit. Which high temp nylon are you suggesting?
ColorFabb
#5
Nice looking part! Our HT material might just be enough for your application, with a temperature resistance of about 100/110C. We’ve helped a guy 3D print inlet manifolds which he has used on a Mini Cooper.
best,
Gijs
1 Like
juanmedina
#6
Thanks! I been looking at your filament and I am wondering how food is at taking vibration and repeated heat cycles?
3DPrintingBeast
#7
You could you matterhackers PC or Polycarbonate. You put Fahrenheit.
peakadditive
#8
There are not too many Thermoset resins that can take that kind of heat. Thermoplastics are the way to go.
peakadditive
#9
Honestly, PC or Nylon are your best bet for a prosumer machine. If you want something that will last spend the money and get your part made out of ULTEM 1010. I know a few guys that use this under their Corvette and it works like a charm.
-Peak Additive
ColorFabb
#10
How big is this part? We might have some time for a test print…
juanmedina
#11
The elbow is not that big. I don’t have the model with me right now but if I remember correctly It is about 11" on the long side, on the short side is about 6" and the diameter is 3.25" OD. I will verify the dimensions when I get home. Let me know if you want me send you the STL file.
Thanks
juanmedina
#12
The dimension are actually 9" x 5" with a 3.25" OD.
ColorFabb
#13
STL file would be great!
best,
Gijs
juanmedina
#14
…
juanmedina
#15
Here is the STL file.
Thanks
Elbow for ColorFabb.STL (34.5 MB)
ColorFabb
#16
Thanks! It’s a little tall for the standard UM2, so I’ve split the part. Let you know how it progresses.
best,
Gijs
juanmedina
#17
Awesome thanks for the update. I am going to Atlanta Motorsports Park on August the 27th. Maybe the part can see some real world testing :).
HongNorrRacing
#18
Hi Juan,
Stumbled on this thread. FYI, we have a garage at AMP, 3D printer, and Solid Works. Please email me at [email protected] if we can help in any way, or swing by the garage next time you’re at the track (HONG NORR - a couple doors down from Discovery)
Mike
Using 3D Printing to Make Heat-Resistant End Use Parts and Spares for Motorsport
Andrea Pirazzini, the founder of Help3D, used Formlabs 3D printers to create an intake manifold for a pit bike that he rides at the 12 Pollici Italian Cup championship.
When his team tunes the motorcycle, they try as much as possible to come up with linear power output. Pirazzini used fluid-dynamic analysis on possible manifold wringing designs to limit horsepower without having to apply reduction flanges, which could create localized pressure drops.
Pirazzini turned to 3D printing because it allowed him to print multiple versions of the same part at low cost, test the designs the next day, and have an advantage on the track. Elia Marescutti, Pirazzini's teammate, won the 2021 championship on a bike with a 3D printed manifold.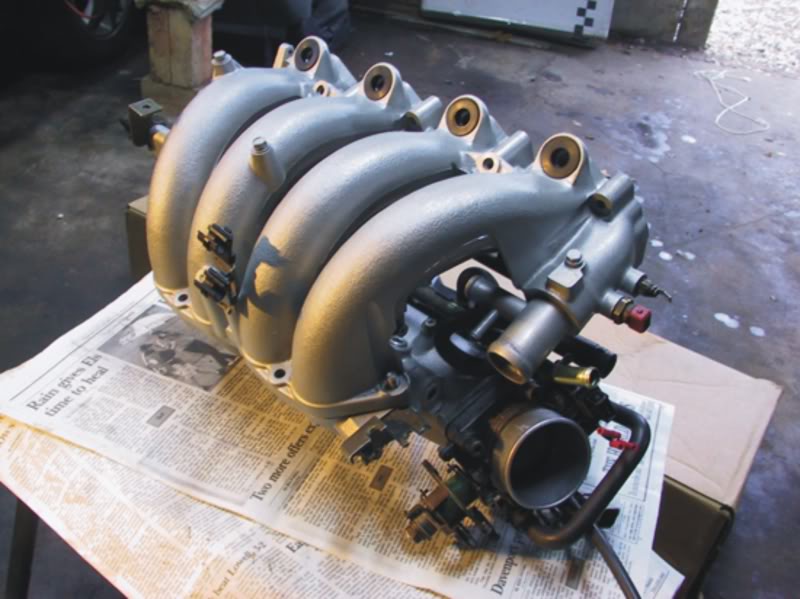 Read on to find out how Pirazzini developed the project.
Motorcycle of Elia Marescutti, the winner of the 2021 S1 Over championship, used a custom manifold printed on the Form 3.
Pirazzini has been riding motorcycles since 2012. Since the beginning, he’s been using 3D printing to create small pieces for his bike, such as support brackets for the stopwatch. He was hesitant to develop more functional and heat-resistant pieces until he learned about the launch of Rigid 10K Resin.
After consulting the specifications in detail, Pirazzini thought that 3D printing an intake manifold, a part that’s traditionally machined from aluminum, would be an interesting project. In the past, he had tried using FDM technology, but the result was not what he hoped for, as air leakage distorted the carburetor and the engine’s output.
Scan of the pit bike engine.
To develop the project, Pirazzini used 3D scanning and Autodesk Fusion 360 software to reverse engineer the design. The scan of the four-stroke engine (two-valve) engine with its frame and carburetor helped him to correctly size the manifold and then to position it so that the carburetor would not crash into the frame or the exhaust system. Pirazzini also designed intake trumpets and intake ducts. With the use of CAD, it was possible to align the diameter of the head inlet with the carburetor, avoiding steps and any pressure drop or turbulence.
White Paper
3D scanning and printing workflows can be applied to replication and restoration, reverse engineering, metrology, and more. Download our white paper or watch our webinar to learn how to start using these technologies to sophisticate your own design workflows.
Download the White Paper
Different versions of the intake manifolds printed with the Form 3.
In case the manifold had to be stripped to limit the maximum power output, Pirazzini created a 3D model of the manifold sized to limit the power delivered without losing linearity. He then performed trial runs with the aid of a test bench which made it possible to find the right manifold for each type of engine that he examined.
The result was the extension of the delivery curve at higher engine speeds without the classic loss of horsepower.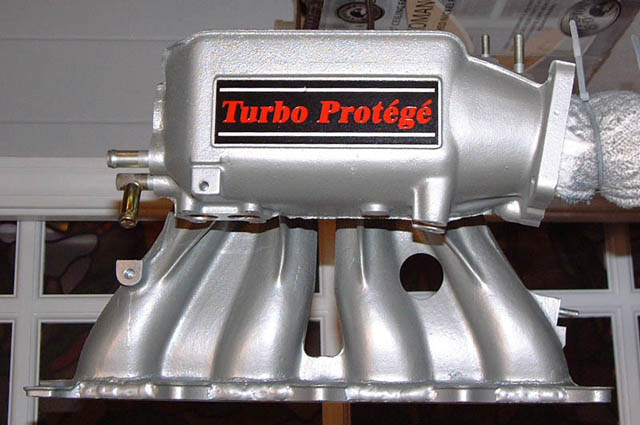 In essence, the engine had more horsepower (about 1 HP, almost 10% increase) available compared to the standard machined manifold, while remaining within the limits imposed by the rules of the championship.
WEBINAR
Watch this webinar with Peel 3D to explore how to integrate 3D scanners into your 3D printing workflow to elevate your product development process.
Watch the Webinar Now
The new manifold design was printed with the Form 3 using the Rigid 10K Resin at a 100 microns layer height, creating a smooth surface without visible layer lines. As for the finish, Pirazzini used classic water-based sandpaper to smooth the surface. Unlike an FDM manifold, which has to be treated externally and internally to be watertight, SLA printing creates solid and waterproof parts.
sample part
Rigid 10k Resin is the stiffest material in our engineering portfolio. See and feel Formlabs quality firsthand. We’ll ship a free sample part to your office.
Request a Free Sample Part
The print time depends on the thickness and size of the manifold but generally varied between two hours and two hours and forty-five minutes. The price of each part varied between €10 and €12. Pirazzini could print up to seven different types of manifolds overnight, which he could then test the following day.
Andrea Pirazzini, founder of Help3D
“In the world of 3D printing, PreForm is the simplest and overall best-performing program I have ever used.”
Two versions of intake manifolds ready to be sent to print using PreForm.
In PreForm, the user can position the object manually or use automatic orientation. Pirazzini found the latter very useful because it tends to minimize the creation of supports that can be added or removed according to the user’s needs. If supports are missing in key areas of the print job, the software will notify the user.
Andrea Pirazzini, founder of Help3D
“One very nice thing about the Form 3, in particular, is that the size of the support in contact with the print is really tiny and leaves a very little residue to remove.”
The manifold that Pirazzini printed with the Form 3 has withstood high and low temperatures perfectly and is still mounted on his pit bike. Thanks to the use of a thermal imaging camera, Pirazzini discovered that Rigid 10K Resin also offered a significantly better thermal performance: The 3D printed manifold with cooling fins recorded a 40-50 degrees celsius lower temperature compared to a classic aluminum manifold. Moreover, after a race of about 20-25 minutes at an outside temperature of about 33 degrees, it was possible to touch the manifold without getting burned because it was actually cold.
The intake manifold is just one of the projects that have come to life using the Rigid 10K Resin. In fact, Pirazzini expects that the material would also be suitable for the construction of reed valve packs for two-stroke engines, tappet covers, reduction flanges for cylinder head couplings, and any other part that needs to be air resistant.
Using 3D Printing to Make Heat Resistant End Models and Motorsport Parts
Andrea Pirazzini, founder of Help3D, used Formlabs 3D printers to make an intake manifold for a pit bike he rides in the 12th Pollici Italian Cup.
When preparing a motorcycle, the team strives to achieve maximum linear power output. Pirazzini used a hydrodynamic analysis of possible header lap designs to limit power without the use of adapter flanges that could cause localized pressure drops.
Pirazzini used 3D printing to print multiple versions of the same part at a low cost, test the design and gain an edge on the track. Elia Marescutti, Andrea's teammate, won the 2021 championship on a motorcycle with a 3D printed manifold. Read on to learn more about how Andrea Pirazzini worked to bring his ideas to life.
Elia Marescutti, 2021 S1 Over Champion, has the original Form 3 printed manifold.
Andrea Pirazzini has been riding motorcycles since 2012. From the very beginning, he used 3D printing to make small parts for his motorcycle, such as support brackets for a stopwatch. He hesitated to develop more functional and heat-resistant parts until he learned about the arrival of Rigid 10K Resin.
After studying the specifications of this polymer in detail, Andrea came to the conclusion that using 3D printing to make an exhaust manifold, which is traditionally made of aluminum, is an interesting idea. In the past, he tried to apply FDM technology, but the result did not live up to his expectations, as air leakage disrupted the carburetor and reduced engine power.
Pit bike engine scan.
Pirazzini used 3D scanning to develop his idea, and reverse engineered the structure using Autodesk Fusion 360 software. Scanning a four-stroke (two-valve) engine with its frame and carburetor helped to correctly size the manifold, and then position it so that the carburetor did not crash into the frame or exhaust system. Andrea Pirazzini also designed the air intakes and intake ducts. Thanks to CAD, it was possible to equalize the diameter of the inlet and carburetor, avoiding ledges, pressure drops or turbulence.
White Paper
3D scanning and printing workflows can be used for replication and recovery, reverse engineering, metrology, and more. Download our white paper or watch the webinar to learn how these technologies can help you improve your design processes.
Download white paper
Variations of intake manifolds printed on Form 3.
In case the manifold needs to be removed to limit maximum power output, Pirazzini has created a 3D model of it, sized to limit power without losing linearity. He then ran test runs on a test bench to find the right manifold for each type of engine he was studying.
As a result, it was possible to widen the feed curve at higher engine speeds without loss of power. The engine can now deliver more power than a standard conventional manifold (about 1hp, almost 10% more) while still staying within the range set by the championship rules.
A new smooth surface collector design with no visible layer lines was printed on Form 3 using Rigid 10K Resin at a layer height of 100 microns. To make the surface as smooth as possible, Pirazzini used classic sandpaper. Unlike an FDM manifold whose water resistance is directly dependent on its internal and external processing, stereolithographic printing allows the immediate creation of hard and waterproof models.
Sample
Rigid 10k Resin is the stiffest in our range of engineering resins. Experience the quality of Formlabs printing. We will send a free print sample directly to your office.
Request a free sample
Print times range from 2 hours to 2 hours and 45 minutes depending on the thickness and size of the manifold. The price of each part is 10–12 euros. During the night, Andrea Pirazzini could print up to seven different types of collectors, and test them the next day.
Andrea Pirazzini, Founder of Help3D
"PreForm is the easiest and most efficient 3D printing program I've ever used."
Two intake manifold options ready for print using PreForm.
In PreForm, the user can position the object manually or use automatic orientation. Pirazzini found the automatic orientation to be very useful as it minimizes the number of supports that can be added or removed according to the user's needs. If supports are missing in key areas of the print job, the software will notify the user.
Andrea Pirazzini, Founder of Help3D
“Another advantage of the Form 3 is that the size of the support in contact with the model is extremely small, so there are practically no marks on it.”
The manifold that Pirazzini printed on the Form 3 has withstood high and low temperatures and is still installed on his pit bike. Through the use of a thermal imaging camera, Pirazzini found that Rigid 10K Resin also provided significantly better thermal performance. The 3D printed manifold with cooling fins recorded temperatures 40 to 50 degrees Celsius lower compared to the classic aluminum variant. Moreover, after 20-25 minutes of racing at an air temperature of about 33 degrees, you could touch the manifold without fear of getting burned, since it was cold.
The intake manifold is just one of the projects implemented with Rigid 10K Resin. Andrea Pirazzini expects this material to be also well suited to make spring valve packages for two-stroke engines, pushrod covers, adapter flanges for cylinder head couplings and any other airtight parts.
Incredible printing: can you 3D print an intake manifold?
The automotive industry is one of the fastest changing markets. Since many concepts are under development, market participants are constantly looking for effective technologies. To help them stand out, most car manufacturers are investing in a variety of areas, including design software, manufacturing technology, improved facilities, and new employee skills.
Of these, 3D printing is a technology that has generated a lot of interest. This is mainly due to the ability of the technology to quickly produce complex and non-standard parts. However, other intriguing factors include streamlined design, accelerated tool cycles and customized solutions for all value chains in vehicle development.
For all of these reasons, the automotive industry was one of the first industries to widely adopt 3D printing to improve design and increase productivity on the shop floor. Thanks to the integration of 3D printers into the production line, the production, purchase and repair of parts is much faster.
In this article, we will focus on a particularly popular vehicle component: intake manifolds. Despite their complex nature and crucial contribution to vehicle performance, 3D printing is already being applied in the design and construction of these parts.
After a closer look at the benefits, we will find out who is involved in this movement and what exactly they create.
Overall, the main benefits of 3D printing in the automotive sector are as follows:
-
- Simplified and accelerated design of parts, especially complex parts.
-
- Fewer production steps and reduced production costs.

-
- Reduced turnaround time. High level of detail.
-
- Reduced part weight in many cases.
-
- Easier obtaining of tools, molds and fixtures.
So what made automakers specifically redesign the intake manifold? Why do they use 3D printing? Could this new approach affect the car's performance?
The intake manifold controls the flow of the air-fuel mixture, which is the main element necessary for the operation of the vehicle. So changing the design of that particular part can make a big difference in horsepower, potentially boosting horsepower levels.
The design of the intake manifold is quite complex, and production involves the assembly and welding of several components to obtain the final part. Enthusiastic drivers and automotive companies interested in producing high-performance vehicles have turned their attention to using 3D printing solutions to improve results.
Let's take a look at how some major automotive companies and racing teams have adopted 3D printing to strengthen their market position.
Although automotive parts are usually provided with metal components, the idea of using thermally and mechanically strong alternatives has received a lot of attention lately. In particular, scientists and researchers study and test thermoplastic and thermoset materials.
Ultem 9085 is one such high strength flame retardant thermoplastic. Produced by Sabic (https://www.sabic.com/), it is mainly used in tooling, end-part manufacturing and prototyping.
Ultem intrigued Arizona State University professor Dr. Bhate. In particular, he wanted to know how best to optimize printing using this material for complex parts.
As you know, FDM and resin printing often requires support structures. Unfortunately, in addition to increasing the amount of waste, correct removal of supports and finishing the final model can sometimes require additional operations. Therefore, Dr. Bhate conducted a case study to minimize these efforts while establishing the value of Ultem.
Using an FDM Stratasys Fortus 400mc, Ultem 9085 and an existing intake manifold CAD design from the ASU SAE group, a 2016 study focused on optimizing process parameters.
Among other steps, several design iterations were undertaken using Insight (https://www.insight.com/en_US/shop/partner/autodesk/software.html) design software and a suitable part orientation was obtained. In addition, a box-type support structure was used to facilitate removal of the support. The end result was a fully functional (and beautiful) intake manifold that could be directly connected to the SAE team engine.
California State University's Hornet Racing Formula SAE team partnered with Carbon (https://www.carbon3d.com/) in 2017 to improve the performance of their car's engines. The idea was to use 3D printing to reinvent and redesign the intake manifold.
The main problem the team faced was poor airflow, resulting in reduced engine performance. This problem is usually associated with the welding of many small components, which often leads to power supply problems.
The manifold has been redesigned for production using Carbon Digital Light Synthesis (DLS) technology. In this process, an LED light engine projects a sequence of UV images through the bottom of a container filled with resin. The images are cross sections of the part being printed, and the photosensitive resin is cured.
As you might expect, this process alone does not produce a fully functional part. After printing, the part is fired in a thermostat, which determines the mechanical properties of the part through a chemical reaction. This causes the material to achieve the desired final properties.
Using Carbon DLS technology, Hornet Racing was able to achieve a fully customizable manifold with minimal welds. The result is a constant and optimal flow of air and fuel, maximizing engine performance. As an added benefit, the updated design has reduced weight by 50% by replacing aluminum with rigid polyurethane, a durable and heat-resistant plastic.
In 2018, students from the Tecnun School of Engineering at the University of Navarra (https://tecnun.unav.edu/en/), Spain, tried to simplify and redesign their racing car. To do this, they turned to 3D printing, using its capabilities to minimize production while maintaining the strength, structure and durability of parts.
In line with this decision, the team decided to replace the aluminum with a carbon fiber composite to reduce the overall weight of the manifold.
Tecnun was sponsored by Stratasys in this endeavor with a Fortus 450mc printer and two materials: carbon fiber composite for the manifold and ST-130 for the consumables. The latter was used as a support material in empty areas, as it is easy to break or wash away.
With the ST-130, the team was able to create complex designs with a lead time of around five hours (compared to the weeks it would otherwise take for such a project). The final part was able to withstand 121°C while reducing weight by 60%, greatly improving part performance.
Briggs & Stratton (https://www.briggsandstratton.com/eu/en_gb/home.html) is one of the largest manufacturers of engines and farm equipment in the United States. With the purchase of a selective laser sintering (SLS) printer from 3D Systems in 2015, the company's research and development team decided to test the durability of their new and future product. In particular, they wanted to solve the problems associated with traditional CNC machining, casting, and other manufacturing technologies.
Among other tests, the team used Statasys' DuraForm ProX PA to create an epoxy-sealed V-twin intake manifold. The high strength and plasticity of the polymer made printing a complex thin-walled structure relatively painless. Some sections were only 0.8 mm thick and remained strong and flexible.
After the V-twin manifold was printed, it was tested at high temperatures for over 2000 hours for design compliance and performance analysis. This has enabled the company to meet numerous requests for complex components over the years.
Orion Racing (http://www.orion-racing.com/) was one of the first racing teams in India to reproduce the carbon fiber chassis of a Formula 1 car using 3D printing. After learning that the design of the intake manifold was too complicated, the team contacted the Imaginarium 3D printing service (https://www.imaginarium.io/).
The goal of the project was to print an aerospace-grade engine chassis that would allow the team's race car to accelerate from 0 to 100 km/h in 4 seconds. Imaginarium took the goal into account and proposed to design the header and chassis using single pass manufacturing technology. This was done in order to avoid connecting several smaller components.
The parts were printed in PA 12 nylon on a Sinterstation HiQ, SLS machine (https://all3dp.com/1/best-sls-3d-printer-desktop-industrial/). With this precise technology, the results were strong, durable and detailed, making installation and assembly easy.
As expected, the race car benefited from the overall weight reduction. This allowed the Orion Racing team to take its rightful place among the competitors.
Last year, Papadakis Racing (https://papadakisracing.com/) used its own Selective Laser Melting (SLM) service offered by Mimo Technik (https://www.mimotechnik.com/) in California. This collaboration combined the aluminum capabilities of their M 500 machine with CAD specifications provided by Papadakis Racing. Target? To test a 3D printed manifold on a Toyota Supera with a 1000 hp engine.
M 500 works by first applying a layer of thick aluminum powder. Then, using a controlled laser, the powder is selectively melted and bonded to form successive layers of the model.