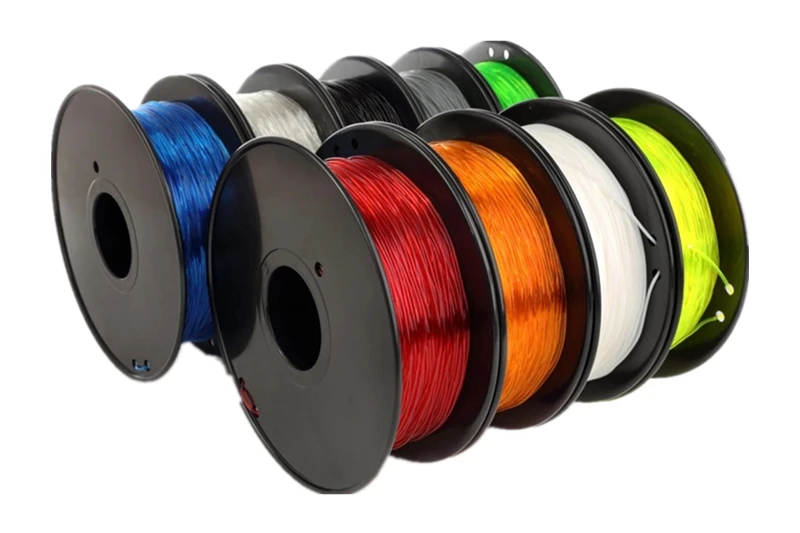
3D printing glue
Print Smoothing: 101 — 3D Gloop!
Using 3D Gloop! you can achieve near plastic-injection molded surface finishes on your prints!
We're talking smooth as a baby's... Well, you know, right?
It’s pretty easy to do too! If you couldn't tell, we like simple at 3D Gloop!
Step 1! - Setup
Making beautifully smooth prints takes time, patience, and finesse.
First thing first, remember, 3D Gloop! is a solvent based product. As solvents evaporate they tend to fill rooms with strong odors quickly and can sometimes become overwhelming. Set up your finishing station in a well ventilated area. Please always be safe by using our product correctly.
Naturally, 3D Gloop is sticky... (Who would have thought and adhesive would be sticky?!) Cover your work space with a disposable covering such as paper, or cloth. DO NOT use 3D Gloop on a plastic work surface. You will not have a fun time. ..
Step 2! - Choose Your Fighter! & Fight!
Step 3 varies a little bit depending on the application method as 3D Gloop! is available in brush-on (continue to step 3B) and aerosol (continue to step 3A) forms.
Each method has its own benefits, while also having limitations. Neither method is perfect.
Step 3A! - Spray Gloop! (Glooped!)
This is by FAR the best method for smoothing. But before you get all excited, Spray Gloop! isn’t available quite yet! We just like to be a tease. 😉 You can find out more information about Spray Gloop! and when it is expected to be released at: https://glooped.com
Seriously, we recommend our Spray Gloop! to be used primarily in finishing applications as it is specially formulated to provide uniform and even coverage. - A little bit will go a very long way.
First shake the can for about 30 seconds.
While holding the nozzle roughly 8 inches away from your print, depress the cap, and keep the can moving.
Try your best to not spray too much in one area as this can result in runs and a poor finish.
Spray Gloop! dries pretty quickly, but it is best to wait several minutes before applying subsequent coats if necessary.
HELPFUL TIP: Once you are finished with Spray Gloop! it is best to purge the nozzle by holding the can of Spray Gloop! upside down, and depressing the cap until only clear gas emits from the nozzle.
Step 3B! - Brush On 3D Gloop!
For those out there who don't believe in the awesome power of aerosol that's fine...
Creating smooth prints with Brush-on 3D Gloop! is still possible! You may have a bit more post-smoothing work.
Fist, take your brush applicator out and make sure it is loaded up with Gloop!
Using long continuous brush strokes do your best to evenly distribute Gloop! across the surface of your print.
Keep the brush applicator wet with Gloop! as this helps spread and even out the coating. - Try not to re-coat an area that has already been Gloop!'ed as it may result in poor finish quality.
Overall, its pretty simple right? I mean not as simple as Spray Gloop! but it sure works!
HELPFUL TIP: Brushing-on 3D Gloop! can be tricky to master. Try brushing in a parallel direction with the layer lines of your 3D print. This will help level out brush strokes and make application a bit easier. Addionally, do your best not to apply Gloop! too thick, this will increase cure time and possibly result in a poor finish.
Step 4! - Hurry Up and WAIT!
I know, I know! No one likes waiting around. Especially when you are looking at an amazing work of art that is your 3D print right?!
Well, this step is critical and short cycling the cure time will only lead to poor results or one fugly 3D print...
Best thing to do here is go grab lunch, start and epic adventure, visit the moon, or just fast forward time until your print is cured and ready to go to step 5!
Curing times vary drastically. The longer you leave your print alone the better. A good rule of thumb is 1 hour for small prints and up to 3 for larger ones.
Not waiting long enough is sure to result in a poor finish and a frustrating experience. Totally not cool!
Step 5! - Sand Baby Sand!
Okay, so regardless of your smoothing method sanding will help even out your application of Gloop!
Step 5 is entirely optional honestly. We recommend it, but it's not required. Make sure before you start sanding that your application of smoothing Gloop! has completely cured. It should be rock hard! If it is not, give it more time!
If you choose to sand your print, just lightly brush the surfaces with 100 - 200 grit sand paper to help even out any uncovered layer lines, uneven Gloop!, zits, or scaring that show through.
Just as every other smoothing technique some work is going to be required... After you complete Step 5 to your liking, you can re-coat problem areas or move onto further finishing and painting!
That's all folks! Hopefully your prints come out looking freaking amazing! - Happy printing!
SmoothingAndrew Mayhall
0 LikesFAQ — 3D Gloop!
What is your shipping policy?
We do our best to process all orders the moment they are received. Sometimes though we miss the mark because of the impending robot revolution, time traveling bandits, or a massive black hole threatening all of existence... Regardless, even in the face of certain annihilation, all orders are processed within 2-3 business days.
Our robot overlords work us Monday through Friday with mandatory rests on weekends and holidays (Its the mercy clause in our contract!) so orders are regrettably not processed or shipped on weekends or holidays.
If we are experiencing a high volume of orders, shipments may be delayed by a few days. (Trust us, the overlords will be incredibly displeased so this event is avoided at all costs!) Please allow additional days in transit for delivery. If there will be a significant delay in shipment of your order, we will contact you via email or telephone.
DOMESTIC
For entities (biological, non living, or other) residing in the United States, all shipments are delivered via USPS Priority Flat Rate service. Transit time is dependent upon proximity to St. Louis, MO.
Our automated shipping robot will notify you when your order is shipped and provide you with the multidimensional tracking identification cryptography key (Tracking number for you humans) so that you know where your order is located throughout time and space.
All shipping fees are automatically calculated by our automated shipping robot and classified by shipment size. Most single product orders will fall into our standard economy class. Larger orders may have to be shipped in multiple boxes. It is best if you plan on placing a larger order to contact us before placing your order.
INTERNATIONAL & EXTRATERRESTRIAL
3D Gloop! will ship packages to international and extraterrestrial entities.
Orders bound for international delivery could require additional processing time. Additionally, due to the distance and sometimes unreliable nature of matter teleportation, transit times may take up to 15 days. ..
..
Matter teleportation is also expensive as we must power up the particle accelerator to generate new unstable particles of matter. Because of these variables we may need to adjust shipping prices occasionally and you may be asked to pay additional charges after you check out before your order can be shipped.
Entities are responsible for VAT, tariff, taxes, handling fees, and customs clearance fees, etc required by your country or planet for importing consumer goods. Our overlords do not collect this before hand and we can not give you an estimate on these charges due to the varying nature of "the economy"...
For those entities shipping to an extraterrestrial address, please contact us before placing your order. Our overlords are good friends with the people at SpaceX so we may be able to offer a discount for those orders going to Mars. Please understand that rockets are dangerous and sometimes... Sometimes things go very wrong and well, they go boom. In the event of a catastrophic failure 3D gloop! will replace your order free of charge. It will ship via the next launch window.
For all other International and Extraterrestrial shipping questions please don't hesitate to reach out to our customer service overlords!
Are returns accepted?
3D Gloop! is happy to process any return for any reason within 30 days of purchase.
If you should find yourself dissatisfied with our product for any reason please reach out to our customer service as we would wish to remedy your dissatisfaction.
Was your 3D Gloop! damaged in shipping? Send us a picture of the damage and we will ship a replacement out free of charge.
Backordered Products
From time to time our indentured servants, uh... employees! will have trouble keeping up with demand of this awesome science sauce. This, unfortunately, means our products will automatically be placed on backorder until we can increase our production.
Our automated checkout system will still allow certain items to be added to your cart and complete payment for your items. In doing so, you will be notified your products are backordered upon adding your selection to your cart.
Typically, backordered products are shipped within 10 business days with our average being around 5 business days. If you happen to place a backorder for products and the wait will be longer than 10 business days, our customer service overlords will reach out to you to keep you informed.
Backorders are fulfilled by the order they are received. So if you are really needing some 3D Gloop! you best be getting in line! 😉
If you should find yourself wondering when your order will ship please reach out to our customer service overlords and we will happily inform you about your order.
My brush is bent... I need a replacement.
We get this question a lot... So first, let us ask you a question. Did you by chance order one of our 75ml bottles of 3D Gloop! either as a standalone or as our Experimenters Kit?
If so, rest assured, this bent brush is NORMAL and your product is NOT defective. Every 75ml bottle of 3D Gloop! comes with what is called an “Angled Reach” brush top. The brush is bent at a 45ish-degree angle in order to reach the product all the way at the bottom of the bottle. Straight brushes are not able to efficently reach the bottom of our 75ml bottles and thus, product would be wasted if the brush was not angled.
Now, if you by chance didn't order a 75ml bottle and your brush is bent, then please do reach out to our customer service overlords as this is NOT NORMAL!
Is 3D Gloop! safe to use?
First, please refer to the products Safety Data Sheet (SDS) for specific instructions, precautions, warnings and risks.
3D Gloop! is a solvent based adhesive. Like with any adhesive it is imperative that it be used in a well ventilated environment and away from any source of ignition such as an open flame or spark.
As the solvent in 3D Gloop! evaporates, the adhesive will begin to dry. The solvent has a slight chemical smell sometimes followed with a sweet aroma. If you smell this solvent, chances are you do not have adequate ventilation. Please refer to section 8 of our SDS for more details on personal protection.
Do not under any circumstances directly inhale solvent vapors emanating form 3D Gloop! as permanent, irreversible damage to your olfactory nerves (Nose and nasal passage) may occur along with other serious health effects outlined in our SDS.
For other health and safety related concerns, please check the products Safety Data Sheet (SDS).
How do you use 3D Gloop! ?
3D Gloop! is quite simple to use really! We suggest you check out our How-To section on our website for more detailed information on application and other uses but we will give you the quicky here!
Before your first use, please refer to the products Safety Data Sheet (SDS) for specific handling instructions, precautions, warnings, and risks.
Once that is out of the way, prepare your printer by warming up your build platform. (Please make sure your build platform is clean by using a scraper or cleaning solution before applying your 3D Gloop!)
Remove your 3D Gloop! from its designated safety bag and open the container away from your face in a well ventilated area where you 3D printer is located.
3D Gloop! is best applied between temperatures of 40° - 70° C for heated build platforms or at room temperature for non heated platforms. - A good rule of thumb is to apply 3D Gloop! around 10° C away from your target temperature.
NEVER! apply new 3D Gloop! above 70° C as this could result in a fire or exposure to overwhelming solvent vapors as well as other safety & health risks. Please refer to the SDS for further information.
Start by quickly brushing at least 1 layer of 3D Gloop! onto your build platform slightly larger than the area of your part. - Try you best to make long sweeping brush strokes in the same direction.
Once your area is covered in 3D Gloop! wait approximately 45 seconds for the first layer to dry. Once dry, being application of another layer of 3D Gloop! making long sweeping brush strokes perpendicular to the previous layer of 3D Gloop! - You can apply as many layers as you like but 3D Gloop! preforms best at 1 - 3 layers thick.
Wait for all the applied layers to dry before beginning your print and that's it! Overall, its pretty simple, Right?
We hope you enjoy your 3D Gloop! - Happy Printing!
What build platforms can I use with 3D Gloop?
3D Gloop! is a solvent based adhesive compound that has incredible bonding characteristics. Our overlords recommend only using 3D Gloop! on glass build plates with the exception of kapton/polyimide tapes, painters tape, and some* PEI sheets.
ALWAYS test your 3D Gloop! on a small corner of your build surface to ensure it is compatible and can be removed.
Our overlords do not recommend using 3D Gloop! on Prusa style PEI coated build platforms. Most PEI sheets (actual sheets of PEI) are compatible with 3D Gloop! but it is strongly recommended to test interactions in a small area or corner of your specific build platform with your specific printer.
DO NOT use 3D Gloop! on any plastic or textured print surface as it will likely permanently fuse to it.
If you should find yourself wishing to use 3D Gloop! on a plastic build plate make sure you protect the surface by using a superficial layer such as tape.
Why are there different versions of 3D Gloop! ?
3D printing is exciting, fulfilling, and quite simply enjoyable. Our overlords understand that there are wide variety of materials available in the ecosystem not just ABS and PLA. And besides, printing in only two materials isn't a whole lot of fun...
3D Gloop! currently offers three families of adhesive with many more in the works this very moment!
To put this simply:
3D Gloop! ABS is specially formulated for ABS filaments.
3D Gloop! PLA is specially formulated for PLA filaments.
3D Gloop! PET is specially formulated for PETG and Co-Polyester filaments.
Now there's a lot of other filaments out there other than ABS, PLA, and PETG we know. But overall, these are by far the most common. That being said, even ABS and PLA have different variations such as ABS+ and PLA+. In most cases 3D Gloop! will work with these variations provided the base polymers are the same. But it is impossible to know how different the material wil behave from manufactuere to manufactuere so we recomend sticking to the pure stuff.
We know there are other solutions out there to bed adhesion claiming a one size fits all shouting "works with all filaments" showing you simple comparisons and promising the world and then some.... Ultimately though, these one size fits all solutions are mediocre at best. And even more frustrating, most if not all of their formulations are based on common adhesives such as Styrene/Acrylates Copolymers, Vinyl Acetate, Poly Vinyl Acetate (PVA), Poly Vinyl butyral (PVB), and Poly Vinyl Pyrrolidone (PVP). Most of wich are commonly found in hair spray and glue sticks... Seriously? Who wants to pay for over priced glue sticks?
3D Gloop! is different. Our adhesive formulation is engineered from the ground up to work with a specific plastic such as ABS or PLA.
Science, and a lot of testing helped the slaves I mean chemists here at the 3D Gloop! laboratories perfect each compound for the best performance. This means you, our conquered servants, I mean customers get the best performing print adhesive on the market.
Are 3D Gloop! ABS and PLA interchangeable?
Unfortunately 3D Gloop! formulations are not interchnageable.
3D Gloop! ABS is not compatible with PLA filaments when used as a bed adhesive. Likewise 3D Gloop! PLA is not compatiable with ABS filaments.
Each version of 3D Gloop! is specifically formulated to work with a specific family of plastic. 3D Gloop! ABS works with all ABS plastics as 3D Gloop! PLA works with all PLA plastics.
While it is possible that a version of 3D Gloop! may work with other plastics, our overlords do not officially guarantee the use on anything other that the specific formulation.
Our slaved chemists are hard at work expanding the compatible plastics for 3D Gloop! and we soon hope to offer PETG, PC, TPU, and even Nylon Gloop!
How long does 3D Gloop! last?
3D Gloop! is good for up to 1 year when left unopend sealed tight in its container and safety bag stored correctly at a temperature below 15°C [60°F]. 3D Gloop! Overlords even extend a 3 month warranty on all products we sell! It is possible that 3D Gloop! will last much longer with proper use and care but that means you're not using 3D Gloop! as often as you should be... (Warning) Don't displease the Overlords!
It is recomended that every brush top or bulk bottle of 3D Gloop! be used completely within a period of 2 months from date of opening to ensure the best possible results. That's not to say you can't take longer to use your oh so coveted 3D Gloop!
Our standard 75ml (2.5oz) packages of 3D Gloop! should cover around 1.1 square meters (11.8 square feet) when applied in a single layer.
Using the optimal application of 3D Gloop! that equates to around:
60 - 120 small prints (5.5cm | 2.2in)², 30 - 60 medium prints (8.0cm | 3.2in)², 15 - 30 large prints (11.5cm | 4.5in)²
Throughout normal use of 3D Gloop! you might notice your gloop has progressively gotten thicker than normal or perhaps solidified beyond use. In any event, should your 3D Gloop! no longer be usable within 3 months of purchase, drop one of our customer service overlords a note and we will instruct you to send your unusable 3D Gloop! back to our factory in exchange for a brand new bottle! - How cool?!
Is 3D Gloop! gluten free?
We are proud to announce that version 1.0 of 3D gloop is indeed gluten free! But... We would like to strongly stress that no human or living biological entity consume 3D Gloop! in any manner. It does not taste very good and it can make biological life very ill even result in death.
Just don't do it... Okay?
How do I order wholesale?
Are you a robot overlord selling other 3D printer related goods or services? Are you interested in reselling 3D Gloop! to your conquered servants, I mean customers? Please reach out to customer service with your inquiry today!
Tips for better ABS printing using 3D Gloop! ?
While 3D Gloop! is incredibly impressive, it is still an adhesive.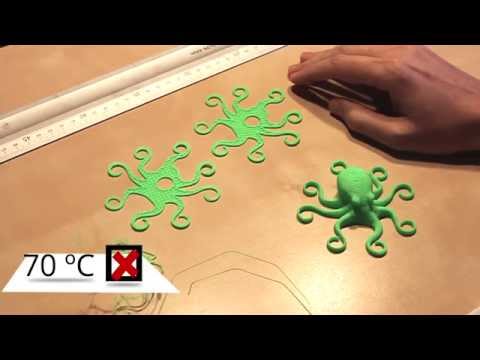 .. As much as we want to bend the laws of physics we're simply not that smart. - Yet!
3D Gloop! is designed to help your printer produce high quality prints in ABS and PLA. Now keep in mind that every printer is different, and every model printed is unique in its own ways. When using 3D Gloop! you are putting a lot of science to work hopefully resulting in a stunning near perfect print every time. Sometimes even the best heroes can't save the girl.
If you are experiencing warping when printing ABS using 3D Gloop! bed adhesive, here are some helpful tips that should produce better results.
When printing in ABS, typical practices to reduce curling/warping as well as improve layer adhesion are still very useful and, in many cases, helpful when relying on 3D Gloop! to adhere your print to the build platform.
TEMPERATURE: While our scientists and others in the community have successfully printed ABS on room temperature build platforms countless times it is still recommended to use a little bit of heat if you have the capability. Against conventional practices and wisdom, 3D Gloop! ABS works best with bed temperatures lower that 80° c. Above this temperature 3D Gloop! offers no extra holding ability. Above 90° c slight losses of holding performance is noticed expanding further as temperatures approach 110° c and above. Every printer is different, but a good target should be a bed temperature of 70°c.
SPEED: Generally, when using 3D Gloop!, the slower the printing speed the better the performance. Printing ABS at high speed using 3D Gloop! is totally possible! The results are pretty impressive too! But, for larger models, slower feed rates enable more uniform cooling as a new layer is deposited thus resulting in less internal stresses and hopefully less warping.
LAYER SETTINGS: When printing in ABS using 3D Gloop! it is a best practice to use as little infill as required by your part. Not only will this save you printing time and reduce material costs, it will help ensure a flawless print! ABS is prone to warping/curling due to the high shrinkage ratio between hot extruded plastic and cold fused plastic. As layers build on you prints, stresses accumulate proportional to the amount of plastic being deposited. As one could imagine a part with 100% infill is likely more prone to warping than one with 10% infill.
Layer height has little effect on 3D Gloop! other than the first layer. It is again a best practice to print your first layer at 90% of your desired layer height and 105% - 110% extrusion to facilitate proper bonding of your print to 3D Gloop!
ADDITIONAL SETTINGS: Our overlords recommend when printing in ABS to use a brim with at least 4 mm of stick out around your part. If you are using Simplify 3D, multiple layers of brim are sometimes helpful for tricky or stubborn pieces.
Sharp corners are the hardest for any bed adhesion mechanism. 3D Gloop! is no exception to that rule unfortunately. - Again, it’s not magic. With 3D Gloop! warping or curling is minimal when compared to other methods if no brim is used during a print. However, with some patience, fine-tuning, and the correct application of 3D Gloop! it is totally possible to print with no curling or warping without the use of a brim.
Any other questions?
Contact Us!
California Residents & Proposition 65
California's Proposition 65 entitles California consumers to special warnings for certain products that contain chemicals above certain threshold levels.
The general Proposition 65 notice is as follows: WARNING: This product contains chemicals known to the State of California to cause cancer and birth defects or other reproductive harm.
Testing liquid adhesives for adhesion
Technician
Subscribe to the author
Subscribe
Don't want
10
So we managed to assemble the whole team of liquid products to increase the adhesion of the table in 3D printing. And this means that Mnogo3D, obsessed with adhesion, is back with you. Picaso 3D glue, 3DM 3D glue and I made 4D glue gathered in our hands at the same time. The first two are already familiar to the readers of the portal according to the test "Adhesion means: professional versus amateur".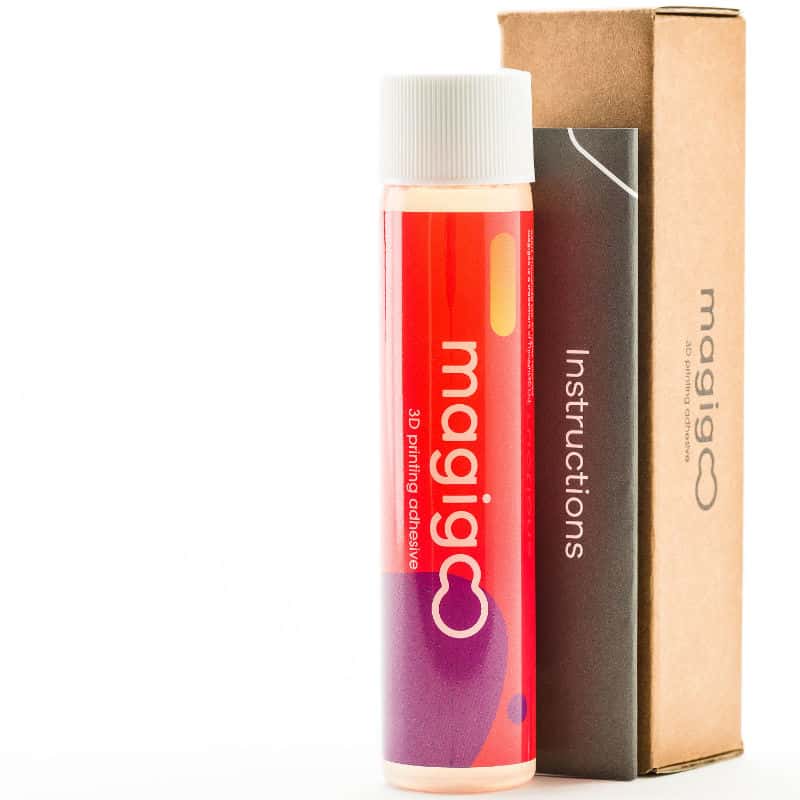 The last one just arrived. And so we will do a test of who is capable of what. In order not to be bored, the glue stick "Kalyaka-Malyaka" and Eeeee ... Povidone on isopropyl alcohol will take part in the test. Kalyaka is the standard of adhesion and it is needed as a guideline. And povidone to debunk or confirm the myth that a professional remedy can be created at home.
Since the last test, we have diluted our "Nurofen", bringing the concentration to approximately 1 sachet of medicine per 0.5 liter of alcohol. And very thoroughly mixed, getting rid of the flakes. Thanks for the recommendations on finalizing the solution to Ilya Pinchuk and advice on the test in general.
This time we decided not to test on nylon, ABS is enough. For the purity of the experiment, we will carry out the test on the material from two manufacturers. Black is Chinese, sold under the Good3D brand, and gray is from REC.
Disclaimer: I express my gratitude to the portal 3DToday because 3DM glue, as well as REC gray plastic are winnings in competitions held by him. Let's not forget Top3DShop either. Glue Picaso provided by them for the last test free of charge.
4D glues "I made" and "Kalyaka-malyaka" were bought from office. dealers without informing about the intention to conduct testing.
Introducing the participants. Glue from Picaso and 3DM are longtime players in the 3D printing market. Their composition is declared the same: Water, Isopropyl alcohol, P-complex and flavor. But manufacturers are different. 3DM smells stronger of alcohol. Either they saved on the fragrance, or the spirit was vigorous. 4D glue "I made" is different. In its composition, PVP is immediately indicated. It has a yellowish tint and is thicker. The smell of alcohol is less noticeable. On the contrary, there is a pronounced woody smell. Apparently the wombat is on the label for a reason. All three are supplied in 250 ml squeeze bottles. "I did" is also available in 100 ml bottles.
Homemade remedy is simpler and cheaper. In a pharmacy, we buy a sachet of medicine Enterodez 5 grams with the active ingredient POvidone and dissolve it in 0. 5-1.0 liters of isopropyl or ethyl alcohol. Doesn't dissolve well. Therefore, you need to periodically shake the bottle until the flakes disappear. Why Povidone and where does the pharmacy?! It's simple, PVP is polyvinylpyrrolidone. And its other name is just povidone or polyvidone. This substance has a very wide range of applications in medicine and chemistry. But it is one thing to know the composition, and another to know the recipe. In the last test, homemade did not show itself in any way. Let's see what happens this time.
Magic glue stick "Kalyaka-Malyaka" is also not simple and has its own legends. We took several briquettes of this glue. we prefer this particular method of adhesion and can debunk a few more myths about it. Actually everything is in the photo.
Even in one briquette there are tubes of different shades of yolk with contents of different shades of pink. Also different ends of the glue. Some are pointed, while others are flat. And all this in one sealed pack from the dealer.
And so... to the test!
Test piece:
Frame with 0.8mm wall, 15x150mm, 50mm high. We print with a nozzle of 0.8 mm and a layer of 0.3. The first layer is 50% of the base layer height. Speed up to 50 mm/sec. Brim at 5 perimeters. Printer open Corexy with ball screw. The temperature in the room is 22-25 degrees, without drafts. The surface is a mirror. The conditions are deliberately set to be unrealistic, so that it would be easier to evaluate the result by the amount of printed material.
The idea was to put 4 parts side by side and see what happens.
But the idea turned out to be so-so. A part that went out of the way caused the test to stop. Here, either apply the Olympic system, or test it for a long time and dreary piece by piece.
We settled on the last method and started printing the same code with different adhesives. Accordingly, they waited for the platform to cool down, washed it, dried it, degreased it with pure alcohol, dried it, and applied the composition.
Contrary to advertising, one coat of compound does not work! Not even two work. Applying a large amount is also not an option. You need at least three layers. And for 3DM, even three layers do not work. In this regard, for the outsiders of the first round, the adhesives 3DM and "I did" were given a second chance to prove themselves. In the second attempt, only 3DM was given a second chance. The concentration of the substance, apparently, is less in it. Therefore, after a failed attempt on 3 layers, the printing was repeated on 4. The difference, as they say, is "on the face." Assigned seats are our subjective decision on typing comfort. And it wasn't easy. You run the test. You control that the brim began to stick to the table. If the composition is small, then a new layer of the composition was applied and the test was started again. If the print has gone, then you sit and wait for the coveted click and crackle of the extruder on skipping steps. You fix the % of the task completion and the separation. Stop printing. Table cooling, washing, drying and new. Over 100 photographs were taken. Let's show some.
Picasso 1st attempt.
Most printing stopped within 30-50%. The best results were shown only by "Kalyaka-Malyaka".
3DM glue and its 3rd attempt.
It should be noted that REC plastic, unlike Good3D, is more rigid and more prone to delamination. On it, the subjects showed poorer results. In particular, in the second attempt, when printing on a painter, the plastic tore the brim, and not completely tore it off, as in all other cases.
And almost broke another corner
Well, actually the results.
And in tabular form:
Thanks for reading.
Sincerely, Mnogo3D (3D printing in Ryazan and beyond)
PS Eta4Ever was the first in our VK mini-survey to guess which of the trinity of liquids is the best. Cool!
adhesion glue
Follow author
Follow
Don't want
10
3D Printing Adhesive 3D PrintFix Strong 60 ml
3D PrintFix Strong - adhesive for 3D printers
3D PrintFix Strong is an adhesive adhesive designed specifically for FDM/FFF 3D printing.
3D PrintFix Strong 3D Printing Adhesive is designed for use in 3D printers with and without heated bed. Provides excellent adhesion between model and 3D printer platform.
Application 3D PrintFix Strong securely fixes your model on the table and prevents deformation and peeling of the part.
The 3D PrintFix Strong 3D Printing Adhesive is applied quickly, easily and economically with a spray dispenser.
Benefits of 3D PrintFix Strong adhesive:
- Easy to spray
- Fast drying
- Suitable for 3D printers with heated bed
- Reliably fixes all types of plastics – PLA, ABS, PET, ASA, TPU, PA…
- Easy to remove from surface
- Allows you to firmly fix the part on the surface, and also easily remove it after printing
How to use:
- Spray 3 consecutive coats of adhesive liquid onto a clean table. Wait for the previous one to dry before applying each subsequent layer.
- If necessary, heat the table to a suitable operating temperature.

- Start 3D printing.
- After the 3D printing process is completed, wait for the platform and part to cool down
- Carefully remove the model.
Adhesive retains its properties for 8-10 3D printing cycles. There is no need to spray it every time. To clean the table, it is enough to wash off the adhesive with plain warm water.
Attention! 3D PrintFix Strong adhesive contains alcohol and is flammable. Do not use near open flame.
Spray available in the following sizes: 60 ml, 250 ml, 500 ml.
| Manufacturer | 3DProf |
|---|---|
| Print Technology | FDM/FFF |
| Country | Ukraine |
| Condition | New |
| Consumables | for 3D printer |
| Accessory type | Glue (adhesive) |
| Volume ml | 60 ml |
4. 7
7
reviews: 3
Write a review and get 5 loyalty points. You can convert your points into a voucher and get a discount on your next orders. Points will appear in your account after the review is posted.
Date: Newest first Date: Oldest firstRating: Highest firstRating: Lowest firstReviews with picture: first with pictureReviews with picture: first without pictureVerified purchase: first customers who bought the productVerified purchase: first customers who didn't buy the product
Spraying more than directed. The adhesion is excellent.
Fixes the part well on the table, sometimes it is difficult to tear it off
thanks for the product. shipped promptly. keeps the model on the table well
Customers of this product also purchased:
- Share
- -20%
Out of stock
Out of stock
3D accessories
Nozzle wrench E3D V5/V6, MK-8 (7mm)
356741
5.
Learn more