3D printing flexible
Ultimate Materials Guide - 3D Printing Flexible Filament
Overview
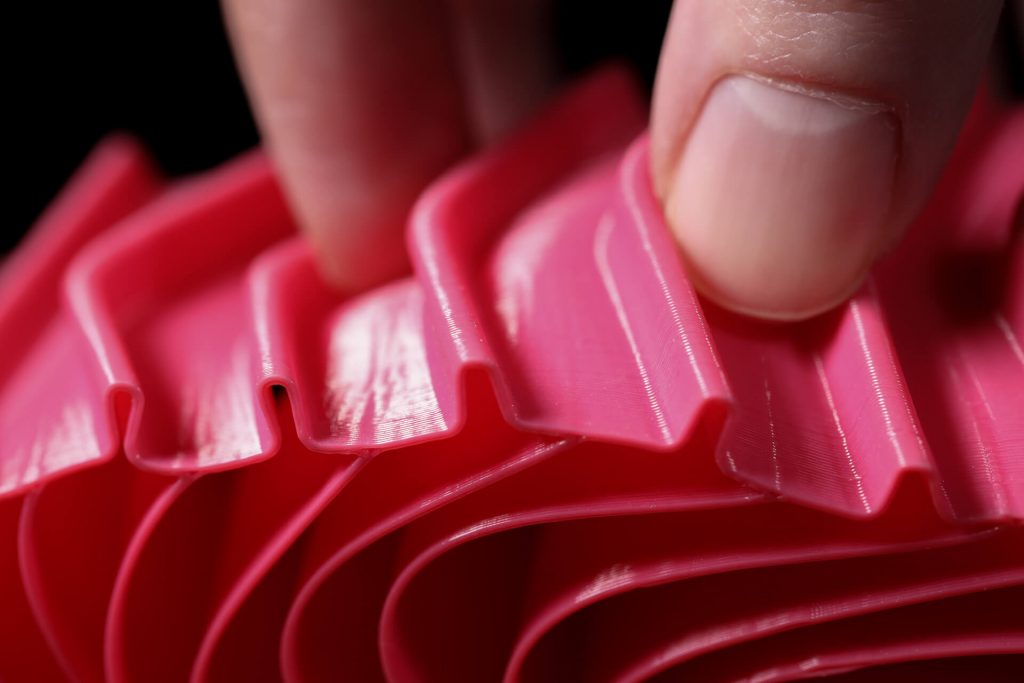
Flexible filaments are made of Thermoplastic Elastomers (TPE) which are a blend of hard plastic and rubber. As the name suggests, this material is elastic in nature allowing the plastic to be stretched and flexed easily. There are several types of TPE, with Thermoplastic polyurethane (TPU) being the most commonly used among 3D printing filaments. In many cases, these terms are used interchangeably, along with popular brand names such as Ninjaflex. The degree of elasticity in the plastic depends on the type of TPE and the chemical formulation used by the manufacturer. For example, some filaments can be partially flexible like a car tire but others can be elastic and fully flexible like a rubber band. This guide will cover tips to help you with both of these variations of flexible filaments.
- Flexible and soft
- Excellent vibration dampening
- Long shelf life
- Good impact resistance
- Difficult to print
- Poor bridging characteristics
- Possibility of blobs and stringing
- May not work well on Bowden extruders
Hardware Requirements
Before 3D printing with flexible filaments, make sure your 3D printer meets the hardware requirements listed below to ensure the best print quality.
Bed
Temperature: 45-60 °C
Heated Bed Optional
Enclosure Not Required
Build Surface
PEI
Painter’s Tape
Extruder
Temperature: 225-245 °C
Direct Drive Extruder Recommended
Cooling
Part Cooling Fan Required
Best Practices
Flexible filaments come with many unique challenges that you want to be aware of. These tips will help you reduce the chances of common 3D printing issues such as clogging, kinking, and stringing.
Use Direct Drive Extruders
While some partially flexible filaments work fine with Bowden Extruders, most fully flexible filaments require a Direct Drive extruder for best results. The distance between the drive gear and the melt zone of the hot-end needs to be as short as possible to efficiently feed the filament into the nozzle. Additionally, the pathway through which the filament travels into the melt zone should have tight tolerances to prevent the filament from kinking or coiling inside. For these reasons, it is typically much easier to print flexible filaments with a Direct Drive extruder versus a Bowden extruder. If you are unsure about your 3D printer’s capabilities, you may want to check with the manufacturer to see if the extruder has been approved for use with flexible filaments.
Use Slow and Consistent Feed Rates
Flexible filaments typically print best using a slow and consistent feed rate. Because the material is elastic, it can be very difficult to control sudden changes in the print speed. Higher print speeds can cause the filament to compress and will most likely result in a jam. Slow and steady is the best approach. Simplify3D provides all of your feed rate settings on the Speeds tab of your process settings so that you can easily configure these values. Finding the optimal print speed for your material can take several attempts based on trial and error. We have seen that speeds of 1200 mm/min (20 mm/s) can be a good starting point for most materials.
Reduce Resistance from the Filament Spool
A few tweaks to your material spool can also make a big difference with flexible materials. Typically, your extruder will pull the filament into the nozzle, forcing the filament spool mounted on your printer to unwind a bit of plastic in the process. However, because flexible materials are elastic, this will stretch the filament out as it is being pulled in and can actually result in under-extrusion. Try mounting the spool above your printer so that the filament unwinds in a downward direction which can reduce the resistance. It can also be incredibly helpful to mount the spool’s hub on a bearing to allow the spool to spin as freely as possible.
Tune Your Retraction Settings
The elastic nature of flexible filament makes it sensitive to quick movements such as retractions. In order to successfully print the filament, you will need to optimize your retraction settings to reduce these movements. While you are first starting with this material, we would recommend disabling retraction completely. You can make this change in Simplify3D on the Extruders tab of your process settings. With retraction disabled, you can focus on finding the perfect speed and extrusion rates that allow you to reliably print your models. After you are more confident in these settings, you may wish to add a very small amount of retraction with a slower retraction speed to help with any potential oozing from the hot-end. Simplify3D also includes a unique option called Coasting, which will automatically help lower the pressure in the nozzle when you approach the end of a segment, which can significantly reduce blobs and stringing with these materials. If you want more information about other options that can help reduce hairs and stringing on your prints, we have an entire section on our Print Quality Guide dedicated to that issue: How to Reduce Stringing and Oozing.
Optimize Your Travel Movements
Retractions can be particularly troublesome for flexible materials, so it is typically best to minimize the number of retractions required for your print.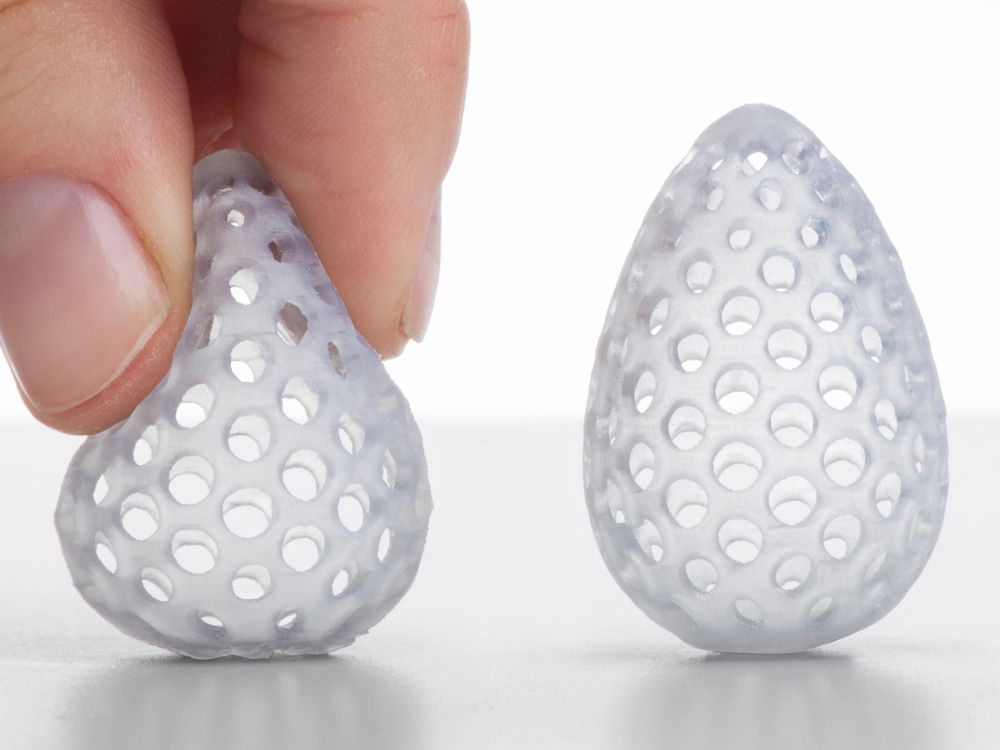 Simplify3D has a great feature that was built specifically for this situation. Instead of moving in a straight line from point A to B, the software will actually choose a completely new path when moving between these points, with the goal of staying within the interior of your object so that there won’t be any oozing or stringing. With this unique feature enabled, you can greatly reduce the amount of retractions required for your print and significantly improve your print quality. To use this feature, click on the Advanced tab of your process settings, and enable the “Avoid crossing outline for travel movement” option.
Pro-Tips
- Optimize the feed rate by printing at lower layer heights in the 0.1mm – 0.2mm range. The lower layer height requires less plastic, so it allows your extruder to use a lower feed-rate, relieving the burden on the filament.
- Try to avoid using rafts with flexible materials, as the base layers of the raft have higher extrusion rates which may create issues.
- If you are designing a flexible part that needs to fit on top of another object, try using a negative tolerance between the parts so that the flexible part will need to stretch to fit over the other object snugly.
Get Started with Flexible Filaments
Now that you’re ready to start printing with flexible materials, we have a few tips to help you get started. View some typical applications below, try out a few of our sample projects, or choose a popular filament brand to purchase for your next project.
Common Applications
- Vibration dampening
- Grip Sleeves
- Phone cases
Sample Projects
- RC Car Tire
- Phone case
- Bike Handle
Popular Brands
- NinjaTek Ninjaflex, Armadillo, Cheetah
- Polymaker PolyFlex
- eSun TPE
- Sainsmart Flexible TPU
What are flexible filaments and which one should you choose?
Adam Kohut14 May 2020
Applications
Flexible 3D printing filaments open up a lot of possibilities for designers and engineers. Complex elastic forms can be produced easily in-house, then used in a variety of different ways – from prototyping flexible features to creating custom tools.
However, for novice 3D printer users, printing with TPU and other flexible materials can seem daunting, as they’re not as easy to use as some others.
Here’s more information about working with flexible filaments, and the benefits that they offer.
What are flexible filaments?
Flexible filaments are materials with a blend of rigid plastic and rubber properties. This mix is called a thermoplastic elastomer (TPE). Thermoplastic elastomers behave in a similar way to rubber, and can be stretched and twisted to a large extent without breaking.
There are a variety of different flexible filaments available, and some are more elastic than others. The most commonly used is thermoplastic polyurethane (TPU).
Flexible filaments pros and cons
Flexible 3D printing filament offers some big benefits for users, such as:
Great elasticity.
 If you need a filament that can be stretched, maneuvered and bent, this is the ideal choice
Impact resistance. Even significant impact doesn’t usually deform products printed from flexible filaments
Less vibration. Rubber-like material dampens vibrations, which can be useful in parts for mechanical or industrial applications
However, there are a few drawbacks, like:
More difficult to print. If you are used to printing with PLA, you will need to get used to the different characteristics of flexible filaments like TPU. Stringing can occur, which makes it less suitable for aesthetic prints. Bridging overhangs can also be difficult
Post-processing. TPU generally offers fewer post-processing options for your finished print
A 3D printed gasket prototype for fit testing
Robot grippers with TPU inner grips for secure clasp
Common applications of flexible filaments
There are several ways in which materials like TPU can be used.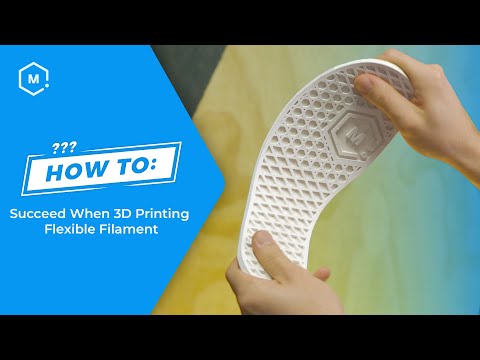
Functional prototyping and fit testing. Designers creating products or parts with elastic properties can test functionality with true-to-life flexibility – for example a phone case or seal
Custom tooling. Flexible filaments enable the creation of tools with ductile elements, such as handles or gripper parts
End-use parts. Rubber-like properties are ideal for many usable or spare parts. In particular, materials like TPU can offer softer contact points to avoid machinery damaging goods on production lines
Common industries using flexible filaments
As the number of 3D printing material types grows, flexible filaments are becoming increasingly popular across a range of industries.
In the automotive industry, vehicle panels and wheels often have to withstand impact during assembly, but any damage can cause expensive scrap costs. Using flexible materials reduces the risk of scratching vehicle parts when using 3D printed custom tooling, which can be made more quickly and at lower cost.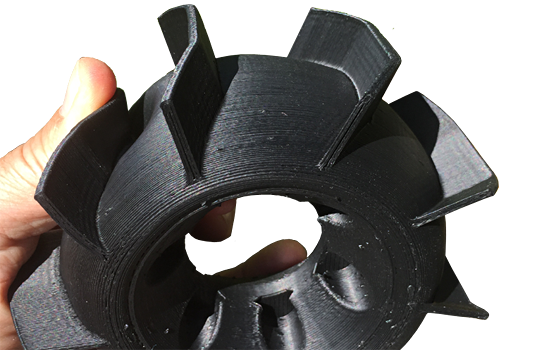
A tool for accurately placing vehicle emblems, with a TPU side for soft contact
The tool in use at the Volkswagen Autoeuropa production facility
In consumer goods, there is a similar need on product packaging lines. The blue spare parts below are 3D printed in TPU 95A by Heineken at their Seville brewery, and help to direct packs of beer bottles on a conveyor belt.
3D printed spare parts (printed in blue) direct products delicately
And in product and industrial design, flexible filaments can be used to test many prototypes, from bike handles to machine components.
Hardware requirements
With so many TPU and TPE filaments available, requirements will differ between filaments. On Ultimaker 3D printers, our TPU 95A is supported on the Ultimaker 2+, Ultimaker 3, and all S-line models.
When printing with Ultimaker TPU 95A, you’ll need the following hardware requirements:
Temperature. The build plate should be either unheated or up to 70 °C and nozzle temperature between 220 and 235 °C
Cooling fan.
 You’ll also need a part cooling fan in your 3D printer to get the best possible results
Adhesion method. In most instances, extra adhesion is not necessary for a successful print, but we always advise applying a thin layer of glue or Magigoo Flex to your glass build plate
An enclosure isn’t required for flexible 3D printing filaments but can aid the printing environment by making it more stable.
Choosing your flexible filaments type
There’s a range of flexible filaments to choose from. Here’s an outline of the materials that Ultimaker offer, or filaments that can be easily printed on Ultimaker 3D printers thanks to predefined print profiles.
| Material | Characteristics | Applications | Example |
|---|---|---|---|
| Polypropylene (PP) | Durable, chemical resistant, tough, low-friction, retains form after bending or twisting | Prototyping, end-use parts | Ultimaker PP |
| Thermoplastic polyurethane (TPU) | Resistant to wear and tear, rubber-like flexibility, chemical resistant | Industrial coatings, prototyping | Ultimaker TPU 95A |
| Thermoplastic co-polyester (TPC) | Highly elastic, UV and chemical resistant | Tooling, prototyping, end-use parts | DSM Arnitel® ID 2045 (in Ultimaker Marketplace) |
| Thermoplastic elastomer (TPE) | Durable, resistant to fatigue, lightweight, resistant to cold, easy to print | Spare parts, end-use parts, manufacturing aids, sporting goods | Arkema 3DXFLEX™ TPE (in Ultimaker Marketplace) |
How to print with flexible filaments
With so many different flexible materials on the market, it’s important to check the manufacturer’s recommended settings.
If you are using any of the materials in the table above with an Ultimaker 3D printer and Ultimaker Cura software, you can get preconfigured print profiles. This saves you a lot of time choosing the settings manually for your print job.
For an in-depth look at how to print with Ultimaker TPU 95A, read our full support page.
To learn more about Ultimaker’s range of flexible materials, visit the Materials page on the website.
Explore flexible filaments
How to print flexible materials on a conventional FDM printer? Likbez from the company REK.
Along with beautiful photos and interesting videos, where someone prints high-quality models with flexible material on a regular FDM printer without any problems, there are many questions and messages on the Internet, such as “How to print with flex?”, “I generally have flex doesn’t work, what should I do?” and so on.
In short, the average picture looks something like this:
Time to end this. Likbez from the company "REK".
Foreword.
For flex printing, it is important to observe some points. Alas, not all 3D printer manufacturers create their product with the ability to print with flexible materials. But after all, you already have such a powerful tool as a 3D printer, on which you can print any desired part, so it's time to put the old joke “buy a 3D printer - print a 3D printer” into practice. The entire printer will most likely not need to be printed, but a quick and easy tuning will be required. 9).
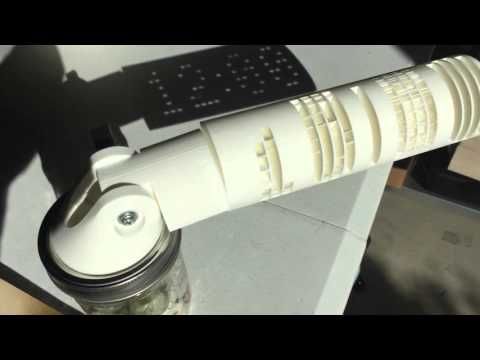
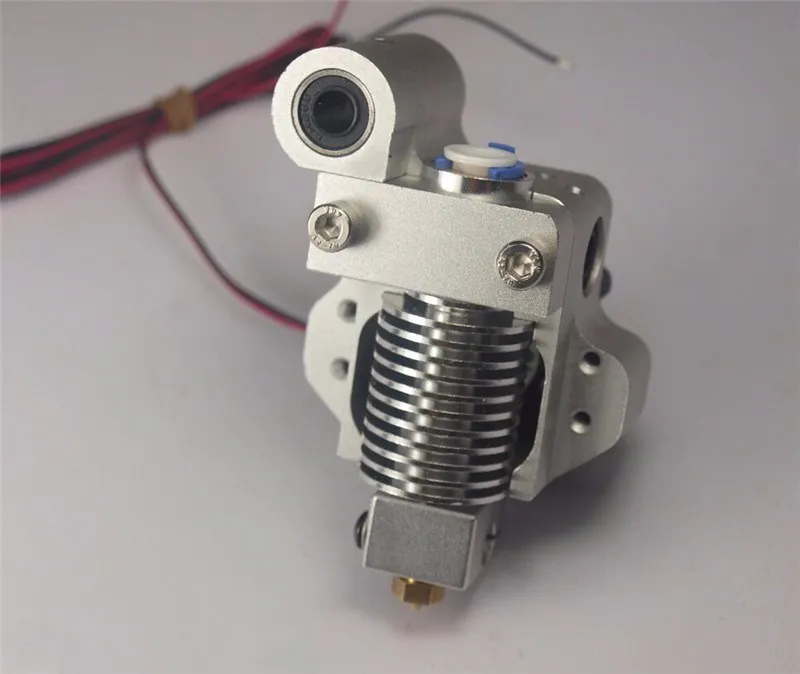
Hardware. extruder. The most common problem is that the extruder chews up the rod and it looks something like this (the problem area is circled):
No matter how carefully and accurately you push the flex into the extruder, after 5 seconds or after 5 minutes, it still chews up. This happens because there is a gap between the feed rollers and the entrance to the hot end or tube (bowden) channel in which the flexible rod will jam (YES, even if it is a very small gap. YES, even if there is only a couple of mm).
Familiar ABS and PLA are quite hard, they are difficult to crumple even in a centimeter gap. Flexible plastic should not be left even the slightest opportunity to go somewhere “not there”, so this gap in the extruder must be removed. For RepRap owners, this will not be difficult at all, because. they probably already have tuning experience; in free catalogs of 3D models (such as thingiverse or youmagine or myminifactory) everything has already been invented before us and there are already ready-made models of modified extruders or parts for tuning existing ones. In general, the new extruder will be different in this:
Here are some examples of tuning extruders for different printers:
http://www.thingiverse.com/thing:247024 - Solid Dulls and analogues
http://www.thingiverse.com/thing:191503 - Printbots (masterkits)
http://www.thingiverse.com/thing:16319 - MK9 Extruders
http://www.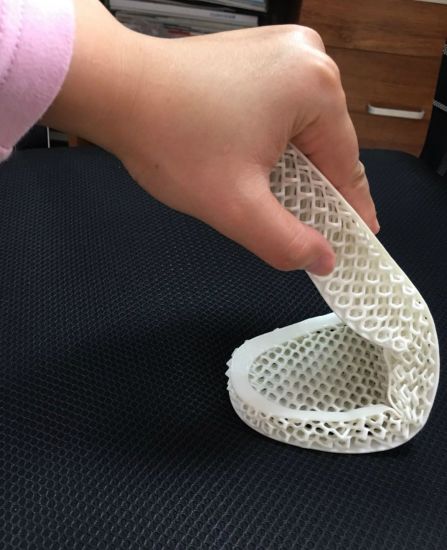 thingiverse.com/thing:231310 - Replicator 1, Duplicator 4
http://www.thingiverse.com /thing:18875 - Makerbot variant
http://www.thingiverse.com/thing:553917 - DaVinci
http://www.thingiverse.com/thing:391803 - 3DRag
http://www.thingiverse.com/thing:550788 - Robo3D
https://www.youmagine.com/designs /um2-feeder-sp3d-version - Ultimeker 2
http://www.thingiverse.com/thing:99395 - Orca 0.43
Add to the list in the comments :) Hardware #2. Hot end. (Let's come up with a normal Russian name for this thing). Not all “hot ends” (hot ends) are equally useful and this needs to be corrected.
This moment, by the way, concerns not only flexible rods, but also often causes difficulties when printing PLA.
The essence of the problem lies in the fact that the bar, getting into the hot end, begins to melt even before it reaches the nozzle, and a so-called “plug” from the material melt appears, which is not easy to push through.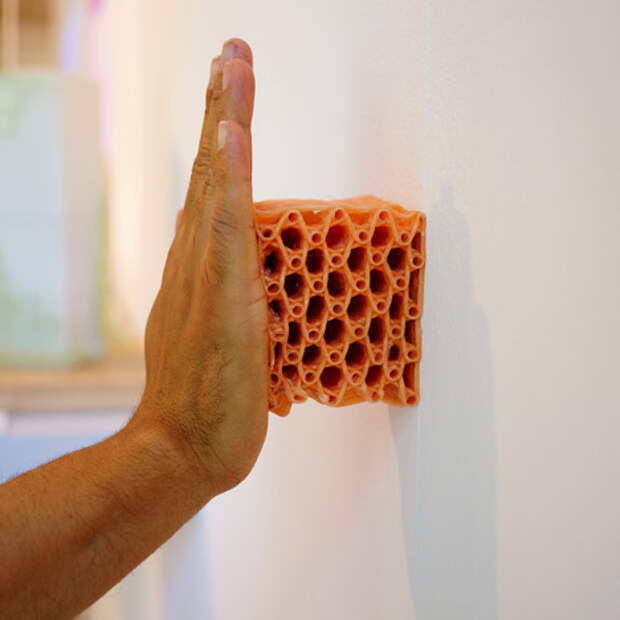 If a rigid PLA rod can still push through the melt due to the power of the extruder, then such a trick will not work with a flexible material - it will wrinkle, bend and curl even in those places where it seemed impossible. Very often, owners of 3D printers in frustration call such a situation “nozzle clogged”, although this is not entirely true.
The picture below shows a schematic of a hot end. Where the color indicates the normal state of the bar during the printing process. (blue indicates where the rod is still hard, red indicates where it begins to melt)
In this state, the plastic will exit the nozzle quite calmly without any difficulty, but if the heat goes higher, the rod will begin to melt earlier (in the cold zone) and will create additional resistance for the extruder. Solution: cool the top of the hot end by any means. Put the fan on the hot end, smear the heatsink (if any) with thermal paste at the junction with the hot parts, make the air flow directed (to the hot end), etc. and so on.
Once you've got a sharp enough transition from cold to hot, you won't have any problems with hot-end 'plugs' anymore.
For lovers of a thorough approach, I can recommend the article http://3dtoday.ru/blogs/akdzg/struggling-with-obstruction-of-steel-channel-gotanda/ as an addition to the above recommendations.
Software.
In addition to the “iron” nuances of working with flexible materials, there are also software ones. All printers are different and the “slicer” programs are also different, but the general principles work the same everywhere, the main thing is to understand them.
So, after successfully tuning your 3D printer, you need to choose the optimal print speed settings, and there is only one method - trial and error. From experience, you can designate the operating range of print speeds for flexible materials:
REC RUBBER - from 5 to 20 mm / s
REC FLEX - from 10 to 40 mm / s
If you get it faster - you are a real Jedi! 8)
As for temperature settings, here they are:
REC RUBBER
Nozzle temperature 210 - 240°C
Table temperature 100 - 120°C
Requires an adhesive film or varnish on the table.
REC FLEX
Nozzle temperature 220 - 240°C
Table temperature 80 - 110°C
Printed on glass, any film will be permanently welded to the model.
If you are not confident in your abilities, but you really want to try flexible materials, welcome to the office of the REK company - we will give you a free material sample.
Flexible plastics TPE and TPU
3DPrintStory 3D printing process Flexible plastics TPE and TPU - what's the difference
TPE and TPU are thermoplastic elastomers that allow the finished product to easily stretch or flex. Before we get into the details of these two types of materials that are used in 3D printing, let's talk about flexible materials in general and why they are used.
There are several reasons why you should consider using TPE or TPU plastics for 3D printing. These may be the need for vibration damping and damping, high impact strength and good tear and wear resistance, high resistance to chemicals, and high or low temperatures. With all these advantages, it should be noted that printing with flexible materials is not as easy as we would like. As a rule, the softer and more flexible the material, the more difficult it is to use for 3D printing.
Now let's talk more about TPE and TPU materials and clarify the differences between them. In the article, we will also look at advanced 3D printing techniques and offer you some 3D models that you should try printing with TPE or TPU plastics.
Two TP plastics
TPE
TPE stands for thermoplastic elastomer. It is a mixture of hard plastic and soft rubber, so it has both thermoplastic and elastic properties. TPE covers a wide range of flexible materials including thermoplastic polyurethane (TPU), thermoplastic copolyester (TCP), thermoplastic polyamide (TPA).
TPU
TPU stands for thermoplastic polyurethane. This is the most common type of TPE and is in the group of flexible materials with greater rigidity.
Clearing Up the Confusion
Since the terms TPE and TPU are often confused, it's worth clarifying.
- TPE is known as a soft material and has been available for several years. On the other hand, TPU has only recently entered the market, so it is new to the market.
- TPE is a non-specific term for flexible material whereas TPU material refers to a stiffer but still flexible material.
Now that we know the basics about these 3D printing materials, let's take a closer look at their differences.
Similar but different
TPE and TPU can be divided by their hardness, which is measured by the material's resistance to deformation. As we know, TPU is harder than TPE, and TPU Shore hardness is from 60A to 55D with a high elastic range (typically 600 to 700%).
Logically, TPE has a wider hardness range than TPU. Differences in the chemical composition of TPE means that some types of TPE are partially hard and suitable for 3D printing something like a car tire, while other types are very elastic, comparable to a rubber band in their properties.
Compared to TPE, TPU exhibits greater rigidity, which should not be confused with hardness. Stiffness characterizes the ability of a material to bend, indicating the tendency of a material to return to its original shape after being subjected to a load.
Other differences are that TPU will cause more problems during 3D printing because TPU is denser than the TPE group of plastics. TPU has a smooth surface while TPE usually has a more rubbery texture. TPU has greater wear and abrasion resistance than most TPE plastics, and TPU shrinks less than TPE.
Now that we've covered the differences between TPU and TPE materials, let's look at the recommendations for 3D printing with these flexible materials.
Flexible TPU and TPE 3D printing settings
TPE 3D printing
Printing TPE plastics can cause problems due to elasticity. It is recommended to print with the following settings:
- Extruder temperature: 210 ºC - 260 ºC
- Bed temperature: unheated - 110 ºC
- 3D printing speed: 5-30 mm/s
- If 3D printing is too fast, it may cause a jam. TPE works best with a direct drive extruder, so be especially careful if you have a Bowden type extruder.
Prices of some popular brands of TPE materials: eSun TPE (about $42 / kg), MatterHackers Pro Series TPE (about $55 / 0.5 kg) and 3DXFlex TPE (about $68 / 0.5 kg) .
3D printed TPU plastics
The good news is that TPU plastics are easier to print than TPE because it is relatively rigid. But compared to rigid materials such as PLA, 3D printing with TPU plastics is still more difficult. It is recommended to print with the following settings:
- Extruder temperature: 210 ºC - 230 ºC
- Bed temperature: unheated - 60 ºC
- 3D printing speed: 5-30 mm/s
- optimize the 3D printing process.
Learn more