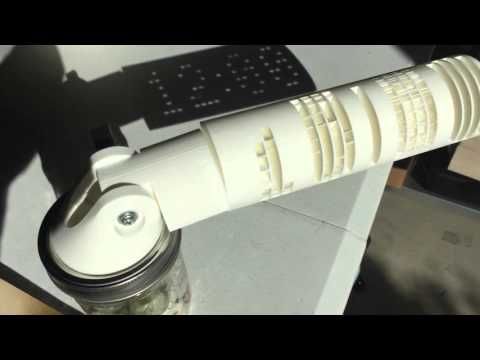
Sla 3d printing supports
6 key principles of resin printing supports that work
Updated on May 16, 2019
We have noticed one standard issue for most beginners of “bottom-up” style SLA 3D printing. That is when you get only supports on the build plate after resin 3D printing instead of the intended object. In this article we will cover this very frequent issue of SLA 3D printing. This problem is more common to beginners but is also not uncommon for more experienced 3D printing users.
Resulting desperation and frustration might send a nice resin 3D printer into the trash bin. However, by understanding underlying reasons of this phenomena one can easily adapt simple techniques and get rid of this issue. So, let’s discuss this in more detail.
Why do you need supports in resin 3D printing?
Before diving into this subject, we would like to discuss why we use supports in UV resin 3D printing in the first place. There are some subtle aspects here and it is worth understanding them. These are not all of them, but we listed most important ones based on our learnings.
- Overhangs. It is obvious that you need to support overhanging structures. That is quite common to most 3D printing technologies not only to SLA.
- Proper geometries at the bottom. It is quite common to over cure initial layers of 3D printed object to have better adhesion to build plate. However, this would result in visible layer lines and thicker sections at the bottom due to increased exposure time. To compensate this, object tends to be placed on attachment layer and supports.
- Preserving uniform cross-sectional area when using orientations. It is important to preserve uniform transition of cross-sectional area of layers. That will help avoid visible layer lines. To achieve this, you use various orientations. Usually when using those orientations, you need supports to hold the object in place.
- Obtaining proper dimensions.
 Most popular bottom-up style printers like Anycubic Photon, Phrozen, Elegoo Mars 3 have FEP or PDMS resin tray. After each layer is cured separation forces from FEP or PDMS put high stress on a printed object. That can result is various deformations, incorrect dimensions, glitches etc. By supporting more sensitive spots of the object you could reduce the likelihood of failures.
So, when you take all factors in you might end up with a bunch of supports all around the object.
Potential risks and problems
With previously mentioned techniques of resin 3D printing where one places entire object on supports also comes the risk of potential failures. Apart from many parameters related to individual support, the key parameter usually is its tip diameter.
Smaller tip diameter (typically less than 0.3 mm) enables easier removal of supports and leaves less marks on the surface, but is also weaker. On the contrary, thicker support tips (typically larger than 0.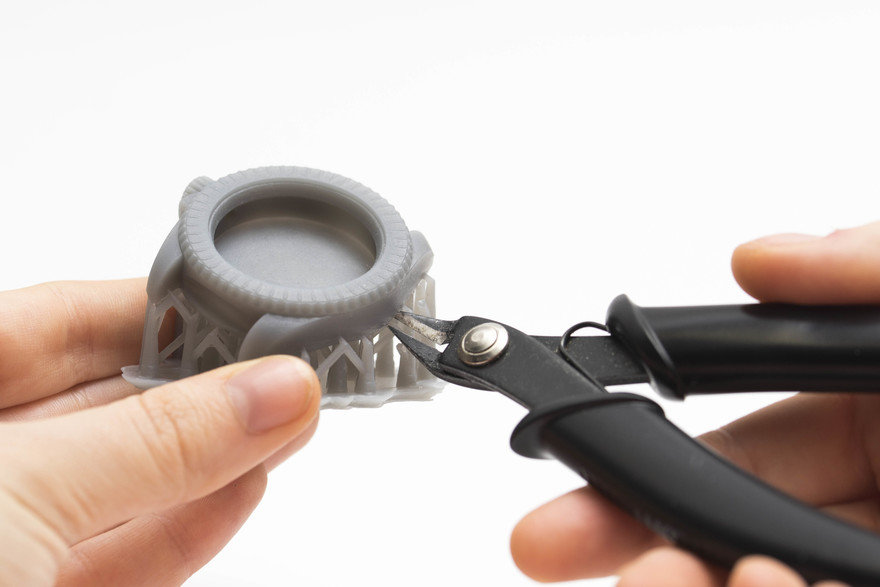 4‑0.5 mm) are stronger but leave more visible marks after removal. Support tip weakness usually comes from the fundamental bottom-up resin 3D printing action, i.e. newly printed layer peeling action from FEP film. Emerging forces during that peeling motion are really high. They greatly depend on cross-sectional area of newly “cooked” layer: the larger the area, the higher peeling forces.
And here comes the key moment. If during printing of an object layer peeling forces from FEP become way higher than forces holding an object on its supports, you have a failure. Keep in mind that quite often our 3D printing sessions can consist of thousands of individual layers and each of them puts some stress on all previously printed layers. See image.
That is what we want to avoid. Let’s get into some possible solutions.
6 key principles of resin 3D printing supports that work
Based on previously mentioned reasons for this issue, it is natural to come up with possible ways to solve this problem.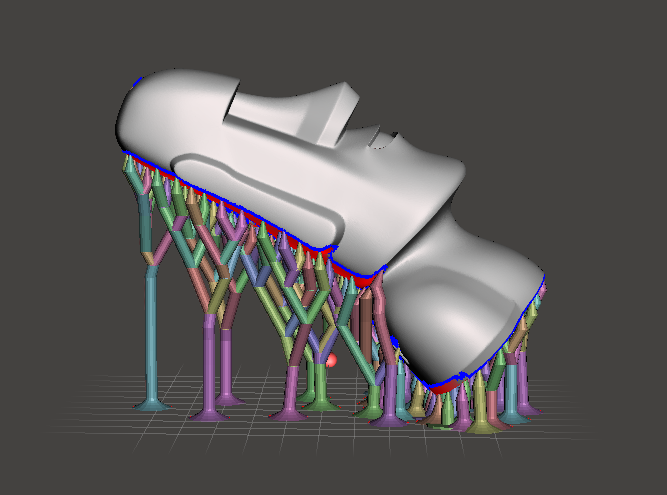 One can think that increasing density of supports or tip diameter will always help to avoid failures. That is partially correct, but answer is not that simple.
It is also worth mentioning that most people choose their own way based on past experience and personal preferences. There is no universal or correct way here. Every 3D print is somewhat unique and requires careful planning in order to get high success rate. Therefore, we will also share our own experience and guidelines that could be used. However, these also should be filtered out and adapted to different situations. Let’s look at solutions from various point of views.
1. Thicker support tips
We usually recommend thicker support tips, i.e. around 0.4–0.5 mm on average, over thinner ones (typically referred as 0.2-0.3 mm). Based on our experience, if one wants to print fast with high lift speeds (sometimes caller vroom 3D printing), supports with thicker tips are a safer way to go. Uncle Jessy covered Vroom printing in this video Vroom – Faster Resin 3D Printing – How To.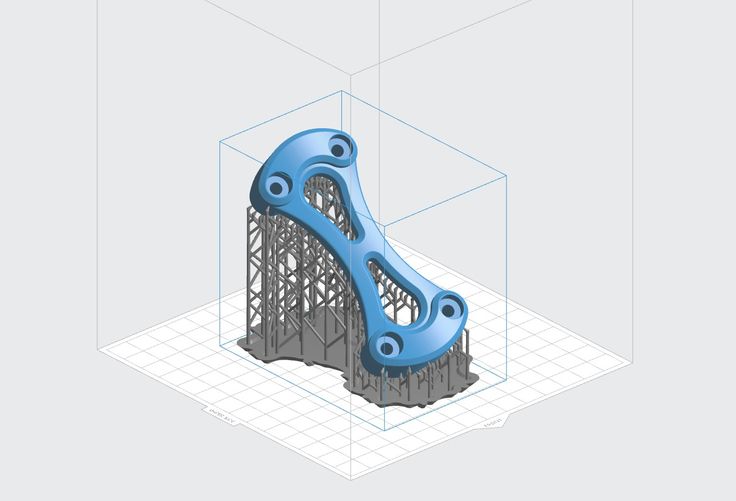 That does not necessarily mean that you should place just a couple of thicker supports and be done with it. We learned that resin 3D printing demands a lot of supports in order to get exceptional success rate and outstanding quality. Thus, you must tune support tips with density.
Moreover, the bigger and heavier the print, the thicker and denser supports you will need. This is especially important to consider with large resin printers like Phrozen Mega 8K.
Nevertheless, some situations still require very thin support tips. These typically are extremely intricate overhangs of models. In those situations, you have no other options. Still have a look at other strategies below and try to incorporate those in such situations to increase your chances of success.
2. High/Medium density of supports
If you use supports, you will always have visible surface marks. So why not use more supports then? If your plan is to get smooth surface, sanding will be necessary. Therefore, by adding additional supports you will not add so much of sanding work for yourself, but your success rate increase can be dramatical. Also, you can plan your orientation that surface with least importance gets heavily supported. This way you might get away with fantastic success rate and zero post-processing efforts. But remember that with increased density you will also increase consumption of material and removal of supports might sometimes be tricky.
3. Use software wisely
Quality of supports greatly depends on your chosen software package. Such programs like Meshmixer, Chitubox, Lychee or Voxeldance Tango allows you to modify almost all parameters of supports. By trying various configuration options and running experiments you can easily find a way that works best for your setup. Remember, that you do not have to stick to original 3D printing software provided by equipment manufacturer. You can import your STL to other software packages, add supports, export that updated STL file and use that on software that runs your machine.
One critical point here. Never fully rely on automatic support generation! Almost all such functions are not perfect and can be used as a starting point, but further analysis and manual adjustment must be done. This is extremely important.
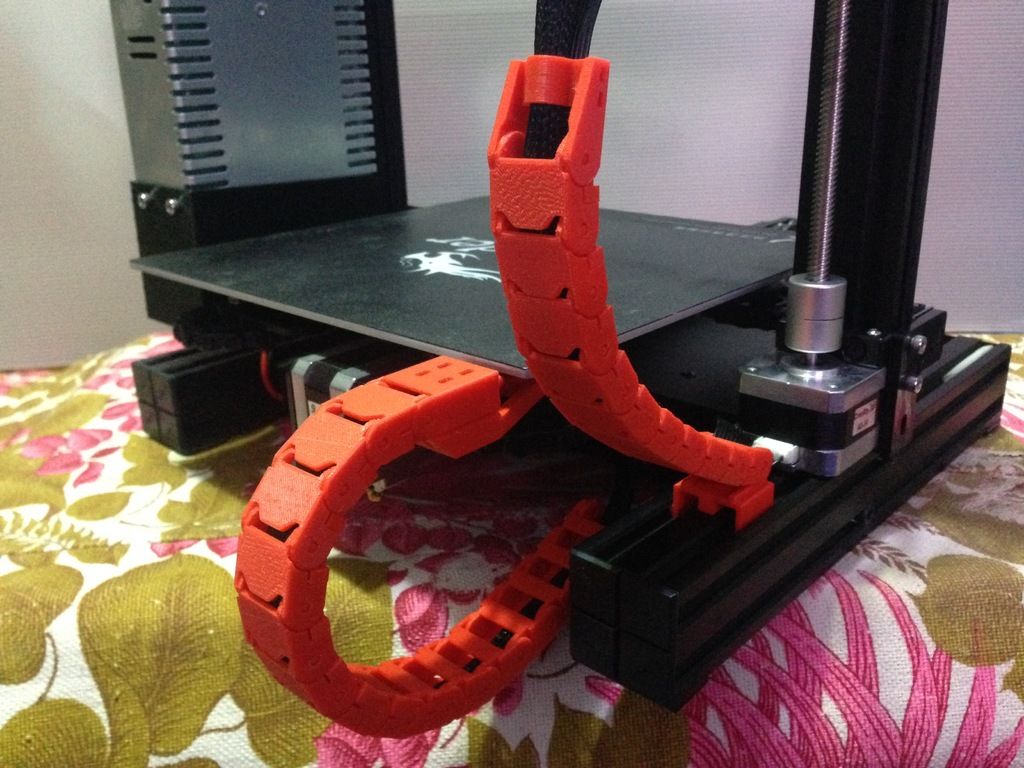
4. Interconnected supports
People often overlook this feature. If you use some third party software, keep an eye on those that allow you to bridge supports together instead of placing them individually.
Such connections among supports greatly reduce chances of support failures. This technique will produce stiffer set of base and secondary supports that are less prone to breakage and failures. However, that also leads to higher consumption of resin.
5. Consider SLA UV resin properties
Resin choice is an important subject here as well. We learned that if you are trying to obtain details of an object with as low number of supports as possible, harder resins work better. Such resins like our AMD-3 LED is specifically designed for 3D printing models with intricate details, which require careful and small-tipped supports. Harder SLA 3D printing resins do not flex severely during layer separation action from FEP film. Such rigidity ensures that even the tiniest features of the model will be preserved.
On the other hand, resins that have flexibility properties might require different tactics. Such resins work best with more supports and thicker tips in order to compensate their flexibility during 3D printing. Moreover, if you couple that with interconnected supports, you can obtain decent success rate with outstanding printing quality.
6. High quality FEP
Last, but not least is condition of your FEP film. We learned that new and fresh FEP film performs better than the one which has been used for a while. If you started to see unexpected failures, when you expected easy 3D printing session, consider checking your FEP film. If it is highly scratched, foggy or warped, go ahead and get yourself a new one. Also remember to take care of your FEP by using silicon spatula and avoid any sharp tools. We have various FEP sheets for both small and large resin printers in our shop.
Final words
Remember that the highest resin consumer is failure and not when you add some “extra” safety measures like supports to avoid it. Would you like to add something else to this list? Share in the comments bellow.
And if you have some spare time, check out check our shop and other blog posts:
- Experiment: 3D Printing Supports that Work
- Can IPA cause cracks on my 3D prints?
- How to Make Jewellery with Silicone Mold
- How to design parts for SLA 3D Printing
- Attachment Layer in SLA 3D printing: what you need to know
- 10 reasons why you get unexpected horizontal lines on your 3D printed parts
- Case Study: 3D printed button for Porsche steering wheel
Best AUTO Supports for Resin SLA 3D Printing (works for any printer) | by HalfBrainToys
The quickest way to get supports for your print to complete successfully
- PrusaSlicer will do the legwork.
Install it and configure it for MSLA:
- Your printer software (in this example for an Elegoo printer we’ll use Chitubox), it will finally slice the model.
A good orientation will optimize print time and reduce the need for supports. Open your model in PrusaSlicer, right click and select Optimize orientation.
Let’s try Optimize orientation on this great Mandalorian Miniature by VelrockThis orientation might be better, since supports will be mostly on the back, making it easier to clean without damaging the details in the frontTip: It can converge to different solutions, you can randomly rotate the model and try again and see if it comes up with an alternative positioning.
Click the SLA Support Points icon in the left bar, and hit Auto-generate points.
If you feel like the part will need either more or less supports, you can change the Support points density and the Minimal points distance. Also, you can manually add supports on specific points with Manual editing, and then clicking wherever you want supports added.
Click wherever you want new supports added and hit Apply changesTip: The shape of the supports can be tweaked in Print Settings > Supports. For instance, a larger Support head front diameter will prevent the supports coming off the part while printing, but will also leave more noticeable marks.
Hollowing the model will reduce the amount of resin used. However, that’s not even the biggest advantage!
A hollow object will have less area being cured at each layer (only the perimeter vs the full slice), and less area means less chances of your model getting stuck to the bottom and getting a failed print.
If the part is big, it might create vacuum like a suction cup, leading to the part again becoming stuck and failing to print. You can use this same tool and click the model to create holes that will prevent the creation of vacuum.
This is what makes this method valid for any printer no matter the maker. Once you are happy with the supports you got, you can export the part including supports and open that file in whatever software your printer works best with.
Export plate as STL including supportsAll you have to do inside the printer-specific software is positioning the part in the build plate, selecting the appropriate printer settings for the resin that you are going to use, and hit Slice!
Adjust print settings according to the resin you will use, and sliceWhen the model is sliced, you can go through the layers, and check that the auto supports did a good job, making sure no islands appear out of nowhere when you go up in the layer stack.
We’ve found that this method, through the awesome PrusaSlicer, gives the best results for the least amount of time invested in manual tweaks. This shortens our iteration times helping our designers create even crazier figures at Half Brain Toys (if you have good skills and ideas you might as well consider joining us!).
We hope this helps you too! Leave some claps if it did and tell us about it in the comments!
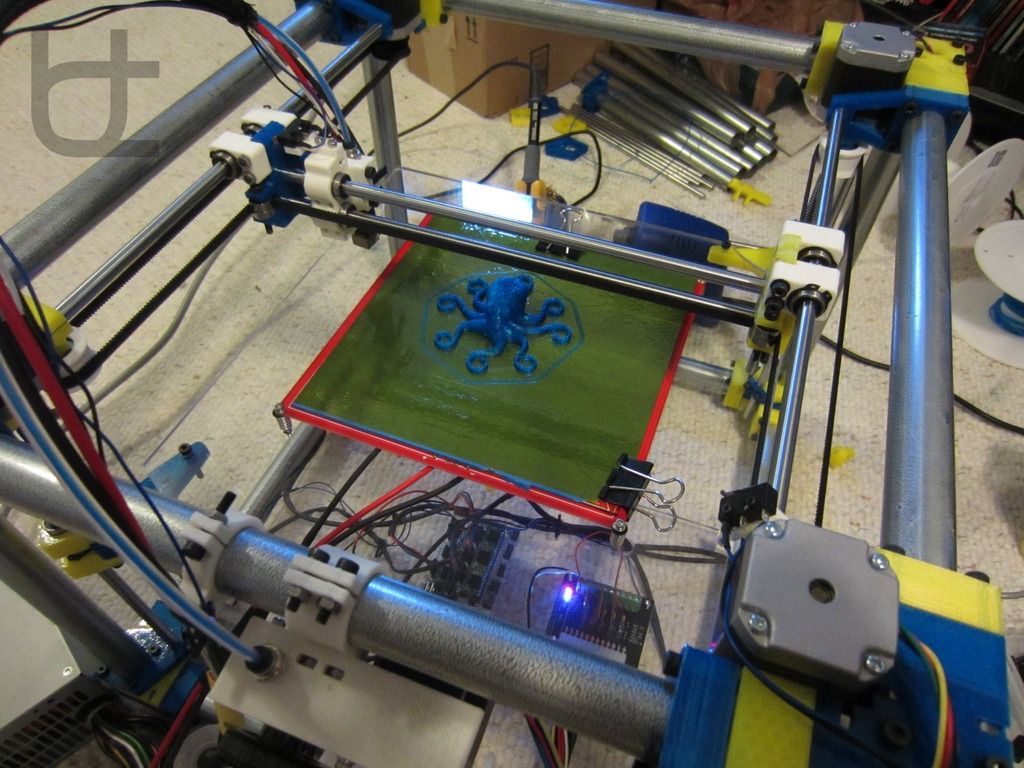
SLA Technology. How SLA 3D printing works.
Hello everyone, 3DTool is with you!
Today we will look at the basic principles of technology SLA . After reading this article, you will understand the main points of the printing process using this technology, the advantages and disadvantages of this method 3D printing .
On our website, you can find a list of 3D printers working on SLA technology, at this link: Catalog of 3D printers printing on SLA / DLP technology
Technology 3 D printing SLA
Stereolithography (SLA) is an additive manufacturing process that achieves the result by means of resin polymerization. In SLA printing, the object is created by selectively curing a polymer resin, layer by layer, using an ultraviolet (UV) laser beam. The materials used in SLA printing are photosensitive thermoset polymers that are available in liquid form.
SLA is known as the first 3D printing technology : its inventor patented this technology back in 1986 . When you need to print parts with very high precision or a smooth surface, the SLA comes to the rescue. In this case, it is the most cost-effective and efficient technology 3D printing . The best results can be achieved only if the operator of the equipment on which the printing process takes place is familiar with the technology and some of the nuances. That is, he has the necessary qualifications.
SLA shares many characteristics with Direct Light Processing (DLP ), another photopolymerization technology. For simplicity, both technologies can be considered equal.
SLA printing process
1) 2) 3)
1) A platform is placed in the tank with liquid photopolymer, at the same height from the resin surface.
2) The UV laser then selectively cures the required areas of the photopolymer resin according to a predetermined algorithm.
The laser beam is focused on a given path using a set of mirrors called galvos. Then the entire cross-sectional area of the model is illuminated. Therefore, the resulting part is completely solid.
3) When one layer is finished, the platform moves to a safe distance and the mixing foot inside the tub mixes the resin.
This process is repeated until the part is printed. After printing, the part is not fully cured and requires further post-processing under the UV lamp . At the end of UV illumination, the part acquires very high mechanical and thermal properties.
The liquid resin solidifies through a process called photopolymerization: during solidification, the monomer carbon chains that make up the liquid resin are activated by an ultraviolet laser and become solid, creating strong, inextricable bonds with each other.
The photopolymerization process is irreversible, and there is no way to convert the resulting parts back into a liquid state. When heated, they will burn, not melt. This is because the materials that are produced by SLA technology are made from thermoset polymers, as opposed to the thermoplastics that FDM uses.
Operation scheme SLA printer
Specifications SLA printer
On SLA systems, most print settings are set by the manufacturer and cannot be changed. The only inputs are the layer height and the part orientation ( last, locates the supports ).
The typical layer height in a SLA print ranges from 25 to 100 micron .
The lower the layer height, the more accurately the complex geometry of the model will be printed, but at the same time the printing time and the likelihood of failure will increase. A layer height of 100 microns is suitable for most common geometries and is the golden mean.
Another important parameter for the operator is the size of the platform. It depends on the type of SLA printer. There are two main types: orientation top to bottom and orientation from bottom to top .
In the first case, the laser is above the tank, and the part is face up. The platform sits at the very top of the resin vat and moves down after each layer is sintered.
Schematic SLA top-down printer
In " bottom up " layout on SLA printers , the light source is placed under the resin tank (see picture above) , and the part is built upside down.
The tank has a transparent bottom with a silicone coating that allows the beam of light to pass through but prevents the cured resin from sticking. After each layer, the cured resin separates from the bottom of the tank as the platform moves up. This is called the sintering step.
Schematic SLA bottom-up printer
The orientation " bottom to top " is mostly used in desktop printers like Formlabs. The " top - down " orientation is used in the industrial SLA printer .
Printers SLA " bottom-up " are easier to manufacture and operate, but the size of the possible print will be smaller, since the forces applied to the part during the sintering stage can cause printing to fail.
Top-down printers, on the other hand, can print very large parts without much loss in accuracy. The wide possibilities of such systems naturally cost more.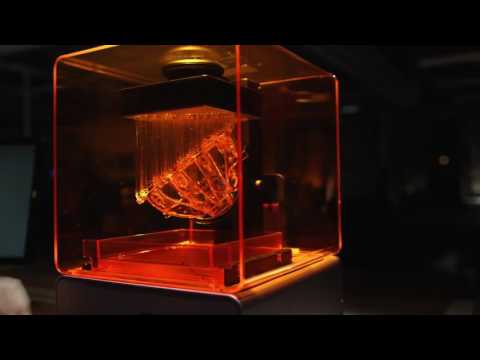
The following are the main characteristics and differences between the two orientations:
| "Top down " | |
| Pros: | |
| lower cost | |
| Wide market availability | |
| Minuses: | |
| Small platform size | |
| Smaller range of materials | |
| Requires additional post-processing due to extensive use of supports | |
Popular brands:
FORMLABS
Printable area: Up to 145 x 145 x 175 mm
Typical layer height and print accuracy: 25 to 100 µm and ± 0. 5% (lower limit: ± 0.010 to 0.250 mm) respectively
| "Down up" | |
| Pros: | |
| Very large platform | |
| Faster Print Time | |
| Minuses: | |
| High price | |
| Qualified operator required | |
| Material change involves emptying the entire tank | |
Popular brands:
PRISMLAB
Print area size: Up to 1500 x 750 x 500 mm
Typical layer height and print accuracy: 25 to 150 µm and ± 0.15% (lower limit ± 0.010 to 0.030 mm) respectively
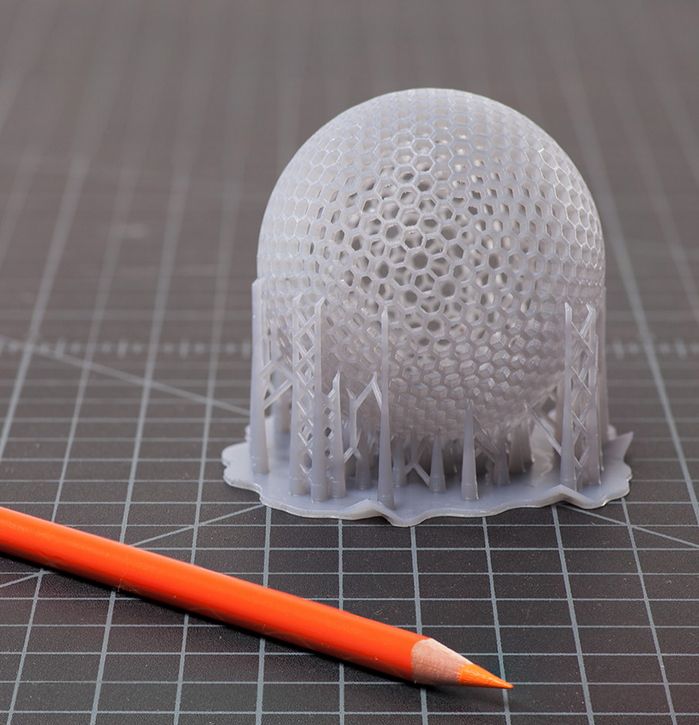
Support during printing 3 D
Supports are always required at Print SLA . Structural structures are printed from the same material as the part and must be manually removed after printing.
Part orientation determines the location and amount of supports. It is recommended that the part be oriented so that surfaces that require maximum quality do not come into contact with supports.
In different types of SLA printers, support is used in different ways:
For top - down printers , support requirements are the same as FDM . They are essential for accurate printing of overhangs and bridges ( the critical overhang angle is typically 30 degrees ).
The part can be oriented in any position and is usually printed flat to minimize the number of supports and the total number of layers.
In printers like " from bottom to top " everything is more complicated. Overhangs and bridges also need to be supported, but minimizing the cross-sectional area of each layer is the most important criterion.
Forces applied to the part during the sintering step can cause it to come off the platform. These forces are proportional to the cross-sectional area of each layer.
For this reason, the parts must be oriented at an angle, and minimizing supports here is not a primary concern.
On the left - a detail oriented on the SLA printer "from top to bottom" (support minimization).
On the right is a part oriented on the SLA printer "from the bottom up" (minimizing the cross-sectional area).
Removing supports for an SLA printed part
Curl
One of the biggest problems with the accuracy of parts made with SLA is curling. This problem is similar to the deformation in FDM when materials shrink.
During curing, the resin shrinks slightly when exposed to the printer's light source. When shrinkage is significant, large internal stresses develop between the new layer and the previously cured material, causing the part to twist.
Adhesion (sintering) between layers
SLA printed parts have isotropic mechanical properties. This is due to the fact that one pass UV beam is not enough to completely cure the liquid resin.
Further passes help the previously hardened layers to fuse together. In fact, in the SLA of printing, curing continues even after the printing process is complete.
To achieve the best mechanical properties, parts printed using this technology should be post-cured by placing them in a chamber under intense ultraviolet radiation ( and sometimes at elevated temperatures ).
This greatly increases the hardness and heat resistance of SLA , but does not make it stronger. Rather the opposite.
For example.
Test specimens printed with standard clear resin on a SLA desktop printer have almost 2 times tensile strength after curing ( 65 MPa compared to 38 MPa).
Can operate under load at higher temperatures ( 58 degrees Celsius, compared with 42 degrees ), but their elongation at break is half as much ( 6.2% compared to 12% ).
If you leave the part in the sun, then nothing good will come of it.
Prolonged exposure to ultraviolet radiation has a detrimental effect on physical properties and appearance. The part may curl, become very brittle, and change color.
For this reason, before using the part, it is recommended to apply a spray of transparent acrylic paint resistant to UV .
SLA media
SLA Printing Materials is available in the form of a liquid resin. The price per liter of resin varies greatly - ranges from $50 for standard material to $400 for specialty materials such as casting or dental resin.
Industrial systems offer a wider range of materials than desktop systems SLA printers, which give the designer more control over the mechanical properties of the printed part.
SLA materials ( thermosets ) are more brittle than materials made using FDM or SLS ( thermoplastics ) and for this reason SLA parts are not typically used for functional prototypes that will be subjected to significant stress. However, new advances in materials development may change this in the near future.
The following table lists the advantages and disadvantages of the most commonly used resins:
| Material | Features |
| Standard resin | + Smooth surface Relatively fragile part |
| transparent resin | + Transparent material - Requires post-processing for Presentable appearance |
| casting resin | + Used to create mold templates + Low ash after burnout |
| Rigid or durable resin | + ABS-like or PP-like mechanical properties - Low thermal resistance |
| High temperature resin | + High temperature resistance + Used for injection molding · - High price |
| dental resin | + Biocompatible + High abrasion resistance · - High price |
| Rubber-like resin | + Rubber-like material - Poor printing accuracy |
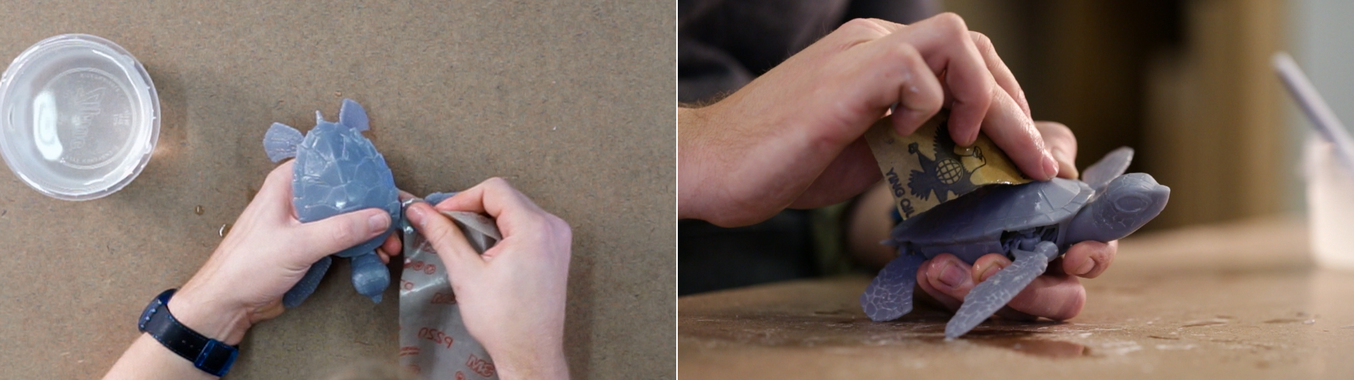
Post-processing SLA 3D printing
Parts printed with SLA technology can be processed to a high quality using various methods such as sanding and polishing, staining and mineral oil treatment. Widely developed articles about post-processing can be found on the Internet.
Transparent resin housing cover for electronics in various finishes. From left to right: removal of the main support, wet sanding, UV irradiation, acrylic and polishing
Advantages and disadvantages of SLA
Pros:
-
SLA 3D printers can produce parts with very high dimensional accuracy and complex geometries.
-
The parts will have a very smooth surface, making them ideal for visual prototypes, for example.
-
Special materials are available such as clear, flexible and cast resins.
Cons:
-
Parts printed using SLA technology tend to be fragile and not suitable for functional prototypes.
-
The mechanical properties and appearance of these parts deteriorate over time.
 They are adversely affected by exposure to sunlight.
 -
Supports and post-processing when printing are always required.
The main characteristics of the SLA are shown in the table:
materials
Photopolymer resins (thermosetting
materials)
Dimensional accuracy
± 0.5% (lower limit: ± 0.10 mm) - domestic
± 0.15% (lower limit ± 0.01 mm) - industrial
typical size
print area
Up to 145 x 145 x 175 mm - for desktop printers
Up to 1500 x 750 x 500 mm - for industrial
Total layer thickness
25 - 100 µm
Support
Always required
(Needed to make an accurate part)
Total
-
SLA print is best for producing visual prototypes with very smooth surfaces and very fine detail.
-
Desktop SLA 3 D The printer is ideal for making small, about the size of an adult's fist, injection molded parts. Moreover, such a printer can be purchased at an affordable price.
-
Industrial SLA 3 D printers can produce very large parts (up to 1500 x 750 x 500 mm)
Well, that's all we have! Thank you for being with us, see you soon. Further it will be more interesting!
You can purchase the 3D printers mentioned in the article , consumables for them, ask your question, or track the order, you can
-
By phone: 8(800)775-86-69
-
E-mail: [email protected]
-
Or on our website: https://3dtool.ru/
Don't forget to subscribe to our YouTube channel:
And to our groups in social networks:
In contact with
3D Printing DLP LCD SLA Photopolymer - Guide to Stereolithography
Stereolithography (SLA) is an additive technology, usually related to 3D printing, that allows, with the help of a light source, layer by layer, through selective exposure to As a result of photopolymerization, transform liquid materials into solid objects.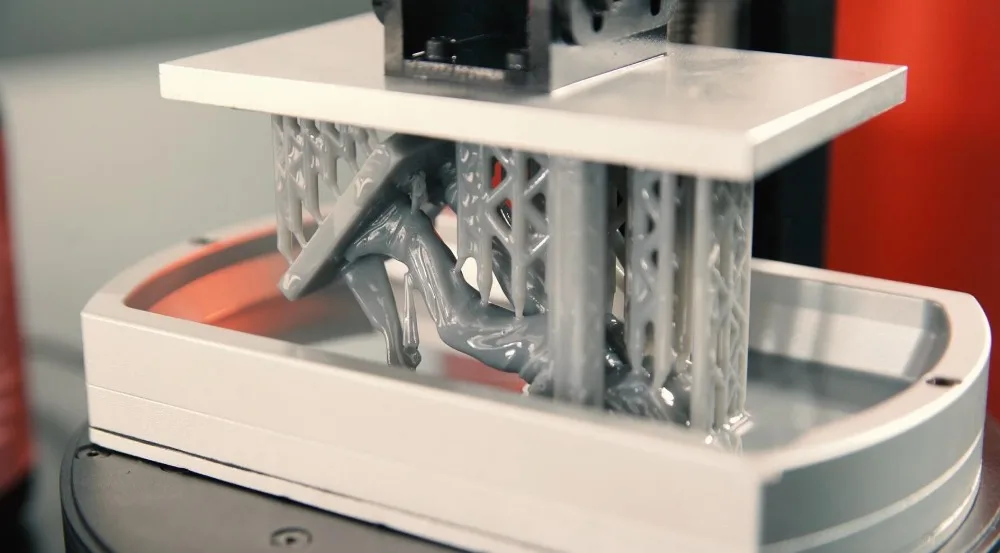 SLA is widely used to create models, prototypes, templates and finished parts in a number of industries - in industrial production, in dentistry, in jewelry, in modeling, in education.
In this comprehensive resource, you will learn about the different SLA systems, the different materials and their characteristics, and how SLA compares to other technologies available on the market.
A Brief History
The SLA process was first demonstrated in the early 1970s when Japanese researcher Dr. Hideo Kodama invented the modern layer-by-layer approach to stereolithography by using ultraviolet light to cure photosensitive polymers. The term "stereolithography" itself was coined by Charles (Chuck) W. Hull, who patented the technology in 1986 and for its commercial promotion founded the company 3D Systems. Hull described the technique as creating three-dimensional objects by sequentially printing thin layers from bottom to top with a material that is cured with ultraviolet light. The definition was later extended to include any material capable of curing and changing its physical properties.
Today, 3D printing and additive manufacturing refers to many different processes that differ in layer methods, materials and hardware.
The patent began to expire towards the end of the 2000s, at which time desktop 3D printers appeared on the scene and expanded access to the technology, offering to start with the introduction of fusing deposition (FDM) to desktop platforms. Although this low-cost, extrusion-based technology has contributed to the widespread adoption of 3D printing, the quality of the resulting parts has limited its use, as repeatable and high-precision results have proven to be critical in professional applications.
Prototypes of the Form 1, the first desktop SLA 3D printer
The SLA soon followed FDM's path to the desktop as well, with the technology appropriately modified by Formlabs in 2011. There was hope that high-resolution printing, previously only possible on industrial systems, would come in a much smaller form factor and at a more affordable price, allowing for a wide range of materials. These capabilities have made 3D printing accessible to a range of applications, including engineering, consumer goods design and manufacturing, dentistry, and jewelry.
SLA systems
SLA technology belongs to the family of additive bath photopolymerization technologies. Accordingly, SLA printers are built around this principle: a light source (an ultraviolet laser or a projector) is used to turn a liquid polymer into a hardened plastic. The main physical difference between the devices is in the configuration of the main components, such as the light source, work platform, and resin container.
How stereolithography works
Right-Side Up SLA Process
Right-Side Up SLA process units are built around a large liquid photopolymer tank and work platform. The ultraviolet laser is focused on the polymer surface, passing along the profile of the 3D model.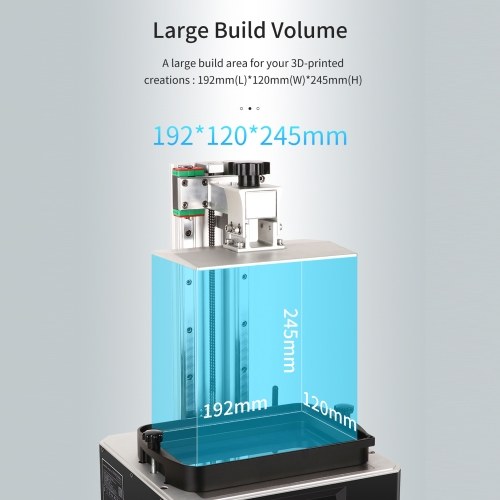 Then the platform is lowered a distance equal to the thickness of one layer, and the spatula with photopolymer passes over the bath to replenish it with material. Layers are built one on top of the other until the part is complete.
This approach is used mainly in large industrial systems and was the standard for stereolithography until the advent of desktop solutions. Its advantages lie in the ability to create very large 3D objects, low stress on the part during the printing process, high detail and clarity.
Due to the large plant size, maintenance requirements and volume of material, normal SLA systems require a large initial investment and are expensive to operate. The entire print area must be filled with resin, often 10-100 liters or more, resulting in a lot of maintenance, filtering and material replacement. Such machines are very sensitive to their position in space, any misalignment can cause the paddle with the polymer to overturn the part, i.e. to a fatal print failure.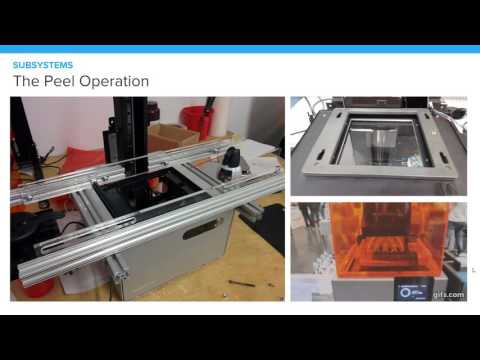
Upside-Down SLA Process
As the name implies, the inverted stereolithography process is the reverse process. This method uses a tank with a transparent bottom and a non-adhesive (to which it does not stick) surface, which acts as a substrate for the curable liquid polymer, allowing free separation from the newly created layer. The platform is immersed in the polymer tank so that there is a space to the bottom equal to the thickness of the layer or the last completed layer.
Through a system of mirrors, an ultraviolet laser beam is directed by two mirror galvanometers to a point with the required coordinates, focusing from below, through the bottom of the bath, onto the curable photopolymer layer. As a result of the vertical movement of the platform and the horizontal movement of the tank, the cured layer is separated from the bottom of the tank, and the platform rises, leaving a new layer of resin underneath. The process is repeated until the print is complete. In more advanced systems, the tank is heated to provide temperature control, and a paddle is run along the tank under the new layer to circulate the polymer and remove any semi-cured residue.
The advantage of this inverted approach is that the size of the created object can exceed the volume of the tank, since the apparatus only needs to have enough material to permanently cover the bottom of the bath. This typically facilitates maintenance, cleaning, material replacement, and significantly reduces machine size and cost, and allows SLA technology to be ported to desktop systems.
Inverted SLA systems have their own set of limitations. Due to the cohesive forces acting on the object as it separates from the tank surface, the working volume is limited and more and more support structures are needed to keep the part above the work platform. Adhesion forces also limit the use of more ductile materials, with a Shore hardness of less than 70 A, as the support structures also become ductile.
About support structures
Both normal and inverted SLA systems in most cases, depending on the design, require the use of support structures.
In normal systems, these structures hold the parts in position, ensuring that the material is correctly placed on them, as well as resisting lateral pressure during the movement of the polymer blade. In inverted SLAs, supports are used to attach overhanging elements to the platform, preventing layers from separating under the influence of gravity and adhesion.
Both SLA systems use support structures to secure parts to the work platform.
Most programs create their own support structures during the preparation of 3D models, but manual adjustment may be required. After the printing process is completed, these supports must be removed and the object subjected to finishing.
Comparison of SLA systems
| Desktop SLA Inverted | Industrial SLA Normal | |
| Price | From $3500 | $60,000 – $1,000,000+ |
| Displacement | Up to 145 x 145 x 175 mm | Up to 1500 × 750 × 550 mm |
| Pros | Affordable | Large displacement |
| Cons | Medium displacement | Expensive in materials Expensive equipment |
Comparison between Formlabs desktop SLA printers and 3D Systems industrial SLA systems.
Materials
SLA 3D printers are a tool, but it is materials that allow stereolithography to create a wide range of functional parts for various industries. In this section, we will look at the photopolymerization process and its raw materials, polymers, both in terms of their unique properties and in terms of various combinations for specific applications.
Polymerization process
Plastics are made up of long carbon chains. The shorter the chain, the less durable the plastic and the more fluid. A polymer is, in this case, a resin consisting of one or more (up to several thousand) short carbon chains. It has all the components of the final plastic, but is not yet completely polymerized. When such a resin is exposed to ultraviolet light, its carbon chains interlock, forming a longer and therefore stronger structure. After enough chains have reacted, a solid part is obtained.
Steps of the polymerization process
Let's take a closer look at the process. The chains of monomers and oligomers in a polymer have active molecular groups at their ends. When UV radiation falls on the polymer, the photoinitiator molecule breaks into two parts, and the bond connecting them forms two very reactive radicals. These molecules donate reactive radicals to the active groups of monomer and oligomer chains, which in turn react with other active groups to form longer chains. As the chains lengthen and cross-links occur, the plastic begins to harden. The entire process of transition from liquid to highly polymerized solid state takes place in milliseconds.
Characteristics of polymers and plastics
Different polymers consist of different main and side groups - different combinations of long and short monomers, oligomers, photoinitiators and additives. This provides unique opportunities to create various formulas with a wide range of optical, mechanical and thermal properties - from clear transparent to colored plastics, from flexible to rigid, from viscous to heat resistant.
Photopolymer resin formulation
| Component | Role |
| Monomers and oligomers | Polymer backbone, carbon chains that later form a solid. |
| Photoinitiator | Molecules that react when exposed to ultraviolet light to initiate a reaction. |
| Additives | Visual and functional additions such as pigments and inks. |
Isotropy and anisotropy
Due to the layered nature of 3D printing technologies, in some cases the properties of the object created in this way differ depending on the direction to a certain extent - this is called anisotropy. For example, a 3D printed object may have different tensile strength or stiffness in the X, Y, and Z directions.
During SLA 3D printing, polymer components form covalent bonds. This provides high lateral strength, but the polymerization reaction is not brought to completion. The printing process is modulated in such a way that the layer is maintained in a semi-reacted state, which he calls "green". The green state differs from the fully cured state in one important way: there are still polymerizable groups on the surface that form covalent bonds with the subsequent layer.
When this subsequent layer cures, the groups of the previous layer are involved in the polymerization reaction, forming not only lateral covalent bonds, but also bonds with the previous layer. This means that at the molecular level, in terms of chemical bonds, there is no or almost no difference along the spatial axes. Any continuous object printed using SLA technology is isotropic.
With SLA printing, there is no difference along the spatial axes in terms of chemical bonds. Any continuous object printed using SLA technology is a continuous polymer network.
Isotropy has both mechanical and optical advantages. Isotropic parts are ideal for prototyping as they reflect some of the properties of traditional injection molded thermoplastics and do not suffer from delamination and porosity. The formation of chemical bonds and the absence of visible layers within the object allow optically clear parts to be printed.
Post-curing
When the stereolithography process is completed, the printed part remains on the build platform in the aforementioned "green" state. Although it already has the final shape and appearance, the polymerization reaction is not completed, so that the mechanical and thermal properties are not yet fully formed.
UV printed SLA. UV curing completes the polymerization and stabilizes the mechanical properties. Photo: formlabs.com
Additional UV curing completes polymerization and stabilizes mechanical properties. This allows the part to achieve the highest possible strength and become more stable, which is especially important in the case of functional plastics for engineering, dentistry and jewelry. For example, successful burnout in a printed mold requires post-cure, and flexible parts also become stronger after post-cure.
Thermoset and thermoplastics
Photopolymer resins are thermoset plastics - as opposed to thermoplastics. Sounds similar, but features and applications can vary significantly. The main physical difference is that thermoplastics can be repeatedly melted to a liquid state and cooled back to a solid in different geometries, while thermoset plastics remain permanently in a solid state after post-cure.
The polymers in thermoset plastics cross-link with each other during the post-cure process, forming virtually irreversible chemical bonds. In the case of the most common thermoset plastics, post-curing is carried out by appropriate irradiation, often under high pressure; in stereolithography, this process is excited by light with the participation of a photoinitiator. The thermoplastic granules soften and liquefy under the influence of temperature, and the process is completely reversible, since chemical bonds are not formed.
SLA Materials by Application
Stereolithography materials are typically created for specific applications or industries. Due to the nature of the techniques and processes used, proprietary materials are usually of limited use in specific SLA systems. Below, we'll introduce Formlabs' selection of desktop SLA printer media.
Standard
Replacement camera made entirely of Standard polymers, including optically clear lenses. Photo: formlabs.com
Standard resins provide high resolution, fine detail and a smooth surface right out of the printer. While post-cure is recommended, it is not always required, making these resins ideal for rapid prototyping, product development, and general modeling.
Engineering
Engineering resin printed objects, including thermoforming and injection moulds, shoe insole and consumer goods. Photo: formlabs.com
Engineering Polymers simulates a variety of molded plastics, helping designers and designers with concepts, prototypes, test pieces, and finished products. With characteristics such as strength, wear resistance, flexibility or heat resistance, these plastics are used to create prefabricated and solid functional objects, touch surfaces, consumer goods.
Dental
Dental resin model, biocompatible dental implant printed on Form 2. Photo: formlabs.com
Dental materials allow dental laboratories and clinics to create a variety of personalized dental products on site. Such products are modeled according to the results of computed tomographic scanning of the patient's oral cavity. Specific applications include orthodontics, diagnostics, teaching models, as well as biocompatible items such as surgical instruments and drill guides.
Jewelry
Castable resin jewelry and finished ring. Photo: formlabs.com
SLA is ideal for prototyping and molding fine detail jewelry. Conventional modeling resins are recommended for prototyping to create low cost fittings and test pieces to match customer requirements before the part is cast. Castable resins are designed directly for mold making, enabling jewelers and foundries to move from digital design to 3D printing straight away.
Experimental
Soap dish printed with Ceramic resin and refinished for a particularly aesthetic look. Photo: formlabs.com
Different formulas of polymers with additives and composites open up new possibilities for creating experimental materials. The Ceramic polymer allows, after further processing, to obtain aesthetically looking objects that are indistinguishable from traditional ceramic. After firing, the printouts turn into pure ceramic, ready for glazing.
Benefits of a Desktop SLA Printer
To help you decide if the SLA process is right for you, we compare stereolithography with traditional manufacturing methods and other additive technologies.
High resolution and smooth surface
SLA technology immediately produces parts with a finished smooth surface. It is ideal for applications that require a perfect finish and reduces production time as parts can be easily refinished, polished and painted if desired.
The usual way to determine the resolution of a 3D printer is to look at the layer height (vertical thickness). On the Form 2 printer, it can be set from 25 to 100 microns, taking into account speed and quality. For comparison: FDM and SLS printers have a characteristic layer thickness of 100 to 300 microns. But 100 micron parts printed on an FDM or SLS printer look different from SLA parts printed at the same resolution. SLA prints have a smoother surface immediately out of the printer due to the fact that the walls of the outer perimeter are smoother due to the interaction of each printed layer with the previous ones, which smooths out the ladder effect. Layers can often be seen in FDM printouts, while SLS has a grainy structure from the sintered powder.
Rooks printed at 100µ layer thickness on benchtop and industrial FDM, benchtop SLA (Form 2), industrial SLA and industrial SLS. Photo: formlabs.com
The minimum possible detail is also less in the case of SLA: 140 microns from the laser spot for Form 2, 350 microns for industrial SLS printers, 250-800 microns from the nozzle of FDM machines.
Learn more about 3D printing resolution
Accuracy and repeatability
SLA printers can create precise, repeatable parts. This is especially important for functional applications such as design assemblies, jewelry molds, or scanned dental products.
The combination of the heated plastic tank and the enclosed space in which the print is made provides nearly identical conditions at every point. Greater accuracy is also due to the lower printing temperature compared to thermoplastic technologies that melt the raw material. Because SLA uses light rather than heat, the printing process occurs at nearly room temperature, and printed objects are free from thermal expansion and contraction artifacts.
In general, SLA print accuracy is between 50 and 200 microns, depending on size, resin, model geometry, and generated supports. In recent tests on the Form 2, 95% of printouts had size deviations of 240 microns or less.
Design freedom
SLA offers the greatest design freedom of any 3D printing technology. Depending on the geometry of the part, concave and convex elements can be made with an accuracy of 300 microns or better. This is especially important for complex applications such as sculptures with small elements and fine jewelry.
In the case of stereolithography, there is no need to adapt the model for 3D printing. Prototypes can be designed with production in mind. This ensures a seamless transition from prototype to traditional technologies such as machining or casting.
SLA printouts are easy to clean and finish. The internal ducts in the plastic are easily flushed out, allowing the creation of microchannels or cavities not possible with any other 3D printing process.
Fluid flow and mixing microchannels printed with Standard Clear. Photo: formlabs. com
Rapid prototyping with rapid iterations
Stereolithography helps engineers and designers quickly improve the look and feel of a project. Mechanisms and designs can be checked and modified without problems within a few days, which greatly helps to speed up development and avoid expensive tooling.
Successive iterations of Sutrue, an automated surgical instrument prototyped on Formlabs SLA printers. Photo: formlabs.com
Desktop SLAs are highly scalable, dramatically increasing performance and reducing user wait time. Teams working in different locations can work independently on the same project, sharing physical objects through digital channels and printing them on the same printers.
Functional parts for a wide range of applications
SLA plastics offer a wide range of features that are suitable for applications from engineering to dentistry and jewelry. Materials can be heat-resistant, biocompatible, optically pure, and meet the parameters of engineering plastics.
The chemical bonds formed between the layers of the SLA object allow the creation of completely dense, water and air tight parts that are isotropic, that is, have equal strength in all directions.
Pricing and Benefits
Accurate prototypes, fast iterations, and early error detection all lead to a better bottom line and reduce risk when moving from prototyping to production. In industry, SLA technology reduces the need for expensive machining by making small batches and customized products available. This also applies to the construction of bridges, and the manufacture of jewelry or dental products.
Industrial SLA printers start at $80,000 and require trained personnel and a mandatory service contract. SLA desktop printers offer the quality and functionality of industrial systems while being easy to use, in a small footprint. They cost from $3500.
Compared to outsourced ordering or traditional machining, home 3D printing reduces costs by 50-90% considering materials, tanks, accessories, maintenance, labor and wear. In the case of desktop SLAs, the characteristic time for obtaining a result is hours, not days or weeks, as when ordering the same project on the side.
Technology Comparison
There are three common plastic 3D printing technologies today. In layer-by-layer deposition (FDM), thermoplastic filaments are laid out on a work surface, in stereolithography (SLA), a liquid photopolymer resin hardens under the influence of a light source, in selective laser sintering (SLS), a powdered material is sintered by a laser.
Each technology has its own advantages and disadvantages, so each is recommended for different applications.
| FDM | Stereolithography (SLA) | Selective Laser Sintering (SLS) | |
| Pros | Fast | Great price | Robust functional parts |
| Cons | Low accuracy | Limited modeling space | Expensive equipment |
| Applications | Cheap Rapid Prototyping | Functional Prototyping | Functional prototyping |
| Price | Mid-range desktop printers from $2000, industrial systems from $20,000. | Professional desktop printers from $2000, large scale industrial systems from $80,000. | Industrial printers - from $100,000. |
Printing process
Now that we know the theory behind stereolithography, let's look at the printing process on a desktop SLA printer.
Project
Use a regular CAD program to design your model and export the result to a printable 3D format. Photo: formlabs.com
As with any other 3D printing process, SLA starts with 3D modeling, the mathematical representation of a 3D surface. This can be done with a CAD program or based on 3D scan data. The model is then exported to a .STL or .OBJ file that is understood by the program that prepares the data for the 3D printer.
Preparation
Prepare your model in SLA 3D printer software. Photo: formlabs.com
Each SLA printer comes with a program for setting print parameters and cutting the digital model into layers for printing. In the settings, you can change the orientation of the object, support structures, layer thickness and material. When setup is complete, the software sends instructions to the printer wirelessly or via cable.
Printing
Stereolithographic printing process. Photo: formlabs.com
After a quick confirmation of the correct settings, the printing process begins, and the printer can be left to itself until the job is completed. In printers with a cartridge system, material is added automatically, in other cases and with large volumes, this may require intervention.
Cleaning
Clean printout with isopropyl alcohol (IPA) to remove uncured plastic. Photo: formlabs.com
When the printing process is complete, the build platform can be removed from the printer. The printout should be cleaned with isopropyl alcohol (IPA) to remove uncured plastic from the surface.
Hardening
Post-harden part to improve material quality.