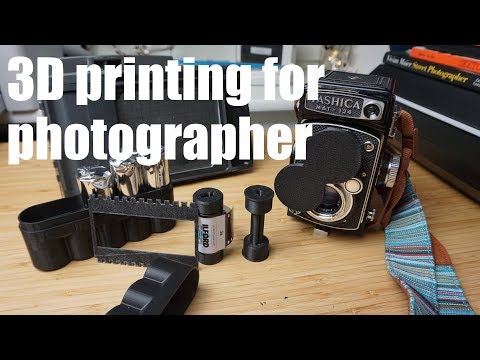
3D printing for photographers
3D-printed Photo gadgets for everyone
Apparently, you can find quite a lot of amateur and professional photographers in the 3D printing community. And a lot of them have already had the idea to use their 3D printer to make various gadgets and accessories that are either expensive or hard to find. You can produce some amazing things that will make it easier to take better photos for everyone. In this article, we are sharing some of our favorite projects and simple tips that will simplify things, save money, and generally let you have more fun.
Camera backpack mounts
There are many accessories that can be mounted on your backpack, for example, a GoPro mount. But you can also print this cool camera mount that can carry even a heavy DSLR camera. This mount is especially useful for wildlife photographers who need their camera always ready and wearing it around your neck the whole day is rather uncomfortable. If your camera is on the heavier side, make sure to test that the printed part is strong enough to hold it (e. g. shake it in the mount above something soft, like a blanket) or secure it with a strap.
Flash OCF grids and diffusers
Another cool improvement for your camera that can be made easier with our printers is a flash diffuser. Lots of photographers often improvise with folded pieces of paper or other, often very creative ways. Thanks to 3D printing you can make effective and professional-looking diffusers. Plus, you can make them cheaply and in no time. Try to experiment a little with transparent filaments and you can achieve some interesting results. We have already covered printing with translucent and transparent materials in great detail in our recent article.
And if you want to improve your photos in an unconventional manner, try to print an OCF grid for your flash that will narrow the source of light. A store-bought product might cost you about 100 USD, however, a 3D printed part will cost you just a few cents.
The Lens Filter Wrench Set
If you use filters during your photoshoots, you might have realized at an occasion that you have tightened them too much.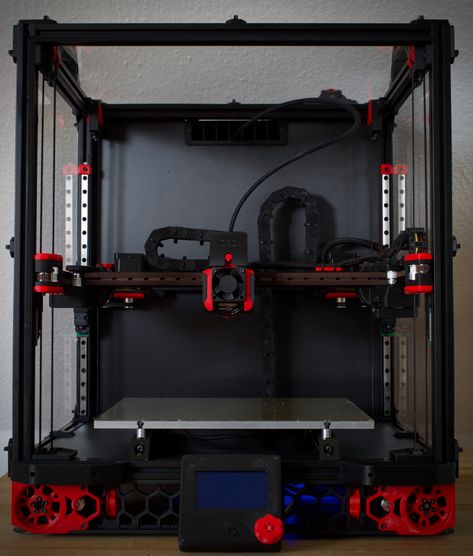 One of our colleagues came up with this amazing idea that solves the problem elegantly. It’s a quick print that requires just a short piece of a filament strand.
Lens hoods
Original lens hoods tend to be very expensive. Again, they can cost you something between dozens and hundreds of USD. However, if you print them, it won’t cost you more than a few bucks, plus you can produce them pretty quickly. Of course, the result won’t be as tough as the original lens hood but that shouldn’t be a problem. After all – you can always print a new one.
Lens Cap Holders
Another cool gadget that will save you some money and stress is this simple lens cap holder. Lens caps are easily lost and it’s an inconvenience and an additional expense to buy them again. Some cameras have lens caps hanging on a short string, but they can sometimes get in the way (in the wind for example). It’s much better to print this holder that can be attached to a strap. Simply put it on your bag to make sure you won’t lose your lens caps again.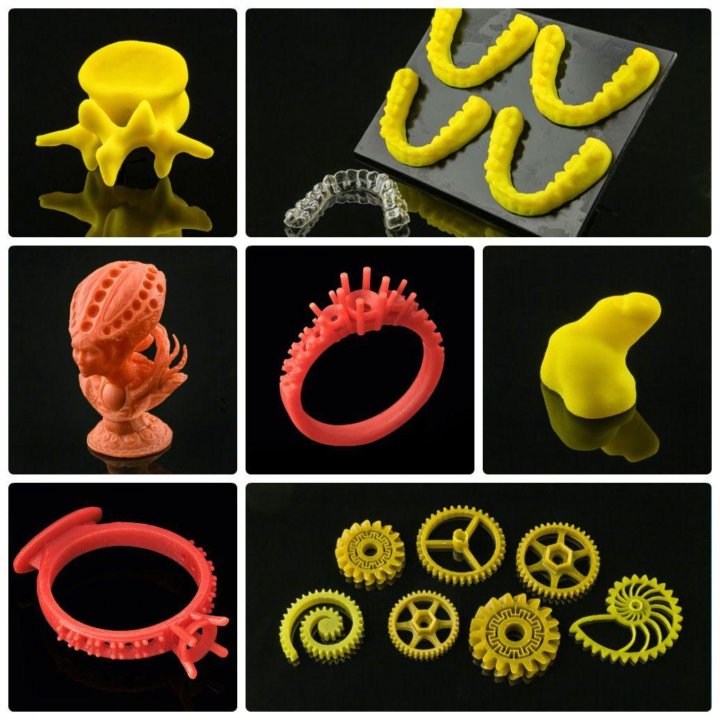
Various GoPro mounts
Thanks to 3D printing you can make a whole set of non-standard parts that are not sold by the official manufacturer. Depending on your requirements for toughness, the number of suitable models available online can be pretty high and there’s a lot of projects to choose from. We recommend printing various GoPro mounts with flexible and resilient materials. One of the toughest (but also one of the most difficult) materials is Flexfill 98a. A suitable alternative is PETG, PC Blend, and other filaments designed for printing mechanical parts.
Cases for SD cards, batteries and other equipment
These everyday items are great not only for photographers but for the vast majority of people. You know the situation when you try to find 4 batteries in your backpack, find only three and the last one is somewhere deep in the pocket. To reach it, you need to empty half of your backpack. Well, you can make it a lot easier with our printer: You can make an unlimited amount of various boxes that will save you from backpack chaos. And it doesn’t end with battery boxes. For example, you can print SD card holders, lens filter boxes, or protective cases for your lenses.
Tripods
Several simple tripods can be found at PrusaPrinters.org or Thingiverse. Most of them are made for smartphones but you can also find some models that are able to support the weight of a compact camera or ultrazoom. We found these three tripods to be quite useful – they can be printed quickly and weigh almost nothing:
The first one (black and orange) is obviously the sturdiest and can carry a device bigger than a phone or GoPro camera. The orange ring serves as a locking mechanism for the legs and although it is not strong enough to carry a heavy DSLR camera, it works well for light-weighted cameras. The holes inside the tripod’s legs also make it easy to hang it somewhere.
The second tripod (grey in the middle) is one of the most space-saving photo-stands we were able to find. However, its hinges are rather fragile so it’s made only for the lightest of cameras.
The third version (on the right) needs a few adjustments when sliced. The wing nut size should be increased to 105% to fit properly on the screws. Or, even better, you should use metal bolts and nuts instead of using the printed ones. The rest of this tripod fits tightly and makes a great phone stand. This tripod is compact and it’s easy to hang from the hooks. Unfortunately, this tripod cannot support a full-size camera.
Some of the tripods feature 3D-printed screws for attaching a camera. However, we advise against using plastic screws: If you accidentally break them off with the attached camera, you will have difficulty removing the broken part from the socket. Instead, you should make (or find) such tripods that have a hole for a metal screw. Because screws commonly used to attach a camera come with a specialized thread (compared to standard M5 bolts), you will buy them online or find them in a good hardware store.
Please keep in mind that 3D printed tripods will never be quite as durable as professional products. Especially, various locking mechanisms and moving parts tend to be more fragile. However, our Original Prusa 3D printers can still produce some really nice, cheap, and compact tripods.
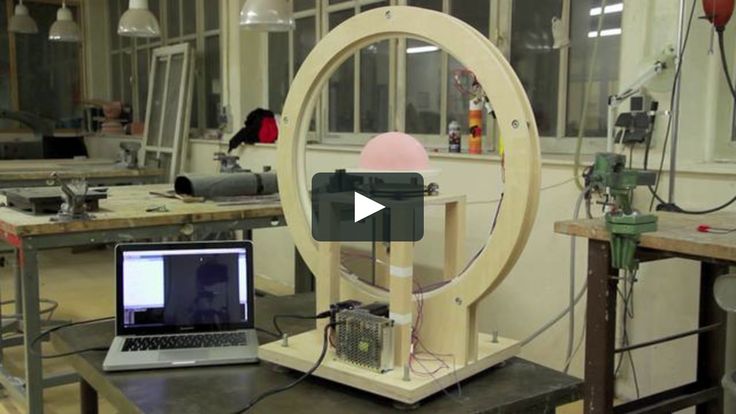
Timelapse slider
Professional time-lapse sliders are usually pretty expensive, large, and heavy. Luckily, we live in a time when a lot of parts (including Arduino and similar computer boards) can be bought for just a few dollars. With these, you can create a professional slider with just a little effort. There are several models available at PrusaPrinters that can help you with that. The slider we use for some of our videos has just a few 3D printed parts but you can make models that are almost entirely 3D-printed. For example, this simple slider needs just a few marbles.
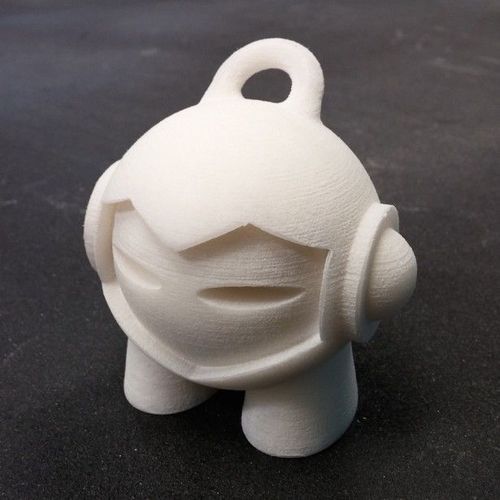
Props
You can find a lot of models online that will help you to make your photos more interesting. For example, you can use this sci-fi-looking artifact that can be used not only for LARP gaming but also as a stylish prop.
A lot of photo gadgets have two main benefits: They don’t require any tiny 3D-printed parts, therefore they are easy to print and often quite tough. Plus, 3D-printed solutions can save a lot of money. No matter whether you are an amateur or professional photographer, we hope this article provided you some inspiration to print something new for your next photo adventure. Just don’t forget to share the result online.
And as always: Happy printing!
Photography best 3D printer files・Cults
35mm film casette crank
Free
120 and 35mm film scanning mask
Free
Compact and foldable camera tripod
Free
Background stand to photography
€0. 50
50
Lamborghini Diablo SE30,1994, 1995,Sportcar Supercar,Ready to Print,STL File,3D Printing Car,High Quality 3D,Digital Product
€14.59
Icona Vulcano Titanium 3D Model Ready to Print,STL File,3D Printing Car,High Quality 3D,Digital Product
€12.65
Photographic Tripod Ball Head
Free
Canon Timelaps rig
Free
Flat support for semicircular lithophane.
Free
Flat support for linear lithophane.
Free
Film Guide - Canoscan 5600F
Free
Filter Case for 77 mm Thread
Free
Nikon 1 Macro Extension Tubes
Free
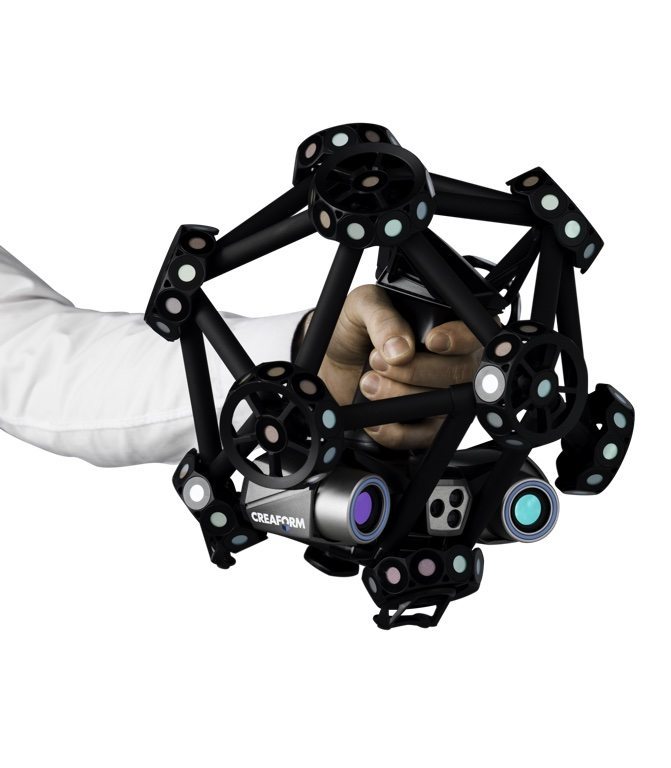
Automated 3D Scanner
Free
Mintion BeagleCam Photographic Support
Free
Olympus Xa Adapter for mount Filter Circle 55mm
€0. 59
59
Industar-69 to EF-M adapter
€10.21
Fan Art Tiffany Valentine Child's Play
€18.34
Child's Play 2 Jack in a box
€9.65
Nikon DX F-Mount Pinhole Lens
Free
Sony ECMCS3 mount for camera hot-shoe.
Free
Light Stand Camera Adpator
Free
TAYRONA 360: Universal Panohead for all mobile models + Street View Google
Free
Gremlins 2 Bullet Gremlin
€9.65
Critter Krite open mouth haired
€9.65
Square lamp with 5 lithophanes
€0.74
GoPro pole surfboard mount
Free
Analog Slit-scan Camera transformation set
Free
Telescopic boom microphone stand
Free
Softbox Light Wall Holder
Free
Photography paper darkroom tongs v2
Free
6x7 Omega film carrier V1
Free
Portrait / picture photographs FRIENDS
€10
Halloween pumpkin
€43. -98% €0.87 54
54
Coldshoe Tripod Adapter
Free
Yashica 44 retro camera
€2.50
Antique film reel camera
€1.50
i1Display Pro Dock/Holder
Free
Lightproof 16mm Film Dispenser
Free
16mm Negative Carrier for Enlarger with Reel Holders
Free
Shaffer Linear Processor v3
Free
Diffuser for Neewer CN-160
Free
Creative Photo Aperture/Bokeh Maker
Free
Concentric Shapes
Free
Customizable Photo Filter Mount/Holder
Free
lens support
Free
MIGHTY-7200 Photogrammetry Turntable Sequencer
€9. 65
65
Safelight Stand
Free
Why does a photojournalist need a 3D printer / Sudo Null IT News
Hello everyone! We share a case of using the Raise3D N2 3D printer by our client, the Photmas photo workshop.
Having been in professional photojournalism for more than 20 years, we know that today's standards for photojournalism place high demands on the speed of transmission of materials to the editorial office and on the variety of shooting points. These problems can be solved with the help of modern technologies and additional equipment that helps to install and control cameras in places inaccessible to the photographer. However, there are many niches on the market for accessories that have helped solve these problems. Most often, photographers construct such things on their own, and they do not go beyond "homemade". We decided to take this problem seriously and concentrated on the development, design and manufacture of accessories that make it easier and easier to work with remote cameras.
Our photo workshop Photmas.ru was born gradually. It all started with a big project - the development of the DKV identikit, with which you can mount the camera in almost any inaccessible place, control it from a distance, receive broadcast from the viewfinder and the photos themselves on a remote computer online. To date, the robot has already been successfully tested at many major sporting events, two copies were bought by a major news agency.
DKV identikit installation at VTB Ice Palace in the Park of Legends
Installation of DKV identikit at the Otkritie Arena (Spartak Stadium)
When developing the first version of the DKV identikit, we ordered the production of all parts on the side. But it was a long and expensive journey. All parts are test and trial - changes are constantly made to them, and when outsourced, you have to pay for the part made, even if by the time it is made (which can take up to a week) it is already clear that it will not be the same. It became obvious that it was necessary to buy their own equipment. At that time - 3 years ago, 3D printers were already present on the market, but the market itself was rather immature. Therefore, we decided to wait a little with the printer and bought a router first.
Photographs taken using equipment made by the Photmas photo workshop
Gradually, we have other developments - equipment that facilitates the work of a news photographer in remote cameras (buttons and pedals of remote control, camera locks, hockey boxes, etc.). However, a milling machine cannot replace all methods of creating parts, moreover, often we only needed test prototypes, which are not rational, and sometimes simply impossible, to grind on a router. The milling cutter is noisy, dirty, any change in the part requires adjustment of the control program, and this is the time. The classic struggle of the additive method against the subtractive one. In other words, what is easier and faster - cut or stick. And I had to go back to the idea of buying a printer.
Photmas.ru workshop equipment: Raise 3D N2 printer, CNC milling machine, thermal designer (plastic bending device).
The printer was chosen for a long time. For us, it was very important to have stable print quality, the presence of two nozzles that allow printing complex parts with soluble supports, a closed chamber for printing with ABS plastic and a large desktop size. We chose from several models - we considered both Chinese and Russian manufacturers. However, in the end they chose Raise3D. In addition to the announced functionality, reliability and price, high-quality and friendly technical support was also important for us - we chose not only the brand, but also the supplier, hoping to find a good partner for the future.
DKV Fire remote control device and its installation during the 2017 Confederations Cup.
somehow awkward - how much he stood out with his metrosexuality, style and glamour.![]() However, looking ahead, let's say that in difficult and rather dusty conditions next to the router and circular saw, the printer does not experience problems.
However, looking ahead, let's say that in difficult and rather dusty conditions next to the router and circular saw, the printer does not experience problems.
Printing parts of the body of the DKV-Fire device
The ideaMaker software for MAC, which comes with Raise3D, was not difficult to master - control via Wi-Fi, presets, auto-updates, visible print areas ... MACh4 with self-written G-code scripts on the screen with lower SVGA resolution, all of the above seemed just a cosmic achievement.
However, the devil is in the details - in our case, this important detail was the heated table: at first (pardon the pun) these very details simply stuck to it tightly. And we were glad that they stick so well with us - usually the problem is that everything comes off ... However, we soon realized that you just need to cool the surface and the part can be easily removed. But as soon as we dealt with this, the real problems with sticking began. We tried a huge number of solutions and techniques (a kind of “dancing with a tambourine”): sugar solution, kvass, and different types of beer. In the end, we came to abs-juice - a solution of abs plastic in acetone. On what we have been living for the last six months.
DKV Flash remote shutter button and club photojournalist of HC Dynamo (Moscow) Sergey Babunov, who equipped his camera with a button.
Printer quality is good. We make cases of our products on it, for example, DKV-FLASH release buttons or DKV-FIRE remote control devices. Buttons are small - and they can be printed 5-6 pieces at once, but Fire - objects are more complex. It takes more than a day to print all the details of 1 case. This summer we had a large order for this product - and it had to be done in a short time. Every day after work in Moscow, I had to come to a workshop in the Moscow region, put the printer on print, go to bed, remove the part in the morning and install a new print before leaving for work. In this almost continuous mode, the printer worked for almost 2 weeks - the quality was consistently good.
Video camera for the DKV robot, which transmits the image from the camera's viewfinder. 5 parts printed on Raise 3d, adjustable retractable lens hood.
I must say that Raise3D is quite friendly to its customers. The head office released a firmware with support for the Russian language (although Pushkin's language, as usual, is 30% longer than Byron's, and some of the inscriptions on the buttons and menus turned out to be abbreviations in the spirit of Newspeak of the 1920s), however, a few comments and suggestions made by us on the forum support has been taken into account.
"Tsvetnoy Mir" is also very efficient - "cartridges" in the form of plastic or spare parts are delivered due to successful geography in just a few hours.
During the operation there were 2 serious breakdowns, but thanks to the CM, the downtime was in each case a couple of hours.
Limit switch broke for the first time. Most likely it was a marriage. It just fell apart and the printer, not finding the limit switch, began to hammer with the extruder and nozzles on the model and the walls. Fortunately, this was noticed immediately and it was de-energized. The repair, that is, the replacement of the headscarf with the switch, took the notorious couple of hours and work resumed.
The second problem after night printing was a blockage in the right HIPS nozzle. An attempt to clean it using the standard methods described in the user manual and on the support site did not help, and when disassembling for washing (it was supposed to be washed with Lemonen), the nozzle broke - it coked and boiled so much. And again, the delivery of parts took only a couple of hours.
As already mentioned, printing is done mainly with ABS plastic with HIPS supports. All ESUN materials. There were practically no problems with the thread. Printing goes either directly on the glass with ABS juice, or on the raft, if you need some roughness on this side. Models with a layer thickness of 0.1 look and feel much nicer, of course, but the print time increases significantly compared to 0.25, so the usual print mode is still 0. 25.
25.
A couple more nuances. The plastic from a freshly spool can get swamped around the shafts on which the spools hang. The program start G-code can be corrected so that the nozzles do not try to cling to the clips that secure the glass. It's in theory. We did not do this, we saved time and simply moved the leftmost clip to the right.)
It is convenient to align the nozzles along Z not only with the help of the gauge that comes with the printer, but more accurately and with the help of cigarette foil - a method traditional for milling cutter and his smoking operator.
Hidden in the back of the FAC on the English site is a guide to calibrating nozzles for X and Y. You just need to look and you will find it.
And, perhaps, the main problem with the printer is to calculate the timing. Why put on print at night, so that at the right time before leaving for work, the print is over. Well, or upon arrival, you could immediately put the next part. Fortunately, the internal software timers work correctly.
In general, Raise3D is full of features. Its price niche is an advanced or expert level buyer who requires reliability, stability and high volume, combined with almost the maximum quality for this class of printers. Therefore, the above and other nuances will not be a big problem. Thanks to powerful shafts and a solid design, this is a machine, a terminator. That is, the resource of use is great. But thanks to the LCD display, great software, Wi-Fi, it is glamorous enough to decorate the office of a large campaign, and impress the client. At the same time, nothing prevents you from putting it at home. It is not noisy, sleep in the next room so-called. home office is absolutely real, especially if you turn off the Z-hop function and print the model without supports. And “chipping off” printed samples in the morning can become a favorite entertainment for young households and pets))).
Text courtesy of www.photmas.ru and www.dkvis.ru.
Join us on social. networks to keep abreast of the latest events:
VKontakte Raise3D Club Russia - club of Raise3D owners in Russia
VKontakte | Facebook | YouTube
Tsvetnoy Mir team
3D printing opens up new horizons for the photographer.
Creativity
Subscribe to the author
Subscribe
Don't want
28
Hi all!
This article is about the intersection of two great fields of activity that are endlessly full of creative possibilities: 3D printing and photography.
Earlier, I wrote about how ... making a fairy tale come true with a 3D printer, a Daedric sword was made from The Elder Scrolls V: Skyrim.
Sword BEFORE painting:
Sword AFTER painting:
In the comments to the previous article, in which I described the stages of making a sword, there were many different estimates.
Cherishing my dream of a photo shoot with costumes, paraphernalia and swords, I decided not to back down for a minute! Several attempts were made to find enthusiastic people who, like me, would be involved in the process with their heads . ..
..
However, oddly enough, it was not the people, but the costumes that became the stumbling block. I had to postpone both the sword and the photo shoot in the 'Box for Unrealized Brilliant Ideas'.
It looked something like this:
Like every fairy tale, mine has an end. And not anyhow, but as it should be - good.
By the will of fate, the universal mind, conspiracy theory and other higher forces, there were people with ready-made costumes, full of strength and desire to create!
I won't bore you with a long story, get acquainted, straight from The Elder Scrolls:
Skyrim mage, Skyrim thief, Ebonheart Pact mage and Lucien Lachance (will appear later in the photo).
So, with the help of higher powers, the guys who despaired of finding a photographer and the photographer who despaired of making a sword printed on a 3D printer collided.
I invite you, dear subscribers, to enjoy the result of joint creativity:
In addition to the sword, , elements of the robber's costume were printed on a 3D printer: master keys (PLA) and thieves' buckle (bronzfil). The result exceeded all expectations:
In conclusion, I propose to look at the rest of the photos:
This project is the result of the joint work of 7 people (!).
The 3D printer opens up truly limitless possibilities for the photographer. This is his true friend and reliable comrade. From image and idea to realization - one barrier is the cover of my Picaso 3D Designer :)
Many thanks to Semyon. According to a rather rough sketch, he completely thought out and embodied the thieves' armor. As one of the participants of the project said - 'When we went for the skin, took measurements and discussed the order, I felt like I was in Skyrim'.
The bracers, belt and clasp on Lachance's robe are also Semyon's work.
Special thanks to Victor (aka mvy on 3Dtoday), who printed the thief's buckle and lockpicks. The result exceeded expectations!
Thanks to Daria, Alexander, Marina and Semyon for their enthusiasm and project implementation.
All the best and successful projects!
Your humble servant, Articoon ;)
Follow the author
Follow
Don't want
28
More interesting articles
29
Subscribe to the author
Subscribe
Don't want
Greetings to all.
My sister's birthday is coming soon. I live in another city, on the DR itself ...
Read more
kenst69
Loading
11/13/2022
1187
28
Subscribe to the author
Subscribe
Don't want
Good time. Article for inspiration) In the process of printing, you often have to do all kinds of processing .