3D printing for dummies download
3D Printing For Dummies by Richard Horne, Kalani Kirk Hausman - Ebook
Enjoy millions of ebooks, audiobooks, magazines, and more, with a free trial
Only €10,99/month after trial. Cancel anytime.
Ebook647 pages4 hours
Rating: 3 out of 5 stars
3/5
()
About this ebook
The bestselling book on 3D printing
3D printing is one of the coolest inventions we've seen in our lifetime, and now you can join the ranks of businesspeople, entrepreneurs, and hobbyists who use it to do everything from printing foods and candles to replacement parts for older technologies—and tons of mind-blowing stuff in between! With 3D Printing For Dummies at the helm, you'll find all the fast and easy-to-follow guidance you need to grasp the methods available to create 3D printable objects using software, 3D scanners, and even photographs through open source software applications like 123D Catch.
Thanks to the growing availability of 3D printers, this remarkable technology is coming to the masses, and there's no time like the present to let your imagination run wild and actually create whatever you dream up—quickly and inexpensively. When it comes to 3D printing, the sky's the limit!
- Covers each type of 3D printing technology available today: stereolithology, selective sintering, used deposition, and granular binding
- Provides information on the potential for the transformation of production and manufacturing, reuse and recycling, intellectual property design controls, and the commoditization of products
- Walks you through the process of creating a RepRap printer using open source designs, software, and hardware
- Offers strategies for improved success in 3D printing
On your marks, get set, innovate!
Skip carousel
LanguageEnglish
PublisherWiley
Release dateMay 5, 2017
ISBN9781119386322
Author
Richard Horne
Richard Horne is a British writer, graphic designer, and artist whose bestselling books (published in sixteen languages worldwide) include 101 Things to Do Before You Die, 101 Things to Do Before You're Old and Boring, and 101 Things You Need to Know . . . and Some You Don't! The illustrator of The Dangerous Book for Boys, Horne also designed and illustrated the covers for J. K. Rowling's Harry Potter School Books for Comic Relief series, including Fantastic Beasts and Where to Find Them and Quidditch Through the Ages. He lives in London.
Related categories
Skip carousel
Reviews for 3D Printing For Dummies
Rating: 3 out of 5 stars
3/5
4 ratings0 reviews
Book preview
3D Printing For Dummies - Richard Horne
Introduction3D printing has been around for more than 30 years. Recently, the core technology for 3D printers has become available at prices many individuals and smaller companies can afford.
Three key things make 3D printing stand out from almost any other manufacturing process:
Printed parts are grown
in layers. Many complex objects that have internal structures or comprised of subassemblies can be manufactured in a single run, whereas previously, they could not be made by traditional means. This process often improves the performance of the finished part.
Material is added rather than subtracted. This method of manufacturing adds raw materials to build an object rather than removing material. Machining away 90 percent of a metal block to make a cooling system for a race car is far less efficient than adding the 10 percent or so of metal powder needed to make a more compact and efficient design that couldn’t have been machined in the first place.
3D printing often eliminates the need for complex or expensive production tooling. This benefit is becoming significant as 3D printers are being used for mass manufacturing runs in which individual tooling or hand-crafting would make customized products far too expensive (such as solid gold jewelry).
In short, 3D printing turns a digital model in a computer data file into a physical representation of the object or product. The term 3D printing is actually disliked in the wider industry, as it’s a poor representation of what this technology can achieve.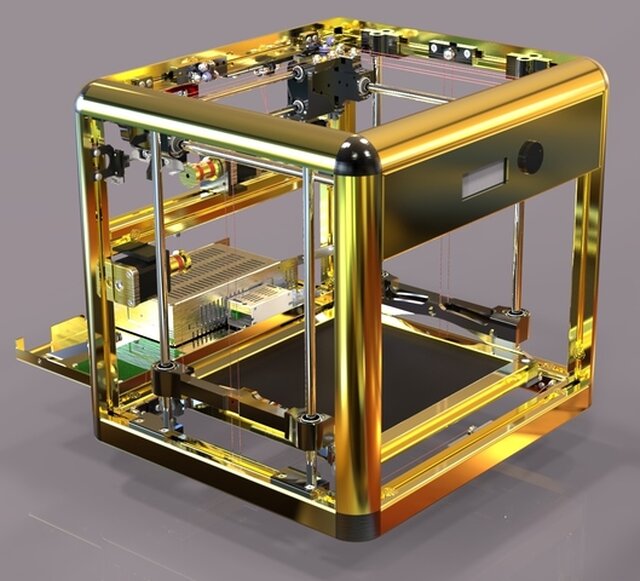 A more professional name is additive manufacturing, which covers a vast array of sectors, materials, and processes used to produce physical objects from data.
Since the first edition of this book was released in 2013, desktop 3D printing and various forms of industrial additive manufacturing have been through the rise and fall of a technology hype cycle. Reports about 3D printing applied to biomedical research anticipated the leap from lab to patient too soon, rather than focusing on the possibility of printing tissue samples for medical research. Researchers and individuals are still working out appropriate uses of 3D-printing technology. There are often still vastly better ways to produce many things without 3D printing.
Much of the media hype surrounding 3D printing was exactly that: hype. But the end of the hype cycle is near, and 3D printing is stronger than ever. Some 3D-printing equipment vendors realize that not everyone needs or wants a home 3D printer. The desktop 3D-printing market has returned its focus to people who need and want to explore this technology.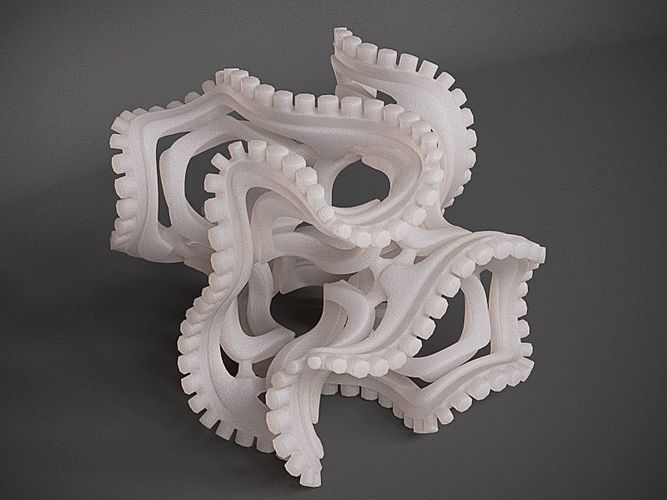
3D Printing For Dummies, 2nd Edition, was written with the average reader in mind. It’s a survey of the existing capabilities of additive manufacturing for both private and commercial purposes and a consideration of the possibilities of its future.
In this book, we review many current additive manufacturing technologies. Some are early uses of a technology or process with numerous limitations and caveats regarding their use. We also explore the process by which you can build your own 3D printer, using the open-source self-replicating rapid-prototyper (RepRap) family of designs. This book won’t make you an expert in all aspects of 3D printing, but it will give you an opportunity to explore additive manufacturing systems. We hope that you’ll be excited by the amazing potential of 3D printers — excited enough to build your own printer and start sharing your creativity with friends and family!
As we updated this book for the second edition, we were pleased by the number of times we could change a statement from something like NASA is planning to take 3D printers into space
to NASA has now successfully tested and 3D-printed spare parts in space.

You may find it difficult to believe that we assumed anything about you; after all, we haven’t even met you! Although most assumptions are indeed foolish, we made these assumptions to provide a starting point for this book.
You have the ability to download or access programs in a web browser if you want to try some of the applications we review in this book. (You don’t need to have a computer to enjoy this book, however. All you need are an open mind and enthusiasm about the future and what additive manufacturing can produce.)
If you want to assemble a 3D printer of your own, you need to be familiar with using hand tools like spanners and screwdrivers. You will also need a computer and software, much of which is free to download and use.
You do not need any experience with 3D design. However, it helps to have a basic understanding of how a 3D model is just like any other digital model; we are just using that digital data to reproduce physical objects.
It is important to understand that the current level of sophistication of 3D printers is close to the first dot-matrix paper printers. They’re slow, and most are limited to a single material; many offer only a single color or one type of plastic type at a time. Just as the evolution of dot-matrix printers led to ink-jet and laser technologies that added speed and full color to paper printers, 3D printers are adding capabilities quickly. But please don’t assume that all 3D printers will follow the same rapid adoption of full color and astonishing print speeds that 2D printers experienced in the past. That would be foolish indeed.
We try to use two common terms for separating a 3D printer you could use at home (desktop 3D printing) and many of the vastly more complicated and expensive machines used by industry (industrial 3D printers). The main difference between the two types, apart from the cost, is that industrial 3D printers tend to be able to use more materials and produce a higher level of detail in the finished parts.
We also don't expect you to know all about product design or the fundamental properties of materials. Where possible we try to explain the most common materials used by both desktop and industrial 3D printers.
Working with 3D printers is very rewarding, but you should learn how to adjust and tune your own desktop 3D printer. 3D printers are all different, so that when things go awry you will be able to fix the issues yourself. It is not necessary to be a do-it-yourself handyman. However, a certain familiarity with basic tools and methods will help you to use your 3D printer whether you build it yourself or buy a fully built and tested machine.
Icons Used in This BookAs you read this book, you’ll see icons in the margins that indicate material of interest (or not, as the case may be). This section briefly describes each icon in this book.
tip Tips are nice because they help you save time or perform some task without a lot of extra work. The tips in this book give you timesaving techniques or pointers to resources that you should check out to get the maximum benefit from 3D printing.
remember Remember icons mark the information that’s especially important to know. To extract the most important information in each chapter, just skim these icons.
technicalstuff The Technical Stuff icon marks information of a highly technical nature that you can normally skip.
warning The Warning icon tells you to watch out! It marks important information that may save you headaches or keep you and your equipment from harm.
Beyond the BookIn addition to what you’re reading right now, this product comes with a free access-anywhere Cheat Sheet that covers the basics about 3D printing.
We have listed various 3D printers, control electronics, and aspects about the assembly of a RepRap 3D printer of your own. We also include common terms used by the software used in 3D printing and the definitions of common settings used by the model-processing software.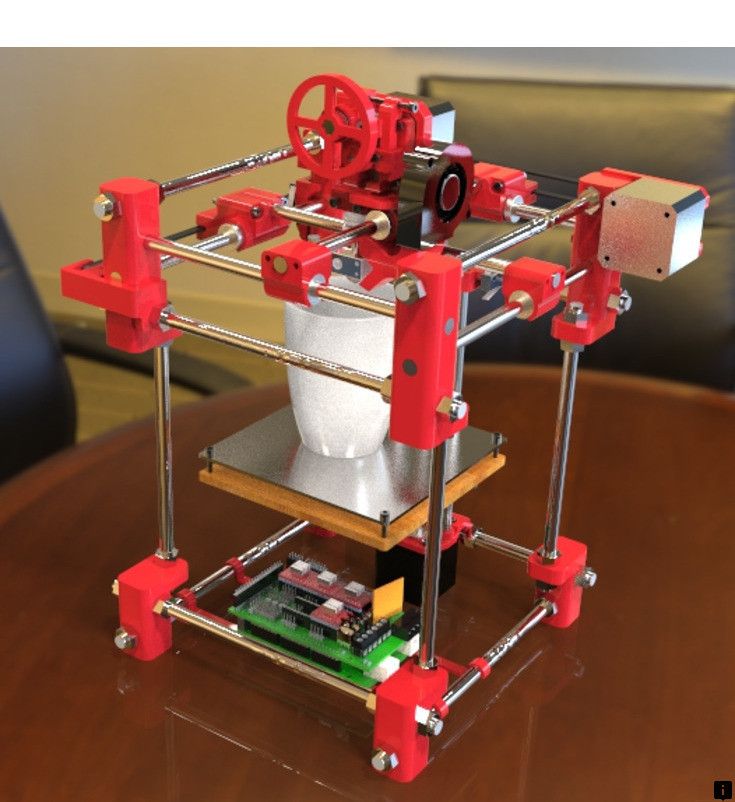 This should all assist you to get familiar with 3D printing as you journey through the book. To get this Cheat Sheet, simply go to www.dummies.com and type 3D Printing For Dummies Cheat Sheet in the search box.
The goal of this book is to get you thinking about 3D printing and the potential it offers in your own life, home, or work. We stand at the start of a new form of creative design and product creation, in which traditional mass manufacturing will give way to personalized, individualized, ecologically friendly, on-demand manufacturing close to home — or in the home. You don’t have to read this book cover to cover, although we think that you’ll find interesting and amazing items on each page. In any event, we hope that you take away dozens of ideas for new products and improvements to old ones made possible by 3D printers.
Part 1
Getting Started with 3D PrintingIN THIS PART …
Explore the world of 3D printing, including many of the different types of additive manufacturing and their applications.
Discover current uses for the ever-growing spectrum of 3D-printing alternatives available today.
Examine alternatives currently in existence for 3D printing.
Discover ways that you may be able to use additive manufacturing in personal and professional settings.
Chapter 1 Seeing How 3D Printers Fit into Modern Manufacturing IN THIS CHAPTERcheck Getting to know additive manufacturing
check Discovering applications for 3D printing
check Introducing RepRap
An amazing transformation is currently under way in manufacturing, across nearly all types of products — a transformation that promises that the future can be a sustainable and personally customized environment. In this fast-approaching future, everything we need — from products to food, and even our bodies themselves — can be replaced or reconstructed rapidly and with very minimal waste.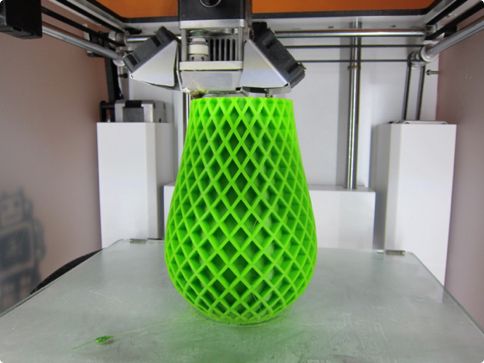 This transformation in manufacturing is not the slow change of progress from one generation of iPhone to the next. Instead, it’s a true revolution, mirroring the changes that introduced Industrial Age and then brought light and electricity to our homes and businesses.
New forms of manufacturing will give rise to new industries and allow for more recovery of materials. Like any truly fundamental change that spans all aspects of the global economy, by its nature, the change will be disruptive. But traditional, inefficient ways of producing new models of products will surely give way to new opportunities that were impossible to imagine before. The technology behind this transformation is referred to as additive manufacturing, 3D printing, or direct digital manufacturing. Whatever you call this technology, in the coming decade, it will be used to construct everything from houses to jet engines, airplanes, food, and even replacement tissues and organs made from your own cells! Every day, new applications of 3D printing are being discovered and developed all over the world. Even in space, NASA is testing designs that will function in zero gravity and support human exploration of other planets, such as Mars. (See Figure 1-1 for a glimpse.) Hold on tight, because in the chapters ahead, we cover a lot of incredible, fantastic new technologies — and before the end, we show you how you can get involved in this amazing transformation by building and using a 3D printer at home.
FIGURE 1-1: A line drawing of NASA’s planned 3D-printed lunar facility.
Embracing Additive ManufacturingWhat is additive manufacturing? It’s a little like the replicators in the Star Trek universe, which allow the captain to order tea, Earl Grey, hot
and see a cup filled with liquid appear fully formed and ready for consumption. We’re not quite to that level yet, but today’s 3D printers perform additive manufacturing by taking a 3D model of an object stored in a computer, translating it into a series of very thin layers, and then building the object one layer at a time, stacking material until the object is ready for use.
tip 3D printers are much like the familiar desktop printers you already use at work or in your home to create copies of documents transmitted electronically or created on your computer, except that a 3D printer creates a solid 3D object from a variety of materials rather than producing a simple paper document.
Since the time of Johannes Gutenberg, the ability to create multiple printed documents has brought literacy to the world. Today, when you click the Print button in a word processing application, you merge the functions of writers, stenographers, editors, layout artists, illustrators, and press reproduction workers into a single function that you can perform. Then, by clicking a few more buttons, you can post the document you created on the Internet and allow it to be shared, downloaded, and printed by others all over the world.
3D printing does exactly the same thing for objects. Designs and virtual 3D models of physical objects can be shared, downloaded, and then printed in physical form. It’s hard to imagine what Johannes Gutenberg would have made of that.
Why is additive manufacturing called additive? Additive manufacturing works by bringing the design of an object — its shape — into a computer model and then dividing that model into separate layers that are stacked to form the final object. The process reimagines a 3D object as a series of stackable layers that forms the finished object (see Figure 1-2). Whether this object is a teacup or a house, the process starts with the base layer and builds up additional layers until the full object is complete.
FIGURE 1-2: A line drawing showing how 3D printing works.
Kirk’s children were building things this way before they ever saw his first 3D printer. They discovered that they could use crackers and cheese spray for more than just a snack: They could build towers and grand designs simply by layering crackers and cheese. These edible structures show the potential in additive manufacturing. Each cracker was given a personalized application of cheese to spell names, draw designs, and even build shapes and support tiny pyramids. The resulting snacks were both unique and customized to the design each child wanted.
3D printers build up layers of material in a few ways: by fusing liquid polymers with a laser, binding small granular particles with a laser or a liquid binding material, or extruding melted materials in the same way that toothpaste is squeezed from a tube onto a toothbrush. 3D printers, however, perform their additive manufacturing with many more materials than just toothpaste or cheese spray. They can fabricate items by using photo-curable plastic polymers, melted plastic filaments, metal powders, concrete, and many other types of materials — including biological cells that can form amazingly complex structures to replace, repair, and even augment our own bodies.
Just as the rings of a tree show the additive layers of the tree’s growth each year, additive manufacturing builds objects one layer at a time. In this way, you can create a small plastic toy and even a dwelling; someday you’ll be able to create complete airplanes with interlocking parts. Today’s research on conductive materials suggests that wires will soon become part of the additive manufacturing process, being printed directly in an object instead of being installed later.
How does this additive manufacturing compare to the traditional methods of subtractive production that have worked just fine since the first Industrial Revolution in the 1700s transformed manufacturing from hand production to automated production, using water and steam to drive machine tools? Why do we need to take up another disruptive technological shift after the second Industrial Revolution in the 1800s transformed the world through the increased use of steam-powered vehicles and the factories that made mass manufacturing possible?
Today, we stand at the opening moment of the next transformation: a third Industrial Revolution, in which mass manufacturing and global transfer of bulk goods will be set aside in favor of locally produced, highly personalized individual production, which fits nicely with society’s transition to a truly global phase of incremental local innovation.
The first Industrial Revolution’s disruption of society was so fundamental that governments had to pass laws to protect domestic wool textiles from power-woven cotton textiles being imported from other countries. The spinning jenny and automated flyer-and-bobbin looms allowed a small number of people to weave hundreds of yards of fabric every week, whereas hand weavers took months to card plant fibers or shorn hair, spin the material into thread, and weave many spools of thread into a few yards’ worth of fabric. Suddenly, new industrial technologies such as the automated loom were putting weavers out of work, sparking the formation of the Luddite movement that tried to resist this transformation. Fortunately, the capability of the new technologies to bulk produce clothing eventually won that argument, and the world was transformed.
A few years later, the second Industrial Revolution’s disruption of society was even more pronounced, because automation provided alternatives not limited by the power of a man or horse, and steam power freed even massive industrial applications from their existence alongside rivers and water wheels, allowing them to become mobile. The difficulties traditional workers faced due to these new technologies are embodied in the tale of folk hero John Henry. As chronicled in the powerful folk song
 The Ballad of John Henry,
Henry proved his worth by outdigging a steam-driven hammer by a few inches’ depth before dying from the effort. This song and many like it were heralded as proof of mankind’s value in the face of automation. Yet the simple fact that the steam hammer could go on day after day without need for food or rest, long after John Henry was dead and gone, explains why that disruption has been adopted as the standard in the years since.
Here at the edge of the transformation that may one day be known as the third Industrial Revolution, the disruptive potential of additive manufacturing is obvious. Traditional mass manufacturing involves the following steps, which are comparatively inefficient:
Making products by milling, machining, or molding raw materials
Shipping these products all over the world
Refining the materials into components
Assembling the components into the final products in tremendous numbers to keep per-unit costs low
Shipping those products from faraway locations with lower production costs (and more lenient workers’ rights laws)
Storing vast numbers of products in huge warehouses
Shipping the products to big-box stores and other distributors so that can reach actual consumers
Because of the costs involved, traditional manufacturing favors products that appeal to as many people as possible, preferring one-size-fits-most over customization and personalization. This system limits flexibility, because it’s impossible to predict the actual consumption of products when next year’s model is available in stores. The manufacturing process is also incredibly time-consuming and wasteful of key resources such as oil, and the pollution resulting from the transportation of mass-manufactured goods is costly to the planet.
Because additive manufacturing can produce completed products — even items with interlocking moving parts, such as bearings within wheels or linked chains — 3D-printed items require much less finishing and processing than traditionally manufactured items do. The traditional approach uses subtractive fabrication procedures such as milling, machining, drilling, folding, and polishing to prepare even the initial components of a product. The traditional approach must account for every step of the manufacturing process — even a step as minor as drilling a hole, folding a piece of sheet metal, or polishing a milled edge — because such steps require human intervention and management of the assembly-line process, which therefore adds cost to the product.
tip Yes, fewer machining techs will be needed after the third Industrial Revolution occurs, but products will be produced very quickly, using far fewer materials. It’s much cheaper to put down materials only where they’re needed rather than to start with blocks of raw materials and mill away unnecessary material until you achieve the final form. Ideally, the additive process will allow workers to reimagine 3D-printed products from the ground up, perhaps even products that use complex open interior spaces that reduce materials and weight while retaining strength. Also, additive-manufactured products are formed with all necessary holes, cavities, flat planes, and outer shells already in place, removing the need for many of the steps involved in traditional fabrication.
Molding/injection moldingTraditional durable goods such as the components for automobiles, aircraft, and skyscrapers are fabricated by pouring molten metal into molds or through tooled dies at a foundry.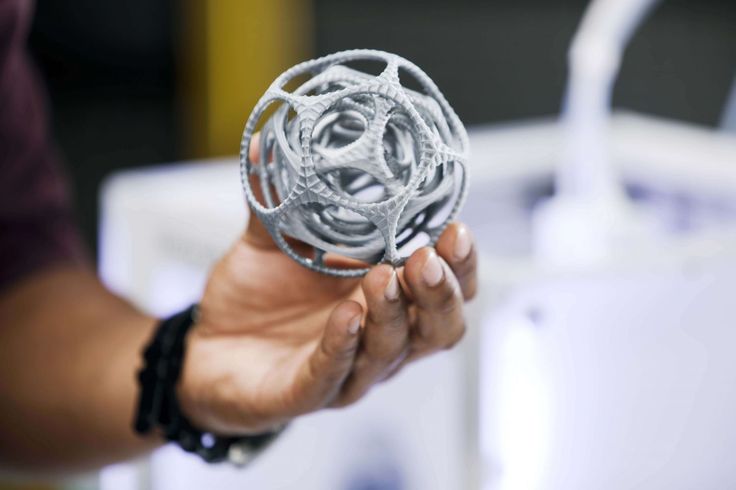 This same technology was adapted to create plastic goods: Melted plastic is forced into injection molds to produce the desired product. Molding materials such as glass made it possible for every house to have windows and for magnificent towers of glass and steel to surmount every major city in the world.
Traditional mold-making, however, involves the creation of complex master molds, which are used to fashion products as precisely alike as possible. To create a second type of product, a new mold is needed, and this mold in turn can be used to create only that individual design over and over. This process can be time-consuming. 3D printers, however, allow new molds to be created rapidly so that a manufacturer can quickly adapt to meet new design requirements, to keep up with changing fashions, or to achieve any other necessary change. Alternatively, a manufacturer could simply use the 3D printer to create its products directly and modify the design to include unique features on the fly. General Electric currently uses this direct digital-manufacturing process to create 24,000 jet-engine fuel assemblies each year — an approach that can be easily changed midprocess if a design flaw is discovered simply by modifying the design in a computer and printing replacement parts. In a traditional mass-fabrication process, this type of correction would require complete retooling.
Because computer models and designs can be transported electronically or shared for download from the Internet, additive manufacturing allows manufacturers to let customers design their own personalized versions of products. In today’s interconnected world, the ability to quickly modify products to appeal to a variety of cultures and climates is significant.
In general, the advantages of additive manufacturing can be grouped into the following categories:
Personalization
Complexity
Part consolidation
Sustainability
Recycling and planned obsolescence
Economies of scale
The next few sections talk about these categories in greater detail.
Personalization at the time of fabrication allows additive-manufactured goods to fit each consumer’s preferences more closely in terms of form, size, shape, design, and even color, as we discuss in later chapters.
The iPhone case for the version 6/7 is downloadable as Thing 67414. (See Figure 1-3.) In no time, people within the 3D-printing community created many variations of this case and posted them to services such as the Thingiverse 3D object repository (http://www.thingiverse.com). These improvements were rapidly shared among members of the community, who used them to create highly customized versions of the case, and Nokia gained value in the eyes of its consumer base through this capability.
FIGURE 1-3: A free downloadable, 3D-printable phone case for the iPhone.
technicalstuff Creative Commons licensing involves several copyright licenses developed by the nonprofit Creative Commons organization (https://creativecommons. org/licenses/), reserving some specific rights and waiving others to allow other creators to share and expand on the designs without the restrictions imposed by traditional copyright.
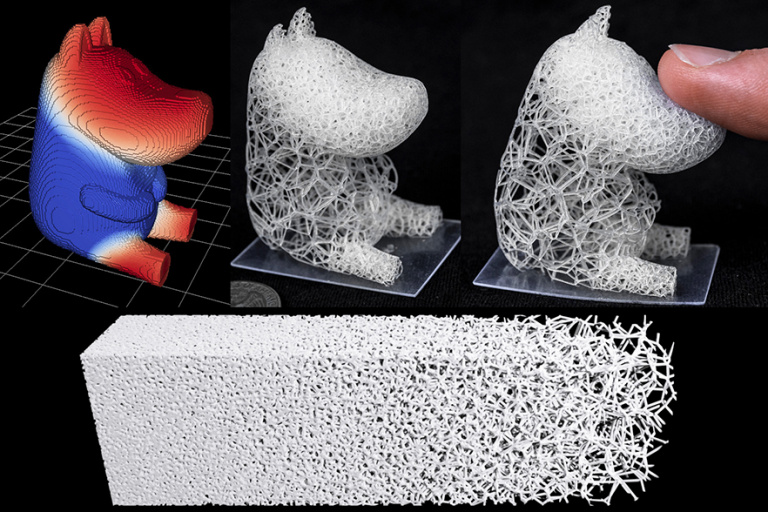
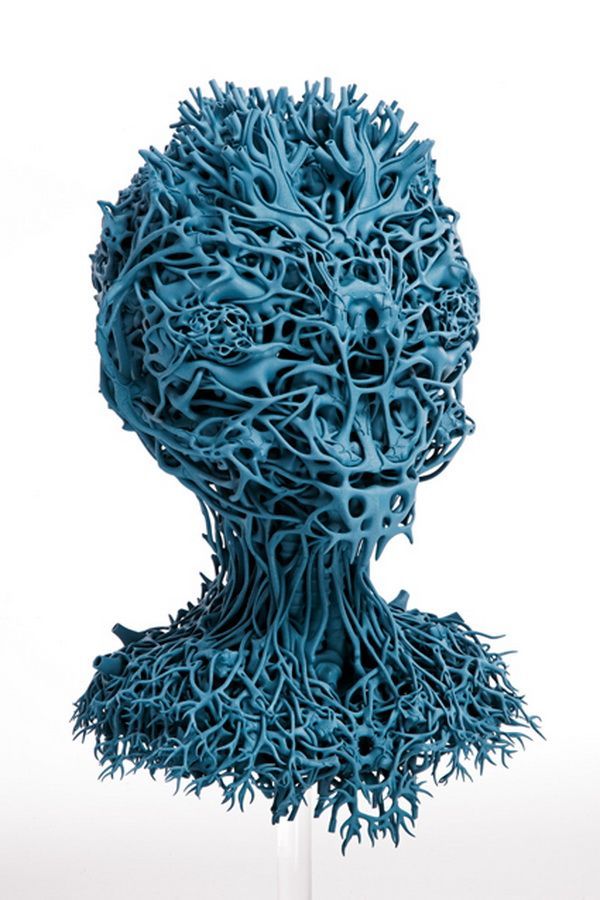
Because all layers of an object are created sequentially, 3D printing makes it possible to create complex internal structures that are impossible to achieve with traditional molded or cast parts. Structures that aren’t load-bearing can have thin or even absent walls, with additional support material added during printing. If strength or rigidity are desired qualities, but weight is a consideration (as in the frame elements of race cars), additive manufacturing can create partially filled internal voids with honeycomb structures, resulting in rigid, lightweight products. Structures modeled from nature, mimicking items such as the bones of a bird, can be created with additive-manufacturing techniques to create product capabilities that are impossible to produce in traditional manufacturing. These designs are sometimes referred to as organic.
When you consider that this technology will soon be capable of printing entire houses, as well as the materials therein, you can see how easily it can affect more prosaic industries, such as moving companies. In the future, moving from one house to another may be a simple matter of transferring nothing more than a few boxes of personalized items (such as kids’ drawings and paintings, Grandma’s old tea set, and baby’s first shoes) from one house to another. There may come a time when you won’t need a moving company at all; you’ll just contact a company that will fabricate the same house and furnishings (or a familiar one with a few new features) at the new location. That same company could reclaim materials used in the old building and furnishings as a form of full recycling.
SustainabilityBy allowing strength and flexibility to vary within an object, 3D-printed components can reduce the weight of products and save fuel. One aircraft manufacturer, for example, expects the redesign of its seat-belt buckles to save tens of thousands of gallons of aviation fuel across the lifetime of an aircraft. Also, by putting materials only where they need to be, additive manufacturing can reduce the amount of materials lost in postproduction machining, which conserves both money and resources.
technicalstuff Additive manufacturing allows the use of a variety of materials in many components, even the melted plastic used in printers such as the RepRap device we show you how to build later in this book. Acrylonitrile butadiene styrene (ABS), with properties that are well known from use in manufacturing toys such as LEGO bricks, is commonly used for home 3D printing, but it’s a petrochemical-based plastic. Environmentally conscious users could choose instead to use plant-based alternatives such as polylactic acid (PLA) to achieve similar results. Alternatives such as PLA are commonly created from corn or beets. Current research on producing industrial quantities of this material from algae may one day help reduce our dependence on petrochemical-based plastics.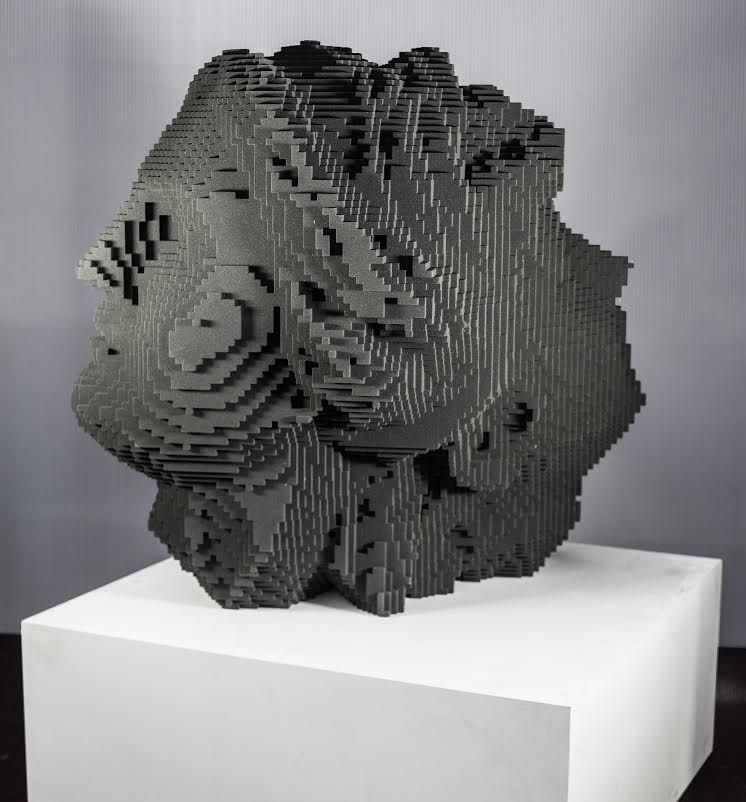
Other materials — even raw materials — can be used. Some 3D printers are designed to print objects by using concrete or even sand as raw materials. Using nothing more than the power of the sun concentrated through a lens, Markus Kayser, the inventor of the Solar Sinter, fashions sand into objects and even structures. Kayser uses a computer-controlled system to direct concentrated sunlight precisely where needed to melt granules of sand into a crude form of glass, which he uses, layer by layer, to build up bowls and other objects. (See Figure 1-4.)
Image courtesy of Markus Kayser
FIGURE 1-4: A glass bowl formed by passing sunlight through the Solar Sinter to fuse sand.
Recycling and planned obsolescenceThe third Industrial Revolution offers a way to eliminate the traditional concept of planned obsolescence that’s behind the current economic cycle. In fact, this revolution goes a long way toward making the entire concept of obsolescence obsolete. Comedian Jay Leno, who collects classic cars, uses 3D printers to restore his outdated steam automobiles to service, even though parts have been unavailable for the better part of a century. With such technology, manufacturers don’t even need to inventory old parts; they can simply download the design of the appropriate components and print replacements when needed.
Instead of endlessly pushing next year’s or next season’s product lines (such as automobiles, houses, furniture, or clothing), future industries could well focus on retaining investment in fundamental components, adding updates and reclaiming materials for future modifications. In this future, a minor component of a capital good such as a washing machine fails, a new machine won’t need to be fabricated and shipped; the replacement will be created locally and the original returned to functional condition for a fraction of the cost and with minimal environmental impact.
Economies of scaleAdditive manufacturing allows individual items to be created for the same per-item cost as multiple items of the same or similar designs.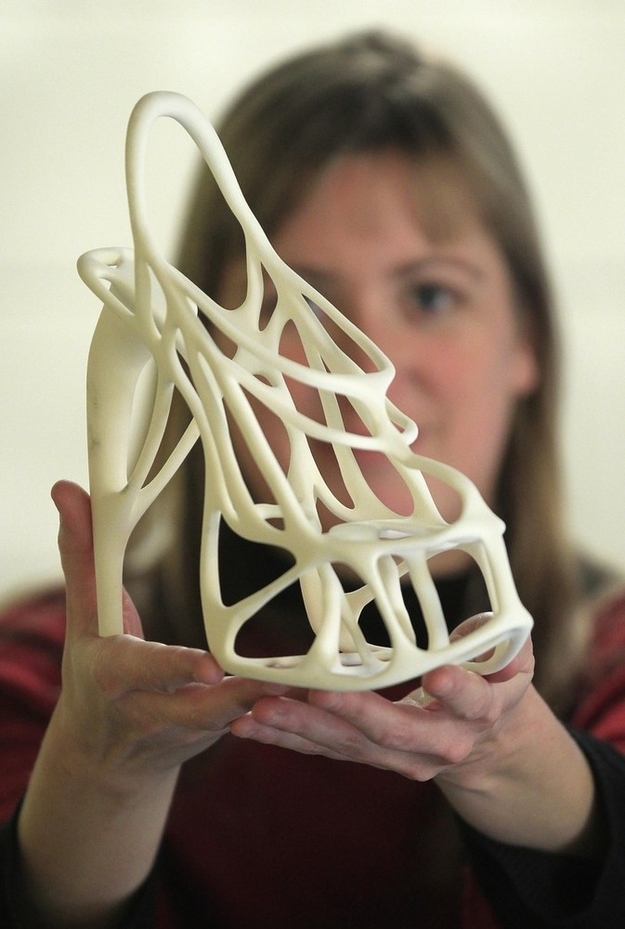 By contrast, traditional mass manufacturing requires the fabrication of huge numbers of identical objects to drop the per-item cost passed
Enjoying the preview?
Page 1 of 1
3D Printing For Dummies Cheat Sheet
By: Kalani Kirk Hausman and Richard Horne and
Updated: 03-08-2022
From The Book: 3D Printing For Dummies
3D Printing For Dummies
Explore Book Buy On Amazon
Unlike traditional manufacturing, which involves injecting material into a pre-formed mold or removing material from base material objects, 3D printing starts with a virtual 3D model that is transformed into solid form one layer at a time. Each layer is built on top of the layer before, creating a solid form representing the virtual 3D model in all of its complexity and detail without requiring additional forms of machining and treatment necessary in traditional forms of manufacturing.
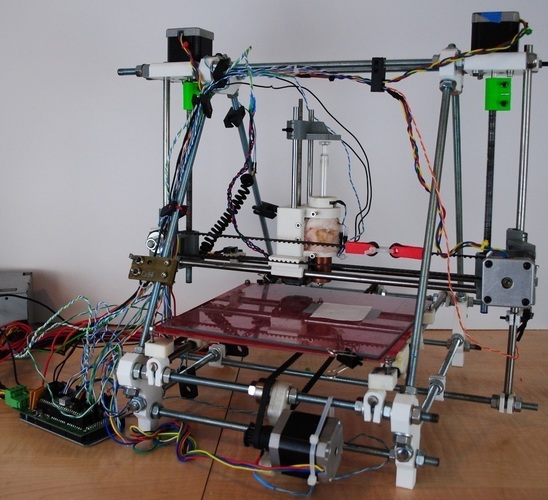
You can build your own 3D printer using the open-source self-REPlicating RAPid-prototyper (RepRap) family of designs. Check out these helpful articles to guide you toward selecting the right RepRap design for you.
Deciding on a RepRap of your own for 3D printing
When it comes to 3D printing, selecting a RepRap printer for personal use begins with an analysis of your particular need in terms of the type, size and other qualities such as turnkey off-the-shelf or build-it-yourself creation. Total cost is also a factor, along with source licensing preference such as the determination of open vs. closed source technologies.
Some of the RepRap designs include:
-
Mendel, Prusa Mendel, Mendel90, Prusa i3: One of the more common branches of Cartesian design, this printer has spawned many variations including the miniaturized Huxley.
-
Wallace and Printrbot: Common educational-sector alternatives for kit construction.
-
MendelMax: This is the derivative of the Prusa Mendel that’s an example of Cartesian RepRaps.
-
Ultimaker: A box-frame RepRap using Cartesian movement.
-
Tantillus: A miniature box-frame RepRap which has the most 3D printable parts of current RepRap variations.
Several RepRap options exist beyond the standard Cartesian format, including:
-
Rostock, RostockMax: A Delta-format RepRap printer that provides a tall build volume. The RostockMax is a laser-cut kit form that we will build here as an example of Delta RepRaps.
-
3DR: An alternative delta-style RepRap designed by Richard Horne, based on the Rostock format with inspiration from the Tantillus for self-replication.
After identifying the type of printer, you will need to select the proper type of plastic filament you wish to print with and the components that will be used in building the printer itself, including the framework, extruder, build plate, control electronics and software that will be used.
Understanding RepRap 3D printer control electronics
A RepRap 3D printer is an example of a purpose-built robot, using the popular open-source Arduino microcontroller at its heart together with stepper motor controllers, motors, and sensors to control its movements. Some custom 3D printer boards have been created to integrate an Arduino’s functions and the related items typically found on a 3D printing “shield” that attaches to the basic format. Some of these options include:
-
RAMPS: The original Arduino shield designed for multiple stepper motor control and management of the extruder and built plate heaters.
-
RAMBo: A modular all-in-one combination of the Arduino board and RAMPS shield.
-
Sanguinololu: A popular build-it-yourself all-in-one board integrating both microcontroller and stepper motor controllers
-
Minitronics: A reduced size variation of the Sanguinololu.
-
RUMBA: A modular integrated board with modules supporting LCD panels, external memory cards and other add-on capabilities.
-
ELEFU-RA: A developer integrated electronics set that can plug in standard ATX computer power supplies
-
Megatronics: The “big brother” of the Minitronics board, which allows the use of higher-temperature thermocouple thermal sensors in place of the more common thermistor type sensors.
Many components have multiple options such as the selection of contact switches or magnetic hall-type sensors for the end-stops or the use of different fans to meet the type of plastic you are using. Even the type of motor controllers and wire connections (soldered vs. crimped) will affect options available upon completion of your RepRap.
Assembling the RepRap extruder and RepRap upgrades on a 3D printer
Once the framework for a 3D printer has been assembled and the electronics selected, the final component needed is the extruder and hot-end that melt and deposit plastic to create your object. The extruder slides the plastic filament incrementally into the heated hot-end, where it pushes a small amount of the molten plastic out with each step. The extruder can be made in many ways, including:
-
Geared: Some extruders include additional gears to slow the advance of filament with each step to gain greater control, and to increase the force with which the filament can be advanced into the hot-end.
-
Hobbed: Smooth plastic filament can be held by the extruder using interlocking gears or a hobbed bolt (one with teeth cut along the axis around the bolt’s girth) to hold the filament against an idler wheel so its advance and retraction can be carefully controlled.
-
Bowden: This type of extruder forces the filament through a tube connecting the extruder and hot-end rather than forcing the filament directly into the hot-end, separating the two and allowing the hot-end to be lighter without the directly attached extruder motor for non-Cartesian formats.
-
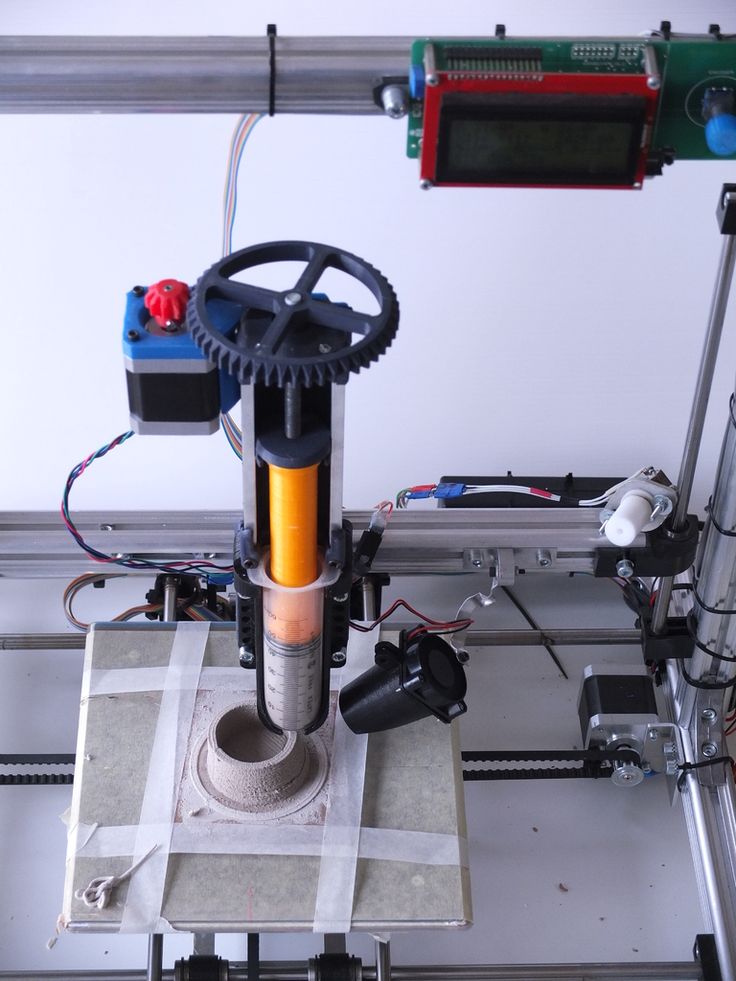
Syringe: For designs like the [email protected] printer or RepRaps equipped with Richard’s Universal Paste Extruder, a syringe can be used with a constrained strap to incrementally extrude paste or gel materials instead of the usual melted plastic.
-
Multi-color: Advanced extruders include multiple gearboxes and motors to advance multiple filaments into the hot end at the same time. By varying the rate of each color using additional electronics, the end result is a multi-colored print that varies throughout.
-
Dual: A common variation with more limited color mixing involves a dual extruder, which is simply two extruders side by side. This is useful for prints that include PVA (polyvinyl alcohol) or other soluble support material integrated into the same print as the object filament material.
Identifying 3D printer software and machine calibration
The software chain for a RepRap 3D printer begins with the products used to create and prepare the virtual 3D model for printing.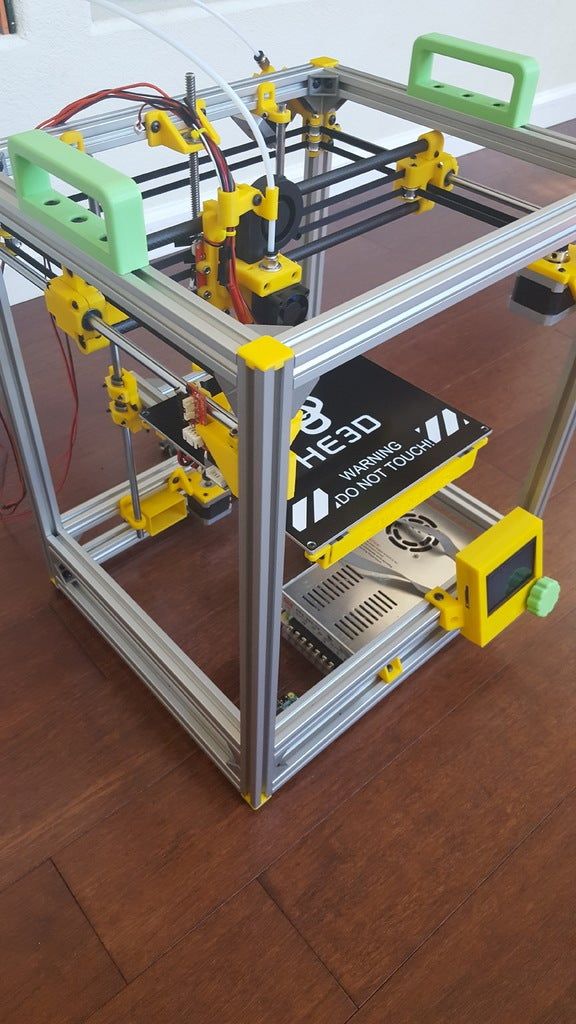 However, once an object model has been created or obtained, the model must be processed through several steps before the solid object is created by the RepRap printer:
-
Support: Unlike granular binding systems, fused plastic extruders cannot deposit plastic in mid-air and have it remain there. For overhangs and wide spans, support material must be added to the design and later removed after printing.
-
Raft: Depending on the type of material and build plate used, it may be useful to add a raft or flat printed layer that forms a base on the build plate for your model. As in the case of support, the raft is later removed in finishing the object.
-
Fill: Because additive systems like the RepRap are unaffected by complexity, it is possible to define any solid object as a solid outer shell and an interior space that can be completely solid (100% fill), empty (0% fill) or some midway point in which a regular pattern of thin walls provide support with voids interspersed.
 The amount of volume that includes plastic is defined as its “Fill” and allows you to produce the same object printout using far less plastic than solid equivalents.
 -
Slicing: The virtual model is calculated as a series of layers, with each slice then translated into codes that will direct the printer to move a particular distance while extruding or not and then again, until that layer is done and the z-axis can be moved to the next layer with the process begun again. This code is called “g-code” and many slicers can add support and raft elements automatically, along with an automatic “fill” pattern to reduce the amount of plastic needed for each print.
Once your model has been prepared and sliced, a few final details are handled by the printer control software. Settings for the hot-end and heated build plate will control the melted plastic viscosity and layer adhesion, while the movement rate of the extruder will control the thickness of the extruded material and the rate of the printer’s movement.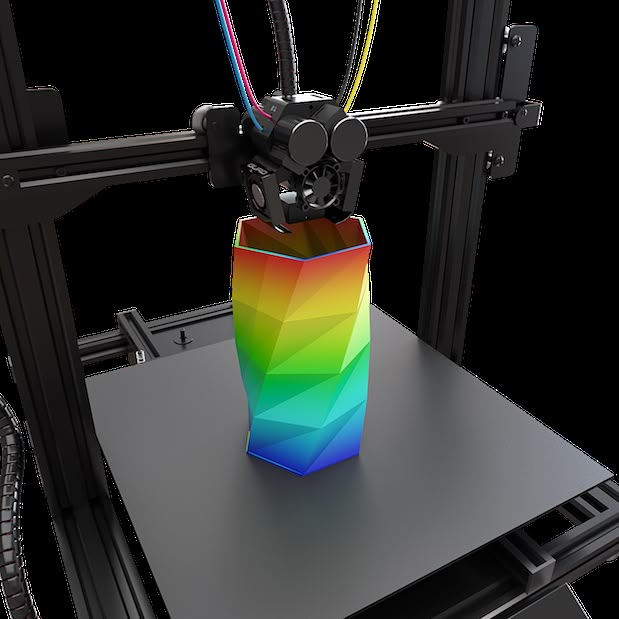 Additional factors can be adjusted for finer control of each feature.
About This Article
This article is from the book:
- 3D Printing For Dummies ,
About the book authors:
Richard Horne (RichRap) has worked as an engineer, marketer, and product designer. He blogs and shares ideas on making 3D printing easier for everyone. Kalani Kirk Hausman has experience as an IT consultant, enterprise architect, auditor, and ISO. He conducts research on integrating 3D-printed materials into educational curricula.
This article can be found in the category:
- 3D Printing ,
Book 3D printing from scratch (D. Gorkov)
Book “ 3D printing from scratch ” – title page
from prominent Russian-speaking authors on the subject of volumetric printing - Dmitry Gorkov in 2015. The publication is rightfully considered one of the best sources of information on 3D printing technology and related equipment for beginners.
On this page of the electronic library of the portal you will find a description of this book, content and a direct link to a third-party source on the Internet, where you can download this book for free and without registration.
Description of the book “3D printing from scratch”
The purpose of this book was to fill an empty niche in teaching 3d printing technology. This technology is just beginning to massively penetrate into the life of society. One of the reasons that this process does not happen quickly (according to the author) is the lack of structured information on the topic “where to start”.
The Internet is filled with promotional articles about the use of industrial printers. But you have to look for information on how to work on a “regular” (household / desktop) FDM printer bit by bit on specialized forums. Much of the information is teeming with specific terms and can be difficult for beginners to understand.
The goal of the book “3D printing from scratch” is to convey all the basic information to the end user in an accessible language without trying to “break the brain”. The author tried to create a step-by-step guide that will allow even a beginner in the field of 3dp to choose the right 3D printer for individual needs. The book also takes a detailed look at how to work with different types of 3D printing plastics. The book also pays special attention to such an important issue as 3d printing software: it discusses the currently used (at the time of writing the book - 2015) computer programs for 3D printing on a printer with practical examples of designing in a 3D editor of simple objects.
After studying this book, you will receive the necessary basic knowledge to start your work in the field of 3D printing - one of the most promising and rapidly developing branches of science and business in the modern world. Study programs Cura, Tinkercad. Master the skills of post-processing printed products. Learn about all the top causes of poor print quality and how to avoid them.
| Author : | Dmitry Gorkov |
| Issued : | 3D-Print-nt.ru |
| Release date: | 2015 |
| Free download (direct link) | PDF (36.3 Mb ) |
| Volume: | 400 pages |
Contents of the book “3D printing from scratch”
- Brief summary of the book
- Introduction
- Children's dreams. Or like everything, someday it will come true
- Suitable 3D printers and where to buy them
- Which 3D printer to choose?
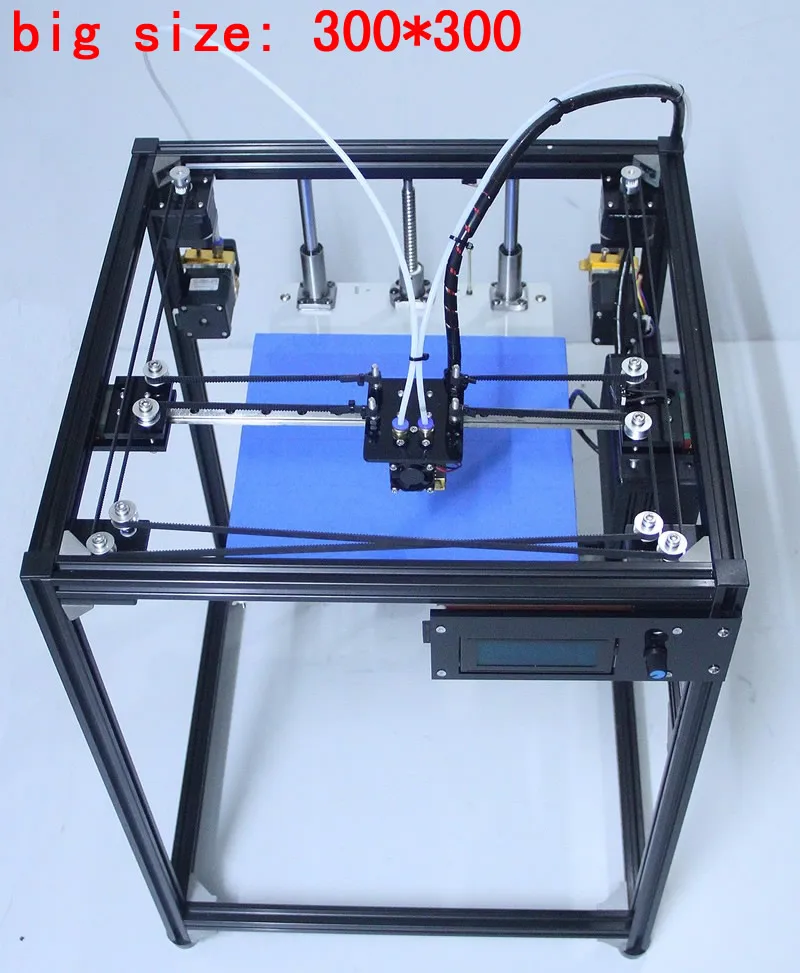
- Basic circuits used in 3D printers
- 3D printer device
- 3d printing supplies
- Used file types
- 3D printing software
- Cura 3d
- Useful features of Cura.
 Part 1
 - Useful features of Cura. Part 2
- Tinkercad Simulation Editor
- Making a bumper for Iphone
- Metric thread in Tinkercad
- Useful resource Thingiverse
- Post-processing of parts in 3D printing
- How I design parts in the 3D editor
- Types of defects in 3D printing
- 3D Scanners
- Robot with 3D scanner Cyclop
- Processing models in MeshLabs
- 3D Printing Use Cases
- Spare parts for cars (3D printing)
- Auto tuning with 3D printing
- Souvenir printing
- Products for fishermen
- Hobby and model parts
- 3D printing and industrial design
- Souvenir products for organizations
- Parts for small batch production using 3D printing
- Coffee mask
- 3D printing parts for household appliances
- Tool and Equipment Repair Parts
- Extreme
- Print accessories for GoPro cameras
- Photo and video equipment
- Models
- Subculture
- Phone cases
- Fittings for clothes and various accessories
- Appendixes to this book
- Printer and Hardware Reviews
- My Replicator from China.
 Or how a 3D copy can be better than the original
 - Gefesh, as he is. Teapot Notes
- Ultimaker 2 in the grip of a kettle
- How many eyes does a Cyclop have?
- Testing filament for 3D printing
- Flex by REC
- PLA from REC
- Prototyper T-Soft from Filamentarno!
- Ruber from REC
- Afterword to the book 3D printing from scratch
- Book supplements
The book 3D printing from scratch contains a large number of detailed illustrations on the topic of narration - 3D printing (technology, equipment, consumables, application practice).
| Author : | Dmitry Gorkov |
| Issued : | 3D-Print-nt.ru |
| Release date: | 2015 |
| Free Download (direct link) | PDF (36.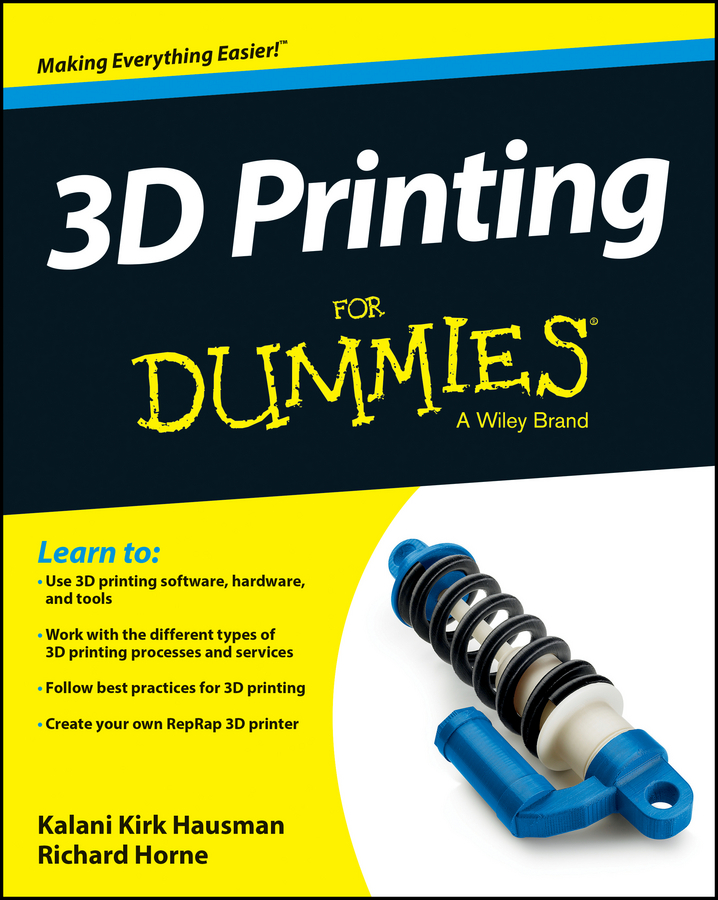 3 Mb ) 3 Mb ) |
| Volume: | 400 pages |
Noticed a mistake? Select it and press Ctrl+Enter
Tweet
Top 20 Free 3D Printing & 3D Printing Software
Looking for 3D printing software? We've rounded up the top 20 software tools for beginners and professionals alike. Most slicers are free.
What is a slicer? This is a program for preparing a digital model for printing. Models for 3D printing are usually distributed in STL files. To turn an STL file into G-code (a language that a 3D printer understands), a slicer program is required. It is called a slicer because it cuts (to slice - English) a 3D model into many flat two-dimensional layers, from which a 3D printer will add a physical object.
Which slicer should I choose? In this article, we will tell you which slicer is best for 3D printing for each stage of your work.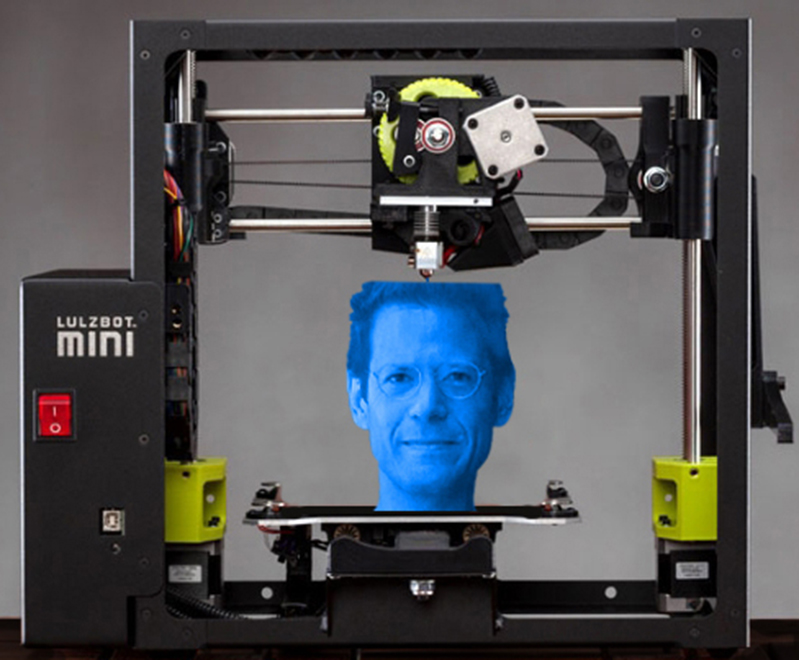 Which one is better for preparing a 3D model for printing? But what if you need to create a 3D model from scratch? And if you are only taking the first steps in 3D?
Don't be afraid, we've answered all of these questions, including the required skill level for each program and where you can download it. The great thing is that most of these programs are completely free and open source.
- Cura
- CraftWare
- 123D Catch
- 3D Slash
- TinkerCAD
- 3DTin
- Sculptris
- ViewSTL
- Netfabb Basic
- Repetier
- FreeCAD
- SketchUp
- 3D Tool
- Meshfix
- Simplify3D
- Slic3r
- Blender
- MeshLab
- Meshmixer
- OctoPrint
#1: Cura
For beginners who need a slicer to prepare STL files for 3D printing
Cura is the default slicer software for all Ultimaker 3D printers, but can be used with most others , including RepRap, Makerbot, Printrbot, Lulzbot and Witbox. The program is completely open source, its capabilities can be extended using plugins.
This program is very easy to use and allows you to manage the most important 3D printing settings through a clear interface. Start in Basic mode to quickly get up to speed and change print quality settings. If finer control is required, switch to Expert mode.
Cura can also be used to directly control the printer, but then the printer and computer must be connected to each other.
Download: Cura
Price: Free
Systems: PC, Mac, Linux
#2: CraftWare
For beginners to prepare STL files for 3D printing its crowdfunding device CraftBot. However, the program works with other printers.
Like Cura, CraftWare allows you to switch from "Easy" to "Expert" mode, depending on how confident you feel. It's a colorful app that features a visual G-code visualization with each function represented by a different color. But the most outstanding feature is the individual support service. As far as we know, only the paid program Simplify3D has this.
Please note, however, that this program is still in beta, so bugs may occur.
Download: CraftWare
Price: Free
Systems: PC, Mac
#3: 123D Catch
-systems, smartphones and tablets, which allows you to convert images of objects into a 3D model. Pictures can be taken with a smartphone/tablet or digital camera.
You need a lot of photos of the object from different angles - the more the better - after which a 3D model will be compiled from them.
123D Catch is more of a fun app than a professional 3D printing tool, but after some tambourine dancing, you can get good results, especially when paired with an STL editor like MeshLab or Meshmixer.
Price: Free
Systems: PC, Android, iOS, Windows Phone
#4: 3D Slash
For beginners who want to create 3D printable models
This is a 3D printing program that is both amazingly simple and refreshingly new. With 3D Slash, you can design 3D models using your dice skills.
You can start with a large block and, like a virtual sculptor, remove small cups from it with tools such as a hammer or drill, or start from empty space and build a model from cubes and other shapes. You can paint with flowers or use template pictures.
Other features worth mentioning are tools for creating logos and 3D text. The Logo Wizard imports an image and creates a 3D model, while the Text Wizard allows you to enter and format text, and then turn it into 3D.
Recommended!
Download: 3dslash.net
Price: Free
Systems: PC, Mac, Linux, Browser
#5: TinkerCAD
For beginners who want to create printable 3D models
TinkerCAD is an online 3D printing computer-aided design (CAD) system that is a good starting point for beginners. Since its capabilities are limited compared to Blender, FreeCAD and SketchUp, many users switch to more powerful tools after some time.
As in 3D Slash, here you can build models from basic shapes. At the same time, unlike 3D Slash, TinkerCAD allows you to create vector shapes in 2D and convert them into three-dimensional models.
Come in: Autodesk TinkerCAD
Price: Free
Systems: Browser
#6: 3DTin
For beginners who want to create 3D printable models
another simple, intuitive tool online choice for beginners in 3D modeling. All you need is a Chrome or Firefox browser with WebGL enabled.
Choose from a huge library of 3D shapes and add them to your sketch. All sketches are stored in the cloud, access to them is free if you honor the Creative Commons license. Everything can be exported to STL or OBJ formats.
Enter: 3DTin
Price: Free
Systems: Browser
#7: Sculptris
For beginners who want to create 3D printable models
clay. This is a fantastic 3D modeling program if figurines are your main task. For example, you can make a bust of your favorite video game or comic book character. Sculptris is completely free and bills itself as a stepping stone to the more complex (and expensive) ZBrush tool.
Download: Pixologic Sculptris
Price: Free
Systems: PC, Mac
#8: ViewSTL
For beginners who want to view STL files
Using ViewSTL is the easiest way to view STL files . Simply open a web page and drag the STL onto the dotted box.
The STL online viewer allows you to display the model in one of three views: flat shading (for a quick view), smooth shading (for a high-quality image), and wireframe.
Come in: ViewSTL
Price: Free
Systems: Browser
#9: Netfabb Basic
some nice features that allow you to analyze, "repair" and edit STL files before moving on to the model cutting stage.
A good choice if you need more than just a slicer and want to be able to quickly fix STL files without having to learn programs like MeshLab or Meshmixer.
Don't let the 'Basic' in the title fool you, Netfabb Basic is actually a very powerful 3D printing tool. It's "basic" only in the sense that it doesn't cost €1,500 like Netfabb Professional!
Download: netfabb.de
Price: Free
Systems: PC, Mac, Linux
No. 10: Repetier
For advanced to prepare STL files for 3D printing
9002 the next level of 3D printer slicer software, but if you want to stay open source, you should look into Repetier. It is the great grandfather of 3D printing software and a favorite of the RepRap community.To date, the program is moving by leaps and bounds from the level for beginners to advanced users. Packaged in an all-in-one configuration, it supports up to 16 extruders, multi-slicing via plug-ins, and virtually every fusing 3D printer on the market. Get ready to tinker!
What's more, Repetier Host works remotely via Repetier Server, so that the 3D printer can be controlled via a browser, tablet or smartphone.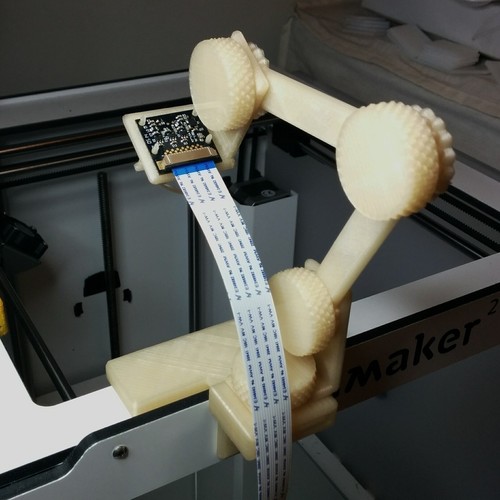
Download: Repetier
Price: Free
Systems: PC, Mac, Linux
#11: FreeCAD
The program is a great option for developing your design skills. More technically, this parametric 3D modeling program allows you to easily change the project by rolling back through the history of the model and editing the parameters.
5
Download: freecadweb.org
Price: Free
Systems: PC, Mac, Linux
#12: SketchUp
For beginners who want to create 3D printable models
SketchUp functionality, with a user-friendly interface and a relatively flat learning curve (i.e., as experience grows with the time spent), the ideal program for developing three-dimensional models.
The Make SketchUp version is free and will include everything you need for 3D modeling if you also download and install the free STL exporter. There is also a professional edition for architects, interior designers and engineers.
Download: sketchup. com
com
Price: Free (SketchUp Make), $695 (SketchUp Pro)
Systems: PC, Mac, Linux
#13: 3D-Tool Free Viewer
view and check STL files
3D-Tool Free Viewer is a sophisticated tool that, among other things, allows you to check the structural integrity and printability of your file. With the Cross-Section function, for example, you can look at the model from the inside and check the wall thickness. Very useful if you want to check your STL file for killer errors before printing.
Download: 3D-Tool
Price: Free
Systems: PC
#14: Meshfix
your model for errors.
Price: Free
Systems: Browser
#15: Simplify3D
For professionals to prepare STL files for 3D printing print. A flexible algorithm checks the model for problems, fixes them, shows a preview of the printing process (ideal for identifying potential problems), and then slices it.
This slicer offers the best infill pattern options in the competition. For models that require supports, Simplify3D will create the appropriate structures on its own and give you full control over their placement. For printers with a dual extruder, when printing with different materials, the Dual Extrusion Wizard will help, as a result of which, for example, it will be easier to remove the dissolving filament.
Simplify3D supports 90% of today's commercially available desktop 3D printers and is compatible with Marlin, Sprinter, Repetier, XYZprinting, FlashForge, Sailfish and MakerBot firmware. Simplify3D can also be used to directly control the printer, but then the printer and computer must be connected to each other.
Download: simplify3d.com
Price: $149
Systems: PC, Mac, Linux
#16: Slic3r
source code, which has a reputation as a carrier of super new functionality, which you will not find anywhere else. The current version of the program is able to show the model from multiple angles, so that the user gets a better preview experience.
There's also an incredible 3D honeycomb infill, the first of its kind that can extend over multiple layers rather than repeating itself like a stamp. This significantly increases the strength of the internal filling of the model and the final printout.
Another option is direct integration with Octoprint. Once the files on the user's desktop are sliced, they can be directly uploaded to Octoprint with one click.
Download: Slic3r
Price: Free
Systems: PC, Mac, Linux
#17: Blender
For professionals who want to create 3D printable models
Blender is a popular computer-aided design (CAD) system with a steep learning curve. Not at all the best choice for beginners, but what you need if you are quite experienced and need something more complex for modeling and printing.
In short, Blender is one of the most powerful tools out there. Its community is always ready to help, there are a lot of educational materials. It's also open source, so enthusiasts often write extensions to make it even better and more powerful.
Download: blender.org
Price: Free
Systems: PC, Mac, Linux
#18: MeshLab
For professionals to prepare STL files for 3D printing
MeshLab - advanced editor. It allows you to remove parts of a 3D model, merge two models into one, patch holes. If you need a program to modify models for 3D printing or some kind of "repair" work, MeshLab is the right choice.
Price: Free
Systems: PC, Mac, Linux
#19: Meshmixer
For professionals to prepare STL files for 3D printing files. It's especially good for identifying potential problems and fixing them automatically. For example, it will show paper-thin walls that can lead to problems with 3D printing. Meshmixer is part of the Autodesk family of 3D printer software, so it should work well with tools like TinkerCAD.
Price: Free
Systems: PC, Mac
#20: OctoPrint
start, pause or interrupt 3D print jobs.