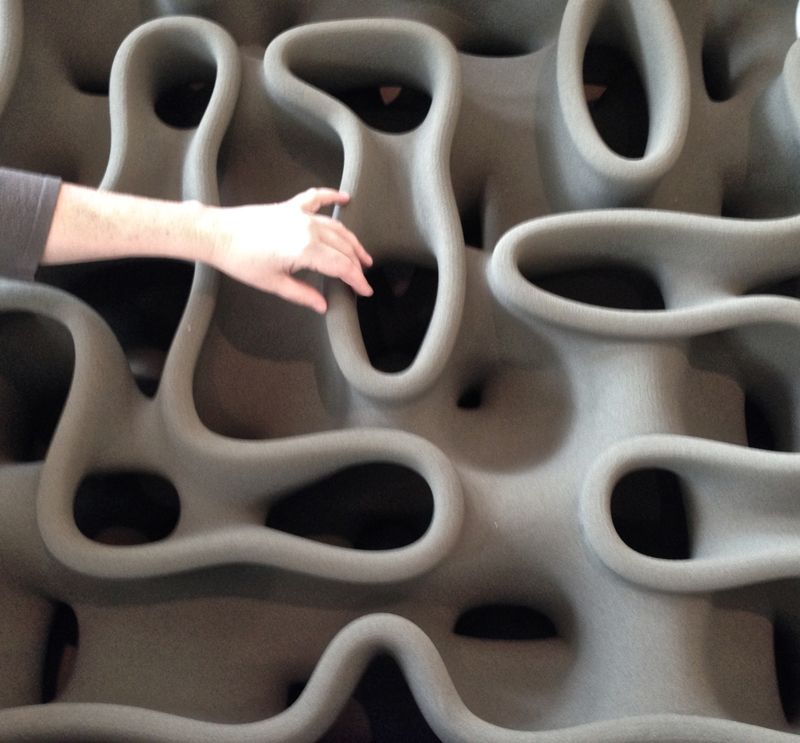
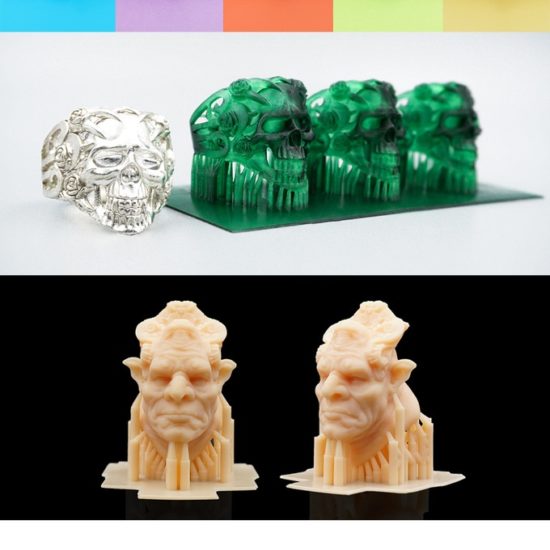
3D printed concrete forms
BigRep and Forward AM launch new Concrete Formwork for construction 3D printing
0Shares
Large-format 3D printer manufacturer BigRep and BASF’s additive manufacturing arm Forward AM have launched a new architecture-oriented 3D printing material.
Appropriately named ‘Concrete Formwork,’ the firms’ PET filament is designed to enable the creation of complex supports for precast concrete, at lower costs and lead times than normal building methods allow. Using BigRep’s STUDIO G2 3D printer and their new polymer, the companies are already planning to construct a unique concrete staircase, to showcase the material’s design and efficiency potential.
“We are excited to work with Forward AM to bring more solutions to the architecture and construction industry,” said Dr. Sven Thate, Managing Director of BigRep. “Our customers are seeing huge gains in terms of cost and speed thanks to our large-format machines and the new Concrete Formwork filament. Our solutions are opening the doors to many new possibilities. ”
Developing future-proof architecture
As modern architects continue to come up with novel, innovative and ultimately demanding designs, it’s becoming increasingly difficult to reinforce their complicated creations effectively. Usually, formworks are used to temporarily support the building of such concrete structures, but as creatives have grown more ambitious, normal methods of reinforcement are becoming unable to cope.
In order to enable the construction of more advanced concrete molds, BigRep and Forward AM have therefore extended their existing partnership, to develop and launch their Concrete Formwork filament. Designed specifically for use with BigRep’s G2 machines, the new material is said to be characterized by high stability, low moisture absorption and resistance to temperatures of up to 100 °C.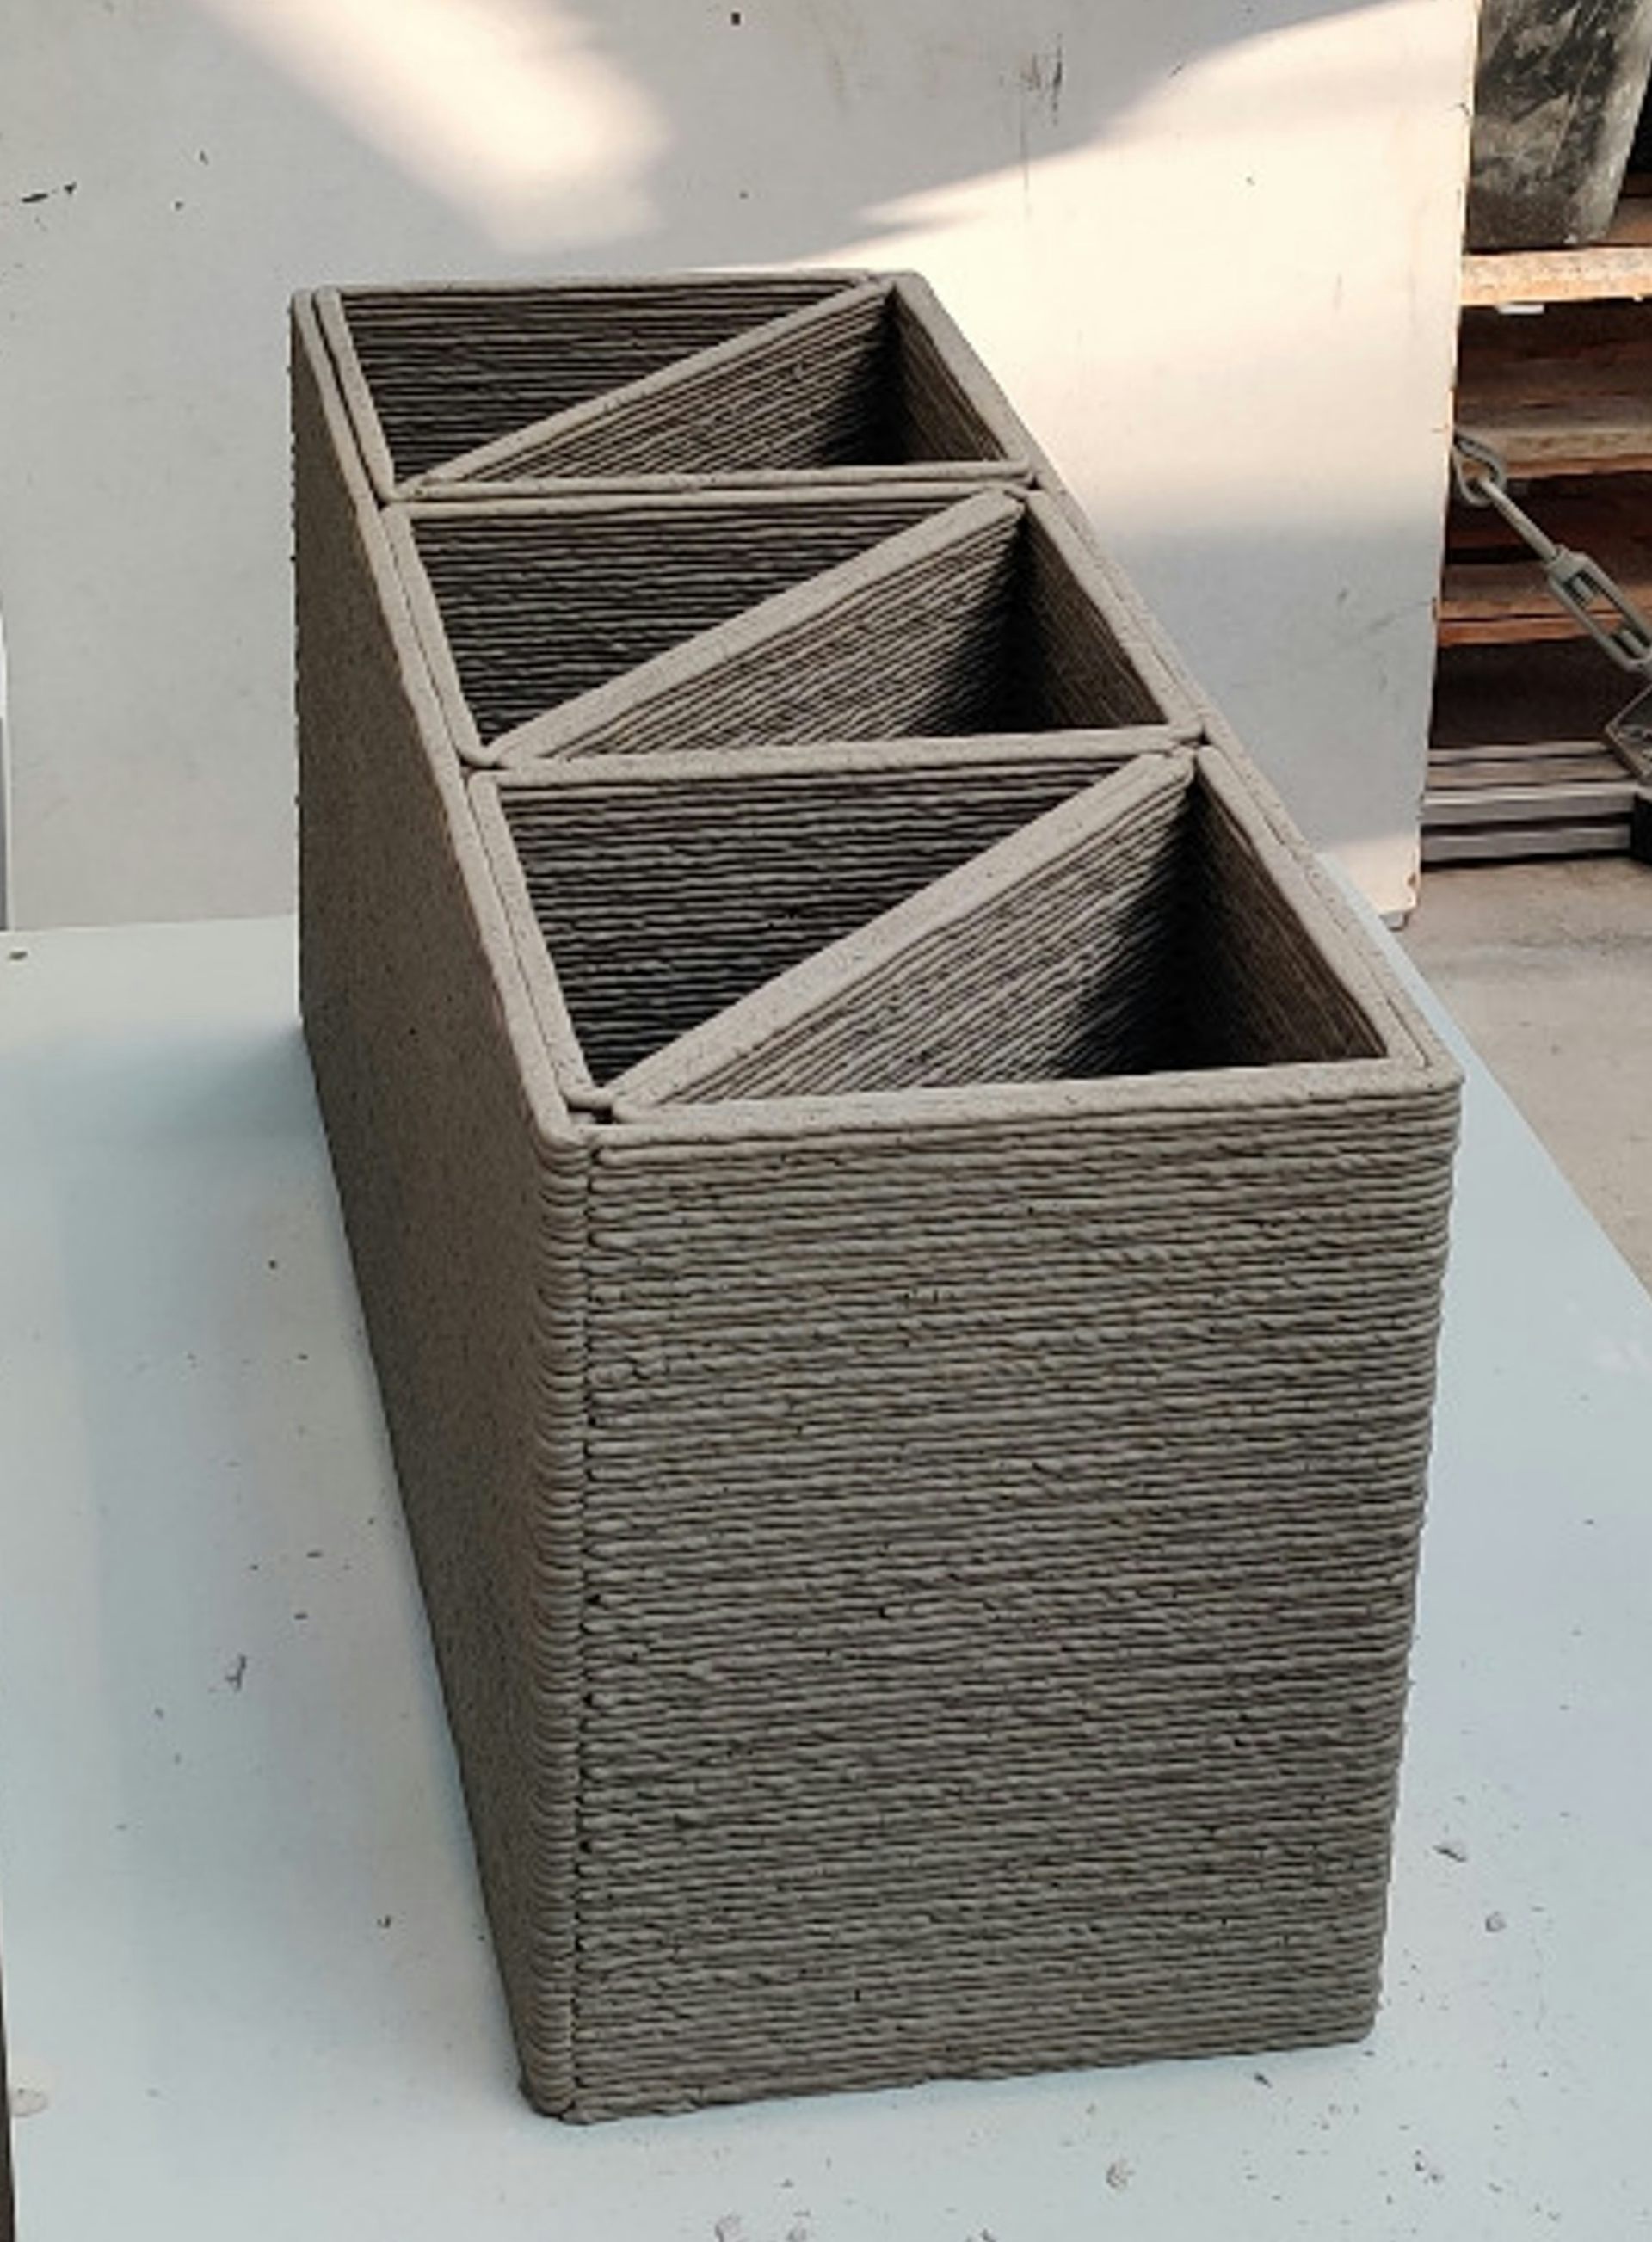
According to the BigRep and Forward AM, building conventional formwork requires the contribution of highly-skilled workers, which can drive the process’ price up to 60% of a build’s total budget. By contrast, using their Concrete Formwork, the firms say that it’s now possible to create casts with organic geometries, double-curved surfaces and even cavities, at a “fraction of the cost.”
A piece of staircase formwork being 3D printed on BigRep’s Studio G2 3D printer. Image via Forward AM.‘Design-to-production’ 3D printing
In addition to co-developing their new filament, BigRep and Forward AM have combined their expertise in virtual engineering and 3D printing to create a ‘digital design-to-production’ process. Within the firms’ concrete casting workflow, formwork can be seamlessly designed, additive manufactured, deployed and reused, potentially enabling adopters to significantly reduce their material waste.
Leveraging the companies’ approach, it’s also possible to scan and 3D print highly-accurate replicas to aid the restoration of old buildings, and if users require formwork that’s larger than the G2’s build volume, they can just produce it in pieces before assembling, post-processing and placing it alongside ordinary supports.
Since developing their new workflow, Forward AM and BigRep have also begun working with ETH Zurich’s DBT, ROK, SW Umwelttechnik and WaltGalmarini, to precast a set of concrete stairs. Nicknamed ‘Nest Step2,’ the upcoming architectural element is being built to exhibit the circular credentials of digital construction, and its steps are set to be 50% lighter than regular concrete, giving them a reduced carbon footprint.
Construction firm Geiger, meanwhile, has put Concrete Formwork into practise, using it to 3D print supports that have expedited the restoration of a building’s five meter-tall window frames. Elsewhere, the new material has been deployed to reinforce the builds of everything from outdoor sculptures to sensor-embedded walls, proving its efficacy in supporting a wide variety of highly-customized concrete structures.
The ‘Nest Step2’ staircase due to be built at the EMPA in Zurich. Image via ETH Zurich.Large-format concrete 3D printing
The introduction of digital design within the construction industry is increasingly providing manufacturers with a means of building bigger, bolder and more ambitious concepts than before.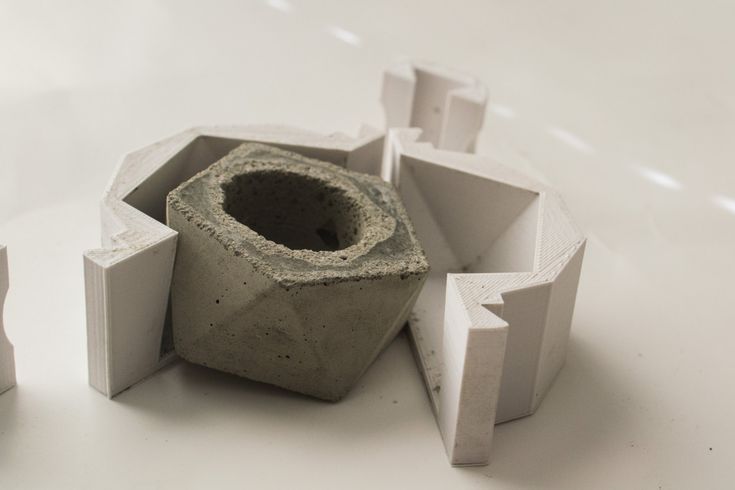 Just last month, a team of BAM and Weber Beamix engineers started to build the world’s longest 3D printed concrete pedestrian bridge in the Netherlands.
Designed by Michiel van der Kley and the Eindhoven University of Technology, the 97-foot structure is being built freeform, in a way that would be impossible to achieve with traditional formwork-based techniques. In Italy, meanwhile, researchers at the University of Messina have developed a lightweight foamed concrete, that could be used to 3D print structures without the need for any formwork whatsoever.
In more end-use applications, formwork and scaffolding system supplier PERI is currently using Danish manufacturing firm COBOD’s large-format systems to construct a commercial apartment building in Germany. Once finished, the three-floor structure is set to be listed on the local housing market as five separate rentable apartments.
To stay up to date with the latest 3D printing news, don’t forget to subscribe to the 3D Printing Industry newsletter or follow us on Twitter or liking our page on Facebook.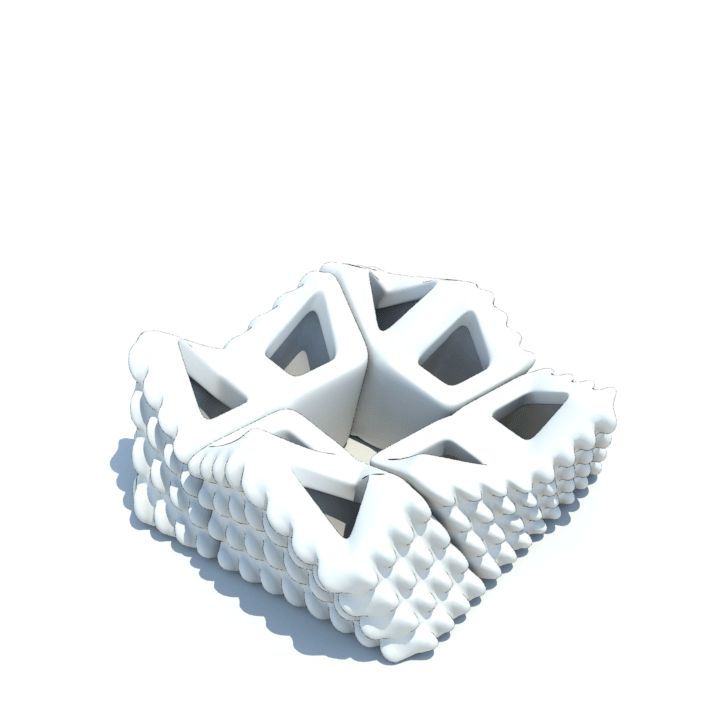
Are you looking for a job in the additive manufacturing industry? Visit 3D Printing Jobs for a selection of roles in the industry.
Featured image shows a piece of staircase formwork being 3D printed on BigRep’s Studio G2 3D printer. Image via Forward AM.
Tags BAM basf BigRep COBOD Eindhoven University of Technology ETH Zurich DBT Forward AM Geiger PERI Group ROK STUDIO G2 Sven Thate SW Umwelttechnik University of Messina WaltGalmarini Weber Beamix
Paul Hanaphy
Paul is a history and journalism graduate with a passion for finding the latest scoop in technology news.
Concrete Casting with 3D Printed Formwork
Digitize Production to Create Complex Concrete Formwork Faster and Cheaper
3x FasterProduce complex formwork at lightning speed with reduced lead times.
30% CheaperSave money with reduced costs of digital craftsmanship.
Achieve complex shapes unthinkable with traditional methods.
Concrete formwork in construction can make up 40 – 60% of a total budget, especially for complex shapes such as curved concrete forms. Some designs like organic shapes, double curved surfaces, and cavities are simply not feasible to produce because they require highly skilled laborers to produce customized formwork resulting in high costs, long lead times, and material waste.
BigRep 3D printers can produce large-scale, complex formwork up to 3x faster at a fraction of the cost of traditional methods. With the new CONCRETE FORMWORK filament developed by BASF Forward AM and BigRep, you can unlock the massive benefits of 3D printed formwork.
Advanced Applications with
3D Printed Formwork
BigRep 3D printers empower customers and partners to produce concrete formwork for building restoration, concrete facade panels, precast concrete stairs, public sculptures, and more.
Designed by DBT at ETH Zurich partnered with BASF Forward AM, ROK, SW Umwelttechnik and WaltGalmarini. NEST by EMPA is an innovative building utilizing digital fabrication and circular economy.
Image © DBT / ETH Zurich
GEIGER, BUILDING RESTORATIONGeiger’s restoration of 5m tall window frames was finished on a short timeline with 3D printed formwork.
BB BETON, PUBLIC SCULPTUREBB Beton uses 3D printed formwork to produce large-scale concrete sculptures for public parks in Stockholm.
Image © Veilhan, Alexis Bertrand / Bildkunst and Robin Hayes, 2020
SMART CONCRETE WALL, EMBEDDED TECHNOLOGYDesigned by NOWLAB and presented in Dubai, this room divider features integrated electronics and sensors.
This curtain wall is a custom-designed facade panel developed by BASF Forward AM with BigRep technology for Dressler Bau.
How to Produce 3D Printed
Formwork for Concrete Casting3D printed formwork is a perfect solution for casting complex geometries. The first step is to design and print the formwork. For restoration projects, it is also possible to scan existing elements to create the 3D models for the formwork.
If the formwork is larger than BigRep print volume (1m3 on the BigRep ONE, for example) then it can be printed in parts and assembled after. If needed, the 3D printed formwork can be post-processed with a variety of methods. It is also possible to combine traditional formwork for simple shapes with 3D printed formwork for complex parts. Then the concrete is cast using standard methods. Finally the formwork can be cleaned and reused.
Step 13D Print the formworkStep 2Assemble the parts(for extra large formwork)Step 3Post-process the formwork
(if needed)Step 4Cast concrete using standard methodsStep 5Clean and reuse the formwork
CARBON FIBER
In this video you will discover a great new level of productivity and consistency by adding capacity for six front-loaded material spools.
CARBON FIBER
In this video you will discover a great new level of productivity and consistency by adding capacity for six front-loaded material spools.
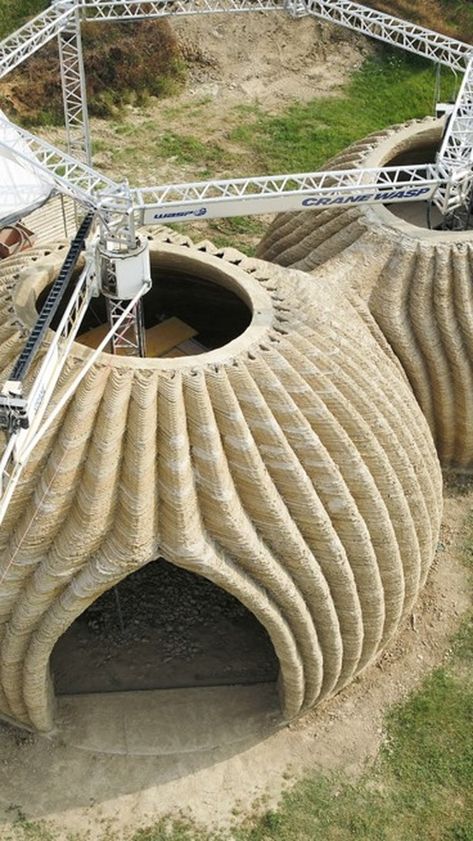
Concrete 3D printing: still ahead
Back to Concrete Issues main pageAdditive manufacturing, more commonly known as 3D printing, has been around since the 1980s. 3D printers have long been available for home use, so it's not surprising that industrial companies have begun to explore the possibility of using them in construction.
The use of 3D technology is widely and frequently discussed in the construction industry. Almost every week there is news of plans to 3D print structures ranging from bridges to houses that developers say can be built in one day. However, the initial enthusiasm in the media is quickly fading as there is less and less news of successful projects in this area. To shed some light on this topic, we asked a few experts for their opinions on the current state of 3D printing in construction.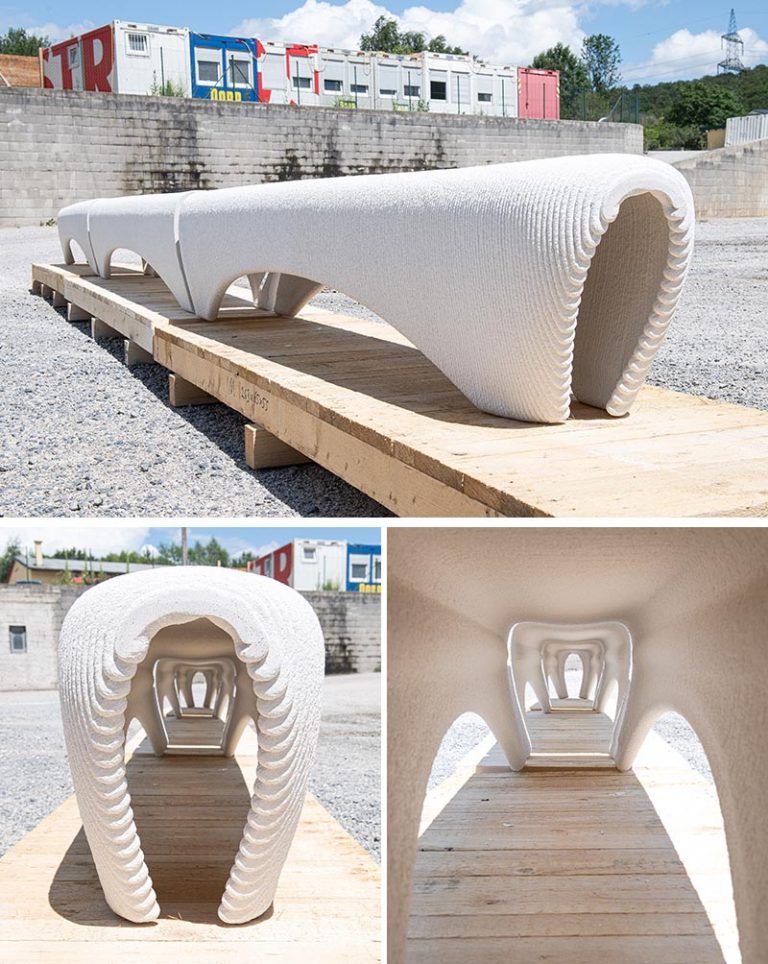
One of the approaches to automation
There is a lot of hype in the construction industry around 3D printing technology, which, however, is still at an early stage of development. Concrete is a difficult material for 3D. A construction 3D printer works by applying concrete, layer by layer, through a nozzle, and in order to flow out of it, the concrete must be liquid. After printing, on the contrary, the material must quickly lose most of its fluidity in order to retain the printed form. However, at the same time, it should not harden too quickly to give the layers time to stick to each other. If layers are simply applied on top of others, without any connection between them, this will result in a weak structure, with no tensile strength. All this means that we cannot use ordinary concrete in 3D printing, and each structure needs a special type - always with different impurities.
We must also take into account the complexity of the frame of the building that is being built. 3D printing is best for simple designs. Wall structures in Northern Europe, for example, are quite complex, and using 3D printing in them is quite problematic. The structure of the sandwich panel itself is a challenge for 3D printing: it has three layers - internal concrete, insulation, and external concrete. In addition, there are usually various wiring components inside the wall structure. Printing a three-layer structure and assembling electrical components during the printing process is not an easy task. The entire wall structure needs to be redesigned for 3D printing.
The current speed of 3D printers is incomparable with modern precast concrete factories. In addition, the quality of products from factories is much better than that obtained using additive technologies. 3D printing makes it possible to produce complex shapes, but in the case of typical concrete structures such as wall panels, its efficiency is far from that achieved by modern precast concrete technology.
Despite the limitations, we must be open to the possibilities that 3D printing brings. It can be considered as one of the approaches to increase the level of construction automation. If you look objectively, the future of 3D printing in construction is not clear. It may be one of the tools to help develop automation in construction, but certainly not the only one.
We must keep in mind that one of the main advantages of concrete is that it can be cast into shapes, create images and structures of varying complexity. Various types of concrete surface treatment are also currently available. Concrete construction is based, as a rule, precisely on its flexibility. With the help of 3D printing, we will completely change this. 3D printing certainly gives us new opportunities, but at the same time we lose some of the benefits of using concrete.
Jouni Punkki
Professor of Practice (Concrete Technology)
Aalto University, Helsinki, Finland
Jouni Punkki
Professor of Practice (Concrete Technology)
Helsinki Aalto University3
Financial viability is a big issue in the use of 3D printing in construction
We should consider 3D printing in construction as a very interesting technology that has some potential in the future. From a safety point of view, there are rules governing construction of any kind, and of course there are requirements for adding reinforced bars as supports in 3D framing. Since this technology is new and regulatory practices are constantly changing, these rules can be difficult to comply with. But I don't think there is any reason to be concerned about the safety of 3D printed structures.
Concrete 3D printing faces the same challenges as other industries embracing this technology. Using molds to make components by casting will be much faster because with 3D printing you need extra time to make sure the previous layer can support the structure before adding the next one.
One advantage that 3D printed structures can provide over conventional building methods is that they are much easier to incorporate smart technologies such as sensors, making them easier to integrate into the smart city concept. From this point of view, it is much more difficult to modernize existing houses built using traditional building technologies.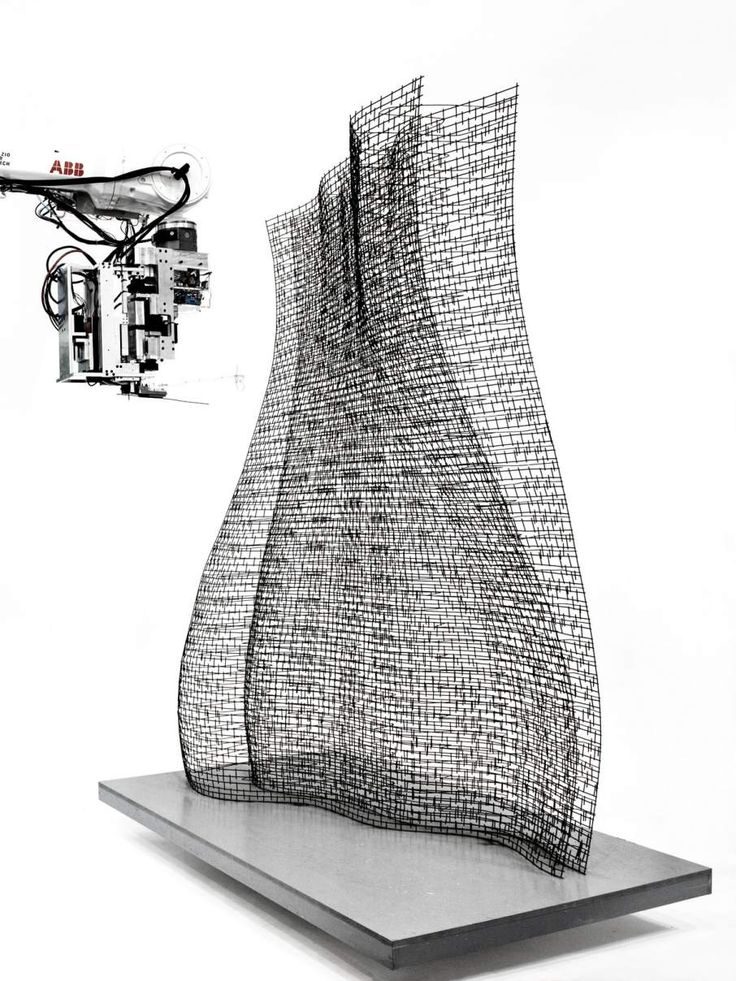
Developing new technologies takes time. It's about testing, learning, and trying to figure out all the different variables. 3D printing of concrete structures is likely to become more commonplace. However, what role it will take in the construction industry, we cannot yet predict.
The big question, of course, is can we make it financially viable? Is this technology something that customers will pay for? Will the cost of acquiring special 3D technologies be competitive, or at least comparable to what is on the market? There are other ways to achieve similar results, and these options are cheaper and more readily available to the construction industry.
Jouni Partanen
Head of Department (Advanced Manufacturing)
Faculty of Mechanical Engineering
Aalto University, Helsinki, Finland
CONCRETE EXPERIMENT 01 Design: Ashish Mohite, Michal Trpak Concrete Printing done by: Hyperion robotics Photographer: Umění ve městě 2019CONCRETE EXPERIMENTS Design: Ashish Mohite, Kunal Chadha Concrete Printing done by: Hyperion robotics Photographer: Ashish MohiteLots of claims, but not much evidence yet
There are several companies in the US and Europe that claim to be 3D printing concrete, but in the last two to three years they have only completed small projects such as private homes. One Russian company was erecting a three-story building in Dubai, and another company, already in Estonia, is now building a house using 3D printing. We help them make it a reality, but the project is still far from being completed.
Construction is a highly regulated industry, and one of the reasons why 3D printed concrete is no longer commercially available is the time it takes to get permits. In addition, the concrete used for 3D printing is more expensive than traditional concrete materials due to the admixtures needed to ensure the correct composition.
However, this technology continues to evolve. When a wall is 3D printed, it looks like a sandwich with two sublayers to make room for pipes and ventilation. In Zurich, it was possible to build a three-story house using various technologies. They invented a "smart stove" that had all the heating elements inside, however very expensive 3D printed molds were used for this. It was a pilot project to prove that the concept could be implemented.
Most companies involved in 3D printing in construction, of course, say that this technology is better than precast concrete, but in reality this has not yet been proven.
Ashish mohit
Doctoral
Mechanical Engineering Faculty
Aalto University, Helsinki, Finland
Ashish Mohita
Department of Engineering
AALTO University, Helsinki, Finlander, Finland
3D printing: promising, but it has a long way to go
The current technology used in construction is pouring concrete. To make it financially viable, you must keep the structure simple and standardized. If you don't, the price will go up as you have to make and customize different molds. In addition, simple products are not only visually unattractive, but also require a large amount of concrete in the manufacture. With 3D printing, we can reduce the amount of concrete used by about 50% by focusing, for example, on where the wall bears the load. We can print lines to make a slab and only use materials where we really need them. However, this means that we must also develop new design methods to benefit from the technology. Unfortunately, this takes time.
The industry is focused on using currently available material. I think if you're going to change something, you'd better look at it from a social perspective and from a sustainability perspective. I saw an opportunity when working with digital concrete: everyone supports changing the composition of concrete because 3D printing is not perceived as a threat to the traditional construction industry.
I think 3D printing opens up a lot of possibilities for making smart materials. Why not tie the conductive materials directly into the concrete so that you no longer have to insert wires into concrete structures after they are made? With 3D printing, you can add inches, make material changes, make electrical connections in the right place, make concrete transparent where you want. It's about combining 3D printed concrete with smart technology to ultimately benefit us as a society.
One of the barriers is economic viability. A technology such as 3D printing will not be widely adopted unless there is a visible economic benefit at some point. Thus, manufacturers could consider expanding their business model so that construction is valued not only by the price of the house or structure being built, but also by the impact it has on our ecosystem and its sustainability.
However, there is a big difference between 3D printing a bridge and a house. We announced a 3D printed house project in Eindhoven two and a half years ago, and the first house has yet to be built. The complexity becomes apparent already when compared with the first printing bridge, which was opened within half a year after the start of the project.
We found this to be terribly difficult because building a house involves complex systems - HVAC, electricity, internet connection - that you have to consider. It took us a long time to figure out how to do this, and I think it will be many more years before we can print houses or buildings on a larger scale. Bridges are much easier to build using 3D printing, as they have fewer details.
Theo Sale
Dean of the Faculty of Built Environments
Professor of Structural / Concrete Design
Technical University of Eindhoven, The Netherlands
Theo Sale
Dean of the Faculty of Built Environments
Professor of Structural / Concrete Design
Technical University of Eindhoven, The Netherlands
Ideal for decorative elements, but not yet for structures
3D printing is a very interesting manufacturing system that we are following closely. It is already used in many industries such as steel and plastics, as well as in aeronautics, and especially in the production of aircraft parts. However, it is not widely used in the construction industry.
According to experts, there are still many barriers that need to be removed before 3D printing will leave its mark on construction, but I believe that it is the future of our business - it's just a matter of time. Now 3D printing is mainly used to create decorative items. Some cruise ships, for example, use 3D printed plastic and cellulose fibers as part of their interior design.
Although concrete is not yet widely used in 3D printing, it offers many advantages: fire resistance, strength and the ability to support heavy structural elements. This is what makes it an ideal material for 3D printing items such as statues or columns, especially since each of us needs something beyond the usual box-like prefabricated structures.
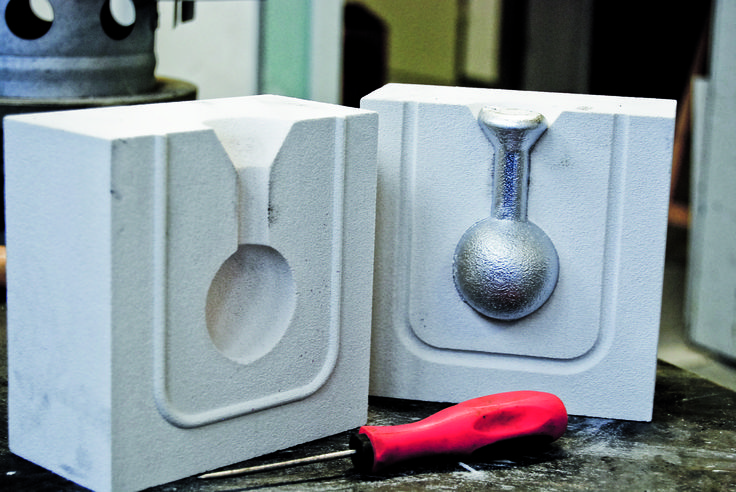
Decorative elements, of course, can also be molded from concrete, but this requires workers - craftsmen to equip the molds. One of the practical applications of 3D printing in construction is mold making. In complex precast concrete projects, mold tooling is always a challenge as it requires a lot of manpower and precision. If the molds were 3D printed, the process would be easier and less labor intensive.
Tested to 3D print entire frames using concrete for projects such as small single-family cottages. It is good that these tests are being carried out, but at the same time it is already clear that 3D printed concrete still has a long way to go. There are technical and quality issues that need to be addressed, especially when we start thinking about 3D printing large structures such as multi-story buildings. Building with 3D printed concrete also faces an economic challenge. The additives required for concrete to be used with 3D printing technology are very expensive.
Building entirely based on 3D printed concrete – where all the reinforcement, HVAC and sewerage systems are integrated rather than installed separately as is done today – is simply not possible at present. Perhaps in the future, when concrete technology is developed to the right level, 3D printed structures will become a viable option.
Petteri Laitinen
Vice President, Projects and Services
Elematic
Petteri Laitinen
Vice President, Projects and Services
Elematic
Do-it-yourself stamped concrete.
 How to make your own?
 In this article, you will find out in which cases you can easily handle stamped concrete yourself, in which cases it is better to turn to experienced specialists, get acquainted with the full list of pitfalls and decide for yourself whether such beauty is worth your future efforts.
Our company KONA specializes in the production of molds, stains and materials for stamped concrete. We work on our own materials, supply them to beginners and professional construction teams, as well as dealers throughout Russia.
Stamped concrete is both easy and difficult to make yourself.
Simply - if you will make a path, parking, garage entrance, blind area or design a recreation area (barbecue, patio). If at the same time you plan to interfere with your own mortar or concrete and take your time.
Difficult - if you want to quickly fill a large volume, eg 50 m2. The difficulty is that in this case you will have to order a mixer with concrete, have at your disposal 5 or more workers, and most importantly, experienced workers who know how to work with concrete in such quantities.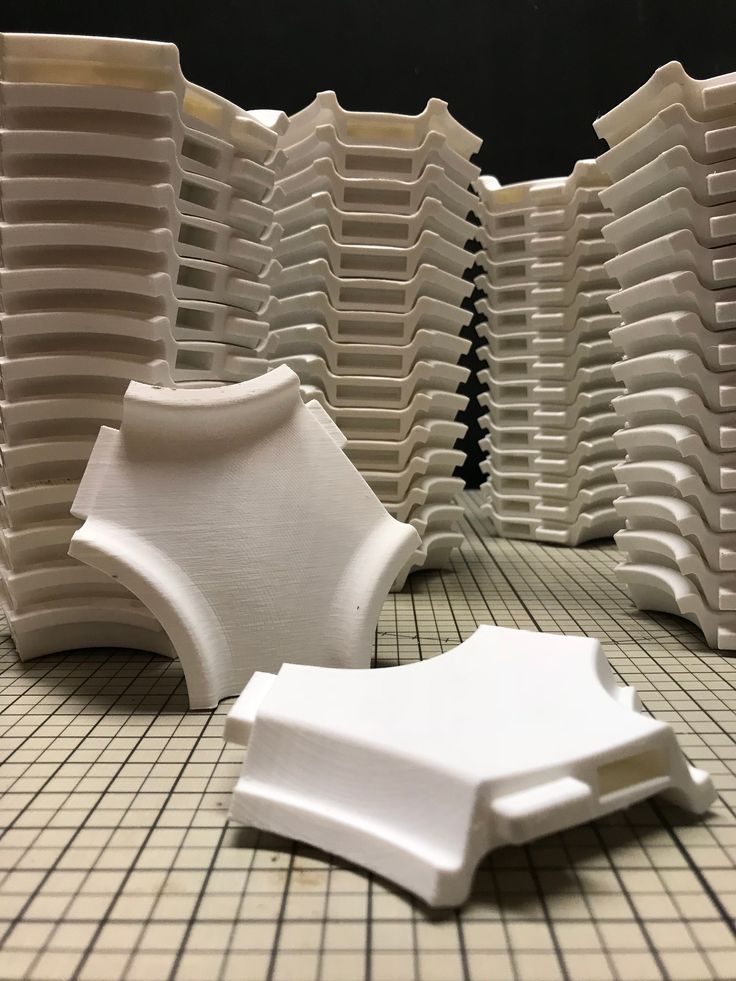 As you can see, the difficulty is not so much in the stamped concrete technology itself, but in choosing the right concrete and its laying - that is, ordinary concrete work.
If you choose the second option, then start by looking for experienced concrete workers. And in this article I will talk about the first option, in which you yourself will make the desired tracks for yourself or you will be led by relatives or hired helpers.
Did you know that printed concrete is only a decorative coating, the basis for which is an ordinary concrete or cement-sand screed?!
Therefore, all work is divided into two stages. The first step is to set the profile of the future track, install the formwork and pour the screed. Most of us have done this over and over again. The second stage is just a device for printing concrete: it is necessary to apply a fixative and a separator to the concrete, to print the texture on the concrete with a stamp.
Stage 1.
 Creating a conventional concrete (cement-sand) screed
 1. PREPARE THE FOUNDATION
Remove excess soil, add the missing, plan the profile of the future path.
2. LAY THE FILM
The film holds the necessary moisture in the concrete. Lay it so that it covers the entire area of \u200b\u200bthe future path and protrudes beyond the formwork.
3. INSTALL THE FORMWORK
The formwork determines the shape of the future walkway. As a formwork, you can use improvised materials, wood, plywood, cladding panels and siding, a drywall profile or a convenient flexible plastic formwork.
4. PREPARE MORTAR M300
Buy ready-made cement-sand mixture M300 or mix cement with sand yourself (1 to 3). The approximate consumption of the mixture per m2 for three popular track thicknesses will be: 86 kg - 4.5 cm, 110 kg - 5.8 cm, 148 kg - 7.8 cm. At this stage, do not forget to add fiber to give strength to sand concrete at the rate of 40 /50/60 g of fiber per 1 m2 of the track at a thickness of 4. 5/5.8/7.8 cm. To fill the entire track, you may need to make 10 or more batches. The exact amount of grout will depend on the width, length and thickness of your track. Smooth the surface of the track with a wooden board or a rule.
Step 2: Place Stamped Concrete
1. APPLY FIXER
Apply the fixer evenly to give the base color to the surface. For a better distribution of the fixer, use a regular coarse mesh sieve. Round the edges of the track with a special edge bender. Rub the fixer into the surface of the concrete using concrete floats or a rule. If necessary, repeat the application of the fixer until a uniform color of the base is obtained.
2. APPLY SEPARATOR
Evenly, without creating lumps, apply a release agent to give additional color to the base. For a better distribution of the separator, use the same sieve. It is not necessary to rub the separator into the surface.
3. STAMP THE SURFACE WITH THE STAMP
Place the stamp at the beginning of the track, leave a clear impression on the concrete.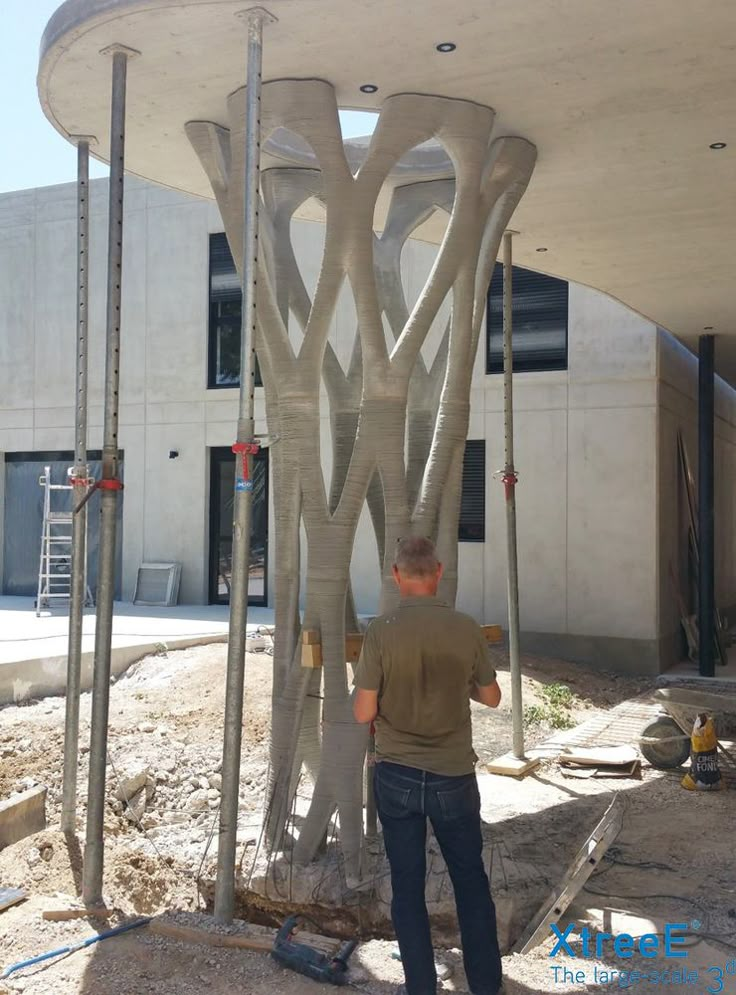 Move the stamp side by side and align it with the print left earlier. Repeat the operation until the entire surface is stamped.
4. WASH THE CONCRETE SURFACE WITH WATER
After a few days, wash off the separator with running water. It should remain in the seams and recesses of the printed texture.
5. APPLY PROTECTIVE VARNISH
One week after washing, apply a protective varnish to the concrete surface. Be sure to follow the recommendations for applying varnish - it is very capricious.
Stamped concrete walkway is ready!
An example of self-manufacturing of a sidewalk garden path using stamped concrete technology:
For best results, follow the directions:
- Use clay-free sand (lowest content) and fresh cement
- Mix with a mixer or concrete mixer, a shovel will not provide a good mix with the required amount of water
- Be sure to premix the dry ingredients together
- Control the amount of water - the solution must be plastic like plasticine
- Recommended cement to sand ratio 1 to 2.
 5 (M300)
 - Be sure to use at least 100 micron film to keep the ground from picking up moisture from the concrete
- When laying the mortar, tamp it to remove air
- Round the edges of concrete with a stainless steel bender
- Do the filling with cards (pieces) of a meter and a half. Round the edges of each card with a crimp.
- Apply the fixer and release agent through a regular coarse sieve - in this case, the application will be uniform and without lumps. Use wet shoes for large areas.
- Smooth the divider with a stainless steel trowel (optional)
- Apply release agent on a matt surface (optional)
- When stamping, press the die from the middle to the edges
- Wash off the separator after 24 hours at a temperature not lower than 10 °C
- Rinse with water until soapy effect disappears Apply
- Lacquer after 5-7 days on a dry, clean concrete surface in two layers at a temperature not lower than 10 °C.
 The first layer is covered with varnish, previously diluted with solvent 646 in a ratio of 1 to 1. The second layer is covered with a thick varnish after 60-120 minutes. The varnish is applied with a brush or sprayer. The lacquer coating must be renewed every 2-3 years, depending on the intensity of use of the coating. Varnish consumption: 1 liter per 5 m2 (based on two layers). See here for possible problems when applying varnish and how to fix them.
An example of making a site measuring 2 x 1.5 m using stamped concrete technology:
In our store you will find all the materials and tools for self-production of stamped concrete:
Stamps https://shop.mycona.ru/moulds -for-printed-concrete/
Hardeners https://shop.mycona.ru/color-hardener-for-stamped-concrete/
Separators https://shop.mycona.ru/color-release-for-stamped -concrete/
Varnish https://shop.mycona.ru/varnish-for-concrete-and-plaster/
Tool https://shop.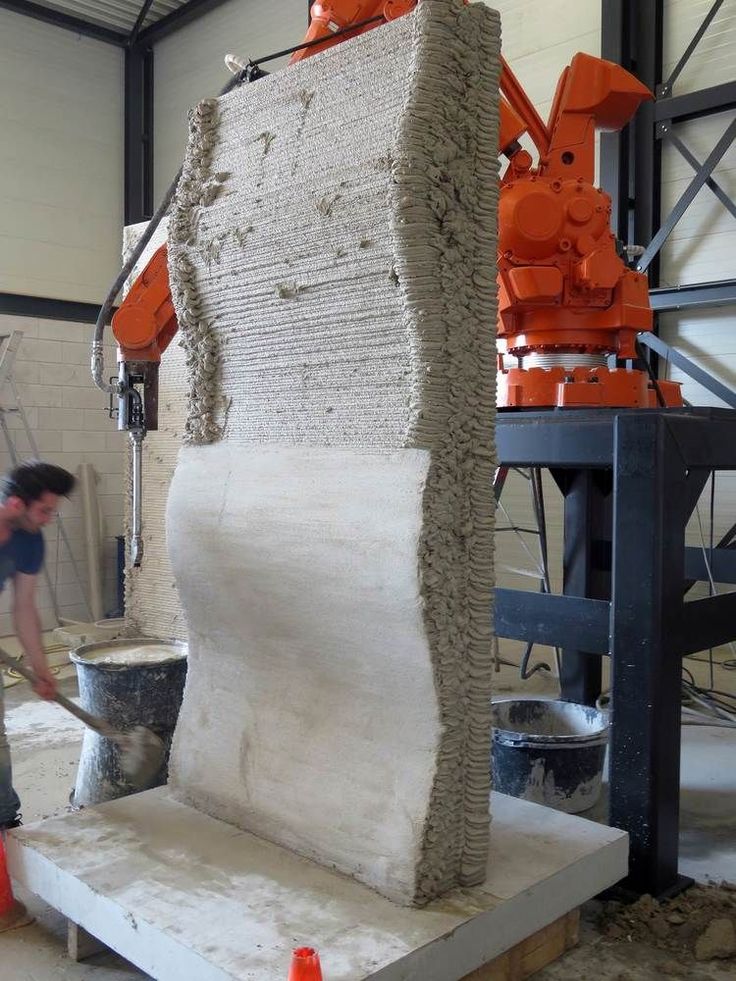 mycona.ru/concrete-tools/
Ask a question on Whatsapp
Reflections on stamped concrete:
Below I will give answers to frequently asked questions. If among them you do not find the answer, then write your question in the Comments at the end of the article.
Stamped concrete can be made in different ways and combinations:
1. Color fixer + color spacer = classic color;
2. Color fixative + colorless release agent + acid dye = natural natural color;
3. Color fixer + clear spacer = solid color;
4. Colorless spacer = uncoloured stamped concrete.
Stamped concrete with acid dye
The whole process of setting stamped concrete can be divided into several steps:
1. Preparation of tools and materials.
2. Pouring conventional concrete screed.
3. Stamping the concrete surface.
4. Coloring of concrete with acid dye.
5. Surface washing.
6. Applying a protective coating - polyurethane varnish.
Stamped concrete using colored fixer and spacer
You will need to complete the following steps:
1. Prepare tools and materials.
2. Pouring conventional concrete screed.
3. Application of color fixer.
4. Rubbing the fixer into the concrete surface.
5. Application of colored separator.
6. Stamping the concrete surface.
7. Surface washing.
8. Application of a protective coating - polyurethane (acrylic, epoxy) varnish.
Below I will give advice regarding all options for the color of stamped concrete:
- Approximate consumption of acid dye 1l of concentrate per 6m2. Dilute with water to taste, but usually the proportion is: 1 to 1, 1 to 2, 1 to 3. are made on gray cement), then you need to apply a white colored fixative before stamping and rub it in. There will be a kind of bleaching concrete. After drying, you can apply acid dye. In this case, the acid dye can be diluted more strongly, up to 1 to 5.
- Minimum set of tools: hand trowel for rubbing in the colored fixer, bender for rounding the edges of the concrete surface, long-haired brush for applying the colored spacer.
- Do not apply colored fixer to the concrete surface prematurely. The colored fixer must be rubbed into the concrete surface. The surface of the concrete must be free of excess moisture, there must be no puddles and streams on the concrete.
- Before stamping, make sure that the concrete has acquired the required degree of plasticity and has become similar to plasticine. If you start stamping too early, the concrete surface will not be able to support your weight and keep the print lines. If you are late, then for a clear print you will have to put more effort on the stamps. In addition, the texture of the stamps may not be imprinted at all on very dense concrete, especially at the end of the work.
- To determine the degree of concrete density, it is enough to press a finger on the concrete surface at several points on the site.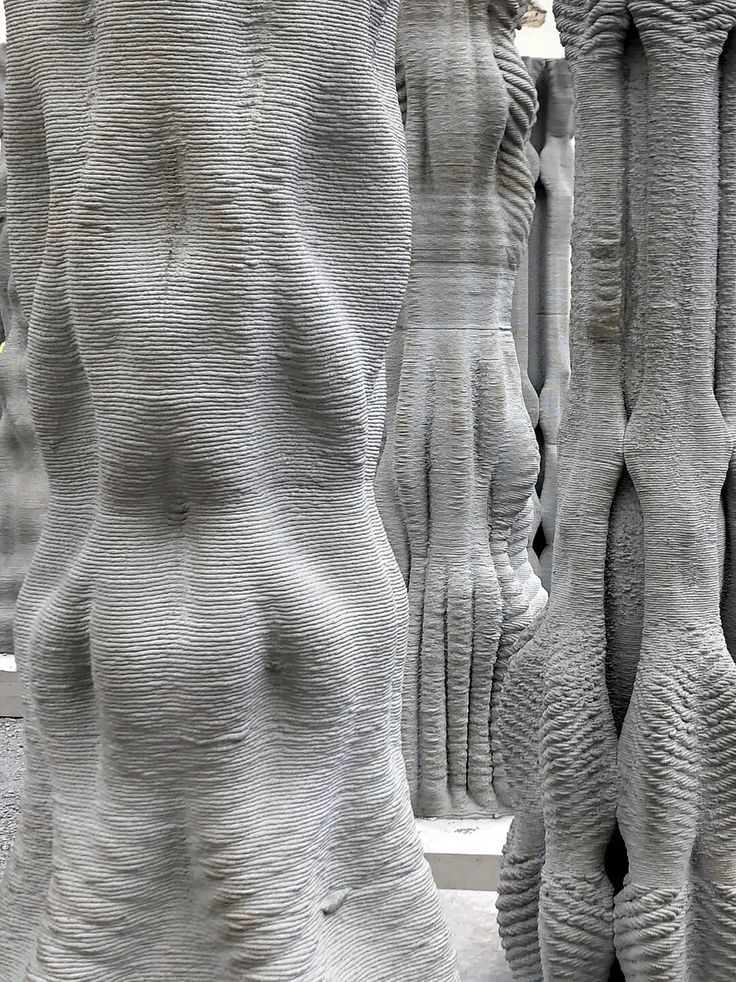 If there are prints with a depth of 4-6 mm, then you can start stamping. You can check in another way: place a stamp on the concrete surface (at the edge of the site) and step on it. The stamp should hold your weight, not sink into concrete, not slide on the surface.
- Fixer consumption for dark colors: 2 - 3 kg/m2, for light colors: 3 - 4 kg/m2. Separator consumption: 0.2 kg per m2 of surface.
- If it is not possible to use a high pressure washer (Kärcher) to remove the colored release agent from the concrete, brush off the release agent and wash off the residue with 5% hydrochloric acid. If the release agent is not completely removed, the varnish will not adhere to the surface of the stamped concrete.
Answers to questions:
Question: How long should I wait between applying the fixative and release coats?
Answer: The fixer application is always the same and does not depend on the area. It is necessary to apply and rub the fixer when there is no more water on the surface of the concrete.