3D printing dimensions
Understand Units and Sizes for your 3D printing Dimensions
3D Learning Hub
See all categories
Contents:
- Introduction
- How to Choose a Unit of Measure for your CAD File
- Dimension, Weight and Size Constraints of a 3D printing
- Modify the Size of Your 3D Printed Object
Introduction
Designing for 3D printing requires to keep in mind that your object will be a physical object with weight, size and constraints. Even if your object is coherent and seems to be at the dimensions you wish on the screen, it is really important to check if the 3D printed object will match your expectations and the machine constraints. Here are some tips to help you manage the units and size for 3D Printing with Sculpteo.
How to Choose a Unit of Measure for your CAD File
Whether you use the metric system or not, you need to know the exact size and dimension of your model.
Quite frequently, when you create a new file or scene in your CAD software, you are asked what unit of measure you want to use for this modeling project.
If not, you can modify it in the software settings. We wrote tutorials for the most used CAD software, that you can discover here.
On Sculpteo the default measure unit set is the millimeters, but you can choose, before you upload your file, between Millimeters, Centimeters and Inches as unit of measure for your 3D print.
Be careful however because if you designed your model in centimeters in your CAD software, when you’ll upload it on Sculpteo and choose millimeters, your object’s unit of measure will be changed.
For example, a cube of 10x10x10cm will become a 10x10x10mm cube. That’s why it’s extremely important to choose the same unit on our platform as you did on your CAD software.
If you forget to choose the unit of measure before uploading your file, don’t worry! You can still do it afterwards.
In the 3D printing settings tab, under Review and Checkout, you can see a recap of the options you chose before placing your order. If the measure unit doesn’t match your CAD file settings, modify it. As you change the settings, the price will automatically adjust (as you can see on the image below).
Dimension, Weight and Size Constraints of a 3D printing
The 3D printing process observes some constraints depending on the material you choose and the associated 3D printer.
The printing surface is indicated on the material page of our Learning Center.
For example, 3D printing in white plastic polyamide (PA11) with raw finish involves a maximum size of 677 x 368 x 565 mm.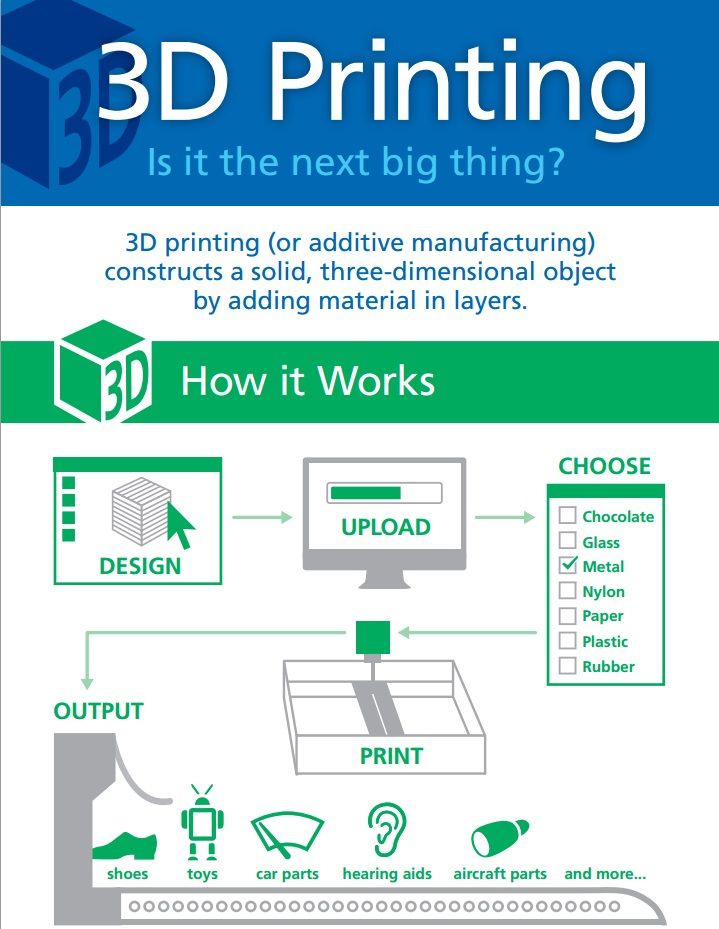
Depending on your material, finish and needs, the size plays a great role in the success of your 3D printing project.
To learn more about the material sizes of each material, you can visit our Learning Center.
The weight of your model also plays a role in the price and the size of your object. A bigger object involves more raw material, which leads to a more expensives and heavy object.
To counter this effect, you can hollow your model in your CAD software or directly on Sculpteo with our automatic Hollowing tool.
You just have to place two holes on your model to allow the unfused material to be evacuated, your model to become lighter, and its price to be reduced in real time on the platform.
Modify the Size of Your 3D Printed Object
As you are going to transform a digital model (you CAD file) into a physical object (the 3D printed object), it is quite important to control the size of what you designed.
To modify the size of your object in your CAD software, you can see our tutorials on how to prepare your CAD file for 3D printing.
The method consists in using a measure tool on each part to check if the object is at the right size. Another technique is to create a cube you know the dimensions of outside of your model. When your object is inside of the cube, you obtain the approximative area occupied by your object in the machine’s tray.
We did a video to show you step by step how to control the size of your object in 3Dstudio Max.
As you can see, this method is slow and specific. To simplify the process, we decided to provide a scaling tool directly on Sculpteo that allows you to modify the global scale of your object and see the impact on the price.
To use that tool, you just have to go in the 3D Printing Settings and modify the scale values. The online tool scales the object proportionally in every axis to keep its proportions.
Be careful however to not oversize your object as it has to fit in the machine’s tray. A message will display if the object size exceed the machine’s capacity.
On the contrary, do not reduce too much the scale of your object as finest parts may not be 3D printed. Our online solidity check tool will verify if the thinnest parts could be printed or not and warn you about it. If parts of the model are too thin, our thickening tool could fix the issue directly online.
To learn more about the help tools to optimize your file, you can visit our Learning Center and upload a file
Related Topics
- Return to Top
Get the latest 3D printing news delivered right to your inbox
Subscribe to our weekly newsletter to hear about the latest 3D printing technologies, applications, materials, and software.
How to Choose a Large Format 3D Printer
Large format 3D printers is one of the fastest-growing sectors of the 3D printing market.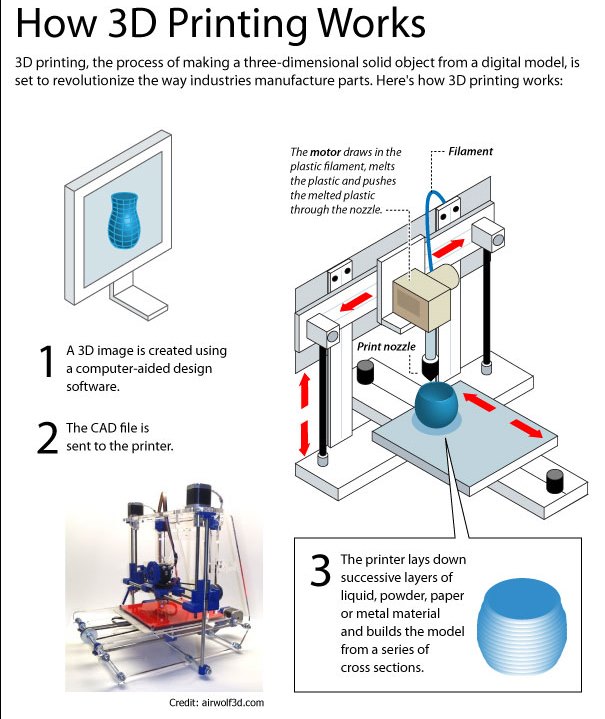 While some might think large format 3D printers are inaccessible—only a few years ago, prices would start around $100,000—the truth is that today’s large format 3D printing options are much more accessible.
There are three different 3D printing processes on the market today in an accessible, benchtop format, ranging from $5,000 to less than $20,000. Given the high cost of outsourcing large parts and prototypes, this means that investing in a large 3D printer can have a positive return on investment in months.
As the options for large format 3D printers are constantly expanding, how can businesses choose the right one?
This buyer's guide will explain how to choose the best large format 3D printer that’s right for any price point and application.
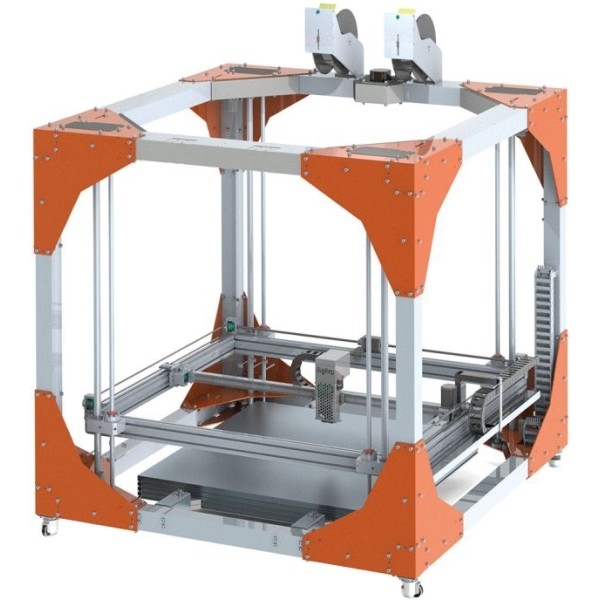
In essence, large format 3D printing today means build volumes beyond the 15-20 cm (5.9-7.9 in) cube dimensions common in desktop 3D printers.
The sweet spot for most large 3D printers today is around 30 cm (11.8 in) in one of the dimensions and around 15-30 cm (5. 9-11.8 in) in the remaining two. These accessible benchtop large format 3D printing can create full-scale prototypes, models, and production parts for a wide variety of applications, including consumer products, healthcare, manufacturing, and more.
There are also 3D printers on the market that go well beyond this size and can print 50-100 cm (19.5-39 in) parts, but this often means that options are limited to industrial 3D printers, where prices skyrocket, complexity increases, and facility requirements become stringent.
The three large format 3D printing processes available at accessible prices are the following: fused deposition modeling (FDM), stereolithography (SLA), and selective laser sintering (SLS). Let’s take a closer look at each technology.
Fused deposition modeling (FDM), also known as fused filament fabrication (FFF), builds parts by melting and extruding thermoplastic filament, which a printer nozzle deposits layer by layer in the build area. FDM is the most widely used form of 3D printing at the consumer level, fueled by the emergence of hobbyist 3D printers.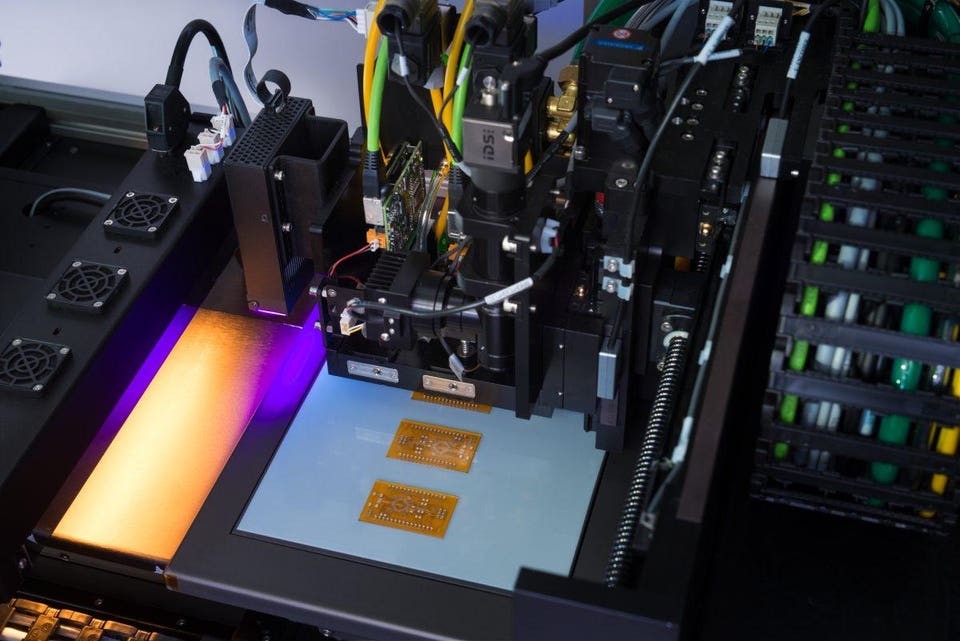
Mid-range large format FDM printers are available from $4,000 and can typically print objects up to about 30 x 25 x 30 cm in size, while larger systems that can create up to 60 cm tall parts start around $6,000.
FDM works with a range of standard thermoplastics, such as ABS, PLA, and their various blends. The technique is well suited for basic proof-of-concept models, as well as low-cost prototyping of simple parts, such as parts that might typically be machined.
FDM has the lowest resolution and accuracy when compared to SLA or SLS and is not the best option for printing complex designs or parts with intricate features. Higher-quality finishes require labor-intensive and lengthy chemical and mechanical polishing processes. Some large-format FDM 3D printers use soluble supports to mitigate some of these issues and offer a wider range of engineering thermoplastics, but they also come at a steep price. With large parts, FDM printing also tends to be slower than SLA or SLS.
White Paper
Want to learn more about the Form 3L and Form 3BL ecosystem, and how they compare to other methods of creating large prints?
In this free report, we look at how in-house large-format 3D printing with the Form 3L stacks up against other methods of production, chiefly outsourcing and using FDM printers.
Download Now
Stereolithography (SLA) printers use a laser to cure liquid resin into hardened plastic in a process called photopolymerization. SLA is one of the most popular processes among professionals due to its high resolution, precision, and material versatility.
While SLA used to be available only in smaller desktop printers or large industrial printers that cost more than $200,000, with Formlabs’s Form 3L printer, businesses now have access to industrial-quality SLA for just $11,000, offering a large build volume of 30 x 33.5 x 20 cm.
The Form 3L is capable of 3D printing large prototypes the size of a full-scale helmet.
SLA parts have the highest resolution and accuracy, the clearest details, and the smoothest surface finish of all plastic 3D printing technologies, but the main benefit of SLA lies in its versatility. SLA resin formulations offer a wide range of optical, mechanical, and thermal properties to match those of standard, engineering, and industrial thermoplastics.
SLA is a great option for large, highly detailed prototypes requiring tight tolerances and smooth surfaces, as well as molds, tooling, patterns, medical models, and functional parts. It also offers the material with the highest heat deflection temperature of 238 degrees Celsius—which makes it an ideal choice for certain engineering and manufacturing applications—as well as the widest selection of biocompatible materials for dental and medical applications. With Draft Resin, the Form 3L is also the fastest option for 3D printing large parts, up to 10X faster than FDM.
SLA’s wide versatility comes with a slightly higher price tag. SLA resin parts also require post-processing after printing, which includes washing the parts and post-curing.
Here are some examples of large 3D printed parts manufactured on the Form 3L:
Some examples of large 3D printed parts manufactured on the Form 3L.
Sample part
See and feel Formlabs quality firsthand. We’ll ship a free sample part to your office.
Request a Free Sample Part
Webinar
Formlabs 3D Model Manager Evan Fisher walks the viewers through CAD and PreForm tips for larger parts and introduces Form Wash L and Form Cure L for post-processing.
Watch the Webinar Now
Selective laser sintering (SLS) printers use a high-powered laser to fuse small particles of polymer powder. The unfused powder supports the part during printing and eliminates the need for dedicated support structures, which makes SLS an especially effective choice for complex mechanical parts.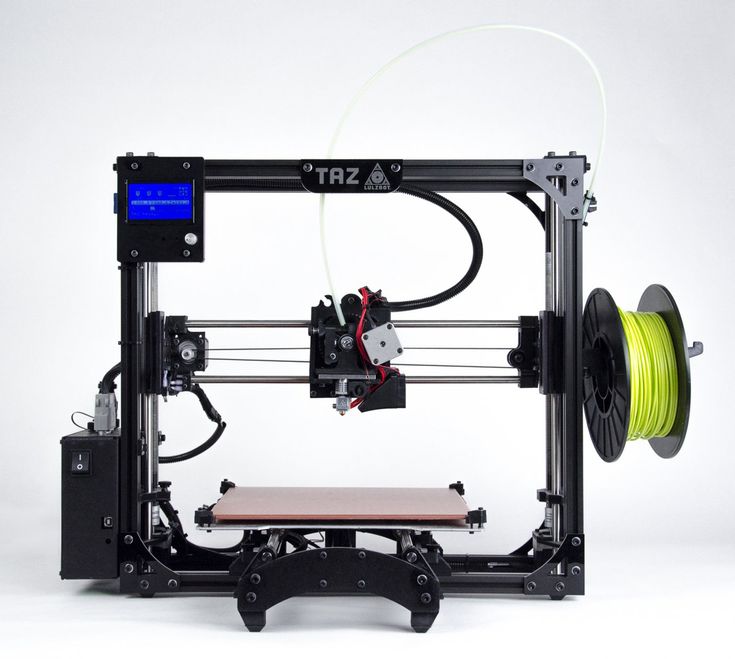
Because of its ability to produce parts with excellent mechanical capabilities, SLS is the most common additive manufacturing technology for industrial applications.
Just like SLA, SLS used to be only available in industrial machines starting at about $200,000. With Formlabs’s Fuse 1 SLS printer, businesses can now access industrial SLS starting from $18,500 with a 30 x 16.5 x 16.5 cm build volume.
Parts printed on the Fuse 1 SLS 3D printer.
Since SLS printing doesn’t require dedicated support structures, it’s ideal for complex geometries, including interior features, undercuts, thin walls, and negative features. Parts produced with SLS printing have excellent mechanical characteristics, with strength resembling that of injection-molded parts.
The most common material for SLS is nylon, a popular engineering thermoplastic with excellent mechanical properties. Nylon is lightweight, strong, and flexible, as well as stable against impact, chemicals, heat, UV light, water, and dirt.
The combination of low cost per part, high productivity, and established materials make SLS a popular choice among engineers for functional prototyping, and a cost-effective alternative to injection molding for limited-run or bridge manufacturing.
SLS has the highest entry price of the three technologies. While nylon is a great all-rounder material, material selection for SLS is more limited than for FDM and SLA. Parts come out of the printer with a slightly rough surface finish and require media blasting for a smooth finish.
Sample part
See and feel Formlabs SLS quality firsthand. We’ll ship a free sample part to your office.
Request a Free Sample Part
Large format 3D printing technologies aren’t interchangeable—the technologies all have distinct advantages and disadvantages that make them suitable for different applications.
| Fused Deposition Modeling (FDM) | Stereolithography (SLA) | Selective Laser Sintering (SLS) | |
|---|---|---|---|
| Resolution | ★★☆☆☆ | ★★★★★ | ★★★★☆ |
| Accuracy | ★★★★☆ | ★★★★★ | ★★★★★ |
| Surface Finish | ★★☆☆☆ | ★★★★★ | ★★★★☆ |
| Throughput | ★★★★☆ | ★★★★☆ | ★★★★★ |
| Complex Designs | ★★★☆☆ | ★★★★☆ | ★★★★★ |
| Ease of Use | ★★★★★ | ★★★★★ | ★★★★☆ |
| Build Volume | 30 x 25 x 30 cm (12 x 9,8 x 11. 8 in) and larger 8 in) and larger | 30 x 33.5 x 20 cm (13.2 × 7.9 × 11.8 in) | 32 x 16.5 x 16.5 x cm (12.6 × 6.3 × 6.3 in) |
| Price range | Starting from $4,000 | Starting from $11,000 | Starting from $18,500 |
| Materials | Standard thermoplastics, such as ABS, PLA, and their various blends. | Varieties of resin (thermosetting plastics). Standard, engineering (ABS-like, PP-like, silicone-like, flexible, heat-resistant, rigid), castable, dental, and medical (biocompatible). | Engineering thermoplastics, typically nylon and its composites. |
| Ideal applications | Basic proof-of-concept models, low-cost prototyping of simple parts. | Highly detailed prototypes requiring tight tolerances and smooth surfaces, molds, tooling, patterns, medical models, and functional parts. | Complex geometries, functional prototypes, short-run or bridge manufacturing. |
| Disadvantages | Lowest resolution and accuracy; not ideal for complex designs or parts with intricate features. The slowest form of large format 3D printing. The slowest form of large format 3D printing. | Parts require post-processing after printing. | Material selection is limited; parts require media blasting for a smooth surface finish. |
Video Guide
Having trouble finding the best 3D printing technology for your needs? In this video guide, we compare FDM, SLA, and SLS technologies across popular buying considerations.
Watch the Videos
A large format 3D printer represents a significant initial investment, but it can often recoup the initial investment even faster than smaller machines.
Outsourcing production to service bureaus is recommended when your business requires 3D printing only occasionally. Bureaus generally have several 3D printing processes in-house such as SLA, SLS, FDM, and metal 3D printers. They can also provide advice on various materials and offer value-added services such as design or advanced finishing.
The main downsides of outsourcing are cost and lead time. One of the greatest benefits of 3D printing is its speed compared to traditional manufacturing methods, which quickly diminishes when an outsourced part takes a week or even multiple weeks to arrive.
Outsourcing large 3D printed parts is also often very expensive. Depending on the number of parts and printing volume, investing in a large format 3D printer can break even within merely a few months.
For example, climbing and skiing gear manufacturer Black Diamond added a large format Form 3L SLA printer to their fleet to create full-scale prototypes in-house.
“We have reduced our costs on full-size prototypes from $425 a print to $70 a print. With that savings, Form 3L would pay for itself in only three months, said R&D technician Matt Tetzl.
| Outsourcing | In-House | |
|---|---|---|
| Time | 7 Days | 3 Days |
| Cost | ~$425 | ~$70 |
By 3D printing full-scale prototypes in house on a Form 3L, Black Diamond reduced their prototyping costs by 80-90%.
Interactive
Try our interactive ROI tool to see how much time and cost you can save when 3D printing on Formlabs 3D printers.
Calculate Your Savings
The latest generation of large format 3D printers have made manufacturing large prototypes and parts faster and much more affordable, opening the doors for almost any company to use 3D printing to improve product development and production.
With the Form 3L and the Fuse 1, the first accessible large format SLA and SLS 3D printers, Formlabs strives to revolutionize professional 3D printing. If you’re ready to leverage 3D printing in your business, find the right Formlabs 3D printer for your needs today.
See the Form 3LSee the Fuse 1
3D printer print size - 1.2 x 1.5 x 1.8 m. by Sprint 3D.
Rapid prototyping of large-scale art products
In the minds of many contemporaries, 3D printing is a technology that can create extremely small objects - spare parts, souvenirs, various kinds of models, and so on.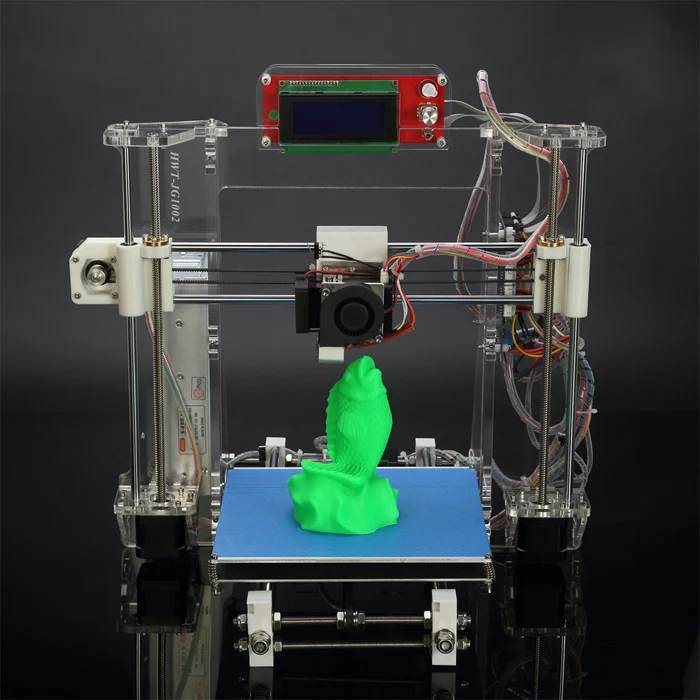 Moreover, many believe that it takes many hours. In the meantime, a whole car has already been created through 3D printing. And it didn't take weeks. Let's consider which print size 3 D printer is possible today and what print speed 3 D print is currently being achieved. But first, a few words about prototyping.
Rapid prototyping of 3D models is a process of rapid creation of mock-ups of models (prototypes), which will later be used to improve and finalize design solutions. In some cases, such prototypes can also be used as finished products. nine0013
Satellite 3D Printer 500x500x800 cm
Modern 3D Printer Capabilities
3D printing equipment has made a huge leap forward in recent years. One of the brightest representatives of the new generation of printers for rapid prototyping of dimensional art products is the 3D printers that we use in our work.
Main equipment features:
- Working area - up to 1.2x1.5x1.8 m.
- Speed 3 Printing D of along the Z axis (in height) - 35 cm / hour.
How do you achieve high print speeds and the ability to produce large items? First of all, due to the use of special photopolymer gel compositions with a high degree of viscosity, as well as due to the rationalization of the placement of supporting structures. The so-called GDP-technology (Gel Dispensed Printing) is used. It is based on the use of liquid light-sensitive compounds that quickly harden under the influence of ultraviolet lamps. Those are located directly above the print heads and act directly on the material. This system ensures fast curing. nine0013
Due to the fact that the GDP technology cures faster than other technologies, it is not necessary to use supports for horizontal surfaces. Obviously this saves time. And at the same time, the materials of production.
Also note that 3D printer models and some analogues use two printheads that work independently of each other. This allows you to create two objects at the same time in one workspace or separate components of one large product. Accordingly, print size 3 D of printer in this case, when gluing, it increases at least twice and can exceed 3 meters.
Large-scale 3D printing: how much more difficult it is than small-sized
In fact, print size 3 D of the printer practically does not affect the complexity of production and subsequent post-processing. If in older models of printers there could be cases when the material clogged the nozzle and the work done simply went down the drain, then modern equipment is devoid of such shortcomings. You don’t have to worry that something will go wrong in the many hours of printing and you will have to redo everything from the beginning, wasting time and a lot of resources. nine0013
Separately, we note the simplicity of the post-processing process. After hardening, the gel lends itself perfectly to a wide variety of processing. It is perfectly painted and varnished, which opens up the widest possibilities for creating a wide variety of dimensional objects: stands, product models, models of equipment and much more. Everything is fast, convenient and at the same time quite inexpensive. The printing process itself and finished products meet the requirements of environmental friendliness and safety of use. During production, no harmful and dangerous substances are emitted, and the printed products fully comply with modern environmental standards and are hypoallergenic. This is a particularly important factor at the present time. nine0013
How does 3D prototyping work? A physical structure is built according to a previously prepared mathematical model.
The advantages of prototyping are obvious:
1. Visibility of the whole process;
2.
 Minimization of the time required for preparation of production;
 3. Reduce engineering and design costs. nine0003
The first step in prototyping is mathematical modeling, which creates a mathematical model in STL format. After that, prototypes are finalized to create the necessary surface textures. Prototyping also includes the development of technologies, the production of specific models and their finishing. Everything is almost identical to small-sized printing, although products are made with many times larger sizes.
Advantages of rapid prototyping in large-scale printing:
- Accurate and fast verification of the conformity, function and form of the printed design.
- Extensive design flexibility and versatility with the ability to quickly transition between different stages of production.
- Increased speed 3 D print and no waste of materials that are already used in large quantities.
- Ability to quickly test the properties of specific products in order to further develop new materials and at the same time obtain new properties of finished products. nine0039
- Minimize the risk of any design errors and improve the quality of finished products.
If printing on a 3D printer with a working area of 1.2x1.5x1.8 m is also relevant for you, SPRINT3D is at your service. Modern technological equipment for dimensional printing, high-quality materials and professionalism at all stages of production - all this the SPRINT3D team provides to each client.
Still have questions? Use the feedback form on the website or call + 7 (929) 680 27 76.
What is the actual size of the product after 3D printing?
05/10/2018 in 3D Modeling, Expert Blog, Instructions
In this article, we will consider the most common reasons for changing the final dimensions of manufactured products printed on a 3D printer. This article will be helpful for designers and inventors to understand how to design 3D models for 3D printing.
First, let's introduce some terminology. All deviations that occur in the technological process of 3D printing and related technologies, we will call “error”. Consider what types of errors are and delve into each of them. nine0013
- Extrusion width error.
- Approximation of radii depending on layer height.
- 3D printer extruder positioning accuracy.
- Inertial beats.
- Uncontrolled material shrinkage.
- First layer error.
- Porosity.
- Matching accuracy after printing details, splitting into components.
- Support material tearing points.
- Thin wall roughness. nine0039
Extrusion width error.
Preparing a 3D model for 3D printing comes down to creating a so-called G-code. G-code is a computer code that sets the movement for all the electric motors of a 3D printer. These motors include those responsible for moving the extruder (the 3D printer's 3D printed head)..jpg) The movements and movements of the extruder are given by the trajectory, which is determined by the line. In preparation for 3D printing, the model is split along the Z axis into layers, determined by the selected layer height. The trajectory of the extruder is built based on the dimensions of these layers, and in the case of the layer perimeter, it describes the outer surface of the model, averaged along the Z axis. In turn, the extruder repeats the trajectory laid down in the G-code, namely the center of the nozzle. Ultimately, when designing models, it is necessary to take into account the fact that the nozzle itself has a hole diameter through which plastic is extruded. In simple terms, the nozzle radius is added to the size of the 3D model. When choosing a 3D printer, in terms of extrusion width error, the accuracy of the part will be higher on the one with a smaller diameter nozzle. And when designing three-dimensional models for 3D printing, it is necessary to lay a margin for model widening.
The movements and movements of the extruder are given by the trajectory, which is determined by the line. In preparation for 3D printing, the model is split along the Z axis into layers, determined by the selected layer height. The trajectory of the extruder is built based on the dimensions of these layers, and in the case of the layer perimeter, it describes the outer surface of the model, averaged along the Z axis. In turn, the extruder repeats the trajectory laid down in the G-code, namely the center of the nozzle. Ultimately, when designing models, it is necessary to take into account the fact that the nozzle itself has a hole diameter through which plastic is extruded. In simple terms, the nozzle radius is added to the size of the 3D model. When choosing a 3D printer, in terms of extrusion width error, the accuracy of the part will be higher on the one with a smaller diameter nozzle. And when designing three-dimensional models for 3D printing, it is necessary to lay a margin for model widening. I want to note that in other 3D printing technologies that use a laser or an illumination device, the width of the outer perimeter line depends on the focus, that is, on the thickness of the beam. As a rule, these parameters can be clarified with the manufacturer of the 3D printer or with Studia3D specialists. nine0013
Let's see how this works on the example of a 3D model that has a hole.
The figure shows the 3D model, rendering of the prepared G-code and the trajectory of the center of the extruder nozzle for the 7th layer of 3D printing. Select the perimeters of the holes and overlay the actual extrusion width on the trajectory (Highlighted in light green).
As you can see, the hole diameter is smaller. How much? On the nozzle radius on one side + the nozzle radius on the other. That is, when designing a hole, I need to lay a gap equal to the width of the nozzle. The same goes for all other cars. The smaller the nozzle size, the closer to the nominal dimensions the part will be. At the same time, printing with a nozzle of a smaller diameter will cost more. This is due to performance. Through a larger nozzle, more plastic comes out per unit time, which affects the speed of printing. The operating time of the printer, as well as the amount of material, affects the cost of obtaining the product. nine0013
Approximation of radii depending on layer height.
The specified layer height directly affects the accuracy of 3D printing. This is clearly expressed on the radii in the sections of the model along the vertical. Consider the part from the previous paragraph, positioning it on the edge in the 3D printer chamber.
As you can see in the figure, the quality of the hole depends on the selected layer height. The lower the layer height, the better the detail. In this case, it is worth considering the time of 3D printing. As the layer height increases, the print time decreases by reducing the total length of the trajectory described by the extruder. Accordingly, the price of the part is reduced, because. The operating time of a 3D printer directly affects the cost of 3D printing. nine0013
3D printer extruder positioning accuracy.
This parameter determines the accuracy of repetition by the center of the extruder nozzle of the trajectory specified in the G-code. In other words, this parameter characterizes the maximum possible deviation of the center of the extruder nozzle from the trajectory during printing. This parameter is specified by the 3D printer manufacturer for a specific printer model. But it should be noted that this parameter corresponds to the manufacturer's recommended 3D printing speed. In turn, Studia3D specialists, when preparing the G-code, reduce the influence of this parameter to a minimum, but do not exclude it at all. In addition to speed, this parameter is affected by the rigidity of the 3D printer and the extruder drive system. nine0013
Inertial beats.
As a special case of positioning accuracy, we single out inertial beats that occur during 3D printing as a separate point. This parameter is affected by the same positions that were described in the previous paragraph, however, this error is reduced in a different way. This can be understood by studying the moment at which the influence of this error on the print quality arises - a sharp change in the direction of the extruder's motion vector. When the electric motors, together with the drive system, abruptly change the direction of the trajectory, the print head, which has some characteristic weight, continues to move in the previous direction by inertia. As a result, dynamic damped oscillations occur, which negatively reflects the surface. The influence of this error is reduced in two ways. Decreasing the speed of printing the outer perimeter, which we use when printing all models without exception and is laid at the stage of preparing the G-code. The second method is laid down when designing the model: if possible, it is necessary to add mates to acute-angled faces in the model, which, when the part is positioned on the 3D printer platform, in sections parallel to the XY plane, will give sharp corners in the perimeters.
 As practice shows, a pairing of 2 mm is considered sufficient. We show with an example. nine0013
As you can see in the figure, by rounding the corner (by entering a fillet on the face), we minimized the influence of this error.
Uncontrolled material shrinkage.
This parameter has its effect, as a rule, in the case of 3D printing of large objects. Large - this means more than 30% of the maximum size of the 3D printer camera along any of the coordinate axes. Most often, this error manifests itself in interlayer adhesion and a decrease in dimensions in planes parallel to XY. nine0013
Our observations have shown an approximate shrinkage for some of the most common materials in relation to dimensions along sections parallel to the coordinate axes.
ABS: XY ≈ 5%; Z ≈ 1%
PLA: XY ≈ 2%; Z ≈ 0.5%
Polypropylene: XY ≈ 7%; by Z ≈ 10%
First layer error.
The G-code preparation program considers the 3D printer platform to be absolutely parallel to the XY plane, however, in practice, platform calibration also has its own error. In Studia3D, the norm for the difference in thickness of the first layer is:
Δ=0.1 mm from a layer height of 0.2 mm
Δ=0.05 mm from a layer height of up to 0.2 mm
Porosity.
Porosity in the case of 3D printing is usually discussed only in the case of the percentage of filling of internal floors up to 100%. However, when printing with 100% infill, the porosity does not go anywhere.
This can be clearly seen by examining the gap in the workpiece under a microscope to determine the strength characteristics.
If the model is not included in the printable area of the 3D printer, it is split into components. In the best case, grooves are provided for the most accurate assembly. You need to understand that the assembly of the model from the components also affects the accuracy of the overall design. This accuracy is very difficult to assess. We accept deviations from the given model of the order of + - 2%. To fix the joint, we almost never use glue, but use a special chemical solution. Ultimately, the parts are not glued, but soldered, only not by thermal melting of the material, but by chemical. As for the adhesion strength: it is higher than the adhesion between layers. In simple terms, if you throw such a part against a wall, it will break, but first of all not at the joints. nine0013
Locations where support material has been torn off.
This item applies to mechanically removed supports. Since the material of the support and the material of the main part consist of the same material, they are simply soldered together under the influence of temperature. When such supports are torn off, traces, threads, chips, etc. remain.
To minimize this error, it is necessary to order 3D printing with soluble supports. Due to the expensive soluble support material, the cost of 3D printing also increases significantly. Accuracy, like beauty, requires sacrifice. nine0013
Thin wall roughness.
When preparing a G-code in standard form, the program strives to make your part as strong as possible. This is bad only in one case, when the product has thin-walled elements. When constructing a trajectory, we set the minimum wall thickness inside which the infill will be built. As a rule, this thickness is equal to the 3rd nozzle diameter. But in cases where there are places where the thickness is less than the thickness of the outer wall, when constructing the trajectory, the program will draw one perimeter on each side, and fill the void between them. Due to the fact that filling will occur at a distance of 1 to 2 nozzle diameters, the extruder will begin to vibrate, inertial beat will begin (see point inertial runout ). The more this distance is reduced to 1 nozzle diameter, the faster the near-resonant frequency occurs. All this negatively affects the appearance of this wall, since the vibration is transmitted to the adjacent material. Let's look clearly.
To minimize this error, it is necessary to design the part in such a way that the wall thickness is a multiple of the nozzle diameter.


