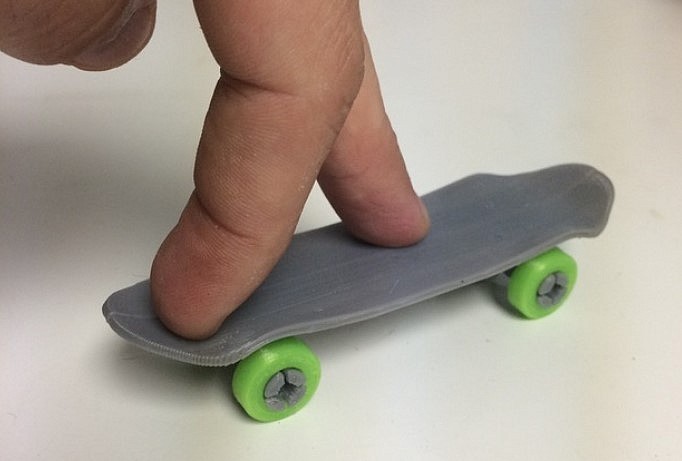
3D printer skateboard
Skateboard best 3D printing models・Cults
Skate Tits
€1.27
Longboard Wallmount for 83mm wheels
Free
Skate mobile wheels
€2.50
Skateboard Deck No-screw wall mount
Free
skateboard wall mount, skate board wall mount, skate board wall mount
€2
SKATE
€9.82
HALF PIPE
€9.82
Evolve GT - AT Motor Protector
Free
Evolve GT - AT Belt/Motor Guard
Free
Meilan X5 - Truck Mount
Free
Skateboard/Longboard shelf mount
Free
Electric Skateboard Battery Enclosure with Rosenberger RoPD 10s4p
Free
Hydrant
Free
Creality C10 V3 Filament Runout Sensor Bracket and Spool Holder
Free
Fingerskate bench
Free
Mudguards Skateboard / Scooter mudguard mudguard
€9. 88
FINGER SKATEBOARD
€0.92
skateboard
Free
Fingerboard Ramp
€2.76
Spine-Transfer for Fingerboards with Ledge
€2.40
"Bulb" Fingerboard Obstacle with Ledge and Quarter
€2.80
Miniature Garbage Can, Rubbish Bin, Trashcan for Dioramas / Miniature Garbage Can, Rubbish Bin for Dioramas
€2
Miniature Bottles for Dioramas and such / Miniature bottles for dioramas and such
€1
Skateboard Trampoline Trucks
Free
Meepo Hurricane Truck Mounted Light
€0.91
Skateboard Convex & Concave Footstop
€8
Concave Footstop Skateboard
€5
Skateboard Convex Footstop
€5
skateboard rack
€1
Skate ramps
Free
F1 style skateboard wheels
€8. 39
39
rails skate
€0.99
skateboard tail bone
€0.99
Turn signals for MAX G30.
€4
DualOMO Nose Saver
Free
Landwheel Battery Caddie
Free
Skateboard Stand
€2.30
Penny Board Pendant - Skateboard
€5
Skatepark 01
€5
Rocket Board
€1.66
Skateboard support #SPORTXCULTS
Free
MBS Matrix II 10mm Riser
Free
Skateboard Mount
€0. 60
60
Screwless Filament Guide - Ender 3 (Pro, V2)
Free
ORANGATANG STYLE LONGBOARD ROAD WHEELS
€5.69
ORANGATANG STYLE LONGBOARD OFFROAD WHEELS
€5.69
Zed Zombie
€3.41
EKKO SKATEBOARD OF ARCANE / LEAGUE OF LEGENDS MODEL - STL AND OBJ FILES FOR 3D PRINTER
€4.61
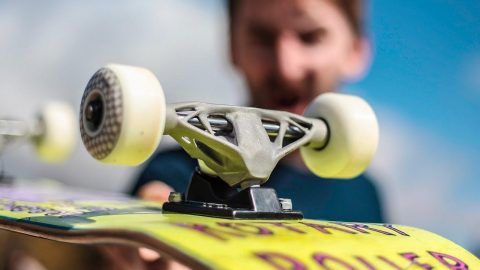
Project Build: 3D Printed Skateboard Truck
This blog post will cover the creation of a finished, functional part: a 3D printed skateboard truck, printed in Onyx reinforced with carbon fiber. Let’s go.
What is a Skateboard Truck?
A diagram of all the parts of a standard skateboard truck.The trucks of a skateboard are the interface between the deck and the wheels. At its simplest,each truck consists of a baseplate (which is bolted to the board) and the hanger (on which the wheels sit).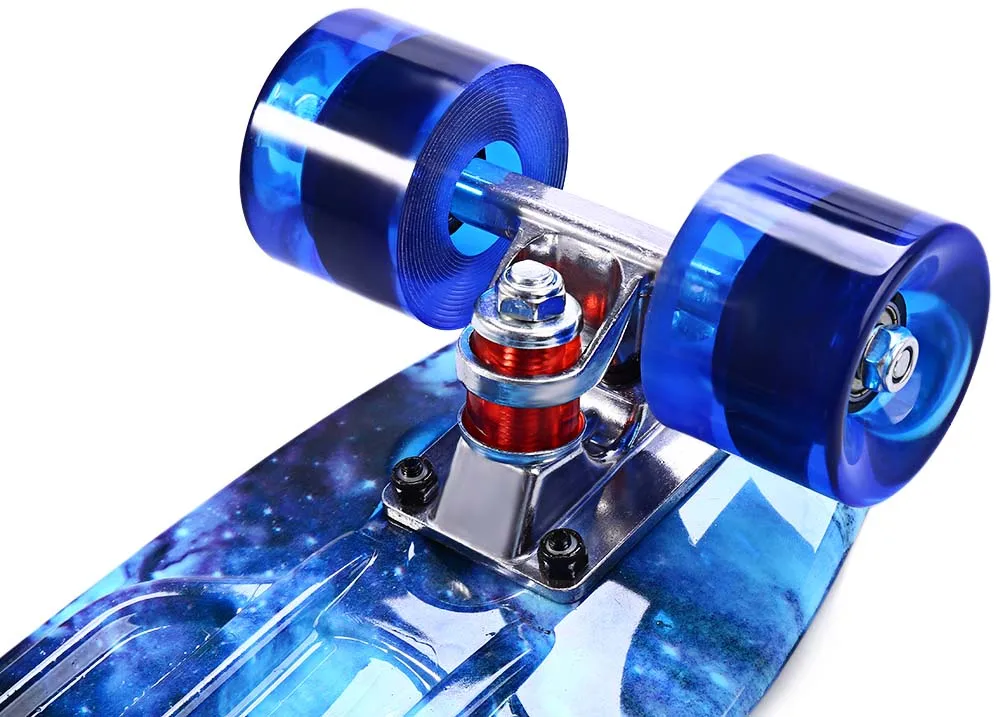 It also serves as the steering mechanism for the skateboard, translating leaning to one side into turning. The magic of the steering mechanism relies on the interface between the baseplate and the hanger, which forms a triangle. The hanger is free to rotate around one edge of this triangle, with bushings acting as springs to re-center it when the rider isn’t leaning.
Why 3D Print a Truck?
First, let’s specify something: I am not printing the entire truck, only the parts that would normally be made out of aluminum (the main parts of the baseplate and the hanger). The axle I am making myself out of 1144 “fatigueproof” steel (more on that later), and the hardware and polyurethane bushings are off-the-shelf.
The aluminum parts of the truck are typically cast in steel or sand molds. That means that in order to prototype new shapes, a new positive must be made, then a negative cast (presumably in sand for a prototype), then the new positive cast in aluminum. This turnaround time could potentially be shortened by simply printing the prototype overnight then assembling it in the morning. This project build explores that possibility while showing how the Mark Two dramatically eases the process of fabricating by hand.
Making the Hanger
The first step of this project was, of course, to model the truck. In my case, I used Fusion 360 because it allowed me to combine sculpted shapes and parametric features. I dimensioned most everything off an Indy 139 Silver truck (Independent Trucks are a well-respected standard in skateboarding). The only exception was the bulky part of the hanger, which I sculpted manually to be a little extra stocky to provide more support in bending.
The beginning of the sculpted shape for the hanger.The completed CAD model of the truck in Fusion 360.At first, I printed just the hanger, and printed it in two parts with two small mortise-&-tenon joints to keep them together. My hope was that a two-part design would allow me to route fibers in two different planes, giving the truck extra strength. Unfortunately, my lackadaisical joinery made for a joint that could split under the formidable forces of skateboarding. While it never broke, the joint flexed too much for my needs. So, I went with a single body for the hanger. And, as I mentioned before, that hanger needed a steel axle insert.
As an aside, here’s a fun fact about skateboard axles: They work because they use mixed units. Normally, bearings fit nicely on shafts because they are precision machined with very tight uni-directional tolerances. However, they are also significantly more expensive, and that cost isn’t justified in a piece of hardware that’s going to be beat up and replaced in a matter of months, if not weeks. Instead, the standard for skateboard trucks is to use a 608 ball bearing (8mm ID x 22mm OD x 7mm W) on a 5/16” axle to allow looser tolerance on the shaft diameter. Why does this work? Because bearings are likely to be within 3 tenths of a thou of their nominal (~.3150”), so your allowable tolerance in your shaft is now .3147”-.3125” = .0022”. That’s about an order of magnitude looser than the tolerance for a typical drive shaft. Now it’s much easier to cheaply manufacture the axles and ensure that the bearings will easily slip on and off repeatably.
To keep costs low, I bought lengths of “Extra-Strength” or “Fatigueproof”1144 medium carbon steel rod. I chose this steel for a few reasons: 125,000 psi yield strength, very machinable, no need for heat treatment, high impact resistance, and very low cost on McMaster. Seems perfect for a hand-made axle.
Because I didn’t cast my axle into the hanger or use a special ribbed axle (like many truck manufacturers), I notched the shaft into the rest of the hanger to constrain it axially and rotationally, creating a kind of sideways keyway. Cutting the keyway turned out to be very easy with the help of this custom printed tool:
The jig for the sideways keyway on the bandsaw.Using this keyway jig, I could hold the rod against the band saw table and in the vice with no worry of slipping, as well as using the the cutout in the holder as a guide to get the right keyway dimensions without having to slowly creep up on my measurements. I simply rough cut with the band saw then filed until I hit the nylon of the jig.
Then, still using the holder, I cut the threads on each end of the axle, followed by putting the rod in a drill and lightly sanding the sharp edge off the thread. Voila, axle complete.
I prepared the 3D printed part of the hanger by simply ripping off the supports that I could access and drilling out the supports inside the hole for the axle. I then had to hammer the axle into the hole, and to do so I wanted to grip the printed part firmly in a vice. To do this, I needed a soft jaw to hold the front of the hanger, which was fairly easy to model in CAD and then perfectly easy to print over night. Once the axle was inserted I just hammered in the key (also printed out of carbon fiber-reinforce Onyx) and the hanger was ready to ride!
The custom 3D printed fixture for holding the truck in the vice.The fixture works perfectly.Assembly
The baseplate was much less of a process to make because it involves no steel reinforcement. All I had to do was print it and insert the off-the-shelf pivot cup. I then put the rest of the truck together the way you would any skateboard truck: insert kingpin, slide on bushings and hanger, then crank everything down with a nylon insert locknut.And that’s the entire build! A little hand machining made simple with the help of some 3d printed jigs and fixtures, along with a functional 3D printed truck. If you have any other projects you want to see done with the Mark Two, let us know via Twitter, Facebook, or LinkedIn!
Best Fingerboard 3D Printing STL Files・Cults
CODE Fingerboaed
18.43 €
Windrider Finger surfboard
4.15 €
Guitar Neck Radius Gauge (set of 2)
€1.50 -20% 1.20€
Hydrant
Free
Finger bench
Free
Fingerboard
Free
Neck ramp
2. 76 €
76 €
Fingerboard spine transfer with edge
2.40 €
Obstruction on the neck "bulb" with ledge and quarter
2,80 €
Miniature trash can, waste container, bin for dioramas / Miniature trash bin, waste bin for dioramas
2 €
Miniature bottles for dioramas and the like / Miniature bottles for dioramas and the like
1 €
nine0002 Headstock mold - on request3.44 €
Jersey barrier
2.06 €
Finger bench
2.75 €
Outdoor curb
0.69 €
Neck bend
2.06 €
Skatepark Fingerboard
€5. 69
69
Pocket Kicker Neck Ramp
1.38 €
Wall Mount/Tech Deck Holder
€1.38 -15% 1.18 €
concrete parking block kit fingerkate fingerboard concrete block concrete block concrete concrete concrete
6 €
Skatepark 01
5 €
bed bar
0,50 €
Jersey Barrier/curb Mold/Fingerboard Mold/Technical Deck. Resin or FMD printable.
€5.68
Finger board bench
1.38 €
nine0002 Guitar Finger CapFree
SKATEBOARD BOX AND RAILS (SKATE FINGERS RAILS)
1 €
Skateboard with fingers
Free
Fingerboard wheels - skateboard juampi_toon
Free
Skateboard Fingerboard juampi_toon
0. 50 €
50 €
Short mold with jersey barrier
3.44 €
Winkler Mini
20.65 €
Fingerboard ladder kit with handrail and hub
10.32 €
Fingerskate picnic table
2.47 €
nine0002 (Barrier STL) Jersey barrier ends0,85 €
(Barrier STL) Jersey barrier
0,85 €
neck ramp
Free
Fingerskate
1 €
Neck mold
3.95 €
nine0002 ridge bar3 €
skateboard fingerboard bullet rail
5 €
ridge bar
5 €
ridge bar
5 €
ridge bench
5 €
Tech Deck 9 Neck Ramp0003
0. 92 €
92 €
neck guide round
0.55 €
fingerboard ramp
1 €
"Pocket screw
0,60 €
Fingerboard
1 €
how to make your own skateboard using generative design and 3D printing
This year, a young German designer Philipp Manger came to the Autodesk University Russia 2017 conference. He is the author of the T.O.S.T (Topology Optimized Skateboard Trucks) project, a skateboard with a unique suspension, which is designed using generative design and printed with titanium on a 3D printer. In an interview prepared for 3Dtoday with the participation of our friends from Autodesk, Philip talked about why he chose these technologies, what materials and software turned out to be the most suitable, and also shared his vision of the prospects for additive manufacturing.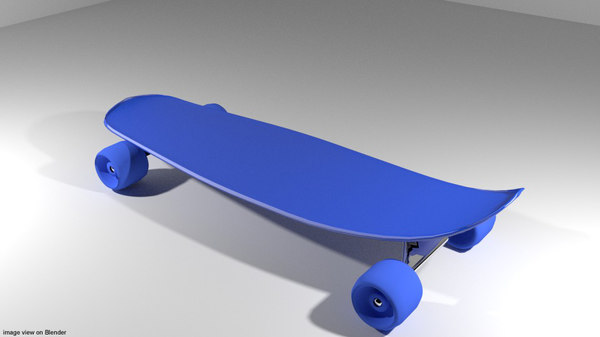 nine0005
Let me start by congratulating you on your well-deserved victory in the 3D Pioneers Challenge. Tell our readers a few words about yourself: who are you and what do you do?
In fact, I have received several awards. After the 3D Pioneers Challenge, I was nominated for the TCT Awards ( an award established by TCT Group, one of the leading international accelerators of 3D technology - approx. ) in the category "Consumer Product Application" along with companies such as Carbon. nine0005
I study additive manufacturing and generative design at the University of Applied Sciences in Jena. I also worked for several companies producing various equipment, participated in the development of steering columns for Mini Cooper and BMW cars. I live in Germany and the company is located in Liechtenstein, so I had to move there for a while. Now I'm doing my research again and at the same time I'm working for a skateboard company.
Why did you choose a skateboard as your project? nine0205
First, I did research on additive manufacturing as part of my research projects. Secondly, this is my job, I design skateboard hangers. And thirdly, I really like to ride them ( smiles at ).
Tell us a little about the construction of the skateboard: what materials and 3D printing technologies were used? Did you have access to production facilities, or were the parts printed to order?
Skateboard printed in titanium using SLM technology. I was helped with production by the Fraunhofer Institute for Machine Tool and Molding Technology, which houses the most famous research community in Germany. They made it possible to use their equipment not only for 3D scanning and 3D printing of skateboard elements, but also for testing. My employer provided their skateboards for comparison.
How long did it take to design and manufacture from idea to finished product? nine0205
The whole project, from idea to production, took a year. The design took about three months. During this time, I collected data using sensors, created a suspension model, and conducted several tests. The production took about 32 hours. In the future, I plan to make another version of the skateboard.
As far as we know, this skateboard is an example of generative design. What software did you use and what determined your choice?
I used Autodesk Netfabb software and Autodesk Fusion 360 cloud CAD. I created models in Fusion 360 and it saved me a lot of time. Topological optimization requires a lot of power and performance of a PC, and a cloud service allows you to simply upload a project to it. Just in time to start working on T.O.S.T, Fusion 360 had topological optimization tools that I liked. I have worked with 25 different load patterns and this feature has helped me get everything done very quickly. To optimize the internal structure, I used Netfabb and with its help I prepared the model for 3D printing. nine0005
Do you think it is possible to achieve similar results without the use of special software, and if so, how much would the time cost increase approximately?
I think it would be impossible. Of course, there are other topological optimization software out there, but it would likely take much longer to work with, simply because Fusion 360 allows you to do everything in the cloud. Without this, the project timeline would certainly have increased by several months. nine0005
Is there any commercial background in your project or is it just a demonstration of technology and your own skills?
I don't have any commercial plans yet. The first goal of the project was to explore the possibilities of hybrid design - in the sense of the combined use of topological optimization and optimization of the internal structure of the product. But I think that in 5-10 years there will be many projects, including commercial ones, made using this technology. nine0005
Have you ever tried to ride a skateboard, and if so, how did it feel?
Yes, of course, I rode it. The main thing that distinguishes my skateboard from any traditional one is that it is 20% lighter, while being just as durable. And of course, riding your own made skateboard is amazing!
How would you rate the future of additive manufacturing in the near and long term?
I am sure that additive manufacturing will have a huge impact on the development of many industries. In fact, this is already beginning to happen - it is increasingly being used not only in the "heavy" industry, but also by manufacturers of household items. Take Adidas, for example, which plans to mass-produce 3D printed sneakers. I think within 5-10 years most manufacturers will be using 3D printing to create customized products. That said, traditional methods will continue to exist - I don't think mass production is possible without them. That is, 3D printing will not completely replace them, although it will take a significant piece from them. nine0005
Finally, would you like to say a few words of parting words to the makers of 3Dtoday, no doubt impressed by your work?
The main thing is to literally burn with passion for your project.