3D printer time estimator
How to Calculate 3D Printing Times
- Author
- Recent Posts
Martin
Martin has a M.Sc. in physics and has gained many years of experience in industry as a lab manager and quality assurance manager. He has now tested dozens of 3D printers and is happy to share the collected experience with each new article.
Latest posts by Martin (see all)
Disclosure: Links marked with * are Affiliate Links. I earn from qualifying purchases if you decide to make a purchase through these links – at no additional cost for you!
3D printing of an object can take minutes, hours or even days, depending on various factors.
However, there are several ways to get an accurate estimate of the printing time and thus find out when the 3D model will be completed.
The best way to estimate how long a print will take is to use slicing software, such as Cura. There you can upload your design or STL file, enter various parameters such as the layer height, nozzle diameter and filling settings and you will then be shown an approximate printing time.
This is only a short version of a possible solution, but there are many details you should know.
So how exactly can the printing time for 3D printing be predicted as accurately as possible?
Cura Estimated Printing Times (source: reddit)Table of Contents:
- 1 The Easiest Way to Estimate the Print Time of an STL File
- 2 The Estimated Total Printing Time
- 2.1 Example 1
- 2.2 Example 2
- 2.3 Example 3
- 3 Printing Speed Calculator
- 3.1 Calculation by Software or Slicer
- 4 The Estimated Total Weight of Your 3D Print
- 5 Related Questions
- 5.1 Is it possible to run a 3D print when you are not at home?
- 5.2 What preventive measures can be taken when leaving the house during a 3D print?
- 5.3 What happens if the print speed is set too high?
- 5.4 How long does a 3D print take on average?
The Easiest Way to Estimate the Print Time of an STL File
As already mentioned, the slicer software gives a first estimation of the expected printing time for your 3D print. This is based on the various instructions your printer receives from the G-Code or the STL file.
The G-code is a list of instructions from an STL file that your 3D printer can understand.
Here are a few examples of G-Code commands:
- G1 X0 Y0 F2400: Sets a speed of 2400 millimeters per minute at a position of X = 0 and Y = 0 on the printing bed
- G1 Z10 F1200: Reduces the speed of the Z axis from 1200 millimeters per minute to Z = 10 millimeters.
- G1 X30 E10 F1800: Fills 10 millimeters of filament into the nozzle while the nozzle is moving at a position X = 30.
- M104 S190 T0: Heating from T0 to 190 degrees Celsius
- G28 X0: Brings the X-axis to the starting position while the extruder is still heating.
- M109 S190 T0: Wait until T0 is at 190 degrees Celsius before continuing with other commands.
The slicer software analyzes all G-codes and then estimates the expected total printing time based on the number of instructions and other factors such as layer height, nozzle diameter, outer shell, as well as circumference, printing bed size and acceleration.
These slicer settings can be changed at will and all have a significant influence on the printing time. The estimate provided by the slicer software includes pure printing time.
You should therefore note that both the time required by the printing bed to heat up and the cooling time at the end are not included in this estimate.
The Estimated Total Printing Time
As already mentioned, there are various settings in the slicer software that can affect the printing time. These include, for example, the layer height, the nozzle diameter, the different speed settings, the acceleration and retraction settings, the set scaling, the filling settings, and also the selected thickness of the skin.
These factors have different effects on the total printing time, but the greatest effect is produced by the layer height, the print size and the nozzle diameter.
Printing with a layer height of 0.1 millimeter takes twice as long as with a layer height of 0.2 millimeters.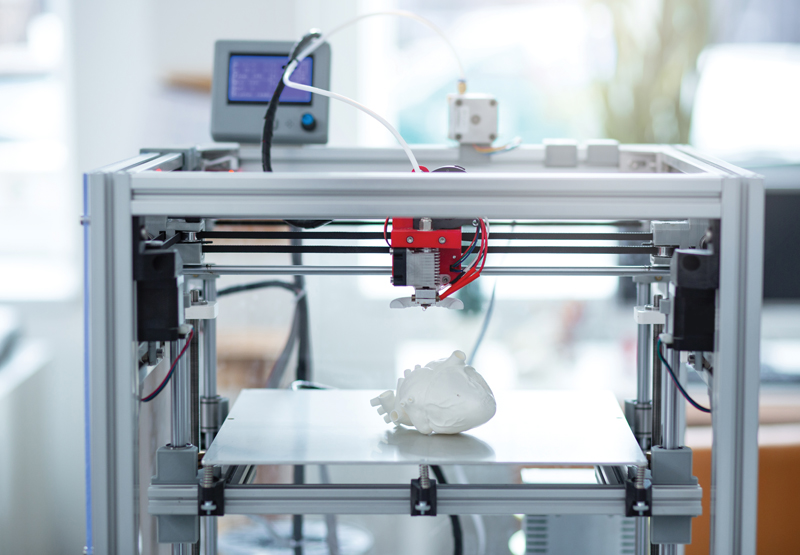
Example 1
A calibration cube with a layer height of 0.2 millimeters takes 31 minutes to complete. However, if the same calibration cube has a layer height of 0.1 millimeters, the total printing time on Cura is 62 minutes.
The print size of an object increases exponentially, which means that as the object grows larger, this also means a longer total print time, depending on how large the object is scaled.
Standard Calibration Cube (source: reddit)Example 2
A 100 percent scaled calibration cube is completed within 31 minutes. The total printing time of the same cube at 200 percent scaling is 150 minutes.
According to Cura, material consumption will then increase from 4 grams to 25 grams.
The nozzle diameter also influences the feed rate and determines how fast the material is extruded. The larger the nozzle, the faster the filament is applied, but the lower the quality.
Example 3
A calibration cube printed with a 0. 4-millimeter nozzle takes 31 minutes to complete. If it is a 0.2-millimeter nozzle, the printing takes 65 minutes.
If you combine these examples, the total printing time of a simple cube would increase by 1632 percent if the cube were to have a layer height of 0.1 millimeters at a scale of 200 percent and a nozzle of 0.2 millimeters. This corresponds to a total printing time of 506 minutes!
Printing Speed Calculator
Another possibility to get a reliable statement about the expected printing time before the start of 3D printing is the print speed calculator.
This is an easy-to-use tool that provides the user with practical information on speed based on a large amount of collected data, which in turn is summarized and evaluated in diagrams.
The basis of this calculation is the extrusion width, the layer height, the minimum and maximum line width as well as the material you use, which determines the temperature and thus also affects the printing speed and thus the total printing time.
The formula you can use in this context is:
Flow Rate = Extrusion Width × Layer Height × Printing Speed
The various slicer programs have been continuously developed in the past and now provide very precise information regarding the total printing time.
Calculation by Software or Slicer
There is software that can even predict the filament length, filament weight and expected material costs relatively reliably.
If you have saved the G-Code files instead of an STL file, you can enter these files into the G-Code viewer. This will provide you with a variety of helpful measurements and estimates of your respective file.
With this browser-based G-Code solution, you can, for example, analyze the G-Code and have the printing time, filament weight and layer height determined. It is also possible to have the printing, movement and retraction speeds displayed. Furthermore, you can have partial layers of the 3D print shown, which even contain animated sequences of the layer print. You have the option to display two layers at the same time to search for overhangs. Another option is to adjust the line width to simulate prints more accurately.
The output values are only estimates, since your 3D printer may behave fundamentally different than expected by your slicer software. However, experience has shown that Cura provides quite reliable estimates, but other slicer softwares also show larger differences in accuracy. It may happen that certain factors, such as acceleration settings, are not taken into account or are entered incorrectly by the slicing program. As a result, the estimated printing times vary more than usual. In some cases, this can be easily corrected by editing the file delta_wasp.def.json and entering the acceleration settings of your printer.
With a few adjustments, you can achieve a very accurate estimate of the total printing time, and for the most part, these estimates will not differ from the actual result.
The Estimated Total Weight of Your 3D Print
In addition to the printing time, your slicer software also gives you an estimate of the weight of your 3D print. Depending on the settings you choose, the final model can be quite heavy.
Some factors that determine the weight of the 3D print are its fill density, the selected infill pattern, the number of individual walls and the overall size of the desired model.
After you have changed your slicer settings, the new print is sliced and an estimate of the weight of the 3D print object in grams is given. You also have the practical option of maintaining the part thickness while reducing the part weight.
3D prints have already been documented where the print weight has been reduced by about 70 percent while still maintaining significant strength. This is possible through the use of efficient infill patterns and optimal part alignment to maintain the directional strength of the parts.
As 3D printing continues to improve over time and new technologies are developed, it is likely that further progress will be made in terms of printing speed and the associated quality of the 3D model.
Related Questions
Is it possible to run a 3D print when you are not at home?
Particularly with prints that take several hours or even a day, the question arises as to whether you can let the print run when you leave the house.
This is generally not recommended, but numerous preventive measures can be taken to eliminate any risk of fire. Very high temperatures, electrical current and inadequate circumstances repeatedly lead to the development of a fire without alarm systems being triggered in time.
However, if you have the necessary experience and knowledge of how to complete a 3D print, which would normally take ten hours, within a few hours, this problem is not necessary. In general, the longer the 3D printer is in operation, the greater the risk of problems that can have devastating consequences.
What preventive measures can be taken when leaving the house during a 3D print?
Various measures can be taken to ensure that problems do not occur during an absence while the 3D printer is working.
As a general rule, before each print, the various components should be visually inspected and all parts should be in their intended place. It should also be determined whether the device has an automatic switch-off function.
It is advisable to install special fire/smoke detection switches, as these automatically cut off the power supply if they detect any hazards.
The 3D printer should always be insulated from flammable objects, because filaments are flammable. It is also important that the printer is reliable and that no problems have occurred so far.
Print at low speeds and low temperatures during absences to reduce the fire hazard.
PLA should be used without a heated printing bed if possible. A webcam with a view of the 3D printer, which can be connected to a smartphone, for example, is useful in order to be able to check the situation on-site from a distance.
All cables and screws should be secure and well fastened. Most fires are due either to operating errors or lack of maintenance. It should be noted that even with a high-quality printer, unexpected problems can occur.
What happens if the print speed is set too high?
Especially for the first layer, care should be taken to select the correct printing speed. If the first layer is printed too fast, the plastic has no time to bond with the surface of the building platform.
Therefore, it makes sense to print the first layer at a slower speed than the rest of the 3D model. In this way, the plastic has enough time to bond with the printing bed.
Most common slicer programs offer a setting for this problem and allow the working speed to be reduced during the production of the first shift. It is recommended to use 50 percent of the speed used for the rest of the model.
How long does a 3D print take on average?
The 3D printing of a model can take between 30 minutes and seven days or even longer. There are several factors that determine the total printing time, including the overall size and geometry of the 3D model and the printing technology used.
The larger the part and the more complex its geometry, the longer the printing process takes.
The volume is usually the first indicator. The larger the model is, the more time is needed for printing. Small parts measuring one cubic inch may take as little as five minutes, while very large models over 100 cubic inches may take more than 200 hours to print.
The area that the model occupies on the printing bed is also known as the footprint. The greater the space required, the further the print head has to move from its initial position to complete each layer, which takes time.
The overall height of the 3D model is probably the most important dimension to determine the printing time. Although the volume of two different parts can be the same, a different height can also mean a different printing time. This is due to a higher number of layers and that in such a case the print head has to make more passes to create them.
A complex geometry can also mean a longer duration for a 3D print.:quality(80)/images.vogel.de/vogelonline/bdb/1645300/1645327/original.jpg) A part with many small features has layers that resemble a group of small islands, while a simple cube or sphere looks like a single large island. The print head has to draw the boundary of each island and then fill it in, so that more islands also means more time.
A part with many small features has layers that resemble a group of small islands, while a simple cube or sphere looks like a single large island. The print head has to draw the boundary of each island and then fill it in, so that more islands also means more time.
Disclosure: This website is the property of Martin Lütkemeyer and is operated by Martin Lütkemeyer. Martin Lütkemeyer is a member of the Amazon Services LLC and other Affiliate Programs. These are affiliate advertising programs designed to enable websites to earn advertising revenue through advertising and linking to Amazon.com and others. Links marked with * are affiliate links.
How to Estimate the 3D Printing Time of an STL File – 3D Printerly
3D printing an STL file can take minutes, hours or days depending on many factors, so I wondered if I could get an estimate of the exact time and know how long my prints will take. In this post, I will explain how you can estimate printing times of any STL and the factors that go into it.
To estimate the 3D printing time of an STL file, simply import the file into a slicer like Cura or PrusaSlicer, scale your model to the size you want to create, input slicer settings such as layer height, infill density, printing speed, etc. Once you press “Slice”, the slicer will show you an estimated printing time.
That’s the simple answer but there are definitely details that you’ll want to know which I’ve described below so keep on reading. You can’t estimate the print time of an STL file directly, but it can be done through 3D printing software.
If you are interested in seeing some of the best tools and accessories for your 3D printers, you can find them easily by clicking here (Amazon).
The Simple Way to Estimate Printing Time of an STL File
As already mentioned, you’ll find an estimate directly from your slicer and this is based on the several instructions your printer receives from the STL file’s G-Code. The G-Code is a list of instructions from an STL file that your 3D printer can understand.
The following is a command to linearly move your 3D printer which accounts for up to 95% of G-Code files:
G1 X0 Y0 F2400 ; move to the X=0 Y=0 position on the bed at a speed of 2400 mm/min
G1 Z10 F1200 ; move the Z-axis to Z=10mm at a slower speed of 1200 mm/min
G1 X30 E10 F1800 ; push 10mm of filament into the nozzle while moving to the X=30 position at the same time
This is a command to heat up your printer’s extruder:
M104 S190 T0 ; start heating T0 to 190 degrees Celsius
G28 X0 ; home the X axis while the extruder is still heating
M109 S190 T0 ; wait for T0 to reach 190 degrees before continuing with any other commands
What your slicer will do is analyze all of these G-Codes and based on the number of instructions and other factors such as layer height, nozzle diameter, shells and perimeters, print bed size, acceleration and so on, then estimate a time for how long it will all take.
These many slicer settings can be altered and it will have a significant effect on printing time.
Remember, different slicers can give you different results.
Most slicers out there will show you the print time during slicing, but not all of them do. Keep in mind, the time it takes to heat up your printer bed and the hot end won’t be included in this estimated time that is shown in your slicer.
How Slicer Settings can Affect Printing Time
I’ve written a post on How Long it Takes to 3D Print which goes into more detail about this topic but I’ll run through the basics.
There are several settings in your slicer that will affect your printing time:
- Layer Height
- Nozzle Diameter
- Speed Settings
- Acceleration & Jerk Settings
- Retraction Settings
- Print Size/Scaled
- Infill Settings
- Supports
- Shell – Wall Thickness
Some settings have more of an effect on print times than others. I’d say the biggest time-consuming printer settings are the layer height, print size, and nozzle diameter.
A layer height of 0.1mm compared to 0.2mm will take twice as long.
For example, a calibration cube at 0.2mm layer height takes 31 minutes. The same calibration cube at 0.1mm layer height takes 62 minutes on Cura.
The print size of an object increases exponentially, meaning as the object gets bigger the increase in time also increases based on how bigger the object is scaled.
For example, a calibration cube at 100% scale takes 31 minutes. The same calibration cube at 200% scale takes 150 minutes or 2 hours and 30 minutes, and goes from 4g of material to 25g of material according to Cura.
The nozzle diameter will affect the feed rate (how fast material is extruded) so the bigger the nozzle size, the faster the print will be, but you’ll get lower quality.
For example, a calibration cube with a 0.4mm nozzle takes 31 minutes. The same calibration cube with a 0.2mm nozzle takes 65 minutes.
So, when you think about it, the comparison between a normal calibration cube and a calibration cube with a layer height of 0. 1mm at 200% scale, with a 0.2mm nozzle would be massive and would take you 506 minutes or 8 hours and 26 minutes! (That’s a 1632% difference).
Print Speed Calculator
A unique calculator was put together to aid 3D printer users see how fast their printers could go. It’s called the Print Speed Calculator and it’s an easy-to-use tool that calculates flow rates with respect to speed based mainly on E3D users but can still give all users some practical information.
What it does for people is give a general range of how high of a speed you can input on your 3D printer by looking at flow rates.
The flow rate simply is the extrusion width, layer height and print speed all calculated into a single score that gives you an estimate of your printer’s speed capabilities.
It gives you a pretty nice guide to knowing how well your printer can handle certain speeds, but results won’t be a precise answer to your questions and other variables such as material and temperature can have an effect on this.
Flow Rate = Extrusion width * layer height * print speed.
How Accurate is the Printing Time Estimate in Slicers?
In the past, printing time estimates had their good days and bad days in how accurate their times were. Recently, slicers have stepped up their game and are starting to give pretty accurate printing times so you can have more belief in what time your slicer is giving you.
Some will even give you filament length, plastic weight and material costs within their estimates and these too are pretty accurate.
If you happened to have the G-code files and no STL file saved, you can input that file into the gCodeViewer and this will give you a variety of measurements and estimates of your file.
With this browser-based G-Code solution, you can:
- Analyze G-Code to give print time, plastic weight, layer height
- Show retracts and restarts
- Show print/move/retraction speeds
- Display partial layers of a print and even animate sequences of layer printing
- Show dual layers simultaneously to check for overhangs
- Adjust line width to simulate prints more precisely
These are estimates for a reason as your 3D printer can behave differently compared to what your slicer projects it will do. Based on historical estimates, Cura does a pretty good job of estimating printing times but other slicers may have wider differences in their accuracy.
Some people report a 10% margin difference in print times with Cura using the Repetier software.
Sometimes certain settings such as the acceleration and jerk settings aren’t taken into account or input incorrectly within a slicer, so printing estimate times vary more than usual.
This can be fixed in some cases by editing the delta_wasp.def.json file and filling in your acceleration and jerk settings of your printer.
With some simple tweaking, you can get very accurate slicer time estimates but for the most part, your estimates shouldn’t be off by too much either way.
How to Calculate the Weight of a 3D Printed Object
So, the same way your slicer gives you an estimate of the printing time, it also estimates the number of grams used for a print. Depending on what settings you are using, it can get relatively heavy.
Settings like infill density, infill pattern, number of shells/walls and size of the print in general are all some of the contributing factors of a print’s weight.
After changing your slicer settings, you slice your new print and should see a weight estimate of your 3D printed object in grams. The great thing about 3D printing is its ability to retain part strength while reducing part weight.
There are engineering studies which show drastic decreases in print weight of around 70% while still keeping a significant amount of strength. This is done by using efficient infill patterns and part orientation to get parts directional strength.
I can imagine this phenomenon will only get better over time with development in the 3D printing field. We are always seeing new technologies and changes to the way we 3D print, so I’m confident we will see improvement.
If you want to read more, check out my article on the Best FREE 3D Printing Software or the 25 Best 3D Printer Upgrades You Can Get Done.
If you love great quality 3D prints, you’ll love the AMX3d Pro Grade 3D Printer Tool Kit from Amazon. It is a staple set of 3D printing tools that gives you everything you need to remove, clean & finish your 3D prints.
It gives you the ability to:
- Easily clean your 3D prints – 25-piece kit with 13 knife blades and 3 handles, long tweezers, needle nose pliers, and glue stick.
- Simply remove 3D prints – stop damaging your 3D prints by using one of the 3 specialized removal tools.
- Perfectly finish your 3D prints – the 3-piece, 6-tool precision scraper/pick/knife blade combo can get into small crevices to get a great finish.
- Become a 3D printing pro!
Photoresin exposure time estimate
I am new to 3D printing, so strange thoughts sometimes come to mind.
For example, I thought - I have a new resin for photo printing - how to determine the exposure time for it? Nothing is written on the bottle, and if it is written, it is not for my printer.
Clearly, printing a test pattern is the primary way to test a resin under specific conditions. But this is how many times you need to try, and how much lime resin, and how many times to wash the cuvette, and how much time to spend - to get the first digestible result?
And then print the test a couple more times, decreasing / increasing the exposure, in order to understand the correct limits of the printer settings.
Given my almost zero experience, I don't like this situation at all. I remembered how I asked the seller of my printer about the print settings, and having put into practice his recommendations, I still did not get a normal result.
The head prompted a certain decision. In order to quickly and quickly evaluate the properties of the resin in a real specific printer in one attempt.
This solution still exists in the form of an idea - I would just like to receive comments from the respected community on the performance of this method.
Putting together such a thing.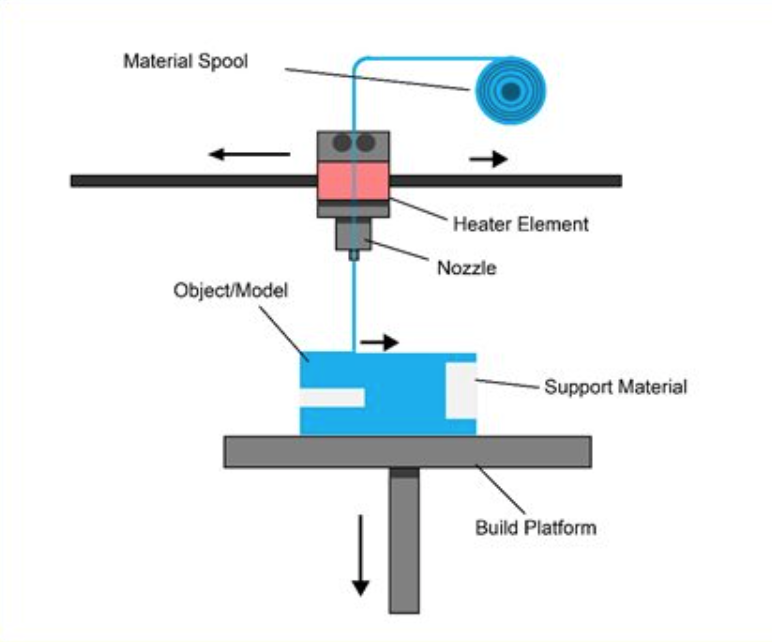 The working title is Exposure Matrix.
Fiberglass frame around the perimeter for rigidity and for tying to the standard resin flask mounting bolts. In the center is copper foil 50 µm thick with holes 5 mm in diameter. Bottom - a transparent plastic substrate, not adhesive to the cured resin.
The sandwich production technology is as follows:
- cut out a transparent substrate of the required size and a piece of copper foil,
- weld the foil to the substrate with an iron or laminator,
- print a template for holes in the foil using the LUT method, and etch the foil in your favorite amateur radio way.
Get a matrix of holes.
The method of pre-drilling or cutting or punching holes in the foil, and only then welding to the substrate is not good, in my opinion, because then the holes will have uneven and sharp edges that will spoil the plane of the substrate.
Making such a model.
Cylinder heights from 0.05 mm to 1.75 mm in 0.05 mm increments, total of 35 cylinders.
Slice the model so that the cylinders fall under the holes in the exposure matrix (the matrix is located in the center of the printer screen, and the model in the slicer is also placed in the center).
We set the layer thickness in the slicer to 0.05 mm, printing the 1st layer, say, 3s. Print subsequent layers with an exposure time of 0.5 s. It is advisable to set the print interval between layers to 0 if the slicer and printer allow it.
A model for the exposure matrix is obtained, when each cell is exposed in the range from 3s to 20s with an exposure step of 0.5s.
It is clear that by controlling the slicing parameters it is possible to change the resin exposure time in the cells of the exposure matrix very widely.
Next, we apply quite a bit of the resin to be tested into each cell. The volume of each cell is less than 1 cubic mm. = 1/50 of a drop, i.e. less than one carly resin is needed for the entire test. If a lot of resin got into the cell, we brush off the excess with a small spatula. The task is to get the level of resin in the cells flush with the upper plane of the foil, i.e. get a layer of illumination equal to 50 microns (equal to the thickness of the foil itself).
After printing, we pick the resin with something and look at what exposure the curing begins. Apparently, with a certain small margin in the big direction, it is also necessary to choose the exposure time for the tested resin.
In my opinion, the advantages of the method are as follows:
- we get a wide range of test exposures in one test,
- the test time - printing is very short - in my example less than 1 minute,
- a scanty amount of resin consumed,
- testing takes place in real conditions, for a specific light scheme of a specific printer.
So what are the opinions? Is such an exposure matrix necessary? Let's discuss.
Subscribe to the author
Subscribe
Don't want
7
3D printers (Additive machinery), conformity assessment.
3D printers (Additive machinery), the equipment manufacturer or its authorized representative must ensure that a risk assessment is carried out to determine the health and safety requirements that apply to the equipment. The equipment must be designed and built taking into account the results of such a risk assessment.
The Machinery Directive 2006/42/EC sets out the basic health, safety and performance requirements for the products they cover.
The EU legal framework is technologically neutral and does not prescribe any specific binding technical solutions for product design. Therefore, manufacturers can use a number of technical solutions to meet these basic requirements.
The Machinery Directive enables manufacturers to rely on specific technical solutions, which are detailed in harmonized European standards or parts thereof, references to which are published in the Official Journal of the European Union. If the manufacturer chooses to make such a technical decision, it is assumed that the product complies with the applicable essential health, safety and performance requirements that the harmonized standard seeks to cover.
If the manufacturer decides to adopt any other technical solution, he must provide a detailed explanation of the compliance of such technical solution with the requirements of EU legislation in the technical file. The following are some of the most important harmonized standards for 3D laser printers:
EN ISO 12100 Safety of machine tools. General principles for design. Risk assessment and risk reduction
EN 60204-1 Safety of machinery - Electrical equipment of machinery
EN 13849-1 Safety of machines - Safety related parts of control systems
EN 13850 Machine safety - Emergency stop function - Design principles
EN ISO 11553-1 Safety of machinery — Laser processing machines — Part 1: Laser safety requirements
EN 1127-1 Explosive atmospheres - explosion prevention and protection
EN ISO 19353 Safety of machinery - fire prevention and fire protection
Fire and explosion safety standards are also relevant for plastic printers.
There are some non-harmonized standards for
laser products EN 60825-1 (Safety of laser products - Part 1: Equipment classification and requirements)
EN 60825-4 (Safety of laser products - Part 4: Protective equipment against laser radiation)
CE marked
the order indicates the use - household, industrial, medical, age limit from years, as they can be used in schools. Specifies the user's skill level and certain restrictions, including suggested or excluded age groups. Specifies whether the 3D printer has any features that could lead it to be considered primarily as a machine, such as equipment with significant available mechanical (moving parts) or thermal energy sources (hot surfaces) as primary potential hazards, compared to others, enclosed units with shrouds or guards to protect the operator. Any raw material used in the 3D printer may have certain characteristics such as flammability or powder form, which may cause the installation or workplace rules to become a more important factor due to by-products from the printer, such as combustible dust or other emissions to the atmosphere.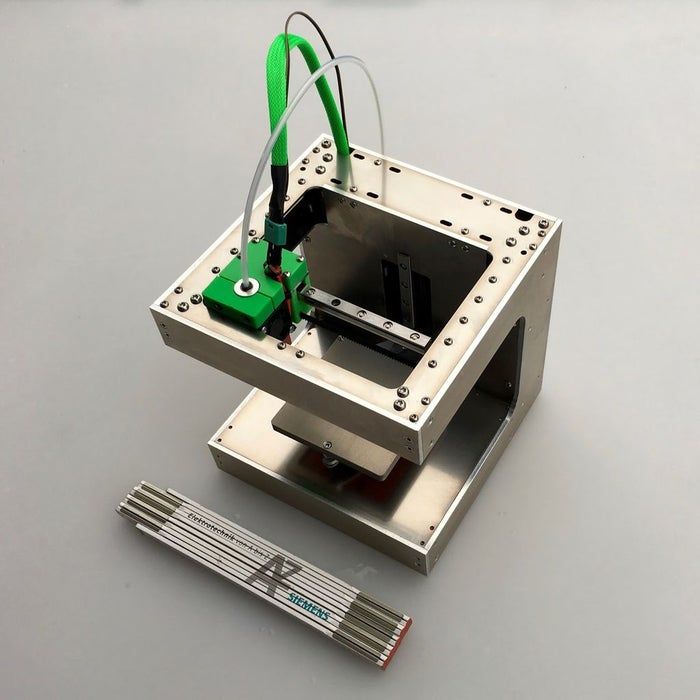
As a general rule, products intended primarily for use by children are often subject to more stringent regulations than products intended for use by adults. For example, in the US, baby products are subject to a number of federal safety regulations. rules called baby product safety rules. US law defines a "children's product" as a consumer product designed or intended primarily for people 12 years of age or younger. Most 3D printers intended for use in schools will be used by children over the age of 12 with adult supervision.
In the European Union, products intended for use by children are subject to Directive 2009/48/EC on the safety of toys (Toys Directive), 3D printers intended for schools are not currently mentioned anywhere in the Directive, nor in the relevant Guidance Documents, such as Guidance Document No. 16 on electronic equipment (GUIDANCE DOCUMENT No. 16 ON THE APPLICATION OF THE DIRECTIVE ON THE SAFETY OF TOYS Electronic equipment) is intended for use by children, so it is unlikely that this Directive and related standards referred to in it, will apply to 3D printers used in schools. In this case, the entire responsibility lies with the school staff.
When equipment compliance is considered in the context of product safety standards and regulations, there are usually several key aspects to consider.
These include:
safety of the product itself and safe use, handling of the product by operators and maintenance personnel, generally in accordance with harmonized safety standards
safe operation of the product in the environment in which it is intended to be used in accordance with any installation regulations related to the safe use and protection of consumers and workers in the workplace.
In Europe, the potential application of ATEX Directive (2014/34/EU) remains subject to consideration for equipment installed and used in a potentially explosive atmosphere. Like the Machinery Directive, the ATEX Directive contains a number of criteria that must be met in order to determine the Directive's applicability.