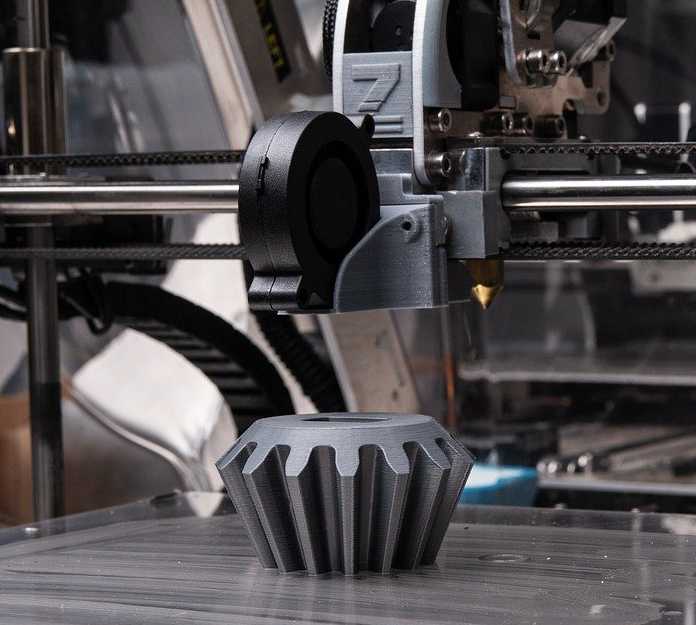
3D printer smallest layer height
3D Printing Layer Height vs. Nozzle Size
- Author
- Recent Posts
Martin
Besides many test devices, Martin now has his fourth own 3D printer running and prints as a hobby for friends, family and himself. He is happy to share his experience with each new article.
Latest posts by Martin (see all)
Disclosure: Links marked with * are Affiliate Links. I earn from qualifying purchases if you decide to make a purchase through these links – at no additional cost for you!
What influence do the layer height and the nozzle diameter have on the end result in a 3D print? In a 3D printer, individual layers are applied on top of each other using a filament. The layer height refers to the height of each individual layer.
For most printers, the adjustable layer height is between 0.1 and 0.4 mm. At the same time, however, the layer height also depends on the nozzle diameter. This is because the nozzle diameter results in a maximum and a minimum achievable layer height.
But how do the layer height and nozzle diameter affect print quality?
Thicker layers offer higher printing speeds with lower resolution. With thinner layers, higher resolution can be achieved with increased printing time. The maximum layer height is about 75% of the diameter of the nozzle and the minimum layer height about 25%.
That was the short version. You can find out exactly how that works in this article.
Table of Contents:
- 1 Layer Height
- 1.1 The effect of layer height on the printing process
- 1.2 When lower layer thicknesses make little sense
- 1.3 The advantages of a lower layer height
- 2 Nozzle
- 2.1 Nozzle diameter
- 2.2 Nozzle materials
- 3 Relationship Between Layer Height and Nozzle Diameter
- 4 Practical Test & Comparison
- 5 Related Questions
- 5.1 Which layer heights are typical for the different printing processes?
- 5.2 What materials are most nozzles made of and why?
- 5.
 3 What are brass nozzles coated with?
 - 5.4 What are stainless steel nozzles suitable for?
- 5.5 How much does a nozzle actually cost?
- 5.6 Which nozzle diameter is suitable for what? What is the standard diameter?
- 5.7 What else should be considered for the nozzle diameter?
- 6 Conclusion
Layer Height
In 3D printing, the object is built up layer by layer. For commercially available 3D printers, the layer height is approximately between 0.1 and 0.4 mm. Of course, there are also 3D printers available that can also create a layer height below 50 μm (= 0.05 mm).
With some printing processes, the layer height has hardly any effect on the result. But especially with the SLA and FDM processes, the choice of layer thickness is a very important factor.
The effect of layer height on the printing process
The selected layer height has a direct effect on the print result. Choosing the right layer height is quite comparable to deciding on the resolution of a TV screen. A lower layer thickness leads to a higher resolution of the object and to smoother surfaces. The layer thickness (= Z-resolution) can be set on every 3D printer and is sometimes also dependent on the 3D printing process.
On the other hand, the layer height has significant effects on the printing process. If, for example, the layer height is halved from 300 μm to 150 μm, then printing takes twice as much time and the costs also increase enormously. With a lower layer thickness, more layers are applied on top of each other, this circumstance leads to a higher error rate.
When lower layer thicknesses make little sense
A lower slice height leads to a higher Z-resolution, nevertheless, it is not always useful. The key question when deciding on the slice height is – is appearance more important or functionality?
If the object has only horizontal surfaces and no or hardly any curves, then the effects of a lower layer height are hardly noticeable. If the angle between two layers is 90°, then a reduced layer height makes no sense. If the target object is, for example, a cube with an edge length of 60 mm, then reducing the layer height from 150 μm to 60 μm has no effect.
With a lower layer height, not only the printing time and the costs increase. In the end, a greater layer height often leads to improved mechanical properties. If, for example, the part is to be post-processed (sanded or painted), then a reduced layer height is more of a disadvantage.
The advantages of a lower layer height
The result of a lower layer height is a higher Z-resolution and thus a smoother surface. If you are dealing with delicate, detailed objects, then you should tend to use a lower layer height.
The effect is most effective when the object has curves, angles, or holes. Imagine there is a hole printed along the horizontal axis.
The hole would have to be cut in several superimposed layers, resulting in stair-like edges on the surface. With a significant proportion of curves, the lower layer height leads to higher accuracy and detail.
Nozzle
The nozzle is one of the most important components of a 3D printer. The nozzles have a tapered shape and are made of various materials.
They have a thread at the bottom end with which they can be screwed to the hot end of the 3D printer. The length of the thread and also the diameter can differ for the individual nozzles. You should therefore check in advance whether the respective nozzle is compatible with your 3D printer and for which filaments it is suitable.
Nozzle diameter
The borehole diameter (nozzle diameter) for most nozzles is between 0.1 and 2 mm. The standard are nozzles with a diameter of 0.4 mm. It is worth buying a set of different nozzles. The nozzle diameter has a significant influence on the printing result.
Nozzles with a large diameter are suitable for an increased layer height, nozzles with a small diameter are ideal for a low layer height and thus for a higher resolution.
Nozzle materials
The nozzles for 3D printers are often made of brass, copper or (stainless) steel*. Optionally, a coating is also available. Depending on the intended use and requirements, nozzles made of other materials or alloys are also available. Some nozzles are made of ruby at the tip, for example.
The ideal material depends on the filament and your own requirements. For example, for a very hard filament, stainless steel nozzles are more suitable than brass, even if the thermal conductivity is somewhat worse.
Relationship Between Layer Height and Nozzle Diameter
The nozzle diameter in the 3D printer has a direct influence on the recommended layer thickness and thus also on the printing speed. Depending on the nozzle diameter, there is a recommended maximum and minimum layer height.
The maximum layer height is calculated according to formula 1, the minimum layer height according to formula 2:
- maximum layer height = 0.75 * nozzle diameter
- minimum layer height = 0.25 * nozzle diameter
Of course, these are rules of thumb, but they are helpful for orientation. If the nozzle diameter is 500 μm, then the maximum layer height is 375 μm and the minimum layer height is 125 μm. For example, many experts print with only half the nozzle diameter. With a nozzle diameter of 0.2 mm (= 200 μm), they print with a selected layer height of 100 μm. The given nozzle diameter limits the maximum amount of material that can be extruded.
A very small nozzle diameter also implies some low printing speed for the following reasons:
- the diameter limits the amount of material to be extruded
- more pressure is needed to press a large amount of filament through a small nozzle
- at an increased speed, more material must be transported in the same time period
With an increased nozzle diameter, it is therefore possible to print faster. With a larger nozzle, however, you have to choose a larger layer height, which leads to a coarser resolution.
Practical Test & Comparison
To put these formulas to the test, I equipped my Anycubic Mega S with different nozzles. I set the layer height to 25%, 50% and 75% of the nozzle diameter respectively.
| Layer Height | Nozzle Diameter | Print Time |
|---|---|---|
| 0.7 mm | 1.0 mm | 0:06 |
| 0.5 mm | 1.0 mm | 0:08 |
| 0.25 mm | 1.0 mm | 0:15 |
| 0.6 mm | 0.8 mm | 0:07 |
| 0.4 mm | 0.8 mm | 0:10 |
| 0.2 mm | 0.8 mm | 0:19 |
| 0.45 mm | 0.6 mm | 0:13 |
0. 3 mm 3 mm | 0.6 mm | 0:18 |
| 0.15 mm | 0.6 mm | 0:37 |
| 0.3 mm | 0.4 mm | 0:24 |
| 0.2 mm | 0.4 mm | 0:38 |
| 0.1 mm | 0.4 mm | 1:03 |
| 0.225 mm | 0.3 mm | 0:46 |
| 0.15 mm | 0.3 mm | 1:07 |
| 0.075 mm | 0.3 mm | 2:15 |
| 0.15 mm | 0.2 mm | 1:26 |
| 0.1 mm | 0.2 mm | 2:08 |
0. 05 mm 05 mm | 0.2 mm | 4:18 |
What is directly noticeable in the pure data is the big difference between the printing times.
Especially with the smaller diameters, this difference becomes greater and greater. With the 0.2 mm nozzle and at 25%, i.e. 0.05 mm layer height, this is already over four hours for the selected object!
Here you can see how the settings and the different nozzle diameters affected the surface:
From the tests, I have learned that for most objects it makes no difference to the eye if you use a layer height of 0.1 mm or less.
You can really only see the difference between 0.1 mm and 0.05 mm if you look very closely.
Besides, it’s always a question of whether it’s worth the time.
The printing time doubles very quickly. Likewise, the printing time doubles quickly if you want to print the same layer height with a smaller nozzle (e.g. 0.15 mm layer height with a 0.6 mm nozzle takes 37 minutes and 0.15 mm with a 0.3 mm nozzle takes 1 hour and 7 minutes).
This is, of course, because you have to print the same volume. With a smaller extrusion width, the printhead has to travel more distance and print more infill walls to get the same printed volume.
Related Questions
Which layer heights are typical for the different printing processes?
- FDM 0.05 to 0.4 mm (standard 0.1 mm)
- SLA/DLP 0.025 mm to 0.1 mm (standard 0.05 mm)
- SLS 0.08 mm to 0.12 mm (standard 0.1 mm)
- Material jetting 0.016 to 0.03 mm (standard 0.016)
- Binder Jetting 0.1 mm
- DMLS 0.03 mm to 0.05 mm
What materials are most nozzles made of and why?
Most 3D printer nozzles are made of brass. Brass has proven itself especially due to its good thermal conductivity. These nozzles are very easy to manufacture and are inexpensive. Brass nozzles are not suitable for filaments with a strong abrasive effect.
What are brass nozzles coated with?
A coating protects the brass nozzle from excessive abrasion. Chrome or nickel can be used as a coating.
What are stainless steel nozzles suitable for?
Stainless steel nozzles are much more robust than those made of brass or copper. A disadvantage is the poorer thermal conductivity, so you have to set a higher pressure temperature.
How much does a nozzle actually cost?
The price, of course, depends on the material. The cheapest are nozzles made of nickel without coating, these are sometimes available for less than 10 bucks. The price for stainless steel nozzles ranges from $15 to $25. Noticeably more expensive are nozzles with ruby, these can also cost $90 or more.
Which nozzle diameter is suitable for what? What is the standard diameter?
Most 3D printers are equipped with 0. 4 mm nozzles. Nozzles with a diameter of < 0.4 mm are suitable for objects with intricate details. Nozzles with a diameter of 0.6 to 1 mm are perfect for less precise and fast 3D prints.
What else should be considered for the nozzle diameter?
With a higher nozzle diameter and a higher printing speed, more filament must be melted. Note that the extruder and the heating cartridge have a power limit.
Conclusion
Both the layer height and the nozzle diameter have a decisive influence on the printing time, the costs and the printing result. The given nozzle diameter results in a minimum and a maximum layer height each (see formulas 1 and 2).
Basically, the higher the nozzle diameter, the greater the maximum possible layer height. A greater layer height often also leads to fewer print defects and improved material properties. If the part is to be reworked, then a greater layer height is optimal.
In 3D printing, the object is built up layer by layer, with the layer height defining the height or thickness of each individual layer. A low layer height leads to a higher Z-resolution and to a significantly increased printing time. The maximum printing speed is also limited by the nozzle diameter. A higher nozzle diameter enables faster printing.
Nozzles with a small diameter of < 0.4 mm are suitable for printing fine, delicate objects with many details. The ideal material for the nozzles depends on the filament, but nickel is often a very good choice. With numerous curves, a better result is achieved this way due to the flatter surface. One disadvantage is that it increases the time needed for printing. If you halve the layer height, then the 3D printer will take twice the time.
So, when choosing nozzle diameter, the following factors are crucial:
- Does the object have many curved surfaces, holes or fine details? Then small nozzles and a low layer height are ideal. For non-curved objects with horizontal surfaces and 90° angles (cubes, cuboids), you should choose a high layer height.
- Is it a matter of visual appearance or functionality? If the object has to be reworked, then a greater layer height is clearly more practical.
 After all, printing is also a question of cost. If it’s mainly about functionality, then you should go for a greater layer height.
Disclosure: This website is the property of Martin Lütkemeyer and is operated by Martin Lütkemeyer. Martin Lütkemeyer is a member of the Amazon Services LLC and other Affiliate Programs. These are affiliate advertising programs designed to enable websites to earn advertising revenue through advertising and linking to Amazon.com and others. Links marked with * are affiliate links.
Which Layer Height is Best for 3D Printing? – 3D Printerly
The layer height of your 3D printed objects are important for quality, speed and even strength. It’s a good idea figuring out which layer height is the best for your situation.
I’ve wondered what the best layer height is for certain 3D printing situations, so I did some research about it and will share that in this post.
The best layer height in 3D printing for a standard 0. 4mm nozzle is between 0.2mm and 0.3mm. This layer height provides a balance of speed, resolution and printing success. Your layer height should be between 25% and 75% of your nozzle diameter or you might run into printing issues.
You have the basic answer but wait, that’s not all! There are more details to look into when working out the best layer height for yourself, so stick around and keep reading to find out.
If you are interested in seeing some of the best tools and accessories for your 3D printers, you can find them easily by clicking here (Amazon).
What is Layer Height, Layer Thickness or Resolution?
Before we get into choosing what layer height is the best, let’s all get on the same page about what layer height is.
So basically, the layer height is the measurement, usually in mm that your nozzle extrudes for each layer of a 3D print. It’s also known as layer thickness and resolution in 3D printing due to being what makes a 3D print better quality.
If you think about a detailed object, having a large layer height means that the detail can only go so far. It’s similar to trying to build a detailed object using Lego pieces, the blocks are just far too big for the details to really come out.
So, the smaller the layer height, or ‘building blocks’ the better your quality but it also results in more layers needing to be extruded to complete the same print.
If you are wondering “does layer height affects print quality?” it does directly, as well as dimensional accuracy. The lower your layer height, or higher your resolution, the more your 3D printed parts will be dimensionally accurate, and have better print quality.
Layer height is basically the same as resolution.
Now that we have this basic understanding of the layer height, let’s answer the main question of choosing the best layer height for 3D printing.
Which Layer Height is the Best For 3D Printing?
This isn’t the most straightforward question to answer because it really depends on your preference.
Do you need a fast as lightning print so you can get them out ASAP? Then pick a bigger layer height.
Do you want an artistic piece with highly detailed parts and unmatched precision? Then pick a smaller layer height.
Once you determine your balance between speed and quality, then you can pick which layer height would be good for your 3D printing situation.
A good layer height that works in most situations is 0.2mm. That is what the typical layer thickness is for 3D printing since the default nozzle is 0.4mm and a good rule is to use around 50% of the nozzle diameter as the layer height.
For a situation like 3D printing PPE face masks and face shields, your main goal is getting them printed as fast as possible. Not only would you opt in for a larger nozzle, but you’d also use a large layer height, up to the point where it’s fully functional.
When you have a model of a detailed, artistic statue that you would like to display in your home, the goal is to have the best quality. You would opt in for a smaller nozzle diameter, while using a small layer height to get an extremely high level of detail.
To properly determine which is the best, you should 3D print objects like a calibration cube, or a 3D Benchy at different layer heights and inspect the quality.
Keep these as reference models so you know just how well the quality will be when using those nozzle diameters and layer height settings.
You should keep in mind though, there are limits to how small or large your layer height can be, depending on your nozzle diameter.
A layer height too low for your nozzle diameter would cause plastic to be pushed back into the nozzle and it will have issues pushing out filament at all.
A layer height too high for your nozzle diameter would make it hard for layers to stick to each other due to the nozzle not being able to extrude with good accuracy and precision.
There is a well-known guideline set in the 3D printing community about just how high you should set your layer height, as a percentage of your nozzle diameter.
Cura even starts to give warnings when you put in a layer height that is above 80% of your nozzle diameter. So if you have a nozzle diameter of 0.4mm which is the standard nozzle size, you’ll get a warning with a layer height anywhere from 0.32mm and above.
As previously mentioned, your layer height should be between 25% & 75% of your nozzle diameter.
For the standard 0.4mm nozzle, this gives you a layer height range of 0.1mm up to 0.3mm.
For a larger 1mm nozzle, it’s a little easier to calculate, with your range being between 0.25mm & 0.75mm.
The middle or the 50% mark is usually a good starting point to be at, then whether you want better quality or a faster printing time, you can adjust accordingly.
A good layer height for PLA or PETG is 0.2mm for a 0.4mm nozzle.
How Does Layer Height Affect Speed & Printing Time?
As previously mentioned, we’ve determined that layer height affects the speed and overall printing time of your object, but to what extent. This one, luckily is pretty basic to figure out.
Layer height affects printing time because your print head has to print each layer one by one. A smaller layer height means your object has more layers in total.
If you have a layer height of 0.1mm (100 microns), then you adjust that layer height to 0.2mm (200 microns) you will have effectively halved the total amount of layers.
As an example, if you had an object that was 100mm high, it would have 1,000 layers at a 0.1mm layer height, and 500 layers for a 0.2mm layer height.
All things being equal, this means halving your layer height, doubles your total printing time.
Let’s use a real example of the one and only, 3D Benchy (a staple 3D printing object to test printer abilities) of three different layer heights, 0. 3mm, 0.2mm & 0.1mm.
The 0.3mm Benchy takes 1 hour and 7 minutes, with 160 layers in total.
The 0.2mm Benchy takes 1 hour and 35 minutes, with 240 layers in total.
The 0.1mm Benchy takes 2 hours and 56 minutes to print, with 480 individual layers to complete.
The difference between the printing time of the:
- 0.3mm height and 0.2mm height is 41% or 28 minutes
- 0.2mm height and 0.1mm height is 85% or 81 minutes (1 hour 21 minutes).
- 0.3mm height and 0.1mm height is 162% or 109 minutes (1 hour 49 minutes).
Although the changes are very significant, they become even more significant when we are looking at large objects. 3D models that cover a large portion of your print bed, wide and high have bigger differences in print times.
To illustrate this, I sliced a 3D Benchy at 300% scale which almost fills up the build plate. The differences between printing times for each layer height was huge!
Starting with the largest layer height at 0. 3mm, so the faster print, we have a printing time of 13 hours and 40 minutes.
Next up we have the 0.2mm 300% Benchy and this came in at 20 hours and 17 minutes.
Lastly, the highest quality Benchy with a 0.1mm layer height which took 1 day, 16 hours and 8 minutes!
The difference between the printing time of the:
- 0.3mm height and 0.2mm height is 48% or 397 minutes (6 hours and 37 minutes).
- 0.2mm height and 0.1mm height is 97% or 1,191 minutes (19 hours and 51 minutes).
- 0.3mm height and 0.1mm height is 194% or 1,588 minutes (26 hours and 28 minutes).
When we compare the normal Benchy to the 300% Benchy we see the differences in relative printing time differences.
| Layer Height | Benchy | 300% Scale Benchy |
|---|---|---|
| 0.3mm to 0.2mm | 41% Increase | 48% Increase |
| 0.2mm to 0.1mm | 85% Increase | 97% Increase |
0. 3mm to 0.1mm 3mm to 0.1mm | 162% Increase | 194% Increase |
This goes to show that if you are printing large objects, your layer height is going to count more towards the printing time, even though the quality remains the same.
The trade off for layer height and print time makes it slightly more beneficial to opt-in for a bigger layer height for larger objects.
‘Yes, of course’ you’re thinking, more layers means a longer printing time, but how about the quality?
How Does Layer Height Affect Quality?
Depending on how you personally see things, you might not really be able to tell the difference between a print with 0.2mm layer height and 0.3mm layer height, even though that is a 50% increase.
In the grand scheme of things, these layers are extremely small. When you are looking at an object from a distance, you really wouldn’t notice a difference. It’s only up-close with good lighting around the object when you realize these quality differences.
Just as a test and a helpful visual example of this, I 3D printed some Benchys out myself in a few different layer heights. I picked 0.1mm, 0.2mm and 0.3mm which is a range that the majority of 3D print users replicate in their prints.
Let’s see if you can tell the difference, take a look and see if you can figure out which is 0.1mm, 0.2mm and 0.3mm layer height.
Answer
Left – 0.2mm. Middle – 0.1mm. Right – 0.3mm
Great job if you got it correct! When you inspect the Benchys closely, the main giveaway is the front. You can see the ‘stairs’ in the layers more prominent with the bigger layer heights.
You can definitely see the smoothness of the 0.1mm layer height Benchy all across the print. From a far distance, it might not make such a difference, but depending on your model, some parts might not print successfully with large layer heights.
Smaller layer heights can deal with issues such as overhangs a lot better because it has more overlap and support from the previous layer.
If you were looking at these from far, would you really notice the difference in quality?
To determine the best layer height for your 3D printer, just ask yourself whether you prefer the increases in quality over time and quantity, if you are printing many parts.
Your nozzle size will have an effect on the layer height in terms of the limitations for how high or low it can be, following the 25-75% rule.
Does Layer Height Affect Strength? Is a Higher Layer Height Stronger?
CNC Kitchen has created a staple video on which layer height is the best for strength, whether it’s a low-detailed large layer height, or a very precise small layer height. It’s a great video with visuals and well-explained concepts to give you the answer.
I’ll summarize the video for you if you want the quick answer!
You might think either the largest layer height or the smallest layer height would come out on top, but the answer is actually pretty surprising. It was actually neither of the extreme values, but something in between.
After testing a number of hooks at layer heights of between 0.05mm and 0.4mm, he found that the best layer height for strength was between 0.1mm & 0.15mm.
It does depend on what nozzle size you have for which layer height works best.
Ender 3 Magic Number Layer Height
You might have heard the term ‘Magic Number’ when referring to the layer height of a specific 3D printer. This comes about because of the Z axis stepper motors travel in ‘steps’ of 0.04mm, pushing the hotend that distance.
It works for the Ender 3, CR-10, Geeetech A10 and many more 3D printers with the same lead screw. You have M8 lead screws, TR8x1.5 trapezoidal lead screw, SFU1204 BallScrew and so on.
It is possible to move in between values with microstepping, but those angles aren’t equal. Using the natural rotation of the stepper motor is done by moving the hot end in increments of 0.04mm.
This means, if you want the best quality prints, for the Ender 3 and a range of other 3D printers, instead of using a 0.1mm layer height, you’d want to print with a layer height of 0.08mm or 0.12mm and so on.
Using these magic numbers has an effect, of averaging out variations in layer heights from unequal microstep angles, for a consistent layer height throughout.
This is well described by Chuck at CHEP on YouTube which you can watch below.
Simply put, a stepper doesn’t give you feedback so your printer has to follow the command and be in a position as good as it can be.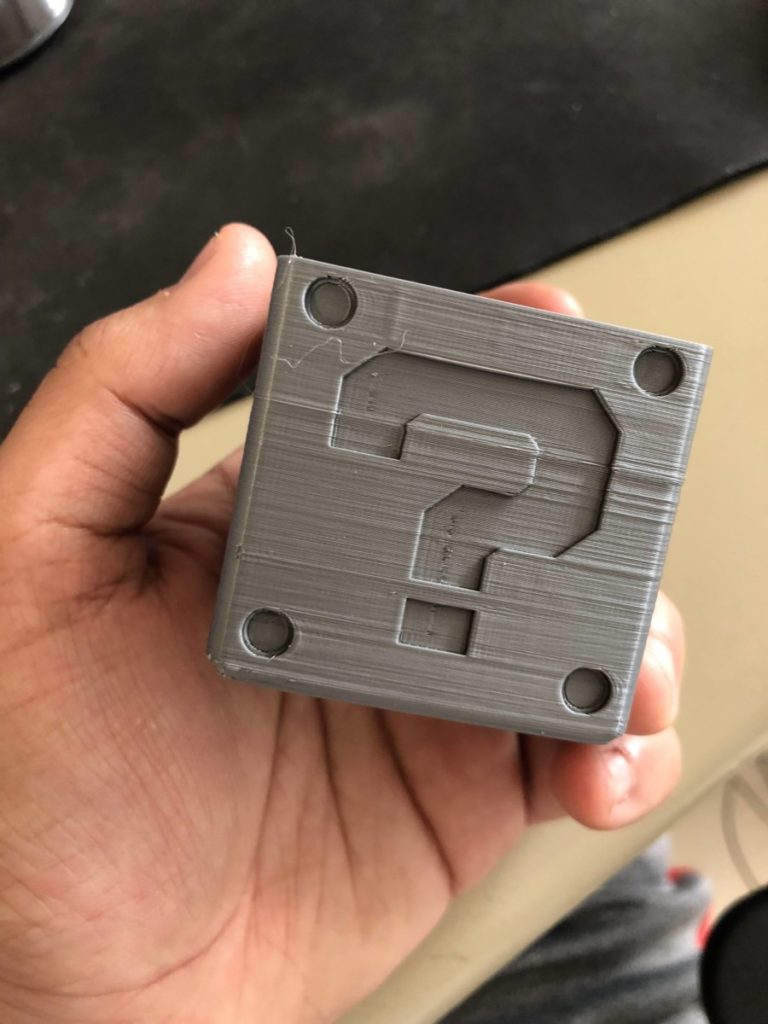 Steppers usually move in full steps or half steps, but when moving in between that, there are several variables which determine the step distances for these microsteps.
Magic numbers avoid that hopeful game for precise movements and use half and full steps for the best accuracy. The level of error between the commanded steps and actual steps get balanced out every step.
Other than 0.04mm, there is another value of 0.0025mm which is the 1/16th microstep value. If you are using adaptive layers, you should use values divisible by 0.0025 or limit them to a half-step resolution of 0.02mm.
Optimal Layer Height Calculator
Josef Prusa created a sweet calculator for determining optimal layer height for your 3D printer. You simply enter some parameters and it spits out information about your ideal layer height.
Many people have recommended and used this calculator over time, so it’s worth checking out for yourself.
What is the Best Layer Height for an Ender 3?
The best layer height for an Ender 3 is between 0. 12mm and 0.28mm depending on what quality you desire. For high quality prints where you want the most detail, I’d recommend a layer height of 0.12mm. For lower quality, quicker 3D prints, a layer height of 0.28mm is a great layer height that balances out well.
What Are the Downsides of Using a Small Layer Height?
Since your printing time would increase with a smaller layer height, it also means there is more time for something to go wrong with your print.
Thinner layers don’t always result in better prints and can actually hinder your prints in the long-run. An interesting thing to know when it comes to smaller layer objects is that you usually experience more artifacts (imperfections) in your prints.
It’s not a good idea chasing a tiny layer height for some extremely high quality objects because you might just end up spending significantly more time for a print that doesn’t even look great.
Finding the right balance between these factors is a good goal to pick the best layer height for yourself.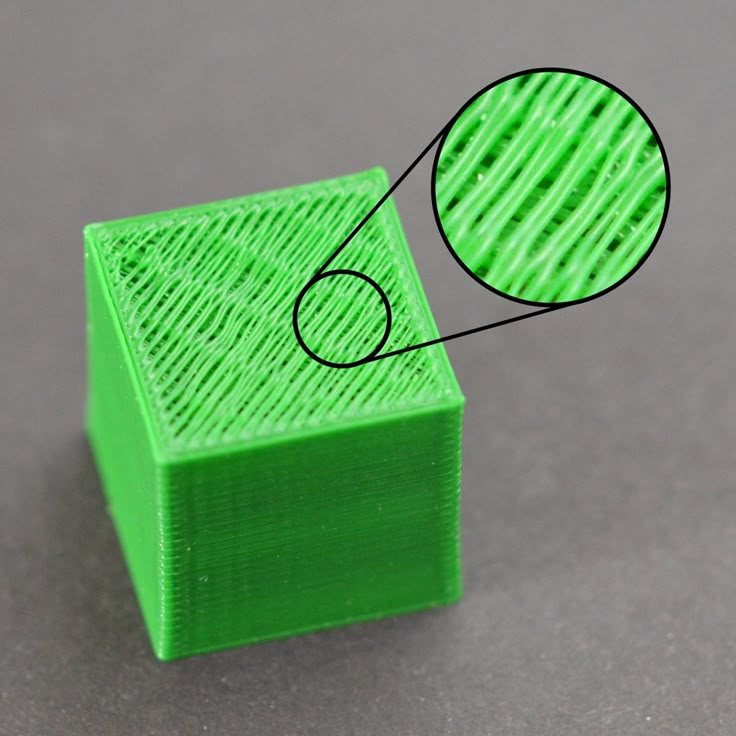
Some people wonder whether a lower layer height is better, and the answer is that it depends on what your aims are as mentioned above. If you want high quality models, then a lower layer height is better.
When looking at nozzle sizes and layer heights, you might question how small a 0.4mm nozzle can print. Using the 25-75% guideline, a 0.4mm nozzle could print at a 0.1mm layer height.
Does Layer Height Affect Flow Rate?
Layer height has an effect on the flow rate since it determines the amount of material that will be extruded from the nozzle, but it doesn’t change the actual flow rate set in your slicer. Flow rate is a separate setting that you can adjust, usually default at 100%. A higher layer height will extrude more material.
3D Printing Layer Height Vs Nozzle Size
In terms of layer height vs nozzle size, you want to generally use a layer height that is 50% of the nozzle size or diameter. The max. layer height should be around 75-80% of your nozzle diameter. To determine the layer height of a 3D printed object, print your own small test 3D prints at different sizes and pick the one you desire.
If you love great quality 3D prints, you’ll love the AMX3d Pro Grade 3D Printer Tool Kit from Amazon. It is a staple set of 3D printing tools that gives you everything you need to remove, clean & finish your 3D prints.
It gives you the ability to:
- Easily clean your 3D prints – 25-piece kit with 13 knife blades and 3 handles, long tweezers, needle nose pliers, and glue stick.
- Simply remove 3D prints – stop damaging your 3D prints by using one of the 3 specialized removal tools.
- Perfectly finish your 3D prints – the 3-piece, 6-tool precision scraper/pick/knife blade combo can get into small crevices to get a great finish.
- Become a 3D printing pro!
3D print layer height: how important is it?
3DPrintStory 3D printing process 3D print layer height: how important is it?
Layer height is actually the height of each layer of plastic, extruded, vulcanized or sintered on a 3D printer. This setting is configured with your slicer and has a much larger impact on the final 3D printed model than it might seem at first glance. When used correctly, this setting will increase the speed, resolution, and quality of 3D printing in general.
The height of a 3D printed layer is usually measured in microns. One micron is equivalent to 0.001 mm.
Things to watch out for when playing with layer height on FDM printers: a thinner vertical layer results in a thicker horizontal line, and a thicker vertical layer results in a thinner horizontal line. This can reduce horizontal accuracy, especially in small moving parts.
Different printers have different maximum layer height resolution. The standard minimum height is typically 50 to 100 microns (0.05 to 0.1 mm). Cheaper 3D printers usually do not have such high accuracy. In printers such as the Anet A8, the minimum layer height is 100 microns (0.1 mm). Therefore, when buying a 3D printer, you should consider the minimum layer height.
SLA and laser 3D printers typically have a much lower minimum compared to FDM printers, which explains the insanely detailed models they can print.
Optimizing 3D print speed
One of the most common reasons for changing 3D printer layer height settings is to increase 3D print speed. The higher layer height means the printer doesn't have to print multiple layers to achieve the same overall height, resulting in much faster 3D printing.
In general, increasing the layer height reduces the resolution and print quality. Thus, this "trick" is best suited for large 3D models, where close-up details will either be ignored or corrected during any post-processing.
The layer height can be optimized for each model separately to achieve maximum print speed while maintaining a specific resolution. However, this is something that should be judged individually for each 3D printer, as effective 3D printing will require some play around with the settings.
Increasing resolution
A little-known fact in the 3D printing community is that most 3D printers have higher vertical resolution than horizontal resolution. Why? The lead screws provide your 3D printer with a much more precise vertical position than the drive belts used for other axes. Thus, the printer can create sharper patterns in the vertical plane than in the horizontal plane.
This is one of the reasons why aaskedall's "Fillenium Malcon" model is so popular (among Star Wars enthusiasts). It is because of the presence of such amazing details that can be implemented on a huge number of 3D printers.
A lower layer height on your 3D printer will, of course, slow down printing, but the printer will apply more layers for a given height, resulting in much higher detail.
Smoothing out a surface
Another use for the extreme detail available at lower layer heights is to smooth 3D models. With a lower layer height, they become less noticeable, and the details become smoother. As the layer height increases, the surface of the model becomes rough, and the layers are clearly visible.
With this knowledge, you can ensure that parts that require a very smooth finish (such as axles or shafts) are as smooth as possible by reducing the 3D print layer height. As you might have guessed, this increases detail but reduces 3D printing speed, so keep this in mind when printing large 3D models.
Slicer developers have noticed this point and the PrusaSlicer software has even added a setting to increase the smoothness of the print by changing the layer height. For more information on how to anti-alias models, you can check out this PLA anti-aliasing guide.
Subtleties of 3D printing. Part 2. Theory and practice.
I continue the series of articles started with the part devoted to polymers. This part will be devoted to the theory and practice of 3D printing, and I will try to reveal the questions that arise when in practice it turns out not quite what, it would seem, is theoretically known.
To begin with, a little elementary theory of FDM printing, which seems to be known to everyone and everyone :)
It would seem, what could be simpler? There is a rod on a reel that enters the magic hot end, where it melts and gradually, like toothpaste from a tube, is smeared in layers. During this process, our printout grows. Everything seems to be simple, but not quite.
The fact is that as soon as the plastic bar starts heating in the hot end channel, it begins to expand. A strange picture arises: let's say, 1 cubic centimeter of plastic enters the hot end of the print head, and a slightly larger amount of it comes out! And it would be fine if it remained so later - we would put up with this strange mathematics that violates the laws of conservation of energy. But, that's bad luck, as soon as the plastic leaves the print head through the nozzle and starts to cool, it begins to strive to return to its original volume.
At the end of the first part of the article 'Polymers', I already considered this issue and gave a general advice: do not heat the plastic beyond the temperature necessary to achieve good adhesion between the layers, since the shrinkage of the heated plastic is the stronger, the higher the printing temperature. For each of the plastics used in 3D printing, this temperature, of course, has its own and is experimentally in the temperature range indicated by the manufacturer of the rod on the package.
Why doesn't the manufacturer specify a specific ideal temperature?
The fact is that we all use printing for a variety of, sometimes very bizarre purposes! Someone needs the highest detail when printing small objects, and someone prints final products of very decent sizes. Someone needs only the appearance of the prototype, while someone else is interested in the mechanical strength of the resulting printout.
And it is very important to understand for yourself what you want to get, since getting a full set of these properties can be quite problematic. Not everyone prints for themselves and for their own purposes, many also print to order, and here you should be very good at both the theory and practice of printing, and even be a materials scientist to some extent in order to offer the customer the material, model and printing method that is the most he will be satisfied in the form of a finished result.
In general, the lower the printing temperature of a particular plastic, the higher the detail that can be obtained, but the lower the mechanical strength of the printout.
How can I increase print strength without increasing the print temperature?
In order to get an answer to this question, you can dig into the mathematic jungle, again recall the forces of van der Waals... but you can also just give clear examples from the life around us.
Have you ever tried to separate 2 even glasses lying on top of each other? The larger their area and the smoother they are, the larger the surface of their contact and the more difficult it is to separate them.
The same relationship can be traced with 3D printing. The larger the contact surface of the subsequent printout layer with the previous one, the better the adhesion between them.
What influences the size of this area, apart from the area of the printed layer itself?
Nozzle size and printing temperature have the greatest influence on the area of contact between layers. The higher the temperature, the less viscous the plastic comes out of the hot end, so it 'wets' the surface of the previous layer better.
* What's interesting is that, theoretically, the rougher the surface of the previous print layer, the better it will adhere to the next layer, at the right print temperature!
The illustration shows 3 variants of layer sections. 1 - typical result of too low print temperature; 2 - ideal, when the fluidity of the plastic is sufficient to fill the irregularities of the previous layer; 3 - an imaginary super-ideal variant of the increased bonding area due to the uneven surface of the previous layer.
A purely visual difference between options 1 and 2 can be seen on the transparent plastic printout. The printout begins to shine throughout its entire thickness, as if it is all pierced with thin silvery threads. In essence, it is - the silvery threads are the air remaining between the layers.
Most of the air remains at the junction of the perimeters, due to the fact that the 'sausage' of plastic extruded from the nozzle in cross section is not a rectangle, but a rectangle with completely rounded edges. It is in the places of the side joints of these 'sausages' that the air lies, which reduces the strength of the printout.
You can reduce the number of joints by reducing the number of elements forming the joint!
Of course, the ideal option for a plastic product with properties that are homogeneous throughout its thickness is casting - one element per product. But we are talking about 3D printing.
Accordingly, in order to obtain the most stable printout, it is necessary to maximize the diameter of the nozzle used and the layer thickness, thus reducing the number of elements!
The layer thickness must not be increased excessively, as well as the nozzle diameter. But if everything is clear with the diameter - the smaller it is, the higher the possible detailing, then with the layer thickness, everything is not so transparent, since it does not affect the detailing so much due to the fact that it is smaller than the nozzle diameter. And the question is how much less?
What is the nozzle diameter and layer height in terms of slicer mathematics?
The slicer does not see what nozzle you have in the printer. And he will not even be able to check if you deceive him :) And here's why: for the printer control program, as well as for the slicer that prepares the code for the control program, the nozzle diameter and layer height are no more than 2 variables based on which it is calculated the amount of plastic that needs to be pushed through the hot end while it moves 1 cm away. That's it!
Accordingly, if you are sure that more plastic will certainly crawl through the nozzle installed on the printer, feel free to set the diameter of the nozzle more than the physical one. Smaller sizes can also be displayed. But here, as elsewhere, there are limits. And if everything is clear with a programmatic increase in diameter, then a programmatic decrease in the diameter of the nozzle can give instability to the flow of plastic and its separation from the nozzle. This is especially noticeable in the filling. So if your fill mesh is constantly tearing - just set the nozzle diameter to a larger one.
*The photo shows the results of printouts made with a 1.2mm nozzle. In the slicer parameters, nozzles 2, 1.5, 1.3, 1, 0.8, 0.5 mm are set in series.
It is not necessary to use the same diameter nozzle for all printing operations! Ask how? So you have never gone to the Advanced tab in the Slic3r settings.
It is quite possible to set the program diameter of the nozzle to 2 mm for filling, and leave 1 mm for perimeters and continuous filling. Or vice versa.
*The photo shows the results for these two options.
Correct ratio of nozzle diameter to layer thickness.
It should be clear to everyone that if the layer thickness is equal to the diameter of the nozzle, then the printout will be nothing more than a bundle of weakly glued bars equal in diameter to the nozzle! This option can just be seen in the illustration in the upper right corner.
* The illustration shows a plate of the most suitable ratios of nozzle diameter to bed height. In general, the smaller the layer height, the smaller the number of nozzles you need to print. The ratio of nozzle diameter to layer height is approximately 2-4 to 1.
But, it would seem, why is it bad to set the layer height to be much less than the nozzle diameter? Of course, the height of the layer can be reduced to a certain limit, but not infinitely, since errors begin to accumulate over time and artifacts form on the surface (outer perimeter) of the printout. This is most likely because the plastic flow is forced to spread over the not perfectly flat surface of the previous layer, thus increasing the error from layer to layer or repeating it with a slight offset.
If the height of the layer is increased, then the errors are hidden and become less noticeable with each new layer.
* Photo prints made with 1.2mm nozzle (2mm nozzle size is set in slicer settings) with layer height from 0. 4, 0.3, 0.2, 0.15, 0.1mm. It is easy to see that surface artifacts appeared on the printout with a layer of 0.1mm.
Based on the above arguments, we can conclude that the correct ratio of nozzle diameter to layer height should be observed in order to obtain the best quality printouts.
What is typing speed in terms of mathematics and physics?
Simplifying the scheme as much as possible for clarity, we will get a clear picture of the fact that: the printing speed is primarily reflected in the volume of plastic that needs to be heated and forced through a nozzle of a certain diameter.
We will not consider such speed limiters as the design of the printer and its kinematics, as this is beyond the scope of the issues discussed in the article.
In fact, the most significant print speed limiters are 2 parameters:
- hotend power (it must melt the maximum amount of plastic per second)
- nozzle diameter (the maximum amount of melted plastic per second must pass through it)
We all probably still remember the problem from the school algebra course: calculate how much you need to increase pipe diameter so that water from the pool pours out 2 times faster;)
So it turns out that if we have a specific printer at home or at work, then we can increase its printing speed only by increasing the melt temperature (increasing the power supplied to the hotend) and increasing the nozzle diameter.
Moreover, in order to increase the print speed by 2 times, you need to increase the nozzle diameter by about 1.4 times :)
Cooling.
So, we increased the print speed by 2 or even 3 times. OK! Great. But here's the bad luck, according to the law of conservation of energy, if we started to heat the plastic 2-3 times faster, then we need to cool it just as fast. Otherwise, completely unplanned failures caused by plastic sagging are possible, especially if you print with plastics with a low glass transition temperature (simply, they take a long time to harden). Such plastics include PLA and its mixtures, as well as the majority of impact and frost-resistant plastics - thermoplastic elastomers, including Filamentarno plastic! Prototyper of our production.
*The photo shows a typical result of insufficient airflow on the printout.
Airflow is one of the thinnest and most difficult tools in 3D printing. And it is as useful as it is difficult to master.
Printing bridges, overhangs, fine details, small models - all this is almost impossible to speed up without the use of blowing the printout.
The blowing power should be considered as a parameter related to the print speed - the higher it is, the more powerful the blowing should be.
Epilogue.
Briefly, all the theses of the article can be reduced to the following:
Do not increase the printing temperature beyond what is necessary to achieve sufficient adhesion between layers***
Experiment with all materials available on the market - this will help you understand the range of possibilities available to you
* **
Use nozzles of the right size for the purpose; be sure to have several from 0.2 to 1.2mm
***
0005
***
Match layer height to nozzle diameter
***
Match print temperature to match both print size and nozzle diameter
***
Select blower power according to print speed
That's all for now!
The next article in this series will most likely be about print modeling.