Anet 3d printer assembly instructions
ANET A8 3D PRINTER INSTALLATION MANUAL
DownloadAdd to my manuals
Bookmark this page Manual will be automatically added to "My Manuals" Print this page-
page of 38
- Bookmarks
Advertisement
Anet A8 3D Printer
Installation Guide
Previous Page
Next Page
Related Manuals for Anet A8
- 3D Printers Anet A8 Quick User Manual
(48 pages)
- 3D Printers Anet A8 Installation Manual
(38 pages)
- 3D Printers Anet A8 Instructions Manual
(19 pages)
- 3D Printers Anet A6 Installation Instruction
(45 pages)
- 3D Printers Anet A6 Installation Instruction
(45 pages)
- 3D Printers Anet A9 User Manual
Desktop 3d printer (32 pages)
- 3D Printers Anet A8 Plus User Manual
(30 pages)
- 3D Printers Anet A8 PLUS User Manual
(49 pages)
- 3D Printers Anet A8 Plus User Manual
(36 pages)
- 3D Printers Anet A2 Installation Instruction
(47 pages)
- 3D Printers Anet A2 Installation Instructions Manual
(46 pages)
- 3D Printers Anet E10 Installation Manual
(22 pages)
- 3D Printers Anet E10 Troubleshooting Manual
Print quality troubleshooting guide (69 pages)
- 3D Printers Anet ET4 Pro User Manual
(3 pages)
Summary of Contents for Anet A8
3D Printer Assembly Instructions - 3D Distributed
Home
3D Printers
3D Printer Assembly Instructions
Workhorse 3D PrinterDear User,
Thank you for choosing the Workhorse 3D Printer and welcome the community! This Assembly Guide will help you through the build process.
Visit Youtube to find video instructions and more information: https://www.youtube.com/channel/UCopKI8WOm3WQxUcY6SXtWbg
Happy building and printing and stay in touch!
-Team 3D Distributed
Contact Information
Table of Contents
Table Of Contents
- Table of Contents
- BOM
- 3D Printer Hardware Assembly
- Download Files
- BOM
- 3D Distributed Hardware
- Duet3D Firmware Files
- Electronics
- Sourcing Parts For Your Workhorse 3D Printer
- Frame Assembly
- Frame: BOM
- Sourcing Frame Extrusions
- Gantry Plates
- Gantry Plates Before Gantry Frame And Motor
- X-Carriage
- Linear Rails
- BOM:
- Linear Rail Screw:
- BOM
- Sourcing Parts
- Frame Assembly
- Gantry Assembly
Workhorse 3d printer Dimensions3D Printer Frame DimensionsBOM
| Frame | Length | Units | Description | Misumi Part # |
| 2020 | 930mm Long | 4pcs | Horizontals | HFS5-2020-930 |
| 2020 | 510mm Long | 6pcs | Verticals | HFS5-2020-510 |
| 2020 | 570mm Long | 10pcs | Widths | HFS5-2020-570 |
| 2020 | 808mm Long | 3pcs | Bed Support | HFS5-2020-808 |
| Gantry Extrusions | Length | Units | Description | Misumi Part# |
| 2040 | 770. 5 Long 5 Long | 2pcs | Gantry Horizontals | HFS5-2040-770 |
| 2040 | 456Long | 1pcs | Y-Axis Extrusion | HFS5-2040-465 |
| 2040 | 510 Long | 4pcs. | Z axis Linear Rail Verticals | HFS5-2040-510 |
| Frame Components | Type | Units | Description | Part# |
| Frame Brackets | 20mm Wide | 90pcs | Reversal Tabbed Brackets | HBLFSNF5 |
| T-Nuts (Misumi) | M4 | 75pcs | M4 | HNKK5-4 |
| T-Nuts (Misumi) | M5 | 180pcs | M5 | HNKK5-5 |
| T-Nuts (Misumi) | M3 | 75pcs | M3 | HNKK5-3 |
| Screws | ||
| M5x8mm | Frame | 100pcs |
| M3x8mm Long | Mounts to Carriage | 12pcs |
| M3x6mm Long | Carriage to Linear Rail | 12pcs |
| M3x35mm Long | C-Carriage Insert | 8pcs |
| M3x10mm Long | Gantry to Linear Rail | 32pcs |
| M5x12mm Long | Nema23 to Mount | 12pcs |
| M5x20mm Long | Need Yaxis to nut mount | 4pcs |
| M5x20mm Long | C-Carriage to Extrusion | 6pcs |
| M5x10mm Long | Enclosure | 40pcs |
| M5x16mm | Z-Axis motor Mount | 6pcs |
| M3x5mm | Extruder Motor to mount | 4pcs |
| Lead Screw | Part Number |
| Igus 762mm Long (X Axis) 2pcs | DST-LS-10×50-R |
| Igus 485mm Long (Y Axis) 1pc | DST-LS-10×50-R |
| Lead Screw Nuts 3pcs | DST-JFRM009 |
| Acme Leadscrew Mcmaster Carr (Z Axis) 2pcs | |
| Acme Leadscrew Mcmaster Carr (Z Axis) Brass Nuts 2pcs |
| Linear Rails | Description |
| 450 or 400mm Long w Y axis (1pc) | MGN12H 20mm x 20mm Hole Pattern |
| 700mm Long X Axis (2pc) | MGN12H 20mm x 20mm Hole Pattern |
| 500mm Long Z Axis (4pc) | MGN12H 20mm x 20mm Hole Pattern |
| Machined Hardware |
| Gantry Plates Kit 2pcs w/bearings |
| X- Axis Carriages 2pcs |
| Y-Axis Carriage 1pc |
| Y-Axis Motor Mount 1pc |
| Y-Axis Idler Mount 1pc |
| Hotend Mount |
| Z-Axis Motor Mounts 2pcs |
| Aluminum Bed |
| Electronics | # |
| Nema 17 Stepper Motor | 2pcs |
| NEMA 23 280oz/in X | 2pcs |
| NEMA 23 140oz/in Y | 1pcs |
| DuetWifi | 1pcs |
| Duet Wifi Expansion Board | 1pcs |
3D Printer Hardware Assembly
- Frame
- Gantry
- Motors
- Lead Screw
- Motors
- Carriage
- Electronics
- Wiring
- Enclosure
Download Files
WorkHorse Printer CADThingiverse Files
BOM| Lead Screw | Discription | Part Number |
| 762mm Long (X Axis) | Igus High Helix 10mm w/50mm Lead | DST-LS-10×50-R |
| 485mm Long (Y Axis) | Igus High Helix 10mm w/50mm Lead | DST-LS-10×50-R |
| Lead Screw Nuts | Igus Lead Screw Nuts | DST-JFRM009 |
| 12mm T12x2 Trapezoidal ACME Lead Screw w/ Brass Nut (Z Axis) | 500mm Long | HW-SC-T12x2-P |
| Linear Rails (ZYLtech) | Discription | Discription |
| 450mm Long w Y axis (1pc) | MGN12H 20mm x 20mm Hole Pattern | MGN12H 20mm x 20mm Hole Pattern |
| 700mm Long X Axis (2pc) | MGN12H 20mm x 20mm Hole Pattern | MGN12H 20mm x 20mm Hole Pattern |
| 500mm Long Z Axis (4pc) | MGN12H 20mm x 20mm Hole Pattern | MGN12H 20mm x 20mm Hole Pattern |
3D Distributed Hardware
WorkHorse 3D Printer PartsWorkHorse 3D Printer Gantry Plates| Machined Hardware | Price $ | Source |
| Gantry Plates Kit 2pcs w/bearings | 3DD | |
| X- Axis C- Carriages 2pcs | 3DD | |
| Y-Axis C- Carriage 1pc | 3DD | |
| Y-Axis Motor Mount 1pc | 3DD | |
| Y-Axis Idler Mount 1pc | 3DD | |
| Hotend Mount | 3DD | |
| Z-Axis Motor Mounts 2pcs | 3DD | |
| Aluminum Bed |
Duet3D Firmware Files
Download
Electronics
We now recommend the Duet 3 Mainboard 6HC electronics by Duet3D.
Sourcing Parts For Your Workhorse 3D Printer
Sourcing Lead Screw
Sourcing Lead Screw
Buying Frame PartsFrame Assembly
Workhorse Frame ExtrusionsThe frame is made out of 2020 (20mm x 20mm) aluminum extrusions.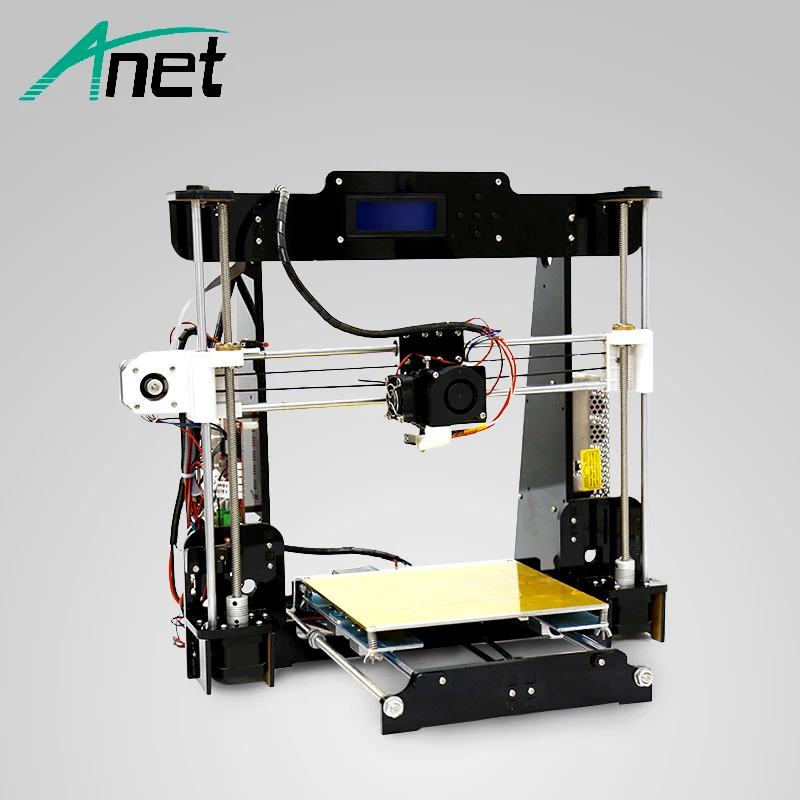
- 20mm x 20mm
- 4pcs 930mm Long
- 6pcs 510mm Long
- 10pcs 570mm Long
- 3pcs 808mm Long
.
20mm x 40mm HFS5 Aluminum Extrusions (Misumi Brand)
4pcs 510mm Long
Frame:
BOM| Misumi Extrusions for Frame | Length | Units | Discription | Part # |
| HFS5-2020 | 930mm Long | 4pcs | Horizontals | HFS5-2020-930 |
| HFS5-2020 | 510mm Long | 6pcs | Verticals | HFS5-2020-510 |
| HFS5-2020 | 570mm Long | 10pcs | Widths | HFS5-2020-570 |
| HFS5-2020 | 808mm Long | 3pcs | Bed Support | HFS5-2020-808 |
| Gantry Extrusions | Length | Units | Description | Part# |
| HFS5-2040 | 770.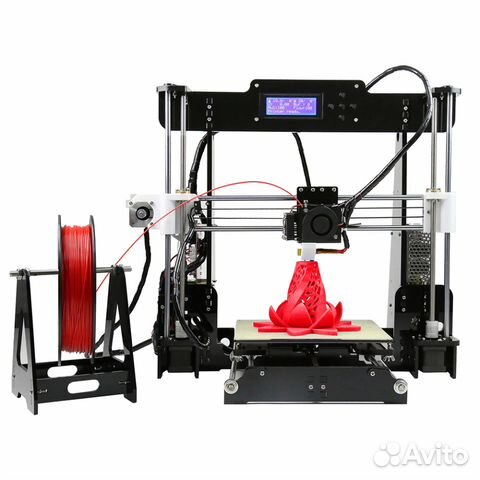 5 Long 5 Long | 2pcs | Gantry Horizontals | HFS5-2040-770 |
| HFS5-2040 | 456Long | |||
| HFS5-2040 | 510 Long | 4pcs. | Z axis Linear Rail Verticals | HFS5-2040-510 |
| Frame Components | Type | Units | Description | Part# |
| Frame Brackets | 20mm Wide | 90pcs | Reversal Tabbed Brackets | HBLFSNF5 |
| T-Nuts (Misumi) | M4 | 75pcs | M4 | HNKK5-4 |
| T-Nuts (Misumi) | M5 | 180pcs | M5 | HNKK5-5 |
| T-Nuts (Misumi) | M3 | 75pcs | M3 | HNKK5-3 |
| Frame Price | Price $ | |||
| Profile Extrusions | $ 122. 29 29 | extrusions and brackets w/tax and shipping | ||
| M5 x 10 Cap Screws (200pcs) | $ 9.99 | 225$ | ||
| brackets | $ 40.32 | |||
| T-nuts | $ 19.32 | |||
| Total | $ 191.92 |
Sourcing Frame Extrusions
Workhorse Frame Step 1Workhorse Frame Assembly DiagramFrame Diagram Front ViewFrame Diagram Front ViewGantry Plates
Gantry Motor PlatesGantry Motor PlatesGantry Plates2040 Gantry Frame Extrusion Thru HolesGantry Assembly Explained2040 Gantry Frame Extrusion Nema 23 Motor Mounting To Gantry Motor PlateNema 23 Motor Mounting To Gantry Motor PlateNema 23 Motor Mounting To Gantry Motor PlateGantry Plates Before Gantry Frame And Motor
Gantry Plates DiagramX-Carriage
X-Carriage AssemblyX and Y-Carriages use 4 M3x6mm Screws
- X-Carriage (X-Axis) 2pcs
- Y-Carriage (Y-Axis) 1pc
- M3x6mm Screws 12pcs (4 for each Carriage)
The x-axis carriage screws down to the 2040 Y-axis extrusion and rail. *Note* The y-axis 2040 extrusion must have hand tapped M5 threaded holes.
Linear Rails
The Workhorse Printer uses MGN12H linear rails with a 20mm x 20mm Hole Pattern.
see Linear Rails Guide
BOM:
- 500mm Long Z Axis (4pc)
- 700mm Long X Axis (2pc)
- 450mm Long w Y axis (1pc)
Linear Rail Screw:
- M3x9mm Long Screws 26 per X-Axis
- M3x9mm Long Screws 14 for Y-Axis
- M3x9mm Long Screws 18 per Z–Axis
Total M3x9mm screws 138pcs.
Install Y-Axis AssemblyNema 23 Motor MountMotor Mount to Carriage
- M3x8mm Long Screws 4pcs
X-Carriage Lead Screw Nut Insert 2pcs
- Each Insert uses:
- M3x35mm screws 4pcs
- M5x55mm Long
The WorkHorse is a large scale machine platform for 3d printing.
Read More
DuetWifi Expansion Board Wiring and Firmaware Configuration
Read More
While a Duet 3 won’t be replacing the Duet 2 anytime soon, it’s a much more professional electronics board that adds a range of options and functionality to your machine build. Although the Duet 3 may be overkill for most users, these options are not for everyone you do get much more out of Duet…
Read More
Read More
How To Wire The Duet 3 Mainboard 6HC The Duet 3 is a great board for your 3d printer, but wiring it up can be confusing.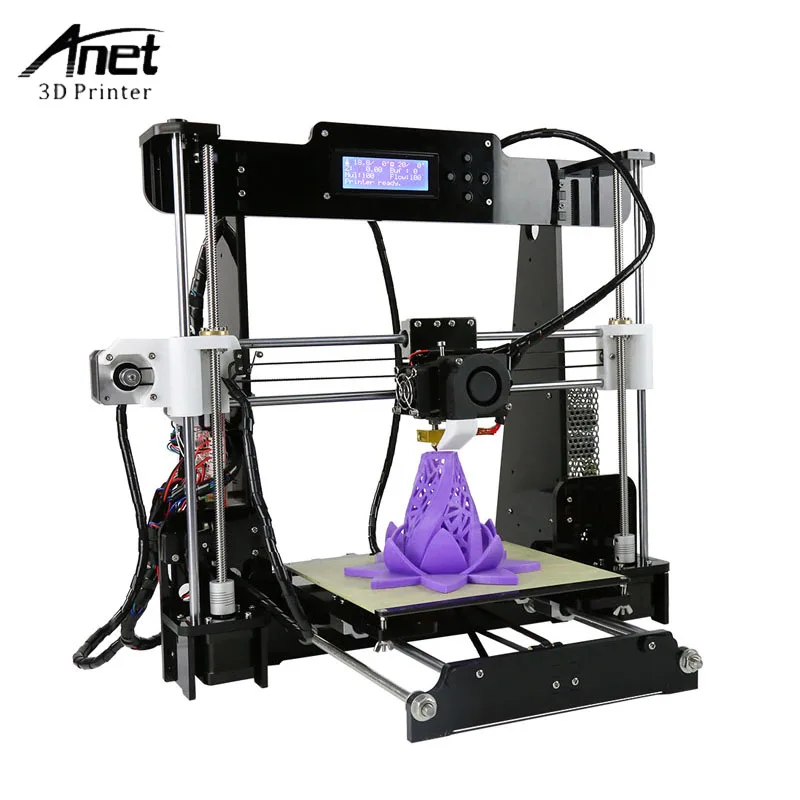 This tutorial will walk you through how to wire the Duet 3 mainboard 6hc to your Workhorse 3d printer. Duet Wiring Instructions This is a guide on how to…
Read More
How can you calculate the wire gauge and length for 3d printer wiring? Most 3D printers use either 12V or 24V. The hotend of a 3D printer may draw up to 4A, while a heated bed draws nearly 12A. If the wire is not large enough or longer than needed, it will have more resistance…
Read More
Layer Adhesion Layer and surface adhesion is a critical component of 3d printing. 3d printing issues increase as object size increases. Large 3d printers can be more difficult when it comes to bed leveling. As the extruded layers bond together they are fused with heat. Proper surface adhesion decreases warping that can decrease part quality. …
Read More
Stepper Motor Color Coding of Wires For any stepper motor to be wired up properly, we’ll need to determine which wires are “pairs” or connected to the ends of each coil.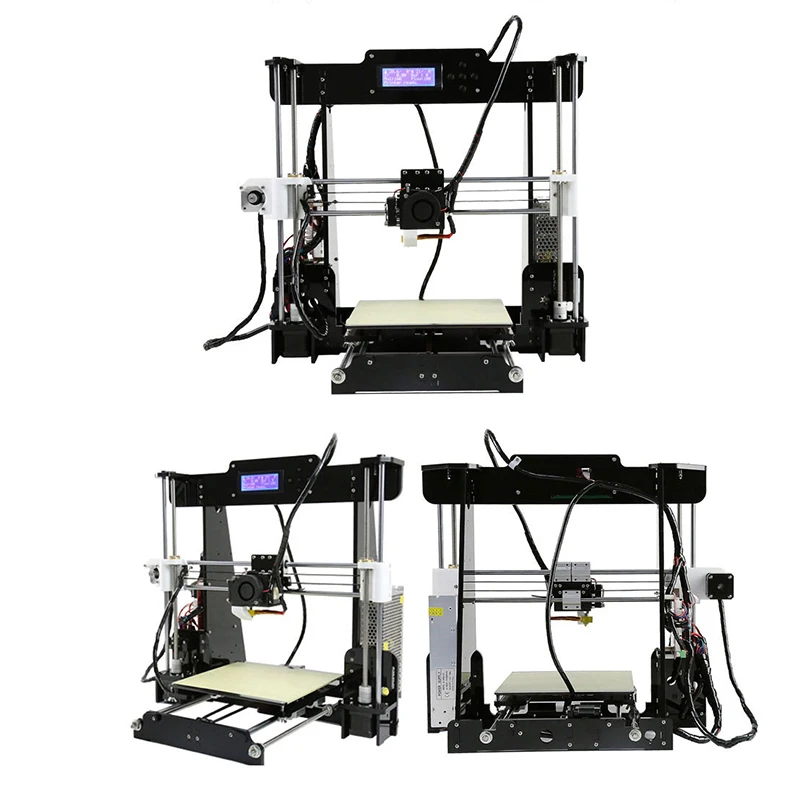 These are usually referred to as coil “A” and coil “B”. The exact order of the pairs Black/Green or Green/Black of pins does not…
Read More
What Size Stepper Motor Should You Use? While the size of a stepper motor is just the footprint it’s the winding that determines torque. There are Nema 17’s with as much torque as a Nema 23. Most 3d printers use stepper motors to drive z-axis motion lead screws to raise or lower the bed or…
Read More
Hello world! We’ve finally finished repairing the shop from the last years storm damage. The new shipping department is setup and a better system has been implemented. Just about everything is back online and we’ll be adding products to the store over the next few days. If you have any questions email us at [email protected]…
Read More
Like this:
Like Loading.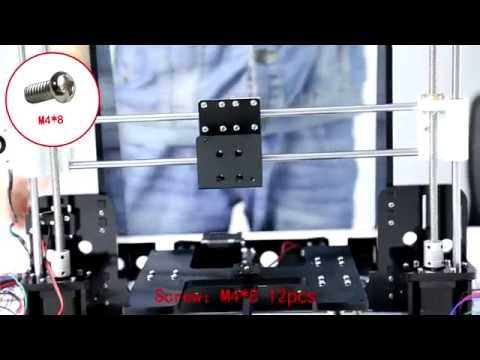 ..
..
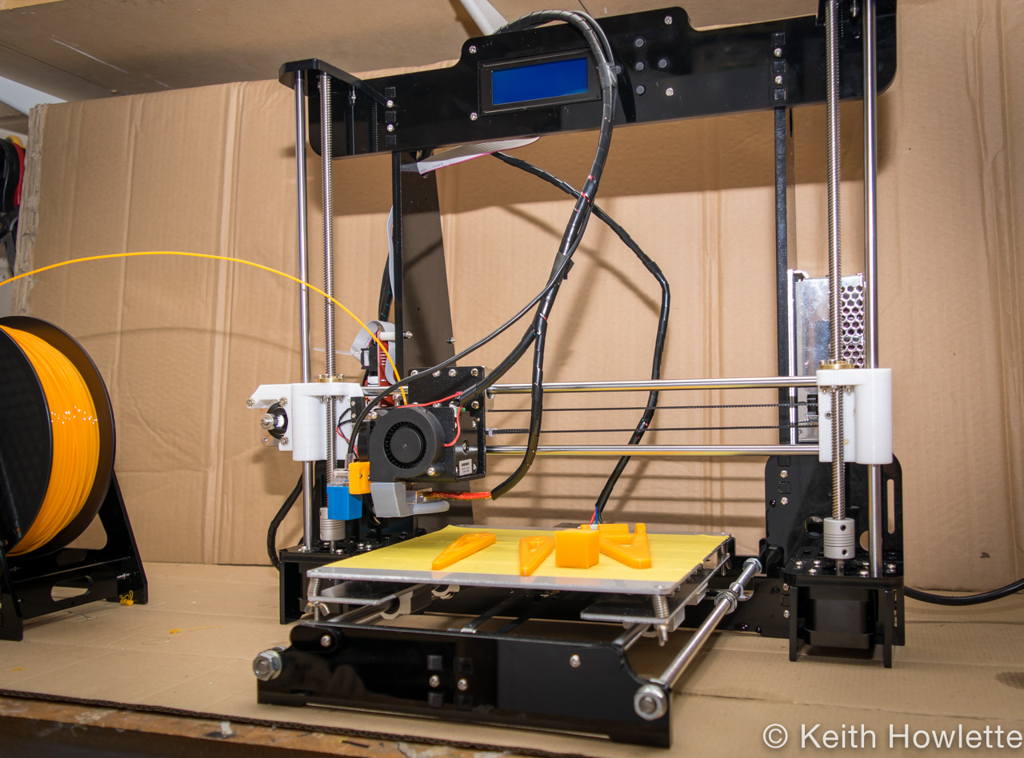
Anet A8 3D printer review. Assembly. Adjustment. Print examples.
I have been dreaming about buying a 3D printer for a long time. Since then, when the first articles about self-assembly printers began to appear on gyktimes (then Habré). But somehow I did not dare to start self-collection. There was a lack of necessary knowledge and skills.
Later, the Chinese mass-produced printers. And it seems that here it is, take it. But here the price has already affected.
Recently, more or less normal prices for printers have become at gearbest and banggood stores. And I, having saved up the necessary amount of money, and waiting for the sale, bought myself Anet A8. Why was this particular model purchased? Probably because of the price.
At the time of purchase, I already knew what this printer was capable of. Knew about his sores, solutions and improvements. But having decided that it would suit me for entering the world of 3D printing, I boldly ordered it.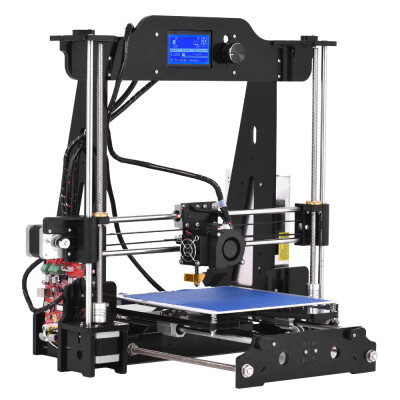
In short, this is a good option for beginners. Based on which it will already be possible to understand whether you need it or not. And, accordingly, abandon the printer, or already modify it, or even switch to more expensive models.
And if you need details. I have them, as always, and a lot. Be careful, there will be a really large number of photos.
Since I am not a professional techie, the reviews are written by me purely from a consumer perspective. I know that I will not be able to reflect all the necessary things in the review, and perhaps somewhere I even make mistakes. You can write to me in a PM, I will definitely fix it, and you can also ask a question in the comments to the review, and I will answer it to the best of my ability and knowledge.
Initially, I had a question about buying a laser engraver and a 3D printer. I bought an engraver first. Already reviewed it. The second was a 3D printer, as it has a different application.
I ordered it on Banggood because the price was lower. Only 160 dollars already with delivery to Kazakhstan. In herbest, printer prices are lower, but delivery is usually at least $ 140. Which is not beneficial at all.
The printer was delivered to me fairly quickly. In just 2 weeks.
At the post office I received a parcel weighing as much as 8 kg.
There were a lot of details inside. And the complete absence of any instructions:
Each group of parts was in a box in its own foam compartment:
They are sorted not just like that, but according to the assembly instructions.
I downloaded the instruction itself, along with the drivers and the Cura 14/07 printing program, here. (total size 303mb) Now I will show my build process . There will be many photos. I will comment in part:
The total time for assembly and the first launch took me about 10 hours of unhurried fuss, with breaks, swearing, alterations and clarification of incomprehensible moments. If it is possible to assemble with an assistant, the time will be reduced by at least half. (unless, of course, you use it with an assistant during the assembly of strong drinks)
The first thing to start assembling the printer is frame . It's made of acrylic:
An hour of total assembly time was spent peeling all the paper off these pieces:
There are a lot of bolts and nuts to assemble the frame. They are conveniently sorted into bags and signed:
(after assembly, I still have a large supply of bolts)
The process has begun:
(in this photo, as it turned out, the upper bar for the display was incorrectly installed. Later, I no longer assembled the printer I rearranged it again, because again I put it on the wrong side)
Lower Frame:
(installed an axis of Y axis and ending)
on the frame:
Bearlings for the belt on the axis Y:
hairpins for the Y:
axis are installed to their places:
I continue to assemble
Fasteners for the belt on the heating table:
Y-axis assembled:
I tighten the belt:
I put the heated aluminum table:
And then I shot it again and adjusted it for a uniform level)
Now moving on to the assembly of the Z axis:
Two stepper motors are used for the z axis:
I put everything in its place. I'm cursing. I put everything in its place, but it's already correct:
Now it's time to prepare extruder:
My model uses extruder MK8 . It is inexpensive, works, but has some sores. Maybe in the future I will change.
At that moment I got carried away and forgot to take pictures. As a result, with the extruder and axis, we have the following:
Now I move to installation of the display:
on the frame:
Setting power supply:
and on the frame:
control board:
I got ANET A8 Mainboard V1-5 . At the time of assembly, I could not even find information about this board. People mostly have Anet A8 Mainboard V1.0
Installed on the frame:
Now I turn to connecting everything to the control board:
The wires included in the kit are signed and have the correct length. Therefore, there are no problems with the connection:
We connect such a mess:
(later I reconnected everything already neatly laid. The cable management also took about two hours.)
Already in the process of connecting the printer to the computer, under the usb cable, I found a card reader and an 8gb flash drive:
The flash drive contained all the same programs, drivers and instructions that I downloaded.
Also included with the printer is a holder for spools of filament. I have already collected it:
To check and test the print, the kit comes with 10 meters of white PLA plastic:
This is quite enough for setting up and testing the print. But if you print something larger, you naturally need to order more.
After laying the wires, my printer stood on the floor at work in the corner:
The printer itself started up after assembly without any dancing with a tambourine.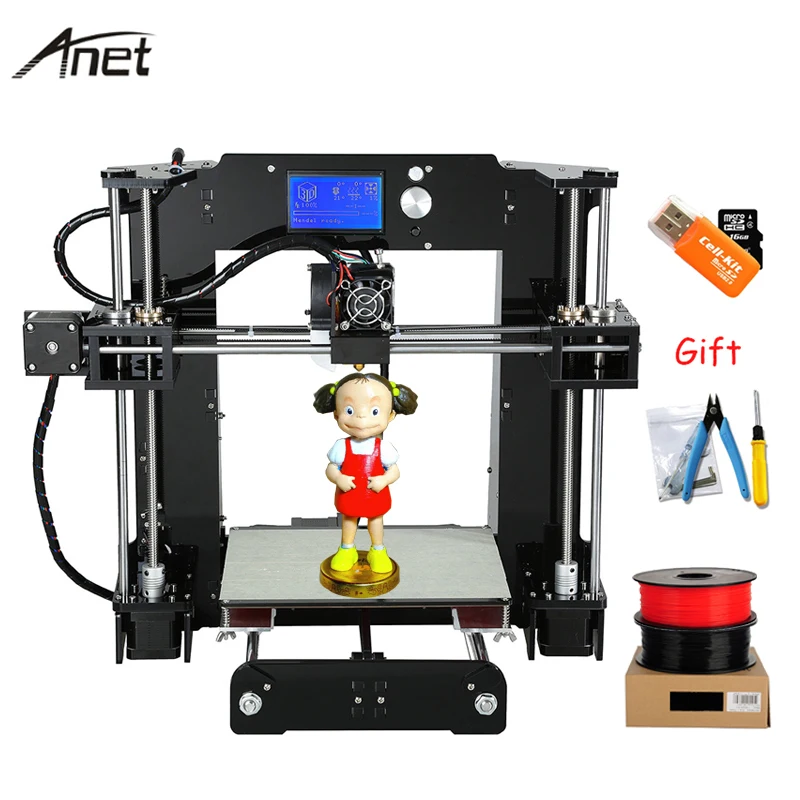
You can print via USB cable from a computer or from a flash drive. In both cases, Cura is used for printing:
The printing process itself is quite simple. Set up the program according to the instructions that came with the printer. We take a 3D model that we want to print. I first used the models that came with the printer, and first I tried to print a box, as the simplest object. Reduced the size, sent to print. At the output I get this:
Yeah. Something is wrong. I read the instructions again.
Trouble in the table. Incorrectly calibrated, too large distance between the table and the nozzle. I reduce. Printing:
My first 3D printed crap. Hurray! He works!
Oh, so you need to print further. I decided that the joke would be relevant: Buy a 3D printer, print a 3D printer, sell a 3D printer
But I will print just improvements. Signing up to thingiverse.com as it is the largest catalog of 3d printable models. I drive Anet A8 into the search and see hundreds of models. Many add-ons, upgrades, parts, and more can be printed to the printer.
I choose a button to press the extruder when loading the filament and a side holder for hexagons: I download it, send it to print:
An hour later I get:
I install it:
There is less and less filament left. I'm looking for something to print small, but necessary. I find plugs-fasteners for studs. In the original design, they are not attached to the top of the frame from above. I'm typing. I get:
I immediately install on the frame:
This leaves me with very little filament left. And the printer is left alone while waiting.
Since I knew that I would need plastic for printing, I took care of this issue in advance. I read the reviews and decided to start my acquaintance with the world of 3D plastic printing from BestFilament. In order to somehow save on delivery, I order 8 kg of plastic at once:
Delivery by SDEK.
Two weeks later I receive two parcels, with a total weight of almost 11 kg:
Since I am not a magician yet, but just learning, I start my experiments with cheap transitional PLA plastic:
I liked the blue color.
I can't help but note the quality packaging of the filament spool. Thick polyethylene. Silica gel bag.
Installed on a stand. I load the rod into the extruder.
To check the plastic and generally to improve the printer, I send for printing a modified belt clip responsible for moving the carriage with an extruder:
at some point the middle part falls off the table. I remove it and print the rest:
Snot in the photo, this is what should have been on the part in the middle.
I get:
After I printed the stretch details, I need to reprint the part that came off.
I print and see that something is wrong with the printer. It does not lower the extruder down. On the contrary, it raises every time.
Breakdown!
Dancing with a tambourine begins. I read the Internet, I dig forums. I even create a question on 3dtoday.ru: Glitch caught some
I press on the printer (in the menu) home all
The x-axis and the y-axis return to the house, rest against the limit switch and norms
And the Z axis raises its head half a millimeter and sends it to the edge of the table. It's like it's already hit the trailer.
I press home all again, everything repeats.
Roughly speaking, if I press home all 50 times, the printer will raise the extruder to the ceiling of the frame. Doesn't go down.
Where to dig?
It's not clear where the glitch came from. In the morning, I normally printed out the rest of the plastic on the plastic guide ring, after that the extruder, as it was raised, went to the side and that's it.
I loaded new plastic, I turn on printing, but it does not lower the extruder.
Just received the printer a few days ago.
The Pronterface program for the M119 command shows the following result:
That is, the limit switch is always clamped.
And I tried to press, squeeze, turn off, connect another limit switch. Every time I see Z_min:H
The limit switch itself is definitely working. Checked with a tester.
Experts cannot say anything sensible. But a little later found the same problem on thingiverse.com True, there is a problem with the Y axis, but I have the same with the Z axis.
Therefore, I do the following:
The essence of the problem is that there is a defective capacitor on the motherboard.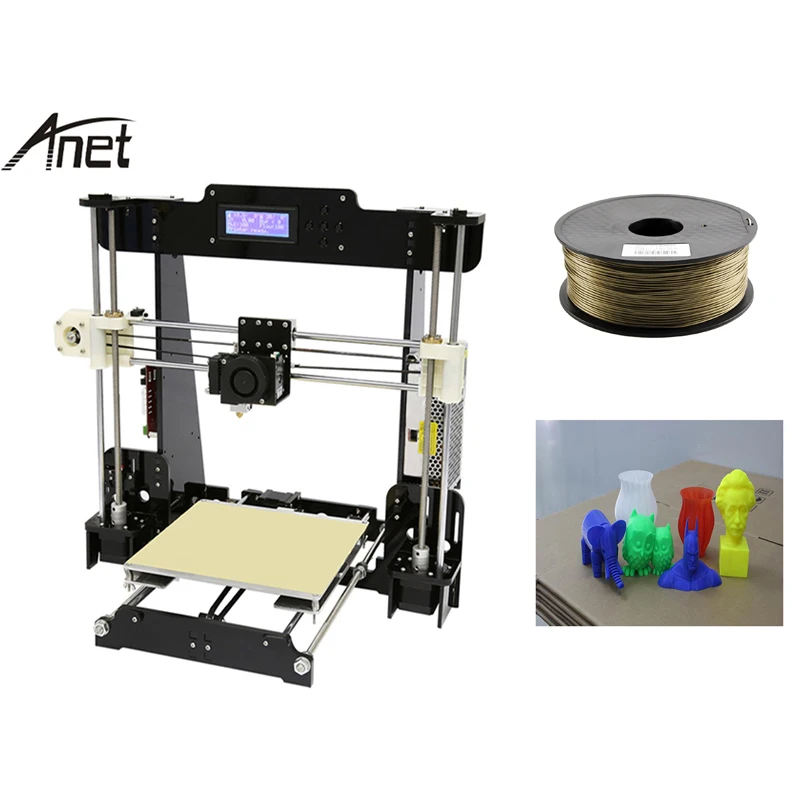 Marriage vylaziit not immediately, but after a few hours of operation of the printer.
As described in the bourgeois article, to check, you need to go through the capacitors with the numbers C43, C44, C45, C46, C47 with a multimeter. (each corresponds to its own axis)
I just showed 1.2v on the Z axis. And on all the rest 9.5v. (I didn’t understand this a bit, since the anet V1 boards should only have 5V. I have Anet 3D V1-5)
After soldering the capacitor, I connected the board in place.
To be honest, I was ready to hear "boom" and watch the blue smoke. But to my happiness, the problem really turned out to be in this piece of iron and silicon:
Bottom line: the printer is working again.
I hope my answer will help other owners of Anet A8 who have faced a similar problem.
After solving the problem, I decided to print some toys for my daughter. At the same time, check the capabilities of the printer:
Printing a boat:
Ghost:
Skeleton fish that can bend:
(it took 2 hours to print this fish)
Plastic from bestfilament fits perfectly. The layers do not shrink, hold firmly on the table and are well glued together. Layering can only be removed by switching from belts to rails and strengthening the frame. But that's another story.
I haven't used the other types of plastic I ordered yet, because I need to slightly tighten the rigidity of the printer. Plus, I don’t print much, and I don’t want to open all the coils in a row. Since during storage they lose quality (collect dust, absorb moisture, etc.)
So far, this is all that I have printed in two weeks of owning the printer.
At the moment I'm reading 3dtoday on issues of improving print quality, learning how to work in blender, and looking at what's interesting there on thingiverse.
As can be seen from the models, the print quality is more or less normal. There are layers, but this is a feature of the model. Judging by the communication with people who have been 3D printing for a long time, the print quality from a printer at this price is even better than it usually is. It certainly pleases me. But there is room for improvement.
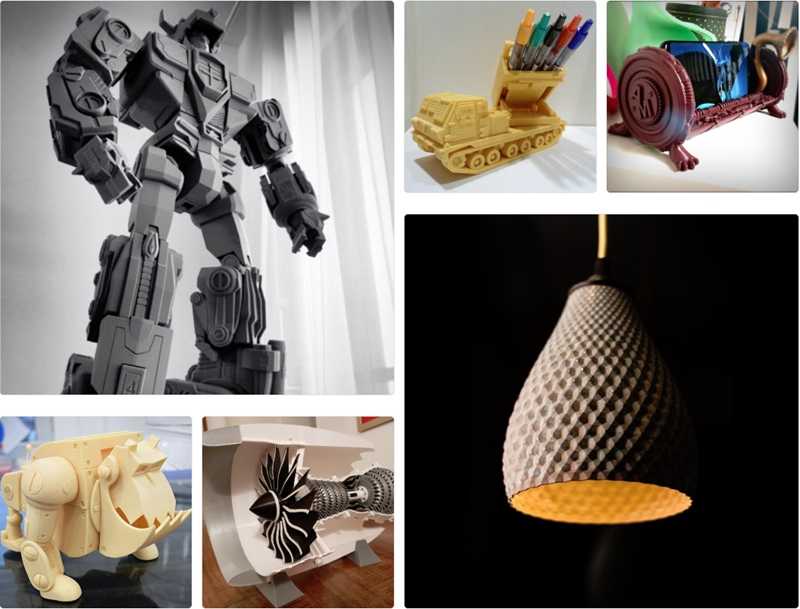
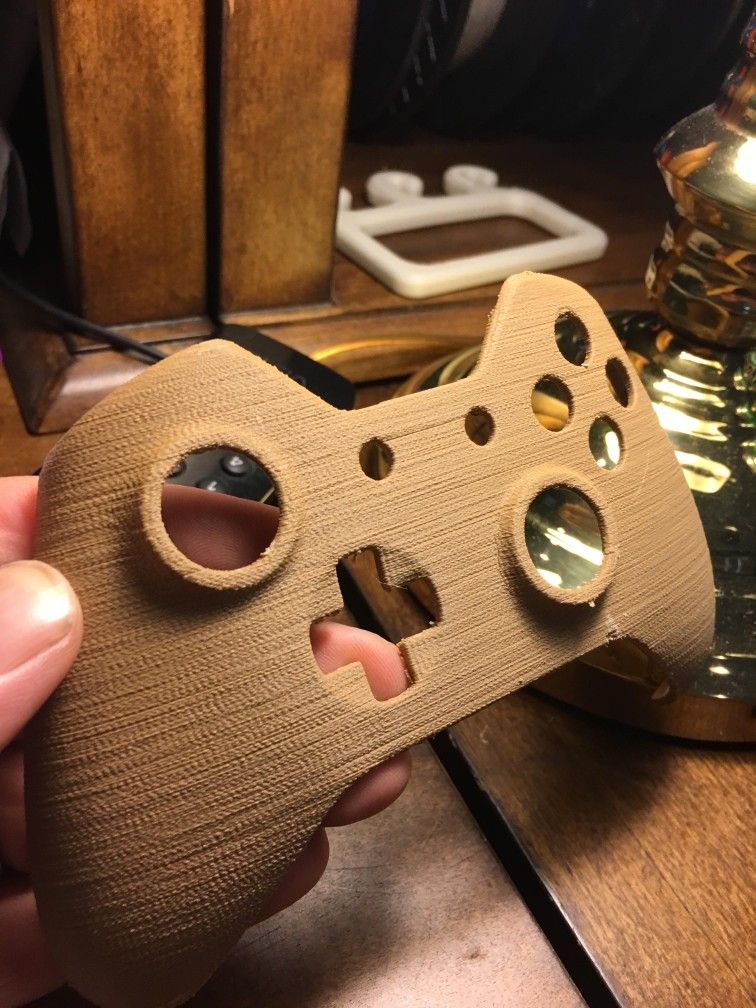
The printer can be used to print toys, auto parts, models, parts, household items, etc.
For the most part, I bought a printer for a hobby, to get acquainted with 3D printing, to satisfy my interest. And in the end I was very pleased.
Conclusions:
The Anet A8 is a great printer for beginners. Suitable for familiarization, for obtaining basic knowledge. On the advice of knowledgeable people, it is preferable to take the Anet A6 model. There is a more rigid frame. But the price is slightly higher.
I am personally very pleased with the purchase. Despite some issues, I had a lot of fun tinkering with this printer. And it is also interesting now to look for something, to print, to try. There are several ideas for the practical application of the printer. But this is in the future, and not for review.
Also, the purchase of a 3D printer will be useful for people with growing children, to attract and involve them in working with a 3D printer. My 4-year-old daughter is very interested in the printer, and I see that such a purchase can positively affect the development of analytical thinking and fantasy. (now I choose a 3D pen, I will order)
Given the current cost of 3D printers, almost everyone can buy them. The price is comparable to a mid-range smartphone. But who needs it, and who does not, this already needs to be decided independently.
LINK TO PURCHASE PAGE
instructions and assembly A8 Prusa i3 and A6 Prusa i3
More recently, the concept of a 3D printer was something beyond fantasy. But not so long ago, the situation has changed radically, and as in most cases, the Chinese industry has become the main culprit of the turning point, hastening to provide ordinary citizens with 3D printers at an affordable price. Although the cost of such a unit is rather big, it still cannot be compared with the exorbitant prices of European, and even more so Japanese manufacturers.
Anet A6 3D printer
Chinese 3D printer manufacturers supply their products worldwide. The popularity of such products, as mentioned above, is due to the relatively low cost and at the same time quite good quality, sometimes surpassing even analogues produced in European countries.
One of such Chinese firms is Shenzhen Anet Technology Co Ltd, which produces Anet printers popular all over the world. In this article, we will consider the most famous models, their parameters, as well as user reviews about the work of printers of the Anet model.
Parts of a 3D printer
Anet A8 Prusa i3
A popular 3D printer with an excellent price-performance ratio, according to many users. The print area of this model is 220x220 mm and 240 mm high. The print speed of this device is 100mm/s. The nozzle diameter is 0.4 mm, and the layer thickness varies from 0.1 to 0.3 mm. The positioning accuracy on the horizontal plane is 0.012 mm, and in height 0.004 mm.
Supports BS, PLA, HIPS and etc, with 1.75mm filament. The frame is made of acrylic plates, and the platform is represented by an aluminum base. There is a monochrome LCD screen to control the device, and a memory card is provided for offline printing. The operating voltage is 12V, and the weight of the unit is 8.5 kilograms.
Printer Anet A8 Prusa i3
In addition to the parts of the device itself, the printer package includes everything you need for assembly, including: wire cutters, screwdrivers and hex keys. Also included is a memory card with the software necessary for the operation of the device, drivers, instructions for assembling and working with the unit, and other necessary information. According to the advice of one of the users, when ordering goods, you should choose stores located as close as possible to your region, this will significantly reduce the delivery time of goods.
User reviews about the printer are mostly positive, but there are also minor complaints that the buyers themselves throw off on the modest cost of the unit. A pleasant aspect for buyers was the fact that the device was relatively easy to set up.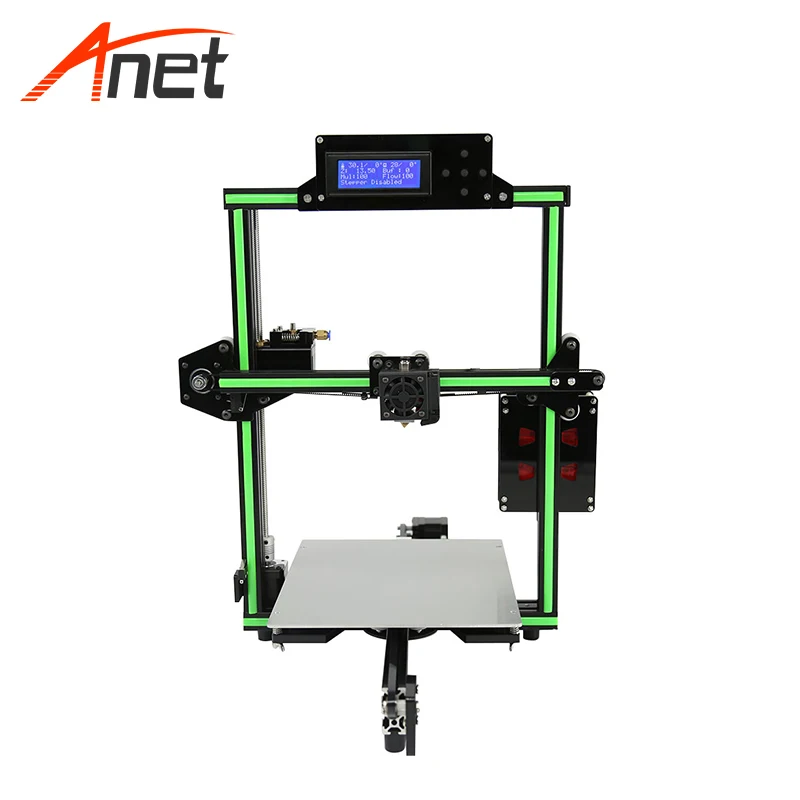 They also note that with solid experience with such units, assembly does not take much time.
3D printer
Anet A6 Prusa i3
Another model from the Anet 3D printer line, like the previous model, is popular among buyers. Among other 3D printers, it stands out for its relatively low price and fairly high functionality. The print area of Anet A6 is 220x220 mm and the maximum height is 240 mm.
The print speed of this device is 100 mm/s, which is quite good even for higher priced printers. The printer uses PLA, ABS, nylon, flexible PLA and PVA filaments with a thickness of 1.75mm. The positioning accuracy on the horizontal plane is 0.012 mm, and in height 0.004 mm. The extruder nozzle diameter is 0.4 mm, and the layer thickness is adjustable from 0.1 to 0.4 mm. The base platform, as in Anet A8, consists of aluminum, and the body is made of acrylic plates. Information is displayed on a small low resolution LCD monochrome screen.
Anet A6 Prusa i3
The supply voltage of the device is 12V, and the current is 20A, the weight of the assembly, like the previous model, is 8.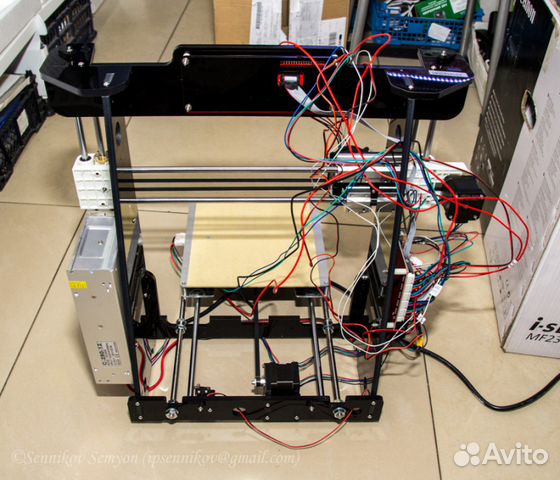 5 kilograms. The device kit includes all the necessary parts and tools for assembling the device, as well as a 16 GB memory card with the software necessary for the operation of the device, drivers, instructions and other necessary information. When connected to a laptop or computer, as a rule, there are no problems, the unit is compatible with all popular operating systems.
This model is slightly newer than the Anet A8 Prusa i3 3D printer and has been somewhat improved compared to its predecessor. Here it should be noted some design features, a reinforced frame and additional materials used for work. It will take from 2 to 6 hours to assemble the unit, depending on the qualifications and experience of the master in this matter. The assembly process itself is quite simple, if you strictly follow the instructions and carefully follow all these steps, then soon you will be able to make your first product.
Anet A2
This device also pleases customers with a low price, like previous models, and is in great demand among consumers.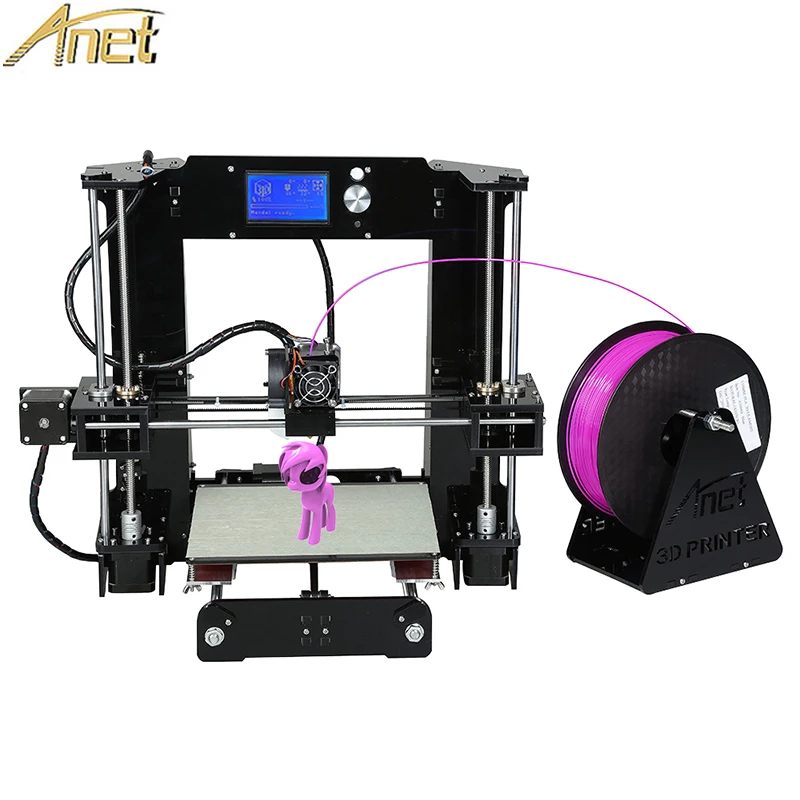 The unit supports three-layer printing and a wide range of materials, including: ABS, PLA, HIPS and others, with a filament diameter of 1.75 mm. The dimensions of the working area are 220x220 mm, and the height is up to 220 mm.
Anet A2 aluminum
The print speed can be adjusted from 30 to 100 mm/s. The nozzle diameter is 0.4mm, and the maximum operating temperature is 260 degrees. The positioning accuracy on the horizontal plane is 0.012 mm, and in height 0.004 mm. The layer thickness can be adjusted from 0.1 to 0.4 mm. Information is displayed on a monochrome LCD screen. You can work offline and print from removable media that comes with the device.
Anet A2
The device is delivered unassembled, the set includes removable media with all necessary software, drivers, and assembly instructions. Assembly will take from 2 to 6 hours, depending on the skill of the master. When connected to a computer or laptop, there are no problems, since the device supports most popular operating systems.