3D printer room setup
Where Should You Place Your 3D Printer In Your Home?
3D Insider is ad supported and earns money from clicks, commissions from sales, and other ways.
As hobby 3D printing has become more popular, we also find more people placing 3D printers somewhere in their house. This situation begs the question – how safe it is to place a 3D printer in a room in your house? What factors should you consider?
A 3D printer should be placed in a room with good ventilation, away from flammable material, and is not accessible to kids and pets. There are also other minor factors to consider. With this in mind, it would be best to place a 3D printer in an isolated workshop, typically a garage, laundry room, or hobby room.
In most cases, you will still need to do some retrofitting to make a space in your house suitable for 3D printing. To help you prepare your space, check out our list of factors you may overlook and our guide on what a suitable space should have.
Factors to consider in setting up a 3D printer
Modern 3D printers are wonderfully compact. While this has been a great selling point for inexpensive 3D printers, some people may end up underestimated just how much physical space a 3D printing hobby can occupy. Here are some factors to anticipate when setting up a 3D printer
Fumes
When plastic is exposed to heat, it will almost always release some fumes. Some of these fumes may be irritating, while others may be more benign (or even pleasant). However, you should always assume that inhaling such fumes is harmful to you.
There are two ways to address this problem. If you buy a 3D printer with an enclosure, it will probably have a vent provision with a HEPA filter. It should be relatively easy to connect a flexible accordion pipe to this vent and redirect it to an open window or a hole in the wall. Just make sure to check the status of the HEPA filter periodically.
The more common scenario involves a printer that does not have an enclosure.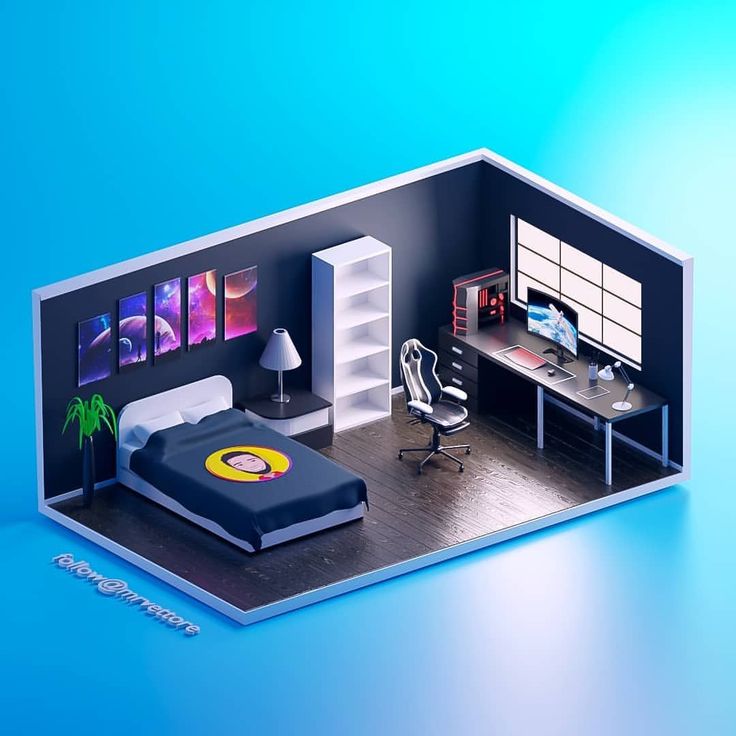 In this case, 3D printing will have to be done in a room with very good ventilation. An open door or a few open windows should do the trick.
Noise
Do you already have a preconceived notion in your head of how noisy a 3D printer is? In reality, a 3D printer is probably going to be even noisier than that. Considering how large 3D printing jobs can take 12 hours or more to finish, placing a 3D printer in a room where peace and quiet are needed is going to be a very bad move.
For this reason, we do not recommend placing a 3D printer in your bedroom, living room, or any space in your house where people normally stay in for long periods.
Storage space
That 3D printer may seem small, but don’t forget that you will also be buying spools of filaments, bottles of resin, plus an array of different tools and supplies. This will inevitably take up much more space than the 3D printer itself. If you don’t plan ahead for storage space, you will almost certainly end up with 3D printing supplies encroaching into your living space.
Mess
There’s no way around it – 3D printing is a hobby that can create a lot of mess. Whether it’s empty filament spools, empty resin bottles, plastic dust, removed supports or rejected prints, you will inevitably accumulate scrap materials whenever you work on a 3D printed project.
Keeping your 3D printer in an isolated room helps keep the mess contained in one place. As much as we love 3D printing, we would not want to find 3D printing scraps all over the house.
Other hazards
3D printing has a slew of other hazards depending on the type of 3D printer you are using. FDM printers generate a lot of heat and must be kept away from flammable materials. Resin printers are inherently dangerous because they use photopolymer resin – a toxic compound in its uncured state.
These hazards highlight the importance of restricting access to a 3D printing workshop, especially for households that have kids or pets. You will not want to rush to the emergency room just because you left your 3D printer unattended.
Tips on setting up your 3D printer
The garage is the best option
If you have enough space in your garage, then it would probably be the best place to set up a 3D printer. Not only does a garage typically have lots of space for your tools and supplies, but it’s easy to provide ventilation by opening some windows or the garage door itself.
Another advantage of using the garage is that it’s typically detached from the rest of the living space. This means that you and your family won’t be bothered by the noise and unpleasant fumes from the 3D printer while it is running.
A home office, laundry room, or basement can also work
If a garage is not an option, then some other rooms inside the house can be considered. A home office or laundry room can be viable since these are not areas of the house where people stay for long periods. You can set up a 3D printing job and step out of the room while it runs.
The basement is another good option if you have enough space. It’s isolated enough from the house that you probably won’t hear any noise from the 3D printer. Just make sure that you don’t have flammable materials stored in the basement. Another potential problem is that most basements have poor ventilation.
Consider placing fans
Not all rooms in your house may have enough ventilation to ensure a continuous flow of fresh air. If this is the case, an easy solution would be to set up fans in your windows.
Nowadays, it’s easy to buy windows that can fit most standard-sized fans. This window fan by Bionaire is designed for reversible airflow, so you can use it as either an air inlet or an exhaust.
Set up a monitoring camera
A common piece of advice is that people should not be lingering in the same room as a 3D printer while it is running. This lessens the risk of inhaling toxic fumes or plastic micro-particles. However, we also understand that watching a model as it is being built is an essential part of the 3D printing experience.
A good middle-ground remedy is to set up a wireless camera so that you can monitor it remotely. An inexpensive security camera, such as a Blink Mini, should work. With a remote camera, you can keep an eye on your 3D printing project even while it is in an isolated location as you go about your day.
Limit access to your workspace
An important reason for isolating your 3D printer is making sure that kids and pets can’t just go near it without your supervision. This is easier to do in detached workshops but should still be implemented for basements or home offices. If you have kids walking around the house, just make sure to lock the door behind you.
This does not mean that you should not involve your kids in your 3D printing hobby. In fact, it’s probably better for them to watch you work with your 3D printer. Safety should be one of the more important lessons, and part of this is knowing that they should not touch the 3D printer without your supervision.
These tips only consider safety and practicality when choosing a spot for your 3D printer. Other factors may affect the quality of your output or supplies. If you print with filaments, it would be better to place your workshop in a room with low humidity. If you print with resin, make sure that your workspace is not under direct sunlight.
A lot of these tips may seem obvious to anyone who has had substantial experience with 3D printing. For those who are just starting out, doing a healthy bit of research before committing to a space can save you lots of headaches down the road.
Final thoughts
3D printing is an amazing hobby, but it should not be taking over the rest of your life. When choosing a spot for your 3D printer in your home, make sure to place it in a room that is isolated and will not interfere with your normal living conditions.
If you plan on taking this hobby seriously, then you will likely end up building an entire workshop for your equipment and supplies. This is something you can plan ahead for.
Warning; 3D printers should never be left unattended.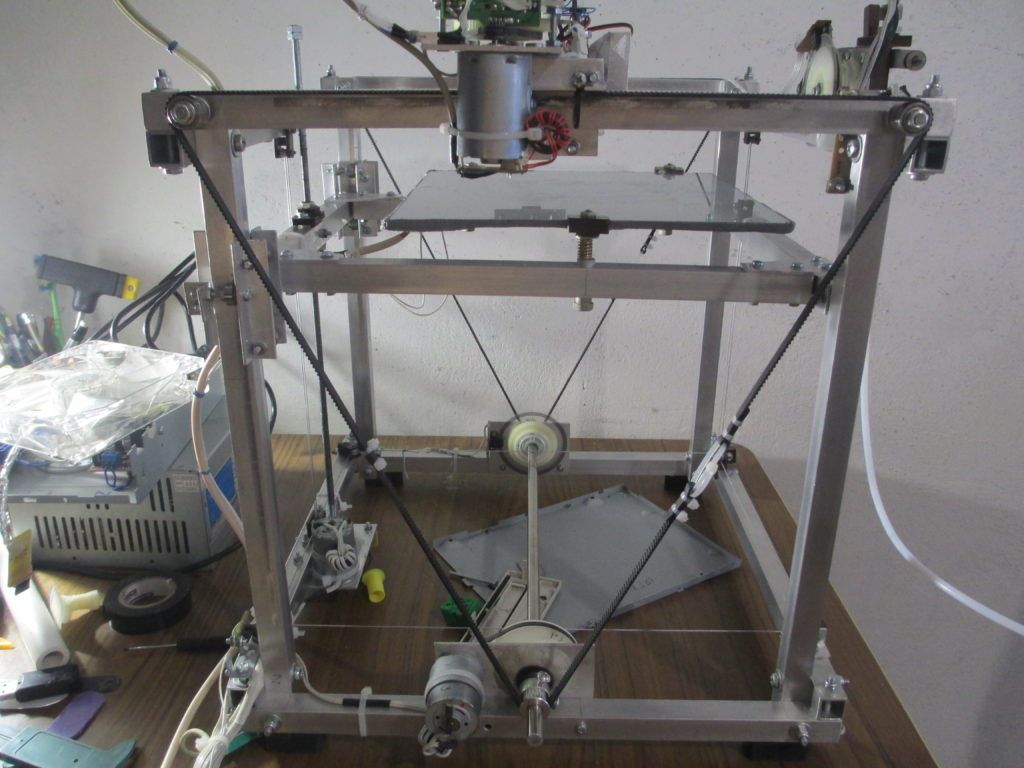 They can pose a firesafety hazard.
Should I Put My 3D Printer in My Bedroom? – 3D Printerly
Anyone using a 3D printer wonders to themselves “where should I put it?” and whether they should put it in their bedroom. It seems like the ideal area because it’s easy to keep watch. There are however some things to keep in mind when thinking about putting it in your bedroom which I will explain in this article.
Should you put a 3D printer in your bedroom? No, it’s not advised to put a 3D printer in your bedroom, unless you have a very good ventilation system with a HEPA filter. Your printer should be in an enclosed chamber, so particles don’t spread out easily.
There are a few important things to keep in mind when deciding where to put your 3D printer. In this article, I’ve pointed out red flags to look out for and other common issues that you should know about.
If you are interested in seeing some of the best tools and accessories for your 3D printers, you can find them easily by clicking here (Amazon).
Factors for Good 3D Printer Placement
The ideal place for where to put your printer is where you’ll get the best quality prints. There are a number of factors that can affect the quality of the final print depending on where your printer is placed:
- Temperature
- Humidity
- Sunlight
- Drafts
Temperature
The average temperature of the room you are printing in can have an effect on the quality of a print. You can find the specs of the required ambient temperature of your printer as many will differ.
If your 3D printer finds itself in a cold environment, the difference in the temperature it needs to adequately print can start to increase warping, and cause prints to become loose on the print bed before it finishes.
Ideally, you want your room temperature high as well as constant. A good way to tackle this would be to have an enclosure around your printer to retain the heat necessary for a good quality print.
If you want to take an extra step, get yourself an enclosure. A great one is the Creality Fireproof Enclosure from Amazon. It’s a great long term purchase if you love 3D printing that should last you years and usually results in better prints.
A good idea to lower how much heating your bed has to do is to use a FYSETC Foam Insulation Mat . It has great thermal conductivity and greatly reduces heat and cooling loss of your heated bed.
If your printer is in a cold environment, I’ve heard of people using an electric radiator to keep the temperature high which should work out. The room temperature, if not at an ideal level and fluctuates a lot, can negatively affect the quality of a print and even make some fail.
Humidity
Is your bedroom humid? 3D printing doesn’t tend to work very well in high humidity. When we sleep we let off quite a lot of heat which can increase the humidity of your bedroom and can ruin your filament when it soaks up the moisture in the air.
A high level of humidity in a room where your printer is printing can leave filaments brittle and easily breakable. Now there is a big difference between which filaments will be affected by humidity.
I wrote an article exactly about Why PLA Gets Brittle & Snaps which has good information and prevention methods.
PLA and ABS don’t absorb moisture too quickly but PVA, nylon and PETG will. In order to combat the levels of humidity, a dehumidifier is a great solution as it’s ideal to have as low humidity as possible for your filaments.
A good choice is the Pro Breeze Dehumidifier which is cheap, effective for a small room and has great reviews on Amazon.
For the most part, proper filament storage will fight the effects of humidity but once a filament is saturated from humidity, a proper filament-drying procedure is necessary to ensure high quality printing.
You want a good storage container, with silica gel beads to ensure your filament stays dry and isn’t affected by humidity. Go with the IRIS Weathertight Storage Box (Clear) and WiseDry 5lbs Reusable Silica Gel Beads.
To measure your humidity levels inside the storage container you should use a hygrometer. You can use something like the ANTONKI Humidity Gauge (2-Pack) Indoor Thermometer from Amazon.
This is how people used to do it, but there are more efficient methods now, like using the eSUN Filament Vacuum Storage Kit with 10 Vacuum Bags from Amazon. It has reusable humidity indicators and a hand-pump to produce a vacuum sealed effect to reduce moisture.
If your filament already has absorbed moisture you can use a professional filament dryer to solve your issues from here on out.
I’d recommend getting the SUNLU Dry Box Filament Dehydrator from Amazon today. These started making an appearance and got people getting them really quickly because of how well they work.
You wouldn’t believe how many people are printing at lower quality because their filament has so much moisture built up, especially if you live in a humid environment.
Sunlight
Sunlight can give the opposite effect from humidity, essentially over-drying out filaments and again, causing a low quality final print.
It can have the effect of making your end product brittle and easily breakable. Make sure the area where your printer is doesn’t have direct sunlight shining on it.
There are some 3D printers that have UV protection to combat against this like the ELEGOO Mars UV 3D Printer. It uses UV photocuring so it’s a necessary protection, but standard 3D printers like the Ender 3 won’t have this.
Drafts
When you have your printer in a bedroom, there can be issues with opening a window in relation to the quality of your prints. Draft from an open window can be a killer for your print quality so ensure your ventilation doesn’t create too much physical disturbance.
There can also be quite a lot of movement going on in a bedroom so you want to make sure your printer is safe during printing and storage to not get bumped in to.
So in brief, you want a room temperature which is fairly constant and not cold, a low level of humidity, out of direct sunlight and with minimal physical movement such as drafts and vibrations from movement.
Getting an enclosure is a great solution to prevent those drafts from affecting your 3D prints. A very popular enclosure that has increased the success rate of many 3D printer hobbyists is the Creality Fireproof & Dustproof Printer Enclosure from Amazon.
Common Complaints About 3D Printers in Bedrooms
There are things that people have in common when having their printer in the bedroom. One of these is the smell and fumes that the filaments give off while high temperatures are used.
PLA generally has a mild smell, depending on how sensitive your sense of smell is, but ABS can be a bit harsher and people do complain about feeling nauseous around it.
Some people will be more sensitive to fumes and respiratory problems than others so you have to take into account the health issues that can arise, especially over many hours in a day.
If you have asthma, the quality of air will be affected when 3D printing if you don’t have adequate ventilation systems put into place so this is something to keep in mind.
To the light sleepers out there, 3D printers do tend to make noise while in action so it may not be a viable option for you. 3D printers can be noisy and cause surfaces to vibrate, so having one printing in your bedroom while you try to sleep can cause issues.
Check out my popular post on How to Reduce Noise on Your 3D Printer.
Using an enclosure should minimize the sound your printer makes, as well as some kind of vibration absorbing pad underneath the printer.
The fan and the motors are the main culprits for the noise made by printers and printers do differ in just how much noise they make. There are many ways to reduce the noise made so it’s not the biggest factor, but does still matter.
Safety Issues with Where to Put your 3D Printer
Surroundings
3D printers get really hot so you wouldn’t want objects that hang over it. Things that are hung up such as paintings, clothing, curtains and pictures can be damaged by the heat of a 3D printer.
So, you want to make sure there aren’t things that can be damaged, which can be difficult especially in a small bedroom.
Another thing to take into account is whether you have a 3D printer kit or a manufactured 3D printer. These are two very different things in regard to fire safety.
When you buy a 3D printer kit, the manufacturer is technically yourself, so the packer of the kit wouldn’t be responsible to ensure the fire or electrical certification of the end product.
As 3D printers develop, the safety features improve so there is a much lower chance of fire risks. This doesn’t mean it’s impossible so having a smoke alarm is a good solution, but isn’t a preventative measure.
Make sure your 3D printer has the latest firmware as it is one of the main things that put safeguards in place.
Possible Fumes & Dangerous Chemicals?
PLA has been considered one of the safest filaments to print with, but since it’s a relatively new material the information on long-term health effects are lacking.
Even though PLA is known for it’s safety and lack of dangerous fumes, it still gives off particles which can still cause health issues.
Some people do complain of respiratory irritation and other related issues when printing with PLA. Even though the fumes aren’t considered dangerous, it doesn’t mean you’ll be able to easily tolerate them while you relax in your bedroom or sleep.
It’s advised, if printing with PLA, to try and use the lower temperature limit of around 200°C to minimize the fumes it gives off.
You probably don’t want to be printing with ABS if you put your printer in the bedroom due to the well-known harsh fumes it can release.
PLA is biodegradable and made from renewable starches, whereas many other filaments are made from less safe material such as ethylene, glycol and oil-based materials and usually require higher temperatures to print.
We deal with harmful fumes on a daily basis, but the difference is, we aren’t subjected to them for longer than a few minutes or in other cases a few hours.
In many cases, simply being in an urban city will expose you to similar harmful particles, but you definitely don’t want to be inhaling that in an enclosed room.
With a 3D printer, you could be running it all day and night resulting in polluted air. It is recommended to not have your printer running while you occupy the room.
This is why putting your printer in a bedroom is not a very good place when taking this into account.
One of the best and most popular filters is the LEVOIT LV-h232 Purifier with HEPA Filter.
You can check out my article about the 7 Best Air Purifiers for 3D Printers.
It’s very effective in removing harmful pollutants in the air due to its advanced 3-Stage Filtration System – pre-filter, HEPA filter & high-efficiency activated carbon filter.
This purifier does an amazing job and removes 99.97% of airborne contaminants as small as 0.3 microns.
It would be ideal to have a printer with an enclosure, as well as with some type of fan or vent to remove harmful fumes. Simply opening a window while your 3D printer prints won’t necessarily direct the particles in the air away.
Your best bet is using a ventilated enclosure, as well as a high-quality filter. In addition to this, have some kind of vent/window to recirculate fresh air into the space.
Flammable Safety Issue
Bedrooms are prone to have flammable materials and may not have the best ventilation, which are both red flags for where to put your 3D printers.
Now, if a 3D printer is in your bedroom, you are much more likely to catch any electrical or fire issues that occur, but this benefit also comes at a cost where it could cause harm.
Should I Put My 3D Printer on the Floor?
For the most part, if you have a solid floor, it’s going to be a flat surface which is exactly what you want for a 3D printer. Having your 3D printer on the floor, however, does increase certain risks such as accidentally stepping or knocking over your printer.
You’ll also get a lot more dust affecting your printer, filament and bed surface which can decrease print quality and bed adhesion. Rather than put your 3D printer on the floor, you should at least get a small table like an IKEA Lack table, which is popular in the 3D printing community.
The Ender 3 is around 450mm x 400mm in width and length so you need a table a little bigger to house a medium-sized 3D printer.
A pretty good table that you can get yourself on Amazon is the Ameriwood Home Parsons Modern End Table. It’s highly rated, sturdy and looks good in a home or apartment setting.
Can You Use a Resin 3D Printer Inside an Apartment or Bedroom?
You can use a resin 3D printer inside an apartment or bedroom, but you want to use low-odor resins that have low VOCs and are known to be safe. Many people recommend not to use a resin 3D printer in living spaces, but rather in places that aren’t occupied. You can build a ventilation system to reduce fumes.
Many people do 3D print with resin indoors in their bedroom without issues, though some people have reported that they get respiratory problems or allergies as a result.
One user mentioned how he thought he had the flu for a few months, but was actually being affected by being next to an active resin printer.
Resins should have an MSDS or Material Safety Data Sheet which provides reliable information about the safety of your resin. Generally speaking, resin fumes aren’t considered hazardous and are fairly low-risk if you have the right ones.
The biggest safety risk for resins is getting uncured resin on your skin because they can easily be absorbed and cause skin irritation, or even hypersensitivity after long-term use.
Related Questions
Where is the best place to put a 3D printer? The usual places people put a 3D printer are in a workshop, garage, home office, wash-room, or basement. You’d just need about four square feet of space and a shelf.
It’s not recommended to keep a 3D printer in your bedroom, bathroom, living room/family room or kitchen.
Should I only print with PLA? PLA, for the most part, can do almost everything that you require for 3D printing and is the recognized as the safer option in the 3D printing community.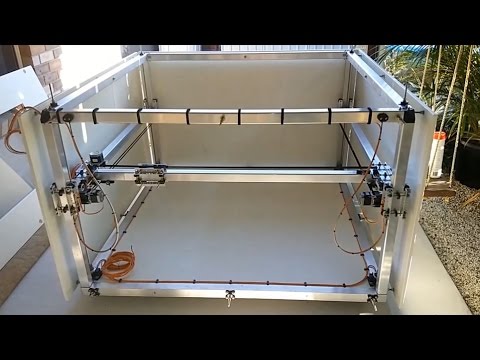
Only in specific cases will PLA not be feasible for prints so I’d recommend only printing with PLA until you have enough experience.
If you love great quality 3D prints, you’ll love the AMX3d Pro Grade 3D Printer Tool Kit from Amazon. It is a staple set of 3D printing tools that gives you everything you need to remove, clean & finish your 3D prints.
It gives you the ability to:
- Easily clean your 3D prints – 25-piece kit with 13 knife blades and 3 handles, long tweezers, needle nose pliers, and glue stick.
- Simply remove 3D prints – stop damaging your 3D prints by using one of the 3 specialized removal tools.
- Perfectly finish your 3D prints – the 3-piece, 6-tool precision scraper/pick/knife blade combo can get into small crevices to get a great finish.
- Become a 3D printing pro!
Printing at low ambient temperatures (from +4)
Technician
Subscribe to the author
Subscribe
Don't want
9
post, all sizes and formatting were spelled out :) )
Actually, my little Ender 2 was standing on the windowsill, buzzing slowly, not smelling much.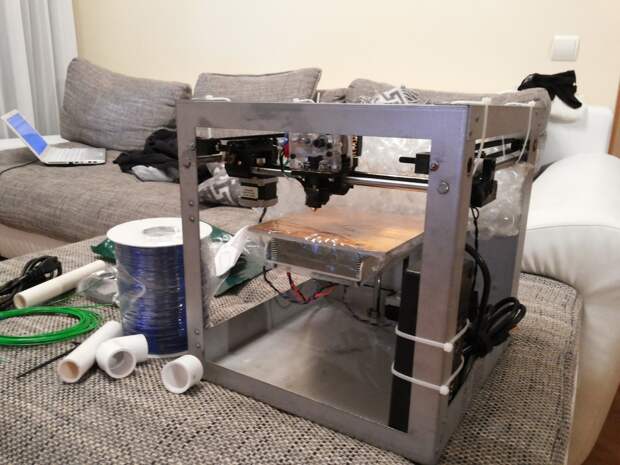 But life to make its own adjustments, and the question arose about his relocation to the loggia. Of course, it is glazed, slightly insulated, but nevertheless, in winter it is 'cheerful' - it does not fall below zero, but it is far from room temperature.
The first thing that came to mind for the prompt solution of this issue was Boxing, in the future with some kind of heating.
I had to do it quickly, but I didn’t really want to fence a bulky structure, I decided to try to do something easy. Here the eyes fell on the old screen for bathtubs :) Well, this is almost a complete kit for assembly - walls and racks, only fittings, bases and hardware are missing.
If you have a printer, then you need to print parts for the printer :)
This is a stand support (printed at room temperature)
[IMG ID=149466 WIDTH=327 HEIGHT=245]
Well, here is an example of printing at (speed about 80)
The reel is mounted on a modified insert and everything is put on a rod with bearings. Initial assembly completed. So far, it is sheathed with panels 'in black' - there are not large gaps, but then I will close them. Having made the installation of the printer and the coil in the received box, he was 'expelled' to the 'native fortified balcony' where a daily exposure took place.
[IMG ID=149455 WIDTH=378 HEIGHT=503]
The most crucial moment - Printing! I tried to run the code created for room conditions - PLA 230/50 at 80mm/s, repeated lubrication of old glue deposits ..... the result is quite expected - the part was torn off the table. Well, we take a rag and wash off the old glue + try to raise the temperature - 235/60 (for this kid in this version, this table temperature is maximum, but the manufacturer promises that in the updated version they did up to 100 degrees).
Voila! :)
[IMG ID=149468 WIDTH=475 HEIGHT=356]
And this is despite the fact that the sensors show +4 before starting, and after printing it cools down to +8 after 20-30 minutes.
Several PLA and PETG parts were made at these temperature and speed settings with print times ranging from 20 minutes to 10 hours.
[IMG ID=149462 WIDTH=284 HEIGHT=171]
As a result, I made the following conclusions for myself:
1 - Printing at low temperatures can be quite high quality.
2 - When printing for a long time, gusts of cold air are more terrible than constant low ambient temperature. from PLA DEXP
(PETG also printed, and the quality is about the same, but unfortunately there are no normal photos)
Baby Groot (even with teenage pimples :) ) - 4/6 hours of printing 9Bracket Here you can see that there are still problems with the first layer, but nevertheless it sticks, it keeps perfectly. kmk you need to play with the parameters of the first layer)
[IMG ID=149460 WIDTH=470 HEIGHT=261]
[IMG ID=149458 WIDTH=473 HEIGHT=303]
[IMG ID=149459 WIDTH=472 HEIGHT=251]
Extension - 10 o'clock.
For comparison, a model that was printed with not cheap PLA at room temperature is attached)
[IMG ID=149463 WIDTH=473 HEIGHT=355]
[IMG ID=149456 WIDTH=474 HEIGHT=355]
[IMG ID=149461 Width = 473 Height = 354]
[IMG ID = 149457 Width = 473 Height = 354]
Thank you for your attention :)
Subscribe to
Subscribe
our experience with them / Sudo Null IT News0001
3D printing in construction
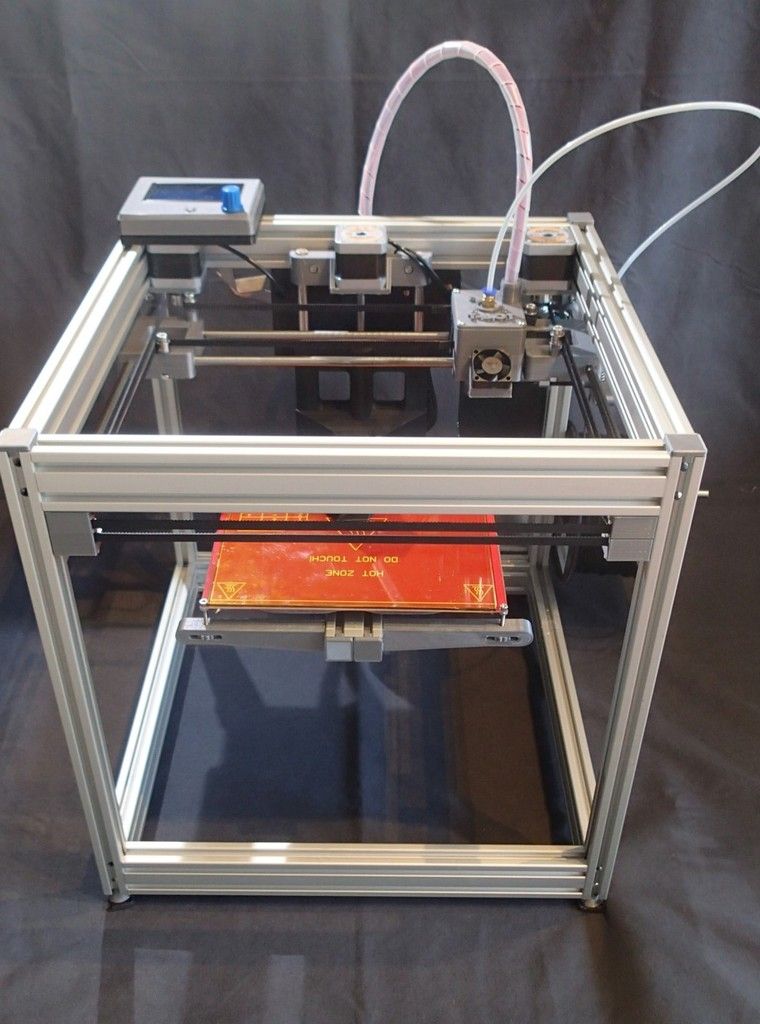
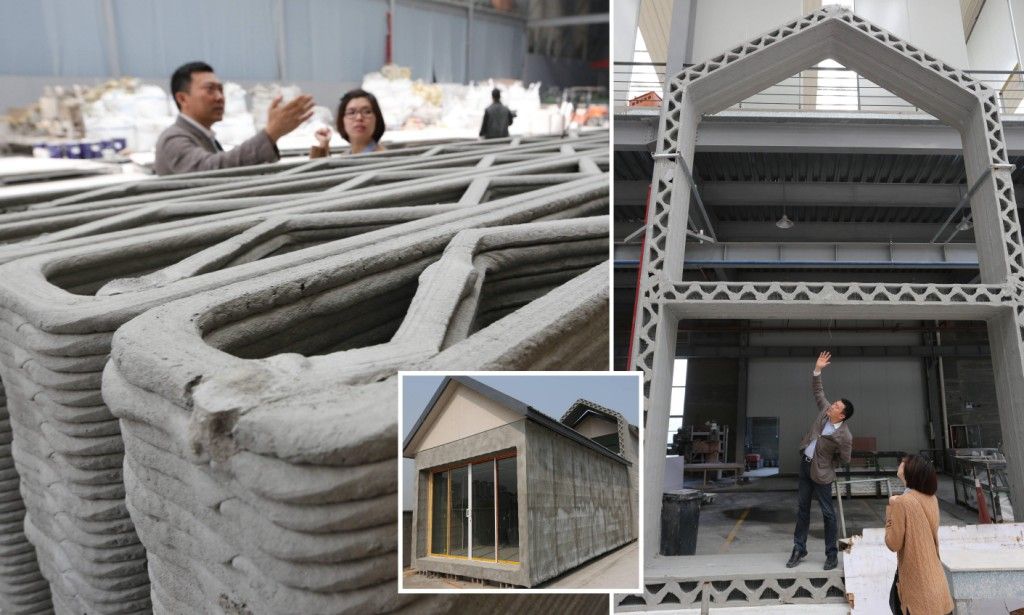
Construction 3D printers are engineering devices that create structural elements of buildings, small architectural forms or entire buildings in layers - just like any 3D printer prints objects from plastic or other material.
A construction 3D printer differs from a conventional 3D printer in the material used and in its size - it uses a site of a construction site or workshop as its working surface, and it prints with a cement mixture.
There are also design differences due to the specifics of the material - in particular, in a construction 3D printer there is no need for a heating element. Such devices allow you to quickly and without unnecessary difficulties print objects of almost any given shape, which is simply impossible for ordinary serial construction, using standard mixtures.
Start
We are interested in any promising application of 3D printers, so as soon as information about the use of 3D printing in construction began to appear on the network, we quickly found people involved in this and agreed on cooperation. It was especially pleasant to learn that in Russia there are companies that are thoroughly engaged in construction 3D printers and produce a very high-quality product.
SpetsAvia has become a pioneer in commercial 3D printing in Russia. Its staff developed and tested a prototype of a construction 3D printing machine and carried out test printing.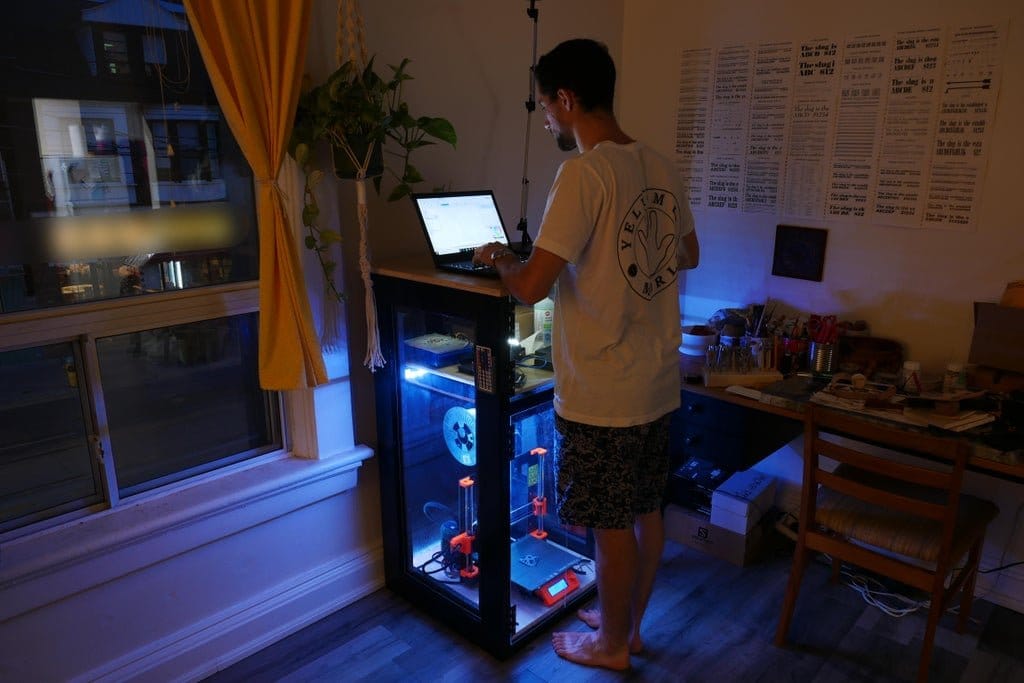
We agreed on cooperation and sent a service engineer to Yaroslavl for training, where he learned a lot of useful things. The training program included, in particular:
- A short introductory course on the interface and functionality of the control software
- Briefing on the algorithm of work in the SheetCam program, which converts files into a layered format accepted by the printer
- Printer Management Instruction in Mach 3, directly in the process of printing
- Calibration - setting zero points in different areas of the printed area
- Concrete flow adjustment during printing
- Manual for the operation and maintenance of the mechanical part of the printer
- Troubleshooting
- Preparation of working mixtures
First steps in practice
Having received the first order in this area, we sent our employee to the buyer - in Kazakhstan, to install the first construction 3D printer S-6045 and train the customer's personnel to work with it.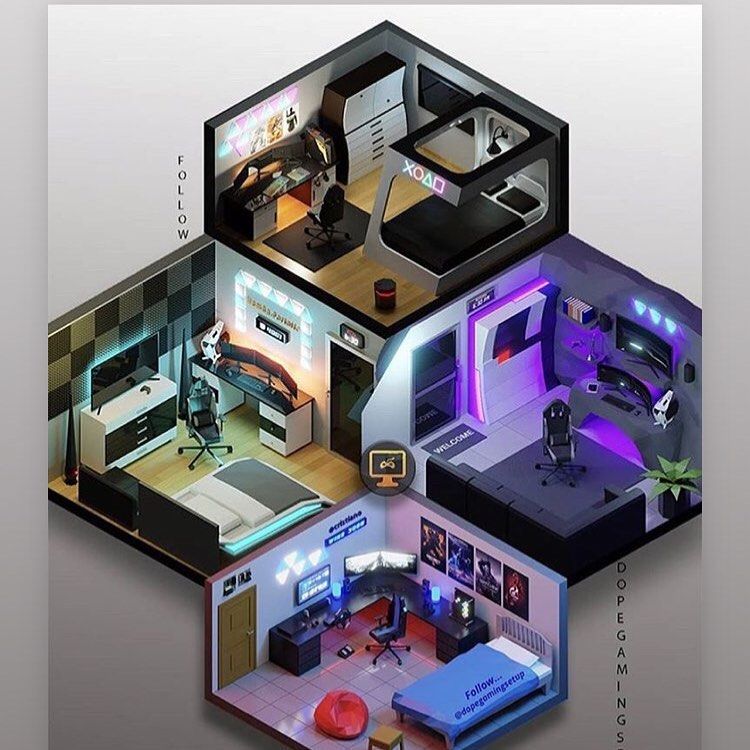
Ensure that the packaging is secure before shipping the equipment. Transport companies do not always carefully handle goods, it is better not to take risks once again - in our case, only a few contacts left during transportation, but it was worth the nerves and several hours of time, as discussed below. If something breaks during transportation, the costs can be much more serious.
In the first days of the trip, our employee checked the completeness of the delivered equipment, measured the premises to calculate the installation, coordinated the location of the future printer with the customer's representatives, introduced them to the course of the planned work and began the installation.
Markings were made for installation and holes were drilled in the floor for the racks.
After carrying out the preparatory work and installing the racks, it was the turn of the installation of the supporting beams.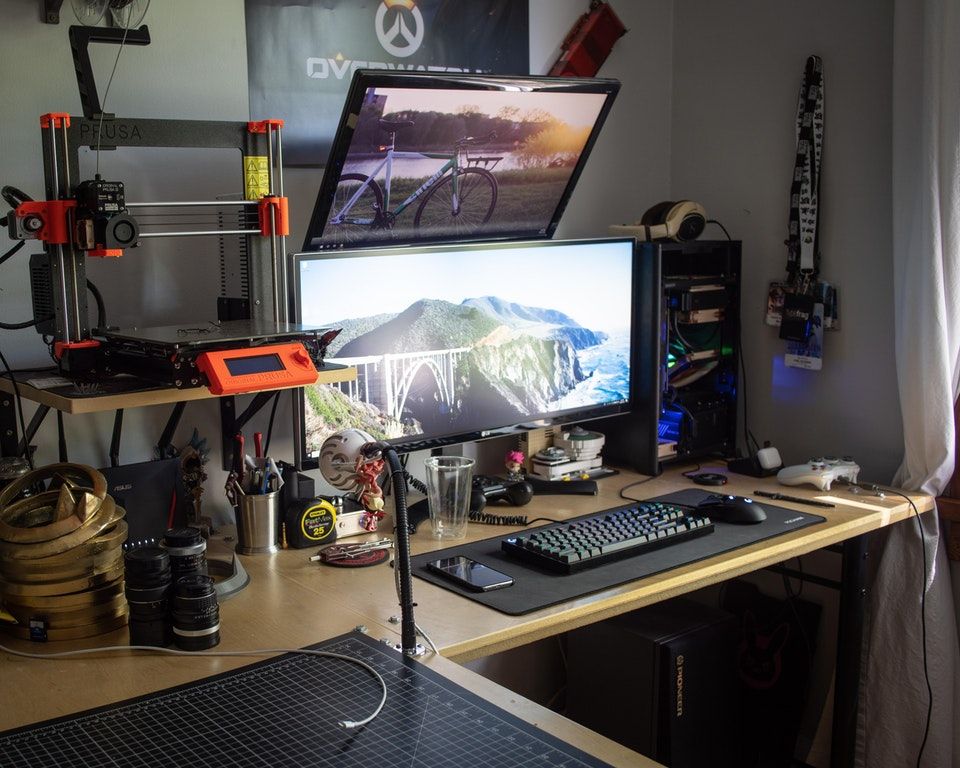 The structural elements are very weighty and several people are needed for such work, which is also better to agree with the customer in advance, otherwise delays are inevitable. People, in the end, were found and everything was done.
Another difficulty that can arise when installing a construction 3D printer is an uneven floor. Without a level plane, print quality is unlikely to be good. The obvious way out of this situation - leveling the floor - is hardly possible at the stage of installing the printer. There is simply no time for this.
Just such a surprise, namely, a significant tilt of the floor, we found out after leveling.
It was decided to weld frames from a steel profile that would compensate for the unevenness.
This also took some time. In the end, the required profile was brought in, properly cut and welded.
To install the leveling frames, the already mounted racks with beams had to be lifted with a construction crane.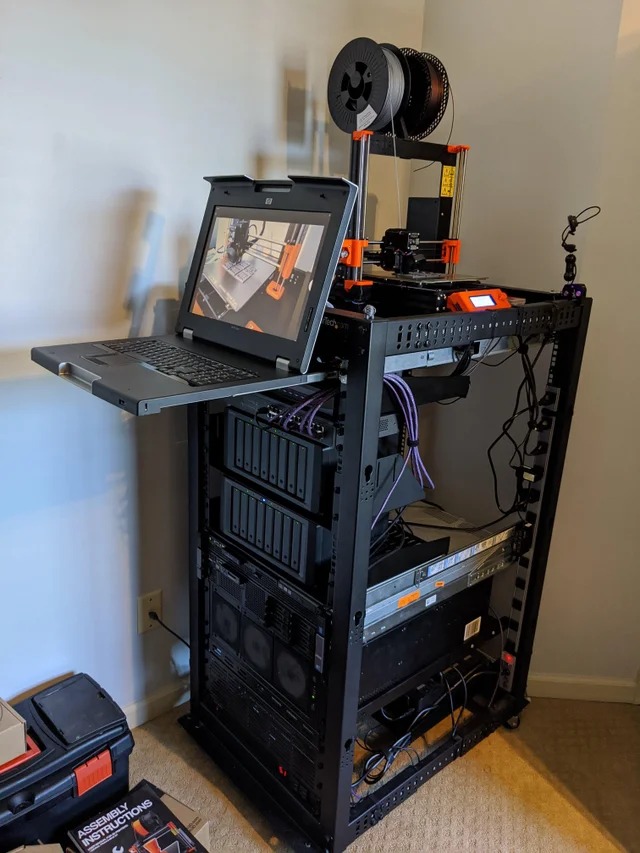
Calipers and bearings for them were mounted, after which the turn of the portal beam came. Here again, the help of a construction crane came in handy, but I had to tinker with it - due to the configuration of the room and the design features of the crane, I had to climb to the ceiling and turn off the limit switches that limited it, the crane, mobility. The ceiling there is about 15 meters.
Mounting the extruder boom and the eccentrics that control it took some time - the welds on the boom itself interfered with the connection with the docking grooves of the platform. I had to level with a grinder.
At the final stage, all connections were tightened, an extruder hopper and an optional part of the structure, a concrete mixer, were mounted.
Connecting the power and control circuits did not immediately go smoothly. However, SpetsAvia responded promptly to a letter of inquiry sent to Yaroslavl, providing all the necessary recommendations for connecting, despite the end of the working day.
During the check, it turned out that during transportation, the contacts on one of the system boards came off. After restoring contacts, everything worked.
After connecting and checking the connection, grease fittings were mounted on all bearings, protective shields for the boom eccentrics and complete plates, on which the installation itself was completed.
Next - installing and configuring the software, checking the functionality. Installation of a substrate for hanging wires connecting moving parts - it is not included in the delivery set, but we meet the needs of our customers.
Train customer personnel on how to use the printer during the trial run.
The customer decided to test a mixture of his own authorship, contrary to our recommendations. Well, the owner is a gentleman. The solution, quite expectedly, crawled. However, the printer itself works properly and we have no complaints.