3D printer records
The Guinness Book of World Records for 3D Printing!
Subscribe Here!
Email Address
Technology and creations go hand-in-hand. The former is fundamental in building anything that can impact development, lifestyle, and economy. Take for instance, the 3D printing technology and how it rewrites the Guiness Book of World Records.
Though it was introduced three decades ago, it is recently that its impact is felt in industrial and manufacturing sectors. It has paved ways for testing and trying many things that has changed the traditional manufacturing methods.
All that invention and creativity that went into it, have enabled in developing many “worlds first.”
But those 3D-printed objects couldn’t impress the record books. It’s only lately that 3D printing creations have found official entry into the Guinness Book of World Records.
The Smallest Rubrik’s Cube
No doubt there were many miniature creations before the arrival of 3D printing. But when something as popular as the 3D puzzle cube is built that is so small that it can easily fit on the tip of your finger, then why shouldn’t the Guinness Book notice it.
Tony Fisher created the world’s smallest Rubik’s cube in June 2016 using 3D printing technology. Though being tiny, the cube is functional. It’s so small that to rotate its sides, you will need tweezers.
Smallest 3D Printed Sculpture of a Human Form
Was it even possible to imagine a human sculpture so small that can sit within the eye of a needle, or fit on the head of an ant? Jonty Hurwitz not only conceived, but achieved it as well. He first captured an image a real-life woman with the help of 200 cameras and imported them into a software to create a 3D image.
He printed the image using the Nanoscribe 3D printer that functions on Two Photon Polymerization technology. This technology directs a laser light onto photosensitive materials and prints the image one 3D pixel at a time.
Tallest 3D Printed Sculpture of a Human
When 3D printing can create the smallest sculpture, it can as well create the tallest one. Perhaps, this thought might have excited James, the creator and owner of YouTube channel xrobots to try building the tallest sculpture of himself.
He scanned himself with an iPad and then gave the image perfect shape and dimensions. When he got the proportion correct, he used two 3D printers that worked 24/7 to print the sculpture and completed it in 500 hours.
Largest 3D Printed Object
The aerospace industry is at a good space with the advent of 3D printing since it facilitates them to print special tools that were difficult to find, require months to make, and used to be expensive.
At Oak Ridge National Lab, researchers have built a “trim-and-drill” tool using 3D printing technology that weights 1,650 lbs, is of an SUV size, and measures 17.5 feet in length, 5.5 feet in width, and 1.5 feet in height. This world’s largest 3D printed object was built in 30 hours with carbon fiber, and different plastic materials.
Lightest 3D Printed Structure
After smallest, tallest, and largest, it’s time for the lightest. This structure is a 3D printed graphene aerogel. It is so light that even flower petals, and a cotton ball can easily bear its weight. It weighs 0.5 milligrams per cubic centimeter.
The world’s lightest structure was built by Dong Lin from Kansas State University. Developed in 2016, it was officially recognized by Guinness World Records as the “least dense 3D printed structure.”
3D Spectra Technologies is proud to be a part of the revolutionary 3D printing technology and spearheading it in India. Based in Pune, Nashik, and Australia, we offer a gamut of engineering solutions to myriads of industries. We would love to hear your ideas and build unique things for you. Let’s add to the Guinness Book of World Records in 3D Printing.
Guinness Book of World Records article and permission to publish here provided by Rohan Kadam at 3D Spectra. Originally published on Supply Chain Game Changer on September 5, 2018.Like this:
Like Loading...
Author [email protected]Posted on Categories Digital Supply Chain, Guest Blog Post, TechnologyTags Automation, Digital, IoT, SCM, supplychain, TechnologyCan You 3D Print A Vinyl Record? Costs, Benefits And Drawbacks
There have been a lot of talks lately about 3D printing and its potential to revolutionize the way we manufacture products. But did you know that you can also use this technology to print vinyl records?
It may seem like an odd concept, but it actually works quite well. In this blog post, we will take a closer look at how 3D printing is being used to create vinyl records, and we will discuss some of the benefits and drawbacks of this process.
Read More About:
- Can You Build Your Own 3D Printer from Scratch? (5 min read)
- Printing a 3D Printer with a 3D Printer: Is it Possible? (5 min read)
- Is it possible to 3D print a vinyl record?
- How do you 3D print a record player?
- How much does it cost to print a vinyl record?
- What are the benefits of printing vinyl records?
- What are the drawbacks of printing vinyl records?
- Can you 3D print a music box?
- What You Can Do With a 3D printed Vinyl Record?
- Final Thoughts
Is it possible to 3D print a vinyl record?
In recent years, 3D printing technology has advanced to the point where it can be used to create a wide variety of products, from eyeglasses to prosthetic limbs.
One potential application of 3D printing is the creation of vinyl records. While the idea of being able to print your own records at home may sound far-fetched, it is actually technically possible.
But this technology has not been perfected yet, it is certainly an interesting possibility for the future of music production.
How do you 3D print a record player?
Many people are wondering how you would actually go about printing a vinyl record. The process is actually not as complicated as it may seem.
Joel from 3D printing Nerd has created a great video tutorial that explains the process in detail. Here is a link to the video tutorial:
As you can see, the process is actually quite simple and fun. They used different types of 3D printer to print the different parts of the record player.
In this video tutorial Joel and Mark used Prusa i3 MK3, Raise3D N2, gMax 2, Artillery3D Sidewinder X2 and Creality Ender 3 printer to print a full functional record player. The printed record player is not perfect but it works great.
How much does it cost to print a vinyl record?
The cost of 3d printing a vinyl record depends on a number of factors, including the size of the record, the quality of the print, and the complexity of the design.
Generally speaking, larger records will be more expensive to print than smaller ones, and records with intricate designs will cost more than those with simple designs.
Additionally, the quality of the print can vary depending on the printer and the type of material used. However, as a general ballpark estimate, it is typically possible to 3d print a vinyl record for around $30.
But you need a high-resolution printer and the right type of material. So, the entire project could cost you a few hundred dollars.
What are the benefits of printing vinyl records?
In the past, records were made by injection molding, a process that was expensive and time-consuming. With 3d printing, records can be produced much faster and at a fraction of the cost.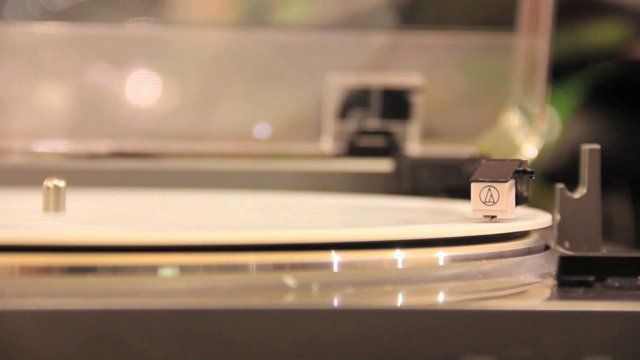
In addition, 3d printing allows for more intricate designs and patterns to be incorporated into the vinyl records. As a result, 3d printed vinyl records are not only more affordable, but also more unique and stylish.
In addition to being more cost-effective and stylish, 3d printed vinyl records are also more durable than their traditional counterparts.
Because they are not made with fragile injection molding tools, 3d printed records are less likely to crack or break. Additionally, the surface of a vinyl record is less likely to be scratched when it is printed with a smooth finish.
What are the drawbacks of printing vinyl records?
Despite the benefits of 3D printing technology, there are some significant drawbacks to consider before investing in a 3D vinyl printer.
- One of the biggest issues is the quality of the sound. Because the records are made from plastic, they tend to produce a poorer sound quality than traditional vinyl records.
- In addition, 3D printed records are also more susceptible to warping and damage.
 Because they are not as sturdy as traditional records, they can easily be damaged if they are not stored properly.
- Finally, 3D printed records are also much more expensive than traditional vinyl records. While the initial investment may be worth it for some audiophiles, others may find that the increased cost is simply not worth the hassle.
Can you 3D print a music box?
3D printing technology has come a long way in recent years, and it’s now possible to print all sorts of objects, from toys to tools. One popular use for 3D printers is making music boxes.
Music boxes are relatively simple devices, consisting of a cylinder with pins that strike a tuned steel comb when the cylinder is turned. This makes them ideal candidates for 3D printing, as the moving parts can be easily printed using a standard desktop 3D printer.
The only other major component of a music box is the musical movement, which can be sourced from online retailers. With a 3D printer and a few simple components, you can easily create your own music box.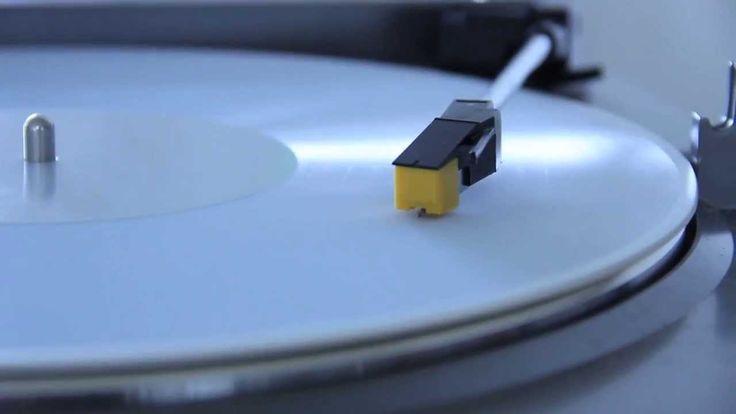
What You Can Do With a 3D printed Vinyl Record?
Now that you know how to print a vinyl record, what can you do with it? You can sell it, of course!
But there are other options as well. For example, you could use it to create a one-of-a-kind gift for a music lover in your life. Or you could use it as a promotional tool for your band or business. The sky’s the limit!
Also, check out our blog to learn more about how you can make decent money by selling your 3d printed objects.
Final Thoughts
As you can see, there are a number of advantages and disadvantages to printing vinyl records. Ultimately, the decision of whether or not to print vinyl records is up to you. If you have the budget and the time, it can be a great way to create unique gifts or promotional materials. However, if you’re pressed for time or money, you may want to stick with traditional pressing methods.
Whichever route you choose, we hope this article has given you a better understanding of the pros and cons of printing vinyl records. Thanks for reading!
Can you think of any other advantages or disadvantages to printing vinyl records? Let us know in the comments below!
If you’re interested in learning more about 3d printing, be sure to check out our other articles.
Instructions for creating time-lapse prints on a 3D printer
Many professional 3D printing studios and even amateurs post beautiful videos where an object magically appears out of nowhere. Those who understand even a little about 3D printing understand that this is really just a time-lapse filming of the printing process. But almost no one thinks about how such videos are made. In fact, creating a time lapse is very simple, it does not require special skills of the operator and editor, and all you need from the equipment is a 3D printer and a smartphone. Next, we will walk you through all the details of creating timelapses and look at mistakes that can be easily prevented even before creating a timelapse. nine0003
What is time lapse?
Before you start creating a timelapse, you need to understand what it is.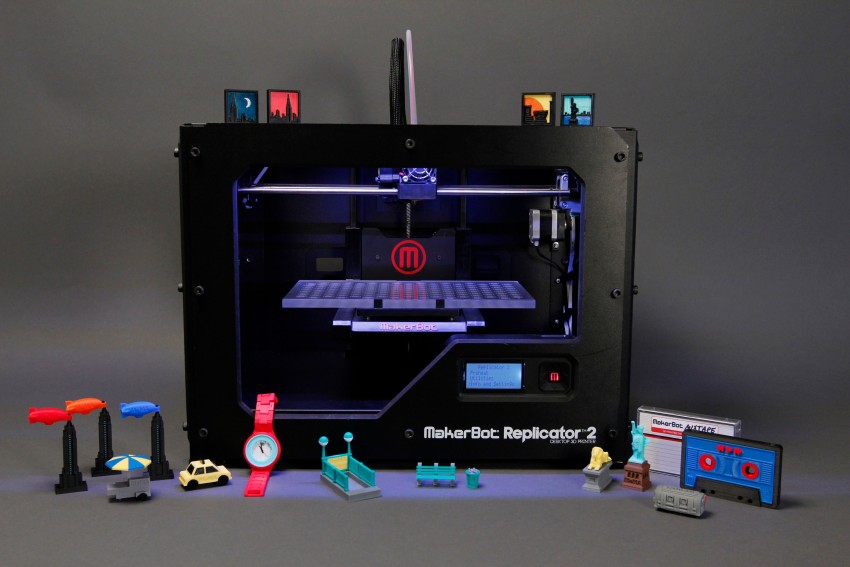 Many people are under the misconception that this is just a speeded up video. In fact, this is a special shooting technology in which photographs are taken at regular intervals, and then they are combined into one video on a computer, where each photo will be a separate frame. Unlike video acceleration, this method allows you to reduce the file size, while increasing the quality of the resulting time-lapse, because we do not shoot a long video, and then throw out unnecessary frames. Everything happens the other way around: we immediately shoot only those frames that will make up the video. And the increase in quality is achieved by creating individual photos, not video, for which high-quality shooting requires expensive equipment. Almost all modern smartphones have a high-resolution camera that allows you to take high-quality photos, but at the same time does not allow you to shoot high-resolution video due to memory speed limitations or low processor power. nine0003
How to create a timelapse
Important clarification: As we understood from the previous paragraph, a time-lapse consists of separate frames, which are then combined into one video.
But no one forbids shooting “the old fashioned way” using the video acceleration method. For simplicity, hereinafter, fast-paced shooting will also be called time-lapse.
The process of “making” a time-lapse is divided into two stages: shooting the material and processing it. Later in this article, we will look at various options for the implementation of these two stages. As an example, we will use the video and photos of printing a small puck on the Raise3D E2 printer. nine0003
Survey methods
Different shooting scenarios may use different equipment. Often, a regular smartphone is enough, on which you may need to install a special application. But to achieve maximum quality, it is better to use a professional camera. Also, do not forget about the battery charge in any of the devices used, especially when shooting models that take more than 1-2 hours to print. To create a high-quality time-lapse, you need to set the camera in such a way that the highest point of the model falls into the frame. This can be easily done by placing an object of similar height on the printer table. Do not forget about the light: if there is no special artistic intent, then it is best to place the light source behind the camera, at the height of the table, so that there are no unnecessary shadows and the model is evenly lit. As a result, the frame should look like the photo below. nine0003
Many photos
This method is what is meant by the word "timelapse". To do this, you need to create photos at regular intervals. Many cameras (including action cameras) and smartphones have this feature. After installing the camera and starting printing, you can start shooting. To calculate the appropriate interval between photos, you can use a simple formula:
interval = print time / (video time * frames per second) nine0003
Here video time is the length of the video received, and frames per second is the number of frames per second of the video received (usually 24, 30 or 60 fps). Note that all times in this formula are in seconds. For example, to get a video of 30 seconds in length when shooting a print of 1 hour (3600 seconds) at a frequency of received video of 30 frames per second, you need to set the interval equal to 3600/(30 * 30) = 4 seconds between photos. It should be borne in mind that when shooting with this method, the printer carriage will be visible in the frame, which means that as a result it will constantly flicker in the time-lapse. This can degrade the quality of the final result, especially on small models. To avoid this problem, you can use the following method. nine0003
Video
This option is the easiest to perform: start shooting video at the moment you start printing. Consider the need for a large amount of free space on the drive where the file will be saved. The advantage of this method is the ability to select certain frames where the caret will not block the model. To do this, before printing, you need to edit the Gcode so that with each change of layer, the carriage moves away from the part. You can read more about editing Gcode files in the article on our website. But extracting individual frames from a video in this way is an extremely time-consuming process. nine0003
Fun fact: blogger GreatScott did an automatic photo of the model without the carriage hanging in random places by modifying the printer firmware and the Gcode print file. The essence of the method is that with each layer change, the carriage drove off to a special point, thereby pressing the limit switch, which in turn activated the camera and it took a photo.
Automatic
This method includes both the shooting of the print and the processing of the resulting photographs immediately after its completion. It is only available for smartphones and some action cameras. In fact, it is a fully automated method of taking many photos, because you only need to turn on the shooting, and the camera or smartphone will combine everything into a time-lapse video. Therefore, there is no need to process the received material. Processing methods After receiving the "raw" material, it is necessary to edit it on a computer. In the case of using video, everything is relatively simple, but to process a large array of photos, you need to use special tools and programs. Video Editor When shooting a large video, you only need to speed it up. For example, in the Sony Vegas video editor, you need to insert the video into the timeline and, holding down the ctrl key, move the right edge of the video to the left. When the edge starts to move, you will notice a zigzag. This means that you are doing everything right. nine0003
Processing methods
After receiving the "raw" material, you need to edit it on a computer. In the case of using video, everything is relatively simple, but to process a large array of photos, you need to use special tools and programs.
Video editor
When shooting a large video, you only need to speed it up. For example, in the Sony Vegas video editor, you need to insert the video into the timeline and, holding down the ctrl key, move the right edge of the video to the left. When the edge starts to move, you will notice a zigzag. This means that you are doing everything right. nine0003
An example of accelerated video on the timeline in Sony Vegas
If you used the method of taking many photos, then you need to select the file item in the top menu, then import, then multimedia. A file selection window will open. Select all photos and under the file browser window you need to check the box “Open sequence”. You will have another window where you can change the frame rate if necessary. nine0065
Creating a time-lapse from a photo using Sony Vegas
Special program
These programs exist for both smartphones and PCs. They are intended only for creating time-lapses, so you will not be able to trim the resulting video or change the frame in them.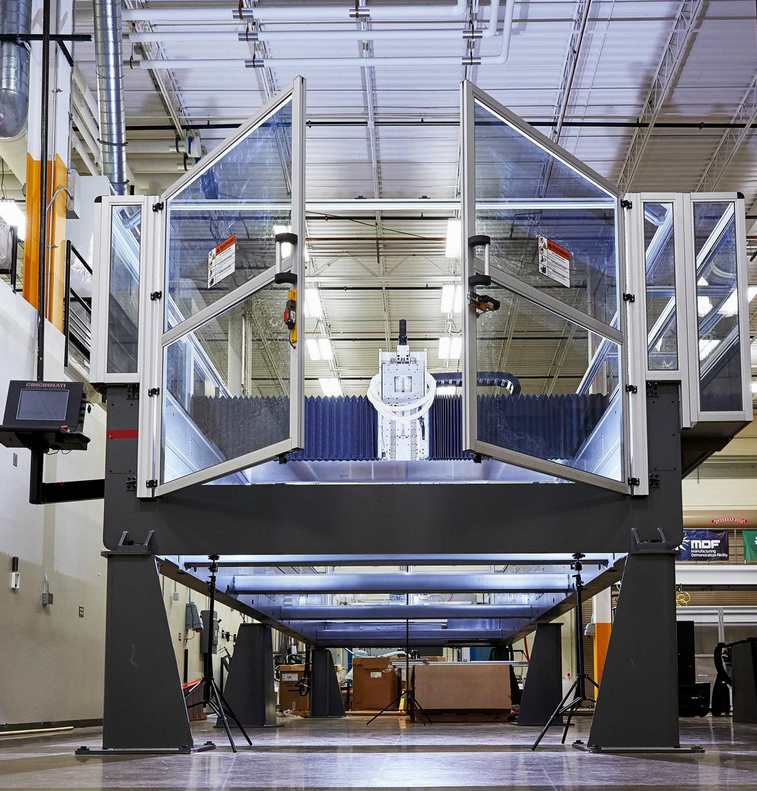 For example, you can use the Time-Lapse Tool on a computer. But on smartphones, it makes more sense to use automatic time-lapse apps like Time Lapse Camera. They have an intuitive interface that even a child can understand. nine0003
Major errors and solutions
Often errors relate to the wrong frame and lighting. If the model is closed by the carriage most of the time, then the only way out is to install the camera at table level. This can severely limit the height of the model being filmed.
Wrong shooting angle
Correct shooting angle nine0003
If strong shadows are visible on the model, which you need to get rid of, then you can use a table lamp aimed directly at the model.
If strong vibrations are visible after combining the photo into a time-lapse, then the camera moved during the shooting. In some cases, this is caused by vibrations that the printer creates. To solve this problem, you need to securely mount the camera to the printer.
Example of camera shake
Summing up
As you can see from this tutorial, making a time lapse is very simple. The only difficulty will be the choice of equipment for shooting. Do not forget that the main stage is shooting the model, and the stage of processing the received frames is secondary, because if you shoot well right away, then you won’t need to process the video much. Also pay attention to the first frames that the camera or smartphone will take, because they can immediately determine the success of the selected frame and lighting. If you are going to time-lapse a large model, it is best to first make a simpler time-lapse of a small model so that if any errors occur, they can be immediately prevented. Although you can shoot a time lapse using any printer, open frame printers, that is, those that do not have any panels, are best suited, as this gives a large variation in free frames. You can read reviews of such printers and many useful articles in our blog. nine0003
Plug-in failure resulted in unauthorized printing of 3D printers
IoT 3D printer failure TSD
Plugin failure resulted in unauthorized printing of 3D printers
Alexander Antipov
IoT 3D printer failure TSD
3D printers suddenly started printing warning signs. nine0003
On the morning of Thursday, August 19, some 3D printer owners were horrified when they woke up to find that their devices had printed a sign saying “TSD is not safe. I connected to you randomly. I'm sorry, but I should have warned you."
As it turned out, the cause of unauthorized printing was a vulnerability in The Spaghetti Detective (TSD) plugin for the OctoPrint web interface of 3D printers. According to TSD developer Kenneth Jiang, the night before the cryptic signs were printed, he made configuration changes to the TSD cloud to improve speed and performance. However, in the process, Jiang made a mistake that for eight hours, users who connected their 3D printers to a TSD account could see each other's printers through the auto-discovery function and even connect to them. The issue affected 73 users who were connected to TSD accounts at the time of the failure. nine0003
One way to connect 3D printers to your account is to use the TSD auto-discovery feature. This feature relies on the fact that devices on the same local network share a common IP address. Therefore, the TSD server can match the Raspberry Pi with a computer/smartphone on the same local network, thereby allowing them to discover each other.
When the developer tried to change the load balancer settings, he mistakenly left out the setting to allow the load balancer to pass the IP address of the connecting client to the TSD destination server.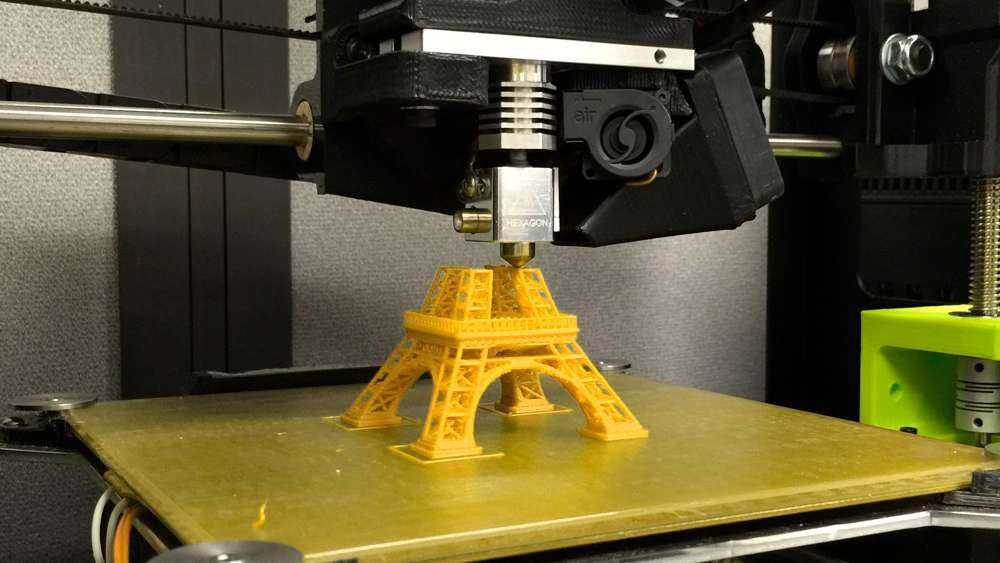 Instead, the balancer passed only its own IP address to the server. As a result, the server received the IP addresses of users who connected their 3D printers to TSD at the same time. The server decided that they were all on the same local network and therefore allowed them to connect to each other. nine0003
According to Jiang, no personal information was involved in the incident, and the credentials were not affected.
TSD is a plug-in for the OctoPrint web interface released in 2019, designed to detect malfunctions in printers using the camera.
The world is going crazy and the cyber apocalypse will break out. Subscribe to our Telegram channel to be the first to know how to survive in the digital nightmare!
Share news:
Related news
A critical error has been detected in the 1C program. Clients prepare claims
The lives of millions of diabetics may be in the hands of cybercriminals
FBI: More than 53% of medical equipment gives cybercriminals complete control over patients' lives
The cause of a large-scale outage in the work of Microsoft in the largest countries of the world has become known
New malware with interesting capabilities is being tested on Linux
Intel and Red Hat open co-working space for developers
Instagram* has experienced a global crash
WhatsApp has experienced a global outage
WhatsApp crashed due to technical error
Subscribe to email newsletter
Subscribe to receive the latest security materials from SecurityLab.