3D printer power requirements
How Much Electric Power Does a 3D Printer Use? – 3D Printerly
Besides the cost of the 3D printer itself and the material to actually print out objects, there’s another thing creeps into people’s minds. Just how much electric is this thing using?!
It is a fair question. As fun as it is to 3D print our own objects, we want it to be as cost effective as possible. In this post I’m going to identify just how much power these 3D printers are using up and ways to manage it.
The average 3D printer with a hotend at 205°C and heated bed at 60°C draws an average power of 70 watts. For a 10-hour print, this would use 0.7kWh which is around 9 cents. The electric power your 3D printer uses depends mainly on the size of your printer and the temperature of the heated bed and nozzle.
There’s some more pretty useful information that you’ll want to know in the rest of this article, so keep on reading to get the proper knowledge on electricity with 3D printers.
If you are interested in seeing some of the best tools and accessories for your 3D printers, you can find them easily by clicking here (Amazon).
Determine Power Use by 3D Printer Specifications
Your 3D printer specifications for the power source and maximum/minimum power ratings are the answers you need so you know the limits of power consumption.
As an example, if a printer has a 30A 12V power source, it will have a maximum Watt of 360 (30*12=360), but the printer won’t always run at the upper limit. These maximums will kick in when heating up the necessary parts to start the printing process but will fall much lower as the printing is happening.
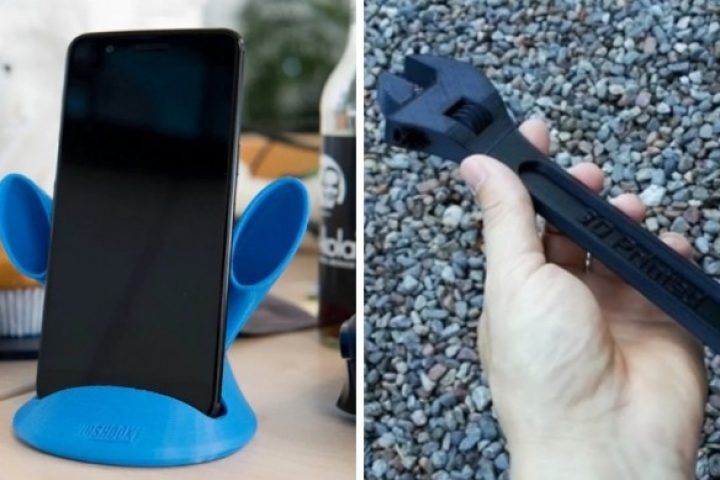
A great low-power 3D printer has to be the Ender 3 (Amazon), it’s an all-round popular machine that is perfect for beginners with quality that matches the most premium printers out there. You’ll see from the glowing reviews just how good it is!
Jason King from 3DPrintHQ used the MakerBot Replicator 2 printer and found that the energy costs were only $0. 05 for a 5-hour print. 3D printing only used 50 watts per hour, which is comparable to an HP Laser Jet printer on stand-by, not even while printing or 1 use of your toaster.
Low Relative Cost of Power
When looking at the overall cost of 3D printing, power costs are something that is relatively very low and not something to worry about. Some printers will of course be more efficient than others, but not at such a point that it’s a big determining factor when choosing a printer over another.
Now there are slight differences in how much power a 3D printer is using depending on what the printer is actually doing. When the printer is preheating to the set temperature, if the print bed is relatively large it will use slightly more power than when printing.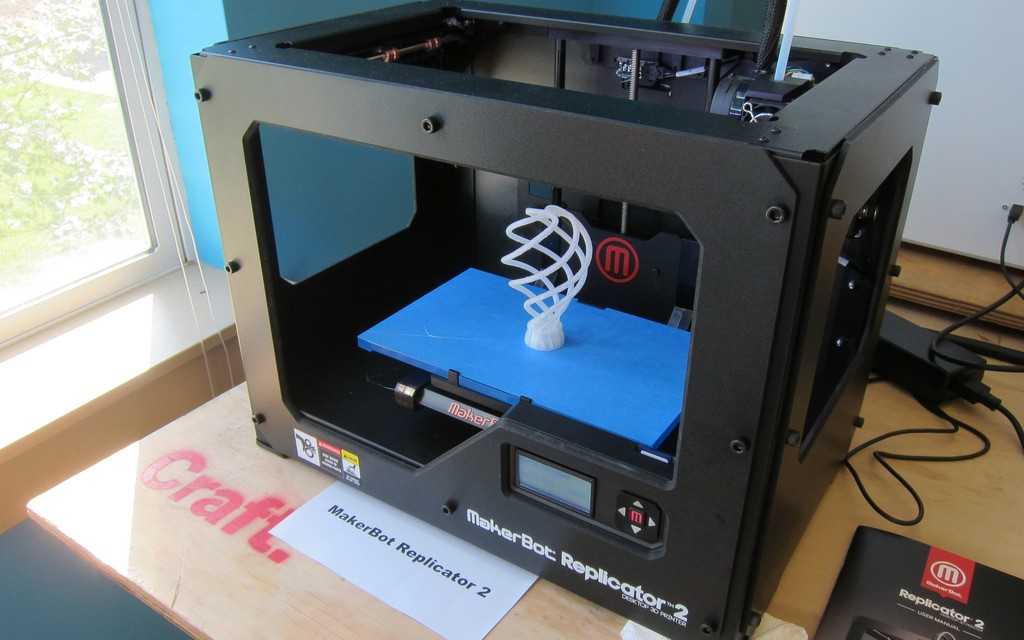
The first real use of electric power when a 3D printer is turned on is the heating of the print bed, then comes in the nozzle is heated to the temperature for the specific material. While printing, you will get spikes in the power usage depending on if the heated platform is on to maintain the ideal temperature.
From what I’ve read around, it looks like the average 3D printer consumers as much electric as your standard fridge.
What Affects How Much Power is Used?
Strathprints done a test to compare the power consumption between four different 3D printers and confirmed a few things. The lower the layer thickness of the material, the longer a print will take therefore leading to a higher power consumption overall.
If you can speed up your prints you’ll be using less power overall so check out my post 8 Ways to Speed Up Your 3D Printer Without Losing Quality.
When the heating efficiency of a print bed or hot end is good, it will result in less power being used due to not having to constantly keep the temperatures hot as much.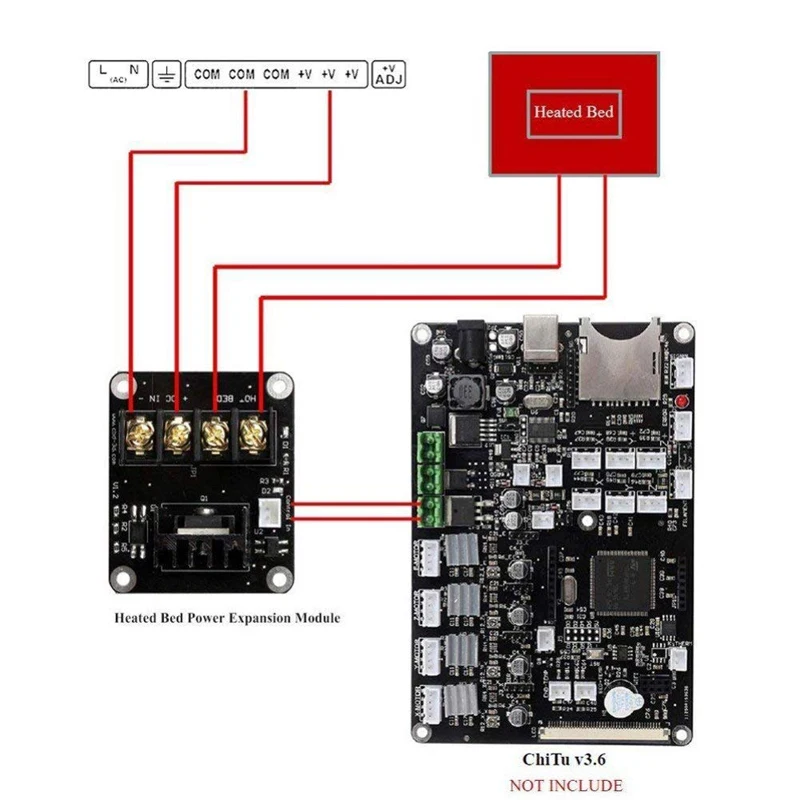
The video below shows the wide differences in how much electricity a 3D printer will use when incorporating the heated bed.
A good idea to lower how much heating your bed has to do is to use an Ashata Heat Insulator Mat. It has great thermal conductivity and greatly reduces heat and cooling loss of your heated bed.
The MakerBot-Replicator 2X had a baseline of between 40-75 watts to power the controller and motor, but peaked to 180 watts when heat was needed. The hotter the necessary print bed temperature, the more frequent the 3D printer drew power shown by fluctuations in the watt meter used.
The test showed that there is quite a variance between the power consumption of 3D printers. So, it can be concluded that 3D printers don’t consume a similar level of power and it really does depend on many factors.
The set-up parameters of your 3D printer will have a pronounced influence on the overall power consumption. It is important to be familiar with the process of 3D printing so you can print high quality products at lower electricity levels.
If you want to take an extra step, get yourself an enclosure. A great one is the Sovol Warm Enclosure for Ender 3D Printers. It’s pretty pricey, but it will last you years and usually results in better prints.
How Do I Lower Electricity Costs With a 3D Printer?
- Use a smaller 3D printer
- Use 3D printing materials that don’t require a heated bed or high nozzle temperatures (PLA)
- Implement 3D printer settings that make 3D prints quicker
- Change to a larger nozzle so your prints don’t last as long
- Make sure you are 3D printing in a fairly warm environment
When it comes down to lowering power costs with your 3D printer, it boils down to finding ways that speed up your 3D prints and doesn’t require as much heating.
The simple things you can do to speed up prints is to use a bigger nozzle, use less infill, print less often, or printing more things at once rather than doing them separately.
Most of the electricity use comes from the heating elements, so focus on reducing the heat and you’ll be able to save more on power.
This isn’t usually a problem since the associated costs aren’t relatively high. You’re definitely going to be using more money on the filament itself than you ever would with the electricity.
How Much Power Does a 3D Printer Use?
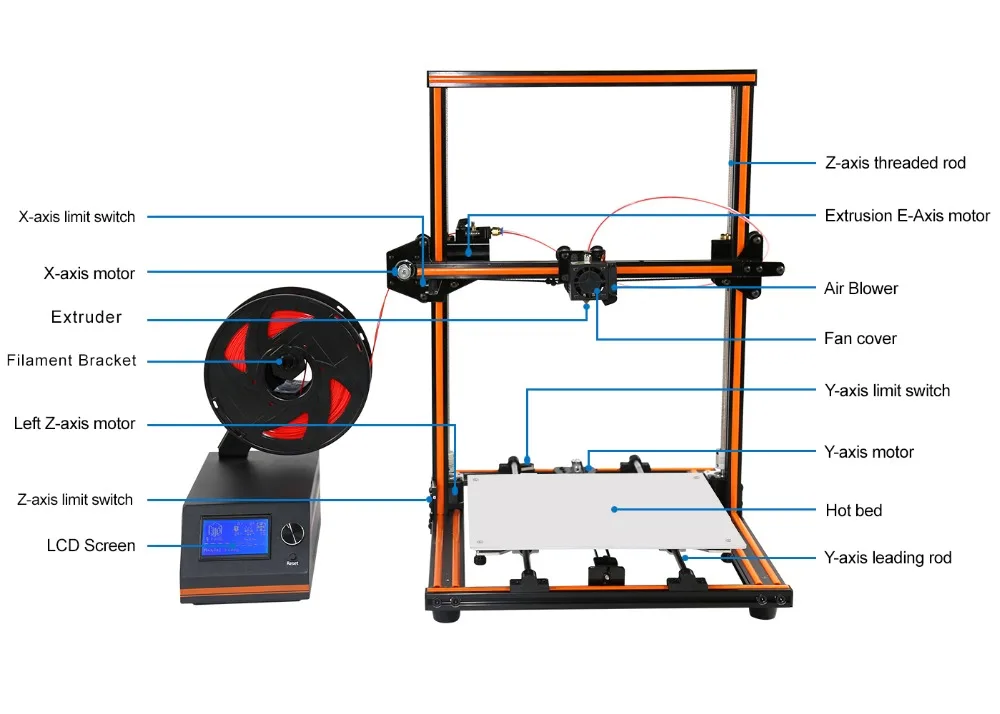
How Much Electric Does an Ender 3 Use?
One Ender 3 user who had their 3D printer running for 4 hours only used around 0.5kWh (kilowatt-hour), which consisted of heating up twice (using 280 watts per). When you calculate this on a per hour basis, we can 0.12kWh per hour of using an Ender 3.
People like to know how much power would cost if their Ender 3 was running for a full day, so let’s take a 24-hour period.
24 * 0.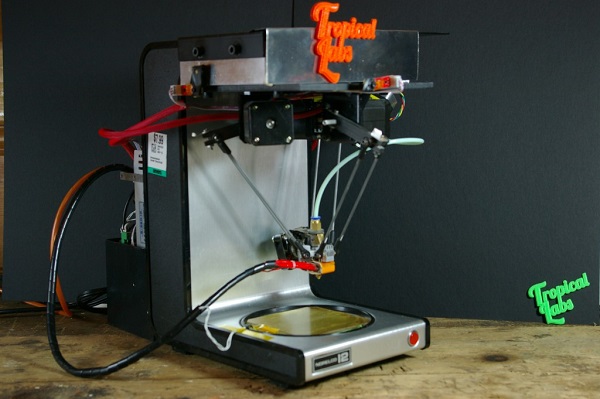 12kWh = 2.88kWh
The average cost of one kilowatt-hour across the US is 12 cents according to NPR, so a full 24 hours of running an Ender 3 would cost $0.35. If you ran your Ender 3 24 hours for the whole month, it would cost you around $11.
The Ender 3 has a 360W power supply (24V DC at 15A.
- Heated Bed – 220W
- 4 Stepper Motors – 16W
- Fans, Mainboard, LCD – 1-2W
After these parts, you should have a spare 60-70 Watts in spare capacity, which allows you to add extra things.
A basic set of 5050 LED lights connected to your 3D printer can be around 20W.
Can You Get Electric Shocks From a 3D Printer?
Now that you know 3D printers don’t actually use that much electricity, you might be wondering whether they are still capable of giving you electric shock. This is a valid question and the answer is pretty simple.
A 3D printer can give you electric shock if you don’t handle it properly, but with proper use, you will be safe from getting an electric shock.
One 3D printer user actually received an electric shock from the power supply, but it was through misuse. After setting up their 3D printer, they used an EU to UK adapter and set the voltage to 230V.
It would have been a better idea to purchase or get the seller to send them a UK plug rather than use an adapter. This could have happened due to poor grounding, because a small current can flow through the connections from the live wire.
Luckily it was just a harmless tingle/shock! You shouldn’t use electronics which are not grounded when they are supposed to be.
How Can I Measure My Actual Electricity Use?
When it comes to electricity use, there really isn’t a perfect measurement we can give you because there are many differences and variables. The best thing you can do to really know how much power you are using is to measure it yourself, rather than us guess for you.
You can purchase a power meter which has an in-built power usage monitor. High-end ones can even calculate the cost of your power usage, so it can easily answer your question.
There are plenty of electricity monitors out there, so I done some research and found one that works very well for most people.
The Poniie PN1500 Portable Electricity Monitor is going to be your best choice. Not only is it officially ‘Amazon’s Choice’ at time of writing, but it is the highest rated out of all the monitors at 4.8/5.
Here’s what’s good about this power monitor:
- Very easy to use, with access to different power parameters
- High-precision current sensor
- Backlight & memory with large digital numbers for easy viewing
- Ability to start detection at just 0.20W so you can monitor almost anything
- 1 full year warranty
You can easily monitor electrical use in real time and it has multiple uses which can allow you to save on future electricity bills. Whether you test other appliances like an old refrigerator or other power-wasting appliances.
Range Of Electricity Use For A 3D Printer
An example of the minimum and maximum levels of power a 3D printer can use is the MakerBot Replicator+, which according to the specs has between 100-240 volts and 0. 43-0.76 amps. To convert this, we simply need to multiply the lower ends and higher ends to get our limits.
100 volts * 0.43 amps = 43 watts
240 volts * 0.76 amps = 182.4 watts
So, the power can range anywhere between 43 and 182.4 watts.
From the watts, we convert this to kilowatts per hour (KwH) by dividing the watts by 1000 then multiplying the number of hours in use. For example, if you had a print that lasted 5 hours the calculation would be:
43 watts/1000 = 0.043 Kw * 5 hours = 0.215 KwH for the lower limit.
182.4 watts/1000 = 0.182 Kw * 5 = 0.912 KwH for the upper limit.
Just as an example, if we take the happy middle for these two power measurements, we’d have 0.56 KWh, costing you only 5-6c in electricity per hour. So now you have a bit of a gauge in just how much electric is used in 3D printing, which isn’t much at all but it can slowly build up over time.
Compared to the actual cost of the 3D printer, the filament materials and other tools and equipment the electric power required for 3D printers is something that you shouldn’t have to worry about.
When we’re talking about sizeable professional printers, then the power costs could be something to take into consideration, but for your standard domestic 3D printer it is very low cost.
If you love great quality 3D prints, you’ll love the AMX3d Pro Grade 3D Printer Tool Kit from Amazon. It is a staple set of 3D printing tools that gives you everything you need to remove, clean & finish your 3D prints.
It gives you the ability to:
- Easily clean your 3D prints – 25-piece kit with 13 knife blades and 3 handles, long tweezers, needle nose pliers, and glue stick.
- Simply remove 3D prints – stop damaging your 3D prints by using one of the 3 specialized removal tools.
- Perfectly finish your 3D prints – the 3-piece, 6-tool precision scraper/pick/knife blade combo can get into small crevices to get a great finish.
- Become a 3D printing pro!
How Much Power Does a 3D Printer Use? – Clever Creations
When deciding on whether 3D printing is the right hobby for you, it is important to take all 3D printing costs into account. Not only are there initial expenses you have to make, like filament and the device itself, but you also have to consider recurring costs.
One of the main operating expenses of a 3D printer is its power consumption. Without power, there won’t be any heating, motor movement and printing, so this cost is hard to avoid.
In this article, I will share how much electricity 3D printers typically use, how you can calculate the electricity cost and give you some tips on keeping energy usage of your 3D printer as low as possible.
3D printers come in many different shapes and sizes and this makes it impossible to give a single power consumption number that covers all models. There are simply too many variables (components) in play.
Luckily, there are several ways you can go about calculating the power consumption of a 3D printer. Some methods are easier than others, but like with many things, the more effort you put in, the better the results. Note that this article covers fused deposition modeling (FDM) 3D printers only.
Using the 3D printer power supply rating
All 3D printers have a power supply that converts high voltage AC (alternating current) to low voltage DC (direct current). This power supply has a maximum rating that it is unable to exceed. With that rating in mind, we can figure out the absolute maximum amount of electricity that a 3D printer can use.
For example, an Ender 3 V2 has a power supply that can supply 24V, 15A. To calculate its maximum power consumption, we use the formula Power = Current * Voltage to get 15A * 24V = 360 Watts.
The real electricity usage of a 3D printer is a bit more complicated, however. The number we just calculated is the absolute maximum amount of power the PSU (power supply unit) can supply, whereas in reality a 3D printer never requires the PSU to be at full load.
3D printer power supplies are usually picked with a safety margin in mind (they can provide more power than the 3D printer would ever need) and the printer’s individual components rarely all operate at full power at the same time either.
In the absence of a better calculation method, using the power supply rating is a good way to get an idea of the upper bound of a 3D printer’s power consumption. But to get a more precise number we need to dive a bit deeper.
Taking the individual components into account
A better way to determine how much electricity a 3D printer uses is to calculate it based on its components. The power of the hot end heater, number of stepper motors and whether or not the printer uses a heated bed are some factors that influence the printer’s total power consumption.
It is important to mention that these components do not run at a 100% power all the time. For example, heaters regularly toggle on/off depending on their current temperature. But looking at the typical power usage of these components can give a good idea of how much electricity a 3D printer uses on average.
Heated print bed
Heated beds are by far the most energy-hungry components in a 3D printer. Not all printers have one, but the ones that do, use significantly more power.
A heated bed helps prevent warping of 3D prints and improves adhesion of the first print layer. It is an essential feature to have when working with specialized or high-temperature filaments, even though it is a good feature to have for standard filaments as well.
Both the size of the heated bed and the temperature you raise it to, attribute to its power consumption. The bigger the bed, the more power it uses. Higher temperatures need more power as well.
A heated bed needs a lot of energy to get up to temperature, but it also needs energy to stay there. Ample heat escapes through its large surface area. To maintain a heated bed’s target temperature, its thermal energy needs to be continually replenished by converting electricity to heat.
Typical wattages range from 120W for a small 20x20cm DC powered heated print bed, to 1000W or more for larger (≥30x30cm) AC powered beds. On popular printers like the Ender 3 Pro and Creality CR-10 you can find heated beds that draw around 200W.
On two equally sized heated beds with different wattages, the one with a higher wattage gets up to temperature quicker and can reach higher temperatures.
Further down in this article you can find some tips on how to reduce the energy usage of your heated bed and 3D printer.
Hot end heater
The hot end heater is responsible for melting our filament and tends to be the second-most energy consuming component in a 3D printer.
Just like a heated bed, the power consumption of a 3D printer hot end heater cartridge depends on the temperature that it needs to reach. That, in turn, depends on the feedrate and the type of filament you are printing. Filaments like PLA do not require much heat, whereas PEEK or PETG need significantly more.
Recommended:
The 10 Best PLA Filaments for 3D Printing
Pushing large amounts of plastic through a hotend, like on a Volcano hotend, increases power requirements. This is because more heat gets transferred from the heater block to the filament and needs to be replaced. Similarly, print cooling fans that are pointed directly at the hotend also increase the amount of power that a hotend draws.
Typical 3D printer hot end heaters are rated at 30-50 Watts. Anything higher than that comes with significant risks.
Stepper motors
The stepper motors in a 3D printer are responsible for extruding filament and for moving the extruder carriage. Sometimes they also move the bed.
A typical Cartesian or CoreXY 3D printer has four stepper motors (X-/Y-/Z-axis + extruder), but some printers come with more. These extra stepper motors are used for additional extruders or sometimes to drive the Z-axis with more control.
Ordinary NEMA17 stepper motors use about 5-10 Watts each when active.
Control board
3D printer control boards are responsible for controlling all other electrical components. They instruct the stepper motors on how to move and turn heaters on or off depending on the current temperature of the temperature sensors.
Control board PCBs have large terminals that can handle a lot of power. Don’t be fooled by these, only a small portion of that power goes to the controller itself. The majority is for powering the aforementioned stepper motors and heaters. The control board simply points that power into the right direction with MOSFETs and transistors.
When isolating the controller, you will find that it only uses 5-15 Watts. Its power usage is highest when the 3D printer is printing and lowest when it is idle (not doing anything).
Other components
Aside from the main 3D printer components listed above, 3D printers can come with several smaller parts that use electricity.
- Fans are used for cooling prints, the hotend heatsink and the electronics. They do not use much power. Depending on their size, they use 1-2 Watts each.
- Some 3D printers come with LED strips, even though you can also install them yourself at a later point.
 LED strips use about 5-15 Watts per meter. High quality bright LED strips use more electricity than your typical AliExpress/eBay variant.
 - LCD screens are a source of 3D printer power consumption as well. The energy usage of a small monochrome LCD is not worth mentioning, whereas something larger like a 7″ PanelDue touch screen still only uses 3-4 Watts at the most.
Adding it all together
For a typical budget 3D printer, say an Ender 3 or Creality CR-10 with a ~200 Watt heated bed, you would see the following power consumption numbers:
| 3D Printer State | Power Consumption |
|---|---|
| Off | 0 Watts |
| Sitting idle | 5-15 W |
| Idle with motors engaged (e.g. after homing) | 20-40 W |
| Preheating after homing | 250-300 W |
| Printing | 50-150 W |
Once the heaters are up to temperature, they require less energy to keep them at that point. So during printing, electricity usage is significantly lower than when it is preheating.
Measuring electricity usage on a specific 3D printer
Of course, the above numbers are still all estimates. There are many different printer models out there and it is hard to say exactly what a 3D printer’s energy consumption is unless you specifically measure it. The target temperatures of the heaters, ambient temperature and stepper driver currents all can not be accounted for in these estimates.
The easiest way to measure 3D printer power consumption is to use a Kill-A-Watt electricity usage monitor. It precisely tracks the energy usage of the device that is plugged into it and even calculates the total electricity cost per day/month/year.
P3 International P4460 Kill A Watt EZ Electricity Usage Monitor , grey
Check PriceAlternatively, a Wi-Fi smart plug with energy monitoring lets you do the same thing but adds the ability of displaying its data remotely on your phone.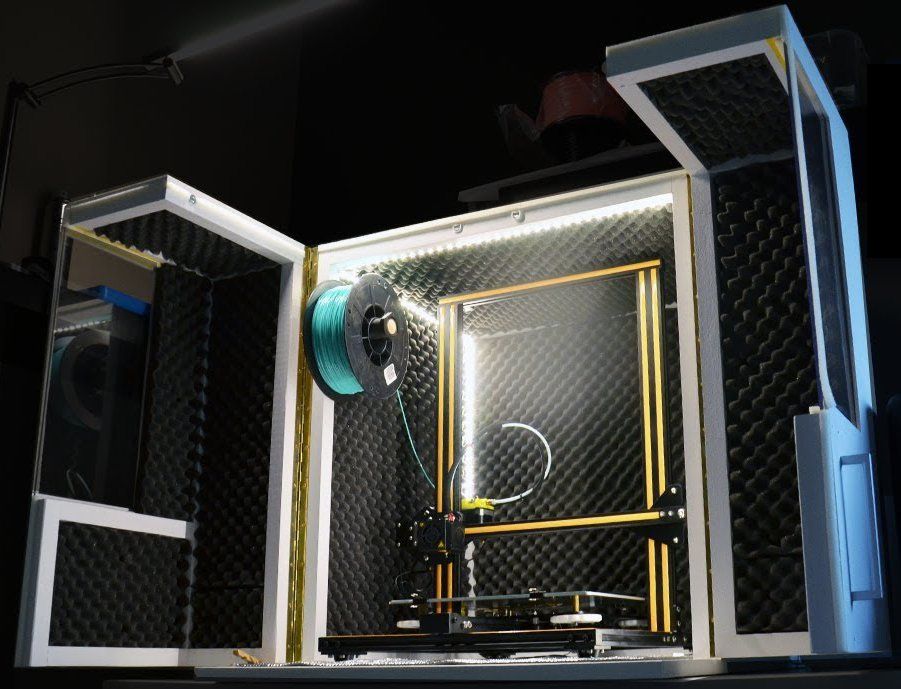
Kasa Smart HS100 WiFi Smart Plug, Classic 1-Pack, White
Check PriceCalculating the electricity
cost of your 3D printerAfter figuring out how much energy your 3D printer uses, you can calculate the electricity cost. In this calculation, there are three numbers that are relevant. The first is the energy usage (measured in Watts), the second is the price of electricity in your area and the last is the number of hours you run the printer.
Taking a 3D printer energy usage of 100 Watts while printing (a good estimate based on our earlier calculations) and an electricity price of $0.13 per kWh (the current US average) gives an hourly cost of 1.3 cents an hour (0.1 kWh * $0.13/kW = $0.013).
So for a print that takes two-and-a-half hours, you end up with a total electricity cost of 2.5 * 1.3 = 3.25 cents. Not much.
Knowing the energy cost, you can calculate how much to charge for 3D prints if you decide to sell them. There are other costs involved as well, of course, like that of filament and wear and tear on the machine.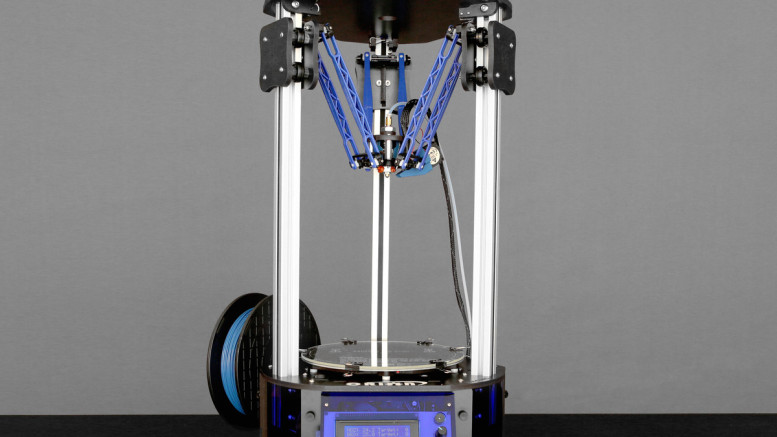
Comparing 3D printer power consumption to other devices
If all these numbers are a bit too abstract, it can be helpful to compare them to those of other appliances in and around your home. A bit of context typically makes energy consumption easier to understand.
| Appliance | Energy Usage |
|---|---|
| 46 Inch LED TV | 60-70 Watts |
| Incandescent light bulb | 60-100 W |
| 3D printer (while printing) | 50-150 W |
| Typical desktop computer | 100-450 W |
| Inverter air conditioner | 1300-1800 W |
| Space heater | 2000-5000 W |
As you can see in the table above, the power consumption of a typical 3D printer is not that much compared to other household appliances. And based on the calculations we did, you know that electricity costs are fairly negligible if you only run the printer for a couple hours a day.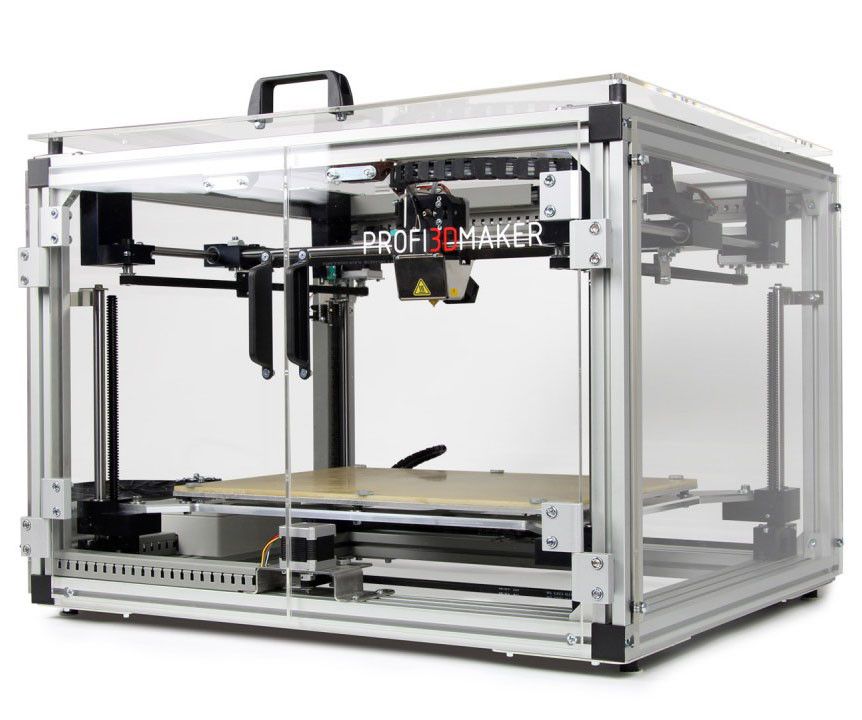
It might be a different story if you have a beast of a 3D printer that runs 24/7, but for something like an Ender 3, the electricity cost is for most people nothing to worry about.
How to reduce the power consumption of your 3D printer
While ordinary 3D printers do not use much energy, it can still be a good idea to reduce power consumption as much as possible. Not only does this lower electricity costs further, but it also comes with secondary benefits such as reduced warm-up time.
Allow me to explain.
Most power consumption reduction methods are centered around keeping as much heat in the (components of the) 3D printer as possible. Less heat escaping means that more energy can be put towards raising the temperature. As a result, well-insulated components reach their target temperatures quicker and are able to reach higher temperatures.
These are the most common methods you can use to make your 3D printer more efficient.
Adding an enclosure to your 3D printer
3D printer enclosures reduce energy usage by trapping heat inside, but they also provide additional benefits.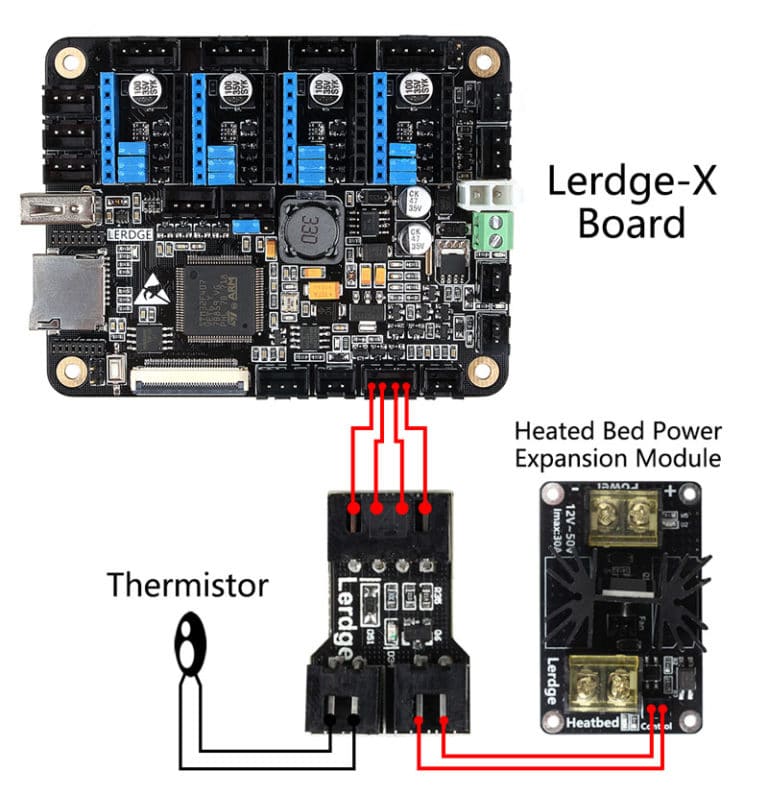 For example, the heated chamber they create prevents warping of filaments (useful for ABS filament, for example), they keep potentially harmful 3D printing fumes inside, and they reduce the sound levels of your 3D printer.
Enclosures are fairly easy to construct. If you look online, you can find many tutorials that show you how to make an enclosure from IKEA furniture or simple wooden frames. Alternatively, you can just buy an aftermarket enclosure for your specific printer online.
Recommended:
9 Amazing DIY 3D Printer Enclosure Ideas
Even better would be to buy a fully enclosed 3D printer from the start, but these are more costly than your typical open-frame 3D printer with the same build volume. While the reduction in power consumption certainly won’t make up for this price difference, the other benefits of the enclosure might.
Recommended:
The 9 Best Enclosed 3D Printers
Insulating the heated bed
As you now know, a 3D printer’s heated print bed is responsible for the majority of the printer’s power consumption. Its large surface area allows for a lot of heat to escape to the surrounding air. Print cooling fans continuously blowing over its surface do not help either.
A good way to reduce the energy consumption of a heated bed is to cover its underside with a layer of insulation material. Good options are a self-adhesive aluminum insulation mat or a cork sheet. Both materials are capable of handling the highest temperatures that heated beds can reach.
You will find that afterwards the bed heats up a lot quicker than before. With less energy escaping to the surroundings, there is much more power available to get the bed up to temperature. Especially beds powered by DC current (from the 3D printer power supply) can benefit from this, as they tend to be underpowered.
Insulating the hot end
Hot end heating elements have an equally difficult job at staying at the right temperature. While they do not have a lot of surface area, they do need to continuously pump energy into filament and deal with cool air from print cooling fans drawing away heat.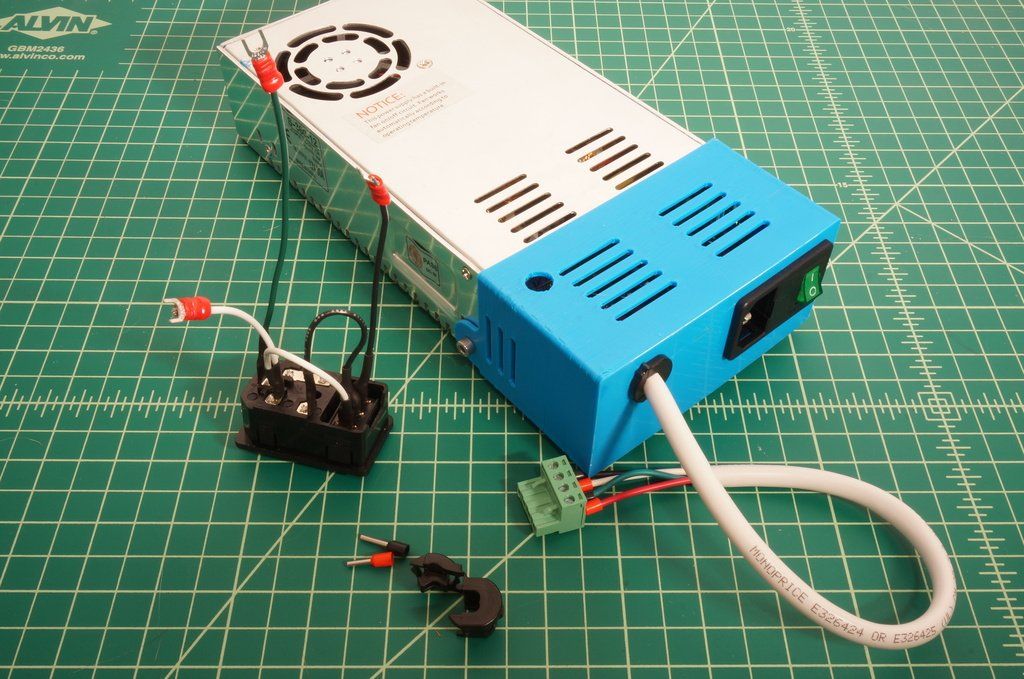
Adding insulation is the best way to reduce energy usage of a hot end. There are several off-the-shelf products available that do this. You can find the most popular ones as silicone nozzle covers or silicone socks.
Reducing print time
Another way of reducing 3D printer power consumption is to simply reduce the amount of time that 3D prints take up. You can do this by increasing printing speed, reducing infill, using faster infill patterns or printing with thicker layers.
For example, while the hexagonal/honeycomb pattern is the strongest infill pattern, it also takes a long time to 3D print. Unless you specificially need its strength or aesthetics, it is often better to go for something simpler and faster to print.
These measures do come with sacrifices (decreased print quality, less strength in 3D prints), so setting these up is a matter of finding the right balance. If you want both a high printing speed and high quality prints, a CoreXY 3D printer can be a great option for you.
Conclusion
Ordinary 3D printers do not use much electricity, only about 50-150 Watts while printing. This is about the same as one or two incandescent light bulbs. There are many different 3D printers and print settings available, however, so for a more accurate number you need to make some calculations or measurements.
There are several methods you can go about calculating the electricity usage of a 3D printer. One of the quickest ways is to look at the power supply rating. This does not give you an accurate number, however, only an absolute maximum. For a more precise estimate, tallying the power consumption of all electrical components works better.
To figure out the exact amount of electricity a specific 3D printer uses, you need to use a device like a Kill-a-Watt or a Wi-Fi smart plug. These give you a 100% accurate measurement and remove any guesswork.
Once you know how much power your 3D printer uses, you can combine it with local price of electricity to figure out the hourly cost of running your printer.
If you want to lower a 3D printer’s power consumption, you can insulate its heat generating components to save on electricity. Enclosing the entire printer in an enclosure is a good solution too.
Power Management Module
Technician
Follow author
Follow
Don't want
9
After updating the firmware on my Sapphire Pro, it became possible to control the printer's power off via G code. This allows, for example, to automatically turn off the printer at the end of printing, and not leave it to buzz with fans all night.
I formed the following input requirements for myself:
- On-off button without fixing
- Execution delay by pressing (on/off) - 0.5 sec
- Switching of capacitive load - switching printer power supply control
The question is what to choose a 555 timer with strapping or a minimal microcontroller from the field of religion. So I'll just tell you what and how it works.
Power unit consists of 2 keys. One is made on a triac, the second is parallel to a relay. First, the triac turns on, then after 0.2 seconds the relay. Thus, the relay contacts do not burn, and the triac is only loaded when turned on. Shutdown occurs in reverse order.
The triac is controlled through an optical pair, the activation of which is synchronized with the transition through 0 of the mains voltage, therefore there are no critical currents when the discharged load capacitor is switched by the triac in the maximum voltage phase.
Tiny13 is used as a control microcontroller. Port PB3 controls the activation of the triac, and PB4 controls the relay. The reset button B1 is not required for installation and was used only at the stage of debugging the firmware.
The rising OFF_REQ signal causes an interrupt and the microcontroller performs a load off procedure. Thus, if OFF_REQ_IN hangs in the air, the optocoupler transistor is closed, and OFF_REQ has a logical 1 and does not affect the operation of the microcontroller algorithm in any way. But if a printer is connected, OFF_REQ_IN will receive potential, and the optocoupler transistor will open, OFF_REQ will be logic 0. The front will now occur if potential is lost on OFF_REQ_IN or OFF_REQ_IN is pressed to the ground under the control of the printer motherboard.
The power on/off button is connected between the MISO signal (PB1) and ground and is processed by software: if 0 is held for more than 0.5 seconds, the procedure for turning the load on or off is called (described earlier).
Single-sided printed circuit board. On the upper side there is a standby power supply, a triac, a relay, a load connector, a programmer connector (aka on-off buttons), a connector for connecting to the motherboard. On the bottom side are SMD components: key binding, microcontroller.
The size of the board allows it to be installed on the side wall of the main power supply unit of the printer. Photo in the first post on the topic.
Firmware with source code, gerber files, svg for film printing: https://github. com/vyacheslav-shubin/power_control_firmware
power control
Follow author
Follow
Don't want
9
More interesting articles
levscha
Loading
11/22/2022
1748
fourteen
Subscribe to the author
Subscribe
Don't want
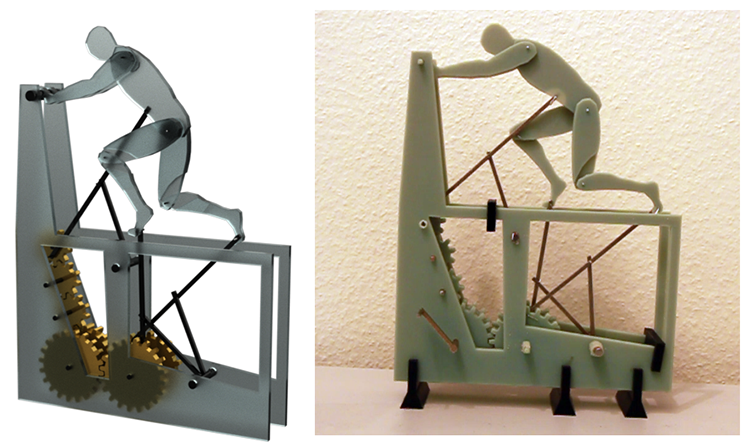
In the previous publication (link), the collective design of the experimental board is described. This project is about...
Read more
eight
Subscribe to the author
Subscribe
Don't want to
Hi all!
My first post, so please save your slippers)
Zaden. ..
..
Read more
xedos
Loading
04/25/2016
335847
207
Subscribe to the author
Subscribe
Don't want
Good afternoon Dear readers!
GCODE: Buns from PavlushkaAfter writing the previous...
Read more
Technical data 3D printers SLS series Fuse
Printer
Fuse 1
Fuse 1+ 30W 9000 9000
Technology
Selective sinter
Castle grade
Clock (W x D x H)
165 x 165 x 300 mm
6.5 x 6.5 x 11.8 in.
165 x 165 x 300 mm
6.5 x 6.5 x 11.8 in.
Layer thickness
110 µm
0.004 in.
110 µm
0.004 in.
Laser Type
Ytterbium Fiber Laser 10 W
Ytterbium Fiber Laser 30 W
Laser Spot Size (SFWH)
20000 µm0.
 0079 in.
 247 µm
0.0097 in.
Process Chamber
Modular, compatible with Fuse 1 and Fuse Sift generation 3D printers
Modular, compatible with Fuse 1 and Fuse Sift generation 3D printers
Technology
Selective laser sintering
Selective laser sintering
Print volume (W x D x H) 905 x 03 905 x 30 cm
6.5 x 6.5 x 11.8 inches
16.5 x 16.5 x 30 cm
6.5 x 6.5 x 11.8 in.
Layer Thickness (Axis Resolution)
110 µm
0.004 in.
110 µm
0.004 in.
Hopper capacity
17.8 liters
14.5 liters
Dimensions
68.5 x 64.5 cm
27 x 25.4 x 41.9 inches
68.5 x 64.5 x 106.5 cm
27 x 25.4 x 41.9 inches
Support Structures
Without Support Structures
Without Support Structures
Design Specifications/CAD
Minimum access dimensions (W x D x H)
125. 5 x 149.5 x 187 cm
49.4 x 59.0 x 73.6 inches
125.5 x 149.5 x 187 cm
49.4 x 59.0 x 73.6 inches
Printer dimensions (W x D x H)
64.5 x 68.5 x 107 cm (165.5 cm with rack)
25.4 x 27 x 42" (65.0" with shelving)
64.5 x 68.5 x 107 cm (165.5 cm with shelving)
25.4 x 27 x 42" (65.0" with rack)
Recommended working area (W x D x H)
145.5 x 149.5 x 167.5 cm for access to the front and sides of the printer.
145.5 x 149.5 x 167.5 cm for access to the front and sides of the printer.
Shelving dimensions (W x D x H)
59.6 x 60 x 58.4 cm
23.5 x 23.6 x 23 inches
59.6 x 60 x 58.4 cm
23.5 x 23.6 x 23 in.
Weight
114 kg (excluding chamber and powder)
251.3 lb (without chamber and powder)
120 kg (without chamber or powder)
265 lb (excluding chamber and powder)
Start Time
< 60 minutes
< 60 minutes
Operating Conditions
18-28ºC
68-82ºF
18-28ºC
68-82ºF
Internal temperature
Up to 200ºC
Up to 392ºF
Up to 200ºC
Up to 392 ºF
Temperature control
Quartz tubular heating elements
Positive temperature coefficient (PTC) cartridges
Quartz tubular heating elements
Resistance air heater
Ventilation
Two-stage pressure controlled filtration
(replaceable HEPA and carbon filters)
Interface for connection to an external inert gas supply
Two-stage filtration with pressure control
(replaceable HEPA and carbon filters)
Power requirements
EU: 230 VAC, 7.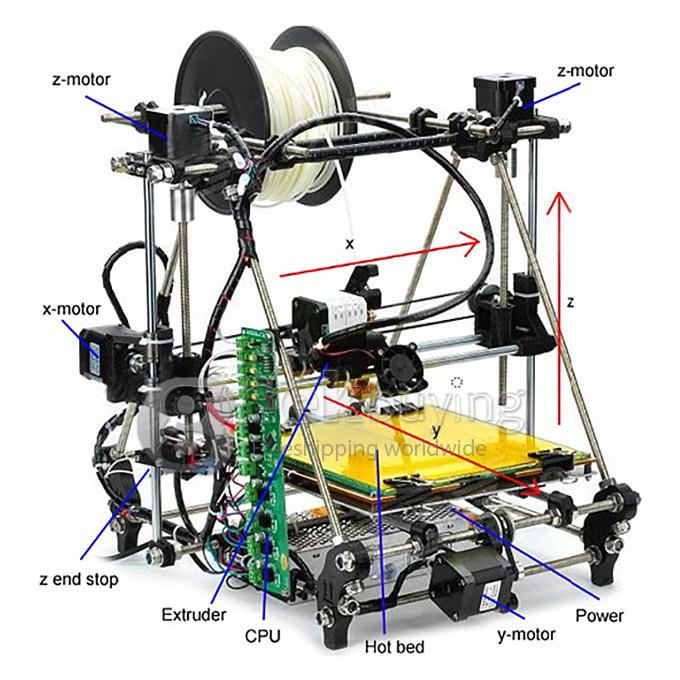 5 A (dedicated circuit)
US: 120 VAC, 15 A (dedicated circuit)
EU: 230 VAC, 7.5 A (dedicated circuit)
USA: 120 VAC, 15 A (dedicated circuit)
Galvanometers
Formlabs Custom
Formlabs Custom 2nd Generation
Laser specifications
Ytterbium fiber laser
Complies with IEC 60825-1:2014
1070 nm
Maximum 10 W
Beam Divergence 4.01 mrad (nominal, full angle)
Ytterbium Fiber Laser
Complies with IEC 60825-1:2014
Wavelength 1070 nm
Maximum 30 W
Beam Divergence 3.24 mrad (nominal full angle)
Laser spot size (FLS)
200 µm
0.0079 in.
247 µm
0.0097 in.
Emissions Information
The Fuse 1 printer is a Class 1 laser product. class 1 limits.
Network interfaces
Wi-Fi (2.4 GHz + 5 GHz )
Ethernet (1000 Mbit)
USB 2.0
Wi-Fi (2.4 GHz + 5 GHz)
Ethernet (1000 Mbit)
USB 2.