3D printer platform adhesion
Rafts, Skirts, and Brims Tutorial
Raft
Skirt
Brim
This tutorial will help you understand the differences between rafts, skirts and brims. All three techniques provide a starting point for your 3D printed models, but they have different uses and advantages.
Rafts
A Raft is a horizontal latticework of filament that is located underneath your part. Your 3D printed part will be printed on top of this raft, instead of directly on the build platform surface. Rafts are primarily used with ABS to help with warping and bed adhesion, but they can also be used to help stabilize models with small footprints, or to create a strong foundation on which to build the upper layers of your part. The raft included in Simplify3D has been optimized over years of testing on hundreds of different machines to ensure easy separation and a high-quality surface finish on the bottom of your part. Once the print is complete, the raft effortlessly peels away from the print and can be discarded.
For our example today, we are going to add a raft to the popular “Dodecahedron” model. First, download and import the STL file from here. Then click “Edit Process Settings” in Simplify3D and place a checkmark beside the “Include Raft” option. The software also includes many settings that allow you to customize the raft for faster print times or improved adhesion. To adjust these setting, click on the “Show Advanced” option in the bottom left of this window and then go to the Additions tab. This tab contains the settings for the raft, as well as the skirt and brim which we will discuss shortly. An explanation of the important settings are given below:
- Raft Top Layers – The number of interface layers that are printed at the top of the raft. Your model will be printed on top of these layers, so you usually want at least 2-3 layers to ensure a smooth surface.
- Raft Base Layers – The number of extra-thick layers at the very bottom of the raft.
 These layers are printed slow and thick to ensure a strong bond to the build platform.
 - Raft Offset from Part – How wide the raft will extend beyond the edges of your part
- Separation Distance – This is an important setting that defines the height of the air gap between the raft and your part. Typically, having a gap of at least 0.1mm will help keep the part connected to the raft,
while still allowing for easy separation once the print is complete. - Above Raft Speed – Use this setting to customize the speed of the first layer of your part that is printed on top of the raft surface. Using a slow speed for this layer will also help the part stay attached to the raft during the print.
Adjust any of these settings and then click OK to save your changes. Click “Prepare to Print” to use the realistic pre-print simulation in Simplify3D to view an animated preview of the exact settings that you changed and how they will affect the print. Once you are happy with the changes, you can try running a test print on your 3D printer.
When the print is completed, remove the entire raft and model from the build platform. You can then grab the raft and begin to peel it away from the part, leaving a high-quality surface finish on the bottom of your print. Usually, this can be done by hand, but for extra delicate parts, you may want to use a thin spatula or tweezers to help with the removal. If you find you are having a difficult time removing the raft from the part, you can try increasing the raft separation distance or altering the other settings explained above.
Skirts
A skirt is an outline that surrounds your part but does not touch the part. The skirt is extruded on the print bed before starting to print your model. Skirts serve a useful purpose because they help prime your extruder and establish a smooth flow of filament. Observing the skirt also allows you to detect and adjust any leveling or adhesion issues before the actual model begins printing.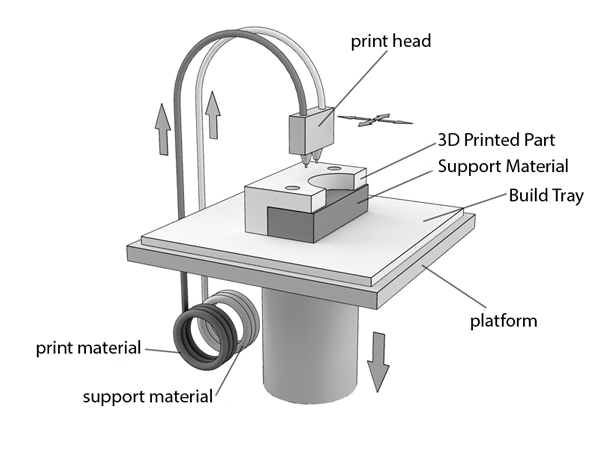
You can customize your skirt by adjusting the settings on the Additions tab. This allows you to adjust the skirt position, the amount of plastic that is primed, and even the extruder that is used for the skirt.
- Skirt Extruder – Choose the extruder that will be used to print the skirt. This allows you to prime different extruders at the start of your print. If you want to prime all of your extruders, select the “All Extruders” option.
- Skirt Layers – How many layers you want to include a skirt. Typically, 1 layer is enough to prime the extruder, but adding a 2nd or 3rd layer may help create a more robust skirt that can be peeled away from the bed easier.
- Skirt Offset from Part – How far away the skirt should be from the edges of your part
- Skirt Outlines – How many loops you want to print around the outline of your model. Increase this value if you need to prime your extruder more by extruding extra filament.
Brims
A Brim is a special type of skirt that is actually attached to the edges of your model. Typically, the brim is printed with a increased number of outlines to create a large ring around your part, similar to the brim of a hat. Brims are often used to hold down the edges of your part, which can prevent warping and help with bed adhesion. The Brim may be a preferred option to the raft (which also helps with adhesion), as the brim can typically be printed much faster and uses far less filament. Once the print is complete, the thin brim can be separated from the solid model and discarded.
Because the Brim is a special type of skirt, it uses many of the same settings explained in the previous section. To setup a Brim in Simplify3D, set the skirt offset to 0mm so that the brim will be touching the edges of your model. Then increase the number of skirt outlines to 5 or more to create a wide ring around your part. You can raise the number of outlines even further if you need to increase the surface area of the brim for extra adhesion. Now when you start your print, the brim will serve as both priming and an adhesion assistant!
After the print is complete, the thin brim should easily peel away from the solid part. If you find that the brim is attached too firmly, you could increase the skirt offset slightly to 0.1 or 0.2mm to add a small gap between the brim and the part.
Now you know 3 new techniques to help improve the foundation of your 3D printed parts! Next time you are struggling with adhesion, priming, or small delicate parts, you will know the exact technique to use.
More Tips to Improve Your Prints
If you want even more tips on how to improve your 3D printed parts, be sure to check out our extensive Print Quality Guide. This guide covers dozens of common issues and provides tips and suggestions for each one, giving you the knowledge you need to succeed.
View the Complete Article Library
How to Get the Perfect Build Plate Adhesion Settings & Improve Bed Adhesion – 3D Printerly
Getting the best build plate adhesion settings for many can get confusing, especially if you don’t have experience using some of these settings.
I decided to write an article to help the people who aren’t too sure what the settings do, and how to get them perfect for your 3D printing journey.
To get the best build plate adhesion settings, you should make use of a brim or raft to help secure your print to the build plate. You want to make sure your build plate temperature is set correctly for the material you are using. Increasing your Initial Layer Flow Rate can help improve adhesion.
Keep on reading through this article for some useful info on build plate adhesion settings and more.
What Types of Build Plate Adhesion Settings Are There?
There are three main types of Build Plate Adhesion settings that can help your 3D prints stick to the bed and come out more successfully. They are a: Skirt, Brim, and Raft.
Skirt
A Skirt is one of the more popular build plate adhesion settings and it simply extrudes an outline around your model to ensure the nozzle is ready to extrude cleanly.
You can set a specific number of Skirts, so 5 skirts would be 5 outlines around your model. Some people use this setting to level their 3D prints before the printing process begins.
According to some 3D hobbyists, it improves the effectiveness of the extruder by defining the print area. Personally, I use 3 Skirts on most of my prints if I’m not using a brim or raft.
Brim
A Brim adds a single layer of flat area around the base of the model to prevent warping. Since this provides an extra surface area, more material will stick to the build plate.
While it uses more material than the skirt option and takes a little more time, you are more than likely to get stronger build plate adhesion.
According to users, it is easy to remove, it doesn’t waste as much material, and it doesn’t affect the bottom layer finish of the 3D print.
Raft
This third build plate setting adds something like a thick grid that has a “raft” between the build plate and the model. It is the filament that is deposited directly on the build plate.
Use the Raft option if you will be working with materials that may have a higher chance of warping, like ABS filament or for larger 3D prints.
Most users mention its ability to give a stronger first layer and overall consistent print output.
As a fourth and rarely used option, you may disable the adhesion types setting to None.
If you make a mistake with your build plate adhesion setting, there is a chance that the print will become loose and that it will fail, especially if you are using a surface like a glass build plate that doesn’t have a naturally textured surface.
To know more about the proper use of Skirt, Brim, and Raft settings in 3D printing, check out the video below for a better visual.
How Do You Increase Build Plate Adhesion?
To increase build plate adhesion, you should ensure the following:
- Make sure your print surface is smooth, clean, and ready.
- Check if there are no greasy liquids, oils, or even fingerprints on the build surface.
- Regularly clean the build surface
- If you use tape or any other adhesion sheet on it, it should be regularly replaced.
- Use soap and water or an alcohol cleaner to remove stubborn stains and glues.
You should correctly level the build surface. To do this, adjust the distance between the nozzle and the build plate. If the distance is too close, your nozzle will find it hard to extrude because there is not enough of a gap for the filament to come out.
If it is too far, the heated filament won’t squash down into the build plate for better adhesion, and would rather lay down softly. Even if you use glue or tape, the bed adhesion would still be weak.
You should set the correct bed temperature in your slicer. What most users do is some trial and error to see which temperature works best for their specific filament. You can adopt that method in setting your bed temperature.
Different types of filament can require lower or higher bed temperatures.
Other users suggest the use of an enclosure to keep the temperature stable. Keep in mind that some materials require a high build plate temperature and they will only work well in a stable printing temperature.
If the temperature of the environment is cooler than the build plate temperature, it can lead to the print’s separation from the build plate during printing.
It might not work as well with PLA since it is a lower temperature filament, but you can use an enclosure and slightly open a gap to decrease the operating temperature in the enclosure.
These few suggestions are proven to work by several printer hobbyists using it for their 3D prints, and they can work for you too.
What is the Best Type of Build Plate Adhesion?
The best type of plate adhesion for smaller prints that don’t need a lot of adhesion is around 3 Skirts. For medium prints that need a little more adhesion, a Brim is the best build plate adhesion type. For larger 3D prints or materials that don’t stick too well, a Raft works really well.
Best Settings for Build Plate Adhesion
Best Build Plate Adhesion Settings for Skirts
There are only three Skirt settings in Cura:
- Skirt Line Count
- Skirt Distance
- Skirt/Brim Minimum Distance Length
You’ll usually only want to adjust the Skirt Line Count to your desired number of outlines, but you can opt-in to change the Skirt Distance which is the distance between the Skirt itself and your model. It stops your model from attaching to the Skirt, being 10mm at default.
The Skirt/Brim Minimum Distance Length simply makes sure you are using enough of a distance to ensure your nozzle is properly primed before printing your model. If your Skirt doesn’t reach the minimum length set, it will add more contours.
You shouldn’t have to adjust this setting either for the best Skirt settings.
Best Build Plate Adhesion Settings for Brims
The Brim has five settings in Cura:
- Skirt/Brim Minimum Distance Length
- Brim Width
- Brim Line Count
- Brim Distance
- Brim Only on Outside
The Skirt/Brim Minimum Distance Length defaults to 250mm, a Brim Width of 8mm, a Brim Line Count of 20, a Brim Distance of 0mm and Brim Only on Outside checked.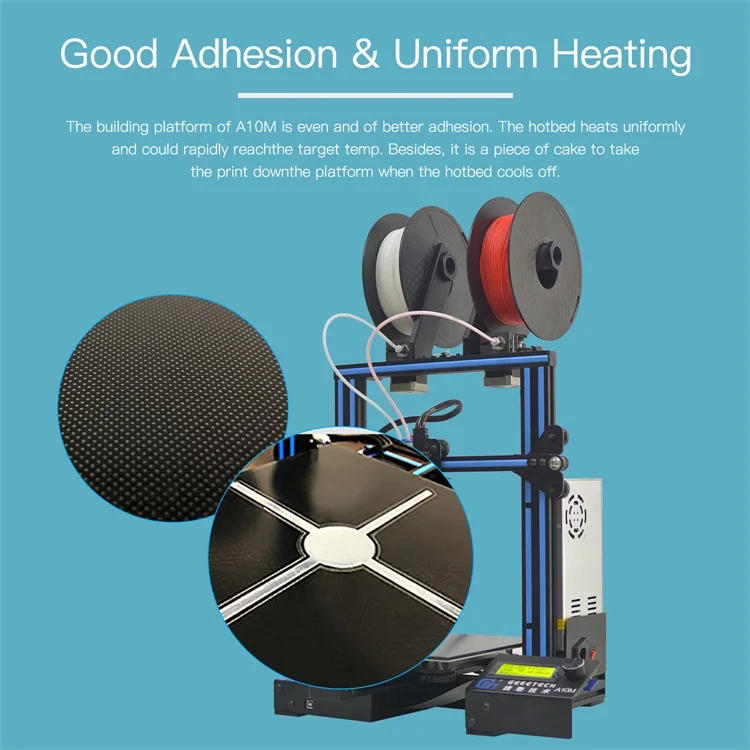
These default settings work really well for Brims so you shouldn’t have to adjust any of these settings. A larger Brim Width will give you better build plate adhesion if desired, though if you have a large print it can reduce the effective build area.
The Brim Only on Outside setting is better to be left on because it stops brims from being created inside the model where there are holes.
If you are having problems with this, you can actually use a Skirt, but put the Skirt Distance at 0mm to attach to the outside of your model.
Best Build Plate Adhesion Settings for Rafts
The Raft has several options:
- Raft Extra Margin
- Raft Smoothing
- Raft Air Gap
- Initial Layer Z Overlap
- Raft Top Layer Settings – Layers/Layer Thickness/Line Width/Spacing
- Raft Middle Layer Settings – Layer Thickness/Line Width/Spacing
- Raft Base Layer Settings – Layer Thickness/Line Width/Spacing
- Raft Print Speed
- Raft Fan Speed
Your raft settings don’t usually need much tweaking unless you are doing some advanced level stuff. The main three settings you may want to change are the Raft Extra Margin, Raft Air Gap & Raft Top Layer Settings.
The Raft Extra Margin simply increases the size of the raft around the model, leading to an increased level of adhesion for your prints. Do keep in mind that it will take up more build space on your print bed.
It also has the added benefit of reducing the warping effect on the raft itself.
The Raft Air Gap is very useful and what it does is allow the raft to be broken off from the print by providing a gap between the raft and the model. It defaults at 0.3mm but increasing it to 0.4mm works better for me to remove the prints nicely.
You don’t want the gap to be too far since it can result in the model letting go of the raft during the printing process.
The Raft Top Layer Settings are done pretty well with default settings, though if you are experiencing issues with rough top layers, you can increase the default value of 2 to 3 or 4, or increase the Raft Top Layer Thickness.
What is the Difference Between a Raft & a Brim?
The difference between a raft and a brim is that a raft is a series of layers that goes under the model you want to 3D print, while a brim is a single layer flat area that lies along the outside of the model. A raft provides better build plate adhesion, while a brim still works but with less adhesion.
Rafts can sometimes be easier to remove than a brim because there is more material attached to remove, while a brim is a single layer which is prone to breaking off in pieces.
It’s a good idea to use tools that can get underneath the model to remove the raft or brim from your model. Most people choose to use rafts rather than brims, but it really depends on the shape and size of your model, as well as what material you are printing with.
Materials that are known to warp a lot like ABS can benefit more from a raft rather than a brim.
How to Improve Build Plate Adhesion with PLA, ABS, PETG
In order to improve build plate adhesion for PLA, ABS, and PETG, you should level your build plate, optimize your build plate temperature, use an adhesive on your build plate, and adjust slicer settings such as Initial Layer Speed.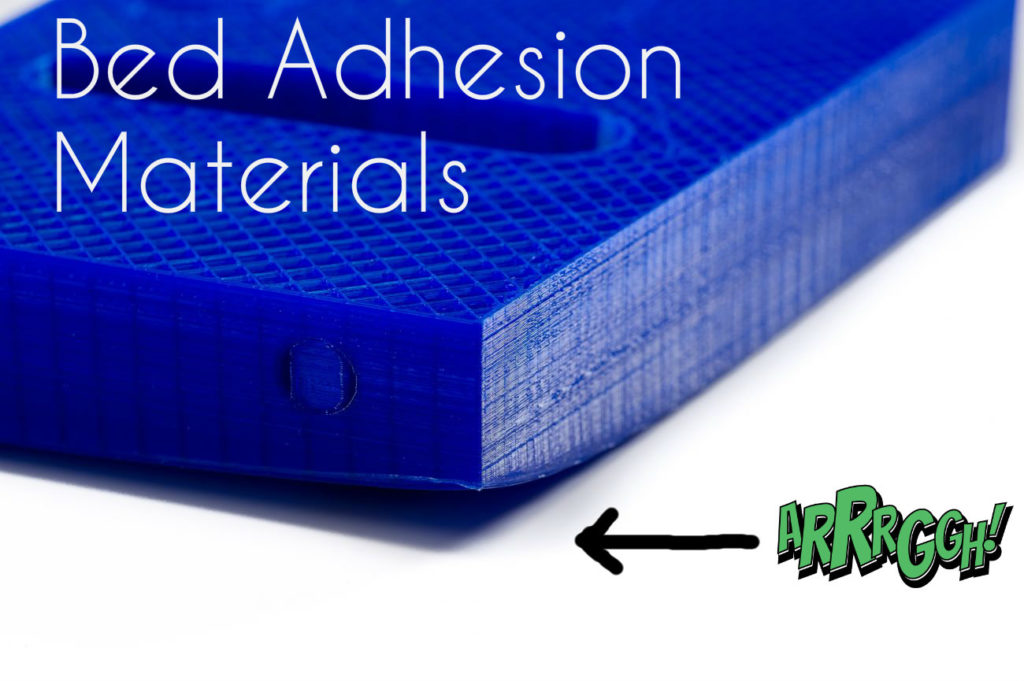
You can avoid plenty of print failures halfway through the printing process by making sure your 3D prints are secure at all times.
Level Your Build Plate
The first and most important step to improve your build plate adhesion is to make sure all sides of your bed are properly leveled. Even if you have the best slicer settings, if your build plate isn’t even, you are likely to run into adhesion troubles.
There are many methods that people use to level their print bed, but the video below shows the most simple and effective method to do it.
Optimize Your Build Plate Temperature
It’s a good idea to test different build plate temperatures so you can figure out what works best with the material you are using. Some heated beds don’t heat very evenly so increasing the temperature may be beneficial to getting better results.
Your filament should provide a recommendation of good build plate temperatures to use for ideal results, but you still want to test different ranges.
In addition to this, using an enclosure can help to stabilize and secure the temperature in the printing environment rather than having fluctuations and swings. Rapid cooling of material is what causes warping, leading to bad build plate adhesion.
One user suggested that turning their cooling fans to better direct at the 3D print can help get better print quality, but the results may vary depending on your choice of filament.
Use Trusted Adhesives
Using an adhesive substance on your print bed is what many 3D printer professionals do to keep models stuck to the build plate, and to reduce warping on the edges of prints.
Layoneer 3D Printer Adhesive Bed Glue is a well-respected and trusted product that works really well for getting great adhesion to the print bed. It’s long-lasting so it doesn’t require application after every print, meaning it costs just pennies per print.
You have a no-mess applicator so it doesn’t accidentally spill, and you even get a 90-day manufacturer guarantee, where you can get a 100% money-back refund if it doesn’t work for you.
Adjust your Slicer Settings
As mentioned above, you could create a skirt, brim, or raft for your model.
One lesser known technique to improve build plate adhesion is to use Anti-Warping Tabs in Cura which is similar to a raft, but much more controlled and precise. You can adjust the size of the tabs, as well as the X/Y distance and number of layers.
These should be easy to remove after your model is printed, but doesn’t take up much time or material to create.
Having a slower Initial Layer Speed is ideal for better build plate adhesion for PLA, ABS & PETG which defaults at 20mm/s in Cura. One thing you can do is increase the Initial Layer Flow percentage to push the first layer material into the build plate.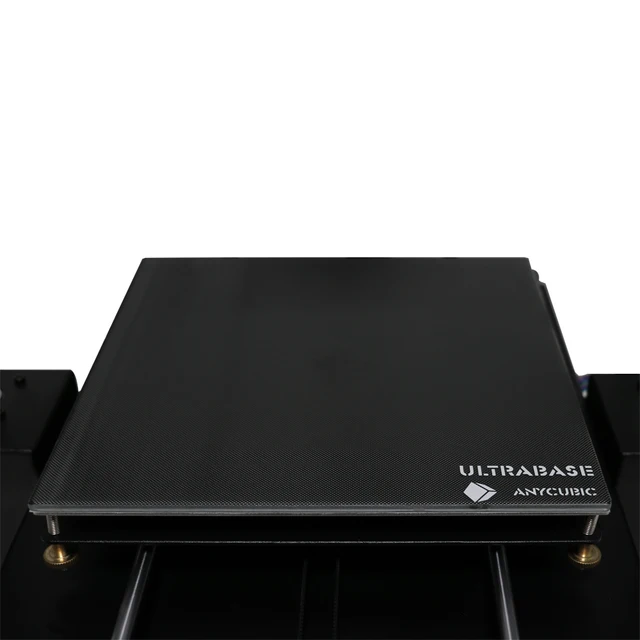
everything you need to know
Many 3D printer owners experience parts coming off the table during 3D printing. Let's take a look at the causes and solutions.
What is adhesion?
The very concept of "adhesion" means the adhesion of surfaces of dissimilar bodies. In 3D printing, platform adhesion is the ability of the plastic that a part is made of to adhere to the surface of the stage during printing.
If the adhesion is insufficient, then the manufactured parts may be deformed or even come off the table. During 3D printing, the part must be firmly attached to the platform, and after completion, it should be easy to remove. Filament manufacturers typically recommend adhesives for their filaments, and 3D printer manufacturers offer worktables in aluminium, glass, stainless steel, or even with specialty coatings. All this helps the plastics stick better during printing, but there are no working surfaces that are equally well suited for all types of plastics.
Also, do not forget about thermal expansion, which causes a change in the dimensions of manufactured parts at different temperatures. The difference in temperature between the bottom and top of a part can cause the edges of the part to peel off during 3D printing. This mainly applies to materials such as ABS, which require a heated worktable to work with. When printing with these materials, the layers need to cool down a bit to be able to build a 3D object at all, but not so much as to cause peeling at the edges.
In this article we will look at what affects adhesion and how to solve many problems in terms of adhesion of products to work surfaces.
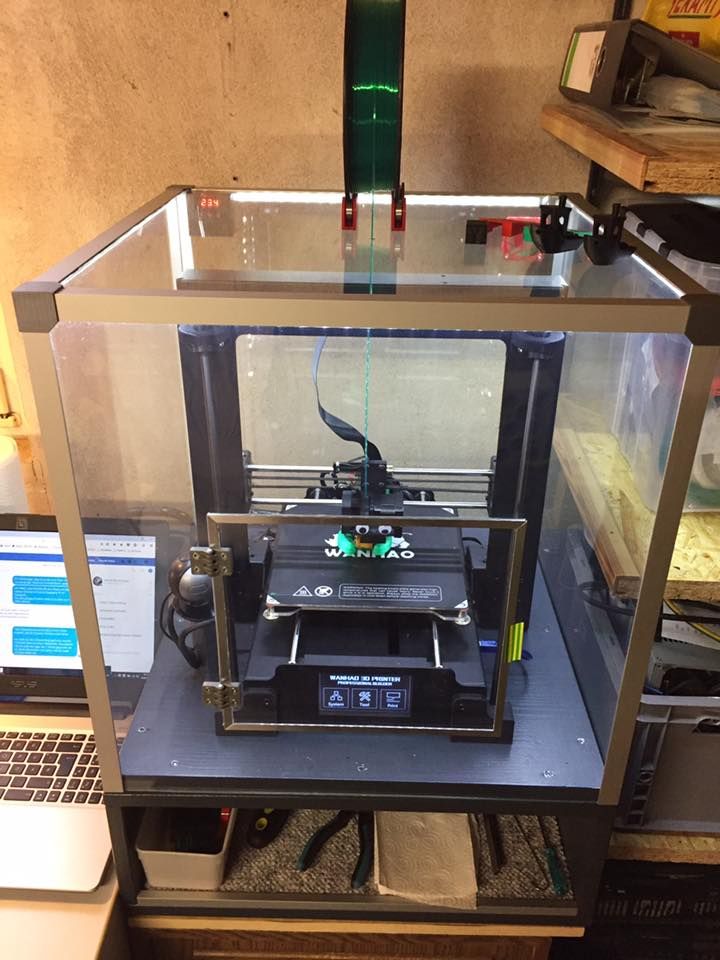
3D Printer Enclosed Chamber
For printing on materials with high heat shrinkage, the best option is to use 3D printers with an enclosed chamber that prevents drafts and retains heat. Many printers are equipped with an active chamber heater that maintains the desired temperature and does not allow the parts to cool. A uniform background temperature during 3D printing reduces warping and ensures better adhesion.
Owners of open printers are left to come up with various devices (for example, boxes) that cover the 3D printer to keep heat, or build heat-retaining walls around the printed model, which increases printing time and filament consumption.
First coat adhesion
The first thing you should pay attention to is the adhesion of the first layer. This is one of the most common problems faced by almost all printers. If the first layer is laid unevenly, then the percentage of rejects for the rest of the part increases very much, so it is very important to solve the issue of adhesion of the first layer before 3D printing. In most cases, the problem is solved by calibrating the work table and adjusting the distance between the nozzle and the work surface.
It is important to correctly set the distance between the nozzle and the stage surface
Brim and Raft methods
For better adhesion of the product to the working surface of the table, in the print settings it is often necessary to create additional elements - the substrate or the frame of the model, which help to keep the manufactured part on the table. Brim or Raft increase the contact surface of the plastic with the work surface around the lower layers and thereby increase traction.
Underlays or Rafts consist of several layers and are horizontal grids of filament located under the model. The raft is used as a base for the first layers of the product and is designed to increase the level of adhesion. In addition, the raft helps to level the surface of the table: if there are irregularities on the surface, they are leveled to a certain extent by the substrate, and the model is printed already on a flat base. Another advantage of rafting is that it reduces the chance of problems due to too much or too little gap between the nozzle and the table when laying the first layer.
Brim is used to stabilize small patterns or "islands" (separated areas of the printed product). Brims increase the contact area and help the model stay on the table if it comes into contact with the surface in small areas.
Worktable temperature and adhesion promoters
After calibrating the platform and adjusting the gap between the nozzle and the surface of the table, let's move on to the next question. The next reasons for poor adhesion may be the wrong stage temperature (if the 3D printer has a heating option) and the wrong selection of adhesion promoters for a particular filament.
Working stage temperature selection
One of the common causes of poor adhesion is the wrong stage temperature selection for a particular material. When the molten filament is applied to the table and then cools, deformation occurs. If the temperature of the stage is incorrectly selected, the outer edges of the printed product are compressed, and we get warpage: the edge of the product comes off, clings to the nozzle, and the product completely comes off the platform.
Usually, 3D printing filament manufacturers list the recommended heating temperature for the stage on their website or boxes. For the most common materials, you can use average values.
Examples of worktable temperatures for some materials:
- PLA: 60°C
- ABS: 100-110°C
- PETG: 85°C
- Nylon: 100°C (depending on material composition) )
- Polycarbonate: 110°C (the higher the temperature, the better)
Worktable temperatures for each manufacturer's plastic may vary. You can choose the optimal temperature only empirically.
Adhesion agents
To increase adhesive properties and reduce the risk of damage to the glass surface of the desktop, additional agents are often used, such as varnish or glue for 3D printing, PVA glue, stationery glue stick, dissolved ABS plastic (so-called "ABS juice" ), blue tape, etc. One tool for printing all types of plastics will not be enough. In our article, we will not consider such folk remedies as beer or sugar syrup, but will focus on more traditional methods.
Basic adhesives:
Varnish or adhesive for 3D printing
The days of hair sprays are long gone, and now almost no one uses them due to low efficiency. More effective adhesives for 3D printing have come to replace.
Typically, 3D printing lacquers and adhesives are formulated to take into account the properties of different filaments and allow the first layer of the printed model to be reliably adhered to the worktable. Simply put, these are universal tools suitable for working with multiple types of filaments.
There are already quite a few manufacturers of 3D printing varnishes and adhesives on the market in various volumes and for any budget. It's not worth saving - one bottle will be enough for several months of printing, and you will save your nerves and time spent on reprinting damaged parts.
Easy to use: spray varnish or glue on the platform and spread it evenly over the surface with a clean, soft cloth.
ABS juice
Composition for those who like to save money or who do not have glue or varnish on hand. It is made simply: finely chopped ABS rod or the remnants of a previous printing with ABS plastic are immersed in acetone and after a few hours a thick solution is obtained that can be applied with a brush even on a cold platform.
This method is very reliable as an additional adhesive, but acetone evaporates during 3D printing and creates an unpleasant odor.
PVA glue, stationery glue stick
PVA glue is applied to the work surface with a brush and rubbed until a uniform thin layer is obtained. As a rule, when hardening, the glue becomes transparent. After drying, you can start 3D printing. The method is not bad, but the reliability of such a method is doubtful due to the fact that not all PVAs work well.
Stationery glue stick is mainly used when there is nothing else at hand. The most popular option is Kalyaka-Malyaka glue. The glue is applied in one layer, after the platform cools down, the part is easily separated, and the glue itself is easily washed off the glass and from the printed part.
Kapton film, blue masking tape and Lomond film
Masking tape is more suitable for 3D printers without platform heating. The adhesive tape is carefully glued to the entire area of the table and allows you to print small details without heating the table.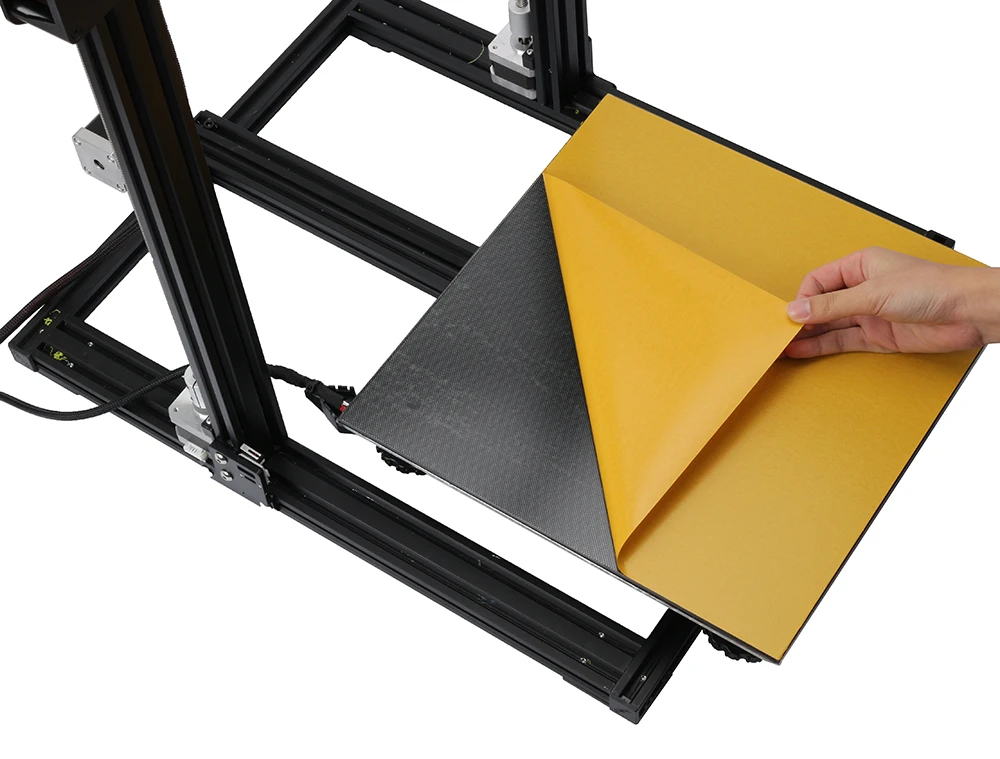 This option is especially suitable when working with PLA plastic, however, with an increase in the area of \u200b\u200bproducts, the edges of the parts can come off along with the adhesive tape, so the relevance of this method is limited. Kapton tape or Lomond film is more commonly used.
On Kapton tape, the lower surface (the sole of the product) is very smooth, the parts are well separated after cooling, but you can’t leave the product on the cooled table, as the plastic pulls the tape together, and air bubbles form under it. When 3D printing on Kapton tape, it is necessary to heat the platform and additionally smear the adhesive tape with glue. Suitable for 3D printing of medium-sized products.
Lomond film was popular until various adhesives appeared. After gluing, the top layer on the film itself must be washed off for better adhesion. Details after printing on such a film are quite difficult to tear off. Over time, bubbles also form under the film, so the film must be changed regularly. Suitable for 3D printing large items.
Additional Points to Remember
PLA is the least demanding polymer. For stable printing with polylactide, it is not necessary to treat the surface of the table with additional adhesives, a clean glass surface is sufficient. A prerequisite is that the platform is heated to 60°C. If the platform is not heated, then it is better to print using adhesive agents - varnish, 3D printing glue or blue tape for small parts.
PLA also loves airflow, so keep the fans on full.
ABS is highly shrinkable and needs help to better adhere to the surface. The main types of additional tools are varnish or glue for 3D printing, ABS glue, stationery glue stick, PVA glue.
When working with ABS, the platform must be heated to 100-110°C. It is advisable to use 3D printers with closed cameras that support high background temperatures. When 3D printing on open printers, it is necessary to use a heat-retaining cocoon around the model. Many slicers already offer this feature. Blowing of products made of ABS plastic is highly undesirable, as cracking of parts in layers and detachment from the working surface due to shrinkage can occur.
PETG is a very easy to work material that does not require high temperatures or fine print settings. Plastic has excellent adhesive properties and adheres very strongly to clean surfaces. On the other hand, high adhesion can lead to separation of pieces from glass tables when products are separated, so it is advisable to apply separating layers on the work surface - the same glue or varnish for 3D printing. This will help both separate products and prevent damage to the glass.
Flex has high adhesive properties, bonding well not only between coats, but also to work surfaces. Again, it is advisable to use 3D printing varnish or glue to avoid damaging the glass. Film coatings are not recommended.
In the case of composite materials , the choice of adhesive agents is mainly determined by the type of material serving as the basis. Usually recommendations for preparing for 3D printing with composites can be found on the manufacturer's website. If not, please contact technical support for advice.
For example, the FormaX composite from the X-line range is based on ABS plastic, but the properties of the composite material differ from pure ABS due to the presence of carbon fiber filler. Formax is not characterized by cracking in layers, but the composite requires the use of additional adhesive agents, so the manufacturer recommends using varnish or glue for 3D printing
Material storage and drying
The effect of moisture on filaments can be both cosmetic and functional. The most innocuous result of high humidity is a change in the textures of 3D printed products, although this is rarely limited to roughness alone (and haze when it comes to transparent plastics) and is usually accompanied by a decrease in interlayer adhesion and adhesion to the substrate. A more serious effect can be an uneven supply of plastic: water in a sufficiently wet filament boils when passing through the hot end, and the resulting steam leads to the appearance of bubbles in the material being laid and even to jerky extrusion with all the ensuing consequences in terms of quality and poor adhesion. Detailed instructions for storing plastics are available at this link, and for drying plastics - here.
That's all for now.
The Wiki on our site has separate, detailed articles about each of the filaments. How to print and with what settings. Come read here.
If you have additions or comments - we are waiting for your answers.
Regards, REC3D team.
Photos from the blogs of Sergey and akdzg are published in the article.
Diary of a 3D printer. Adhesion and fight against it
In this article I want to talk a little about adhesion, fight against it and also about delamination. What is adhesion in general?
Adhesion (from Latin adhaesio - sticking) in physics - adhesion of surfaces of dissimilar solid and / or liquid bodies. Adhesion is due to intermolecular interactions (van der Waals, polar, sometimes mutual diffusion) in the surface layer and is characterized by the specific work required to separate the surfaces. In some cases, adhesion may be stronger than cohesion, that is, adhesion within a homogeneous material, in such cases, when a tearing force is applied, a cohesive gap occurs, that is, a gap in the volume of the less strong of the contacting materials.
Generally speaking, adhesion is what makes the plastic adhere to the 3D printer table. The generally accepted main method of increasing adhesion is the use of a hot table. Hot extruded plastic adheres much better to a heated table than to a cold one, even if the plastic can theoretically stick even to a cold table. It doesn't matter if the table is hot or cold, it should be clean and fat-free. An additional plus is the use of special, including perforated glasses, for example, such as Anycubic puts on its printers and calls them Ultrabase. Yes, most plastics stick well to such surfaces. But there are times when this is not enough.
We all print with ABS in one way or another. He doesn't seem to have any supernatural powers.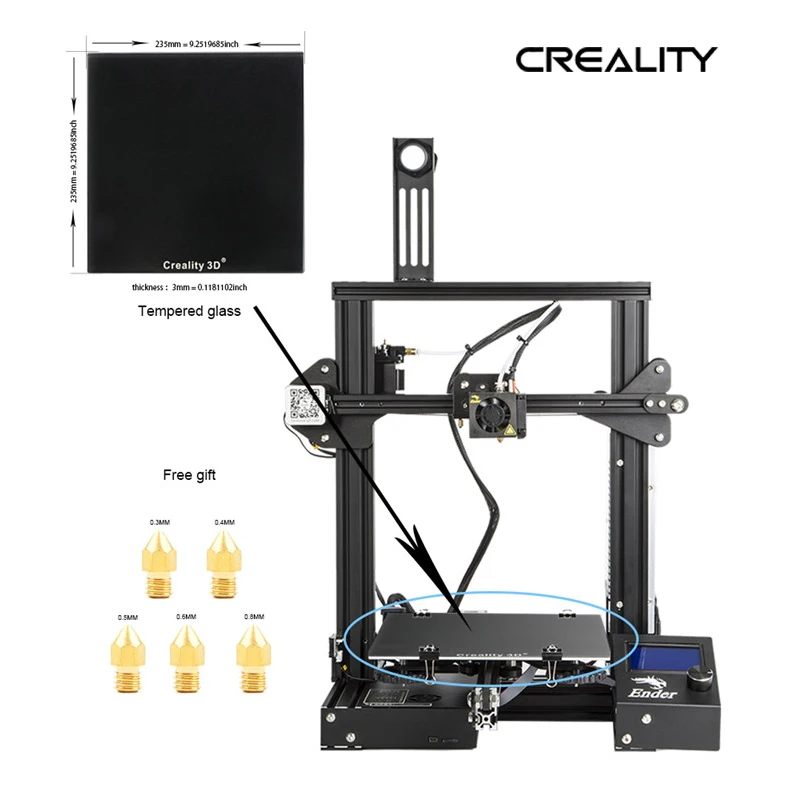 But there is one significant drawback - high shrinkage. Which negatively affects adhesion. The plastic cools down, shrinks (reduces in volume) and at some point just falls off the table. Sometimes it doesn't even need a draft. As a result, it becomes wildly disappointing when the part comes off after a few hours… time, plastic, electricity are wasted…
And here folk wisdom offers a bunch of options to enhance adhesion. From simple glue stick and BF-2 glue, ABS juice, hairspray, to some exotic ones, such as a secret sort of dark beer, tears of virgins, etc. I’ll make a reservation right away, the use of BF-2 and ABS juice is not acceptable for me, because. I print with a wide range of plastics, I don’t want to tear off BF-2 and ABS juice every time. Yes, and for the ultrabase it is harmful.
Since I am the proud owner of Anycubic i3 mega and Anycubic 4Max printers, most of the adhesion problems are solved by using the magic perforated Ultrabase glass in these printers. Most plastics stick to it admirably. So far, I have only encountered the fact that ABS plastic from bestfilament does not stick well. Despite the fact that I raised the temperature of the table to 120 degrees, the slightest snot was enough and everything fell off the table. And even the glue stick did not solve the problem. The only reliable solution for me was the use of a special liquid for wiping the table of a 3D printer:
How to use it? very simple. First, clean the table, wipe it with acetone / thinner / isopropyl alcohol. After that, spray on a cloth with this liquid. We wipe the table. And that's it. We heat the table to 110 degrees and print. ABS plastic can no longer be torn off. Really, it's a great brew. At the same time, she does not have to wipe the table every time. One wipe is enough for several prints.
Glue pencil never dreamed of such a thing. Yes, and it has a significant drawback. Evenly covering the table with glue stick is an art. If you do not spread it very carefully, then the plane of the part lying on the table will turn out to be ugly.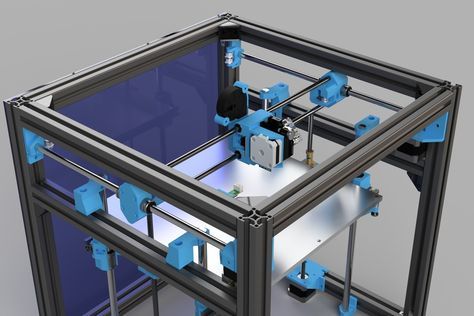 When using this adhesive, this problem does not arise.
Given that there is a lot of liquid in the bottle, it will last for a long time. And, probably, in fact, it will come out cheaper than using a glue stick. But the result is beyond praise.
True, adhesion has a very unpleasant reverse side. Many heard and many printed with such plastic, which is called PetG. So this plastic periodically exhibits the property of excessive adhesion to glass tables. Thanks to this, I killed my ultrabase on the Anycubic i3 mega. Look at these battle wounds:
BESTFILAMENT's PETG trail.
ABSMAKER's PETG trail.
These are still flowers. Some people can't get parts off tables at all. So I'm still lucky. And doubly lucky. The printer manufacturer will replace the glass for me under warranty. This issue has already been resolved.
So, in order to protect the glass, there are 2 options. All the same glue stick and adhesive for 3D printing. I vote for the second one.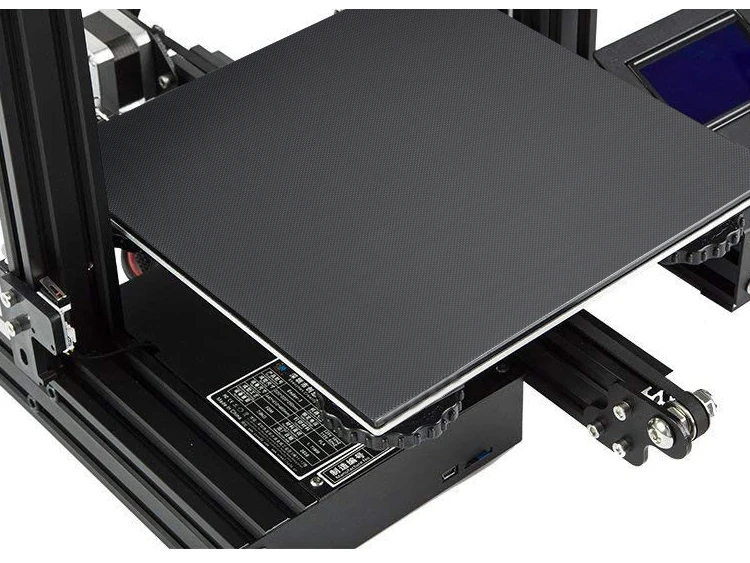
I've already printed over two dozen PETG parts with no problems. After printing, the table cools down and the part itself bounces. Just a fairy tale and not an adhesive.
Here is a list of table temperatures for different types of laminates using this adhesive:
ABS : 105-115°C 115°C
SBS : 110-115°C (I printed first layer 90, second and subsequent 80. Everything held up perfectly)
PLA : 45-55°C
PVA : 40-50°C
FLEX : 100-110°C
PET-G 70-80°C (at 70 degrees I had no problems)
In its favor, I can say that when using it, the appearance of the part does not deteriorate, but it is very economical and easy to clean. cleaned with water or isopropyl alcohol.
Thus, the use of an adhesive allows optimum adhesion. Which, in turn, will ensure good adhesion of the plastic without delamination, and protect the printer glass from damage.