Marked forge 3d printer
Industrial Additive Manufacturing Platform | Markforged
The Digital Forge Platform
Our smart platform makes it easy to solve tough manufacturing problems.
Precision machines that consistently improve.
See all printers
Metals. Continuous fiber. Composites. All at your command.
See all materials
Software that dovetails into your workflow.
Learn more
Turnkey Simplicity
The Digital Forge is purpose-built to integrate quickly and seamlessly into your manufacturing ecosystem.
Robust Parts
Print repeatable, production-quality parts using materials curated for durability and strength.
Perpetual ROI
See returns in weeks, not years. Keep increasing your bottom line with consistently improving machines and streamlined operations.
Unlocked Potential
Transform your supply chain, unleash workforce creativity, and create a culture of innovation.
News & Insights
Resources
-
Learn Blog News & Events
Introducing Simulation from Markforged
With Simulation, you can now virtually test the strength and stiffness of your parts right from Eiger. Validate your part’s performance before you hit print.
-
News & Events
Markforged to Expand into Mass Production of End-Use Metal Parts Through Digital Metal Acquisition
-
Learn Blog
AM Forward Program: Everything You Need To Know
Everything you need to know about the federal Additive Manufacturing Forward program launched in May 2022.
-
Learn Blog Customer Success Stories
Vestas
Vestas is a global leader in wind energy using Markforged’s Digital Forge additive manufacturing platform in support of its direct digital manufacturing (DDM) program to free up manufacturing processes from relying on outside suppliers and provide a knowledge base for collaboration.
-
News & Events
Markforged Expands Software Offering with Acquisition of Teton Simulation Software
-
Learn Blog
Introduction to Eiger™ Fleet
Eiger Fleet, a cloud-based software solution, is designed to accelerate the adoption of and streamline additive manufacturing operations at scale.
 It offers increased operational efficiency and visibility, enterprise-level access management, and simplified workflows.
 -
Learn Blog
What are the Benefits of Adopting Metal 3D Printing? Business Side and Technical Benefits
Metal 3D printing correctly can greatly improve business efficiency and agility — whether through eliminating the need for detail drawings and machine programming, or drastically shortening lead times that bog down product development processes. Learn about the full range of business and technical benefits.
We work with
Talk to an expert Request a demo Try the softwareLet’s get started.
Industrial 3D Printers: Strong Parts. Right Now
A complete line of machines made to create functional parts. Industrial 3D printers that consistently improve with a connected platform and precision construction.
Talk to an Expert
Flagship Industrial Composite 3D Printer
FX20™
An ULTEM™ filament capable production platform for big, strong, high temp parts — usable from factory floor to flight. The ULTEM™ and 9085 trademarks are used under license from SABIC, its affiliates or subsidiaries.
Discover theFX20™
Flagship Metal 3D Printer
Metal X™ System
An accessible way to go from design to metal part — the Metal X System is a leading end-to-end additive manufacturing solution.
Discover theMetal X™ System
Flagship Industrial Composite 3D Printer
X7™
The turnkey industrial 3D printer for many types of functional parts.
Discover theX7™
Flagship Industrial Composite 3D Printer
X7™
The turnkey industrial 3D printer for many types of functional parts.
Discover theX7™
Industrial Composite 3D Printer
X5™
The industrial 3D printer for Continuous Fiberglass reinforced parts.
Discover theX5™
Industrial Composite 3D Printer
X3™
The refined Industrial FFF 3D printer for micro carbon fiber filled nylon parts.
Discover theX3™
Desktop Series
Drive innovation right from your desktop. Powerful professional 3D printers designed to maximize the capabilities of high-quality composite printing.
Explore our Desktop Series
Flagship Desktop Composite 3D Printer
Mark Two™
The powerful professional Carbon Fiber 3D printer for aluminum-strength parts.
Discover theMark Two™
Desktop Composite 3D Printer
Onyx Pro™
The workhorse professional 3D printer for Continuous Fiberglass-reinforced parts.
Discover theOnyx Pro™
Desktop Composite 3D Printer
Onyx One™
The FFF desktop 3D printer for tough, high quality Onyx parts.
Discover theOnyx One™
Strong Parts
Every Markforged industrial 3D printer is built to create strong parts. Period.
Designed for Reliability
Precision design and construction yields predictable, repeatable results.
Platform Connected
Monitored and controlled by a central platform — fabricating functional parts is as easy as pressing print.
1. Design & Slice
Design a part in your chosen CAD platform and export it as an STL. Upload the STL to Eiger and select your material and orientation.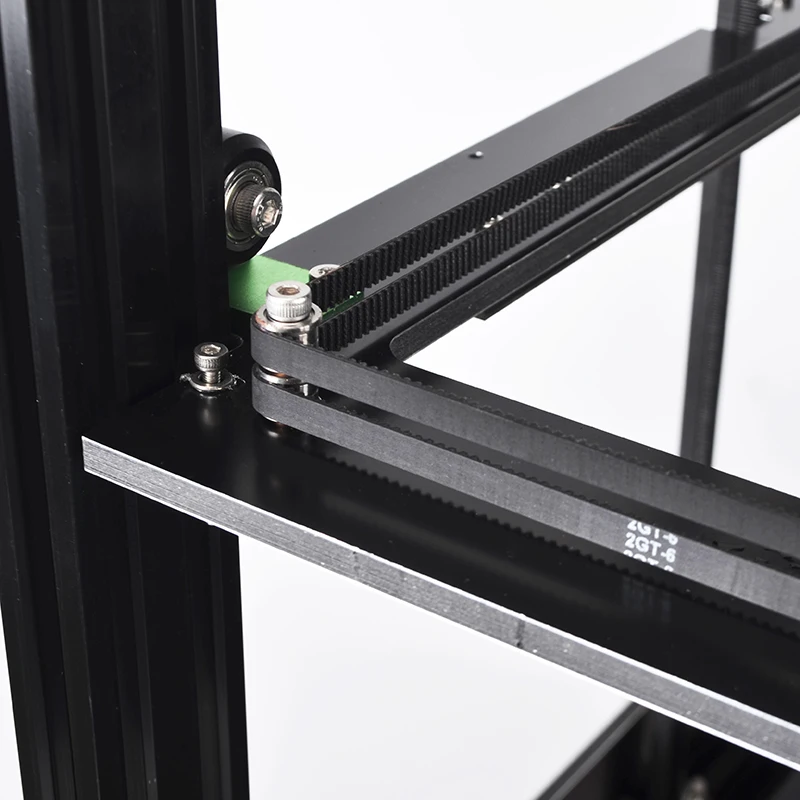 The software slices your part, automatically generating a raft, supports where necessary, and a layer of release material between the raft/supports and the part itself.
About Our Software
2. Print
Metal powder bound in plastic is printed a layer at a time into the shape of your part. Parts are scaled up to compensate for shrinkage during the sintering process.
Available Materials
3. Wash
After printing, “green” parts are placed into the Wash-1, which uses a debinding fluid to dissolve most of the plastic binding material.
Learn More About the Metal X System
4. Sinter
Washed “brown” parts are placed in a Markforged furnace, where they are heated with a material-specific profile to remove the remaining binder and solidify metal powder.
Learn More About the Metal X System
5. Use
Parts come out of the sintering furnace as fully metallic objects and can be used in manufacturing, tooling, and prototyping operations.
See 3D Printed Parts At Work
1. Design & Slice
Using the CAD platform of your choice, design a part. Many different parts can be printed, but following Design for Additive Manufacturing (DFAM) guidelines enables you to fully leverage the unique strength and flexibility of Markforged composite printers. Upload the STL to Eiger and select your base materials and part orientation.
About Our Software
2. Reinforce
Unique to Markforged composite printers with Continuous Fiber Reinforcement (CFR), Eiger enables you to print with two types of printing media: a Composite Base filament and a Continuous Fiber. Configure the reinforcement to your application, choosing a Continuous Fiber and layers to reinforce.
Available Materials
3. Print
A Markforged composite printer automatically prints your part layer by layer. Composite Base material is printed through one nozzle, and Continuous Fiber is laid in-layer by a second nozzle and extrusion system.
Discover the X7
4. Use
The resulting composite part consists of a Composite Base and a Continuous Fiber, and can be used in a wide variety of industrial applications.
See 3D Printed Parts At Work
Talk to an expert Request a demo Try the softwareLet’s get started.
Markforged has updated the range of 3D printers for printing metal and composite products
News
of polymer-metal blanks, a software update for Next Day Metal, and also announced a field version of the X7 3D printer that prints continuous-fiber-reinforced thermoplastics.
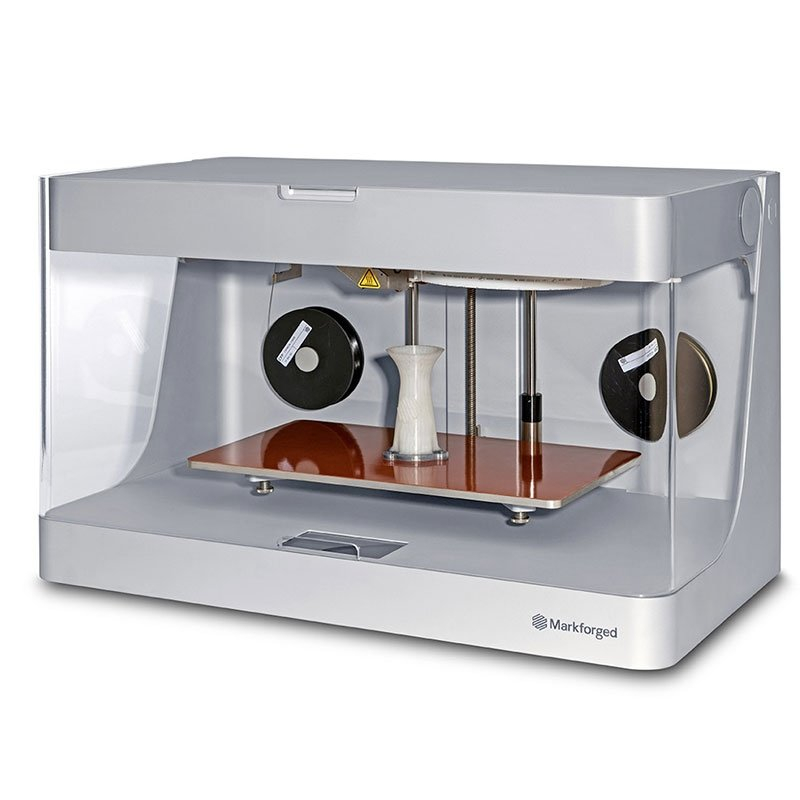
Metal X Gen 2
The first novelty is the second generation of a specialized Metal X FDM system designed for the additive production of polymer-metal blanks. After 3D printing, the binder polymer is removed and the workpieces are sintered into high-density all-metal products.
The second generation Metal X 3D printer is an upgraded version with a number of small but useful improvements, including a new seven-inch on-board touch screen, door sensors for improved operational safety, and additional thermal insulation of the workspace.
In response to the age-old question “why is this necessary?” the company cites the example of Angus 3D Solutions, a Scottish 3D printing firm serving the local oil and gas sector, among other things. This team was commissioned to manufacture several specialized wrenches to the smallest tolerances and in the shortest possible time - so short that prototyping and production by traditional methods would not meet the allotted time, or at least would fly into a huge amount.![]() The bureau printed a functional prototype in a couple of days instead of a couple of weeks and completed the order on time, at the same time saving about twenty-five thousand dollars due to localized production - including transportation costs, since otherwise you would have to pay for direct shipping to meet deadlines by air.
The bureau printed a functional prototype in a couple of days instead of a couple of weeks and completed the order on time, at the same time saving about twenty-five thousand dollars due to localized production - including transportation costs, since otherwise you would have to pay for direct shipping to meet deadlines by air.
Next Day Metal
Users of the original version will not be left out. In addition to hardware upgrades, the company has also been working on software: the Next Day Metal software has also received an update, and now users of the original systems will be able to print faster without the need for hardware upgrades. The increase in productivity comes purely from the increase in positioning and extrusion speed without compromising the resolution of 3D printing.
“We decided to experiment with speeds to test our old assumptions about speed versus quality. As it turned out, the speed can still be increased without reducing the quality of the surfaces.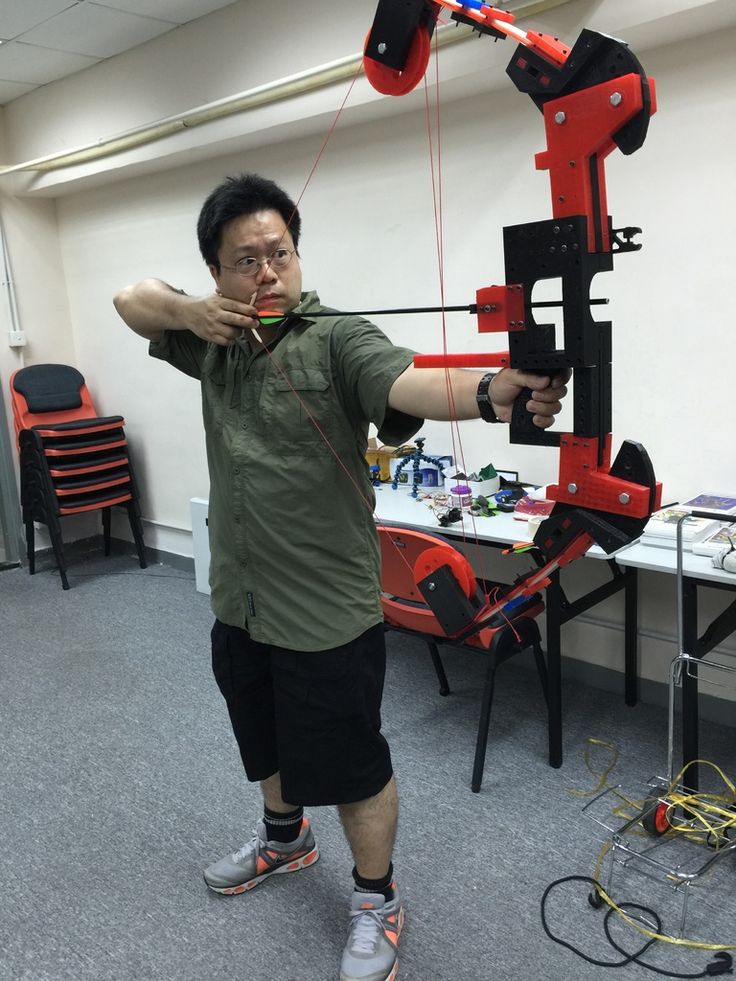 With this update, Metal X users will simply get increased performance without any pitfalls,” says Polina Bako, Head of Public Relations at Markforged.
X7 FE
The latest innovation is not even an upgrade, but an accessory for the flagship X7 system. These 3D printers are powered by the hybrid technology that has earned Markforged its place in the sun. The technology consists in combining FDM 3D printing with polymers or composite materials (usually nylon) with the laying of a continuous reinforcing fiber - carbon, Kevlar or glass. That is, this is the same direction that is being developed with different variations, for example, by the Russian-Luxembourg company Anisoprint, the Russian Stereotech and the sworn enemy of Markforged represented by another Massachusetts company called Desktop Metal, with which Markforged managed to wrestle in court for intellectual property rights. own. The upgrade consists in a protective box, because of which this version of the X7 system received the designation X7 FE, that is, Field Edition or “Field version”.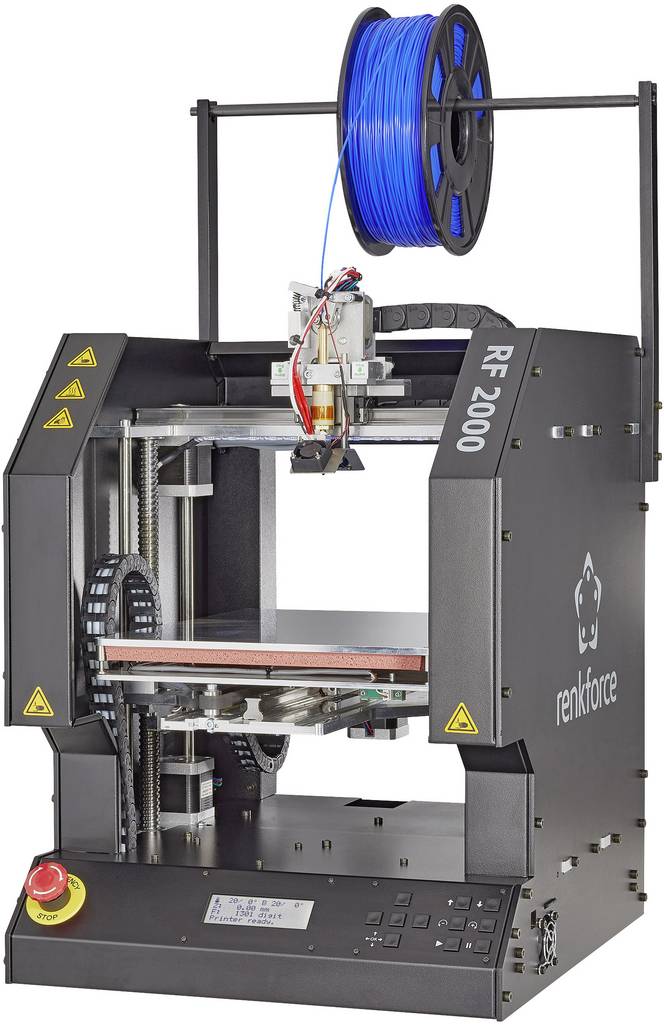
In a new protective case, the X7 3D printer withstands the harshest transport conditions: bumps, airdrops, even delivery by Russian Post. About landing, we mean in the most direct sense. The fact is that the US Marine Corps became interested in 3D printers from Markforged, developing a program of rapid response fab lab workshops under the XFAB code and having managed to test X7 systems in the field. The US military is generally very fond of Peli-branded shipping containers, and the plastic box in the photo above allegedly provides enough protection for air transport (presumably even a parachute drop), after which the 3D printer can be debugged and up and running within a couple of minutes.
Metal X Gen 2 3D printers and updated Next Day Metal software are now available, with the X7 FE scheduled to ship this fall. Additional information about Markforged's offers is available on the official website.
Do you have interesting news? Share your developments with us, and we will tell the whole world about them! We are waiting for your ideas at news@3Dtoday. ru.
ru.
Metal X X7 Next Day Metal F.E.
Follow author
Follow
Don't want
1
More interesting articles
6
Subscribe to the author
Subscribe
Don't want
We summarize the results of the #Obzor2022 contest and announce the winner. Participants were asked to publish details...
Read more
four
Follow the author
Subscribe
Don't want
Establishment of the center will help improve the quality and reduce the cost of engineering products. ..
..
Read more
sarkazm
Loading
04/01/2016
39862
68
Subscribe to the author
Subscribe
Don't want
News from the world of printing in a short line
FDplast announced the release of a free...
Read more
quick start in 3D printing / 3D printers, machines and accessories / iXBT Live
Hello everyone! A small review of the Magic entry-level 3D printer from JGMaker. This is an inexpensive and simple model that does not require any serious skills to assemble and set up and is ready to print in just an hour after receiving it. The JGMaker Magic printer is equipped with a filament end sensor, there are pause and automatic bar change functions. The printer is able to remember the stop point in the event of a power failure and continue printing further (checked!).
Buy JGMaker Magic 3D Printer
So, JGMaker has released an inexpensive entry-level model that can be useful for those who are taking their first steps in 3D printing. This is a simple Magic printer, with quite good characteristics: in the basic configuration it already has an adhesive sticker, a filament sensor. The structure is rigid, all moving and loaded parts are metal.
Other models of 3D printers (FDM) can be found in the article on choice for beginners. But for high-quality plastic, I ask for this selection (there are exotic: silk, marble, wood, etc.). For lovers of photopolymer printing, I can recommend inexpensive SLA UV printers that will be affordable for everyone.
The specifications of this model are shown below.
I will highlight the main thing: this is a pre-assembled printer kit with a print area of 220x200x250 mm, with a short bowden as an extruder. The kit has everything you need to start, as a “bells and whistles” a filament presence sensor is used (accordingly, automation of a bar change and a print pause are provided in the firmware).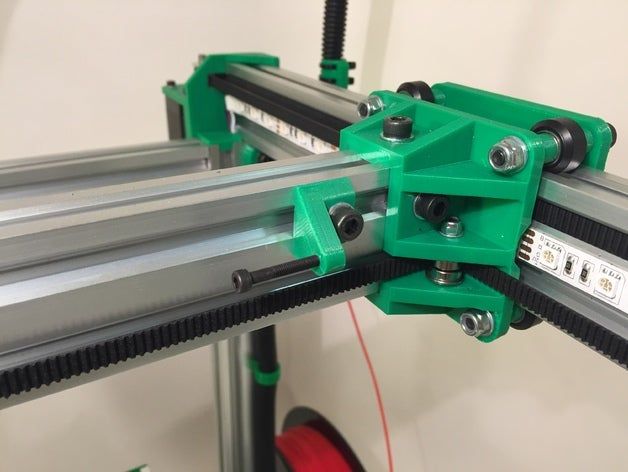 The printer remembers where it stopped when the power is reset.
As I said, the JGMaker Magic comes pre-assembled and pre-configured. The user is required to assemble the upper part of the frame (two posts and a crossbar), assemble the X axis, and the printed circuit assembly is already assembled. The lower part of the printer is a table with a Y axis, a control unit, they are delivered assembled, with connected harnesses.
The picture shows the JGMaker Magic 3D Printer Assembly Kit. Compared to the inexpensive Tronxy XY-2 Pro 3D printer, the latter has the X axis already assembled. and printer settings. The kit comes with a card reader and a memory card that stores information for the user.
The basis of the printer is already assembled and prepared - this is a movable table, display, electronics with a power supply. The layout is in the form of a single module, the body of which is made of steel 2 mm thick.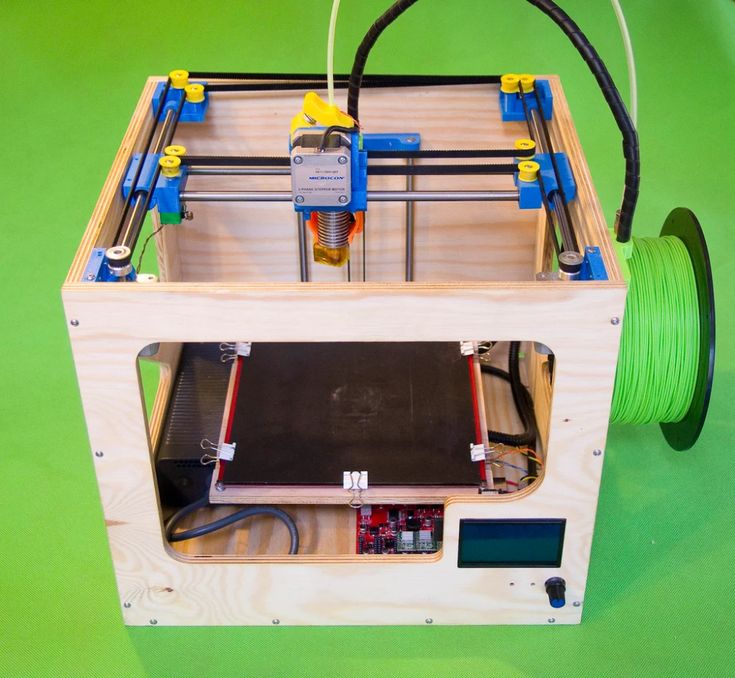
X-axis carriage, with motor installed and T8 nut for height adjustment. As you can see, everything is already assembled, including cage nuts for fastening to the profile.
Separately, there is an assembly of motors designed to be installed in the bar feed mechanism, as well as to move along the Z axis (with clutch). By the way, if you are interested in self-assembly structures, I recommend looking at the B&R assembly kit, as well as the list of components for CNC and 3D.
Carriages with rollers and idler for the belt. All components are made of metal (no plastic!), and are factory painted.
And this is the highlight of this configuration. Not all budget 3D printers can afford to boast the presence of a filament end (break) sensor in the stock configuration. But JGMaker Magic can. A small sensor is mounted on a metal plate and attached to the profile in front of the feed mechanism. If the bar breaks (or the spool runs out), then printing will have time to pause before the tip approaches the extruder feed gear. Further, it will be possible to call the operation of changing the filament from the display using standard functions. You can continue printing after replacement.
Several photos of the printer bed. This is a massive one-piece sheet metal structure, with rounded sides. Rigidity is high and is achieved by using stiffeners. The table belt is already tensioned (fixed with a tie - it must be removed). Cylindrical shafts 8 mm are used as guides. Not the most expensive solution, but quite simple.
The basement houses the control board, power supply and display module. The power supply terminals are covered with a casing.
Driver type HR4988, non-replaceable. Management using MK Atmel ATmega2560. A simple and reliable solution, for which there are many custom firmware.
There is a sticker on the case with information about the model, manufacturer, and serial number (for manufacturer support).
Before printing for the first time, the printer must be assembled. Prepare the workplace and tools. We remove the film from the profile.
First, you need to assemble the X axis along which the print head moves.
Consisting of an axle with a short profile section and two carriages with rollers. Installation takes place in prepared grooves, in order not to confuse the installation side, read the instructions.
Carriage units are fixed in the profile with T-nuts. We loosen them, thread them into the groove, combine the countersink holes, fasten them.
Next, until the X-axis is fully assembled, you need to install the printing block on the profile.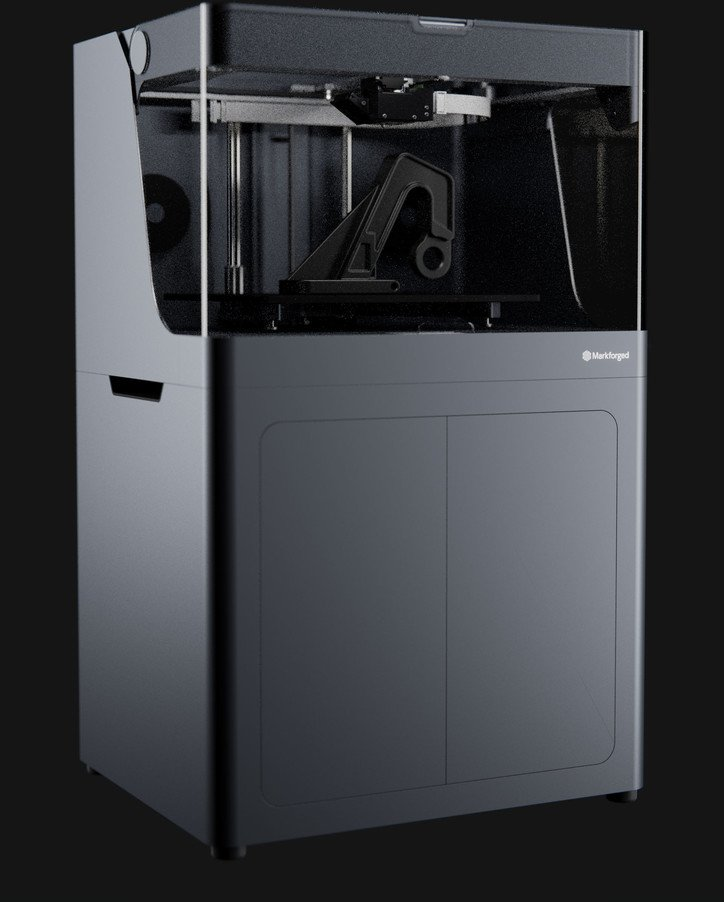 The rollers go into the grooves of the profile, if necessary, the rollers can be tightened with a complete key.
We collect everything together, install the last carriage. When installing, do not confuse the side of the print head, try to refer to the instructions and available photos of finished printers.
The second carriage is installed - now you need to pass the belt through the profile and under the rollers, and then fasten it to the printhead. The belt should be tight and the teeth should wrap around the drive gear.
The manufacturer has already cut the desired piece of belt to size and installed a loop with ties there.
Don't forget about the bypass roller.
We put the loops on the head brackets, check the belt tension.
After assembling the X-axis, it is necessary to proceed to the assembly of the vertical parts, in particular, to the installation of the Z-axis motor and the limit switch on the profile.
We fix the engine assembly in Z on the profile. We install the second vertical crossbar on the printer.
Next, carefully install the pre-assembled X-axis onto the vertical profiles of the printer.
The rollers must slide freely into the grooves, without wedging.
Next, install the T8 lead screw through the nut on the carriage, into the motor coupling.
We tighten the coupling, clamping both the lead screw itself and the motor shaft.
The upper end of the screw is loose.
There is very little left - we fix the upper bar, completing the assembly of the supporting structure. Install the filament sensor and extruder.
Do not forget about the decorative overlay on the upper profile - U-shaped profile with the inscription JGMaker.
We check the movement of the axles with our hands, check the laying of the wires, and also install clothespins on the adhesive sticker.
Complete extruder. We connect the Bowden tube (feeder).
It remains to connect the harnesses with electronics. Each connector is signed - you can't go wrong here. Z-axis.
Sensor and extruder E.
External view of the assembled JGMaker printer.
Everything has been checked, the printer has been assembled, now we move on to connecting and configuring.
Preparing for printing is outrageously simple. Download Cura, select a standard printer in the profile, specify the print area 220x220x250mm and give a name.
We fill the plastic in the printer, slice the model in Cura, dump the G-code on the memory card.
Connect the memory card to the printer.
Starting the printer to print.
Marlin firmware menu, typical menu. There is a check and settings submenu, there is a print settings adjustment in the process. A pause in the printing process is provided (for changing the filament, etc. ). After an emergency reset, the printer offers to start printing from the old place (it turns out well).
Examples of printing models.
One of the simple test models.
Handy mask holder.
It turned out fine, considering that I didn’t have time to choose the printer with the settings “out of the box” and the temperature for the plastic.
You can try to print something bigger.
Various adapters for telescope and camera.
With these adapters you can connect standard eyepieces, cameras to old telescopes and lenses.
The design works, the plastic practically did not shrink - the parts are inserted into each other with little effort.
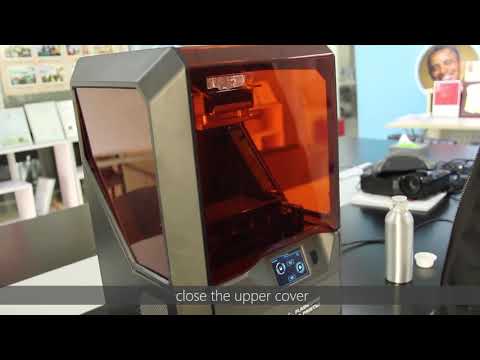
A short video demonstrating the operation of the JGMaker Magic printer.
Here is an example of models after adjusting and selecting print modes for plastic.
Of course, print quality is highly dependent on plastic.