Lost wax 3d printer kit
How To Get Into Lost Wax Casting (with A Dash Of 3D Printing)
I’ve always thought that there are three things you can do with metal: cut it, bend it, and join it. Sure, I knew you could melt it, but that was always something that happened in big foundries- you design something and ship it off to be cast in some large angular building churning out smoke. After all, melting most metals is hard. Silver melts at 1,763 °F. Copper at 1,983 °F. Not only do you need to create an environment that can hit those temperatures, but you need to build it from materials that can withstand them.
Turns out, melting metal is not so bad. Surprisingly, I’ve found that the hardest part of the process for an engineer like myself at least, is creating the pattern to be replicated in metal. That part is pure art, but thankfully I learned that we can use technology to cheat a bit.
When I decided to take up casting earlier this year, I knew pretty much nothing about it. Before we dive into the details here, let’s go through a quick rundown to save you the first day I spent researching the process. At it’s core, here are the steps involved in lost wax, or investment, casting:
- Make a pattern: a wax or plastic replica of the part you’d like to create in metal
- Make a mold: pour plaster around the pattern, then burn out the wax to leave a hollow cavity
- Pour the metal: melt some metal and pour it into the cavity
I had been kicking around the idea of trying this since last fall, but didn’t really know where to begin. There seemed to be a lot of equipment involved, and I’m no sculptor, so I knew that making patterns would be a challenge. I had heard that you could 3D-print wax patterns instead of carving them by hand, but the best machine for the job is an SLA printer which is prohibitively expensive, or so I thought.
A Pattern of Creativity
That perception changed when my brother Sam picked up an Elegoo Mars 3D printer. I was surprised that you could get a sub-$300 SLA machine, and absolutely floored by the quality of prints it produced. I was able to pick up some printer resin designed for investment casting, and printed my first pattern- two tiny Pikachus and a rook.
I use PowerResins WAX for my printing resin. It’s pricey but prints really well and burns out cleanly. It does have issues adhering to the build platform, but you can get around that by priming the plate. Some people recommend painting on a few payers of resin and curing them with UV light before printing. I follow a tip I found in this YouTube video and just include a few primer layers in my print. This may seem a bit wasteful, but if it keeps one print from coming off the plate, it’s worth it.
Of course, we can go the classic route here and make our patterns by hand instead. I’ve taken a swing at this and had success making simple things like a ring which I carved from wax, but I would be lost on more intricate designs. Like I said, I’m no sculptor, but it’s fun to carve a pattern manually. Wax is available in many forms — sheets, blocks, ring blanks, and others. There are some real nice carving tools out there which I own now, but my first ring was formed with a pocket knife, a file, and a disc sander. It’s not all about removing material either- since wax is easy to melt, it’s common to fuse parts together to create a finished piece.
Some like to either take their wax model, or something else entirely and make a silicone mold of it before starting the process. That lets them inject hot wax (a process called injection molding) into the silicone to create the pattern, allowing them to save the original. I’ve never tried the process, but its a great way to make multiple copies of a piece.
Once we have something to replicate in metal, it’s time to make a tree. The tree is a wax structure that holds all of the wax bits we’ve just made, and once wax is burned out of the mold, acts a guide for the molten metal as its poured. The branches of the tree are often referred to as sprues, and the process as spruing. To form the tree, we start with a central wax rod and attach smaller wax wires to it using sticky wax and a wax pen, which heats up wax to melt it. (Man, that’s a lot of wax.) We can then attach the parts we made to those wires. The tree sits in a rubber sprue base, which will form a bowl in the top of the mold called the button. Now that we have a complete pattern, it’s time to make a mold.
Set in Stone… Well, Plaster
We have a positive of our final part, but now we need to make a negative. We’ll take a steel cylinder called a flask and slip it onto the sprue base. We’ll need some investment plaster here too — standard plaster of Paris won’t cut it, as it won’t stand up to the heat. Thankfully, it’s not hard to get your hands on a bag of the the right material. Less thankfully, it’s nasty stuff. I always wear glasses, gloves, and a respirator with I work with it, and work outside for good measure. I even brush my clothes off before going indoors. It turns out that the ingredient that binds the investment, free silica, can cause cancer when inhaled. I’ve found that if something can withstand high temperatures and gives off powder, you probably shouldn’t breathe it. Anyway, we can mix some of that with water and pour it into the flask. I use a handheld electric mixer, which will never see a kitchen again, to mix my investment.
If we just pour it right in, the final piece won’t come out very nice. The mixing process introduces tons of bubbles into the slurry, and thanks to its high viscosity those bubbles aren’t gonna pop themselves. I like to use a vacuum chamber to debubble my investment before pouring it into the flask- don’t let that scare you though.
My “vacuum chamber” is an old mechanical pump plumbed to a Maxwell House coffee can. While the pump is running and the cup of investment is in the coffee can, I violently tap the chamber for a few minutes to help the bubbles make their way to the surface. Another trick I’ve picked up to get rid of bubbles is to wipe isopropyl alcohol onto the pattern and shake off the excess right before pouring the investment. Some like to paint a think layer of investment on and let it harden before mixing up more to pour into the flask. After pouring, I like to put the whole flask into the vacuum chamber to pull out any remaining bubbles, while tapping the chamber a bit more gently. Once we have a flask full of hardened plaster, we should let it to cure fully: at least an hour or two, but I like to wait overnight.
Getting Burned Out
So we’ve made a replica of our final piece, then entombed it in metal and plaster. Now it’s time to destroy all our hard work by throwing it in a furnace. Well, placing it in a kiln. Very carefully. While wearing gloves and safety glasses.
A flask undergoing burnout in a kilnThis part of the process, called burnout, is where we remove the wax/ plastic pattern from the mold. This leaves behind a cavity that, if we’ve done everything correctly so far, is free of ash and ready to accept some molten metal. It’s a bit nerve-wracking, especially if we’ve spent hours carving a wax model.
I like to start the flask out hole-down so that the wax can drip out into a tray as it melts, and then flip the flask hole-up to allow gasses to escape once the melting is complete. Some say to keep it hole-up the entire time. Investment manufacturers have recommended schedules (times and temperatures) to follow, but I like one suggested by Practical Casting by Tim McCreight. I listed the schedule I use in the original blog post I linked at the start of this article. We also have some leeway in our choice of kiln here; for my first few tries, I used a lab furnace I stole off of my brother’s nanofab bench, returning to it every 15 minutes or so to adjust temperatures to follow the scheduled ramps. Now I use a purpose-built programmable kiln.
The last step in any burnout schedule is to hold the flask at a temperature suitable for casting, generally a few hundred degrees below the pouring temperature of the metal. I usually keep it at 1250 °F until I’m ready to pour.
Melting Some Metal
After all that work we finally have a mold, and now it’s time to fill it. Basically, we’ll melt some metal the pour it into the cavity. We’ll need another furnace for this part- while our kiln is keeping the flask hot, we add metal to a crucible, place it in the furnace, and melt it down. Knowing the pouring temperature of the metal is important here- for example, silver melts at 1,763 °F but pours around 1850 °F. I learned that the hard way when silver which appeared molten in my crucible turned solid in the air between the crucible and the flask while I was trying to pour it. We also need to be careful not to boil the metal, which is actually something that can happen.
Similarly to the previous step, I started out with a furnace stolen from Sam before getting one meant for the task. Both my furnace and kiln are small electric ovens made by TableTop furnaces (in America!). I have links to them in the full equipment list in the blog post I linked to.
There are a few ways we can approach the pour. We can take the flask out of the kiln and simply, well, pour the metal. This is known as gravity casting, because we rely on gravity to pull the molten metal down into the mold. It works, but we might see some loss of detail and unfilled crevices where the metal was not able to flow.
Another method is called sling casting, where we put the flask in a holder with a rope tied to it and use our arms to swing the flask in a circle next to us. The centrifugal force helps push metal down into those hard-to-reach spots. I haven’t tried this method, as it terrifies me for obvious reasons.
A slightly more tame version of sling casting is centrifugal casting, where the flask is placed horizontally in a centrifuge, which uses similar action to pull metal into the mold.
My preferred method is vacuum casting. I have a hole in the top of my coffee can vacuum chamber, on which I place a silicone mat (also with a hole through it). The investment plaster is porous, so when I pull a vacuum through the flask, the molten metal is pulled down into the mold.
During the pour, it often doesn’t look like the mold took any metal at all. Instead, it looks like the metal just pooled up in the button rather than flowing through the cavity. This fools me every time, and the pour almost always turns out fine.
Regardless of the method we chose, now we wait a few minutes for the button to cool to a dull red color. At this point, we can quench the flask in a bucket of water. Using tongs, by the way. We’ve been using tongs this whole time. As the water around the flask boils, the investment dissolves and we’ll hear a thud as the metal tree falls to the bottom of the bucket. Wait a minute or so for everything to cool, assuming there’s enough water in the bucket: I use 5 gallons. (Less water = more cooling time.) Finally,we can retrieve the tree and hopefully marvel at how well the process went.
Post Processing
We’re done! Well, almost. We have a metal tree, but what we want is metal parts. Unless the parts we cast are tiny trees, in which case I suppose we have a tree of trees. Now we need to do a few post-processing steps to clean up the parts.
First up is removing them from the tree. We’ll try to cut the part off of the sprue as close to the part as possible. I use a jeweler’s saw and a small hacksaw for this, but a rotary tool or larger saw should work fine too. Once the parts are separated, we can clean them up. I often grind the remnants of the sprue off with a grinding wheel, and touch up the area with a file. Any bubbles or other defects can be similarly dressed up, then it’s off to a tumbler.
I like to tumble with Dawn dish soap and water in stainless steel shot for several hours to polish up the part. This won’t soften the raw cast texture, so if we want to smooth out any surfaces we’ll need to do that with files and sandpaper ahead of time. The post-processing is an art in itself, so we can expect to spend quite a bit of time in this area, depending on the final look we want to achieve. If the as-cast finish is acceptable then the process goes much quicker.
Well, now we’re actually done. All that’s left is to admire the cool thing we just cast, and make our friends jealous with our newfound hobby.
Waxing Philosophical
I’ve been making things with my hands as long as I can remember, but this process feels different from all the others. There’s something existential about spending hours crafting (or even printing) a wax pattern, only to consume it in the process of forming something new. Most steps of this process are a “point of no return” so everything we do must be deliberate, creating as well as destroying. Any mistakes in the wax pattern are carried through to the final metal piece. There are countless ways for it to go wrong, but it’s the most gratifying process I’ve ever worked with.
Maybe I’m reading too far into the whole thing though. All I can say for sure is that I made some cool stuff, and had a ton of fun along the way.
The Complete Guide to Lost Wax Casting and Wax 3D Printing
Most 3D printing technologies are direct; they directly create the finished object with no casting or further steps needed. These include Fused Deposition Modeling, Stereolithography, and many more. However, one lesser-known technique which 3D printing is also useful in is Lost Wax Casting, an indirect 3D printing process.
Also known as investment casting or precision casting, Lost Wax Casting involves creating a duplicate, or clone, of an original mold; usually from a metal such as gold or silver. The process has a rich history; it is believed to have been used since between 4500BC and 3500BC, with objects found in southern Israel created using Lost Wax Casting dated back to 3700BC. That’s over 5700 years ago!
We also have a free 3D printing ebook featuring guides to all the main 3D printing technologies. Click here for more information.
Lost Wax Casting Process Steps
Part 1: 3D Design of Lost Wax Casting Part
When using 3D printing in Lost Wax Casting it is important to remember that you will struggle if you don’t have prior 3D design skills, unless you create something that is freely available online. This is because you will need to design the 3D printer model which you intend to create to 3D print the original mold. You can do this on any of the free or paid 3D software options out there – we’ve also written our own free 3D software ranking and professional 3D software ranking.
Once you’ve chosen your 3D software tool, it’s time to design. Simply create your chosen piece, whether it be a piece of 3D printed jewelry like a ring or pendant, or even a crazy 3D printed heart. Once you’ve designed it, export it as an STL file or similar compatible file type and prepare for printing with your 3D slicer.
For more information on Lost Wax Casting, there’s an example of a Lost Wax Casting YouTube video featuring a sprue mold created with Formlabs’ Form 2 SLA 3D printer.
Part 2: Wax 3D Printing the Mold
Once you’ve sliced the 3D model of your piece to use with Lost Wax Casting, you’re ready to print! To check for sizing and fit, it is recommended to try a test run on lower quality settings, and then once you’ve got a perfect fit to 3D print your final model on higher settings. Once you’ve got a model you’re happy with, you’re ready to create the inner, negative mold.
Printers such as 3D Systems’ Pro Jet range, resin 3D printers such as those by Formlabs, and FDM 3D printers like an Ultimaker can be used to 3D print the mold. There are a number of good wax filaments which are compatible, though the Pro Jet range is able to print supports in material that has a lower melting point, making the support removal process simpler. Stereolithography printers like the Form 3 naturally print in a wax-like resin, similar in consistency to the waxy texture required.
Part 3: The Second Mold
Once your original, 3D printed mold is ready, you need to create a sealed area, or sprue, where you can pour the material inside. After you’ve set this up, pour the molten material (either silicone, polyurethane, or other wax-like material) inside the sprue.
Once this has dried, remove the model. This is an exact negative of your original, 3D printed mold, and will form the basis of what will create your metal 3D printed piece.
Part 4: Creating the final metal piece using Lost Wax Casting
Once your negative mold is ready and dried, it is important to preheat it so it’s ready for the sudden bombardment of molten metal and subsequent heat.
Once your chosen metal has been heated to a high enough temperature and melted, pour it into your negative mold. This make a few tries to get right, and if not done properly can leave you without good enough detailing on your model. It is important to get this just right, or you’ll notice the imperfections forever. When it’s poured, leave it to cool down.
Part 5: Lost Wax Casting Post-Processing
Though nice and shiny, the metal object you’ve cast won’t look as pretty as it could. You’ll first need to cut off the excess metal that you poured into the negative mold. This cut will be rough, and will require polishing, sanding, or a similar process. Which process depends on the metal and it’s strength; soft metals like pewter can be shaped and refined far easier than metal or platinum.
Anything else beyond this is completely your choice. You may wish to accessorize your piece with extras that match your style and creativity. Beyond this, it’s all down to you!
A set of rings created with Lost Wax Casting before post-processing.Lost Wax Casting Materials
A variety of metals can be used in Lost Wax Casting rings, pendants, and more. However, since the uses are mainly jewelry, more precious and expensive metals are used most commonly. These include:
- Gold – Either 14K or 18K gold is commonly used in expensive, high-quality jewelry pieces.
- Silver – 925 silver (92.5% pure) is commonly used also as it is very malleable and has good thermal conductive properties.

- Bronze with copper – A cheaper option, it is worth remembering that it will tarnish if the metal isn’t varnished.
- Brass – Another lower-priced option.
- Copper – A viable low-priced alternative.
If you’re looking for the best wax for Lost Wax Casting 3D printing for the original wax mold, there are a few options. For FDM 3D printing, you can use Print2Cast wax filament or MOLDLAY filaments designed by Kai Parthy. These aren’t like typical filaments, and extrude at different temperatures to PLA or ABS (usually at lower temperatures). For SLA or DLP or LCD 3D printers, there are a variety of wax-like resins available, as well as for Multi Jet printers.
Applications: Lost Wax Casting Jewelry and Dentistry
Unsurprisingly, given that Lost Wax Casting excels at creating very precise geometric patterns of metals, the process is used extensively in jewelry. Pro Jet 3D printers are accurate up to 0. 025mm in creating the original wax model, and this precision can then be passed on to the metal object. The jewelry can be created to perfectly set jewels like diamonds, emeralds, and rubies, making it a versatile and very attractive option for jewelers. Industrial 3D printer companies like EnvisionTEC, Formlabs, and 3D Systems make some of the best 3D printers for this purpose.
Lost Wax Casting Advantages and Disadvantages:
Advantages
- Compared to alternative 3D printing technologies to create geometrically complex metal objects, Lost Wax Casting has low barriers to entry and is cheap to produce. You do not necessarily require a $300,000 Direct Metal Laser Sintering or Electron Beam Melting 3D printer, just the Lost Wax Casting kit and materials.
- Though not a concrete, scientific fact; it is just more satisfying to craft your own pieces. Other 3D printing processes are very detached in that you press a button, and a few hours later out pops the finished product.
 Lost Wax Casting is hands on, thus leaving you with the sense of satisfaction having completed the project.
Disadvantages
- More hands on, and therefore slower and less scalable. Businesses looking to produce larger numbers of pieces quickly will prefer DMLS, Binder Jetting, or EBM, as they can create multiple pieces at higher speeds without the need for manual labor.
- Fairly steep learning curve. Pouring the molten metal correctly so every crevice is well-defined is a skill that takes time. Therefore, be prepared for failed projects, wasted materials, and much frustration
Modern 3D printing market
Source: #bigITrends telegram channel
The “quiet revolution” in 3D printing continues, but it’s not easy to figure out what is happening - there are too many applications for it. An enthusiast of this direction who has been working in this market for a long time, perfectly versed in trends, technologies and the market - Alexander Kornveits, founder and CEO of Tsvetnoy Mir, will help us understand what happened and new trends.
- How do you assess the dynamics of the market of mass-produced 3D printers "in pieces" in the last year?
Alexander Kornveits: The market of desktop 3D printers in Russia, as well as in the world, showed impressive positive dynamics in 2020. According to the latest data published by Context for the second quarter of last year, the global market grew by 68% qoq, but it should be noted that China became the main driver of growth, which emerged from the pandemic faster than other countries. Over the past year, our company's sales grew by 35% in real terms, which reflects the realities of the entire Russian 3D printer market.
- Has this segment been affected by the pandemic?
A.K.: The pandemic has had an extremely positive impact on the 3D printing market worldwide. Two key factors played a role here
First, 3D printing has demonstrated its high efficiency at the time of breaking traditional production and supply chains. With the help of 3D printing, it was possible to quickly organize the production of elements urgently needed to combat the pandemic: protective shields, valves for ventilators, nasal sticks and much more, and all available 3D printers are suitable for solving these problems, from the simplest home models to the latest industrial designs.
Secondly, people around the world, locked in their homes, began to actively indulge in their hobbies: printing miniatures, fakes for the home, puzzles, toys for children, etc. For many, 3D printing has become an outlet amid the many restrictions associated with the pandemic.
- Visualization of design projects, small-scale production, prototyping, DYI enthusiasts - are there new large niches of 3D printing users?
A.K.: The past year was a turning point for the introduction of 3D printing in dentistry. Everyone previously understood the huge potential of 3D printing in this industry, but in 2020 several important factors converged at one point: the cost of equipment has significantly decreased, its quality has increased, and the speed of printing has significantly increased. In parallel with this, a mass of specialized consumables appeared, designed for various dental tasks. Dentistry is actively moving “to the digital”, this is already not a trend for the future, but a standard of highly qualified medical care.
- Have there been any breakthrough technologies in 3D printers, or can a breakthrough be understood as some quantitative changes - an increase in resolution, a decrease in the price of a device, the cost of printing, etc.?
A.K.: There are two factors that do not allow 3D printing to take a significant share of the market for the production of goods: insufficiently high finishing quality of printed models and low printing speed. In 2020, an important step was taken towards improving this situation, in one of the popular 3D printing technologies - photopolymer. The introduction of new 4K LCD masking panels (see sidebar) has significantly improved print quality, speed, and equipment life, all at a significant cost reduction.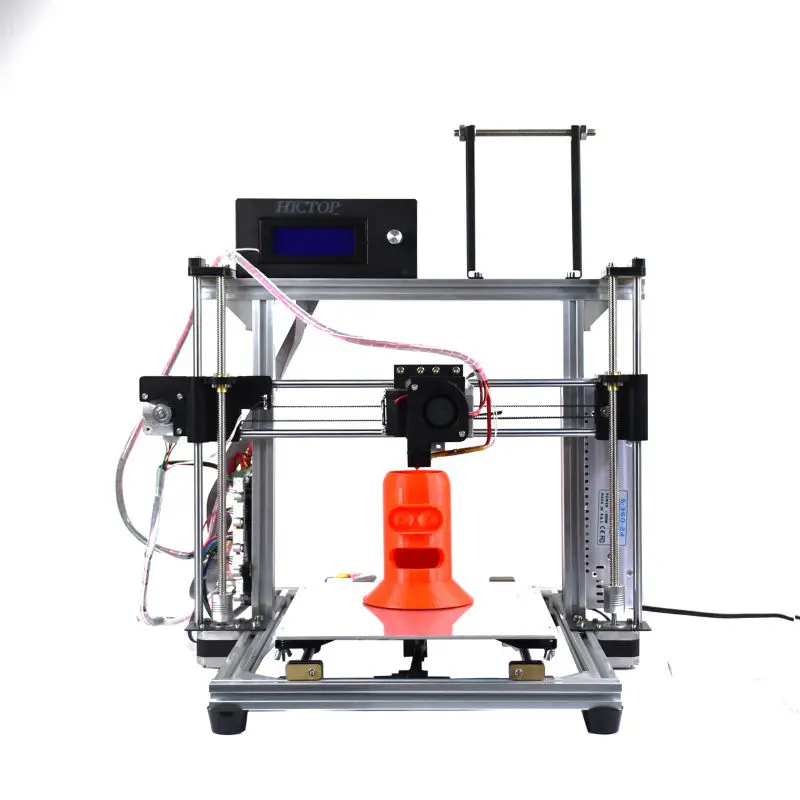 This is what led to the breakthrough of 3D printing in dentistry that I talked about earlier. I emphasize that earlier 3D printers used available RGB matrices, and last year special mono matrices for 3D printing with other polarization properties were created.
Photopolymer 3D printing involves the layer-by-layer application of a polymer resin by a 3D printer, with each layer “fixed” with UV radiation. It is important that this technology does not require heating of the created product during the printing process, which eliminates temperature deformations. In one of the technologies, it uses the illumination of resin with an LED lamp through a filter, which is an LCD matrix. This allows you to more accurately control the process of resin curing and, in particular, increase the detail of printed elements.
- What is happening in the industrial 3D printing segment? For example, Rolls-Royce was going to print turbine blades, and a New Zealand startup was going to print light rockets to put satellites into orbit.![]() How did it end and does the industrial press justify the hopes that were placed on it a few years ago?
How did it end and does the industrial press justify the hopes that were placed on it a few years ago?
А.К.: Metal 3D printing has a great future, it is not for nothing that IT giants such as HP and Xerox are striving to enter this market, but 2020 can be considered a lost year for industrial 3D equipment, unlike the desktop 3D printing segment, the market industrial printers showed a decline for the first time in many years, this is also noted in the Context. First of all, this is due to the reduction of companies' investments in expensive equipment against the backdrop of uncertainty about the future and general instability. In terms of R&D in the industrial metal printing segment, 2020 also turned out to be unproductive, with no significant new or even updated products appearing on the market. The work of developers of such complex industrial equipment requires close cooperation, and in the face of numerous restrictions, it was difficult to maintain it at the right level.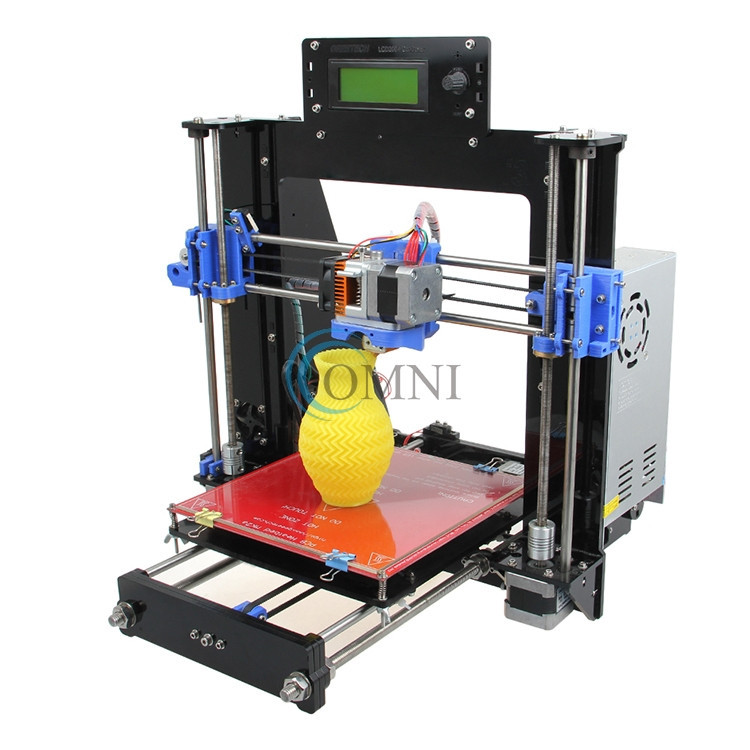
- Over the past year, have you come across any cases of 3D printing that make you look at this direction in a new way? In addition to well-known examples with printed elements for artificial lung ventilation systems .
А.К.: I cannot call this case with valves for ventilation absolutely new. Last year, a set of hardware and software for printing orthopedic insoles appeared as a complete solution. The solution consists of a foot scanner, insole modeling software, a 3D printer for printing insoles, and a special soft TPU plastic that is perfect for this task. This is an important step in starting the production of customized shoes, which in my opinion will dominate the huge shoe market in the near future.
Another interesting example is the 3D printing of hearing aids according to the individual measurements of the patient, in this case photopolymer 3D printing is ideal for creating customized hearing aids, it provides only advantages and does not carry any risks or potential threats.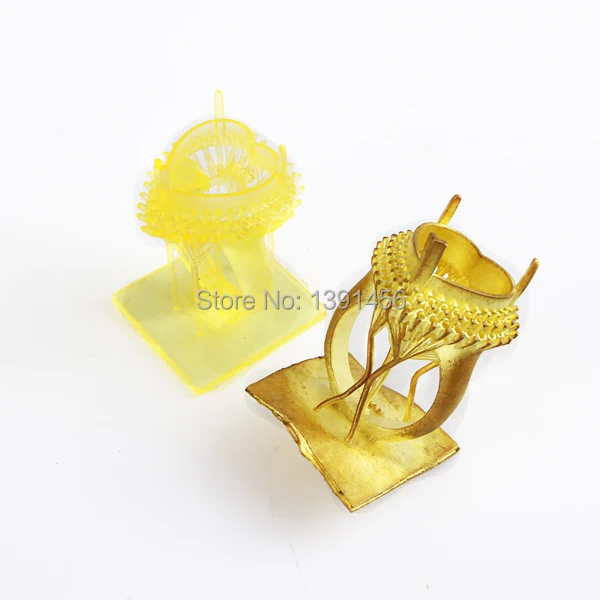
Russian entrepreneur, expert in the field of additive technologies and 3D equipment. Founder and head of the Tsvetnoy Mir company and the Center for Innovative 3D Printing Best3D Print.
Designer Martin Pierce 3D printed a beautiful Game of Thrones bra
Martin Pierce moved with his wife Anne to Los Angeles in 1980 and plunged headlong into the work he loved : creation of architectural design. Over the years, he has released collections that reflect not only his English roots, but also his love of Art Nouveau. Everything he creates, from doorknobs to architectural lighting, fittings and furniture, retains organic, natural forms and has a Far Eastern flavor of Art Nouveau without falling to the level of mere repetition and entertainment. His work is the result of constant practice, and not a simple tendency towards revivalism, he keeps a fine line between the traditions of the past and a forward-looking view of the future.
Art Nouveau works are usually filled with something fantastic and phantasmagoric, and Pearce's latest additions to his sconce collection are clearly in this tradition.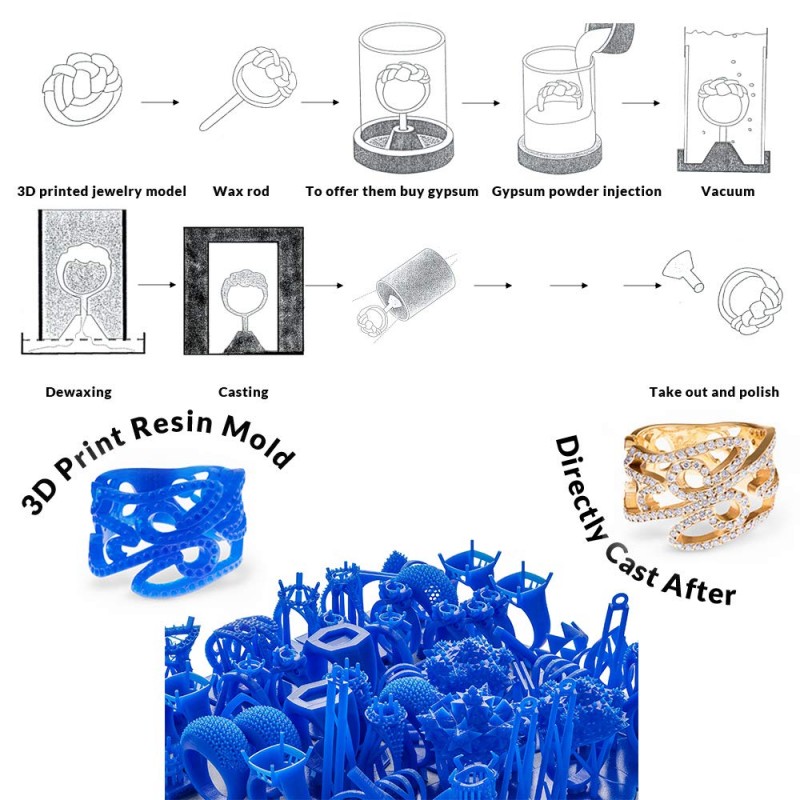 Very relevant and modern is what inspired him to create his collection, namely the book "A Song of Ice and Fire", written by George R. R. Martin, better known as "Game of Thrones". In particular, he was touched by the episode of the dragon eggs that were given to Daenerys, known among other titles as the Mother of Dragons. The beautiful description of these eggs cannot but inspire creativity, in this case, this is a filigree wall sconce that glows with a deep, rich red or bright white as if it, heated from the inside by intense heat, would tell us about the birth of a small life. - dragon. The dragon egg sconce is one of three in this collection, as well as cylinder sconces with patterned patterns and floral motifs.
These sconces are remarkable not only for their appearance, which combines the styles of the past and the present, but also for the technique with which the design was developed. Pierce is accustomed to working with old-school techniques such as "lost wax" and turning on a lathe, but for this work he used 3D printing in part.