3D printer norway
3D Print Lab — NORDIC3D
SLS, Polyjet and Additive Process
Technology | SLS | PolyJet | SLA |
Features | Durable models with high precision, optimal for prototypes, series and larger scale models | Very precise models, with many material options, 2 materials in composite | Cheap and precise, but slower process |
Machine | EOS P395 and P396 | Stratasys Objet 260 Connex3 | FormLabs Form 3 |
Description | Builds by melting very thin layers of polyamid (nylon) plastic into each other with laser. A great choice for series and larger models | A technology that involves a liquid acrylic material that hardens when hit by UV-light. It builds layer by layer to extreme precision. A good choice for detailed models and prototypes. A combination of two materials in the same print (with different hardness)is possible | Precise models |
Precision | 0,1 mm layer | 0,016 mm layer | 0,025 mm layer |
Finish | White Plastic, Plastic with aluminum / glass Any solid color in post-process | Transparent and Opaque alternatives, total of 12 different plastic types, even flexible and solid | White plaster composite with unlimited CMYK color |
Max sizeL × W × H | 320 × 320 × 620 mm | 255 × 255 × 200 mm | 145 × 145 × 185mm |
Price | Example: 600mm Z-height 30 000 NOK | Material: | Material: |
Delivery time | 1 - 2 days (normal) | 1 - 2 days (normal) | 1 - 2 days (normal) |
Materials | PA2200 White Flexible plastic that som is suitable for locking mechanisms, cogs and other parts that needs to be durable, but still precise. PA3200 GF Polyamide with glass particles. Hard models. Alumide Polyamid with aluminium. Light gray models that are thermally conductive. Can be used to make injection molds and things that has to withstand heat. | Transparent: FullCure 720 and VeroClear Hard materials (shore D85): VeroWhite, VeroBlack, VeroGrey og VeroBlue Similar to polypropylen: DurusWhite (shore D76) Flexible rubber like: TangoGrey (ShoreA75), TangoBlack (shore A60) og TangoBlackPlus / TangoPlus (shore A27) Heat resistant materials: Endur (shore D87) will withstand temperatures up to 75 - 80 Celsius Visit Stratasys for more information about the materials Digital ABS |
|
 Good for prototyping
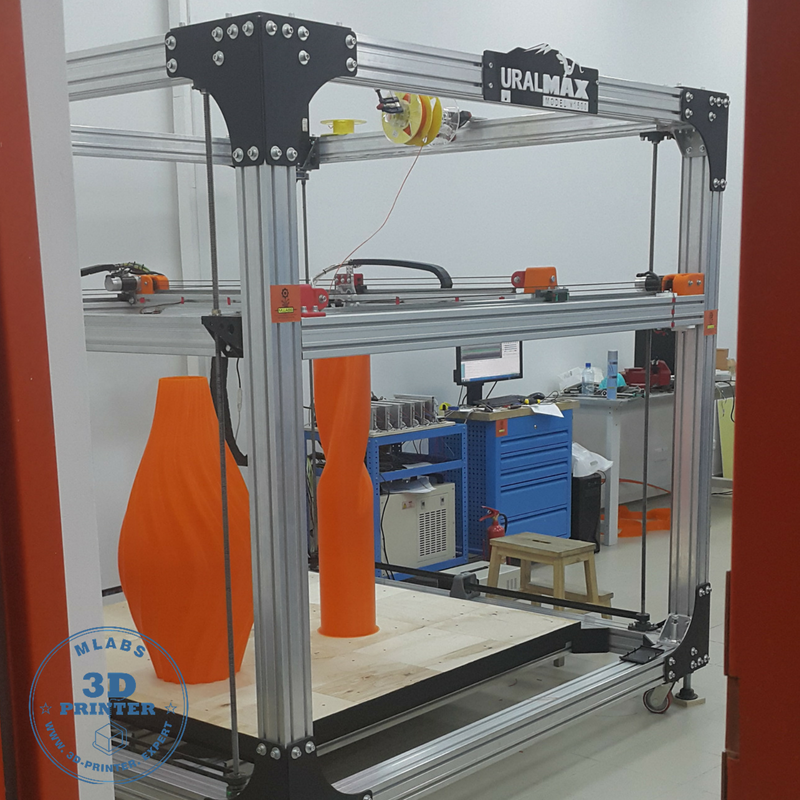 45 MPa)
Breakthrough in Norway to preserve intellectual property when 3D printing
EuropeOffshoreTech
Andrew CoxMay 27, 2021
834 2 minutes read
EquinorIn Norway some big names have come together to overcome one of the biggest hurdles facing additive manufacturing, namely ensuring intellectual property is protected when 3D printers whirl into action.
In an important development for the O&G sector and potentially the shipping sector too, Norwegian start-up, Fieldmade, has entered into a joint industry project (JIP) contract with Equinor and Siemens Energy. The JIP will involve the development of a digital inventory ecosystem, bringing together original equipment manufacturer (OEM) and end user perspectives – allowing the rapid production of spare parts, and also ensuring that intellectual property is protected. It should also act as a proof-of-concept for similar energy sector collaborations.
Majors, contractors, and OEMs need to see this as an opportunity rather than a threat
Fieldmade CEO, Christian Duun Norberg said: “Additive manufacturing has now developed to the point where we can print most of the critical parts the energy sector end-users like Equinor need. As long as there is a digital file of a part, we can reproduce it. This reduces the need for large spare part inventories, it increases the lifespan of equipment at risk of being obsolete, and greatly reduces the length of the supply chain and the potential length of down time.”
Brede Lærum, Head of additive manufacturing strategy and implementation at Equinor said: “Equinor has been a driving force for the modernisation and digitisation of the O&G spare parts supply chain, but to really get full value out of this technology we have needed to work with like-minded OEMs and manufacturers. Additive manufacturing and digital parts libraries will result in cost savings through smaller inventory volumes and reducing costs and risks of late life and obsolescence.”
Norberg concluded: “The significance of this JIP cannot be understated. Additive manufacturing and digitisation are going to profoundly change the way every energy company operates. Majors, contractors, and OEMs need to see this as an opportunity rather than a threat, because the advantages and flexibility this offers are unprecedented.”
With the fourth industrial revolution currently reaching the manufacturing industry, a whole new discussion on IP rights is taking place. Digitalisation does not only involve copyright, it also involves patents and designs, which have in the past generally not been part of similar discussions.
Recent industry reports have also noted that artificial intelligence will also play an increasing role in additive manufacturing adoption. Machine learning could eventually give 3D printers “eyes” (machine vision) and “brains” (closed-looped feedback) to help advance the processes and improve cost, speed and reliability.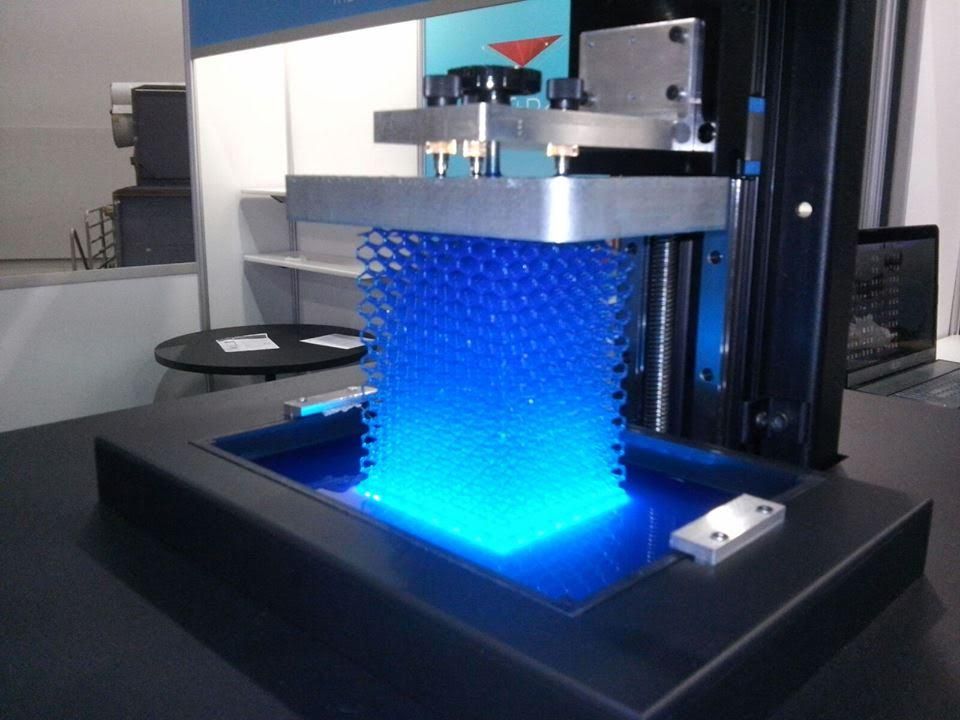
Read Next
March 22, 2023
Scorpio Tankers fixes out LR2 over three years for $43.8m
March 22, 2023
Capital Product Partners seals new containership fixture
March 22, 2023
DeepOcean bolsters fleet with Olympic Subsea MPSV
March 22, 2023
PGS awarded 3D survey contract
March 22, 2023
New Tufton-backed shipowner Stainless Tankers set to list in Oslo
How to create models that are larger than the print volume of a 3D printer
Don't have a large format 3D printer yet? When evaluating the capabilities of a compact desktop 3D printer, do not limit yourself to print volume. Many objects, like your smartphone or a bridge over a river, are made up of many individual components. Therefore, splitting the model into smaller parts that can be aligned after printing is a great solution for 3D printing large objects that do not fit on the platform.
Also, splitting the model can be a great way to get a high quality result, even if the whole model fits on the platform. This makes sense when multiple or opposing surfaces must be free from support structures, when the model has complex ledges, or contains cavities where liquid polymer can remain.
3D printing of various parts opens up new possibilities, for example, the creation of prefabricated structures from various materials or the combination of rigid and flexible parts to simulate the overmolding method.
When choosing a gluing method, it is necessary first of all to take into account the required degree of strength of the glued joints, which depends on the purpose of the models:
-
chemical: use adhesive on artwork, scale models, and complex shapes that are not intended for functional use and should not be impacted;
-
Mechanical: Provide threaded holes or sockets for attaching parts that require a secure mechanical connection, or repeatedly detaching and attaching components as needed.
This tutorial focuses on building large, prefabricated 3D stereolithographic (SLA) printed models with chemically bonded components.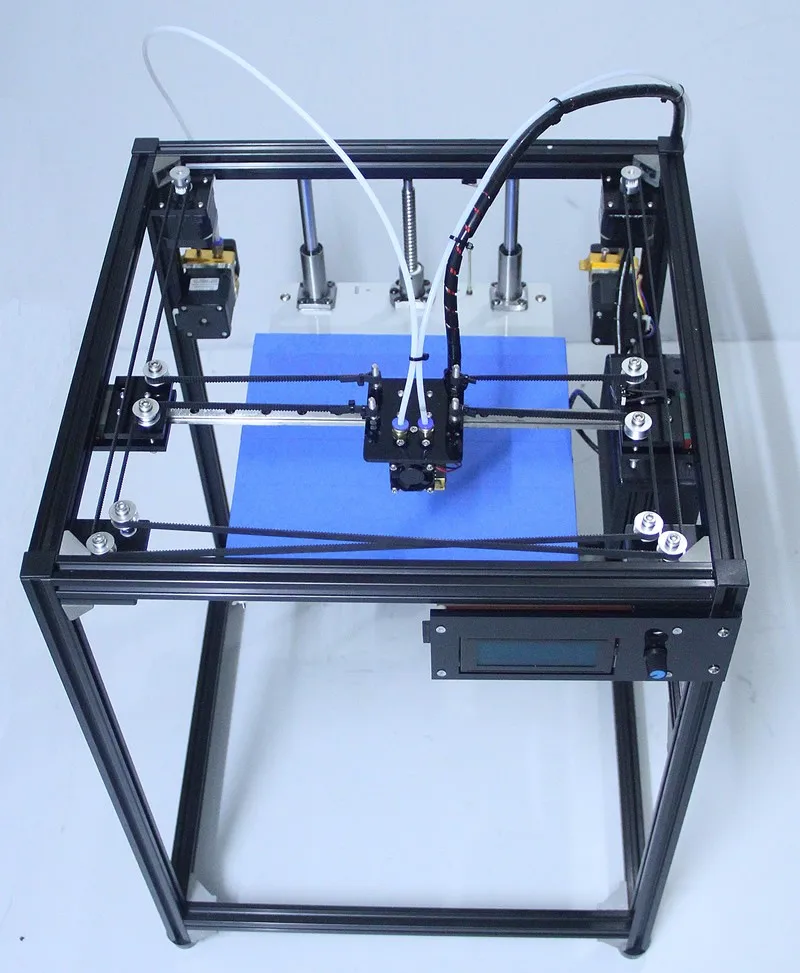 Read on to learn all the steps in this process, from model separation to post-processing for a professional finish.
Formlabs Form 3L is the first affordable, easy-to-use large format 3D printer optimized for reliable production of industrial-quality models. The Form 3L stereolithographic 3D printer features a huge print volume of 30 x 33.5 x 20 cm and unrivaled cost-effectiveness.
Meet the Form 3L
We recommend two ways to separate models: adding features to the design that will allow the parts to fit together, or separating the model with straight lines, which will require them to fit together properly during the bonding process.
Regardless of which method you choose, if you have a lot of parts, it's helpful to add a unique identifier (letters/numbers) for each one to make assembly easier.
Use CAD software to split a 3D model and add basic centering components such as slots, pins, slots, notches, and tabs, or more complex features such as dovetails and slots to match model folds.
Adding centering components to the design makes it easier to assemble parts.
Ideally, these components should make it easier to align and assemble parts, but can cause problems if they differ even slightly from your 3D models, preventing perfect centering. Therefore, centering components are best used only when the printer can print parts with accurate dimensions that are not subject to deformation.
Splitting a 3D model along straight lines requires less effort than adding components to center it. With this separation method, there are also fewer problems if the parts are slightly deformed or differ in size.
Adding IDs for each part makes the assembly process easier.
On the other hand, parts separated by straight lines can be time consuming to assemble, as each part must be manually centered and ensured that they all remain in the correct position until the adhesive is completely dry.
By default, when printing on a stereolithographic 3D printer, solid models without voids are obtained.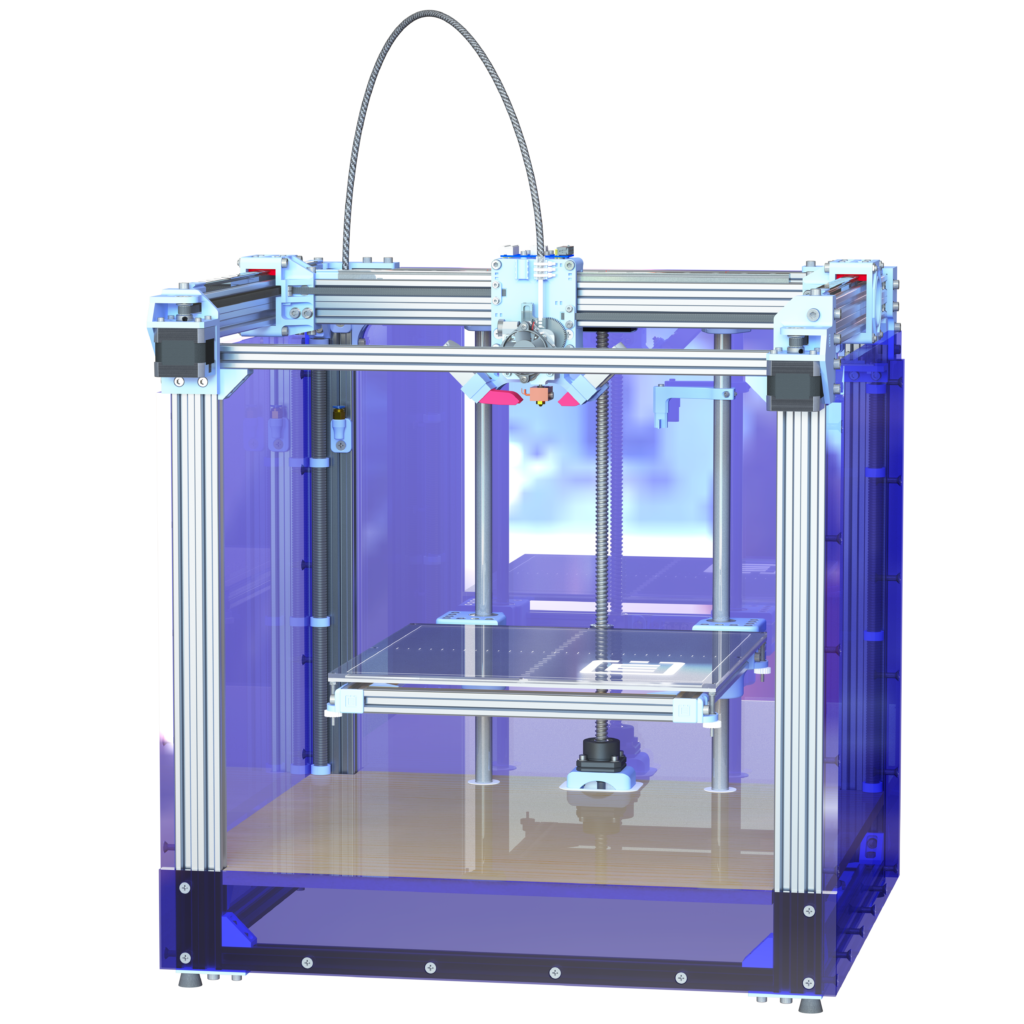 Depending on the design, different requirements may apply to the manufacture of large items. In such cases, 3D printing the outer shell or converting the structure into a hollow is a great way to save a lot of material and time. When printing hollow models on a stereolithographic 3D printer, be sure to add ventilation holes to avoid creating cavities filled with air and pressurized resin.
SAMPLE PART
Experience Formlabs print quality first hand. We will send a free sample of the printed model directly to your office.
Request a free print sample
Converting a model design to a hollow saves a lot of time and material because the printer only needs to print the outer shell.
Learn more about how to save materials and time by hollowing out 3D models.
Depending on the size of the details and the purpose of the model, we recommend three fastening methods:
| Epoxy glue (5-30 min) | cyanoacrylate (CCA, Supercollah) | Resin | ||||
|---|---|---|---|---|---|---|
| Square | Large | Small/Medium | Small | |||
| Paintable | Yes | Yes | Yes | 9006 70072Medium | Low | Low |
For large parts and maximum adhesion, use 5-30 minute dry epoxy. It takes longer to dry than other adhesives, allowing you to fit large 3D printed parts but slows down the assembly process. Most 5-minute epoxy adhesives stop changing shape in as little as five minutes and cure by about 75% in less than an hour.
For large parts and maximum adhesion we recommend using epoxy adhesive.
The next option is cyanoacrylate (CA or superglue), which quickly forms a strong bond, ideal for small to medium sized parts. Thoroughly clean the part before applying CA to the surface, because contaminants adversely affect the quality of the connection. CA has a moderate impact strength, but is not recommended for models that require high strength.
For small models, you can simply use liquid resin from a stereolithographic 3D printer. Pour a small amount of resin into a tray from a bottle or cartridge, pick it up with a pipette or syringe, and place it on the surface to be bonded. Connect the parts and wipe off excess resin that may spill around the edges.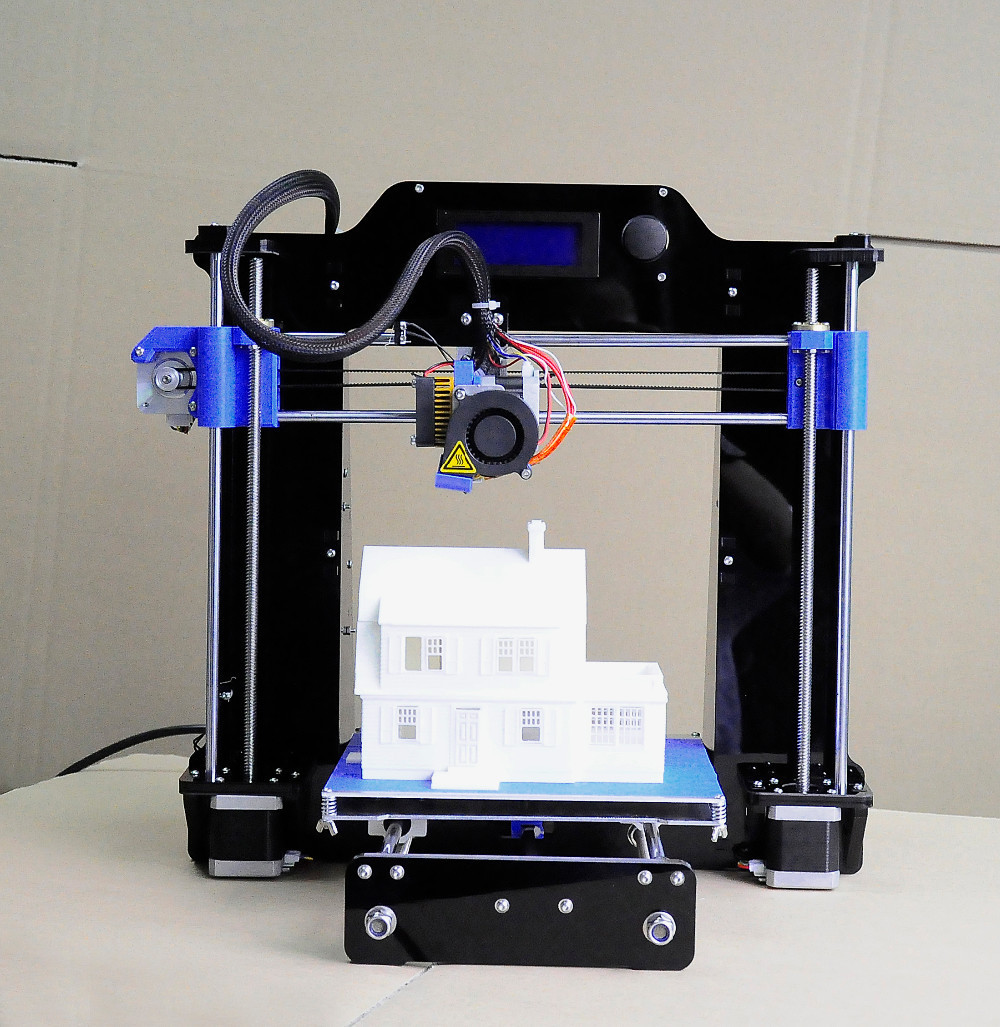 Aim a 5mW (405µm wavelength) UV laser pointer at the contact area to cure the resin and bond the parts.
This method produces a chemical bond similar to 3D stereolithography printing, but is only suitable for bonding small surfaces as a low power light pointer cannot penetrate the model deep enough to create a strong bond.
Note. Protective equipment must be worn when working with polymers, including proper eye protection and gloves.
Download PDF
Don't have time to read the article now? Download it in PDF format.
Download as PDF
After assembling the model, it's time to move on to post-processing. This step includes geometric correction of the model to provide a smooth surface that matches the original 3D model, and aesthetic finishing to obtain a uniformly colored surface.
Depending on the precision of the printer and the size of the printed parts, there will almost always be slight voids or mismatches at the contact points. Automotive sealant (e.g. Bondo 907) adheres well to polymers, therefore, to eliminate such inconsistencies, it is recommended to apply it in a thin layer on the surface. Lightly sand the surface after each coat has dried to bring the model to its final shape.
Sealing models with automotive sealant (red area in image) will help eliminate small gaps and inconsistencies between parts.
Sanding helps remove traces of support structures and remaining inconsistencies in the model. Gently start sanding the surface with 150-grit sandpaper to remove traces of support structures and smooth edges where parts meet. Once the surface is smooth, sand it wet using 320 grit sandpaper to remove any remaining layer lines. Sand the surface in random motions so as not to leave marks. In most cases, these two methods will produce a fairly smooth surface, but you can continue to increase the grit of the sandpaper up to 2 times and, after wetting it, sand the entire model until the surface is reasonably smooth.
Power sanding is great for large flat surfaces, but can ruin fine details. Grinding of small models is recommended to be done by hand, and for large ones, a combination of manual and mechanical grinding is recommended.
Machining large parts with mechanical and manual grinding saves a lot of time. Power sanding is great for large, flat surfaces, but can ruin the fine details, sharp corners, and subtle contours that are typical of stereolithography. As a result of mechanical grinding, a lot of dust is also generated, so before starting processing, it is necessary to prepare the working area.
Note. The use of power tools requires full attention and the use of protective equipment. The surface can be damaged very quickly without even realizing it, just by leaving the sander without moving.
When finished sanding the model, rinse it in soapy water to remove dust and debris and dry thoroughly before proceeding to the last step.
The primer helps the paint adhere to the surface and can indicate areas where additional sanding is needed or removal of traces of supports that you may have missed. The Universal Matte Gray Plastic Primer shows these spots exceptionally well. For best results, apply it to the surface in several thin coats. Sand critical areas and reapply a thin coat of primer. Repeat this process until the entire surface of the model is level.
Note. Use protective equipment during priming and painting, including a respirator to protect against paint fumes.
All-purpose matt gray primer for plastics is exceptionally good at showing fine details and helping to identify areas that need to be sanded down.
Find out more about sanding and priming in our detailed guide.
When painting with multiple colors, protect the model with a temporary coat. First, plan the order in which you will paint the model, depending on the color, transparency, and size of the area of a particular color.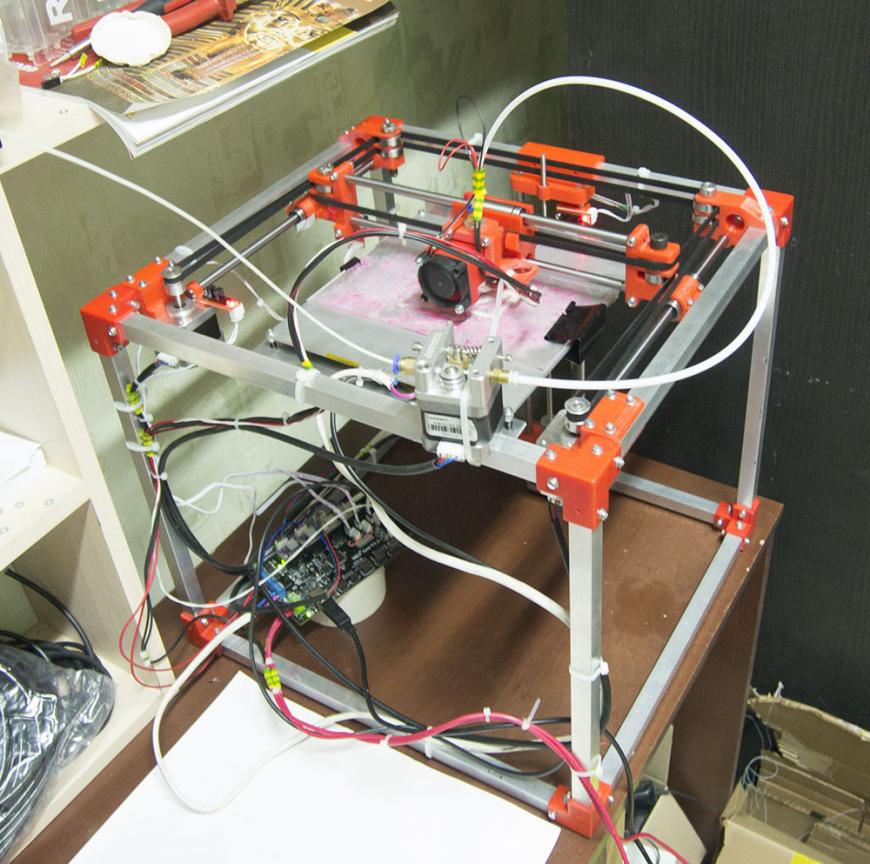 Start with small details so that fewer of them can be protected when painting with the main color. Apply painter's tape to the edges and corners. To quickly cover large areas, attach sheets of paper to them. Ribbon guides (laser cut) can also be useful for creating straight lines, circles and complex shapes.
When it comes to masking, figuring out the correct order is your first priority. In our case, the parts were first painted silver and the sections that would remain silver on the final part were then covered with painter's tape to hide them from the next l
painting. In our case, we first painted the parts silver and put masking tape on the areas that should remain silver in the finished model so that they do not get paint of a different color.
As with primer, several thin coats of paint should be applied for optimal results rather than one thick coat. Most spray paints will achieve the best color in warm and slightly damp conditions in the absence of wind.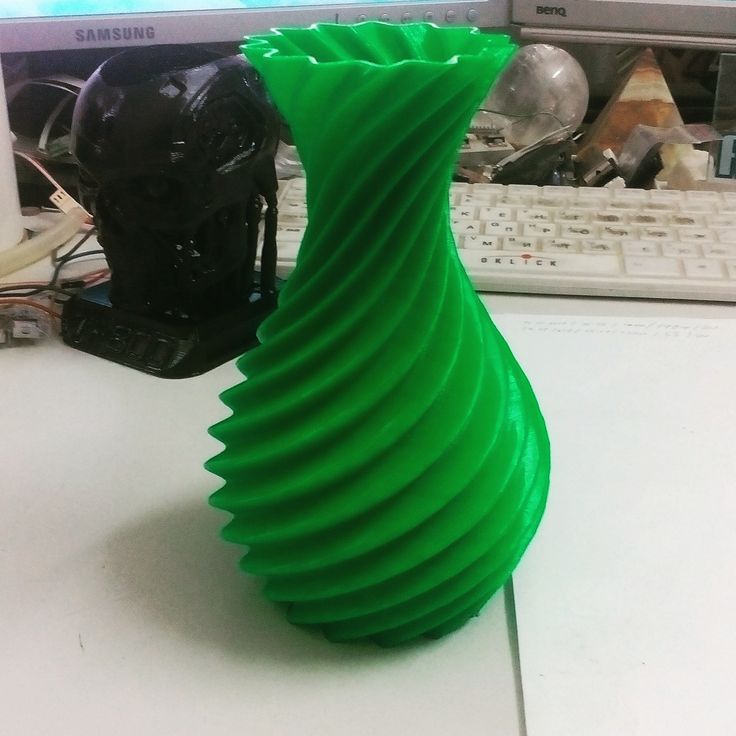 In this case, you must always follow the manufacturer's recommendations, which can be given on the paint container or in the technical documentation.
Consider the time the paint needs to dry: Allow layers to settle before applying the same color and allow the paint to dry completely before applying a new color.
The area where we applied masking tape is still silver.
Become an expert in painting 3D models with our detailed guide
Already wondering what your finished model will look like?
"Sorry sir, that R2-D2 over there is in excellent condition and inexpensive."
Formlabs optics designer Adrien Tanner created this R2-D2 model from 105 parts printed on a Formlabs stereolithographic 3D printer. It even has working electronics borrowed from the Form 2 printer - a galvanometer drive for sound reproduction, a cartridge dispenser for lamps, and a Z-axis drive for dome rotation. 9The 0003
Form 3L is the first large format 30 x 33.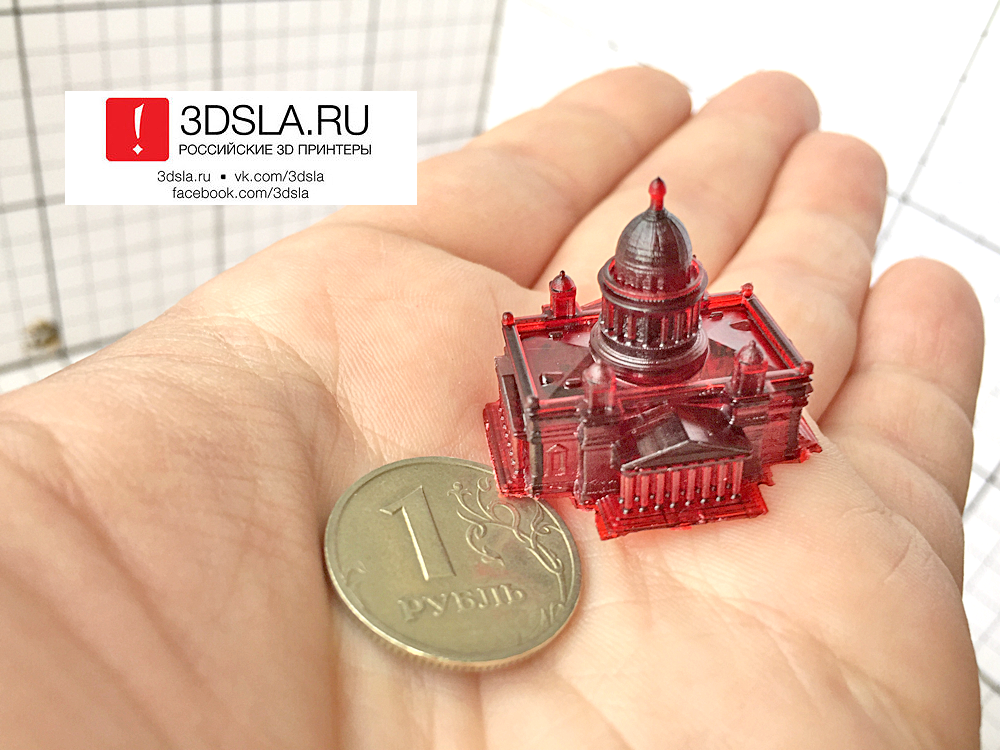 5 x 20 cm 3D printer for producing massive industrial quality models.
Reduce order processing time when outsourcing or manual work when assembling large-scale 3D models. Now you can print large 3D models in their entirety on the Form 3L, the first affordable large format SLA printer.
Want to see how stereolithographic parts work? Explore our resources to learn more about stereolithographic resins, or request a free sample to evaluate print quality for yourself.
Request a free print sample
What is a 3D printer and how does it work? | GeekBrains
https://gbcdn.mrgcdn.ru/uploads/post/1999/og_image/501bb6c82a53bb3bc2a0fee73b0c9e9e.png
In 2011, a printer filled with a human kidney TED printed directly during a TED conference. Two years ago, Adidas announced a new sneaker that can be 3D printed in 20 minutes. And recently, Elon Musk's SpaceX successfully tested the spacecraft's engines, which were also printed on a 3D printer.
In today's world, 3D printing is not an amazing technology of the future, but a well-studied reality.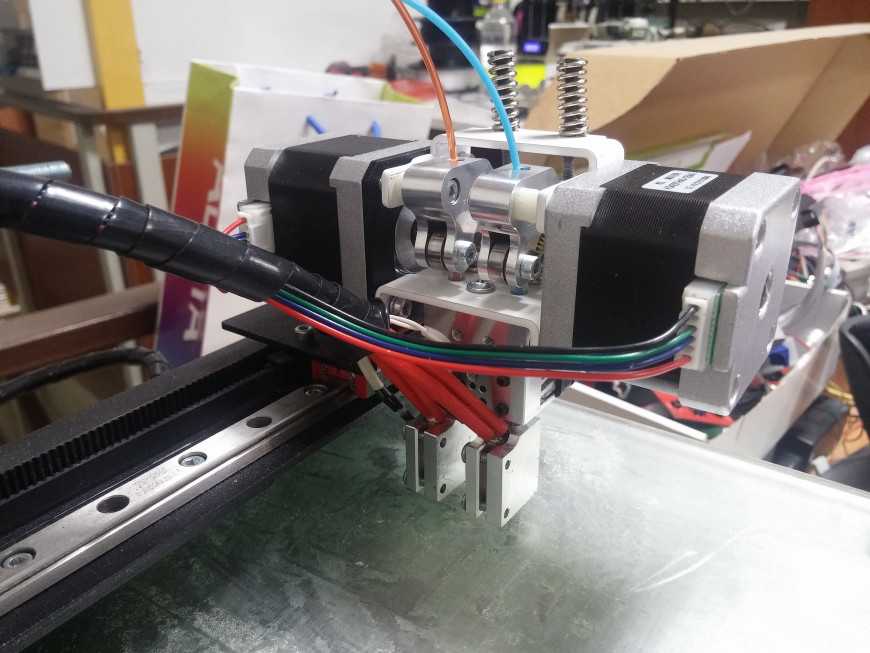 It is used in architecture, construction, medicine, design, production of clothing and footwear and other areas. At the request of "3D printer", search engines give out hundreds of drawings and prototypes of varying complexity - from a soap dish and a table lamp to a car engine and even a residential building.
Anyone can buy a printer and print a case for a smartphone, but not everyone goes beyond 3D printing from a drawing. In this article, we will tell you when 3D printing appeared, how the technology can be applied and what its prospects are.
How the 3D printer came to be
Let's not bore you too much with the dates and briefly retell the history of 3D printing.
A precursor to 3D printing. In the early 1980s, Dr. Hideo Kodama developed a rapid prototyping system using photopolymer, an acrylic-based liquid substance. The printing technology was similar to the modern one: the printer printed the object according to the model, layer by layer.
First 3D printing. The production of physical objects using digital data was demonstrated by Charles Hull. At 19In 84, when computers were not much different from calculators, and ten years before the release of Windows-95, he invented stereolithography, the forerunner of 3D printing. The technology worked like this: under the influence of an ultraviolet laser, the material solidified and turned into a plastic product. The form was printed on digital objects, and this became a boom among developers - now it was possible to create prototypes at a lower cost.
The first 3D printer. Source: habr
The first manufacturer of 3D printers. Two years later, Charles Hull patented the technology and opened the 3D Systems printer company. It released the first machine for industrial 3D printing and is still leading the market. True, then the printer was called differently - an apparatus for stereolithography.
The popularity of 3D printing and new technologies. In the late 80s, 3D Systems launched mass production of stereolithographic printers. But by that time, other printing technologies had also appeared: laser sintering and deposition modeling. In the first case, the powder was processed by the laser, not the liquid. And the majority of modern 3D printers work according to the fusing method. The term "3D printing" came into use, the first home printers appeared.
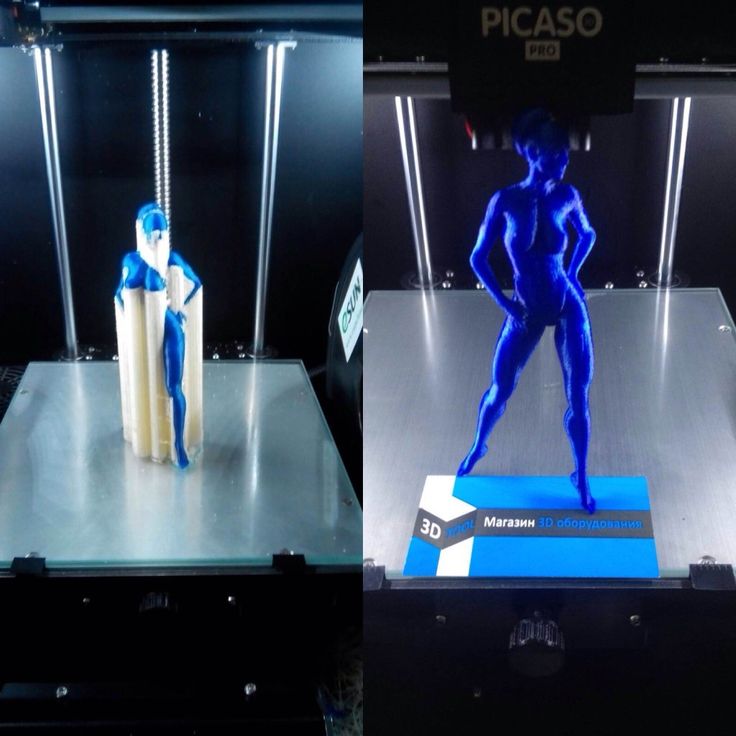
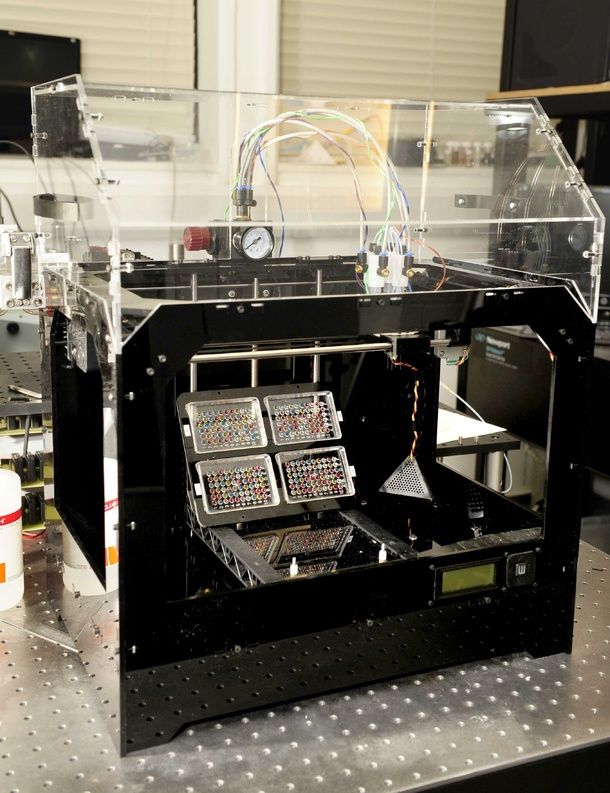
A revolution in 3D printing. At the beginning of the 2000s, the market split into two directions: expensive complex systems and those that are available to everyone for printing at home. The technology began to be used in specific areas: for the first time, a bladder was printed on a 3D printer, which was successfully implanted.
Kidney Test Print. Source: BBC
In 2005, the first high-quality color 3D printer appeared, creating kits for itself and "colleagues".
How a 3D printer works
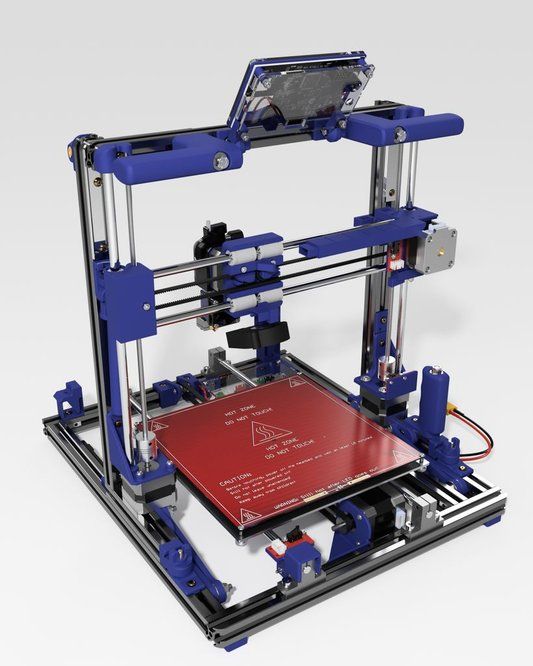
Basically, 3D printers consist of the same parts and are similar in design to conventional printers. The main difference is obvious: a 3D printer prints in three planes, and in addition to width and height, depth appears.
Here are the parts of the 3D printer, not counting the body:
- extruder or print head - heats up the surface, measures the exact amount of material using a gripping system and squeezes out semi-liquid plastic, which is fed in the form of threads;
- desktop (it is also called a working platform or printing surface) - on it the printer forms parts and grows products;
- linear and stepper motors - drive parts, are responsible for the accuracy and speed of printing;
- clamps - sensors that determine the print coordinates and limit moving parts. They are needed so that the printer does not go beyond the desktop, and make printing more accurate;
- frame - connects all elements of the printer.
Schematic of a 3D printer. Source: Lostprinters
All of this is computer controlled.
How products are created
The additive 3D printing process is responsible for creating a three-dimensional product - this is when layers of material are superimposed on each other during the manufacture of an object, from bottom to top, until a copy of the form in the drawing is obtained. This is how plastics are printed. And photopolymer printing works on stereolithography (SLA) technology: under the influence of a laser emitter, photopolymers harden. In addition to plastic and photopolymer resins, modern 3D printers work with metal clay and metal powder.
Printing consists of continuous cycles that repeat one after another - one layer of material is applied to the next, and the print head moves until the finished object is on the working surface. The printer itself removes print waste from the desktop.
How a 3D drawing works
The printer prints a product according to a 3D drawing: it is created on a computer in a special program, then saved in STL format. This file is output to the cutting program for the printer - it helps to set the model of the physical properties of the product, such as density. Next, the program converts the model into instructions for the extruder and uploads it to the printer, which starts printing the product.
3D drawing is easy to make at home - read the instructions on habr.
How to program a 3D printer
Brief instructions for setting up the printer:
- Select a 3D model. You can draw the product yourself in a special CAD editor or find a ready-made drawing - the Internet is full of models of varying complexity.
- Prepare 3D model for printing. This is done by the slicing method (slice - part). For example, in order to print a toy, its model must be “split” into layers using slicer programs and transferred to the printer. Simply put, a slicer shows the printer how to print an object: which contour to move the print head, at what speed, what thickness of layers to make.
- Transfer model to printer. From the slicer, the 3D drawing is saved to a file called G-code. The computer downloads the file to the printer and starts 3D printing.
- Monitor printing.
Whether printed products can be used
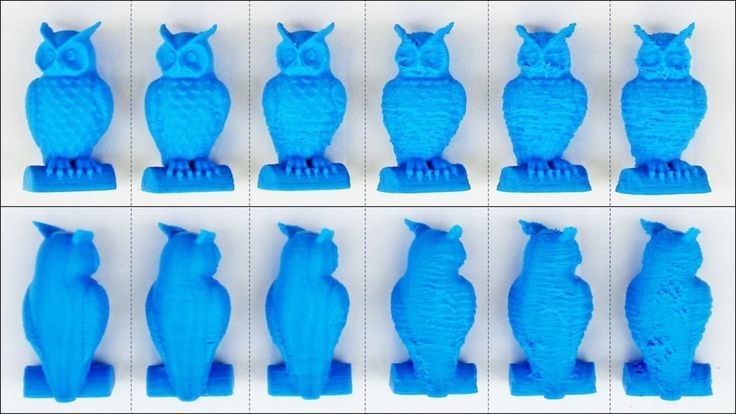
Depends on the quality of the media, printer and end product. Often home printers do not accurately convey the shape and color of an object. Plastic products need additional processing: sometimes they are printed with burrs and defects, and almost always with a ribbed surface.
Product after and before processing. Source: 3D-Today
There are several ways to finish the surface - not all are suitable for home use:
- mechanical processing - hand sanding, deburring;
- chemical - immersion in acetone, sandblasting, applying a special solution with a brush.
What can be printed with a 3D printer
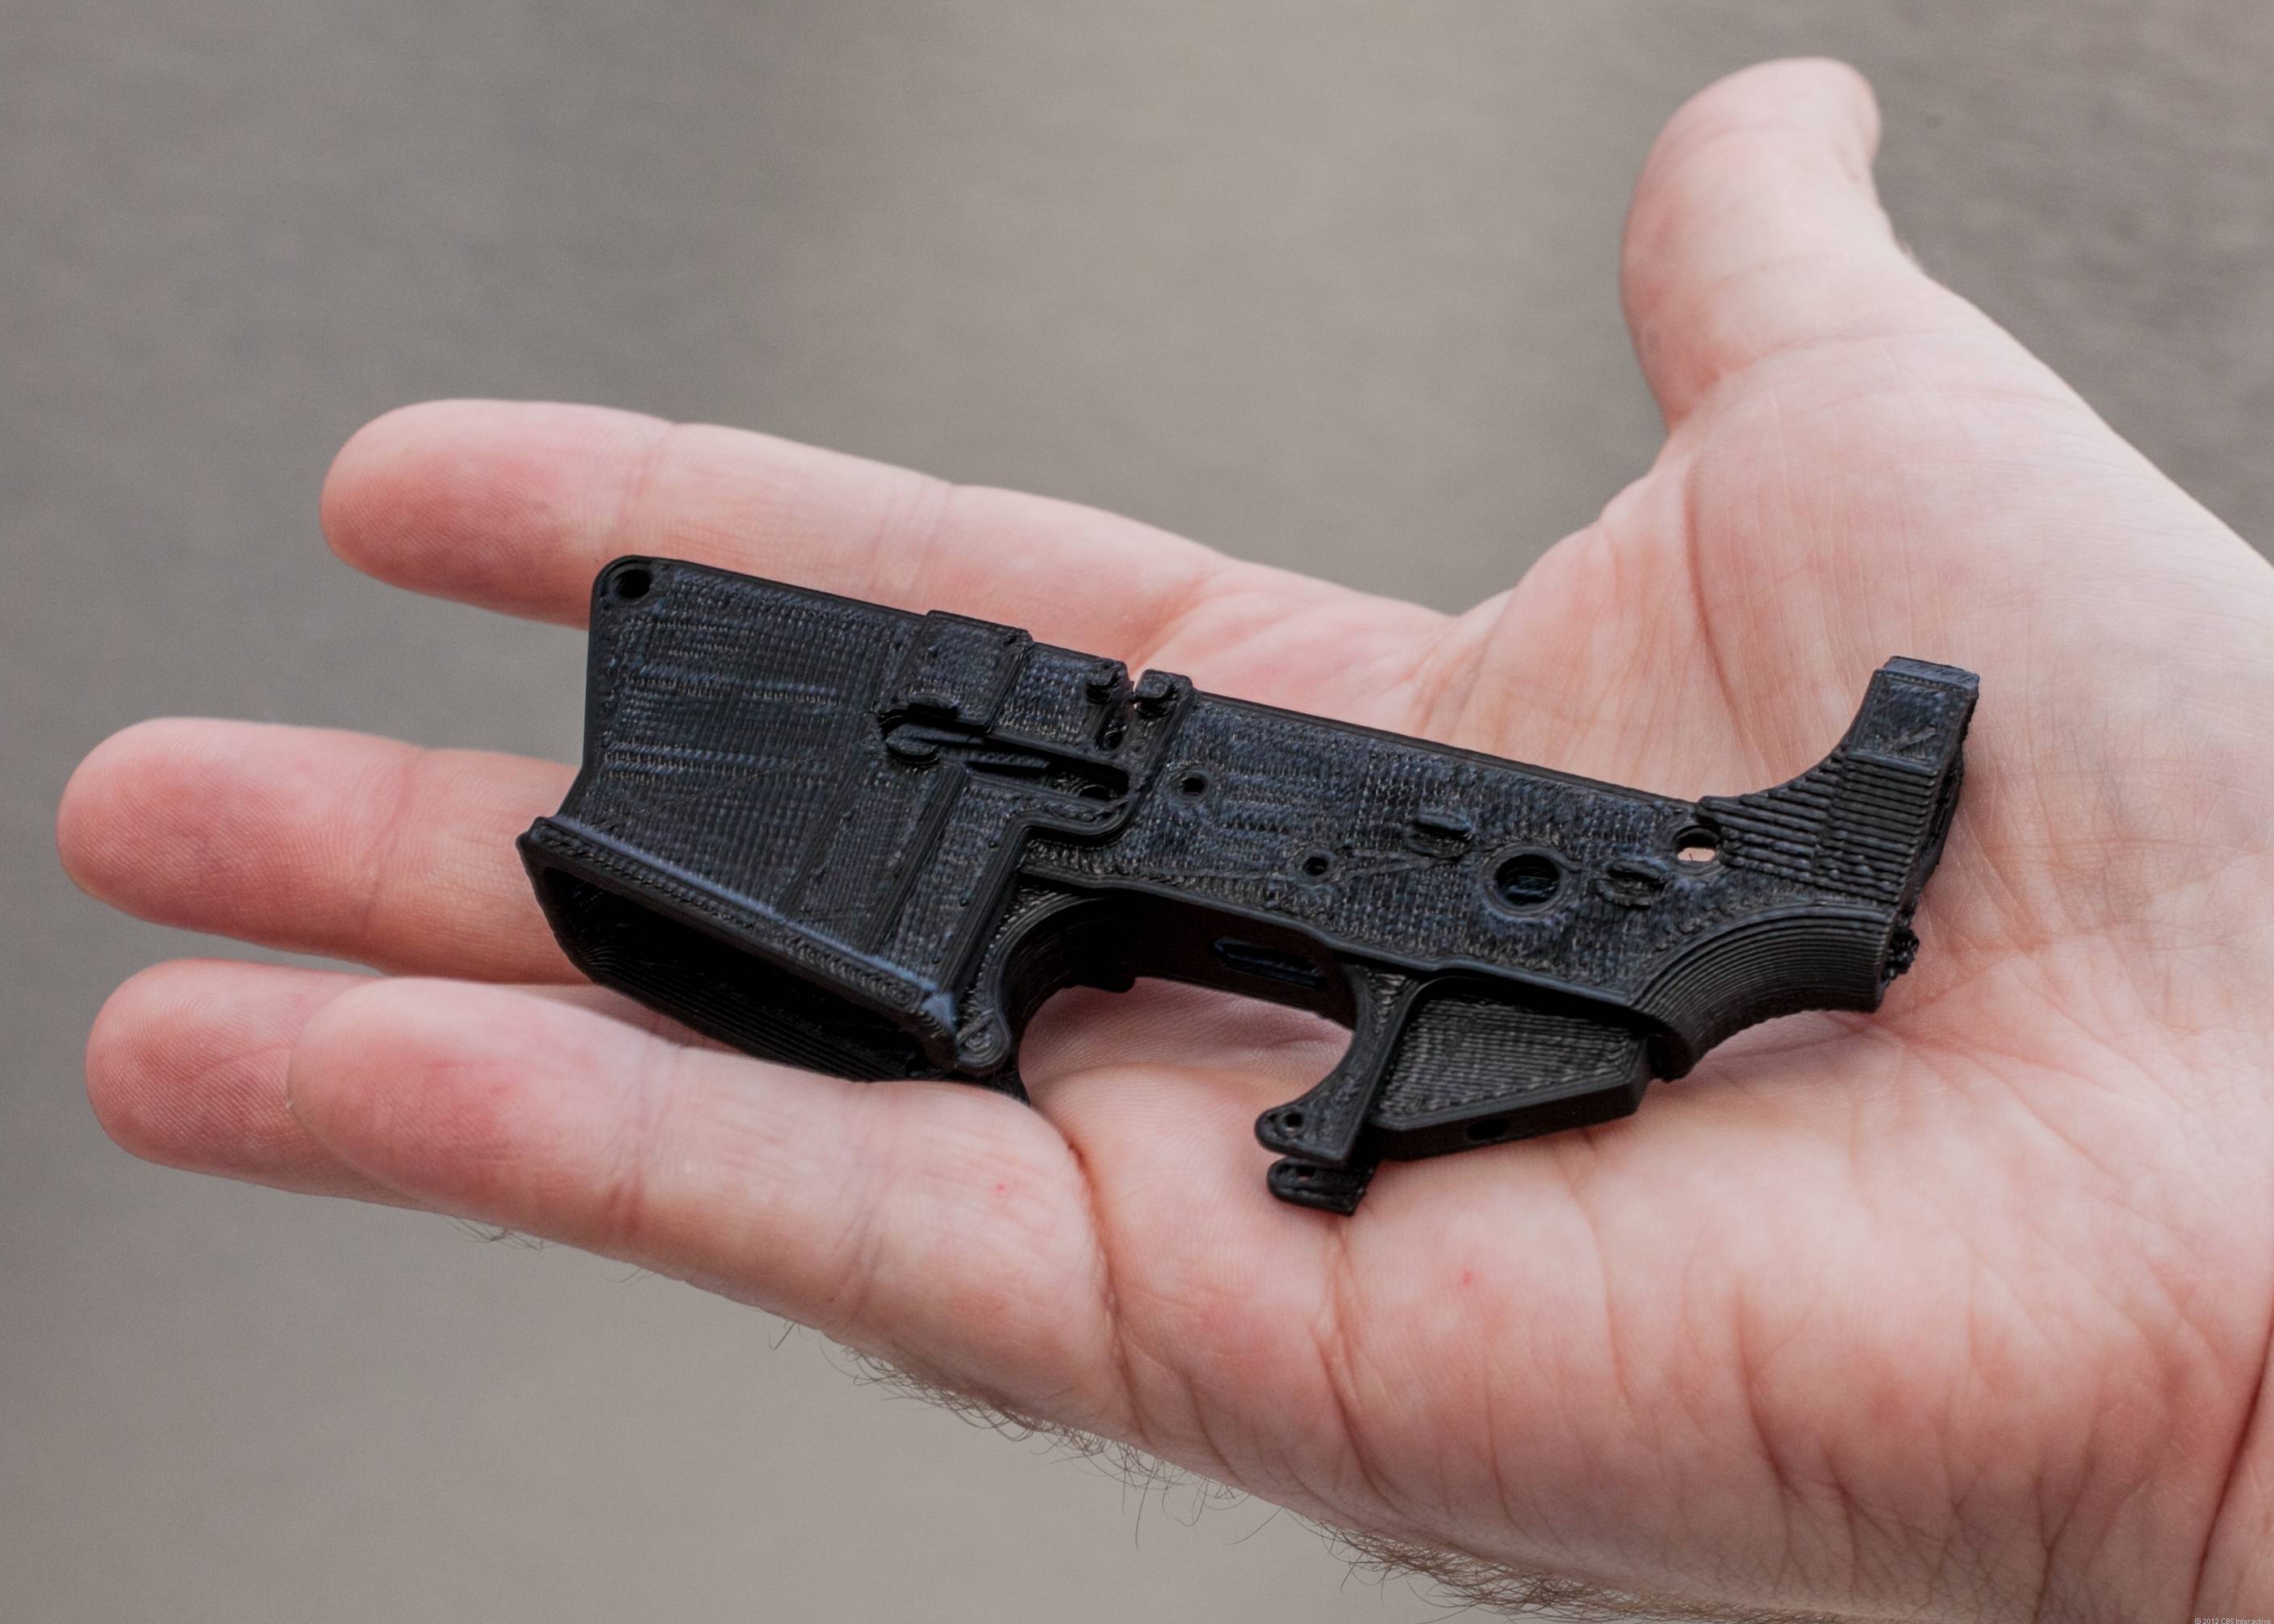
The Internet is full of collections with instructions for printing 3D products. 3D-Today publishes photos of the work of printer owners, from small parts to sculptures. Three years ago, Habré posted a list of "50 cool things to print on a 3D printer." Make3D wrote about larger projects like printing cars, weapons, solar panels, and prosthetics.
There are a number of promising areas where 3D printing is already being applied.
Making models according to your own sketches. Konstantin Ivanov, the creator of the 3DPrintus service, in an interview with Afisha said that 3D printing will lead to the flourishing of customizable things: anyone can assemble and print the desired product online. For example, make a model of a robot and order its printing on an industrial printer, create and print your own design of wedding rings or shoes. Examples of such projects are Thinker Thing and Jweel.
Rapid prototyping. The most popular area in which 3D printing is used. Test models of prostheses, prototypes of medical corsets, bas-reliefs, Olympic equipment are made on 3D printers.
Prototypes of children's prostheses, 3D printing. Source: 3D-Pulse
Complex geometry. The 3D printer can easily handle the production of models of any shape. A few examples:
- an Australian university explored the possibilities of a 3D printer and printed a stool in the shape of a fingerprint;
- a Danish chef won a haute cuisine competition: he 3D printed miniature dishes of complex shapes from seafood and beetroot puree;
One of the chef's winning dishes.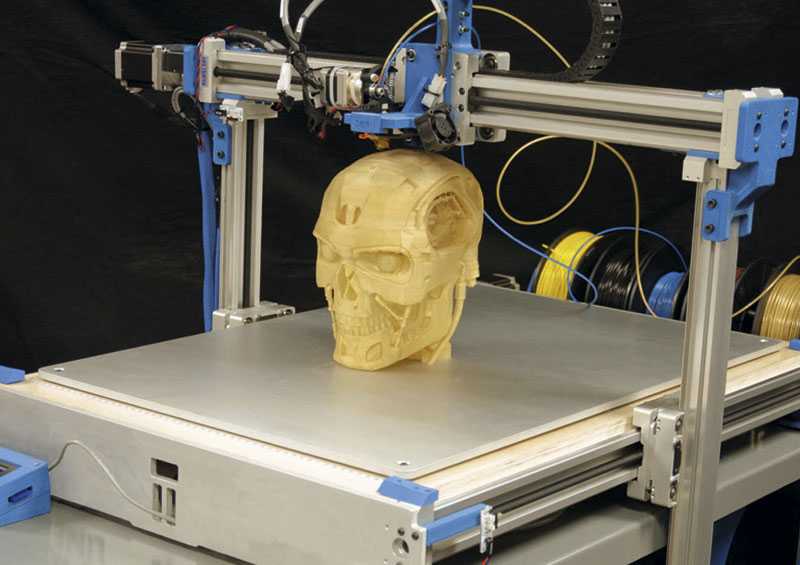 Source: 3D-Pulse
- A German institute has developed a system for accelerated 3D printing - in 18 minutes, the printer produces a complex geometric product 30 cm high. It usually takes printers an hour to print pocket figures.
3D printing technology
Briefly about the main methods of 3D printing.
Stereolithography (SLA). In a stereolithographic printer, a laser irradiates photopolymers and forms each layer according to a 3D drawing. After irradiation, the material hardens. The strength of the product depends on the type of polymer - thermoplastic, resins, rubber.
Stereolithography does not support color printing. Other drawbacks include slow operation, huge size of stereolithographic setups, and you can't combine multiple materials in one run.
This technology is one of the most expensive, but guarantees accurate printing. The printer applies layers with a thickness of 15 microns - this is several times thinner than a human hair.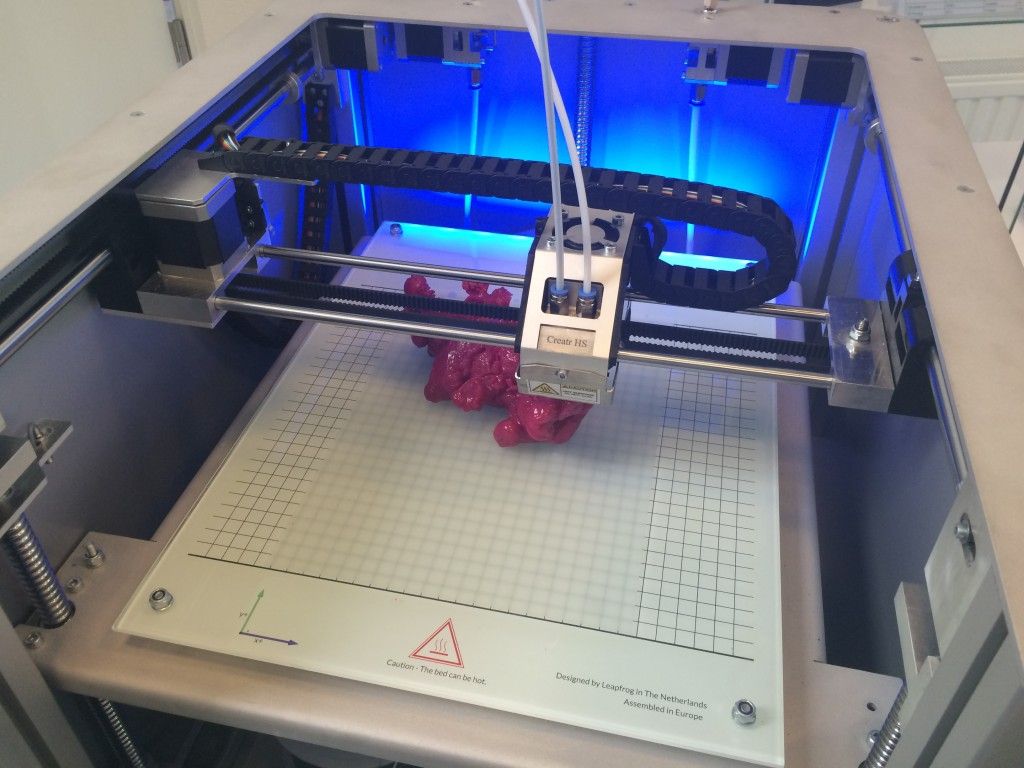 Therefore, with the help of stereolithography, dental prostheses and jewelry are made.
Industrial stereolithography machines can print huge products, several meters long. Therefore, they are successfully used in the production of aircraft, ships, defense industry, medicine and mechanical engineering.
Selective laser sintering (SLS). The most common method for sintering powder materials. Other technologies are direct laser sintering and selective laser melting.
The method was invented by Carl Descartes in the late eighties: his printer printed by layer-by-layer drawing (sintering). A powerful laser heats up small particles of material and moves along the contours of the 3D drawing until the product is finished. The technology is used to manufacture not whole products, but parts. After sintering, the parts are placed in an oven where the material burns out. SLS uses plastics, ceramics, metals, polymers, fiberglass in powder form.
The athlete is wearing New Balance shoes, which were made using laser sintering. Source: 3D-Today
SLS technology is used for prototypes and complex geometric parts. For printing at home, SLS is not suitable due to the huge size of the printer.
FDM or Fused Deposition Modeling. This 3D printing method was invented by American Scott Crump. FDM works like this: the material is fed into the extruder in the form of a thread, where it heats up and is fed to the worktable in microdroplets. The extruder moves along the working surface in accordance with the 3D model, the material cools and solidifies into the product.
Advantages - high product flexibility and temperature resistance. For such printing, different types of thermoplastics are used. FDM is the most inexpensive among 3D printing technologies, which is why printers are popular for home use: for making toys, souvenirs, and jewelry. But mostly fusing modeling is used in prototyping and industrial production - printers quickly print small batches of products. Refractory plastic items are made for the space industry.
3D inkjet printing. One of the first methods of three-dimensional printing - in 1993, it was invented by American students when they improved a conventional paper printer, and soon the technology was acquired by the same company 3D Systems.
Inkjet printing works like this: a binder is applied to a thin layer of material along the contours of the drawing. The printhead applies the material along the boundaries of the model, and the particles of each new layer stick together. This cycle is repeated until the product is ready. This is one of the types of powder printing: earlier inkjet 3D printers printed on plaster, now they use plastics, sand mixtures and metal powders. To make the product stronger, after printing it can be impregnated with wax or fired.
Items printed using this technology are usually durable, but not very durable. Therefore, with the help of inkjet printing, souvenirs, jewelry or prototypes are made. This printer can be used at home.
These candies were made on a ChefJet 3D confectionery inkjet printer that uses water, sugar, chocolate and food coloring instead of plastic. Source: 3Dcream.ru
Inkjet technology is also used in bioprinting, where living cells are layered on top of each other and thus organic tissues are built.
Where 3D printing is used
Mainly in professional fields.
Construction. 3D printers print walls from a special cement mixture and even houses with several floors. For example, back in 2014 Andrey Rudenko printed a 3 × 5 meter castle on a construction printer. Such 3D printers can build a two-story house in 20 hours.
Medicine. We have already mentioned the printing of organs, and 3D printers are also actively used in prosthetics and dentistry. Impressive examples - with the help of 3D printing, doctors managed to separate Siamese twins, and a cat without four legs was given prostheses that were printed on a printer.
Read more about 3D printing in medicine in the article published by 3D-Pulse.
Space. 3D printing is used to make equipment for rockets and space stations.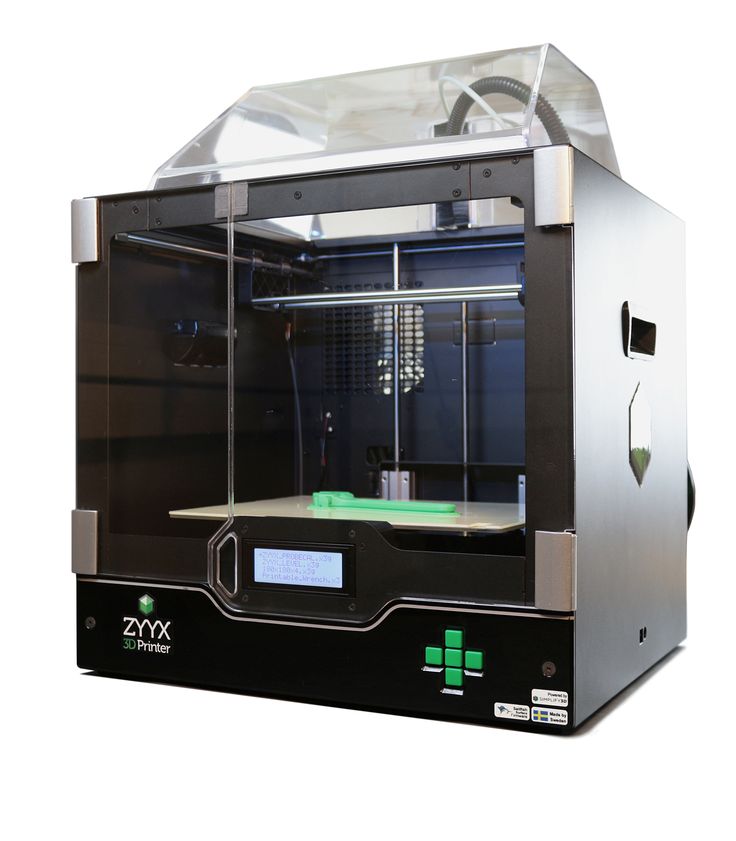 Another technology is used in space bioprinting and even in the work of lunar rovers. For example, the Russian company 3D Bioprinting Solutions will send live bacteria and cells into space, which will be grown on a 3D printer. Amazon founder Jeff Bezos unveiled a prototype lunar module with a printed engine, and space startup Relativity Space is building a rocket 3D printing factory.
Aviation. 3D parts are printed not only for spacecraft, but also for aircraft. Engineers at the US Air Force Lab can 3D print aircraft components, such as a fuselage skin element, in about five hours.
Architecture and industrial design. 3D printers print models of houses, neighborhoods and villages, including infrastructure: roads, trees, shops, lighting, transport. As a material, an inexpensive gypsum composite is usually used.
One of the unusual solutions is the design of concrete barricades by American designer Joe Ducet. After the terrorist attacks with trucks that crashed into a crowd of people, he proposed a model of durable and functional barriers in the form of a designer, which can be printed on a 3D printer.