3D printer life hacks
Weekly Roundup: Ten 3D Printable Life Hacks - 3DPrint.com
The internet tells me that this is a life hack, so I don’t want any whining about using life hack for this list, the internet is never wrong.
I can already hear the outrage over using “life hack” here, because none of these are technically life hacks. And so many people already hate the word ‘hack’ being used in this context, so I’m anticipating some annoyance. But there really is no other way to classify these great 3D printable gizmos and gadgets, other than as gizmos and gadgets, so I went with life hack because it Googles better, so just give me a pass here.
Besides, a life hack is something simple that solves an annoying problem and makes your life easier, and honestly everything on this list does exactly that. This all started with my desire to find a way to hang up a kitchen towel without having to stick one end of it in a drawer or thread it through a pull handle, and it led to this. Because 3D printing isn’t affected by the economy of scale, it’s the perfect tool to build exactly what you need for whatever problem you may need solved in your home. Especially problems that are relatively unique to you and don’t have mass market solutions.
Thankfully there were so many that I had plenty of these to choose from, most of them things that I actually intend to 3D print and use, or things that I will lament about not having available to me in the past.
So without using any more words to pad the length of this article, here they are, Ten 3D Printable Life Hacks.
KEY CONDENSING CLIP
Key Condenser by Blaine Costello
Found on: MyMiniFactory
Cost: Free
This is a great alternative to a standard key chain, especially if you only have a handful of standard keys to keep track of. Think of it like a Swiss Army Knife but with keys instead of various blades that you know have specific uses but you just don’t know what they are.
HANGING TOWEL CLIP
Towel Holder by Weedaily
Found on: Thingiverse
Cost: Free
This is the life hack that started it all, I stumbled on it while looking for a way to hang up a hand towel in the kitchen that didn’t involve a hook. And they work great by the way. I have one on each side of my stove and I can easily hang a towel up without having to use the drawer and watch the towel fall on the ground every time I open it up. I think they actually sell things like these in stores, but for the sake of this article I’m going to pretend that there was no mass market option for me.
BATHROOM WALL OUTLET SHELF
Outlet Shelf by teichelberger
Found on: Thingiverse
Cost: Free
This is something that i wish I had in my first apartment, which had the world’s smallest bathroom. I’m almost convinced that it wasn’t even legally a bathroom but actually just a small closet that had a tiny, little person-sized toilet and a pedestal sink squished inside of it. There was literally no storage for anything beyond a bar of soap on the side of the sink, so there was nowhere to stick anything that you needed. I ended up using a TV tray that I had to set up every morning as I got ready, so I really could have used this.
EGG CRACKING GADGET
Turtle Breaker Eggs by Gabriel Martini
Found on: MyMiniFactory
Cost: Free
Yes, I know, I’m going to defend the use of an egg-cracking gadget. But really, I hate eggs so much. Not because they’re not delicious and useful in all manner of foods, but they are just a pain in the butt to crack. No matter how carefully I crack them, I always end up either hitting it against the counter too hard or not hard enough, and at least 25% of the time I end up with a mess on my hands. I realize that it’s not normal for a grown man to be incapable of consistent egg-cracking, but here I am anyways. I’m like an infomercial come to life, you should see me trying to open a carton of milk.
Take a look at how it works and stop judging me:
CABLE STORAGE HIVE
Cable Management Hive by Juanfly
Found on: Thingiverse
Cost: Free
I have a drawer in my office that i call my e-tumbleweed storage container, because it consists of the various charging cords and headphones that I have for the many devices that I use.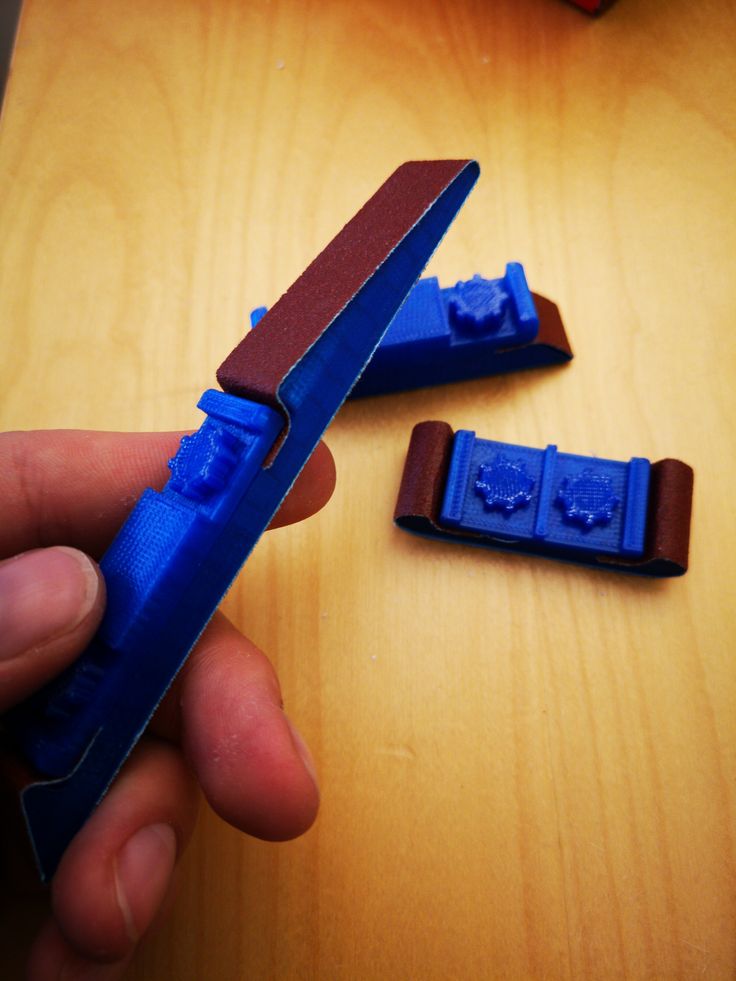 It’s worth keeping my phone charging cord out all the time because I use it every day, but I have to charge my e-reader like once a month, and I only use my headphones when I travel, which is typically when people die. So most of the various cords I have, while occasionally useful, need somewhere to be stored regularly and this cord hive is a great solution. It could also be a cool pencil cup!
ELEPHANT SILVERWARE DRAINER
Jumbo Elephant Cutlery Drainer by aleiovanevcp
Found on: Thingiverse
Cost: Free
While I do have a dishwasher, I often find myself annoyed when I use a spoon or a knife for something quick and simple that really only requires a quick rinse. But I don’t have a dish rack of any kind in my kitchen because the counters are too small. So there is really nowhere for me to put these easily reused spoons other than in the dishwasher, which seems to be a waste, or back in the drawer, which I hate to do while it’s wet. And this is totally a ridiculous problem to have, I realize, but it bugs me.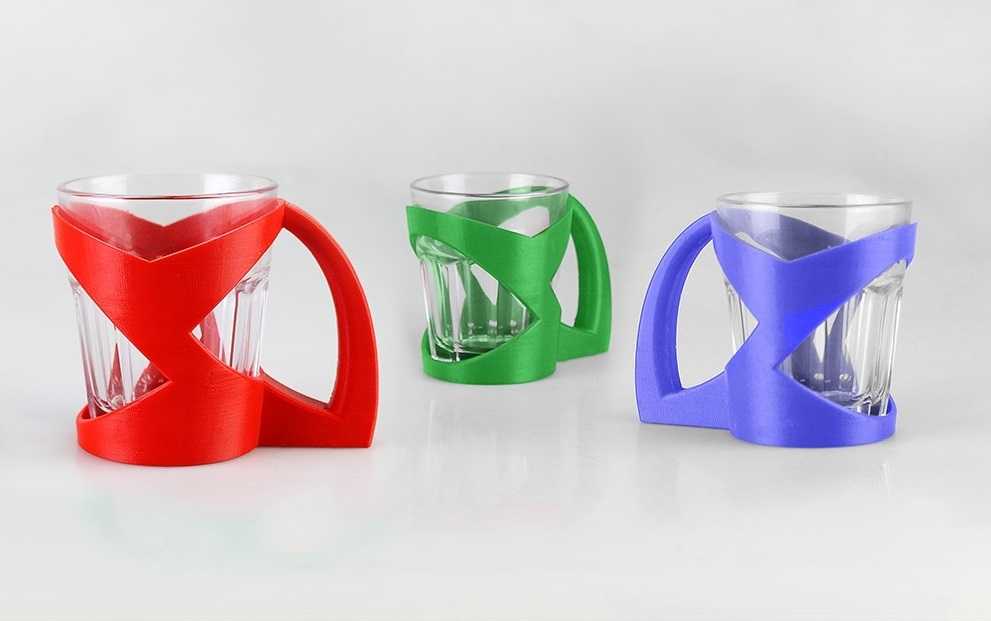 A cup that has a draining spout in it is a perfect solution, and the fact that it looks like an adorable elephant only makes it better.
CABLE CORNER MANAGEMENT
Cable Corner by muzz64
Found on: Thingiverse
Cost: Free
Despite most of our devices, helpfully, going wireless, cable management is still a huge part of keeping your home looking nice. You typically have two options: just leave the cables hanging loose and hope that you or your guests don’t trip on them and die, or use those annoying clips that stick against the wall and don’t do much for corners. These great clips keep everything nice and tidy, can hold up to three cords and require a lot less time to install.
Sorry that I don’t have a joke here, but seriously, these look super useful.
UNIVERSAL BOTTLE OPENER
UBO The Universal Bottle Opener by In3Designs
Found on: Thingiverse
Cost: Free
This is one of those things that you never really think you need until you turn your hand red trying to open that one, stubborn bottle that refuses to cooperate. I’ve actually torn skin off trying to open a soda bottle once, it was ridiculous. I think I gave up soda for a week specifically because I was so bitter about the sore, whatever that part of your hard is that gets sore when you try to open stubborn bottles. The part between your finger and thumb. Thumbpit?
Here is some video of UBO in action:
WALL OUTLET SMARTPHONE HOLDER AND DOCK
Wall Outlet Plate Smartphone Dock by rubb3rtoe
Found on: Thingiverse
Cost: Free
More cord management. All the cord managements! I hate trying to manage all the various cords that we have to use for all of our devices, wireless charging can’t come soon enough. I have a pretty decent set-up for my phone charger now, but I really could have used this a few years ago. I guess the only drawback is that most outlets are down at the base of the wall, not typically up high enough to use for your phone every day. Unless you’re not a lazy dork like me who doesn’t mind bending down once a day or something.
Don’t judge me, I’m tired and old, and unless it’s a dollar bill or a Skittle that i’ve dropped on the floor bending is just a waste of valuable not-bending time.
LONG CABLE MANAGEMENT DISC
The Cable Eater by Anthony
Found on: MyMiniFactory
Cost: Free
I have a pair of headphone that has what I believe to be the world’s longest and most unnecessary cord on it. I don’t have any official measurements, but I’d guestimate that it was about twenty-seven feet long or something. The cord is constantly getting caught under the wheels of my chair, getting snagged on something or just generally getting in the way. I’ve taken to shortening the cord with a twist tie, which is great until I actually need it to be twenty-seven feet long, then it’s a pain in the butt. The Cable Eater would totally solve the length problem, and the few times that I need to unwind it all the way out it’s easy enough to do without having to figure out which way I wrapped the twist tie.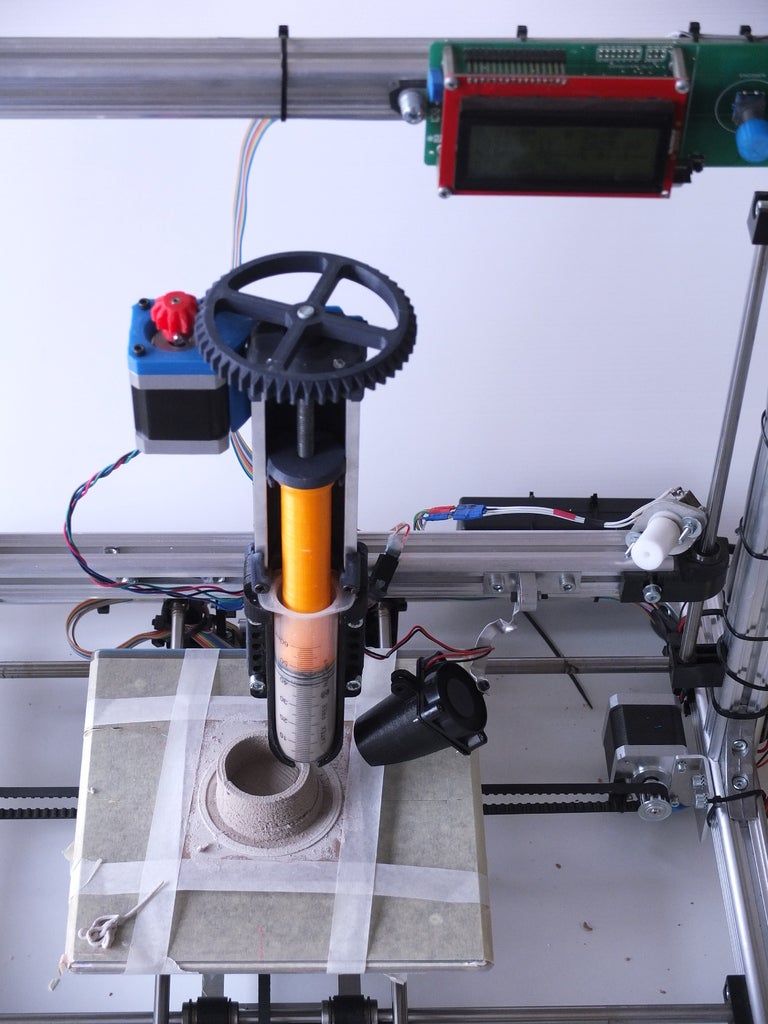 Because you always start twisting the wrong way, the paper bits start coming off and you have a mess on your hands.
Wow, this entire article makes me sound completely inept at adulting. And …I really can’t argue with my lack of ability to adult. Join me, won’t you?
And as always, I love to get pictures of you guys 3D printing the models that I post, so if you hack your life with any of these go ahead and Tweet me @SJGrunewald or drop me one of those new fangled electronic mail things at [email protected].
Stay up-to-date on all the latest news from the 3D printing industry and receive information and offers from third party vendors.
Tagged with: aleiovanevcp • Anthony • Blaine Costello • Cable Corner • Cable Management Hive • Egg cracker • Gabriel Martini • In3Designs • Juanfly • Jumbo Elephant Cutlery Drainer • Key Condenser • life hacks • Muzz64 • myminifactory • rubb3rtoe • Ten 3D Printable Things • ten3dp things • The Cable Eater • The Universal Bottle Opener • thingiverse • thumpit • Towel Holder • Turtle Breaker • UBO • Wall Outlet Plate Smartphone Dock • Weedaily
Please enable JavaScript to view the comments powered by Disqus.
3d Printer Hacks | Hackaday
January 3, 2023 by Maya Posch
Anyone who has done any amount of 3D printing with SLA printers is probably well aware of the peeling step with each layer. This involves the newly printed layer being pulled away from the FEP film that is attached to the bottom of the resin vat. Due to the forces involved, the retraction speed of the build plate on the Z-axis has to be carefully tuned to not have something terrible happen, like the object being pulled off the build plate. Ultimately this is what limits SLA print speed, yet [Jan Mrázek] postulates that replacing the FEP with an oxygen-rich layer can help here.
The principle is relatively simple: the presence of oxygen inhibits the curing of resin, which is why for fast curing of resin parts you want to do so in a low oxygen environment, such as when submerged in water. Commercial printers by Carbon use a patented method called “continuous liquid interface production” (CLIP), with resin printers by other companies using a variety of other (also patented) methods that reduce or remove the need for peeling.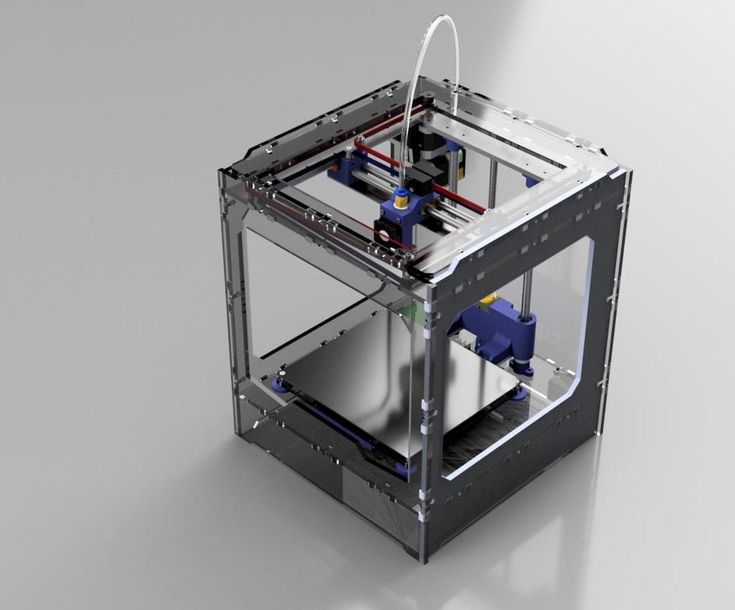 Theoretically by using an oxygen-permeating layer instead of the FEP film, even a consumer grade SLA printer can skip the peeling step.
The initial attempt by [Jan] to create an oxygen-permeating silicone film to replace the FEP film worked great for about 10 layers, until it seems the oxygen available to the resin ran out and the peeling force became too much. Next attempts involved trying to create an oxygen replenishment mechanism, but unfortunately without much success so far.
Regardless of these setbacks, it’s an interesting research direction that could make cheap consumer-level SLA printers that much more efficient.
(Thumbnail image: the silicone sheet prior to attaching. Heading image: the silicone sheet attached to a resin vat. Both images by [Jan Mrázek])
Posted in 3d Printer hacksTagged 3D resin printer, FEP, slaDecember 29, 2022 by Lewin Day
While packing merch for a recent gig, I realised I had the opportunity to do something a little fun.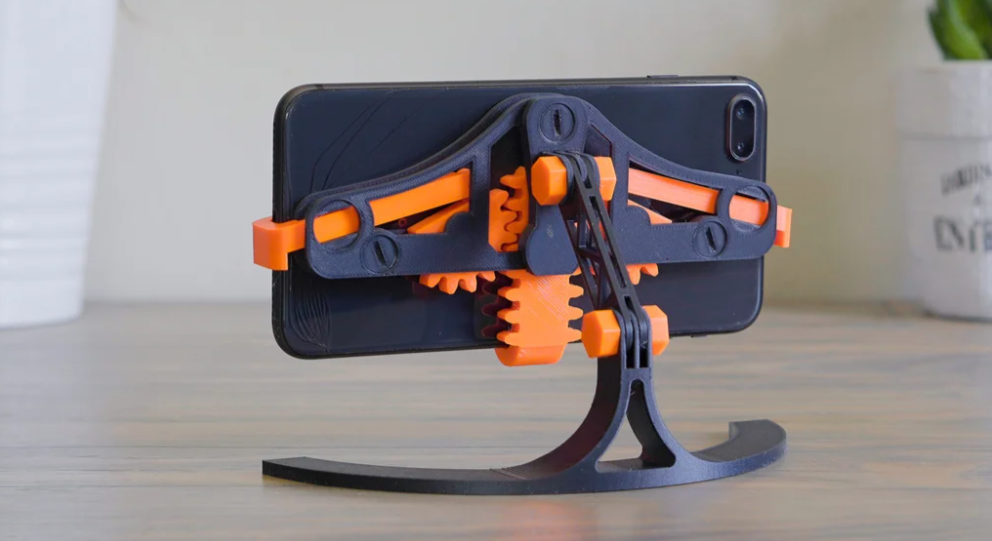 I’d released an album on tape, and spent a little extra to ensure the cassette itself was a thing of beauty. It deserved to be seen, rather than hidden away in a case on a shelf. I wanted to turn this piece of musical media into a necklace.
Of course, cassette tapes aren’t meant to be used in this way. Simply throwing a chain through the cassette would lead to tape reeling out everywhere. Thus, I fired up some CAD software and engineered a solution to do the job! Here’s how I built an adapter to turn any cassette tape into a cool necklace.
Find the design on Thingiverse, and more details below!
Continue reading “Wear Your Fave Cassette Tapes As A Necklace With This 3D Printed Adapter” →
Posted in 3d Printer hacks, Engineering, Featured, Interest, SliderTagged 3d print, 3d printing, adapter, audio, audio cassette, cassette, cassette adapter, cassette tape, compact cassette, tapeDecember 28, 2022 by Arya Voronova
[HolGer71] had a Mini-ITX Intel Atom-powered mainboard that he found useful for its vintage interfaces like COM and LPT. On a whim, he decided to give it even more vintage of a look – transforming it into a device more akin to a 50s home appliance, complete with a fitting monitor, mouse and keyboard. The project, dubbed Legacy-PC Computer Case, imitates the sheet metal construction masterfully in its 3D-printed design. That’s not all there is to it, either – everything is open-source, and there is enough documentation that you can build your own!
[HolGer71] starts with general printing and finishing advice, and goes through every part of the setup from there. The mainboard-holding case builds around a small miniITX case frame, enclosing it and adding extensions for connectors and lightbulbs. For the monitor, he built a new frame around an old VGA-equipped 17″ desktop screen – most certainly easy to find. The keyboard‘s an inexpensive one yet equipped with mechanical switches, and the mouse‘s an old Fujitsu-Siemens, but of the kind you’d see manufactured under different labels. All in all, this combines quite generic components into a trusty and stylish device for your workshop needs.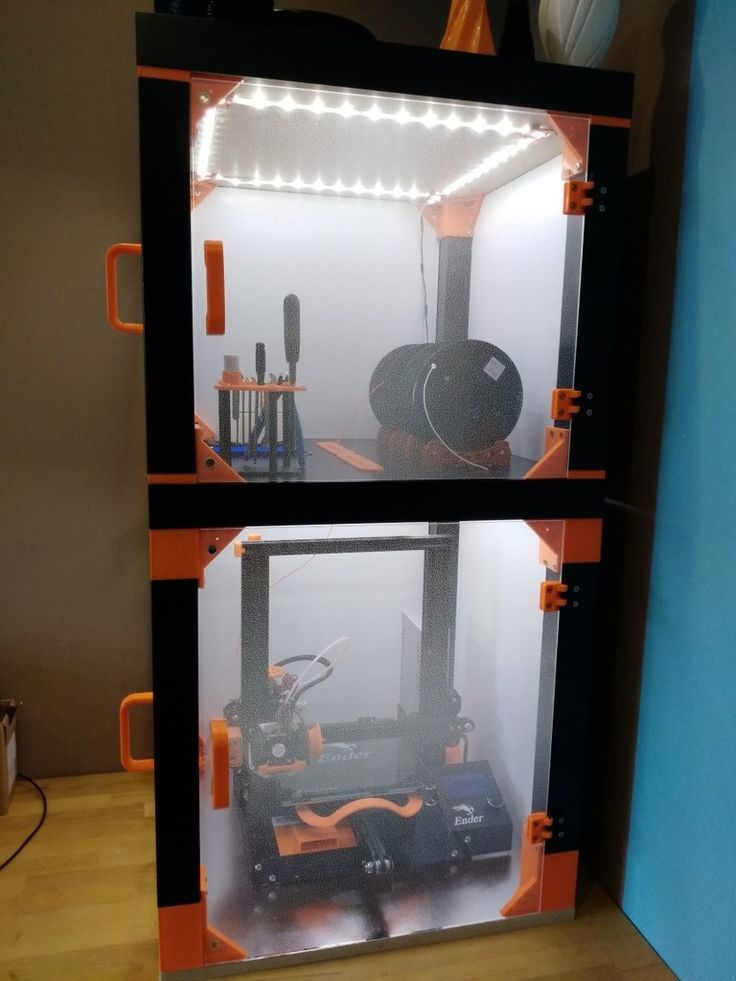
Equipped with Windows 7 as, apparently, the earliest supported version, this machine is now on desk duty – ready to run obscure software for old programming dongles, and look absolutely fabulous while doing so. It’s rare that we see such effort put into creating designs from scratch and sharing them with the community – most of the time, we see PCs built into already existing devices, like this vintage radio, or a benchtop logic analyzer.
Posted in 3d Printer hacks, computer hacksTagged vintage computer, Workbench ProjectsDecember 28, 2022 by Jenny List
There are many clever ways to make stronger 3D prints, be they by the use of special slicing algorithms or by unusual filaments. [Brtv-z] has taken a more straightforward tack, by making glass-reinforced prints using painters fiberglass mesh tape.
It’s a laborious technique that involves stopping the print to manually place the fiberglass at each successive millimeter of print. The resulting test piece comes off the print bed festooned with fiberglass mesh, and once it’s been trimmed, he subjects it to some tests which you’ll see in the video below the break(Russian language, but there are subtitles).
The tests are fairly rough and ready involving a hammer (we winced at the hammering in a vice, but of course this piece isn’t forged steel!) and standing on a flat piece of print balanced between two blocks. As you’d expect, the reinforced piece appears the stronger, but these tests would benefit from a calibrated set-up to quantify the strength.
So if you’re of a mind to experiment, this certainly seems like an accessible if rather tedious way to make glass reinforced 3D prints. If you then want to characterize them, remember this can be done with a bit of farmyard engineering if you have nothing better.
Continue reading “Fiberglass Mesh For Stronger 3D Prints” →
Posted in 3d Printer hacksTagged fiberglass, fibreglass, glass fibre, reinforced 3d printingDecember 26, 2022 by Navarre Bartz
With the proliferation of biometric access to mobile devices, entering a password on your desktop can feel so passé. [Snazzy Labs] decided to fix this problem for his Mac by liberating the Touch ID from a new Apple keyboard.
When Apple introduced its own silicon for its desktops, it also revealed desktop keyboards that included their Touch ID fingerprint reader system. Fingerprint access to your computer is handy, but not everyone is a fan of the typing experience on Apple keyboards. Wanting to avoid taping a keyboard under his desk, [Snazzy Labs] pulled the logic board from the keyboard and designed a new 3D printed enclosure for the Touch ID button and logic board so that the fingerprint reader could reside close to where the users hands actually are.
One interesting detail discovered was the significantly different logic boards between the standard and numpad-containing variants. The final enclosure designs feature both wireless and wired versions for both the standard and numpad logic boards if you should choose to build one of your own. We’re interested to see if someone can take this the next step and use the logic board to wire up a custom mechanical keyboard with Touch ID.
If [Snazzy Labs] seems familiar, you may recognize him from their Mac Mini Mini. If you’re more in the mood to take your security to the extreme, check out this Four Factor Biometric Lockbox that includes its own fingerprint reader.
Continue reading “Standalone Touch ID For Your Desktop Mac” →
Posted in 3d Printer hacks, computer hacks, hardware, Mac Hacks, Security HacksTagged apple, Apple keyboard, biometrics, fingerprint reader, keyboard, touch idDecember 26, 2022 by Al Williams
By now, you’ve surely seen the AI tools that can chat with you or draw pictures from prompts. OpenAI now has Point-E, which takes text or an image and produces a 3D model. You can find a few runnable demos online, but good luck having them not too busy to work.
We were not always impressed with the output. Asking for “3d printable starship Enterprise,” for example, produced a point cloud that looked like a pregnant Klingon battle cruiser. Like most of these tools, the trick is finding a good prompt. Simple things like “a chair” seemed to work somewhat better.
Continue reading “3D Modelling In English With AI” →
Posted in 3d Printer hacksTagged 3d model, ai, point-eDecember 23, 2022 by Al Williams
What’s better? Harmonic or cycloidal drive? We aren’t sure, but we know who to ask. [How To Mechatronics] 3D printed both kinds of gearboxes and ran them through several tests. You can see the video of the testing below.
The two gearboxes are the same size, and both have a 25:1 reduction ratio. The design uses the relatively cheap maker version of SolidWorks. Watching the software process is interesting, too. But the real meat of the video is the testing of the two designs.
Continue reading “Harmonic Vs Cycloidal Show Down” →
Posted in 3d Printer hacks, Robots HacksTagged cycloidal drive, drive, harmonic drivehow to prepare for 3D printing so that you like the result
Are you a happy owner of a 3D printer? Sooner or later, the moment will come when you get tired of printing other people's models and want to create your own. If you want to start printing technical models or making parts for various equipment, then you cannot do without the basics of 3D modeling in CAD. Modeling will help create a layout, prototype, finished product, molds for castings and other technological devices for manufacturing a part. If you've already explored the built-in CAD references and learned the basics of design, our tips will help you adapt models for 3D printing and get a result you'll love. nine0003
1. Model a stable base
If possible, create at least one flat face in the model that can be used as a base for placing on a table. This will allow you to get by with a minimum number of supports and improve the adhesion of the model to the base.
2. Calculate shrinkage
We print a test cube 50x50x50 mm and measure it after printing. The test model must be printed from the same material and with the same heat, fill, and blow settings as the intended final model. It is desirable that the printer is also pre-calibrated for the desired material. nine0003
After that, using dimensional tolerances, in extreme cases - scaling, we adjust the dimensions to compensate for shrinkage. It must be taken into account that shrinkage can be uneven along different axes (usually different along the Z axis). Also separately monitor the shrinkage for the holes. It is advisable to make in the test model all the holes that are planned to be made in the final one. If you are planning a thread, it must also be pre-tested.
3. Observe wall thickness
The wall thickness must be at least twice the diameter (filament) of the extrusion, which is determined by the diameter of the nozzle. Moreover, when calculating thin walls, it must be taken into account that in case of continuous filling, the wall thickness must be a multiple of the extrusion diameter.
4. Strength elements should be as voluminous as possible
When creating a loaded element using 3D printing, it is best to add volume to it and combine it with the structure as much as possible into a single body.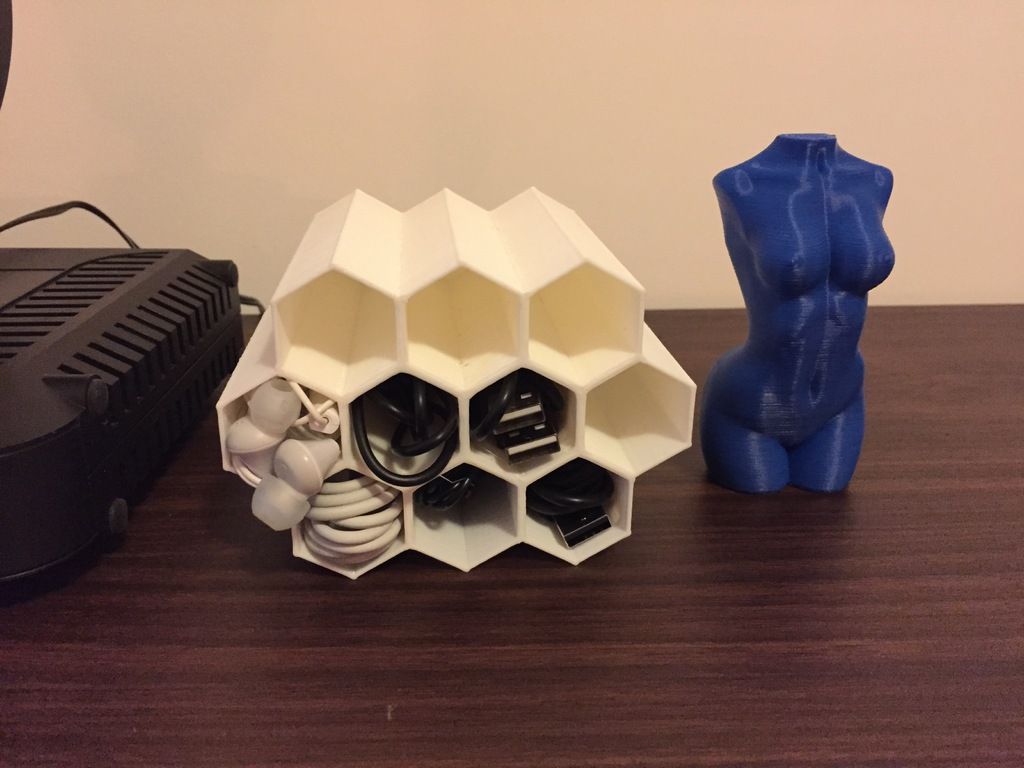 This will allow the strength element to withstand heavy loads with minimal filling. nine0003
5. Design the strength members with respect to the print direction
The load should be distributed across the print layers, not lengthwise. Otherwise, the layers may come apart, since the adhesion between the layers is not 100%.
6. Use reinforcements
This cut will make the model stronger and stiffer, as well as reduce weight; in fact, the profile will become similar to an I-beam. This shape allows to achieve maximum longitudinal rigidity with the least weight. nine0003
7. And a headscarf!
Using a gusset will make the model stronger and lighter. The left and far right models have equal strength with the same infill, but the right model will take much less plastic to print.
8. Add fillets and chamfers
Add chamfers to all edges if possible, and fillets are better. It is especially important to round the loaded and power elements of the part. This will remove high stress areas from the model, make it more tactile, and prevent splinters. Also, the rounding will not allow the part to spread along the layers after minimal damage. nine0003
9. Add stiffeners
For protruding bosses, add stiffeners. They will protect the boss from breaking when lateral forces are applied. The task of the stiffeners is to reduce the leverage for applying force to the edge of the boss and distribute the load over a larger area.
10. Reinforce holes
If holes are planned for fasteners, such as self-tapping screws, they should be reinforced with a set of small concentric holes around it. When the thread cuts through the main hole, the side holes will not allow the gap to grow and save the part from cracking. nine0003
11. Large thickness for strength
For greater strength on products without small parts, it is better to use a nozzle with a larger diameter - this will improve the strength of the outer layer of the model due to more reliable interaction of the layers.
12. Make small holes for local strengthening
but there will be a strong shell around them. nine0003
13. Different colors - different bodies
If you need to make a two-color model, make the colors separate bodies, and then set the required nozzle for each body.
14. Supports can also be done in CAD
To save material, supports can be made in the program (and also a separate body). Usually this is not required and the slicer can handle the creation of supports, but you should not forget about this possibility. nine0003
15. Test the print of the gear pair in advance
When printing gears, it makes sense to pre-print a portion of each wheel and check the fit to ensure that shrinkage does not interfere with the fit. Gears take a long time to print, so it's easier to print just a part for verification.
16. Boolean operation for threaded parts
When creating a pair of threaded parts, such as a bolt and nut, Boolean the counter thread with shrinkage in mind to provide clearance. So you get exactly matching threads and guaranteed clearance. nine0003
What else is important?
Correctly set the save settings in Stl.
Use the calculations: from the calculation of the ICH to finite element calculations and topological optimization.
Use surface modeling to make your model more ergonomic.
On behalf of the editors, we thank the KOMPAS-3D team for the material
Archives Secrets and life hacks of 3D printing
Secrets and life hacks of 3D printing nine0003
After building my own printer, I have been printing on ordinary window glass for a long time. In principle, everything suited. BUT! As always happens, I wanted something better. I'm tired of fussing with glue, constant fuss with adjusting the table, constant “tacks” of corners, and so on. In general, I decided to purchase such a magnetic mat
Read more »
Tags: UBL, table auto level, magnetic mat 2022-06-19 Section: For beginners, Firmware, Secrets and life hacks of 3D printing, Electronics
Author: dark184 Views: 1 077 8 comments
The other day I encountered the need to flash the MKS Gen_L board. It was necessary to reconfigure the firmware. As always, after the firmware, it was necessary to select the parameters of the PID controllers (well, for me to prescribe them every time in the firmware or in the EEPROM). My printer has both the table and the hotend configured for PID control. As usual, because I do this far from every day, it was necessary to remember which commands and its parameters are responsible for this. There is always a hint on the official Marlinfw website. nine0003
М303 – start of autotuning
С – number of autotuning cycles, minimum 3, default 5.
Е – hotend number (-1 for table)
S – target temperature.
Read more »
2020-12-04 Section: For beginners, Secrets and life hacks of 3D printing nine0185 Author: dark184 Views: 5 131 9 comments
Once again I admire the capabilities of Slic3R, or rather Slic3r Prusa Edition or simply Slic3r PE. Starting with version 2.0.0, the developers changed their name to PrusaSlicer. However, it didn't make him any worse.
In this article I want to talk about another interesting feature of the specified slicer, these are macros. What can they do? Based on the information I've been able to gather, the possibilities of macros are not very impressive, however, in certain cases they can help out a lot. The simplest example is a thermal tower for selecting the temperature of a hot end. nine0003
Read more »
Tags: slic3r 2019-07-11 Section: Secrets and life hacks of 3D printing, Slicers
Author: dark184 Views: 4 007 No comments yet
There are many ways to improve the adhesion of plastic to a 3D printer bed. After I tried all the methods known to me, I chose the two most effective for myself:
- Printing on clean glass. Glass is simply washed with soap, dried and printed. The use of various solvents and degreasers only leads to the complete peeling of plastic from glass. Therefore, I print exclusively on glass washed with soap and without the use of degreasers. BUT! As usual, there are pluses and fat minuses to all, this is the need to keep the glass always clean and extremely unstable adhesion. Either the part is held on the glass without any questions, or it does not hold at all. Therefore, you have to print on clean glass if you need a glossy surface, or small details. nine0215
- To increase adhesion and obtain more stable results, it is necessary to apply an additional glue stick. The situation with adhesion is much better, I don’t remember that at least some part came off. BUT! Again, another problem appears, then the part is removed from the table without question, then it has to be torn off along with pieces of glass.
Read more »
2019-05-23 Section: Adhesion and delamination, Secrets and life hacks of 3D printing nine0185 Author: dark184 Views: 7 015 9 comments
Surely many 3D printers are familiar with the problem of insufficient strength of the printed part, especially for mounting holes / protrusions for screws / self-tapping screws. When screwing the fastener into the intended hole, the protrusion simply breaks off, and often right up to the filling, which is usually 30-50%. With small details, you can set 100% infill, which will not particularly affect the duration of printing and plastic consumption. With large details, this trick, although it “rolls”, but the duration of printing and plastic consumption just rolls over. nine0003
Another example is mounting holes, it happens that when tightening the fasteners, the part itself begins to be pressed through due to insufficient filling strength.
Here I want to share how I do in such cases, while plastic consumption and printing time increase slightly. A big plus of the proposed method is that the appearance of the printed model will not be spoiled.
Read more »
Tags: slic3r 2019-05-14 Section: Secrets and life hacks of 3D printing, Slicers
Author: dark184 Views: 4 077 6 comments
The other day I had two problems when printing:
- When printing for more than 24 hours, the nozzle clogged about half of the part. Therefore, there was a desire not to reprint the damaged part, but only to reprint the missing part and then glue them together. nine0215
- As usual, from the well-known site of 3D models, I came across a crooked model. Its curvature lay in the fact that the surface that should be adjacent to the table turned out to be not flat, so it was necessary either to redraw it, or correct the STL file itself, or get by with a little blood and do it right in the slicer.
Read more »
Tags: slic3r 2019-05-13 Section: Secrets and life hacks of 3D printing, Slicers nine0185 Author: dark184 Views: 5 328 2 comments
Hello reader!
In this article, we'll take a look at the details of setting up the brains of a Klipper-based printer, comparing it with Marlin4Kimbra, all installed and tested on a HyperCube Evolution printer under construction. What kind of Clipper - we look in part 1. Read more »
Tags: 32bit, 8bit, Klipper, OctoPrint, Odroid, Orange Pi, OrangePi, RAMPS 1.4, RAMPS4DUE, Raspberry Pi 2017-12-14 Section: 3D printing, Firmware, Secrets and life hacks of 3D printing, Electronics nine0185 Author: StanislavI Views: 21 104 19 comments
Good afternoon everyone!
I want to start the story about the HyperCube Evolution printer from the end, not from the frame, but from the brain. And in this article we will talk about this component, since, in my opinion, it is of the greatest interest. The article will be of interest primarily to those who select electronics for a new printer, are going to move to a 32-bit controller, or have an Octoprint print server. nine0003
Read more »
Tags: 32bit, 8bit, Arduino DUE, Klipper, Marlin, OctoPrint, RAMPS 1.4, Repetier, contest #6 2017-11-26 Section: Contest, Review, Firmware, Secrets and life hacks of 3D printing
Author: StanislavI Views: 17 628 40 comments nine0003
An article about connecting a tone speaker for playing music fragments to the control board of a 3D printer - RAMPS 1.