3D printer letterpress
Open Press Project – The 3D-printed printing press
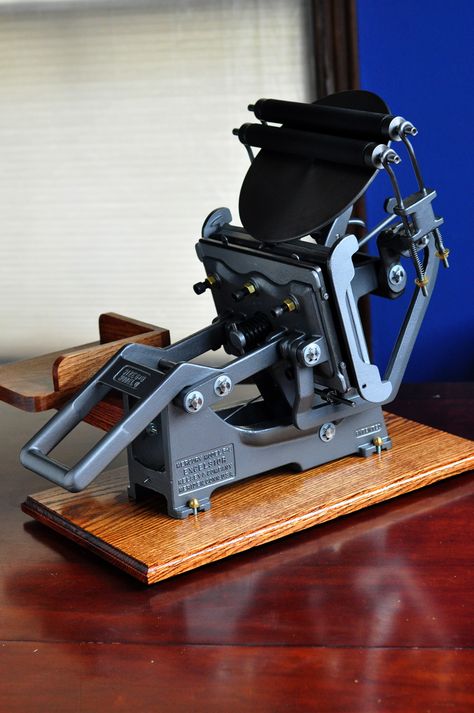
The 3D-printed printing press. Designed to make printmaking accessible.
Tiny, 3D-printed & affordable
Use printmaking for your art whenever and wherever you want. The Open Press fits into your backpack and gives you the ability to print outside, on vacation or in your living room!
Get a press!
Print all sorts of things.
The possibilities are endless. You can use your press to print small greeting cards, business cards, tiny artworks or large pieces consisting of lots of tiny prints. Printmaking is now as accessible as drawing!
Make etching & co accessible.
We noticed that regular printing presses are expensive, heavy and difficult to find. That's why lots of people don't have access to printmaking. Let's change that!
Get a press
With open source in mind.
We are on a mission to make printmaking accessible to everyone. That's why we are giving away the plans for a 3D-printed press for free!
Access to a 3D-printer? Print your own tiny etching press!
How to 3D-print a press
No 3D-printer? That's okay, we can print you a press!
Ready for new orders!
It took us a while, but you can order presses right now!
And because our vision of making printmaking more accessible doesn't stop when it comes to pricing, we came up with an interesting pricing idea:
You can choose what you pay!
Get a press!
Also, you can join the community!
Thousands have already 3D-printed themselves their own press! Check out what printmakers all over the world can do with them.
Open Press Project on Instagram
Stainless steel roller for perfect prints
The press we can manufacture for you comes with a stainless steel roller, so that you'll get perfectly even pressure for your prints and have a durable and long-lasting press.
Wing bolts to adjust pressure
These bolts will make it super easy for you to adjust the height of the upper roller, increase or decrease pressure and print plates that are up to 2,5cm high!
Woven wool blanket
We use the highest quality felt for our presses. Woven wool blankets are extremely durable and will enable you to print the finest of details.
Testimonials
'Martin’s brilliant project first came on our radar in the early days of Pressing Matters magazine, which led to an article and then a firm friendship. I’ve made a point of involving him and his brilliant Open Press Project in the print fairs we attend - his mission to ‘make printmaking accessible to everyone’ is infectious and his little presses never fail to draw a crowd. There is this very special moment when someone uses it and really its NOT a toy and its small size packs a mighty printing punch. (A bit like the man himself!)'
– John Coe, Pressing Matters magazine
I received this tiny printing press for my (early) birthday and I’m dying inside.
Elyse DIt’s a neat addition to my tiny printing space and fitting for my very real love for very small things.
With these mini prints, printing larger editions, allows me to be able to offer original prints at a more accessible entry price.
Helen Bishop
Traditionally, printing presses are prohibitively expensive and extremely heavy. Schneider has managed costs in part by shrinking the press down to a 5.7 by 2.95 inch printing area, but includes the usual steel roller and woven blanket found on a full-sized press.
Colossal, 2018
How to 3D Print Your Own Printing Press
Hi everyone! In this blog post we’ll show you how to 3D-print your own tiny etching press! Because the press needs to be as durable as possible, th. ..
..
- 3D printing
- tutorial
- Read more
Open Press Collection
In the beginning of 2019 we hosted an open call where people with a 3D-printed press were able to send in their tiny artworks. More than 100 artist...
- collection
- event
- exhibition
- Read more
Open Press Map - Mark Your Presses!
An attempt to show the reach of the Open Press Project with colorful presses from all over the world. Submit a photo of your press down below!
- event
- exhibition
- map
- Read more
The printmaking community made it happen.
What started as part of an exam at our university has evolved into a company. A Kickstarter campaign in 2019 gave us the chance to found a company and be able to manufacture presses for thousands of people. We are not only printing printing presses, but organise events, exhibitions, give talks and introduce new people to printmaking!
About us
Use left/right arrows to navigate the slideshow or swipe left/right if using a mobile device
How to 3D Print Your Own Printing Press – Open Press Project
Hi everyone! In this blog post we’ll show you how to 3D-print your own tiny etching press! Because the press needs to be as durable as possible, there are a few things to pay attention to.
A) 2 x side part – B) upper roller – C) lower roller – D) press table – E) roller wrench – F) lower roller pin – G) 2 x M5 screw – H) 2 x M5 hexagon nut – I) top connector – J) 2x side connector – K) printing cloth/felts
Step 0: Downloading the files
First you will have to download the files on Thingiverse: https://www.thingiverse.com/thing:2841592
Keep in mind that they are published under a Creative Commons Attribution-NonCommercial License.
Step 1: Printing the parts
The press-assembly consists of 10 3D-printed parts, two M5 screws and two regular M5 hexagon nuts. We suggest using PLA instead of ABS, because it's much more durable, easier to print and not as flexible!
A) 2 x sideparts
This will be the most time consuming part to print. We recommend printing it with at least 40% infill, 0.2 mm layer thickness, 1 mm wall thickness and flat on the ground to make it more stable against the amount of pressure that is going to be applied to the press table.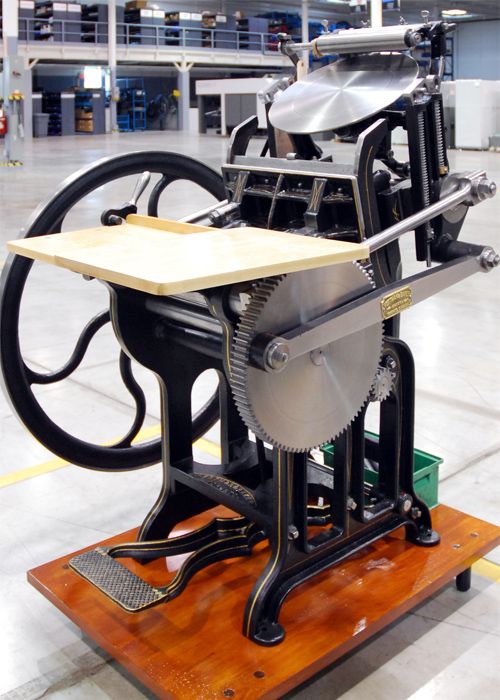 After these are finished you need to use a wrench to free the moving parts in which the upper roller is going to be placed later (a). Make sure they can easily move up and down. If your printer is welding these parts together you might need to edit the STL file and change the tolerance of the parts.
Making these parts solid (100% infill) will make them very sturdy, but if you don’t have the time or material, we suggest increasing the perimeters/wall thickness of the part. It’ll make the part stronger than just using higher infill percentages.
B) upper roller
50% infill, 0.2 mm layer thickness, 1 mm wall thickness and standing up! Some 3D-printers will need to use support structures for this to print successfully.
Keep in mind that this roller needs to be as round as possible. FDM printers might not be perfect at printing circles, so measuring the roller after printing and smoothing it with some sandpaper can be helpful. Also make sure that the bearings of the roller fit the bearings of the side parts. Use a file or more sandpaper to ensure a smooth movement of the roller. Putting a bit of vaseline between roller and side part can help as well.
If you can modify the placement of the seams in your slicing software, we suggest using a random distribution of seams, it’ll make it more round.
C) lower roller
50% infill, 0.2 mm layer thickness, 1 mm wall thickness, standing up and with support structure! This part has to be rather smooth as well. The teeth of the gear have to fit with the teeth that are under the press table! Sand them if necessary.
D) press table
at least 50% infill, 0.2 mm layer thickness, 1 mm wall thickness lying upside down, teeth facing upwards. The side that doesn’t have any gear teeth needs to be as even as possible for it to work properly. You might want to use some sandpaper and roughen this surface to decrease slipping of the intaglio plate.
E) roller wrench
25% infill, 0.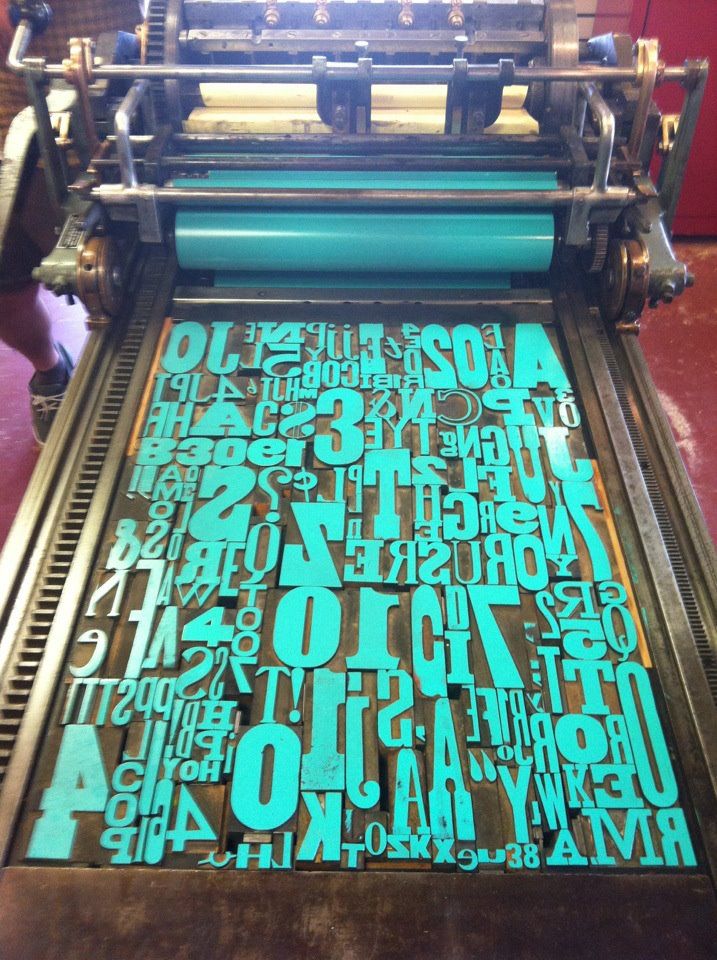 2 mm layer thickness, 1 mm wall thickness, lying on the flat part.
Used to move the lower roller.
F) roller pin
100% infill, 0.2 mm layer thickness, 1 mm wall thickness, lying flat
This pin is supposed to go into the lower roller, so that you can use the handle to rotate it.
It will have a lot of stress on it, so it might be wise to print two of them in case one of them breaks after a while.
I) & J) 3 x connecting parts
These parts will connect the two side pieces and secure the rollers in between. You might need to sand them as well in order for them to fit the holes.
Step 2: Assembly
First make sure that the rollers are moving freely and without jamming. After that place the rollers in between the two sides and use the connection parts to hold them together. The lower roller should now be able to move the press bed back and forth. Notice that they only work in one orientation due to the tilted gear teeth.
Congrats! You successfully assembled your very own 3D-printed pess! It’s time to start printing with it!
Step 3: Additional Materials
You will need some Materials for the press to work. Most importantly: two M5 screws with two M5 hexagon nuts. The nuts (B) are placed above the upper roller in each side part and will help build up pressure later. Once they fit (you might need the help of your file/sandpaper again) you can now screw in your screws (A) from the top, through the hexagon nut and into the moving part.
The press is designed to work with regular bolts, but it can be useful to find 50mm long wing bolts, so it’s easier to adjust the positioning of the upper roller. In general: The more pressure you have the better the proof will be in the end!
Another thing you need to have is an etching press blanket! Try to get some wool blanket from an art supply store. Synthetic felts might work as well. While you’re there you will need to pick up some printmaking paper (professional etching paper is good at absorbing ink, we suggest Hahnemühle, Fabriano or Somerset) and intaglio ink as well.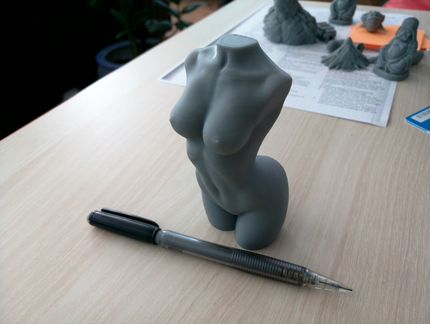 They usually come in small cans or tubes.
So to summarize you need:
2 x M5 bolts (about 50 mm long)
2 x M5 hexagon nuts
one or two blankets in the size of your press table (ca. 150 x 75mm)
Step 4: Your first print!
We collaborated with Make magazine to write a short tutorial on how to use the press, you can read it here: https://makezine.com/projects/3d-printed-etching-press/
Also, we're giving away a free ebook where you can read through some easy-to-learn-techniques and tips on paper and ink! Check it out here!
That's it!
Have fun printing! If there are any questions about the whole process of 3D-printing or printmaking please feel free contact us via [email protected]
Also, please feel free to share prints and colourful presses on Instagram #openpressproject https://www.instagram.com/openpressproject/
Happy printing!
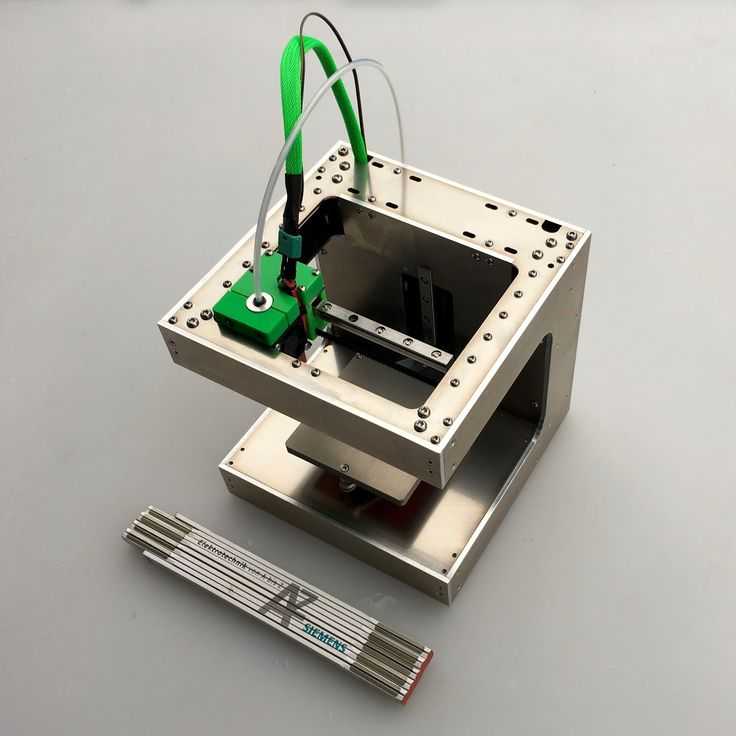
Letterpress. A zero gravity 3D printer has been created - Poisk
Engineers of Tomsk Polytechnic University (TPU) have completed the development of the first Russian 3D printer for printing in zero gravity. The work was carried out by order of the Rocket and Space Corporation "Energia" them. S.P. Korolev” (RSC Energia is part of the state corporation “Roscosmos”) together with specialists from the corporation and Tomsk State University (TSU).
Two pilot printers delivered to customer. According to Roscosmos, one of them will be sent to the International Space Station (ISS) in June 2022. With its help, Russian cosmonauts will be able to make the parts necessary to work with the station equipment. The second sample will remain on Earth.
The development of the printer with all the necessary steps took just over three years. The specialists of the Tomsk Polytechnic University were faced with the task of making an apparatus that would allow them to quickly and directly at the station create the small parts needed by astronauts so that they would not have to be delivered from Earth.
The main scientific and engineering challenge was that 3D printing in zero gravity is different from terrestrial conditions.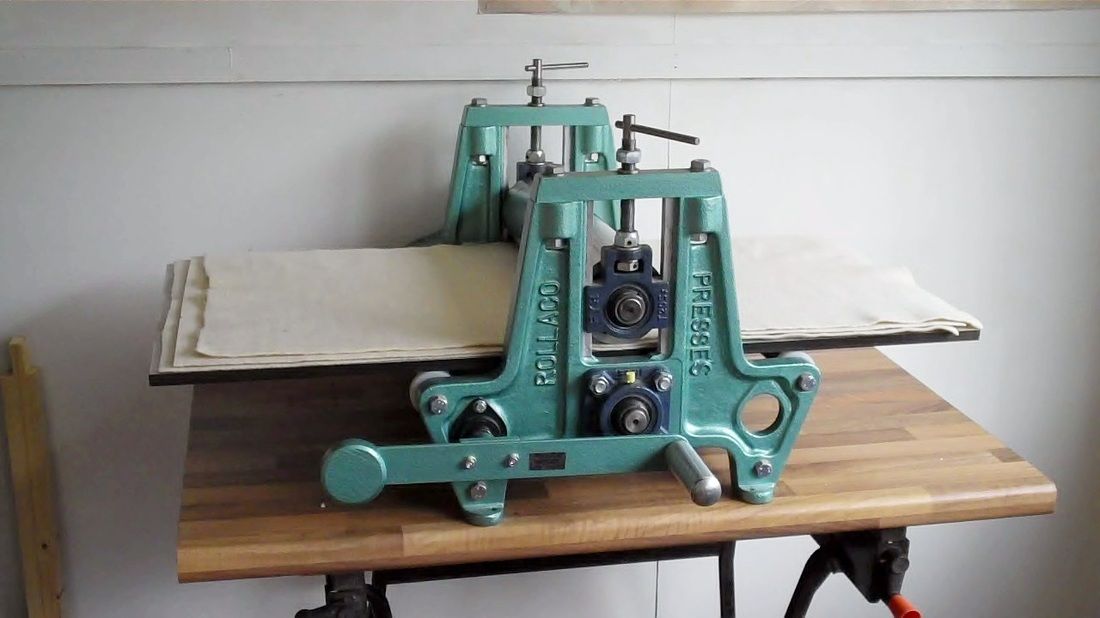 When printing on Earth, gravity makes a significant contribution to the “gluing” of layers during the layer-by-layer formation of a part. The lack of gravity requires changes in both technology and printer design.
The engineers of the Tomsk Polytechnic University had the entire design of the printer, the electronic “stuffing” was developed by the scientists of the Tomsk State University. A complex of tests of a prototype printer was carried out by specialists from the Polyus Research and Production Center.
A 3D printer is about the size of a small analog TV. This is a block-modular design, all components of which are assembled in one housing.
According to a given 3D model, the printer prints the desired object in layers from a polymer material - polylactic acid, this is one of the most common polymers. Parts made in this way are very strong, but at the same time light.
“Behind this work is the work of a large team of researchers and engineers from Tomsk Polytechnic University.
It was not a trivial task to create a reliable, lightweight device that works in conditions very different from those on earth,” says I. about. TPU Rector Dmitry Sednev.
“The software developed by TSU scientists and engineers for the first Russian space 3D printer will allow participants in space expeditions to reach a new level of performing tasks in space using additive technologies,” said TSU Rector Eduard Galazhinsky.
The working chamber of the printer, in which the printing process takes place, is completely sealed. It is equipped with systems of thermal control, ventilation, circulation and air purification. This is important for removing the products of thermal decomposition of plastic from the atmosphere of the working chamber and ensuring the safety of the station crew. In conventional printers, such elements are not provided.
“The participation of Tomsk polytechnics in the project will not end with the development itself.
In the future, we plan to participate in the training of astronauts in 3D printing, how to work with the device. And when the experiment takes place directly on board the ISS, it is planned that the polytechnics will participate in the processing of the results,” Dmitry Sednev notes.
Tomsk Polytechnic University Press Office
everything you need to know
Many 3D printer owners experience parts coming off the table during 3D printing. Let's take a look at the causes and solutions.
What is adhesion?
The very concept of "adhesion" means the adhesion of surfaces of dissimilar bodies. In 3D printing, platform adhesion is the ability of the plastic that a part is made of to adhere to the surface of the stage during printing.
If the adhesion is insufficient, then the manufactured parts may be deformed or even come off the table. During 3D printing, the part must be firmly attached to the platform, and after completion, it should be easy to remove. Filament manufacturers typically recommend adhesives for their filaments, and 3D printer manufacturers offer worktables in aluminium, glass, stainless steel, or even with specialty coatings. All this helps the plastics stick better during printing, but there are no working surfaces that are equally well suited for all types of plastics.
Also, do not forget about thermal expansion, which causes a change in the dimensions of manufactured parts at different temperatures. The difference in temperature between the bottom and top of a part can cause the edges of the part to peel off during 3D printing. This mainly applies to materials such as ABS, which require a heated worktable to work with. When printing with these materials, the layers need to cool down a bit to be able to build a 3D object at all, but not so much as to cause peeling at the edges.
In this article we will look at what affects adhesion and how to solve many problems in terms of adhesion of products to work surfaces.
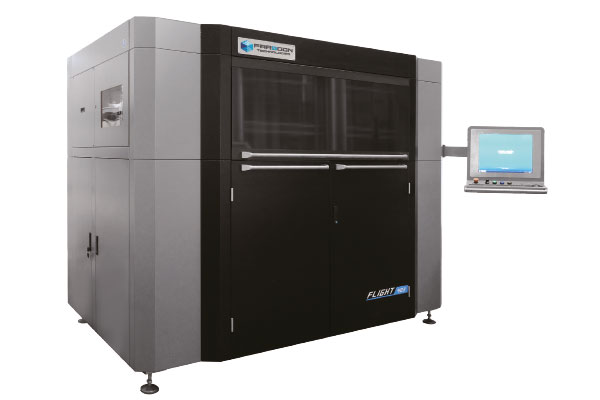
3D Printer Enclosed Chamber
For printing on materials with high heat shrinkage, the best option is to use 3D printers with an enclosed chamber that prevents drafts and retains heat. Many printers are equipped with an active chamber heater that maintains the desired temperature and does not allow the parts to cool. A uniform background temperature during 3D printing reduces warping and ensures better adhesion.
Owners of open printers are left to come up with various devices (for example, boxes) that cover the 3D printer to keep heat, or build heat-retaining walls around the printed model, which increases printing time and filament consumption.
First coat adhesion
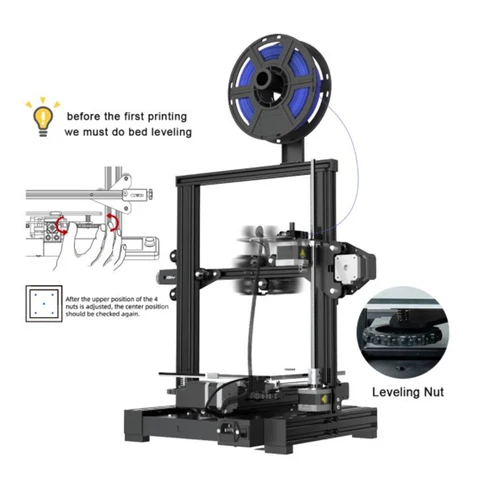
The first thing you should pay attention to is the adhesion of the first layer. This is one of the most common problems faced by almost all printers. If the first layer is laid unevenly, then the percentage of rejects for the rest of the part increases very much, so it is very important to solve the issue of adhesion of the first layer before 3D printing. In most cases, the problem is solved by calibrating the work table and adjusting the distance between the nozzle and the work surface.
It is important to correctly set the distance between the nozzle and the stage surface
Brim and Raft methods
For better adhesion of the product to the working surface of the table in the print settings, it is often necessary to create additional elements - the substrate or the frame of the model, which help to keep the manufactured part on the table. Brim or Raft increase the contact surface of the plastic with the work surface around the lower layers and thereby increase traction.
Underlays or Rafts consist of several layers and are horizontal grids of filament located under the model. The raft is used as a base for the first layers of the product and is designed to increase the level of adhesion. In addition, the raft helps to level the surface of the table: if there are irregularities on the surface, they are leveled to a certain extent by the substrate, and the model is printed already on a flat base. Another advantage of rafting is that it reduces the chance of problems due to too much or too little gap between the nozzle and the table when laying the first layer.
Brim is used to stabilize small patterns or "islands" (separated areas of the printed product). Brims increase the contact area and help the model stay on the table if it comes into contact with the surface in small areas.
Worktable temperature and adhesion promoters
After calibrating the platform and adjusting the gap between the nozzle and the tabletop, let's move on to the next question. The next reasons for poor adhesion may be the wrong stage temperature (if the 3D printer has a heating option) and the wrong selection of adhesion promoters for a particular filament.
Working stage temperature selection
One of the common causes of poor adhesion is the wrong stage temperature selection for a particular material. When the molten filament is applied to the table and then cools, deformation occurs. If the temperature of the stage is incorrectly selected, the outer edges of the printed product are compressed, and we get warpage: the edge of the product comes off, clings to the nozzle, and the product completely comes off the platform.
Usually, 3D printing filament manufacturers list the recommended heating temperature for the stage on their website or boxes. For the most common materials, you can use average values.
Examples of worktable temperatures for some materials:
- PLA: 60°C
- ABS: 100-110°C
- PETG: 85°C
- Nylon: 100°C (depending on material composition) )
- Polycarbonate: 110°C (the higher the temperature, the better)
Worktable temperatures may vary for each manufacturer's plastic. You can choose the optimal temperature only empirically.
Adhesion agents
To increase adhesive properties and reduce the risk of damage to the glass surface of the work table, additional agents are often used, such as varnish or glue for 3D printing, PVA glue, stationery glue stick, dissolved ABS plastic (so-called "ABS juice" ), blue tape, etc. One tool for printing all types of plastics will not be enough. In our article, we will not consider such folk remedies as beer or sugar syrup, but will focus on more traditional methods.
Basic adhesives:
Varnish or adhesive for 3D printing
The days of hair sprays are long gone, and now almost no one uses them due to low efficiency. More effective adhesives for 3D printing have come to replace.
Typically, 3D printing lacquers and adhesives are formulated to take into account the properties of different filaments and allow the first layer of the printed model to be reliably adhered to the worktable. Simply put, these are universal tools suitable for working with multiple types of filaments.
There are already quite a few manufacturers of 3D printing varnishes and adhesives on the market in various volumes and for any budget. It's not worth saving - one bottle will be enough for several months of printing, and you will save your nerves and time spent on reprinting damaged parts.
Easy to use: spray varnish or glue on the platform and spread it evenly over the surface with a clean, soft cloth.
ABS juice
Composition for those who like to save money or who do not have glue or varnish on hand. It is made simply: finely chopped ABS rod or the remnants of a previous printing with ABS plastic are immersed in acetone and after a few hours a thick solution is obtained that can be applied with a brush even on a cold platform.
This method is very reliable as an additional adhesive, but acetone evaporates during 3D printing and creates an unpleasant odor.
PVA glue, stationery glue stick
PVA glue is applied to the work surface with a brush and rubbed until a uniform thin layer is obtained. As a rule, when hardening, the glue becomes transparent. After drying, you can start 3D printing. The method is not bad, but the reliability of such a method is doubtful due to the fact that not all PVAs work well.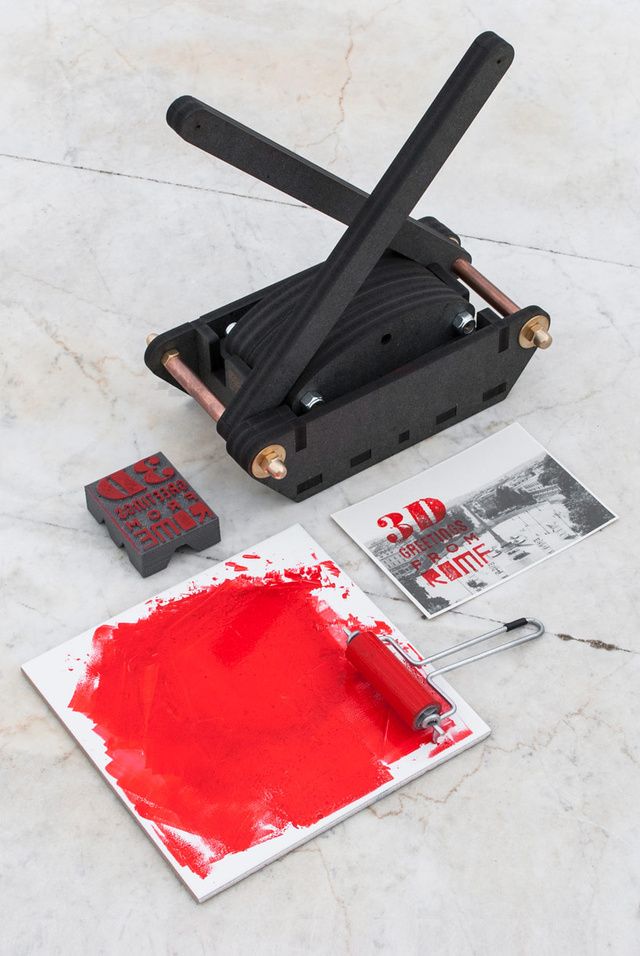
Stationery glue stick is mainly used when there is nothing else at hand. The most popular option is Kalyaka-Malyaka glue. The glue is applied in one layer, after the platform cools down, the part is easily separated, and the glue itself is easily washed off the glass and from the printed part.
Kapton film, blue masking tape and Lomond film
Masking tape is more suitable for 3D printers without platform heating. The adhesive tape is carefully glued to the entire area of the table and allows you to print small details without heating the table. This option is especially suitable when working with PLA plastic, however, with an increase in the area of \u200b\u200bproducts, the edges of the parts can come off along with the adhesive tape, so the relevance of this method is limited. Kapton tape or Lomond film is more commonly used.
On Kapton tape, the lower surface (the sole of the product) is very smooth, the parts are well separated after cooling, but you can’t leave the product on the cooled table, as the plastic pulls the tape together, and air bubbles form under it.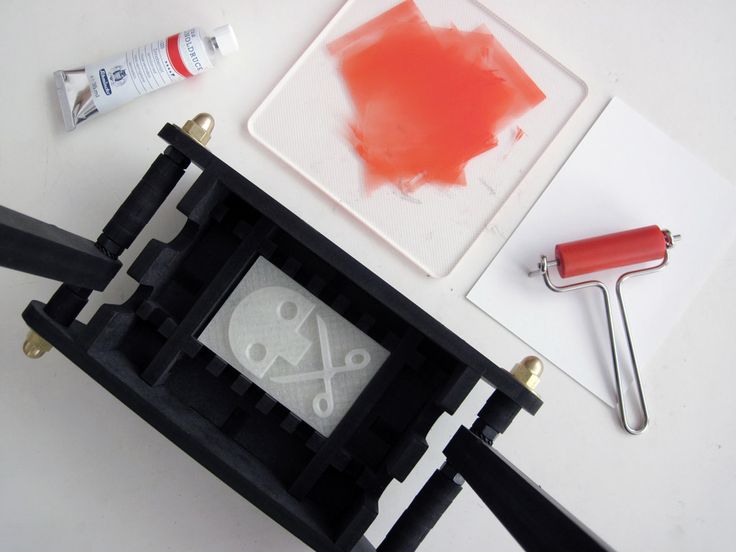 When 3D printing on Kapton tape, it is necessary to heat the platform and additionally smear the adhesive tape with glue. Suitable for 3D printing of medium-sized products.
Lomond film was popular until various adhesives appeared. After gluing, the top layer on the film itself must be washed off for better adhesion. Details after printing on such a film are quite difficult to tear off. Over time, bubbles also form under the film, so the film must be changed regularly. Suitable for 3D printing large items.
Additional Points to Remember
PLA is the least demanding polymer. For stable printing with polylactide, it is not necessary to treat the surface of the table with additional adhesives, a clean glass surface is sufficient. A prerequisite is that the platform is heated to 60°C. If the platform is not heated, then it is better to print using adhesive agents - varnish, 3D printing glue or blue tape for small parts.
PLA also loves airflow, so keep the fans on full.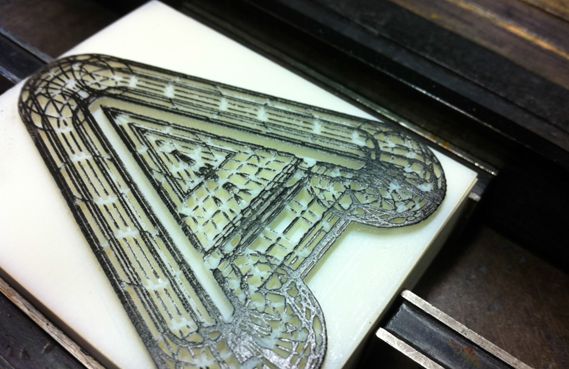
ABS is highly shrinkable and needs help to get better adhesion. The main types of additional tools are varnish or glue for 3D printing, ABS glue, stationery glue stick, PVA glue.
When working with ABS, the platform must be heated to 100-110°C. It is advisable to use 3D printers with closed cameras that support high background temperatures. When 3D printing on open printers, it is necessary to use a heat-retaining cocoon around the model. Many slicers already offer this feature. Blowing of products made of ABS plastic is highly undesirable, as cracking of parts in layers and detachment from the working surface due to shrinkage can occur.
PETG is a very easy to work material that does not require high temperatures or fine print settings. Plastic has excellent adhesive properties and adheres very strongly to clean surfaces. On the other hand, high adhesion can lead to separation of pieces from glass tables when products are separated, so it is advisable to apply separating layers on the work surface - the same glue or varnish for 3D printing. This will help both separate products and prevent damage to the glass.
Flex has high adhesive properties, bonding well not only between coats, but also to work surfaces. Again, it is advisable to use 3D printing varnish or glue to avoid damaging the glass. Film coatings are not recommended.
In the case of Composite Materials , the choice of adhesive agents is mainly determined by the type of material serving as the base. Usually recommendations for preparing for 3D printing with composites can be found on the manufacturer's website. If not, please contact technical support for advice.
For example, the FormaX composite from the X-line range is based on ABS plastic, but the properties of the composite material differ from pure ABS due to the presence of carbon fiber filler. Formax is not characterized by cracking in layers, but the composite requires the use of additional adhesive agents, so the manufacturer recommends using varnish or glue for 3D printing
Material storage and drying
The effect of moisture on filaments can be both cosmetic and functional.