3D printer extruder components
3D Printer Extruders | MatterHackers
Finding the best extruder upgrade or replacement for your 3D printer can take the quality of your 3D printed parts to the next level. The extruder is responsible for how much and at what speed your 3D printer pushes filament into the hotend. MatterHackers can help you find the perfect extruder for your 3D printer to help you get the best 3D printed parts possible.
Guides & Articles
How to Succeed with Quantum Dichromatic PLA Filament
Follow this guide for tips and tricks on how to get the best results when 3D printing with Quantum Dichromatic PLA filament.
How To Succeed with LayerLock SLA Build Surfaces
Successfully achieve strong bed adhesion for Laser, DLP, and SLA resin prints using LayerLock SLA Resin 3D Printing Build Surfaces.
How To Build A Successful Makerspace
Find out the necessary components to create an effective space for your maker community.
How to Succeed When 3D Printing with Polypropylene
Successfully produce 3D printed parts out of polypropylene filament with these tips on achieving stronger bed adhesion and minimizing shrinkage.
Tech Breakdown and How to Succeed: Ionic Hybrid Support Material
Supporting engineering-grade filament has been difficult without a support material dedicated to higher temperature 3D printing. Ionic aims to solve that.
How To Succeed with OBC 3D Printing Filament
From Dow Chemical, OBC combines flexible and rigid into one unique material with properties of both.
How To Succeed with LayerLock Garolite Build Surfaces
Successfully achieve strong bed adhesion for NylonX, NylonG, and standard filaments using LayerLock Garolite Build Surfaces.
How to Succeed with LayerLock Powder Coated PEI Build Plates
Powder coated PEI steel sheets are a great alternative build surface for strong bed adhesion. Here's how you can succeed using this durable build plate.
How To Succeed When 3D Printing With Nylon
Learn how to 3D print Nylon like a pro. Nylon is a stronger and more durable alternative to PLA or ABS and easy to 3D print with using these Tips and Tricks.
How To Succeed When 3D Printing With ASA Filament
Follow this step-by-step guide to learn how to print with ASA, the perfect material for any outdoor projects.
How to Succeed when 3D Printing with Polycarbonate Filament
Follow these helpful steps to start successfully printing with this extremely tough, professional grade material.
How to Succeed with NylonX
NylonX has quickly become one of our favorite filaments for strong, durable, and ready-to-use parts. Here's an in-depth look at Nylon X, and some printing tips to get the most out of this great new material.
LulzBot 3D Printer Tool Heads
Technical Specifications
- Compatible with one or more of the following LulzBot 3D Printers:
- TAZ Pro
- TAZ 6
- TAZ 5
- Mini 1
- Mini 2
3D Printer Extruders
Browse Extruders by Manufacturer
View the different makers of FDM 3D Printer Extruders
Browse Extruders by Drive Gears
Choose between an Idled or Dual-Drive extruder for your 3D printer
Browse by Hobb Material
Choose the extruder component perfect for your application
Browse Extruder Accessories
Keep your extruder performing it's best with maintenance or upgrades
Guides & Articles
How to Succeed with Quantum Dichromatic PLA Filament
Follow this guide for tips and tricks on how to get the best results when 3D printing with Quantum Dichromatic PLA filament.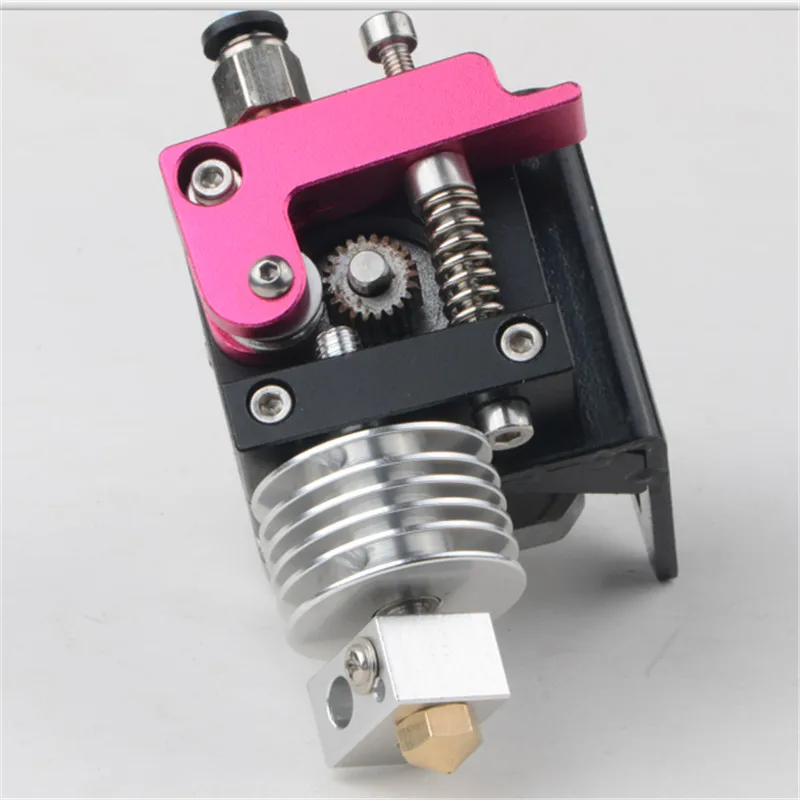
How To Succeed with LayerLock SLA Build Surfaces
Successfully achieve strong bed adhesion for Laser, DLP, and SLA resin prints using LayerLock SLA Resin 3D Printing Build Surfaces.
How To Build A Successful Makerspace
Find out the necessary components to create an effective space for your maker community.
How to Succeed When 3D Printing with Polypropylene
Successfully produce 3D printed parts out of polypropylene filament with these tips on achieving stronger bed adhesion and minimizing shrinkage.
Tech Breakdown and How to Succeed: Ionic Hybrid Support Material
Supporting engineering-grade filament has been difficult without a support material dedicated to higher temperature 3D printing. Ionic aims to solve that.
How To Succeed with OBC 3D Printing Filament
From Dow Chemical, OBC combines flexible and rigid into one unique material with properties of both.
How To Succeed with LayerLock Garolite Build Surfaces
Successfully achieve strong bed adhesion for NylonX, NylonG, and standard filaments using LayerLock Garolite Build Surfaces.
How to Succeed with LayerLock Powder Coated PEI Build Plates
Powder coated PEI steel sheets are a great alternative build surface for strong bed adhesion. Here's how you can succeed using this durable build plate.
How To Succeed When 3D Printing With Nylon
Learn how to 3D print Nylon like a pro. Nylon is a stronger and more durable alternative to PLA or ABS and easy to 3D print with using these Tips and Tricks.
How To Succeed When 3D Printing With ASA Filament
Follow this step-by-step guide to learn how to print with ASA, the perfect material for any outdoor projects.
How to Succeed when 3D Printing with Polycarbonate Filament
Follow these helpful steps to start successfully printing with this extremely tough, professional grade material.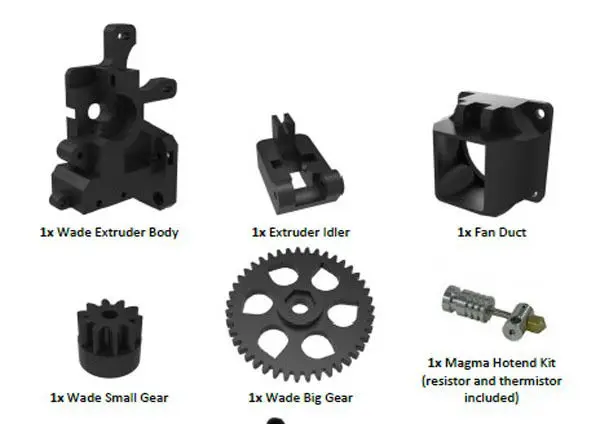
How to Succeed with NylonX
NylonX has quickly become one of our favorite filaments for strong, durable, and ready-to-use parts. Here's an in-depth look at Nylon X, and some printing tips to get the most out of this great new material.
FDM Printer Components... | BeyondWiki
In the last article, we talked about popular 3D printing technologies. In this article, we will look at the structure of FDM - printers.
What does it consist of?
General 3D printer consists of body, motors, extruder, table and electronics. Each of these components is an integral part of any FDM machine. And if everything is very complicated with electronics due to its variability, then with the body, extruder and table everything is somewhat simpler. They will be discussed.
Body
The body is the frame of the 3D machine, it is on it that all components are held.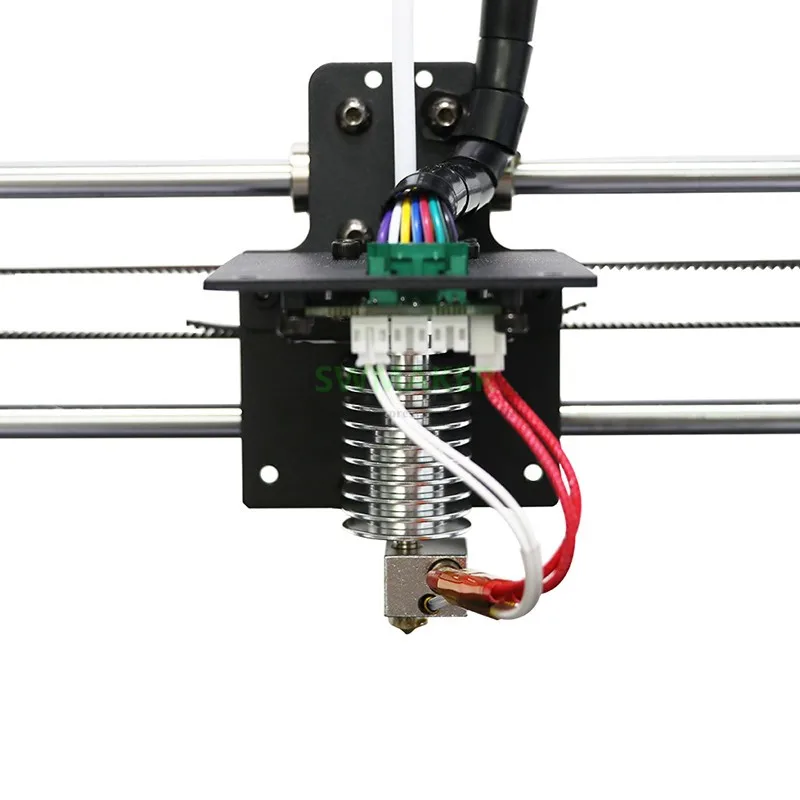 It can be either open or closed. Even though closed case printers are more expensive, they have a number of advantages:
- Noise isolation.
- Insulation of mechanics from dirt, dust, hair, animal hair.
- Isolation of mechanics from children.
- Protection against drafts and temperature changes (they are terrible for engineering plastics).
- The pungent smell of plastics ( ABS ) does not spread throughout the room.
- Better printing with engineering plastics ( ABS, Nylon, HIPS ).
However, despite the preponderance towards printers with a closed case, one should not forget that having an open printer is not critical. Moreover, some craftsmen make the case on their own.
Kinematics
Absolutely every FDM printer has moving parts and platforms that operate according to the kinematic scheme of the device; each type is very different from the others.
Cartesian/Cartesian
The most popular kinematics among FDM machines, based on three Cartesian axes — X, Y, Z . Most often, the extruder moves along one horizontal axis and one vertical axis, and the platform moves along the other horizontal axis. However, there are also alternative movement configurations.
The Cartesian system has many advantages, which is why it is the most common among 3D printing enthusiasts. Namely:
-
Popularity. Since the printers of this system are the most common, it will not be difficult to find information, spare parts or some guides in Russian.
-
Easy assembly. Usually assembled 3D printers are more expensive, which makes it worthwhile to buy kits for self-assembly. With printer assembly/repair Cartesian system can handle even a beginner.
-
Stability of results.
 Compared with other kinematic systems, these printers have excellent accuracy and print quality.
Delta
This type of kinematics includes a fixed print table and an extruder with three attachment and movement points, which gives certain positive and negative sides.
Advantages:
-
Compact. Printers in this system often take up little space in length and width, but can be tall.
-
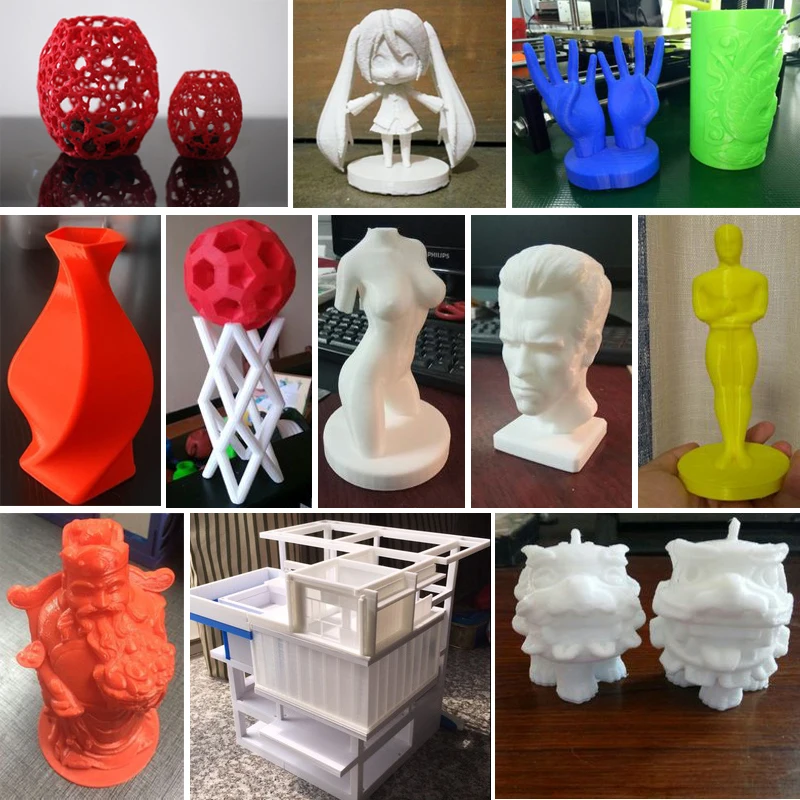
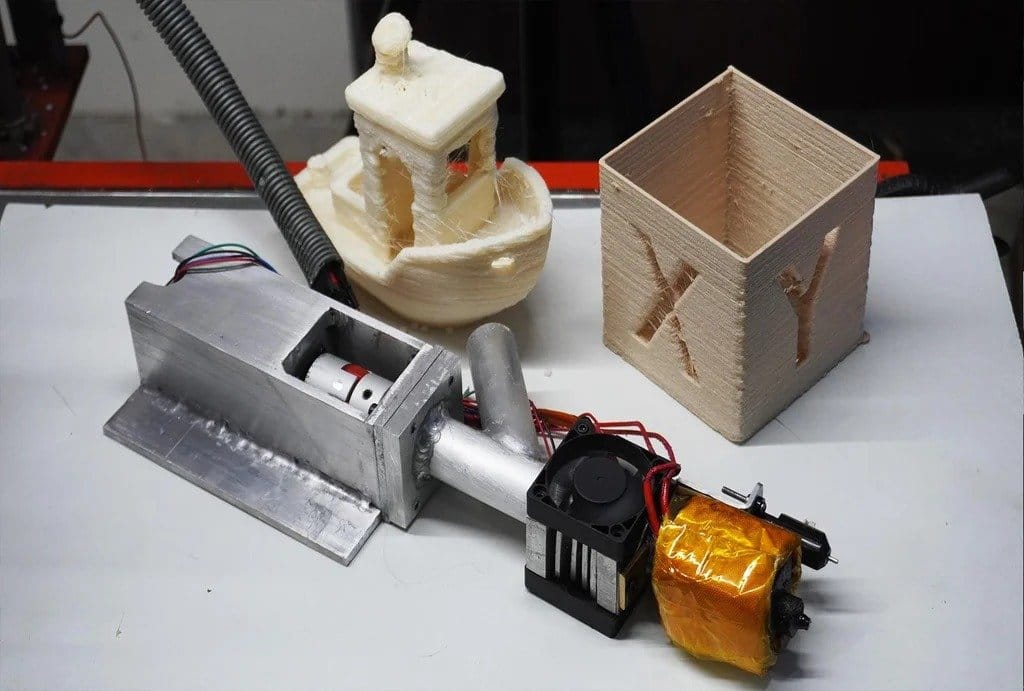
Print high details. While printing long and wide models is difficult, delta system printers are ideal for printing tall models (vases, glasses, towers, etc.).
-
Some printer models are self-extending.
-
Faster print speed than Cartesian system.
Drawbacks:
- Inaccuracy. Due to the specifics of the kinematics system, delta printers tend to make many errors when printing.

- The complexity of the design. The complexity of the delta-type design is much higher than the Cartesian one, which gives a lot of inconvenience, namely, the difficulty in self-assembly and repair.
- Software and electronics. Since the system for working with coordinates is very different and rather complex, more powerful, and therefore expensive, electronics are needed. The same applies to software.
Extruder
The extruder is an essential part of any 3D printer. This tool is designed to melt the plastic filament and extrude it onto the table. There are two types of material feeding through the extruder .
Direct feed
Feed by stepper motor directly into the extruder , the motor is located on the carriage itself.
Pros:
- Quick plastic change.
- No powerful motor required to feed material.
- Minimum plastic feed error.
- Can be printed with flexible materials.
Cons:
- Complex design creates problems during assembly and repair.
- The mass of the carriage is increased due to the feed motor.
- Due to the large mass, inertia increases, which can lead to inaccuracies.
Bowden feed
In this case, the material feed motor is located on the printer body, not on the carriage itself. The material passes through the PTFE tube into the extruder.
Pros:
- Reduced carriage load.
- Simplified design.
- Higher accuracy than direct feed.
- Higher speed.
Cons:
- Extremely difficult to print with flexible materials.
- The plastic feed error is increasing.
- Long plastic replacement.
- Requires a powerful motor to feed material into the extruder.
Table
The print table is mostly a heated surface onto which the extruder extrudes melted material. The task of each table is to keep the model in one place. Different coatings cope with this task in different ways.
PEI
Polyetherimide film is used on many printers from the factory. This type of coating is great for beginners as it requires minimal effort to print.
Pros:
- Has good adhesion to plastic ( ABS, PLA, PETG, TPU ).
- Heat resistant.
- Pretty strong.
Cons:
- Price.
- Degrease the surface every time.
- Has poor adhesion if printed without heated bed.
Glass/Mirror
Glass is also common among 3D printers. The glass can be ordinary window, mirror, borosilicate, phosphate, silicate-lime and other .
Pros:
- Price.
- Easy to install.
- Easy to achieve good adhesion.
Cons:
- Brittle.
- Trying to separate the model from the glass can cut you if the glass cracks
- Low temperature resistance (but not all types).
Magnetic top
Another type of table top. It has a rough surface made of magnetic material. Great for beginners, just like PEI film.
Pros:
- Flexibility.
- Price.
- Excellent adhesion.
Cons:
- Must be degreased every 3-4 prints.
- Sometimes the adhesion is too strong and it is very difficult to tear off the model.
- Adhesive properties degrade over time.
Total
Despite all the pros and cons of everything described, there is no absolutely universal thing that would work great and would not have any complaints. One way or another, any 3D printer is great for getting to know 3D printing, because most FDM printers are easy to improve yourself. Want a closed case? Do it yourself! Need to change the type of extruder mount? Please! Well, changing the table cover is generally a matter of a few minutes.
Design of FDM printers
Terminology, components, possible problems and ways to solve them
We have already considered FDM 3D printing technology in some detail ( Fused Deposition Modeling consumables, and also found out the reasons why FDM printers have become so common and popular at the present time. Now it's time to get acquainted with the accepted terminology and consider the components and design features of such 3D printers.
Printhead: extruder and hot-end
The most important part of any printer, be it inkjet 2D or Fused Deposition Modeling 3D, is the printhead. In this case, it consists of a heater in which a plastic thread (sometimes not a thread, but a rod) is melted and then squeezed out through a nozzle with a small diameter hole - usually in the range of 0. 15–0.5 mm, as well as a mechanism that provides dosed filament supply to the heater. The feed mechanism is usually called an extruder (from the English extrude - to push out, i.e. extruder - a pusher), and a heater with a nozzle is called a hot-end (hot-end; by analogy, the extruder is sometimes called cold-end). Sometimes the entire print head, including the hot-end and cold-end, is called the extruder for short, which is not entirely correct: the extruder is only the largest part of the head.
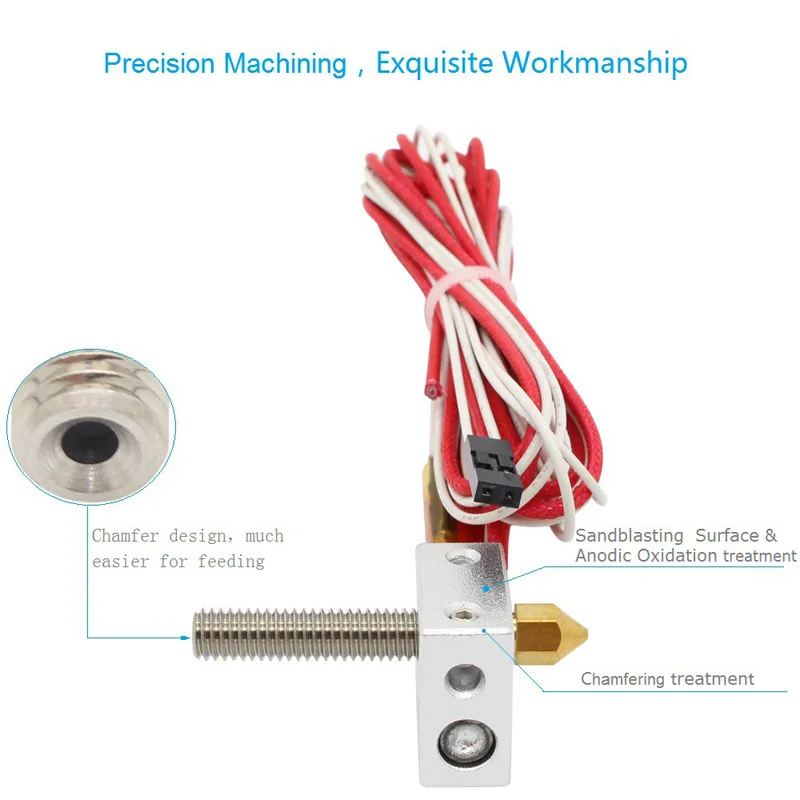
Recall that the thread or rods are supplied in two diameters: 1.75 and 3.0 mm. The extruder can only work with one diameter, which must be specified in the printer specification and taken into account when purchasing consumables. To feed the thread, a stepper motor and a system of gears and shafts are used. The controller controlling the motor provides not only the desired filament feed speed, but also the reverse action - its extraction, for example, when changing the material.
Naturally, the hot-end temperature is controlled by a thermistor, so four wires always go to this part of the head: two thicker wires to the heater and two thinner wires to the thermistor.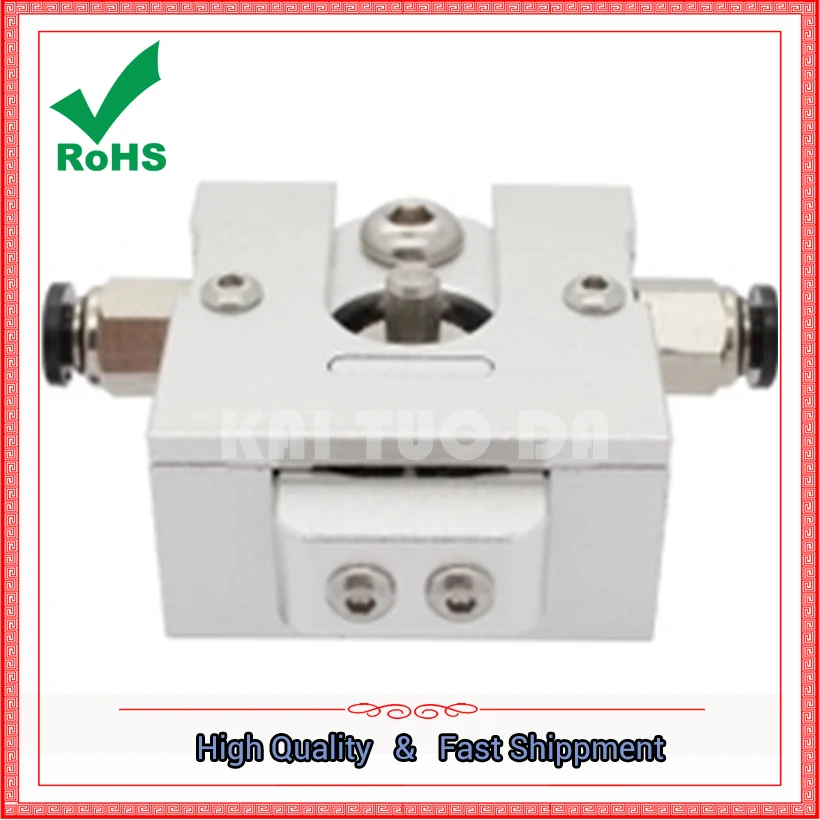
Since the working temperature of most materials is quite high - 200-250 ° C, and sometimes even higher, measures must be taken to ensure that the filament is melted in the nozzle and to avoid heating the extruder, which may contain plastic parts.
To do this, radiators are installed between the hot-end and cold-end, the extruder is additionally cooled with a small fan, and “thermal break” (thermal barrier) is also used: gaskets made of a substance with low thermal conductivity, which can be used as polytetrafluoroethylene ( PTFE, also known as Teflon and PTFE) or polyetheretherketone (PEEK, Latin PEEK). Since the hot-end temperature can approach 300 °C when working with some materials, gaskets must withstand this temperature not only without significant deformation, but also without releasing toxic substances. With regard to Teflon, there are suspicions in this regard, the validity of which we will not discuss and will only say that in any case it is better to work with an FDM printer in a well-ventilated area.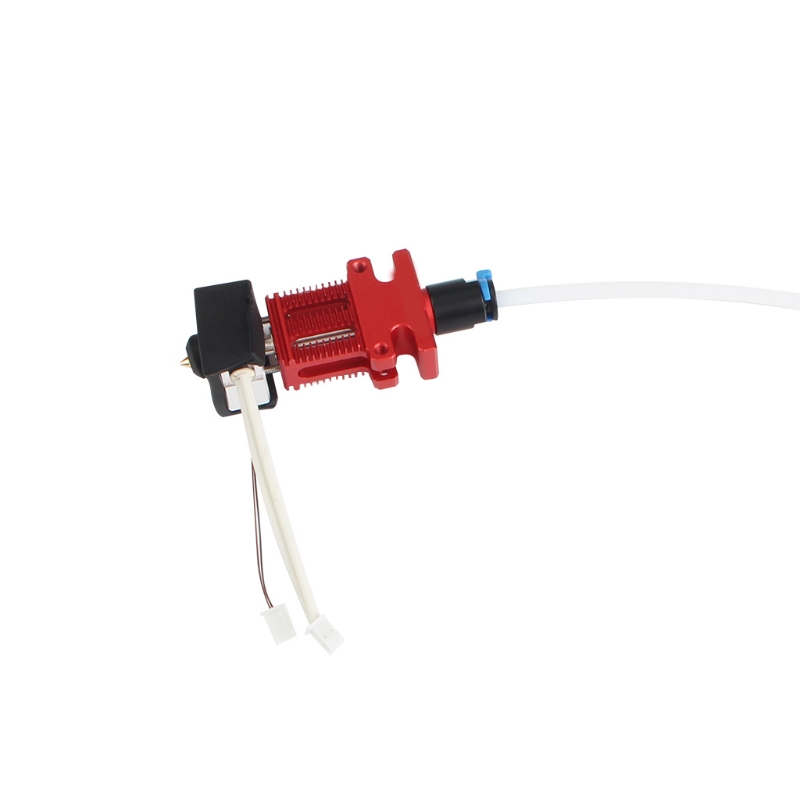
PTFE or PEEK tubes are also used to reduce friction between the filament and the walls of the heater hole, at the entrance to which the plastic of the filament is still solid, then, as it moves to a more heated zone, it passes the glass transition temperature, and only in the area with the most at high temperature it becomes molten. In the glass transition zone, where the filament material is no longer solid but not yet liquid, there is a high resistance to pushing through the filament, so it is highly desirable for the tube to reach a point where the filament is already melted.
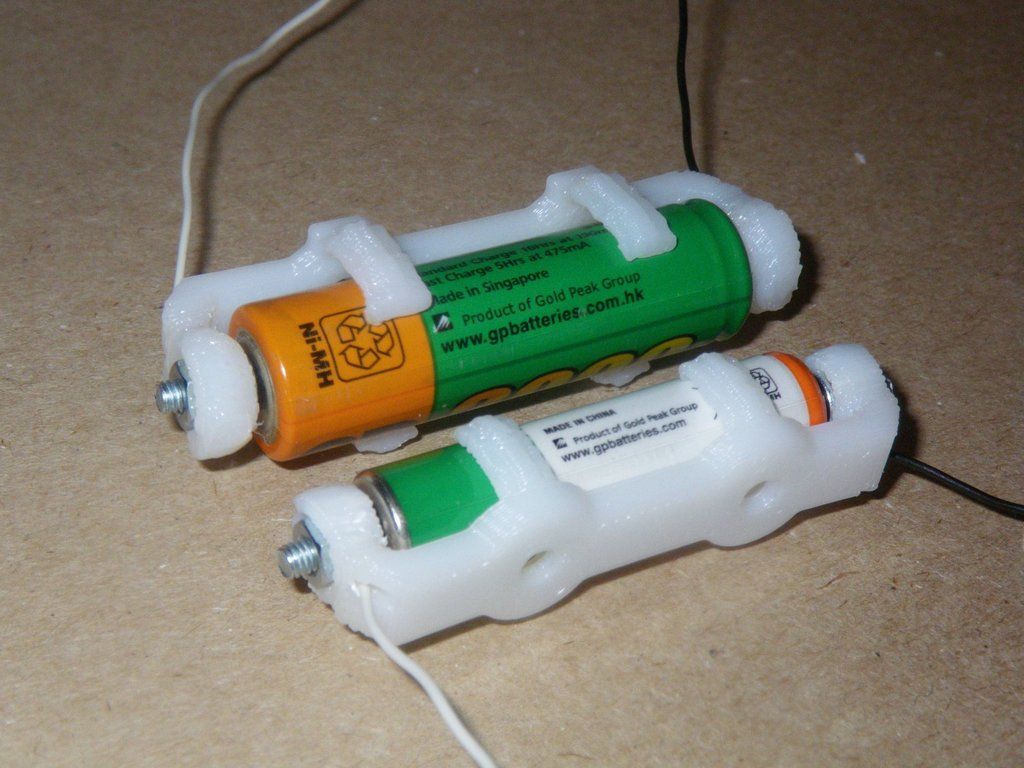
The nozzle is considered a consumable item: its hole becomes clogged over time, covered with soot, and you either have to clean it (which is not easy, especially if the hole is 0.15 mm in diameter) or replace the nozzle. Therefore, it is highly desirable that the nozzle is not just replaceable, but also replaced without much hassle, for which a threaded connection is used. The nozzles of different printers are not always interchangeable: the pitch and diameter of the thread can be different, moreover, the thread on the nozzle itself can be not only external, as in the photo, but also internal.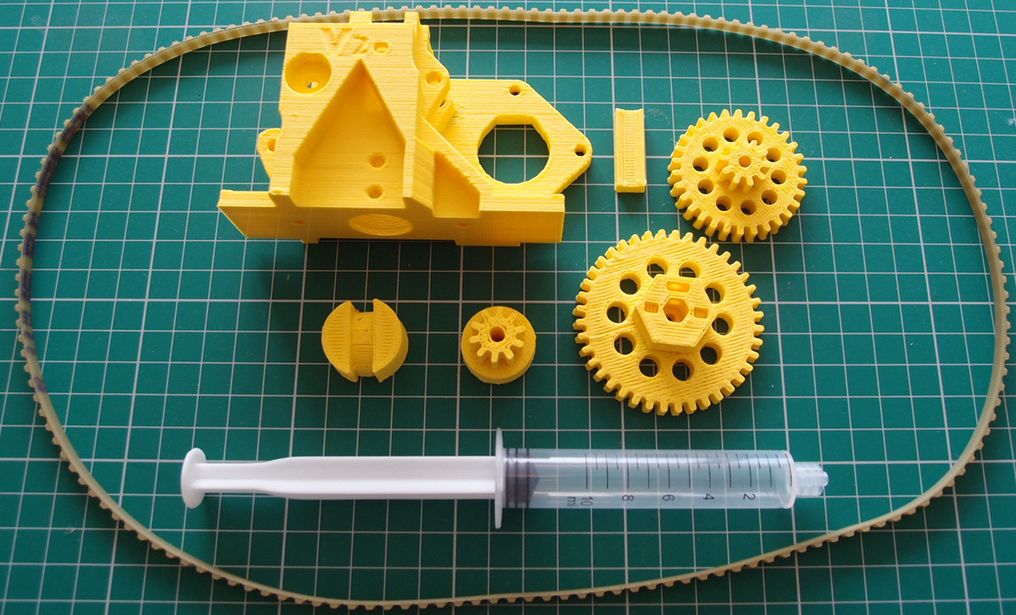
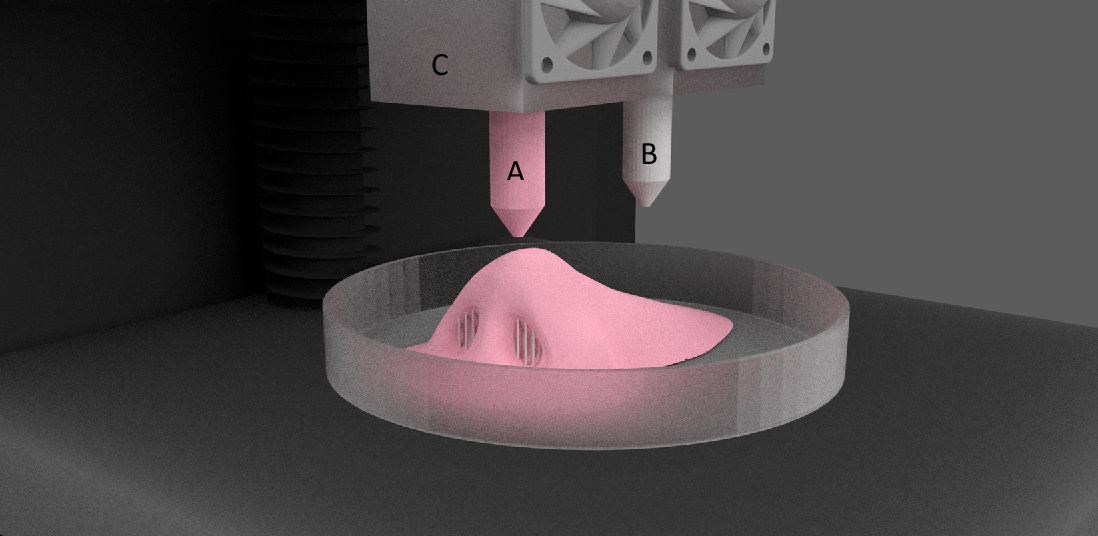
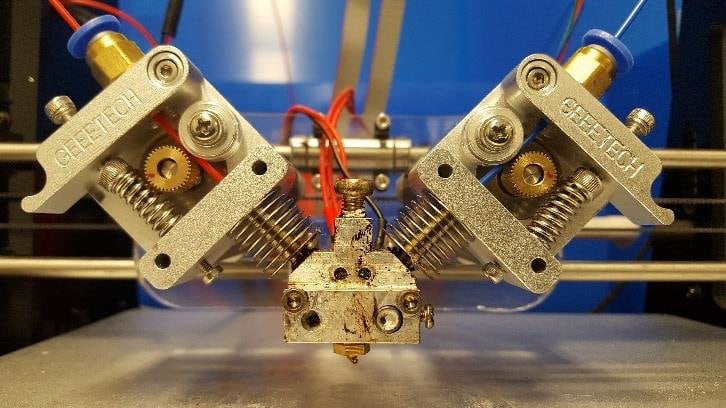
The printhead does not have to be one: there are quite a few printers with two heads. They allow you to use two materials at once when printing - for example, one for the model itself, and the second, easily removed, for supporting structures, which we wrote about in the technology review.
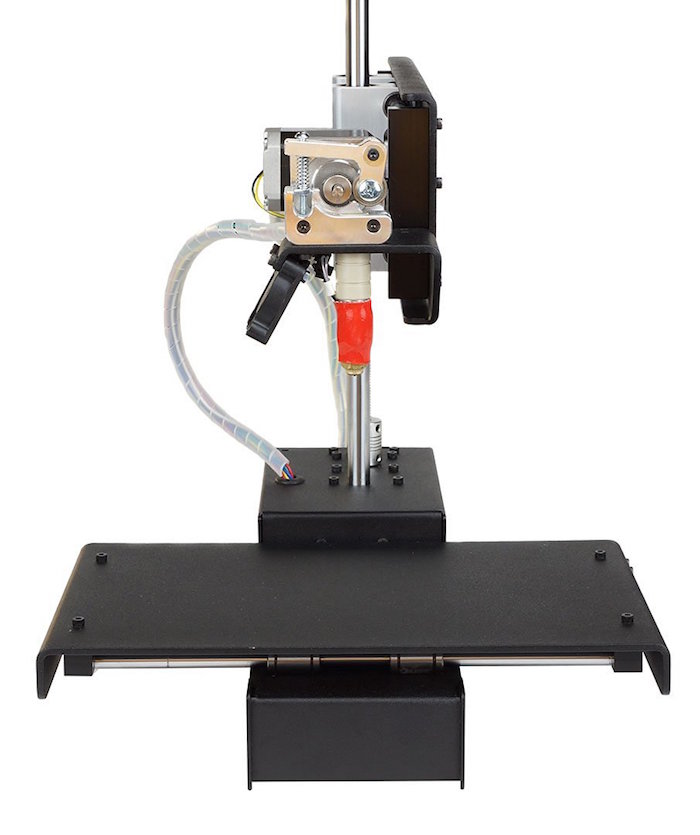
Desktop
The next important detail is the desktop or platform (print bed), on the surface of which the created model is formed. For the working table, it is necessary to ensure the possibility of sufficiently precise adjustment so that the distance between its upper plane and the nozzle outlet is the same over the entire working area. On the other hand, the table must move, so structural elements must be rigidly attached to it to ensure movement. Therefore, the platform is often a two-layer “sandwich”, the lower part of which is not subject to special requirements - it only serves to fasten such elements and is the basis on which the adjusted working surface is located, on which the 3D model will be created.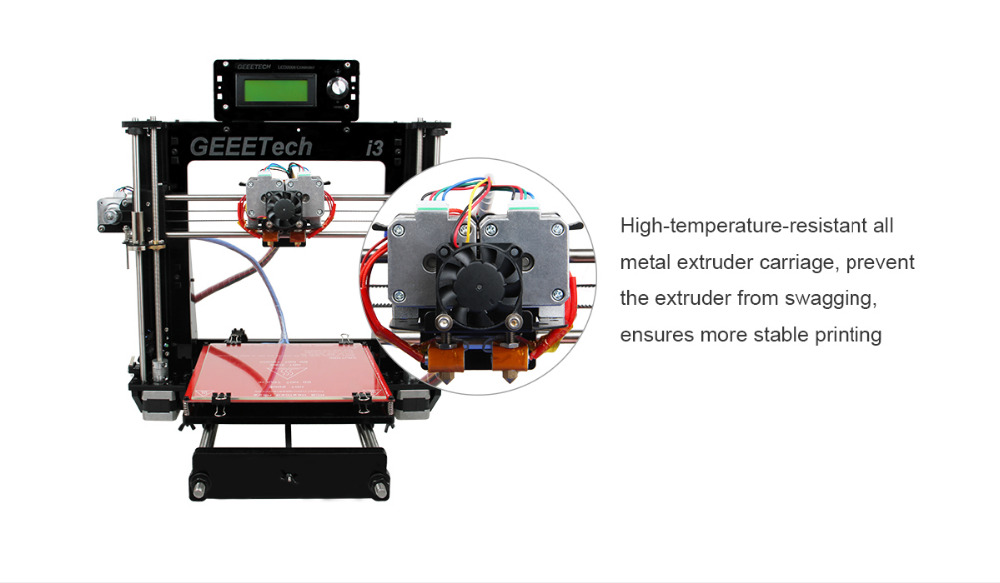 It is about this part of the platform that we will talk further. We only add that in some prototypes created as part of the RepRap project, the lower part of the desktop can be made from the most affordable materials - MDF or plywood.
It is highly desirable that the fastening of the upper part of the table is not rigid, but spring-loaded: in this case, in particular, small adjustment errors are not so critical, when at some position the gap between the nozzle outlet and the platform surface becomes too small, and and even goes into the region of negative values.
Various materials are used as the material for the platform: glass, acrylic, aluminum. And one of the most frequent problems of FDM printing almost always has to be solved - reliable fixation of the first layer of the model on the platform, since the plastics used for printing do not adhere well to aluminum or glass. This is solved in various ways: platform perforation, coating, table heating, as well as a combination of these methods.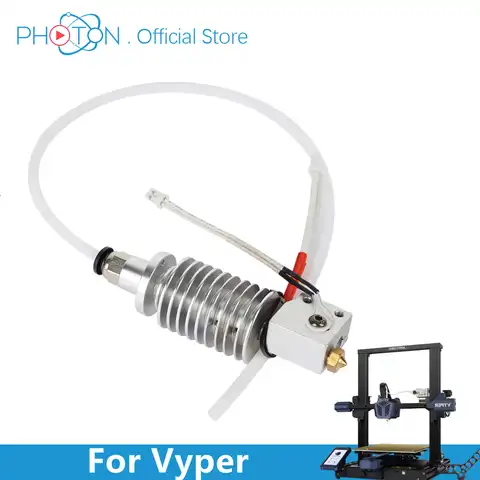
Coating requires materials that not only provide good adhesion, but also withstand the temperature of the molten thread during the application of the first layers. Kapton is often used, a thin yellow polyimide film that can withstand temperatures up to 400 °C. For printers, Kapton is used in the form of a self-adhesive tape with a width of 5 to 200 mm, the segments of which, glued end-to-end, cover the working surface of the platform. Of course, it is difficult to use a 5 mm tape for this - too many pieces will have to be glued, and a 200 mm tape is more difficult to stick evenly, so intermediate values \u200b\u200bare often used.
Another common option is 3M polypropylene-based Scotch Blue Tape. In fact, it is intended for painting and packaging work (for example, it is often used to protect the glossy parts of various products), but its high temperature resistance made it suitable for FDM printing.
For reference: the blue tape item number is 2090, and the following numbers determine the approximate width of the roll in inches: 2090-. 75A - 18 mm, 2090-1A - 24 mm, 2090-1.5A - 36 mm, 2090-2A - 48 mm; there's more 2090-CM designed for corners. Roll length 55 m.
The advantage of the coating, consisting of individual strips, is that it can be replaced in part, but not entirely, as it wears out or if it is damaged.
There are other options, including homegrown hairspray. Another material, self-adhesive film for laser printers, is used in the PrintBox3D One printer, which we will talk about in due time.
But even the presence of a coating does not provide proper adhesion for most consumables, so the platform has to be heated, for which, in a number of models, an electric heater is placed on the bottom of the desktop - made of nichrome wire, or made in the form of printed conductors, or even simply in the form several powerful low-resistance resistors.
This heater is also controlled by a thermistor. The heating of the platform should be uniform, which can be ensured by a sufficient thickness of the platform itself, but at the same time it is desirable that the desktop heats up quickly enough - not in seconds, of course, but at least within a minute or two. And such a popular plastic as ABS requires heating to a temperature of over a hundred degrees, so the heater must be powerful enough.
Bed heating is also needed to reduce the temperature gradient between the first printed layers and those that have just been created. The lower layers begin to cool, and especially quickly if they are in contact with a much more massive platform at room temperature. In this case, deformations occur, due to which the model may begin to bend, and sometimes it simply breaks away from the table. Therefore, heating is desirable even when working with materials whose adhesion to the surface of the table depends little on the temperature of this surface.
Note that both the heater and the thermistor are located on the bottom side of the platform, so the temperature of this side is controlled, and the part will be located on the top. Therefore, it is better to take your time and wait a bit for the whole platform to warm up, especially if it is made of a fairly thick material.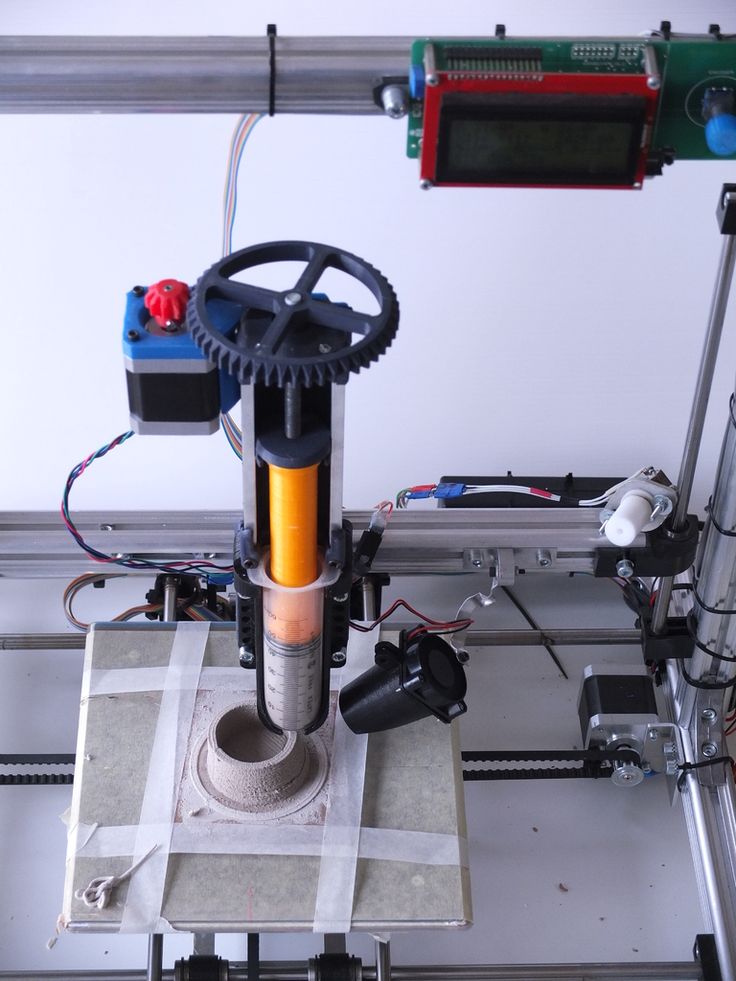
Movement mechanisms
During printing, both the head and platform must move. This requires both mechanisms that implement the actual movement (motors) and guides that ensure the accuracy of movement.
Normally, the head moves along one of the horizontal axes, while the vertical movement and the second horizontal axis are provided by the movement of the desktop. Thus, three engines are needed. As in the extruder, stepper motors are used, typically having a step of 1.8 degrees, i.e. 200 steps per full turn. This is a full-step mode, there is also a half-step and micro-step mode, which is used to improve the accuracy of movement - the engine control electronics adds a certain number of intermediate steps, and often a significant one: the most popular controllers provide division of the engine step into 4, 8 and even 16 parts, and then the full the rotation of the motor rotor will already correspond to 3200 microsteps.
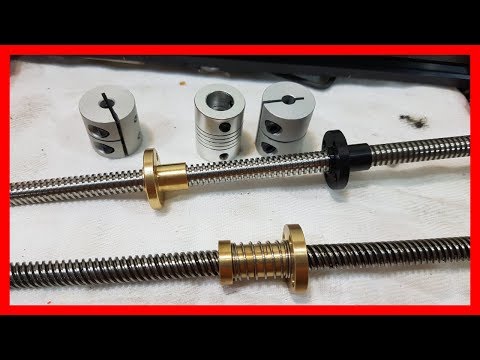
The rotation of the motor rotors must be converted into translational movements of the head and worktable. For this, either pulley and timing belt systems or threaded shafts are used. Shaft transmission is cheaper, but it cannot provide positioning accuracy at high speeds, so it is most often used for vertical movement of the platform, which is quite slow, and only in cheap models is it also used for movements in the horizontal plane.
Guides use cylindrical in cheap models and linear in more expensive ones. The material, of course, is steel, and high demands are placed on the accuracy of manufacturing and the cleanliness of processing, because the accuracy of printing will directly depend on this.
A complex and durable platform will have a considerable mass, which will create a serious load on the engine, ensuring its movement in the horizontal plane (in the vertical direction, movement is both slower and not constant). The engine will heat up, which at some point may cause skipping steps and other troubles. Therefore, they try to lighten the desktop as much as possible - of course, not at the expense of strength, the printing speed sometimes has to be limited and measures must be taken to normalize the thermal regime of the engine (for example, by providing thermal contact with a massive metal frame).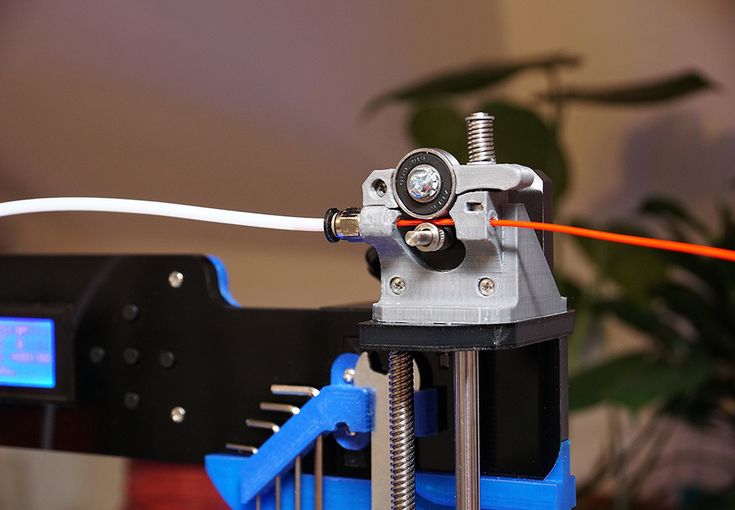
The extreme positions of movement of both the head and the platform are controlled by sensors installed in the appropriate places. In the simplest case, the sensor can be a mechanical contactor or disconnector, but both the accuracy and reliability of such a sensor are not always sufficient, so sometimes they use optical (LED and photodiode, at the right time the gap between them is covered by a shutter) or magnetic, on Hall sensors.
Temperature conditions of the model
There is another point that is taken into account in many printers. It is due to the fact that the plastic that comes out of the nozzle does not solidify immediately, and therefore is subject to deformation. This is especially critical in the presence of so-called "bridges" - long horizontal bridges supported only at the edges: the threads of plastic that has not yet solidified will inevitably sag, which will require the creation of additional supporting structures, which will then have to be removed. But even if there are no “bridges” in the model, there may be curling corners with a small radius of curvature (curling corners), and on elements of a small size, the previous layer will sag, which did not have time to harden before the next one was applied.
To a certain extent, these problems can be avoided if measures are taken to cure the plastic as soon as possible, and this can be done in one way: cooling with an additional fan, one or more. Choosing a fan is not difficult, there are many models of different sizes designed for computers; controlling the speed of their rotation is also not difficult, but choosing the location of the fan itself and the correct direction of air flow from it is a whole art. In this regard, FDM printing has an unpleasant duality: on the one hand, it is necessary to quickly cool the plastic extruded from the nozzle, and on the other hand, this must be done evenly so that one side of the model does not cool faster than the other, otherwise thermal deformations are inevitable. In addition, the cooling air flow should not noticeably affect those elements of the printer that must have a constant high temperature: the hot end and the heated table.
Therefore, the FDM printer is “afraid” of drafts, and some models even provide a protective cover, which, when used at home, at the same time helps to limit children's access to dangerous parts of the device. But under the casing, a closed space is formed, heated by the hot end, and the heated platform, and the running engines, and the cooling plastic of the already created part of the model, which slows down the curing of the extruded thread and leads to even greater deformations.
Frame
Of course, all of the listed components must be located on a sufficiently strong and rigid frame that ensures long-term preservation of geometry and the absence of backlash, regardless of various adverse conditions - ambient temperature and humidity, as well as vibrations that occur during printing.
The frame often uses inexpensive aluminum profiles, such as those used as furniture fittings, and sometimes even ordinary threaded rods, which can be bought in building materials stores.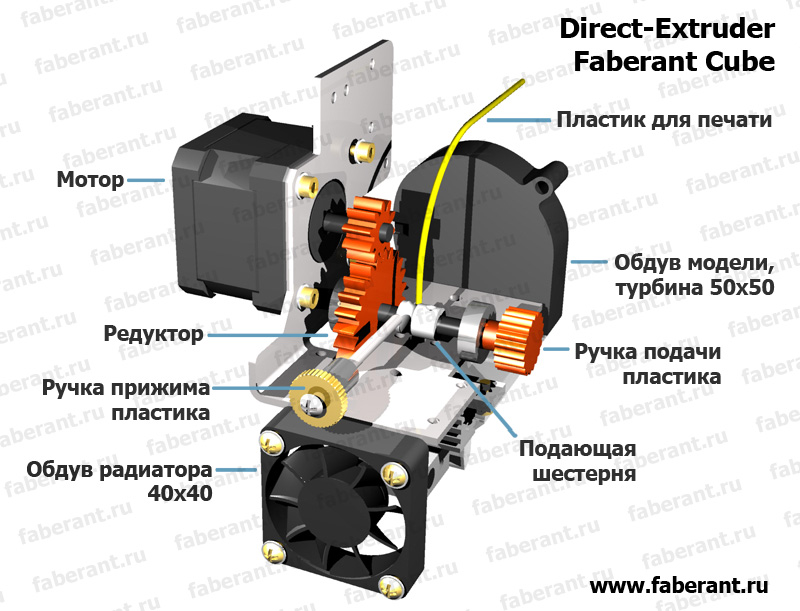 They are connected into a single whole with the help of plastic couplings, clamps and other elements fastened with nuts and bolts. This is permissible only in home-made printers, where the minimum cost of structural elements and their maximum availability for sale are at the forefront.
In some models, including "factory" models, the frame is made of plexiglass or plywood, and it is emphasized that the plywood elements are made by laser cutting; Of course, no laser can turn plywood into metal, so the durability of such structures and the absence of problems when working with such printers are highly doubtful.
Electronics
Now on to the control electronics.
The controller controls the operation of all printer components, which receives the program in the G-code language. It is generated on the basis of an STL file prepared in some 3D editor that describes the future model. G-code is quite simple to understand: the lines of the program contain commands to move the head and platform, turn heaters and fans on and off, so it is not a problem for a more or less experienced specialist to edit the finished code.
The vast majority of 3D printer controllers run on the Arduino platform, which has an open architecture and software code. The programming language is based on C/C++ and is easy to learn, while the Arduino programming environment means working through a USB port without any additional programmers.
Common and relatively inexpensive Atmel microcontrollers: ATmega32u4, ATmega328, ATmega2560, ATmega1280, etc. have been used and are still used as the Arduino hardware from the earliest versions, and the latest developments use the 32bit Cortex-M3 microprocessor ARM SAM3U4E . In FDM printers, the ATmega2560 is more common.
To control various devices (in 3D printers, these are motors, heaters, fans) and receive data (from thermistors and limit sensors), additional modules are used, primarily stepper motor drivers, capable of providing the appropriate output currents and operation in microstepping mode.
For the convenience of interfacing such modules with the microcontroller board, RAMPS intermediate boards (RepRap Arduino Mega Pololu Shield, where Pololu is the name of a company specializing in the production of components for robotics) are used. These boards come in different versions, currently the most common is RAMPS 1.4 with smd components. On the one hand, such a board has groups of pin connectors for connecting to the microcontroller board, and on the other, connectors for connecting modules and external equipment (motors, heaters, thermistors). The result is a single compact unit, which, after loading the control firmware into the microcontroller, is ready to work as part of an FDM printer.
Some printers are controlled only via a computer (usually via a USB port, but there are models connected via Wi-Fi), while others have their own control panel, with which, in the simplest case, you can control the temperature on the LCD indicator, start and stop printing, and in more advanced versions, also calibrate, load and unload plastic filament. There are printers with a built-in SD card reader or a USB flash drive port, through which you can upload a file and then print the model without using a computer. All this is ensured by "hanging" the appropriate modules on the microcontroller and, of course, implementation at the firmware level in the firmware.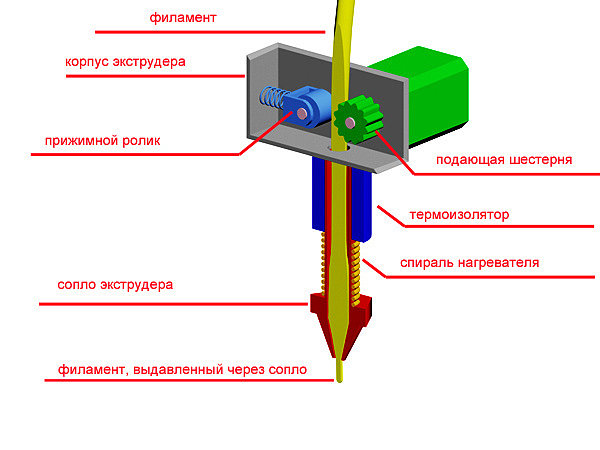
From the controller to the print head, even if it is one, there is a thick bundle of wires: to the stepper motor, to the heater and hot-end thermistor, possibly to the extruder fan (if any). Another similar bundle connects the controller to the desktop. Of course, you can simply tighten the wires with ties, which is done in the most budgetary home-made designs, but the main thing: both of these elements are constantly moving, and even with a sufficient length of the bundles, there is a real danger that some wire will either get into moving parts, or through some -that time will simply fray or break off. Therefore, these wires are placed in special flexible sheaths that ensure free movement of the head and desktop, but at the same time insure against breaks and short circuits.
It is clear that the printer will not work without power. Moreover, if the capabilities of the USB port, to which the printer is usually connected, are often enough to power electronic circuits, then for engines and especially heaters (at least hot-end, if table heating is not provided), you cannot do without a power supply of appropriate power.