3D printer lessons
The PrintLab Classroom
Make a Percussion Instrument
Students are taught about maracas and their construction before designing their own percussion instrument
Tactile Tangrams
Students design tactile tangram puzzles for people with visual impairments
Emoji Tokens
Students design and make emoji tokens to use as feedback systems
Intro to Fusion 360 - Mini Course
Get started with Fusion 360 software and learn all the essential tools
Pandemic Products
Students design solutions to limit the spread of viruses such as Covid-19 on surfaces
Make a Puzzle Cube v2
A mathematical lesson where students explore volumes of cubes to create their own puzzle
Slicing for 3D Printing
Learn how to optimise slicer settings to achieve the best quality prints and test your knowledge in a quiz
3D Printed Orthoses
Students learn how to design and manufacture 3D printable orthotic devices
Mycelium Moulds
Students design and make consumer products out of mycelium, the root-like structures of mushrooms
Organic Homeware
Students design organic homeware by editing 3D scan data and display them online as digital inventory
Slicing Software Challenges
A series of scenarios where students must solve mathematical challenges using slicing software
Fixing Artefacts v2
A series of design challenges where students fix and recreate broken artefacts
Design a Self-Watering Planter v2
Students learn about photosynthesis before designing and 3D printing a self-watering planter
HiveHaus Architecture Project
In collaboration with HiveHaus, this project will guide students in designing a new building for their school
Make your School Name in Braille
Design and 3D print braille blocks that spell out your school's name
Design your own Watchtower
Design and 3D print historical interpretations of the Great Wall of China
Quick Clips
Students use a simple 2D sketch to 3D model workflow to create a range of useful clip accessories
Make an Ergonomic 3D Printed Pen
Turn a clay model into an ergonomic 3D printed pen using a 3D scanner
Make an Egyptian Obelisk v2
Students will learn about hieroglyphics before designing and 3D printing a personalised Egyptian obelisk
3D Printing Technologies
A guided research workshop where students learn about the various 3D printing technologies
Design your own Whistle v2
A lesson where students explore sound waves by designing a functional whistle for their sports department
Design your own Spinning Top v2
A lesson where students compete to design and 3D print the spinning top that spins for the longest time
Packaging Redesign
Students learn about the circular economy before rethinking and redesigning the way we create and use plastic packaging
3D Printing Chemical Structures
Design, edit and 3D print chemical structures
Designing in Tinkercad for 3D Printing - Online Course
Learn how to design specifically for 3D printing in Tinkercad and test your knowledge in a quiz
Make a Bowling Alley
Students combine 2D technical drawing with 3D modelling and 3D printing to create a bowling alley
Little Entrepreneurs Project
A 30-page team portfolio that guides students to create a 3D printing business
Design an Urban Installation
A creative project in collaboration with McCloy + Muchemwa Architects, where students design an urban installation
Make a Suspension Bridge
Students learn about tension, compression, torsion and shear by making a suspension bridge model
3D Printing Basics Workshop
A workshop template that introduces students to the fundamentals of the 3D printing process and industry
Intro to Tinkercad
An introductory course that introduces students to the fundamentals of 3D modelling with Tinkercad
Make an Assistive Bottle Opener v2
Students will manufacture an assistive device to help users with arthritis
Project Reuse
Students create an intervention that encourages the reuse of a product that would typically be thrown away after a single use
Make a Functional Wrench v2
Students design and 3D print wrenches to fit various sized nuts and bolts
Make a 3D Contour Model v2
Students collaboratively design and 3D print a 3D contour model
Make a Tactile Game v2
Students are challenged to design tactile matching games for people who are blind or have visual impairments
The PrintLab Certification Course | The PrintLab Classroom
Learn everything you need to know about 3D printing in the classroom and become a PrintLab Certified Educator - included in all PrintLab Classroom license options
Start a FREE trialSign Up Today
The PrintLab Certification Course is the ultimate training journey for teachers getting started with 3D printing and a great chance for intermediate/advanced users to learn new tips. The course brings together extracts from various PrintLab resources and pieces them together to create a step-by-step professional development journey. The aim of the course is to enable teachers to become proficient and confident in teaching 3D printing curriculum, whilst ensuring they have the necessary 3D design and 3D printing skills.
1 | An Introduction to 3D Printing
The course begins by introducing you to 10 key fundamentals of 3D printing. The aim is to provide a complete overview of 3D printing technologies and the opportunities and limitations that come with them. The course platform includes a 3D viewer that allows you to digitally interact with 3D models to gain an understanding of various aspects of the 3D printing process and industry.
2 | Benefits of 3D Printing in Education
This section of the course is about understanding why 3D printing in education is important and the benefits that come with it. Through a series of visual infographics, you will analyse the results of a survey that asked a range of educators and experts what they thought was the biggest benefit of 3D printing in education. In addition to the results, you will hear explanations and opinions from each participant.
3 | Introduction to Tinkercad Software
The 3D printing process all begins with creating a 3D model and Tinkercad software is a fantastic, free browser tool to do just that! In this section of the course, you will learn how Tinkercad can be used in the cross-curricular classroom before following tutorials to set up a Tinkercad teacher account. This will allow you to moderate and manage a whole classroom of students.
4 | 3D Modelling Basics
With your Tinkercad teacher account set up, you will move on to learn the basics of 3D modelling. Throughout the section, you will be provided with information, tutorials and challenges based on various design tools including navigating the model workspace, placing objects, making holes, mirroring and combining shapes.
5 | Designing for 3D Printing
By showing a series of videos of good and bad practice, you will learn how to design specifically for 3D printing. The video content goes over 10 essential design tips to create models that are suited for the 3D printing process. The tips will help you to advise students and to look out for any 'unprintable' models that are submitted to you.
6 | Slicing for 3D Printing
In this section, you will learn about 10 essential slicer settings to help get the most out of your 3D printer. From print speed and temperature to outer layer thickness and orientation, you'll be sure to learn some handy tips to achieve good quality prints.
7 | The PrintLab Curriculum Framework
There are many ways 3D printing can be incorporated into the classroom. The process and structure of 3D printing lessons can vary depending on the task at hand, but in this section, we'll be showing you an example framework that is used in many of the lessons available on PrintLab Classroom.
8 | Classroom Management
When delivering 3D printing lessons, you may come across certain challenges. For example, you may not have enough time or printers to create every students model or you have concerns about how to budget for materials. This section of the course goes over a range of tips that can make the whole experience more efficient and manageable.
Course Assessments
Using the skills and knowledge gained throughout the course, you will then participate in the 3 course assessments to achieve your certification. These include a multiple choice exam, a challenge to design a 3D object for your classroom and an activity to design your own lesson structure.
How long does the course last?
The online course is completely self-paced so you can fit it around your own routine. Although highly dependent on your skill level amongst other things, we estimate that the course will take between 4-6 hours to complete. Additionally, the requirement to become a PrintLab Certified Educator is to pass the 3 assessments at the end of the course. If you feel comfortable taking these without completing all sections, that's totally fine!
What if I fail an assessment?
Once the exam is complete and the 3D model and lesson structure are submitted, please allow 7 days for a PrintLab representative to assess your work and issue your digital graduation certificate. If assessments are failed, a PrintLab representative will be in touch to advise what needs to be improved to gain the certificate of completion.
What software will I require in order to participate in the course?
A key focus of this course is 3D modelling, which we believe is one of the most important aspects of the 3D printing process. Our recommended software when getting started with 3D printing is Tinkercad, which is browser-based and completely free! Several sections of the course will require you to create and use a Tinkercad account, but don't worry if you haven't got an account yet as there is a section that goes through this process.
Do I need a specific 3D printer to participate in the course?
Absolutely not. All the material on PrintLab Classroom is suitable for use with any FFF 3D printer. In fact, you can even complete this course without a 3D printer.
Enrolling in PrintLab Classroom will give you 12 months access to the PrintLab Certification Course and lesson plan library
Start a FREE trialSign Up Today
3D Printing Lessons.
 Printing thin-walled models from 3Dtool / Habr
 Good day!
As always, our clients help us with ideas for articles. Today we will print an egg. On its example, we will test the built-in function Slic3r , which for some reason few people mention.
The egg needs to be printed not simple, but durable, with minimal plastic consumption and quickly.
It will later be suspended from the ceiling by a hook at the top. The bottom of the egg will be the front part, up with the hook - draft, because it will hang high and the upper part will not be visible. It is possible to print an entire egg loop down with supports at the bottom, but printing and removing the supports will take time.
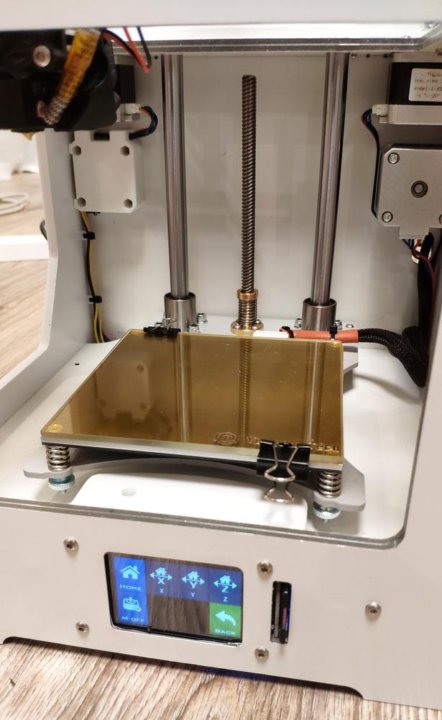
For this task, we chose the Hercules 2018 3D printer - this is a very versatile 3D printer, as it can print all types of plastic and has a large working chamber.
Therefore, we cut the egg into 2 parts, at the same time add a loop at the top.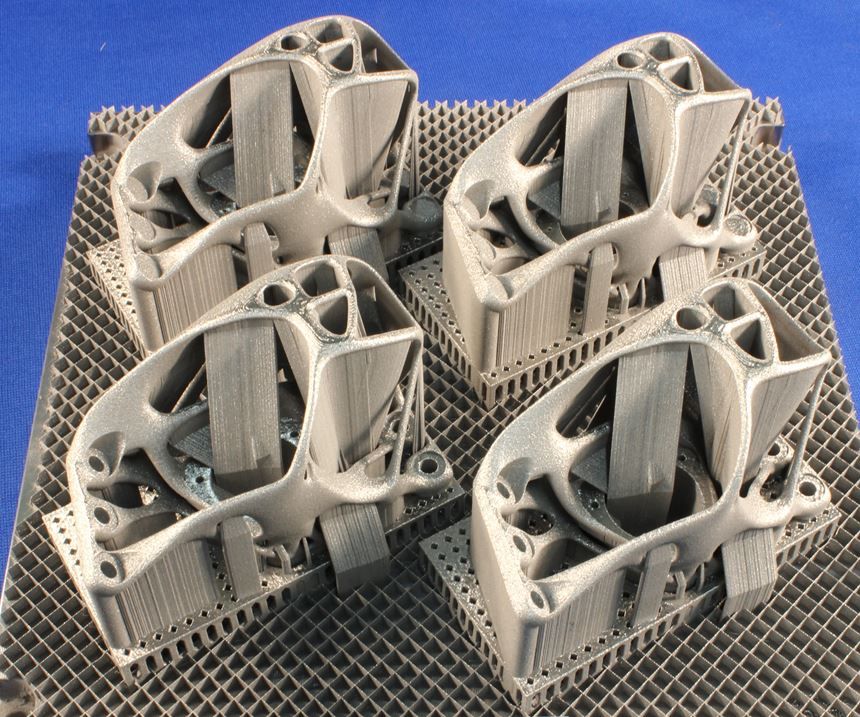 After printing, we will glue the top with dichloroethane.
Now you need to work out the print mode. The part with the eyelet is printed without problems on the standard mode with a 0.5 nozzle, so we will select the mode for the large “half”. The complexity of printing lies in the fact that: firstly, if you print an egg without filling, at some point the walls will have nothing to catch on in the upper part, and they will start to fall down and holes will turn out. Secondly, to improve the quality of the surface, the height of the layer in the upper part of the egg, where the angle of inclination of the perimeters begins to decrease rapidly, will need to be reduced.
Let's start with the usual settings without using a tambourine.
Since the model should turn out with smooth walls without waves from accelerations, we will not print at exorbitant speeds. Speed no more than 50 mm/s.
Method #1 - PLA, 0.5 nozzle, 2 perimeters, 10% infill, layer height 0. 2mm-0.1mm. Speed 50mm/s, extrusion width on infill reduced to 0.35mm as infill in this case is only used to support the walls at the top where the perimeters are printed at an angle. Printing time 2h 26m, plastic volume 22.7 cm3.
Method #2 - 0.5 nozzle, 2 perimeters, Only Infill where needed 10%… Speed 50mm/s, extrusion width at infill reduced to 0.35mm, layer height 0.2mm-0.1mm . Printing time 1h 31m, plastic volume 14.2 cm3.
Method #3 - 0.5 nozzle, 2 perimeters, no fill, using the built-in slic3r (Slic3r Prusa Edition) function Ensure vertical shell thickness (slic3r automatically adds support perimeters in places where walls can fall down), layer height 0.2mm-0.1mm, speed 50mm/s. Print time 58 minutes, plastic volume 9.4 cm3.
Table for understanding the relationship between print time and plastic volume.
In terms of print time and plastic volume, the third option suits us. We try.
Option Ensure vertical shell thickness managed to support perimeters in this case, but bumps appeared on the walls.
In addition, closer to the top, the speed in manual mode was reduced by 20% due to the fact that the angle of inclination of the perimeter printing began to decrease and the walls at a speed of 50mm/s did not have time to harden and bent.
It turns out that in order to get even walls in places where the perimeters are printed at an angle and a flat top, we need to reduce the speed so that the plastic has time to cool, and add infill so that there are no gaps on the inclined surfaces. We will not reduce the speed and add filling for the entire model, this is already too much. In order to slow down the speed on certain layers and add padding where needed, we'll use Slic3r's built-in modifier feature.
A modifier is a surface that is used to apply settings to certain parts of the model. I will write more about how to use modifiers in the next article.
In the meantime... double-click on our model, the Settings window appears. Press Load modifier… and load the pre-modeled surface (we have a cylinder).
Where the model intersects with the modifier, the main settings of the model will be overridden by the settings of the modifier. To set these settings, you need to select the modifier (cylinder) in the window or in the list and click on the "+".
In our case, we reduce the printing speed of the perimeters, add infill and print one layer of fill before filling (Solid Infill every ...) so that the infill has something to hold on to. In order to determine on which layer to print a solid fill, we first generate the code, look at the number of the layer from which the fill starts printing in RepetierHost, and set the previous layer, we have 285. We reduce the printing speed of bridges so that the solid fill layer is printed "in air" without interruption.
We put it in print.
Print time 1 hour 10 minutes, plastic volume 9.8 cm3. Due to the slowdown in printing speed, the plastic changed color a little, but the layers turned out to be smoother than in the previous version, the walls without bumps, the top without gaps.
Of all the options in terms of time, volume of plastic spent and print quality, the last method approached us, using a modifier.
All of the above are just methods that we think are useful to you. How to print depends on the complexity of the part and the desired result.
Catalog of 3D printers: https://3dtool.ru/category/3d-printery/
Don't forget to subscribe to our YouTube channel
(New videos are released every week).
education for school children
3D modeling and printing:
"Quick start" for those who bought a 3D printer or are interested in modern technologies!
Practice on professional equipment
Additional free practice time on our FDM printers during the course.
Free month!
The use of the premises of our center of scientific and technical creativity and supplies for the duration of training are provided free of charge.
10% discount for graduates
Permanent 10% discount on technology zone services (3D printing, scanning, laser cutting).
Program of the course
Developing modeling course for children consists of 4 lessons of 2 hours.
Upon completion of the entire course, students receive certificates from Autodesk and our center for children's creativity and development, Wowstudy.
1. Theory:
Acquaintance with the group and equipment available for work.
Structural modeling. What is 3D modeling from the designer's point of view (construction tree, analytical approach to choosing a program and modeling method, modeling taking into account the physical features of an object, prediction and forecast of operating conditions).
Structural modeling with additional construction elements in SketchUp.
2. Practice:
Overview of equipment, features and classification of 3D printers. Overview of consumables, adhesives, solvents.
Checking homework. Discussing models, identifying features and errors.
PLA print on blue tape. Peculiarities. Possible difficulties.
3. Theory:
Support design. Classification. Features of the construction of supporting elements in different slicer programs.
Creation of a 3d model with support by modeling tools and creation of an automatic support tree in the meshMixer program.
4. Practice:
ABS material. Specifications. Features of the behavior of polymers during printing.
5. Theory:
Simulation without supports. Basic rules, features of the construction of geometry.
6. Practice:
TPE materials. Workshop on 3D printing with elastic FLEX. Buttons, bushings, covers and other elastic bands.
7. Theory:
Chemistry of polymers. Master class from Filamentarno! and other non-standard materials such as LayWoo-3d, bronzeFill, BambooFill, etc.
8. Practice:
Wide nozzle printing. Workshop on post-processing materials. Determination of material by indirect signs, choice of printing and properties.
1. Theory
The most unusual printers and 3d printing technologies.
Fusion 360 - interface and features. The history of the emergence and features of parametric modeling.
2. Practice
What is gcode - basic commands and methods for editing code. When and why to do it. Interrupt printing, printing with multi-color layers.
3. Theory
2-nozzle printing. Advantages and disadvantages of printing with two materials, features of preparing stl models, suitable slicer programs.
Picaso 3d printer - Designer PRO 250. Support materials: HIPS, PVA.
4. Practice
Modeling two-color prototypes for printing with two and one extruder. Correct export.
5. Theory
What is a solid body? Non-prefabricated structures in 3d printing, their types. Features of construction and printing of non-separable movable joints.
6. Practice
Modeling "free forms" in AUTODESK Fusion360. Controls, navigation, interface, basic surface modeling techniques, conversion to T-Spline shape.
7. Theory
Print evaluation. Determination of loads on the part, selection of material / materials and 3d printing technologies.
8. Practice
Printing with complex media: PC, ABS-PC, NYLON, POLYACETAL, PMMA.
Complete labs, pass the exam, and get certified by Autodesk for Fusion 360.
Want to attend a class for free?
By clicking on the button, you agree to the processing of personal data for the needs of this project and agree to the privacy policy
Funtastique EVO
19 900
| Order |
Wanhao Duplicator 7
| Order |
Winbo Super Helper Sh205
17 500
| Order |
Why try our courses?
Innovation
Our teaching methods are based on our experience and include all modern tools.
Up to 8 children per group
Small groups are the best format for science and technology.
Individual approach
Each child is unique and inimitable, so we pay attention to the creation of an individual program.
Homework
We usually provide homework materials. But home practice is not a duty for those.
Adult Involvement
If you are a parent and are interested in the sections of our workshops, you can attend classes with your child.
Course continuity
Courses flow smoothly from one to another.
3D modeling is currently one of the most highly paid and promising areas in the field of new technologies. If you spend most of your time at the computer or want to make a choice in favor of a new profession, you need a thoughtful preparation for 3D courses. 3D printing courses for kids are the best solution. Such courses will help the child understand modern modeling and teach him discipline.
Now, with our modeling and printing courses, you can turn all computer models into real objects using a state-of-the-art 3D printer. In addition, this is just an exciting activity, and not some boring 3D modeling courses. Also, children will get a unique experience in designing and building 3D models not only in an interactive virtual world on a computer, but also in reality. A 3d printer for classes will make their learning even more interesting.
Benefits
Kids will learn how to design beautiful 3D objects with all the details of how they are made. The 3D printer will open up unique possibilities.
Start by understanding the basics and the simplest things. To better improve their skills, children need to know and understand the basics of modeling - all this can be obtained in modeling courses.
3D modeling and printing is one of the most demanded areas in the IT industry. This is a real art that opens up great prospects for everyone who wants to master such graphics. With the help of modern modeling, projects of buildings and structures are created, special effects from the world of cinema are made, and they are also often used in medicine.
The teachers of the online program have specially developed advanced modeling and printing courses, taking into account the young children. Further, due to the gradual increase in the overall level of complexity, all invited students will quickly master the interface.
During the training itself, students will learn the features of graphics and master its creation. Courses provide an opportunity to gain skills in the shortest possible time and become a valuable specialist.
3D printing technologies are becoming more and more popular today. They open up impressive possibilities for us, which relatively recently could only be read in science fiction books. 3D printers are widely used in industrial, military, engineering, medical and other industries. This technology gives a chance in the shortest possible time to obtain a prototype of any product, a workpiece and a high-quality model, and in the near future it will take an important place in the daily life of every person.
Technical Development Center WOWSTUDY invites children to 3D printing and modeling courses that will open up a new cognitive world and contribute to the development of creativity and spatial imagination.
How 3d printing is trained
In our school, training takes place in several directions. We teach children how to work with specialized programs for designing three-dimensional models. Working with such software products develops children's imagination, which will be useful to them in other industries in the future. The educational process begins with simple tasks: designing a cone, sphere and other shapes, and ends with modeling extremely complex parts, mechanisms, robots.
The second direction is the implementation of the developed models on a 3D printer. We show how to print on a printer, talk about the principle of its operation. In the practical part, students independently print designed products under the guidance of teachers.
At the end of the exam and certification, the participants receive the corresponding document.
3 reasons why you will love 3d modeling courses
Technical clubs in Moscow are growing in popularity and are in high demand, but not every school can provide a versatile approach to building lessons. We offer:
A unique curriculum. Students receive theoretical and practical knowledge in an entertaining way. Our lessons are fun for kids of all ages. Competent presentation of the material ensures its better perception and assimilation.
Creative approach. In each lesson, we design different parts, which instills an interest in technology, engineering and science in general, and also develops creative thinking.
Fascinating practice. All practical exercises are structured in such a way that the child was interested. Participants implement many projects on their own, which allows them to gain maximum knowledge. This option is suitable for everyone, regardless of the level of his preparation.
Our educational 3d courses in Moscow are a promising and exciting activity for your child. Hurry up to introduce him to the exciting world of 3D modeling and printing
OUR TEACHERS
We conduct classes, master classes on various topics: pens, printing, robotics
Asya Harutyunyan
3D modeling and printing
Leonid Kartushin
robotics
3D modeling and printing: education for children
one engineering project cannot do without 3D modeling. In the 21st century, this innovation has become commonplace. Purchasing specialty printers has become affordable, and many people print toys, tools, small shelves, and miniature copies of anything at home. But in order to do it right, there are special 3D modeling courses for children that will help from childhood to master all the intricacies of designing and creating unique objects with their own hands. Stages and features of training
3D printing training is carried out in several stages. First, the theoretical part is fully mastered, there is an acquaintance with programs that create 3D models. It helps develop children's imaginations, from simple cone mock-ups and spheres, to complex prototypes of houses, vehicles, and more. After theory, we move on to practice. The children will master the 3D printer, learn and print the resulting samples, learn how to correctly set commands to the printing device, study its design and operation principle. 3D modeling and printing courses are conducted on products designed by the children themselves, and this allows them to see the result and the success of their own efforts. During the lessons, children will learn different types of plastic and take part in master classes on the principles of 3D scanning.
Benefits of learning
There are several reasons why 3D printing courses are so useful for students: An interesting curriculum. During the training period, the guys get grandiose emotions, improve their geometric knowledge and develop their visual imagination to the maximum; Instilling interest in innovative technologies. With each lesson, the student will create and model unique projects, which will help instill a “love” for design, technology and science from childhood; Stimulation of creative thinking. Students work independently on interactive tasks, which allows them to increase their level of preparation and develop creative thinking.
In the future, all these skills will be very useful for inspiring and implementing the most unique ideas. Training is carried out using the latest equipment and tools. An individual approach is applied to each child and the degree of his education is carefully monitored. If desired, each parent can attend the classes. The formation of small groups makes it possible to work in a more comfortable environment, and this contributes to better assimilation of information. At the end of the course, the student will receive a certificate.
How can I order courses?
To order courses, choose the one that suits you best. Fill in the columns where you indicate the type of training that suits you, your name and contact details. We will call you back within a short time and clarify the details. The world of 3D modeling and printing is very exciting and diverse, try to introduce your children to this area as soon as possible.