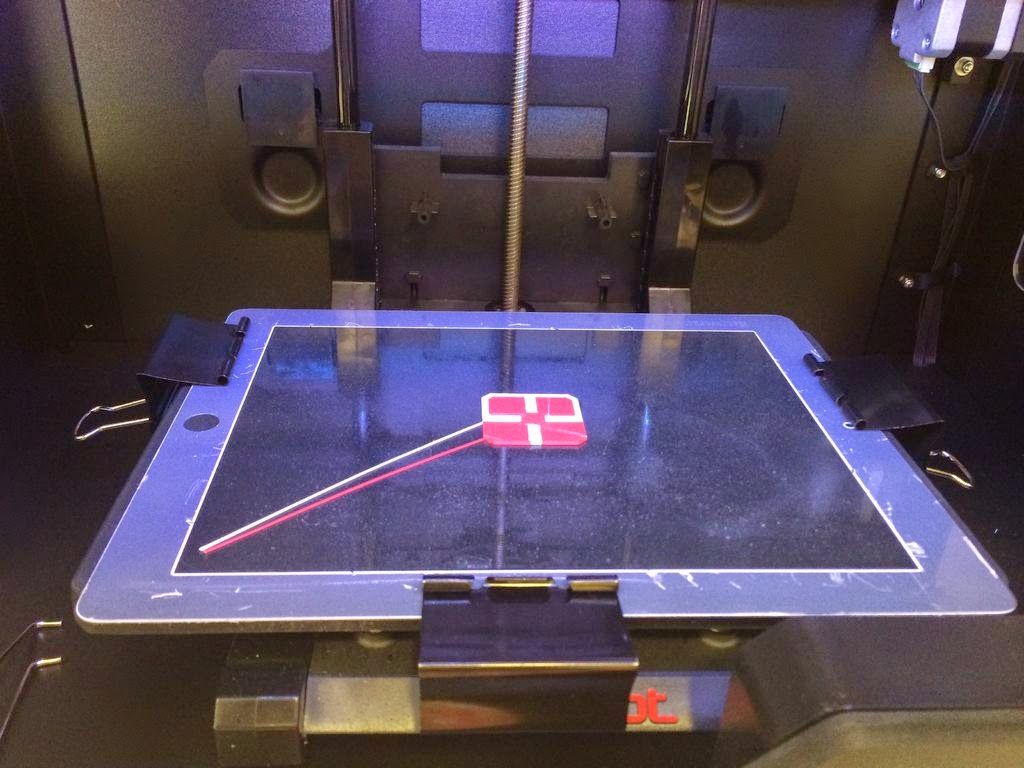
3D printer ipad stand
10 Best iPad Accessories That You Can 3D Print
3D Insider is ad supported and earns money from clicks, commissions from sales, and other ways.
Apple has long been known for designing products that push the boundaries of innovation and technology. Unfortunately, this also means that their products are on the expensive side. If you’ve already spent several hundreds of dollars on an iPad, it’s quite disheartening to know that official Apple accessories will cost you a few hundred dollars more.
The good news is that you might not need to spend that much money if you have access to a 3D printer. Here are some of the best ideas we have seen for 3D-printed iPad accessories.
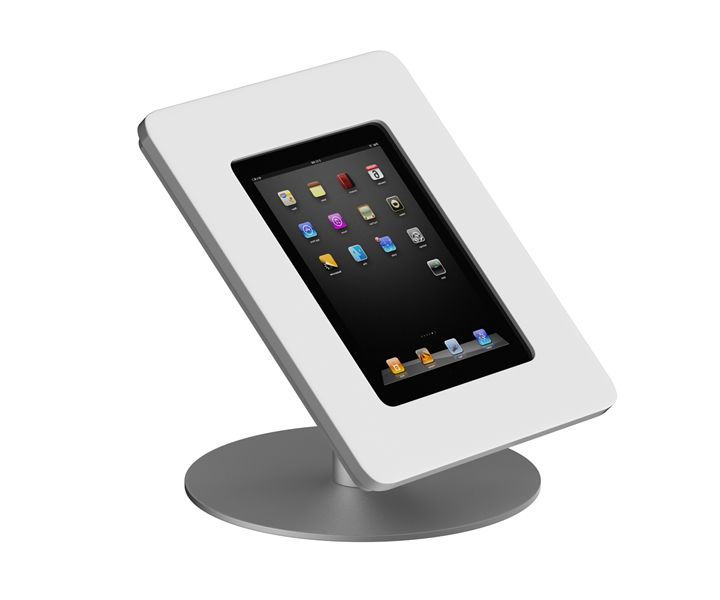
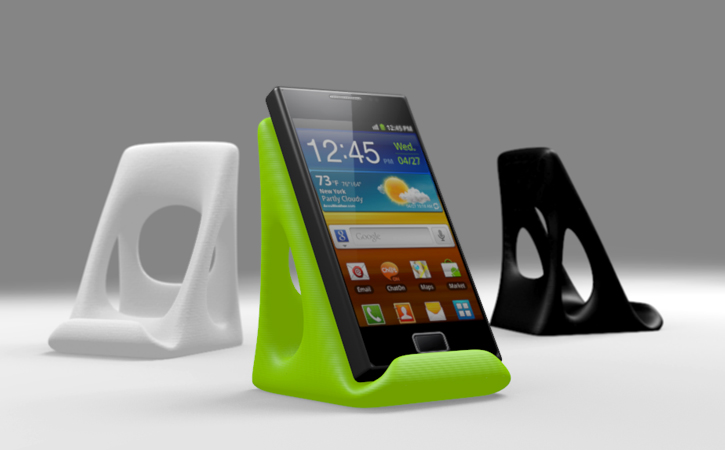
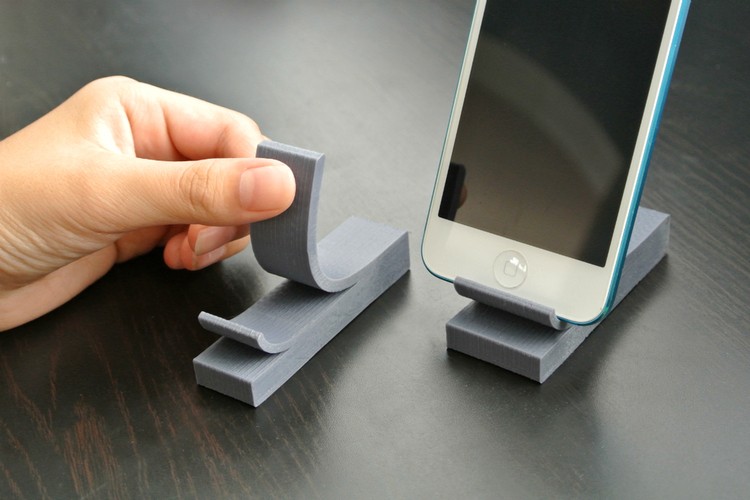
If you want to get any real work done on an iPad, the first accessory you will need is a stand. This ingenious model has you covered. This simple tablet stand is sturdy enough to support an iPad Pro. Its design allows for an adjustable tilt angle. Best of all, the stand can be folded down to a flat form factor, making it easy to stow and carry around.
When 3D printing this stand, we recommend using a filament with high rigidity and strength. ABS or PETG are good candidates. You will want to print the largest version if you are using an iPad Pro. For the base iPad model and the iPad Mini, the medium version should do just fine.
The Apple Pencil is one of the best tools for boosting your productivity when working with an iPad. The problem with the Apple Pencil is that there really isn’t any place to stow it in when you have to put it down or while you’re taking a break. This simple Apple Pencil holder seeks to address that problem.
This Apple Pencil holder has just about everything you will need. It has space to store the Apple Pencil either horizontally or vertically. It also has slots for the recharge piece and extra pencil tips. The cap that comes with the model fits very snugly with the holder, so you might have to do heavy sanding to get the pieces to fit together comfortably.
If you have kids, then you probably already know how effective an iPad is in keeping their attention.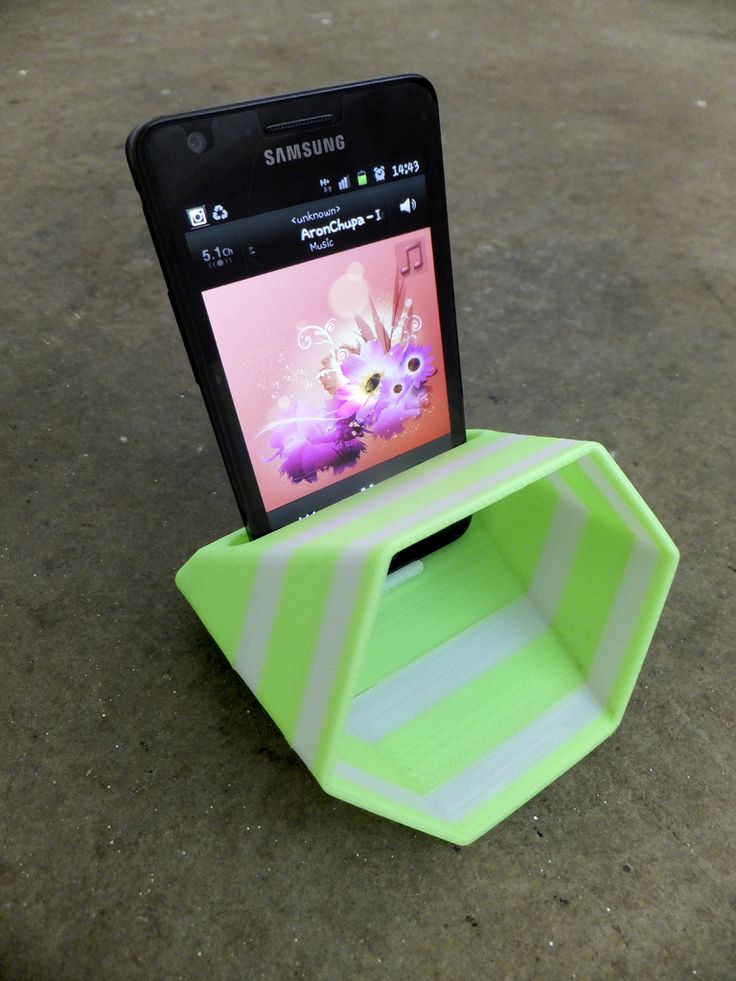 This is something you can take advantage of on long drives. This custom bracket mounts an iPad between the two front seats of a car, effectively turning an iPad into a theater for your young backseat passengers.
To make sure that the bracket is sturdy, it is recommended that you use aluminum tubes and a few metal nuts and bolts in building it. The iPad can be slid horizontally to any point along the bracket so the viewer can sit comfortably anywhere on the backseat. Make sure your kids are all wearing seatbelts while the car is moving and the iPad is mounted to the bracket – you would not want it to cause any accidents.
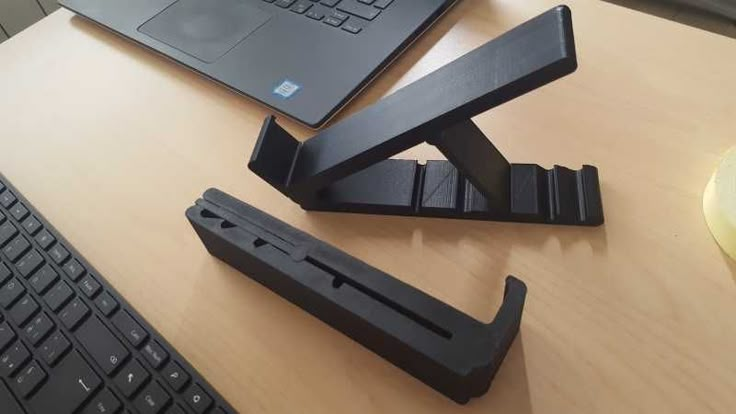
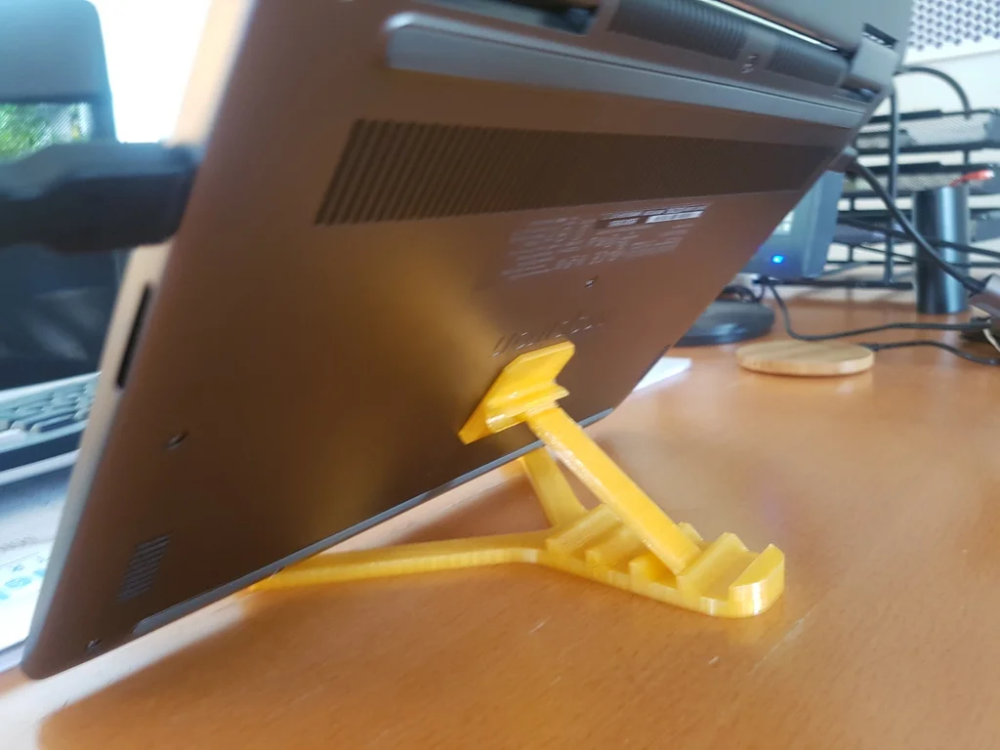
Connecting a Bluetooth keyboard to your iPad is one of the best ways to make it work like a laptop. While there is an official iPad stand that incorporates a keyboard, some people find that it lacks robustness and that it positions the iPad too upright.
This custom iPad keyboard stand positions the tablet at a much more relaxed angle, making it more comfortable to use for long hours.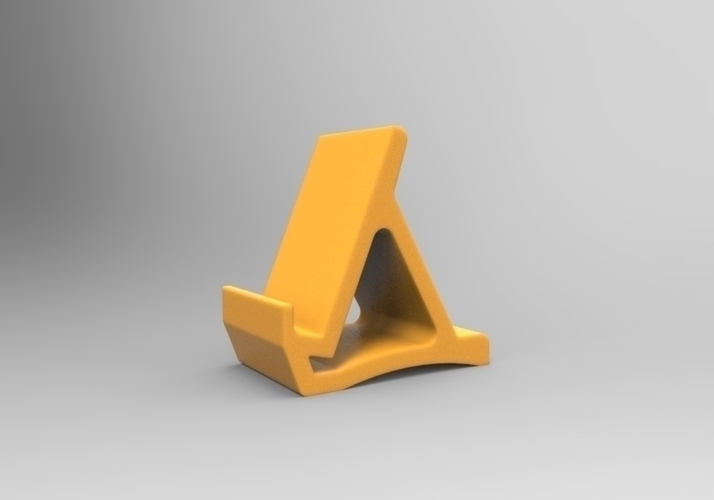 The stand also has a notch for the Apple Bluetooth keyboard to latch onto. This creates a working setup that feels more balanced and ergonomic. The keyboard stand is also just small enough to throw in your backpack in case you need to work on the go.
If you have ever watched a movie or played music on your iPad, you might also have been underwhelmed by the tablet’s sound quality. The limited size of the speakers means that its audio coverage is quite poor especially when you’re in a large room.
This speaker chip acts as a reflector for the audio, magnifying it for the audience positioned right in front of the tablet. There is some assembly required, and some magnets will have to be inserted into the build. This is a fun little add-on to your usual stash of iPad accessories.
6. Protective case
Making your own iPad protective case is just about one of the most fun that you can have with your 3D printer. There are lots of different designs out there such as this honeycomb cover for the base iPad, this “big grips” case for children, or this standard iPad Mini case with an engraved Apple logo.
If you have any 3D modeling skills, then you easily design a custom protective case for your iPad. We recommend using flexible filament like TPU for maximum impact resistance. PLA is also a good candidate with a good ratio of rigidity and flexibility. Just double-check all measurements before proceeding with a print – you want it to be perfectly snug.
This iPad stand isn’t the most practical, but it’s sure fun and makes for a great conversation piece. This stand is basically a single octopus tentacle that is coiled in a shape that provides support to your iPad. The standout feature of this model is that it is very detailed in reproducing the suction cups of an octopus tentacle.
The octopus stand is quite small, so you may want to scale it up for additional reinforcement. We also recommend printing it at 100% infill to reduce the chances of it being wobbly while in use.
All of us are familiar with having to deal with glare while looking up things at the screens of our devices. This can be frustrating when you’re trying to read an e-book on your iPad while at a park or taking notes when you’re outdoors.
If this is a problem that you understand, then the solution is to just 3D print a simple sun visor or sun hood. This sun hood clips right onto an iPad Mini to shield it from the sunlight. When you’re done with your activity, just fold the sun hood and keep it in your pocket. This is the kind of accessory that you did not know you needed but will end up being one of your essentials.
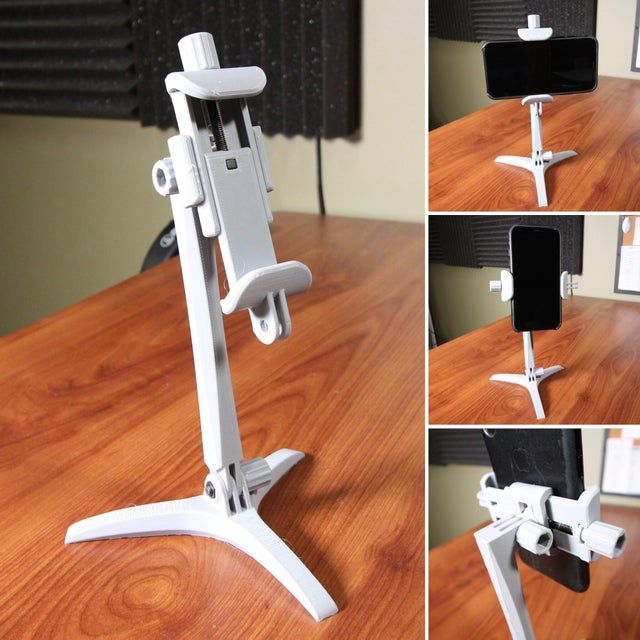
Are you tired of having online meetings where the tablet is constantly facing upwards from your desk at an unflattering angle? Unfortunately, there is not much that you can do with a standard iPad stand. This articulating arm holder will solve that problem.
This arm holder can be clipped to any thick surface such as your work desk or the edges of a bookshelf. The articulated arm can be twisted, moved, and rotated in infinite ways to help you find your best angle. With so many possible setups, this arm holder will change the way that you show up to online meetings and teleconferences forever.
The front-facing camera of iPads is among the best, especially with its smart, subject-tracking features. However, there are times when we just aren’t comfortable with having a camera constantly trained at us. If you’re getting paranoid over other people and clandestine agencies spying on you, then this simple camera lens cover is a quick solution.
There’s nothing fancy about this camera cover. It is just a plastic clip that snaps on one edge of your iPad, providing a barrier between the camera lens and the rest of the outside world. It also makes for a great gift for any of your privacy-obsessed friends.
Final thoughts
Buying into the Apple ecosystem can sometimes feel like you’re sinking into a quicksand of having to spend more and more on essential accessories. If you have a 3D printer, then there are lots of ideas to hack the system.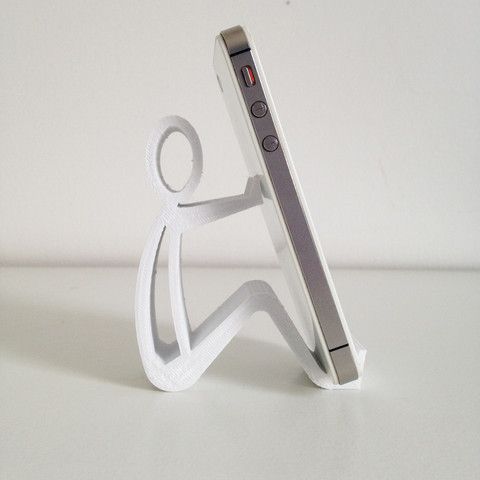 Make the most out of your iPad without having to spend hundreds of dollars simply by spending a few hours on your 3D printer.
Warning; 3D printers should never be left unattended. They can pose a firesafety hazard.
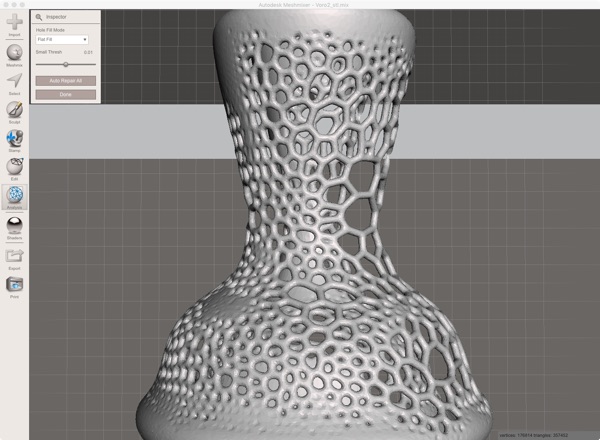
▷ simple ipad stand 3d printed 【 STLFinder 】
Simple iPad 2 Stand -3D printed
thingiverse
I altered the cutout to match profile for an iPad 2 using technical drawings provided by Apple for case manufacturers. ...It seems to fit pretty well.
Simple iPad 2 Stand -3D printed
thingiverse
Instructions You can customize the scad file to set the overall width of the stand, the width of the end pieces and the depth of the cross bars. The attached stl uses 65mm for width and 10mm for the other values. ...This produces a fairly small stand...
iPad 3d printed stand
thingiverse
... time is about 100 minutes with a 0.4 nozzle. Also, you can put a tiny magnet (5×5) on the back in hinge. But this is optional. In (my blog) download, you will find also .step files. https://theveel.com/druk-3d/coviddesign-ipad-3d-printed-stand
iPad 3d printed stand
prusaprinters
... In (my blog) download, you will find also .step files. https://theveel.com/druk-3d/coviddesign-ipad-3d-printed-stand Print instructionsCategory: 3D Printer Accessories Summary I made this stand for my iPad 2th, but the shape it’s based on iPad 7th.
Simple iPad Stand Free 3D print model
cgtrader
SummaryA simple, portable iPad stand. Works better with a pair. I was looking for an elegant and compact design. Thanks Archimiedies for that. ...
Simple iPad mini stand
thingiverse
Simple iPad mini Stand with 3 different angles.
Simple iPad Mini Stand
thingiverse
2 piece portable iPad Mini stand. ... Inspired by mmmlinux's simple iPad Stand (http://www. thingiverse.com/thing:24400). ...Print both sides and enjoy!
simple iphone/Ipad stand
thingiverse
simple ipad/iphone stand. ...Print sideway with supports for clean and fast result
Simple iPad stand
thingiverse
A simple iPad stand that holds the tablet up for easy video viewing or reading.
☆★ Simple iPad Stand ★☆
thingiverse
Simple iPad Stand. Support from iPad mini upto iPad Pro. Time lapse of the printing.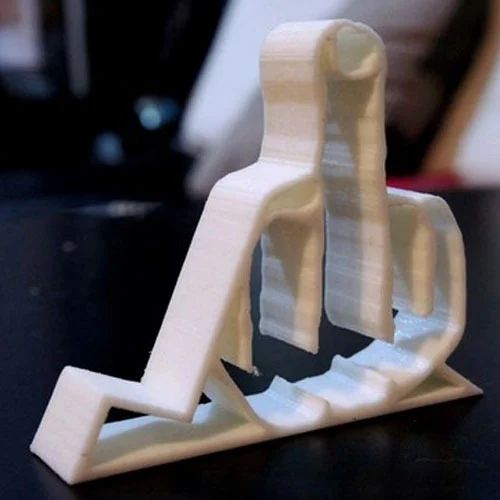 .. ...;)https://youtu.be/0H5edY7R5_8 Print Settings Printer Brand: Printrbot ...
Simple iPad Stand
thingiverse
Simple iPad stand to prop up your iPad, iPad mini or other tablet. I am always working on new stuff to print. If you interested in being the first to know when I release something new, then check out https://www.arsenalproducts.com/3d-printing...
Simple iPad Pro Stand
pinshape
SummaryI don't have a cover or keyboard or other stand for my new iPad Pro, so I designed this stand. It is fairly small so can easily bring in my backpack. Not designed for heavy tapping on the iPad. Can handle some soft tapping in portrait mode.
Simple iPhone/iPad Stand
thingiverse
This is my design of a simple stand. I printed it with PETG at 25% infill and support. It works well with both iPhone and iPad. ...
Simple iPad Stand
thingiverse
A simple, portable iPad stand. Works better with a pair. I was looking for an elegant and compact design. ...Thanks Archimiedies for that.
Small, Simple, iPad stand
thingiverse
I was looking for a small simple iPad stand on Thingiverse and I only found bulky ones! So I decided to make my own and here it is. The iPad sits very stable in both positions (landscape and vertically). The original stand I uploaded worked well...
Simple iPad Stand
thingiverse
Very simple, but quick to print and stable iPad stand. As far as I know, suitable for all iPads. ...On the underside there are four round cut-outs for self-adhesive 20 mm felt or rubber feet, so that the whole thing lies nice and quiet and does not...
Another simple iPad stand
thingiverse
This is another laser cut iPad stand, somewhere half way between todbot and eagleapex's efforts. Instructions Use 4mm acrylic or adjust the size of the slots accordingly! . ..I made the slots 3.8mm for...
Simple iPad Stand
thingiverse
The spacing of the stand legs is narrow enough to not get in the way of the dock connector, or the power button or volume buttons if the iPad is put in the stand upside down. Feel free to add your own engraved logos or images to the side legs! ...
iPad Mini Simple Stand
thingiverse
Yet another stand for an iPad, I made this from scratch as I just wanted a simple stand that had two angles for my ipad mini. Its a generic opening size so that I wouldnt have to take the cover off and it also fits my phone as well. ... Instructions...
Simple Ipad Stand
thingiverse
The Simple Ipad Stand is err an Ipad stand. It's not rocket science but it does the job very well and I use mine all the time. It allows for vertical or horizontal use and can also be used as a rest to type. It also can be used as a picture frame...
Simple iPad stand
thingiverse
its an iPad stand! nice and simple. easily printable. there is also a "travel" version, where its two pieces slotted together for easy storage. Instructions UPDATE 5/9/12: slight update to the solid...
simple 3D printed frame stand
grabcad
the frame need to have a ledge at the back, and shouldn't be too high (25cm maximum) but can be pretty wide takes 15h on an ultimaker² and if you use another printer, make the print slower than normal because it is a pretty high print with not much.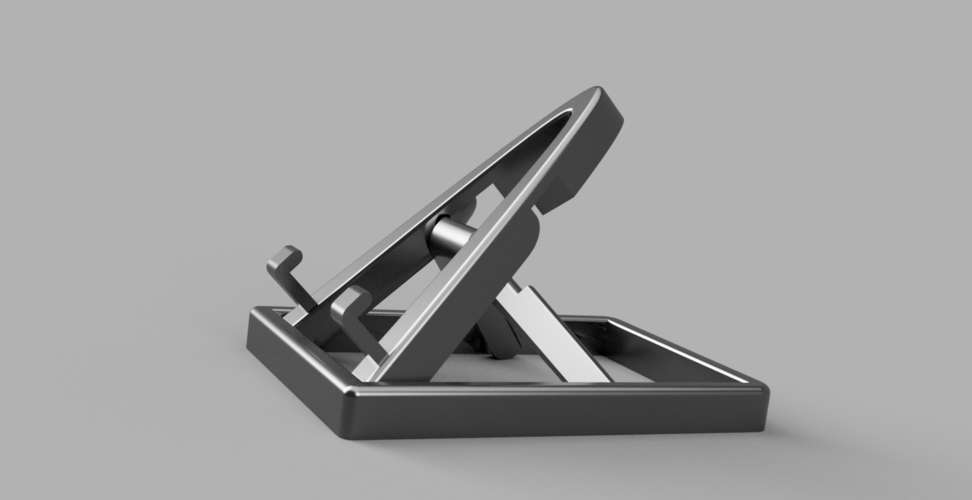 ..
..
Simple iPad Mini stand Free 3D print model
cgtrader
Simple iPad Mini stand useful for having a sturdy platform to set your iPad mini in to when watching videos etc. Fits both portrait and landscape orientations. ...
Ipad Stand 3D model
cgtrader
stand
Simple and compact iPad stand
thingiverse
This is an easy to print iPad stand. It can be taken apart, to save space. ... Instructions Print two side pices and one Bar, press them together and thats it!
Simple Ipad or Iphone Stand
thingiverse
I set it up so that, when printed, the resulting piece will fit flush into the recessed Apple logo on the stand. (95% scale of Stand's logo). I used CA glue to mount it. I think It gives the look of a professionally built product. Anyhow, image...
Simple Desk Stand for 3D Printed Watch
thingiverse
A quick and simple desk stand for the awesome 3D Printed Watch with Tourbillon
A Simple 3D Printed Robot Stand
thingiverse
It's 3D printed part that allows the robot to be left up to tests can run.
Ipad stand 3D print model
cgtrader
apple ipad stand for ipad 2/3/4
Ipad mini stand 3D model
cgtrader
Ipad mini model with a red and green stand. ...
Printing 3D Objects in Photoshop
User's Guide Cancel
Search
Last update Dec 13, 2021 08:23:10 PM GMT
- Photoshop User Guide
- Introduction to Photoshop
- Dream about it. Do it.
- What's New in Photoshop
- Editing the first photo
- Create documents
- Photoshop | FAQ
- Photoshop system requirements
- Transferring presets, operations and settings
- Introduction to Photoshop
- Photoshop and other Adobe products and services
- Working with Illustrator artwork in Photoshop
- Working with Photoshop files in InDesign
- Substance 3D Materials for Photoshop
- Photoshop and Adobe Stock
- Working with the built-in Capture extension in Photoshop
- Creative Cloud Libraries
- Creative Cloud Libraries in Photoshop
- Working in Photoshop using the Touch Bar
- Net and guides
- Create transactions
- Cancellation and transaction history
- Photoshop on iPad
- Photoshop on iPad | General questions
- Introduction to the working environment
- System requirements | Photoshop on iPad
- Create, open and export documents
- Adding photos
- Working with layers
- Drawing and painting with brushes
- Selecting areas and adding masks
- Retouch compositions
- Working with Adjustment Layers
- Adjusting the key of a composition using the Curves layer
- Applying transform operations
- Trim and rotate compositions
- Rotate, pan, zoom and restore canvas
- Working with text layers
- Working with Photoshop and Lightroom
- Getting missing fonts in Photoshop on iPad
- Japanese text in Photoshop on iPad
- Application parameter management
- Touch shortcuts and gestures
- Key combinations
- Image resizing
- Live stream your creative process in Photoshop on iPad
- Fix imperfections with Healing Brush
- Creating brushes in Capture and using them in Photoshop
- Working with Camera Raw files
- Creating and using smart objects
- Adjusting the exposure of images with the Dodge and Burn tools
- Photoshop Web Application Beta
- Frequently Asked Questions | Photoshop Web App Beta
- Working environment overview
- System requirements | Photoshop 9 Web App Beta0010
- Keyboard shortcuts | Photoshop Web Application Beta
- Supported file formats | Photoshop Web Application Beta
- Opening and working with cloud documents
- Collaboration with stakeholders
- Limited editing options for cloud documents
- Cloud Documents
- Photoshop Cloud Documents | Frequently Asked Questions
- Photoshop Cloud Documents | Workflow Questions
- Work with and manage cloud documents in Photoshop
- Cloud storage update for Photoshop
- Unable to create or save cloud document
- Troubleshooting Photoshop cloud documents
- Collection of cloud document synchronization logs
- Sharing and editing cloud documents
- File sharing and commenting in the application
- Working environment
- Working environment basics
- Learn faster with the What's New panel in Photoshop
- Create documents
- Working in Photoshop using the Touch Bar
- Tool gallery
- Performance settings
- Using tools
- Touch gestures
- Touch gestures and customizable workspaces
- Technology overview versions
- Metadata and comments
- Default key combinations
- Touch gestures and customizable workspaces
- Putting Photoshop images into other applications
- Installations
- Default key combinations
- Rulers
- Show or hide non-printing auxiliaries
- Specifying columns for the image
- Cancellation and transaction history
- Panels and menus
- File storage
- Positioning of elements with referencing
- Positioning with the ruler tool
- Setting sets
- Customizing keyboard shortcuts
- Net and guides
- Web, screen and application content development
- Photoshop for design
- Artboards
- View on device
- Copy CSS from layers
- Splitting web pages into fragments
- HTML options for snippets
- Changing the arrangement of fragments
- Working with web graphics
- Create web photo galleries
- Understanding images and working with color
- Resizing images
- Working with raster and vector images
- Image size and resolution
- Importing images from cameras and scanners
- Creating, opening and importing images
- Image viewer
- "Invalid JPEG marker" error | Opening images
- Viewing multiple images
- Customize color palettes and color swatches
- HDR images
- Image color matching
- Converting between color modes
- Color modes
- Erase sub-images
- Blend Modes
- Choice of colors
- Making changes to indexed color tables
- Image information
- Distortion filters not available
- Color details
- Color and monochrome corrections with channels
- Selecting colors in the Color and Swatches panels
- Sample
- Color mode (or picture mode)
- Shade
- Add color mode change to operation
- Add swatches from HTML CSS and SVG files
- Bit depth and settings
- Layers
- Understanding Layers
- Reversible editing
- Create and manage layers and groups
- Selecting, grouping and linking layers
- Putting images into frames
- Opacity and layering
- Layer masks
- Application of smart filters
- Layer compositions
- Move, arrange and lock layers
- Layer masking with vector masks
- Manage layers and groups
- Effects and Layer Styles
- Editing layer masks
- Extract resources
- Display layers with clipping masks
- Generation of graphic resources from layers
- Working with Smart Objects
- Blend Modes
- Combining several fragments into one image
- Combining images with Auto Layer
- Alignment and distribution of layers
- Copy CSS from layers
- Load selections based on layer boundaries or layer masks
- See-through to show the contents of other layers
- Layer
- Mixing
- Composite images
- Background
- Selections
- Select and Mask workspace
- Quick area selection
- Getting Started with Selections
- Selecting with the Marquee Toolbox
- Selection with the Lasso tools
- Selecting a color range in the image
- Pixel highlight setting
- Convert between contours and selection boundaries
- Channel Basics
- Moving, copying and deleting selected pixels
- Creating a temporary quick mask
- Save selections and alpha channel masks
- Selecting focus areas in an image
- Duplication, splitting and merging of channels
- Channel calculation
- Extraction
- Bounding box
- Image corrections
- Perspective distortion
- Blur reduction due to camera movement
- Healing Brush Tool Examples
- Export color lookup tables
- Image sharpening and blurring
- Introduction to color grading
- Applying the Brightness/Contrast setting
- Shadow and Highlight Detail Correction
- "Levels" correction
- Hue and saturation correction
- Juiciness correction
- Adjusting the color saturation in image areas
- Quick tone correction
- Applying special color effects to images
- Image enhancement with color balance correction
- HDR images
- View histograms and pixel values
- Image color matching
- Crop and straighten photographs
- Converting a color image to black and white
- Adjustment and fill layers
- Curves correction
- Blend Modes
- Target Imaging for Press
- Color and tone correction with Levels and Curves eyedroppers
- HDR Exposure and Toning Compensation
- Filter
- Blur
- Lighten or darken image areas
- Selective color correction
- Changing object colors
- Adobe Camera Raw
- Camera Raw system requirements
- What's New in Camera Raw
- Introduction to Camera Raw
- Creating panoramas
- Supported lenses
- Camera Raw 9 Vignetting, Grain, and Haze Removal0010
- Default key combinations
- Automatic perspective correction in Camera Raw
- Reversible editing in Camera Raw
- Camera Raw Radial Filter Tool
- Manage Camera Raw Settings
- Processing, saving and opening images in Camera Raw
- Improving Images with Camera Raw's Improved Spot Remover
- Rotating, cropping and modifying images
- Camera Raw color correction
- Function overview | Adobe Camera Raw | Issues for 2018
- Overview of new features
- Processing versions in Camera Raw
- Making local adjustments in Camera Raw
- Fixing and restoring images
- Removing objects from photos using Content-Aware Fill
- Content-aware patching and relocation
- Retouching and fixing photos
- Image Distortion and Noise Correction
- Basic troubleshooting steps to solve most problems
- Image transformation
- Object transformation
- Crop, rotate and canvas adjustment
- Crop and straighten photographs
- Creating and editing panoramic images
- Deforming images, shapes and contours
- Perspective
- Using the Liquify filter
- Content-aware scale
- Transforming images, shapes and paths
- Deformation
- Transformation
- Panorama
- Drawing and painting
- Drawing symmetrical ornaments
- Options for drawing a rectangle and changing the stroke
- Drawing details
- Drawing and editing shapes
- Paint tools
- Creating and modifying brushes
- Blend Modes
- Adding color to contours
- Edit contours
- Painting with mix brush
- Brush Presets
- Gradients
- Gradient interpolation
- Fill and stroke selections, layers, and paths
- Drawing with the pen tool group
- Making patterns
- Creating a pattern with the Pattern Builder filter
- Loop control
- Managing pattern libraries and presets
- Drawing with pen tablet
- Creating textured brushes
- Adding dynamic elements to brushes
- Gradient
- Draw stylized strokes with the Artistic Archive Brush
- Drawing with pattern
- Synchronizing presets across multiple devices
- Text
- Adding and editing text
- Universal text editor
- Working with OpenType SVG Fonts
- Character formatting
- Paragraph formatting
- Creating text effects
- Text editing
- Leading and letter spacing
- Font for Arabic and Hebrew
- Fonts
- Troubleshooting fonts
- Asian text
- Create text
- Text Engine error when using Photoshop's Type tool | Windows 8
- Adding and editing text
- Video and animation
- Video editing in Photoshop
- Editing video and animation layers
- Introduction to video and animation
- Video and animation preview
- Drawing frames in video layers
- Import video files and image sequences
- Create frame animations
- Creative Cloud 3D Animation (Preview)
- Create timeline animations
- Creating images for videos
- Filters and effects
- Using the Liquify filter
- Using Blur Gallery group effects
- Filter basics
- Filter effects guide
- Adding lighting effects
- Using the Adaptive Wide Angle filter
- Oil Paint Filter
- Effects and Layer Styles
- Application of specific filters
- Image area feathering
- Saving and exporting
- Saving files in Photoshop
- Export files to Photoshop
- Supported file formats
- Saving files in other graphic formats
- Moving projects between Photoshop and Illustrator
- Saving and exporting video and animation
- Saving PDF files
- Digimarc copyright protection
- Saving files in Photoshop
- Printing
- Printing 3D objects
- Printing with Photoshop
- Printing and color management
- Checklists and PDF presentations
- Print photos in a new image layout
- Spot color printing
- Duplexes
- Printing images on a printing press
- Photoshop Color Enhancement
- Printing troubleshooting | Photoshop
- Automation
- Create activities
- Creation of data-driven images
- Scenarios
- File batch processing
- Operation playback and management
- Adding conditional operations
- About actions and the Actions panel
- Recording tools in operations
- Add color mode change to operation
- Photoshop UI Development Kit for Plugins and Scripts
- Color Management
- Understanding Color Management
- Accurate color assurance
- Color settings
- Working with color profiles
- Color management of documents for viewing on the web
- Color management for printing documents
- Color management of imported images
- Perform proofing
- Content authenticity
- Learn more about content credentials
- Identity and origin of NFT tokens
- Connecting accounts for creative attribution
- 3D objects and technical images
- 3D in Photoshop | Common questions about deprecated 3D features
- Creative Cloud 3D Animation (Preview)
- Printing 3D objects
- 3D drawing
- 3D Panel Enhancement | Photoshop
- 3D Concepts and Tools
- Rendering and saving 3D objects
- Creating 3D objects and animations
- Image stacks
- 3D graphics workflow
- Measurements
- DICOM files
- Photoshop and MATLAB
- Image object count
- Combining and transforming 3D objects
- Editing 3D textures
- HDR Exposure and Toning Compensation
- 3D panel settings
Photoshop allows you to print any compatible 3D model without worrying about the limitations of a 3D printer. When preparing to print, Photoshop automatically renders 3D models impenetrable. Photoshop also generates the necessary support structures—platforms and bases—to help you achieve successful 3D printing results.
- Select the menu item Window > Workspace > 3D to switch to 3D mode.
- Open the 3D model in Photoshop. If necessary, resize the 3D model while opening the file.
- Select menu item 3D > 3D Print Settings.
- In the 3D Printing Preferences panel, choose whether to use a printer connected to your computer via USB (local printer) or online 3D printing services such as Shapeways.com or Sculpteo.
You can now print 3D models as 3MF (3D Manufacturing Format) files. When specifying 3D printing options, select 9 for option0844 Print to is Local and Printer is 3MF File. When you send a 3D object to print, Photoshop creates a 3MF file. On Windows computers, Photoshop also launches the Microsoft 3D Builder application to further process the 3MF file.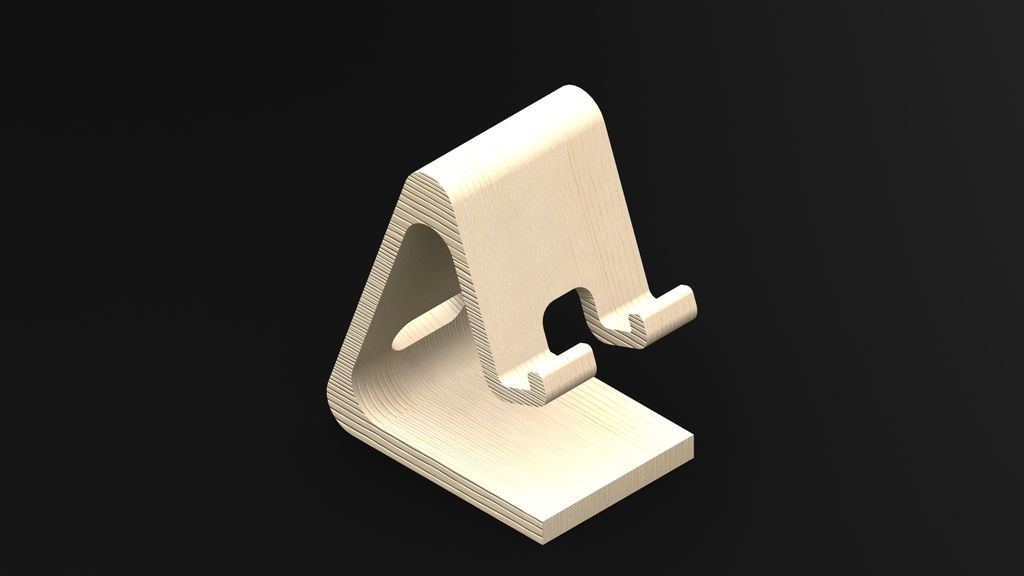
To update the list of supported printers or online profiles, select Get Latest Printers from the Send to Print To pop-up menu.
- Select a local printer or Shapeways.com print profile.
View estimated prices for printing 3D models using available Shapeways.com profiles by selecting Printer > Estimated Price.
- Select the unit of measure for print volume from inches, centimeters, millimeters, or pixels. This unit will serve to measure the dimensions of the volume of the printer as well as the dimensions of the printing plate.
A. 3D model B. Printing plate C. Printer volume overlay
- Select the 3D Printing Detail Level—Low, Medium, or Fine. The time it takes to print a 3D object depends on the level of detail selected.
- If you do not want to see the bounds of the 3D model's print volume, clear the Show Printer Volume Overlay check box.

- Set the Scene Volume options to the appropriate size for the 3D printed object. When you change one value (X, Y, or Z), the other two values are scaled proportionally. When resizing the Stage Volume, notice that the print plate under the 3D model resizes accordingly.
You can scroll through the Scene Volume settings by clicking the size label (X, Y, or Z) and dragging the cursor left or right. By holding down the Shift key, you can scroll through the values faster.
- Select Scale by printer volume if you want to automatically resize the 3D model so that it takes up the entire available printer volume on the selected printer.
- If the 3D model includes normal maps, bump maps, or transparency maps, you can ignore these types of maps when printing the model. Notice how the 3D model changes in real time as you change the Surface Detail settings.
- Optionally, you can exclude the support structures of the 3D object (platforms and bases) from printing.
 Use this option with caution as printing a 3D model without the necessary support structures may produce unsatisfactory results.
 - If your printer supports multiple materials, select the material you want to use to print this 3D object.
You can enable an experimental feature that allows you to print continuous tones with your MakerBot Replicator 2x 3D printer.
Requirement: Enable experimental Photoshop features
Experimental features must be enabled in Photoshop before using multitone printing:
- Select Preferences > Experimental Features.
- Select the Enable multitone printing check box.
- Click OK.
- Restart Photoshop.
Experimental features not yet fully tested. They should be used with caution.
Choose a multi-tone surface material
- Select the MakerBot Replicator 2x printer in the 3D Printing Settings panel.
- In the Material field, select Multitone Surface.
 If you don't see this option, make sure the experimental Multitone 3D Printing feature is enabled.
- Set other parameters according to the generated 3D model.
- To view and print a 3D object, select 3D > 3D Print.
After setting the 3D printing options, follow these steps.
- Click the Start Print icon () or select the menu item 3D > 3D Print. Photoshop will combine the 3D elements of the scene and prepare it for the printing process.
- If you choose to print with a Shapeways.com profile, Photoshop will display a message that the actual print cost may differ from the estimated cost displayed. Click OK.
- In the preview window that opens, you can use the 3D camera tools to rotate, scale, or move the 3D object.
Rotate the 3D camera.
3D camera rotation.
Move the 3D camera.
3D camera slide.
Return to the home position of the 3D camera.
- If necessary, select the Show restoration check box.
 Photoshop displays various restoration colors such as Initial Mesh, Thickened Walls, and Hole Closed.
- You can also turn on Ray Tracing Preview. Viewing ray tracing allows you to more accurately reproduce the printed material.
- If you want to export the 3D printing settings to an STL file, click the Export button and save the file to the desired folder on your computer. This STL file can be sent to a network service server or moved to an SD card for printing with your own printer.
- View a summary of the 3D print object and click the Print button.
You can cancel the current 3D printing process using the menu item 3D > Cancel 3D printing.
Photoshop provides interactive step-by-step utilities that you can use to set up, calibrate, and maintain your 3D printer. These utilities can only be used when the 3D printer is turned on and connected to a computer.
- Select the menu item 3D > 3D Printer Utilities.
- Select the utilities you want to run.
Print plate calibration
Helps in leveling the printing plate. This utility includes the following general steps:
- Requires you to remove all residual print materials from the 3D printer.
- Initializes the print head.
- Allows you to adjust the amount of gap between the platen and the printhead at nine nozzle positions.
You can use this utility in wizard mode or manual mode.
Download Thread
Helps load filament into a Fused Deposition Modeling (FDM) 3D printer. To facilitate filament loading, Photoshop starts the head heating process and the filament loading mechanism.
Remove thread
Helps remove the filament from the FDM 3D printer. To facilitate the removal of the filament, Photoshop starts the head heating process and the filament loading mechanism.
Replace thread
Helps to replace the old filament in the FDM 3D printer with a new one. To make changing filament easier, Photoshop starts the head heating process and the filament loading mechanism.
- Follow the instructions on the screen.
Sometimes you may want to print multiple instances of an object on the same panel. Do the following.
- Select the required objects in the 3D panel.
- Select 3D > Pack Objects on Ground Plane.
- Start printing objects.
Photoshop currently supports the following 3D printers:
- MakerBot Replicator 2
- MakerBot Replicator 2x
- ZCorp Full Color
- Mcor Iris
- MakerBot Replicator 5th Generation
Photoshop also supports several Shapeways. com and Sculpteo profiles.
The MakerBot Replicator 5th Generation Printer Profile does not yet support USB direct printing. You can export files to a USB drive and print them to a local printer.
Yes. Before printing, you can set a cross section to cut off part of the 3D model. Follow these general steps.
- Select the menu item Window > Workspace > 3D to switch to 3D mode.
- Open the 3D object you want to print.
- Select Scene from the 3D panel.
- On the Properties panel, select Cross Section.
- Specify the cross section parameters in the Properties panel.
- Select the menu item 3D > Apply Cross Section to Scene.
- Print the 3D scene.
The desired cross section must be dried before printing.
Yes. Follow these general steps.
- Select a material in the Stage panel.
- In the Properties panel, click the folder icon () next to Emboss/Transparency/Normals and load the texture.
 You can also specify a new texture to apply to the 3D model.
 - When specifying a new texture, save this texture. The texture is applied to the 3D model as a bump map or transparency.
- Print a 3D model.
If your 3D printer has two heads, you can print 3D models in two colors. Pop-up menus for additional available heads are displayed in the Print Properties panel. In the 3D workspace and in the 3D Print Preview window, the model appears in two colors.
Printing a 3D model in two colors From a printing point of view, each layer of a 3D model is treated as a separate 3D object. You can optionally merge two or more layers (3D > Merge 3D Layers).
Related topics
- How to print a 3D object in Photoshop
- 3D painting
- 3D panel enhancements | Photoshop
- Photoshop 3D Documentation
Sign in
To come in
Account Management
features, photos and customer reviews
551. 47 – 554.22 ₽Go to Store
 The product is no longer sold, look at the similar
The link is copied, share it
or send it through social networks
This product is no longer sold, but there are similar and similar 9000 9000 9000 9114 More than average, slightly
Reliable seller - 89%
Above average, can be bought, PuSi Store
- On the site for more than 6 years
- High overall rating (30741)
- Customers satisfied with communication
- Items as described
- Ships quickly
- 3.4% of customers were dissatisfied for the last 3 months
Prices from other sellers from 508.84 ₽
596.86 – 604.42 ₽
New, cases for Apple Ipad Mini 2 Mini 3 Mini 1 case, protective faux leather with flowers, flip-out tablet case card holders
0ratings
0orders
Reliability – 89%
PuSi Store
Go to Store Go to Store tablet/slot for card, case for iPad mini 2 mini 3
0 OTOTEN
0 Prokaz
Reliability - 89%
Seller BIGMZPAI IHOPE DIGITAL STORE
695. 87 ₽ 9000 ₽ Planning 1/2/3/4 leather flip case for ipad mini 7.9%
858.15 ₽
Shiny tablet case for apple ipad mini 1 2 3 4 5, luxury soft PU leather flip case with stand and hand strap for ipad mini 4, luxury case
0
0
-1
%
557.66 – 673.87 ₽
Luxury PU leather flip case for apple ipad mini 1 2 3 smart tablet case with stand 7.9 inch bear case mini1 mini2 mini3 capa fundas
0
0
Reliability of the seller 32%
-3
%
866.40 ₽
Luxury PU leather flip case for 3 apple tablet case
case ipad 7 cover with 1 apple tablet with bear mini1 mini2 mini3 capa fundas
1
1
Reliability of the seller 32%
722. 00 – 726.13 ₽
skin for ipad pro 10.5" with 9 card slots0003
0
0
Reliability of the seller 89%
-2
% 2/3 A1489 A1490 A1599 A1600, Covers
0
0
The reliability of the seller 89%
584.48 - 587.92 ₽
ipad mini2 mini3 7.9", Smart Content for a tablet with departments for cards
0
0
Reliability of the seller 89 %
-0.6
%
443.52 -479.96 ₽
New plain tville case for Apple iPad Mini 1 2 2, fold-out case with tablet stand, faux leather protective case for ipad mini mini2 mini3, case
1
0
89% trustworthiness of the seller 7.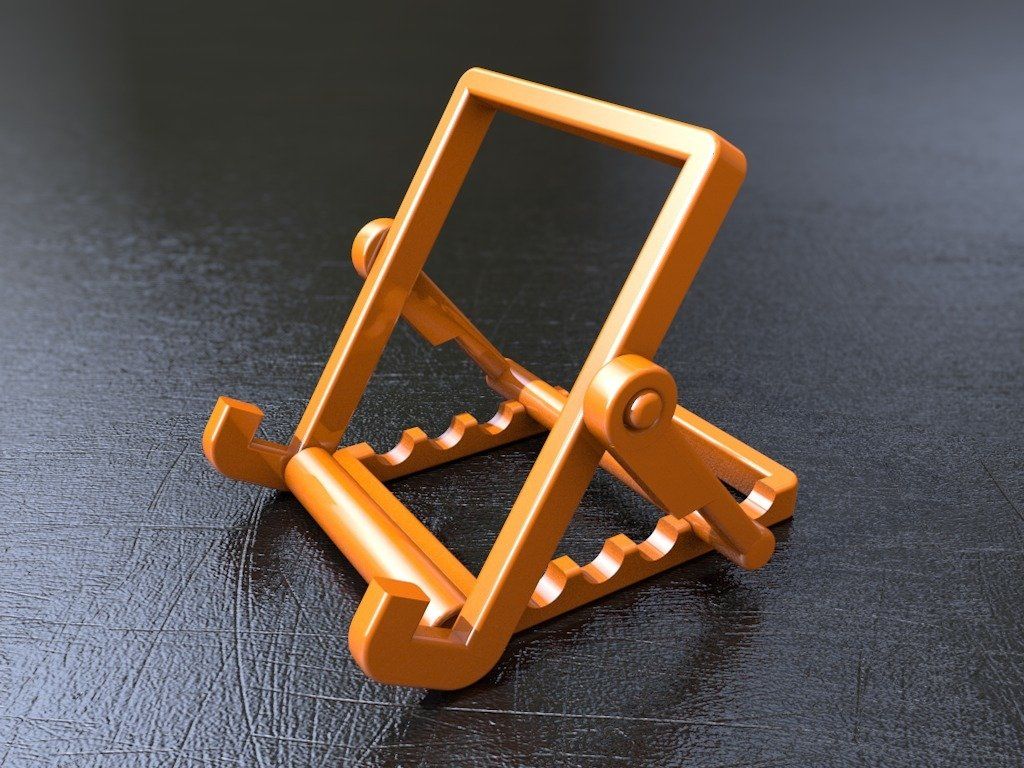 9Retina PU Leather Flip Wake & Sleep Stand for apple ipad mini soft back + stylus
1
1
, 4, 5 PU Leather Flip Tablet Case Soft Silicone Back Cover Case for ipad mini 5 Case 2019 with Holder New case for ipad mini 1/2/3 7.9"cover retro business tablet stand for apple ipad mini mobile phone case PU tpu leather soft back cover
0
0
/3/4/5 PU leather fashion soft back cover for 7.9 inch ipad mini 2019 original tablet case + film + stylus
0
0
Seller Reliability 89%
244.79 – 339.69 ₽
Tablet case for apple ipad mini 1 2 3 7.9 PU leather foldable flip case with stand soft silicone protective case for ipad mini 1/2/3
1
1
Reliability of the seller 85%
687. 62 – 690.37 ₽
Case for apple ipad mini 1/2/3/4/5 i pad shockproof pu leather smart case with stand protective case for ipad mini2 mini5 funda
0
0
9 %
520.53 ₽
Cases for apple ipad mini 1234, high quality PU leather flip case with stand and pattern for ipad mini mini3 mini 4, cover, leather case
1
3
Reliability of the seller 89%
504.71 ₽PU leather stand case for ipad mini 1 2 3 4 5 7.9 inch 360 degree rotation
2
0
Reliable seller 55%
9 518.2
Case for apple ipad mini 1 2 3 Fashion PU Leather Pattern Flip Case for ipad mini2 mini3 7.9" Smart Tablet Stand with Card Slot
0
0
89% Reliable Seller
-3
%
317. 68 ₽
68 ₽
360 Degree Rotatable PU Leather Stand Case for ipad mini 1 2 3 Leather Flip Case for ipad mini 7.9" Tablet Stand Smart Case
0
4 0Reliability of the seller 89%
570.04 ₽
High-quality crown diamond case, PU leather tablet case, apple ipad mini 4 case with stand, tablet case, screen protector
1
3 9002 Reliability seller 89%
-5
%
638.80 ₽
Case for ipad mini 1 2 3 4 5 7.9 case for tablet case-book made of artificial leather case for ipad mini5 2019 mini 4 mini 2 3 1 7, 9 inch case
0
0
The reliability of the seller 89 %-3
%
649.12 ₽
Czech tablet IPad mini 1, 2, 3, 4, 5, 7.9 inches, cute children's cartoon magnetic flip flip - PU leather case with stand, card slot case + pen
0
0
Seller Reliability 55% for ipad mini1 mini2 mini3 mini4 7. 9
9
0
0
Reliability of the seller 89%
-7
%
762.57 ₽
9 inches, TPU cover, back cover, flip -chekol with a stand + handle
0
0
Seller's reliability 66 %
-3
%
558.35 -560.41 ₽
Chekhol for iPad mini 1 2 3 beautiful girl painted PU leather smart book stand soft back cover for ipad mini 4 case 7.9"Slot for the card
0
0
The reliability of the seller is 89 %
-3
%
642.24 ₽
A woven designer leather case for the tablet for the Apple iPad mini 1 2 3 7.9 diets -post for the iPad mini 1 2 3 7. 9 inches Czech + handle
0
0
The reliability of the seller 55 %
9000 -4%
866.40 ₽
Smart magnetic blackbecker made of genuine leather for the tablet apple ipad mini 1 2 3 case with stand 7.9inch, cover mini1 mini2 mini3, covers
0
0
Reliability of the seller 32% case, smart case with stand, card slot + pen
1
0
Reliability of the seller 66%
-3
%
602.36 ₽
90 2 3 7.9
0
0
Seller Reliability 89%
933.79 ₽
mini case for apple ipad mini 11/2/3/4/5 smart leather 7.9 inch case for ipad mini 5 2019, case with pencil holder
0
0
pu leather (polyurethane) patterned for apple ipad mini 1/2/3 tablet case protective case with stand case
0
0
Seller Reliability 89% with pencil holder
0
0
Reliability of the seller 89% skins for mini ipad
9 tablets1094 00
Seller Reliability 89%
Luxury leather flip smart tablet case for apple ipad mini 1 2 3 stand 7.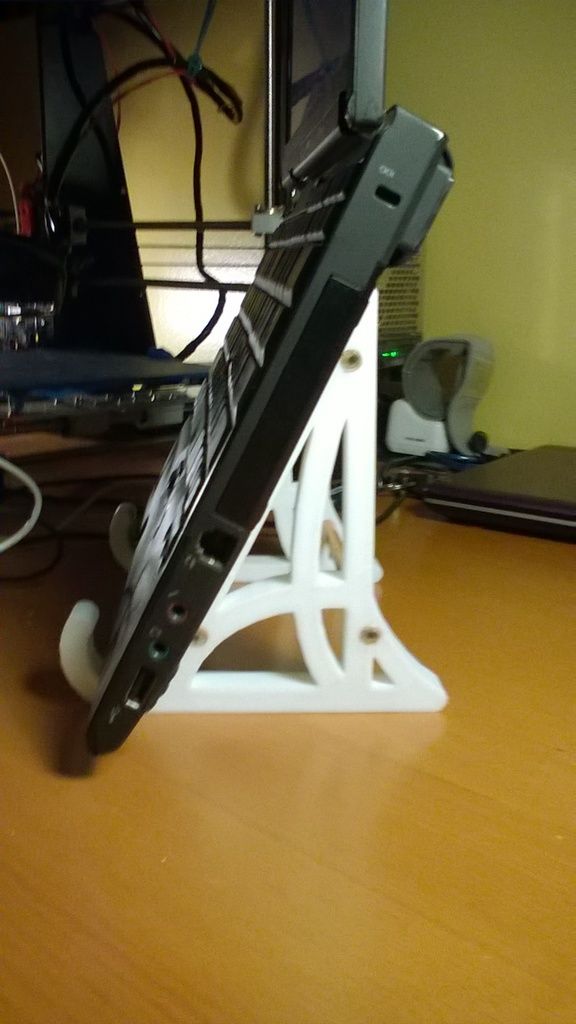 9 inch case mini1 90 90 3 90 mini1 mini3 909 animal cute cases
0
Reliability of the seller 32%
-2
% , cases with a stand for smart tablets
2
3
Reliability of the seller 89% for tablets with card slots
0
0
Reliability of the seller 89%
skin case for apple ipad mini 1 2 3 4 tablet
0
0
Seller Reliability 51%
583.10 ₽
Tablet cases for ipad mini 4 3 2 1, fashionable PU leather case with pattern and stand, smart case for ipad mini 20, shell3
0
0
Seller Reliability 89%
814.14 ₽
Fashion business case pc + tpu + pu leather smart stand case for apple ipad mini 1 2 3 4 cases for ipad mini 2 4 case 7,9&# 39;'
0
0
The reliability of the seller 89 %
-0.