3D printer hot end heater
Everything You Need to Know – Clever Creations
Heater cartridges are essential components in 3D printers. They make sure that the hot end gets up to the right temperature. Without one, a hot end would not get hot enough for filament to melt.
If you want to upgrade a hot end heater cartridge, replace a broken one, or if you are building a 3D printer from scratch, you might have some questions. Perhaps you are wondering which heater cartridge is best. Should you just get the most powerful one? And is there a difference between 12V and 24V cartridges?
In this article, I will answer all your questions and teach you everything you need to know. At the end, you will be able to pick a heater that lets you print the plastics you want and that minimizes the risk of something going wrong.
What is a heater cartridge?
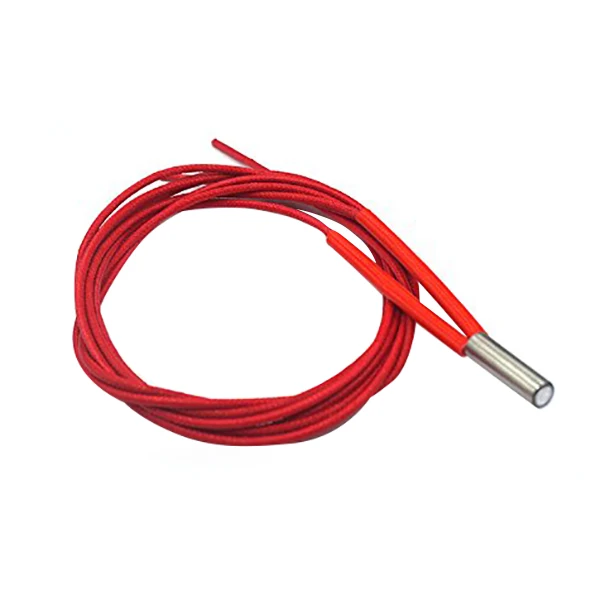
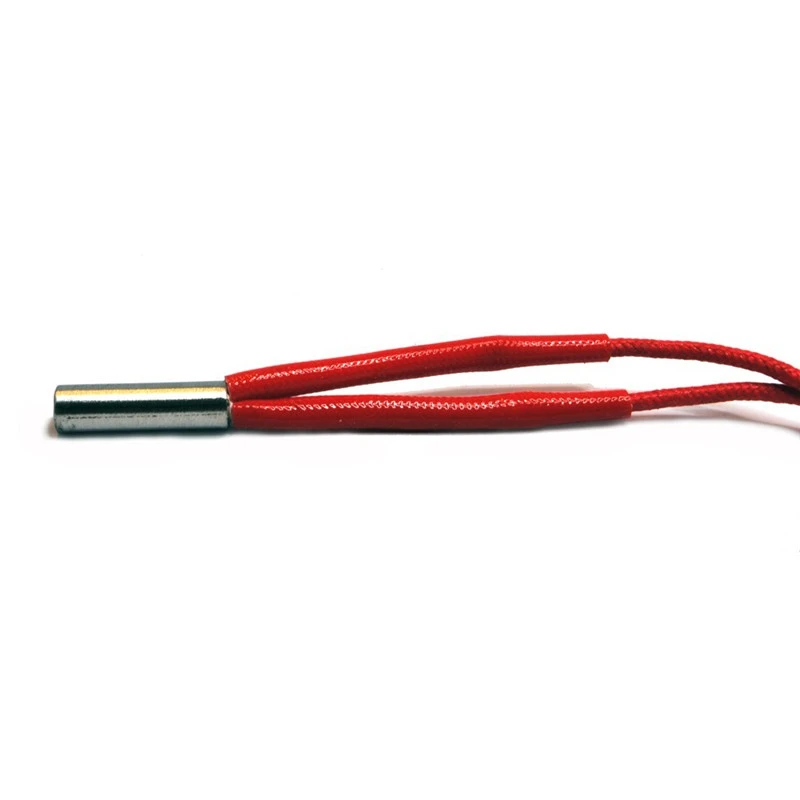
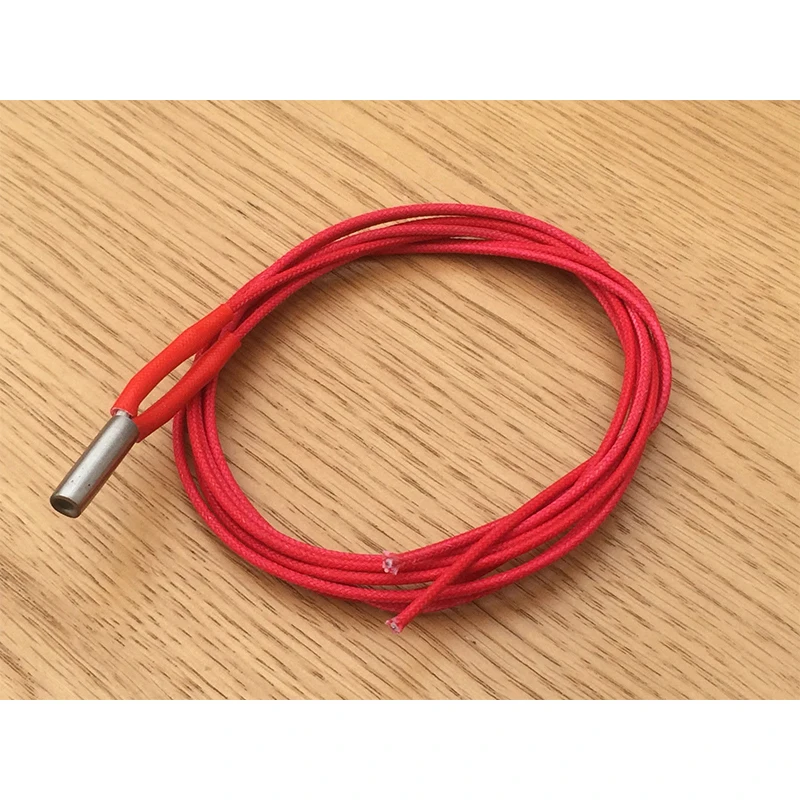
A heater cartridge (or cartridge heater, same difference) is a tube-shaped resistive heating element. Its function is to convert electric current into heat. In 3D printers we use heater cartridges to melt plastic filament in the hotend.
How do heater cartridges work?
Heater cartridges produce heat when an electric current passes through them. They are essentially big resistors, conveniently shaped to be installed in industrial equipment and, in our case, 3D printers.
On a more microscopic level, when electricity in the form of electrons move through the resistor, they bump into its structure. As they do this, they lose some of their energy in the form of heat.
The higher the resistance of the resistor, the harder it is for electrons to get through. On the other hand, if there are a lot of clean paths for the electrons to pass through, the resistance is low.
Cartridge heaters don’t have a brain, and to heat them to a specific temperature they are controlled by other electronics. This is one of the things that a 3D printer controller board is responsible for. It switches the power to the heater on and off as required.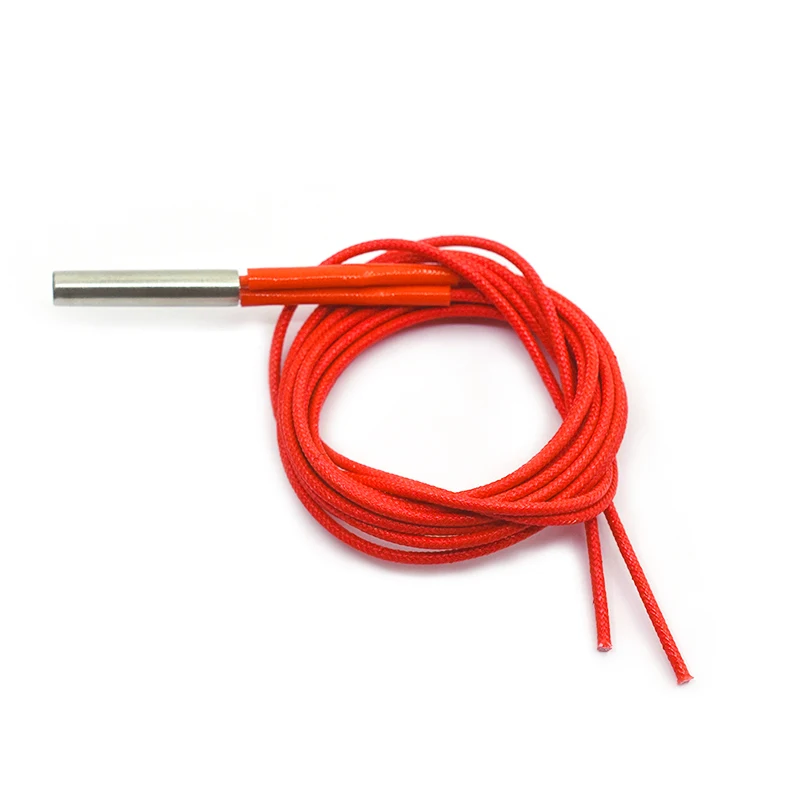
Getting some of the technical stuff out of the way
Before looking at how many Watts of power a hot end heater cartridge needs to have, it is helpful to look at where that number comes from. This stuff is all a bit technical, but I have kept it as simple as possible.
The amount of heating power (P) a resistor gives depends on two factors: the current (I) passing through it and its resistance (R). The formula for the heating power is P = I2R, which is also known as Joule’s first law.
Current (I) can also be calculated using voltage (V) and resistance (R), with the formula I = V/R. Because of this, we can also write Joule’s first law as P = (V/R)2, which can be simplified to P = V2/R.
What is important to remember from this is that the power of the heater cartridge depends on the voltage of the power supply and the resistance of the heater cartridge itself.
How much power does your hot end heater cartridge need to have?
When buying a heater cartridge for your 3D printer hotend, you are likely to be confronted with a wide range of options.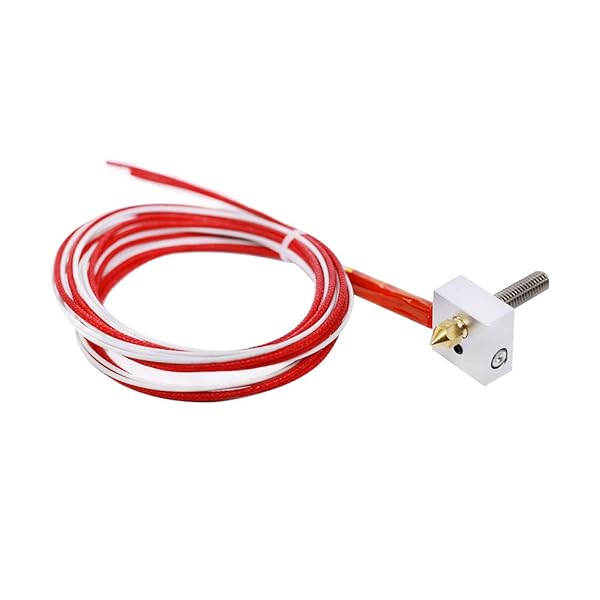 Not only do heater cartridges come in a variety of wattages, but they also have a voltage rating attached to them.
Typical wattages you will find for hot end heater cartridges are 25W, 30W, 40W and 50W. But you can find them as low as 20W and as high as 60W and even 80W for a SuperVolcano hot end.
Their labeled voltages are nearly always 12V and 24V, because those are the voltages that typical 3D printers run on.
Comparing the options
The various wattages of hotend heaters all have their own advantages and disadvantages. So it is a good idea to compare them and see what each brings to the table.
20W and less
Heater cartridges of 20W or less are not very strong and tend to be a bit underpowered for 3D printing purposes. In my experience, they work in some conditions, but not all.
For example, if you have a fan blowing over the hotend to cool the recently extruded plastic, the printer will have trouble keeping the hotend at the right temperature. The same thing happens when printing at a high flow rate. The heater is simply not capable of producing enough heat.
30W
30W cartridge heaters seem to be the de facto standard lately, and for good reasons. They have an excellent balance between performance and safety.
With a heater cartridge of 30W, a hotend can typically get up to around 300°C (572°F). This is more than enough to print standard plastics.
Unless you plan to print high temperature materials like PEI and PEEK, this is sufficient. Even if you intend to use something like a Volcano hotend that extrudes a lot of plastic.
If you do need higher temperatures, you can always use a 30W heater with an insulating silicone sock around the hotend. In this configuration hotends can reach up to about 420°C (788°F).
4PCS Official Creality 3D Printer Hotend Silicone Sock Heater Block...
781 Reviews
Check PriceGenuine E3D V6 Socks Pro (Pack of 3) (V6-SOCK-PRO-3PACK)
Check PriceIn terms of safety, a 30W heater cartridge does not come with any risks.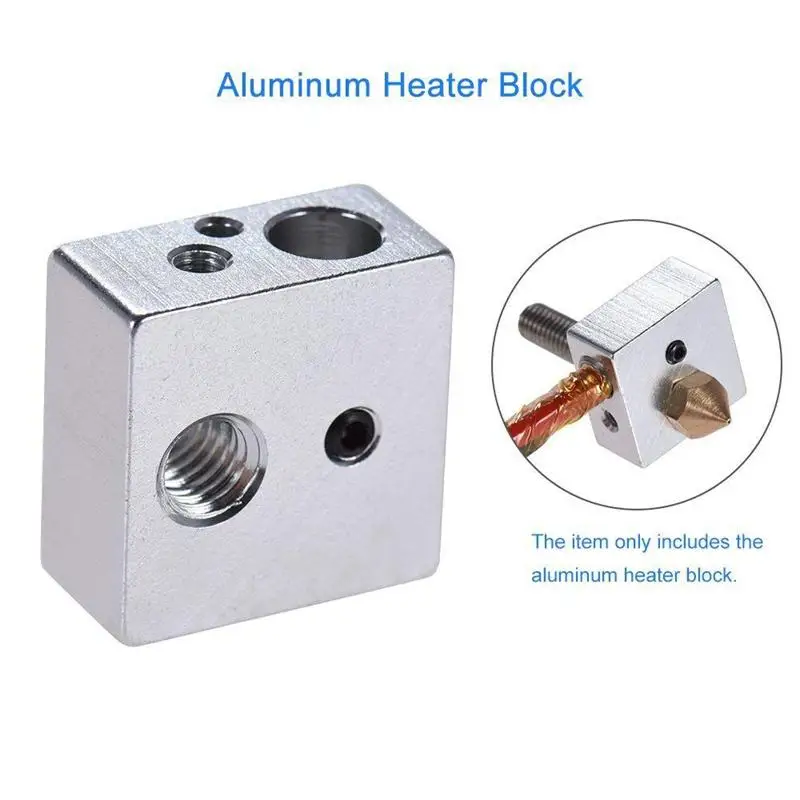 In the event of a thermal runaway situation it maxes out at about 300°C (572°F), or 420°C (788°F) with a silicone sock. While this is likely to break the hotend thermistor, it is not going to cause anything worse.
40W
40W heater cartridges come with more danger. If they get stuck powered on, it is possible for them to reach temperatures high enough to melt the aluminum hotend. Additionally, the filament and 3D printer can catch fire.
3D printers often have firmware protection against these situations, but these are not able to prevent hardware failures. An example is the MOSFET that controls the heater malfunctioning and staying open. This will cause the heater to be continuously powered and overheat.
You can, however, use a thermal cutoff fuse on the hotend for safety. But this is not something that is easily implemented on hotends (and probably a topic for another article).
The main benefit of 40W heater cartridges is that you can use them to 3D print literally any thermoplastic. If they can get hot enough to melt aluminum, no thermoplastic is going to be a challenge.
A secondary benefit is that they heat up faster than a 30W cartridge. But it is not a big difference and you might still have to wait for the heated bed to get up to temperature anyway.
In my opinion, 40W heater cartridges don’t provide enough benefits for their risk and aren’t really necessary outside of extreme use cases. There is a reason that even high-performance hot ends like the E3D Volcano come with a 30W heater by default.
50W+
If 40W is nearly always overkill, then you can probably already guess what the verdict on 50W+ heater cartridges is. There just isn’t any need for them in 99%+ of 3D printers.
40W is already enough to melt aluminum hot ends, so 50W does not let you print any additional plastics. The only benefit is a shorter warm-up time.
Something that I did not touch on yet is that with more powerful heaters you get less stable temperatures. Even after tuning, the PID system that regulates the temperature often can’t handle the swings.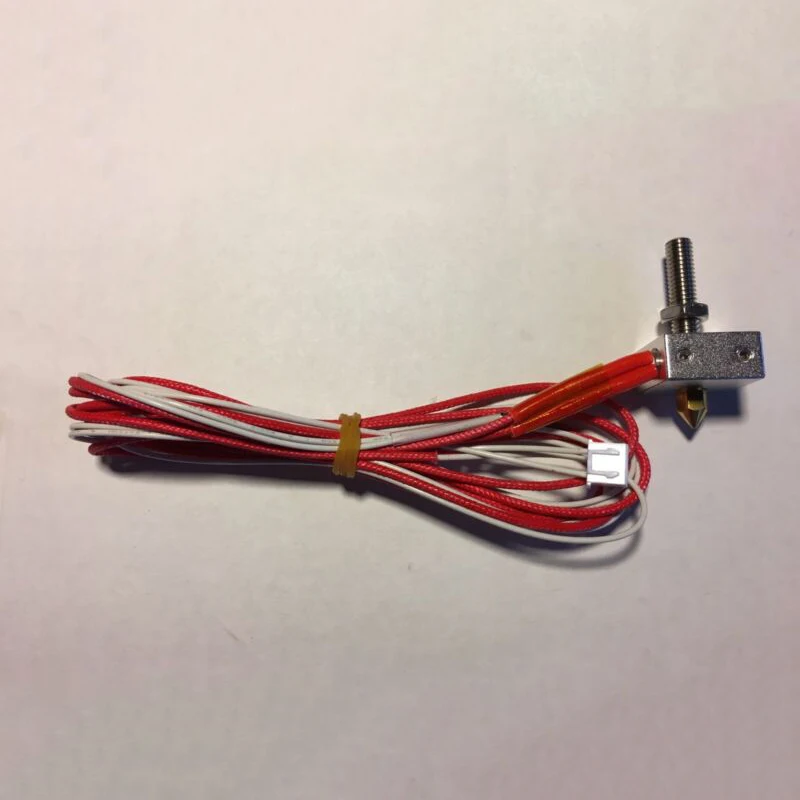 This leads to a fluctuating nozzle temperature that can affect print quality and sometimes even cause nozzle jams.
50W+ heaters come with the same or higher fire risks as 40W heaters. Unless you really know what you are doing and have specific needs that require such a heater cartridge, I recommend staying away from them.
In summary
Pros and cons of
40W+ hot end heater cartridgesPros
- Higher maximum temperature that is only relevant to specialty thermoplastics.
- Reach the desired temperature faster.
- Can deal better with powerful cooling fans.
Cons
- Higher risk of fire when the 3D printer malfunctions.
- Nozzle temperature tends to be less stable.
- Need for additional components (thermal fuse) to keep things safe.
Pros and cons of lower wattage (≤ 30W) heater cartridges
Pros
- More stable nozzle temperatures.
- No risk of the hotend catching fire due to a software bug or hardware malfunction.
- No need for extra components to guarantee safety.
Cons
- Lower maximum temperature (but still enough for the majority of plastics). *
- Slower in getting up to temperature. *
- Can have difficulty keeping consistent temperatures with strong part cooling fans. *
*All of these issues can be improved by using a silicone sock on the hotend. As an added benefit, silicone socks also prevent burnt plastic from collecting on the nozzle.
Things to check when upgrading or replacing a heater cartridge
When upgrading or replacing a hot end heater cartridge, it is essential to keep some things in mind. You can’t simply swap the heater out and call it a day.
- Calculate how many amps the heater cartridge draws and check whether the heater MOSFET on the 3D printer controller board is rated for that load.
- Check whether the power supply can handle the increased load. This is usually not a problem, as upgrading a heater typically only adds about 10W.
- Make sure that you have enabled firmware thermal runaway protection. If necessary, implement some form of hardware thermal protection, like a thermal fuse.
- If you plan on printing at higher temperatures, you might need a more powerful fan to keep the hot end heatsink cool.
- Re-do the PID tuning sequence for your 3D printer. To get accurate temperatures with the new heater cartridge, it is important to recalibrate the parameters of the proportional-integral-derivative control algorithm.
- Always crimp the heater wires. Don’t tighten loose wire strands down in the screw terminals. This is another risk of fire that is often overlooked. Any ferrule crimping tool will do fine. This is the one I use.

FAQ
What happens when you use a hot end heater cartridge with the ‘wrong’ wattage?
If a hotend heater cartridge has a non-optimal amount of heating power, one of two things will happen:
When the heater is underpowered, it will have trouble getting up to or staying at the right temperature.
When the heater is overpowered, it can have trouble maintaining stable temperatures and it comes with an increased risk of fire.
The ‘right’ heater would be one that at maximum power heats up the hotend just above the maximum temperature you print at. This lets you print anything you want and minimizes the risk of fire if something fails.
What is the difference between 12V and 24V heater cartridges?
Looking at the numbers, 12V 30W and 24V 30W heater cartridges might seem similar. They have the same wattage and you can be excused for thinking that using a 12V 30W cartridge with a 24V power supply would just cause it to heat up faster. But this is not the case.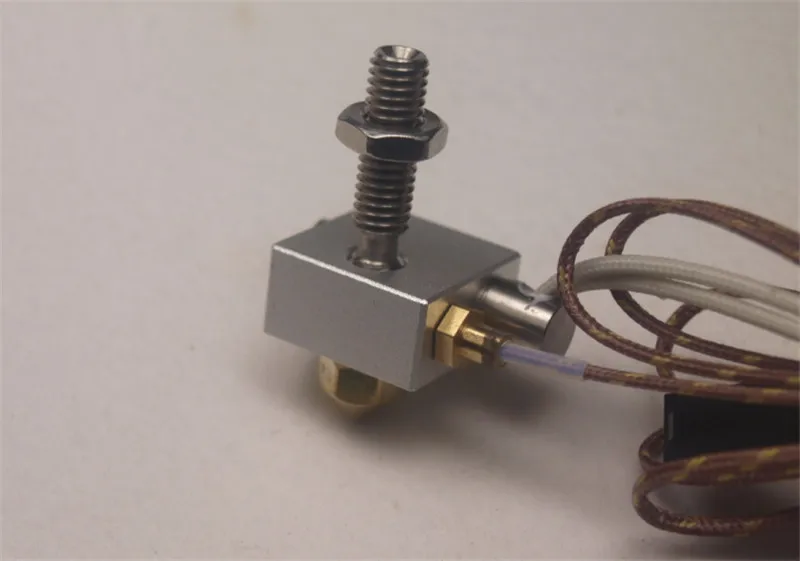
Remember that the formula that defines the output power of a heating element is P = V2/R, where P is the heat output in Watts, V is the voltage across the resistor in Volts and R is the value of the resistor in Ohms.
On a 12V 30W heater, this gives a resistance of 30 = 122/R, or R = 4.8 Ω.
On a 24V 30W heater, however, we get 30 = 242/R, or R = 19.2 Ω.
These are very different resistances! In order for both heaters to produce the same heat, the 24V version has a significantly higher resistance.
Keep in mind that the voltage (V) of our power supply is fixed, so if we want to get a specific amount of heating power we must pick a cartridge heater with the right resistance.
So what happens if a heater cartridge is used with the wrong voltage?
Using the above example and formula, we can calculate exactly what happens when we connect a 12V 30W heater (with >4.8 Ω resistance) to a 24V power supply.
P = V2/R = 242/4.8 = 120W
Yikes! That’s four times more power than we want. Putting that much power through the heater will definitely destroy it, and maybe the MOSFET and power supply along with it.
On the other hand, hooking a 24V heater cartridge up to a 12V power supply will have the opposite effect: it will run at only 1/4 of the power. P = 122/19.2 = 7.5W. That’s not going to get you anywhere.
| 12V PSU | 24V PSU | |
|---|---|---|
| 12V 30W Heater | 30W | 120W |
| 24V 30W Heater | 7.5W | 30W |
In short, always use a hot end heater cartridge with the voltage that it is rated for. Otherwise you will have unexpected and possibly disastrous results. Double-checking the resistance of the heater with a multimeter before installation is always a good idea.
Can’t you just use PWM on a 12V cartridge in a 24v 3D printer?
Yes, it is possible to use a 12V cartridge in a 24V 3D printer and use Pulse Width Modulation to drive it at less power. PWM switches the power on and off really fast at a certain ratio to get an average voltage. In this situation it can create some problems, however.
The first issue is that when you use PWM, you are still driving a lot of amps through the electronics 20-25% of the time. This puts a lot of strain on the MOSFET and power supply, shortening their lifespan.
The second thing is that in case of a MOSFET failure (or firmware problem) when the heater is on, the heater gets stuck at maximum power. At 120W or more, that has the potential to create a lot of damage.
The safe option is to always match the voltage of the hot end cartridge heater to the power supply. It’s really not worth the risk to do otherwise.
How can you tell what voltage or wattage a heater cartridge is rated for?
A simple way to check the wattage of a hotend heater is to measure its resistance. After all, that is the property that (in combination with the PSU voltage) defines the heating power.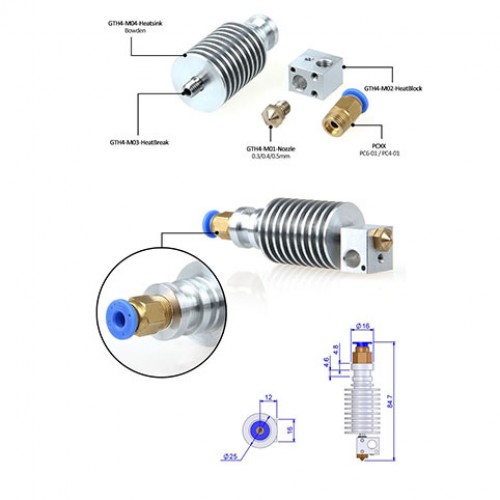
Typical resistance values are:
- 12V 20W -> ~ 7.2 Ω
- 12V 30W -> ~ 4.8 Ω
- 12V 40W -> ~ 3.6 Ω
- 24V 20W -> ~ 28.8 Ω
- 24V 30W -> ~ 19.2 Ω
- 24V 40W -> ~ 14.4 Ω
Heater cartridges aren’t always manufactured with the highest precision, so you’ll likely find a resistance that is close but not exactly the same as one of the above values.
Sometimes, you can find an inscription with the power/voltage rating on the metal casing of the heater. But it’s always a good idea to manually verify the resistance of the heater with a multimeter before installing it in a hotend.
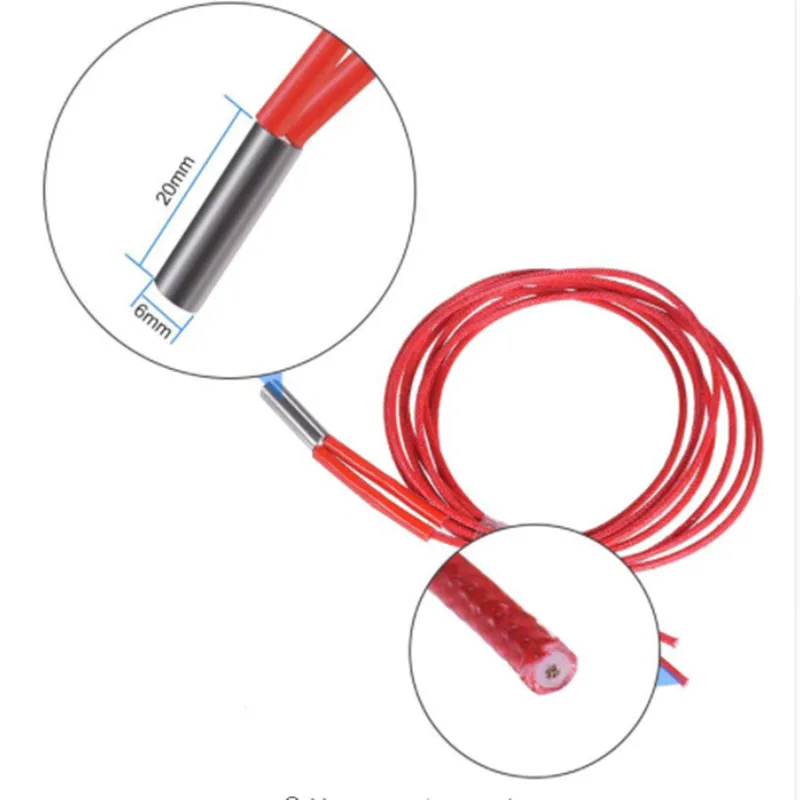
What diameter cartridge should you use?
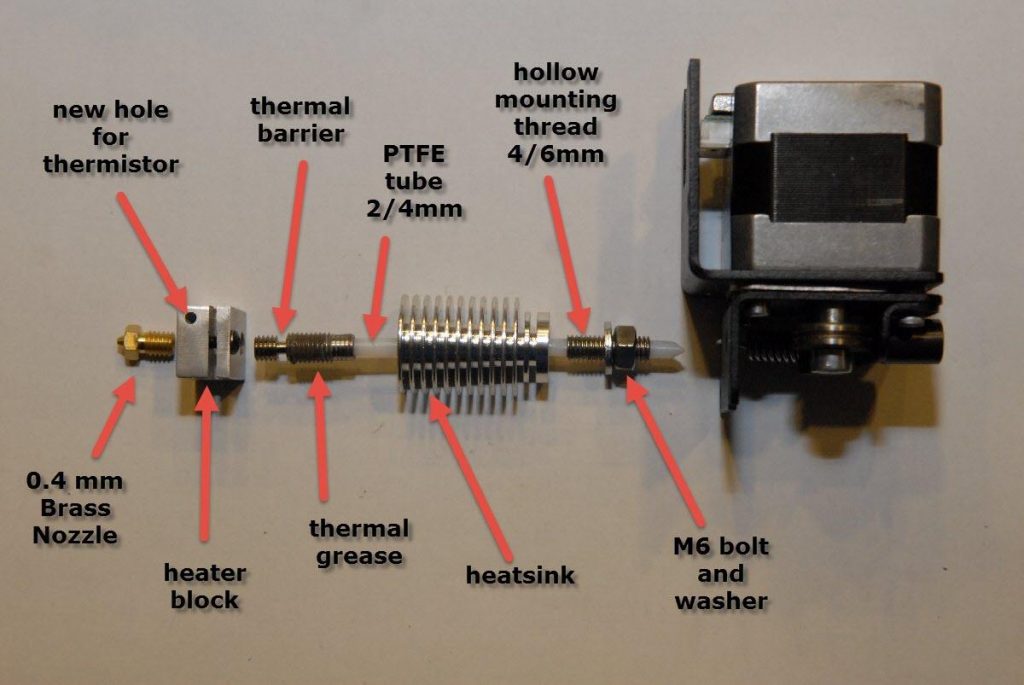
The diameter of the heater cartridge should be the same as the hole you mount it in. Larger and it obviously won’t fit. But significantly smaller than the hole is not good either, because then there will not be enough surface contact with the heater block for sufficient heat transfer.
For instance, a 6 mm cartridge might seem like it would work when mounted in an 1/4″ (6.35 mm) hole, but there will be a large section of the cartridge that does not make contact with the hotend.
Not exactly 6 mm, but close enough.I find that a digital caliper works best for these kinds of measurements.
NEIKO 01407A Electronic Digital Caliper | 0-6 Inches | Stainless...
18,860 Reviews
Check PriceMost cartridges, like those from E3D and the ones for the Creality CR-10 and Ender 3 are 6 mm in diameter and 20 mm long.
Conclusion
That’s about it. All you need to know about heater cartridges for your 3D printer hot end. To recap:
- It is essential to use a heater that is rated for a voltage that is the same as the power supply output. This is typically 12V or 24V.
- For safety, don’t use a heater with more power than you need. For most uses, a 30W cartridge is more than enough. If it is not, you are better off adding an insulating silicone sock first, before you try upgrading.
- Make sure that the cartridge has the same diameter as the cavity in the heater block to get optimal heat transfer.
Spiral Heaters are the Next Step in 3D Printing
A new generation of 3D printer heaters, spiral heaters, is expected to be used more and more in 3D printing in the coming years as they offer better control and consistency. Let’s see why spiral heaters are meant to be the next big thing by going over the history of hotends and heating cartridges.
A bit of history
3D printer hotend has come a long way. Starting with the first design from Adrian Bowyer, then to the very famous J-Head, things have changed and improved over each new generation.
NiChrome wire
If you check back in 2007, the Darwin 3D print was one of the first. Created by Adrian Bowyer, it uses the “Thermoplast Extruder”, one of the first, most effective, and simplest hotend.
Thermoplast Extruder. Mounted electronics, PTFE hotend, direct drive, this extrusion system is the mother of allBy looking at the heater section, you’ll realize that this hotend uses a NiChrome wire. It’s a resistive wire very commonly used in heating elements. It’s a very efficient and reliable solution, as the purpose of Nichrome is to heat, and its maximum operating temperature is way beyond what we use in 3D printing.
If you look closely, you can see yellow fibreglass insulation on the heating wire. Other hotends with similar designs used bare Nichrome wire. Extra care was needed as shorts with the wire could make the hotend not usable. More insulating and planning was required with bare wire.
The High Temperature Resistor
The J-Head has been one of the most popular hotend. It’s well designed, easy to use, and performs incredibly well. It’s one of the first hotend to use PEEK as its main material. The machining complexity and number of components were kept at a minimum. The model you might have seen is the J-Head Mark V-B, with brass heater block and grooved PEEK body.
J-Head Mark V-BThis design uses a Riedon resistor. The specs are 5.6 Ω, with a maximum dissipation of 5 W. The maximum rated temperature is 250 °C, which is good for printing most polymers. The maximum temperature right might not be well adapted for our application, however, as the data sheet suggest lowering the power to 0% at this temperature:
The big improvement of using a high temperature resistor is that you could assemble it in a few minutes, and change it in about the same amount of time if it fails. Kapton tape was most often used to hold the resistor in place, which made it simple for anybody to use.
The Heater Cartridge
Around 2012, we started seeing more and more heater cartridges in 3D printers. For example, the delta 3D printer BerryBot3D included them with their hotend.
The BerryBot3D with a heater cartridgeThese cartridges were well adapted for the situation. The inside contains a heating wire, insulating ceramic, and the housing is in steel. It’s a self-contained heater available is roughly the same format as the heating resistor. People started swapping their J-Head resistor with this heater cartridge.
The need for improvement
All the previous had their strengths and weaknesses. But each of them was an improvement over the previous solution.
- NiChrome wire
- 👍 Designed for heating
- 👍 Powerful
- 👍 Cost effective
- 👎 Complicated to install
- 👎 Required putty
- 👎 Risk of shorts
- Resistor
- 👍 Simple to install
- 👍 Cost effective
- 👎 Limited in power
- 👎 Limited in durability
- Heater cartridges
- 👍 Simple to install
- 👍 Powerful
- 👎 Costly
Manufacturing challenge
The simplicity offered by the resistor and the heater cartridge led to the heater block. The heater block is a thermally conductive piece made from aluminum, copper, brass or steel designed to transfer the heat from the heater cartridge to the nozzle, to the polymer.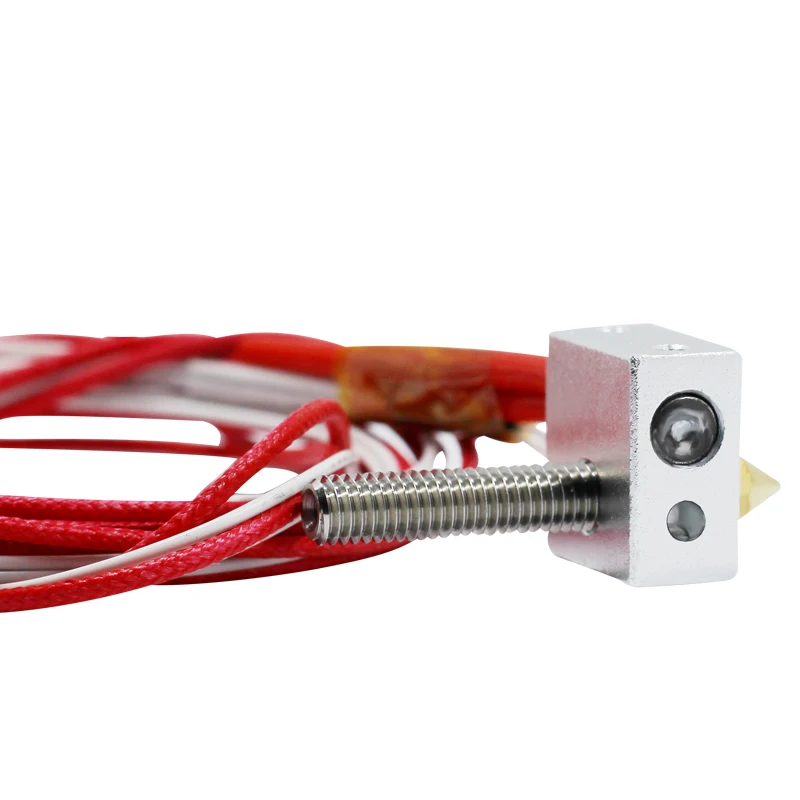
We’ve seen quite a lot of different designs over the years, with the heater in either a parallel direction or perpendicular. Same for the holding methods: Slot, threads for set screw, press-fit, etc.
As you can guess, these constraints can make a simple part more and more complicated. The costs will be directly proportional to this level of complexity.
DyzEnd Pro heat block shows quite a lot of machining and setups to accommodate the heater cartridgeTemperature uniformity
Another weakness is the temperature uniformity. By considering the entering material as a cold material absorbing heat from the center, having a heater on the side only is suboptimal. The further you’ll get away from the heater, the colder it will be. Consider a quick analysis with the following parameters:
- input polymer (PET) at 35 °C at 5 mm3/s
- 20W heater
- 5 mm/s wind in one direction (like if the head was printing slowly)
Adjusting the temperature graph from 245 °C to 255 °C, you can see how the top region, the right section away from the heater, and the nozzle are much colder than the heater.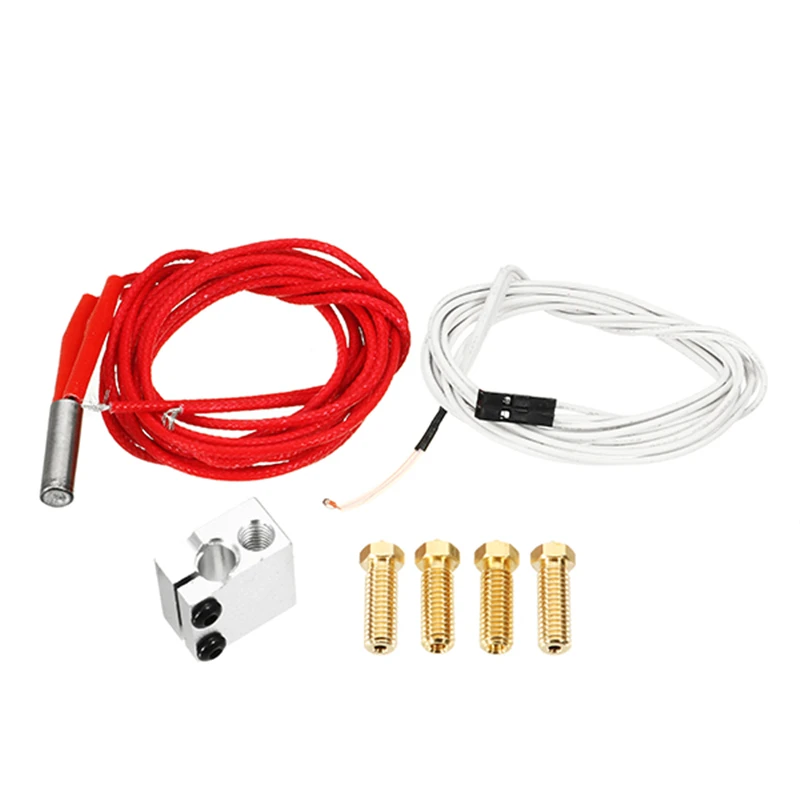
The new solution
Temperature uniformity is critical for printing accurately. Printing too hot, the polymer will degrade, printing too cold, the filament might be very hard to extrude. Having a 10 °C gradient over a small 15 mm melted length can be problematic. This temperature gap will increase a lot more over high temperature polymers such as PEI and PEEK.
Cylindrical Melting Zone
Since the development of our new high flow extruder (Typhoon) and our pellet extruder (Pulsar), we decided to shift our new design toward a more logical melting zone shape. Since the polymer follows a round hole, why not make the heated block a heated cylinder? By using this design, the heat travels naturally toward the center, when the filament absorbs it. The distance between the heater and the polymer is always the same, ensuring maximum uniformity across the melting length.
Cylindrical melting zone from the TyphoonSpiral heater
The cylindrical melting zone also requires a new type of heater.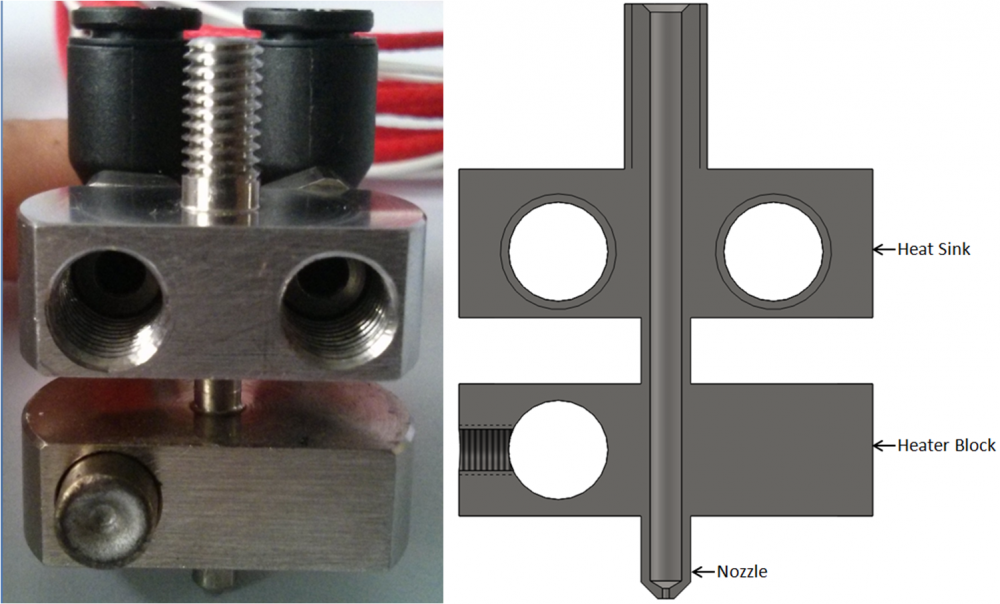 Luckily for us, there are plenty of options for high temperature tube heating.
We ended up choosing the spiral heater type. It’s simple to customize, which allows us to choose the optimal shape and form factor for our application. By choosing the right number of turns, spacing, and power density, we managed to optimize the heater to get an even heating region through our long melting zones.
The Typhoon heater showing two spiral heaters around the cylindrical melting zoneMultiple heaters
The extra long melting zone required for high flow has some new challenges. As you’ve seen previously, the 10 °C delta on a 15 mm length can quickly get worse over more than 100 mm. The picture below shows a single heater acting on the body when extruding 200 mm3 of PET per hour. The temperature difference is critical, ranging from 150 °C to 250 °C.
Single heating zoneAfter running optimizations, you can keep the temperature with a much narrower temperature gap, perfect for printing consistently.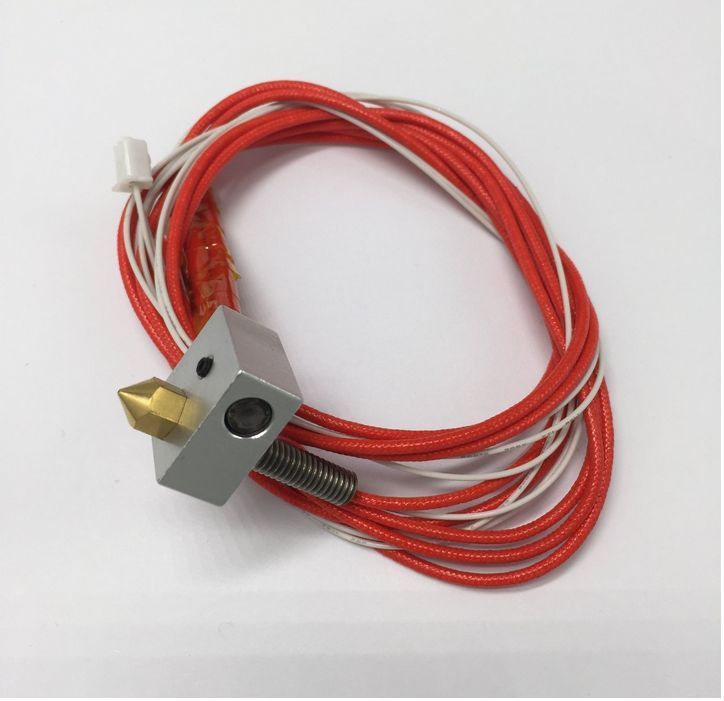
In summary
We’ve seen how 3D printers have evolved over the years, from the NiChrome wire in putty to the heater cartridge. The big temperature difference through the heater blocks showed a clear need for improvement. This is where the cylindrical heaters and spiral heater come: better temperature uniformity, better power distribution, simplified machining.
3D Printing: All About Heatle
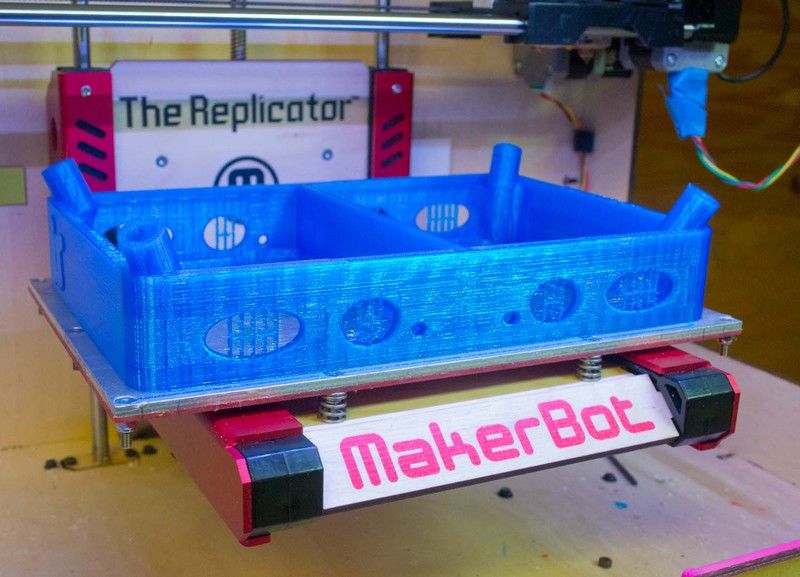
The heating of plastic filaments in specialized printers equipped with heated extruders and print beds creates the basis for the formation of products from molten filaments, also known as 3D printing.
Currently, 3D printers are being used to create tools, camera equipment, medical models, phones and tech accessories, home decor items, toys, and fashion, just to name a few. The applications for 3D printing are almost limitless.
Since 2009, when the main patent for portable 3D printers expired, 3D printing has grown into an industry of its own. As a result, 3D printers are one of the defining products of our time.
3D printers are now being used to create just about anything you can imagine - tools, camera equipment, medical models, phone and personal technology accessories, home decor, toys, and fashion, just to name a few. Its applications are almost endless. Theoretically, any solid object can be made with 3D printing. Although some limitations in technology prevent printing in certain sizes and materials, research and development is rapidly expanding the possibilities.
The most popular type of 3D printing is Fused Deposition Modeling (FDM). Modeling the product on the printer is done by melting and extruding a spool of plastic filament through the nozzle as it moves up, down and across the specified XYZ coordinates.
Creating a product using the FDM process looks something like this:
- 3D model created using software.
- The model is exported as a stereolithography file (.
 stl format) and then imported into the slicing software.
 - The file is split into product layers and specific tool paths are generated.
- The design is sent to the printer.
Within minutes - or possibly hours or days, depending on the size and complexity of the part - the part is made by additive manufacturing.
3D printing heater
3D objects are made by melting, molding and cooling plastic.
Several key components create and manage heat in an FDM printer:
- Extruder.
- Work table.
- Multi-layer cooling fan.
A closer look at each of them will explain how they affect the print result.
Extruder.
The extruder is where most of the printer technology resides. It consists of a cold end that pulls the filament through the system and a hot end that melts the filament as it is extruded.
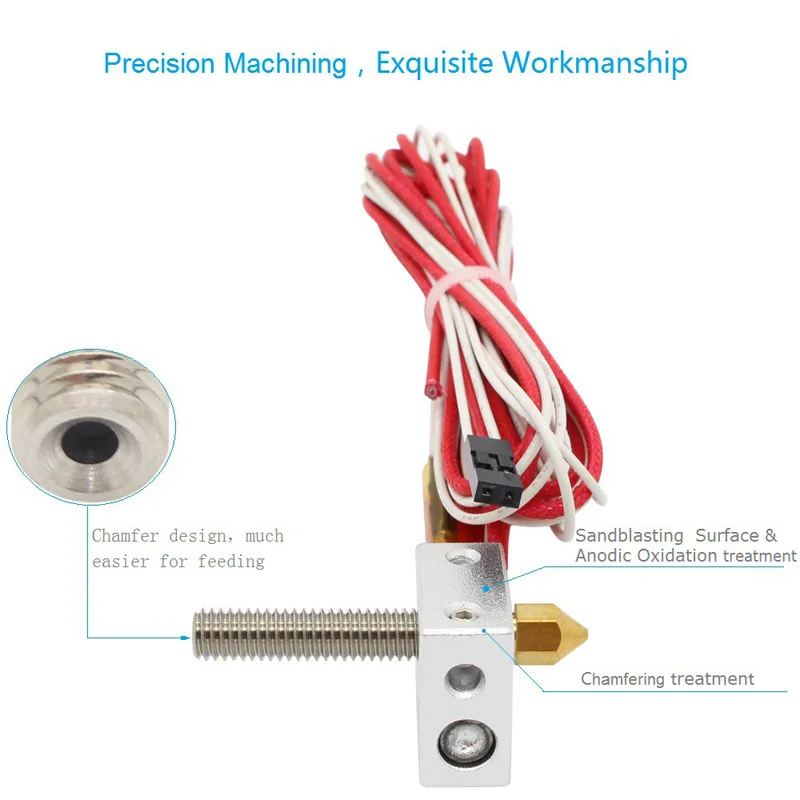
Inside the hot end of the extruder is a heating block.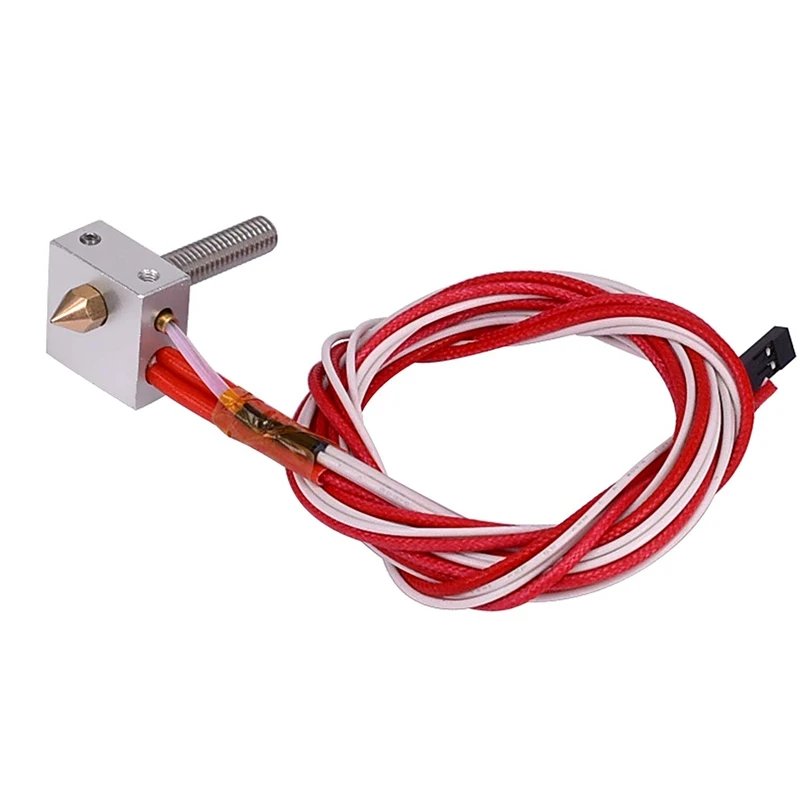 As a rule, this is an aluminum element with a hole for a cartridge heating element. The heating element melts the filament as it passes through the heat pipe and reaches the nozzle.
The extruder also has a fan heatsink. This cooling element helps prevent heat from entering parts of the extruder that need to be kept at cooler temperatures.
Another element of the extruder worth mentioning is the thermistor or thermocouple. This temperature sensor detects and helps regulate the temperature of the hot end.
Work table.
The desktop is the surface on which the filament is deposited in a predetermined form during the printing process. Most PCBs are heated to prevent the plastic from cooling too quickly and deforming the product. Printtables typically maintain temperatures somewhere between 50 and 100°C. Specific temperature requirements depend on what type of plastic is being used.
Some printers do not have heated stages. These machines are limited in the materials they can print with.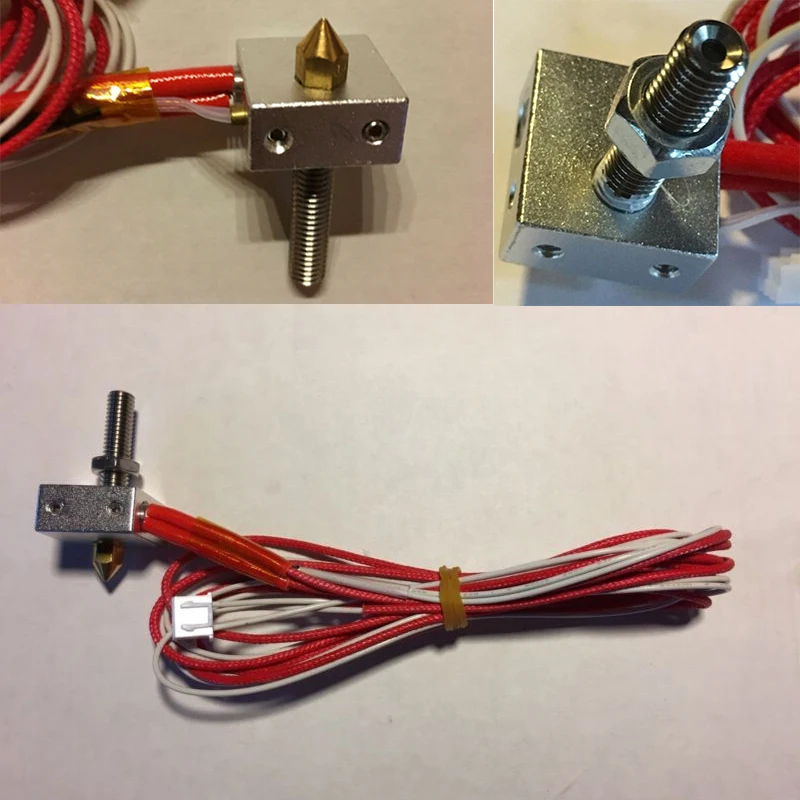 Also, materials may not adhere to these layers and melted parts are more likely to pop out of the middle of the print.
Multi-layer cooling fan.
The cover fan cools the plastic after exiting the nozzle. This element helps the created product to keep its shape when printed.
Heat control: solving heating problems
Since 3D printing is so dependent on heating temperature, any temperature issues can easily disrupt the entire process. Common problems encountered in 3D printing include
- Thermal creep
- Deformation and bending.
- Melted or deformed articles.
- Cracks on the sides of the taller item.
- Slope or bend at the bottom (elephant foot).
- Blurry or undefined first layer.
Manufacturers can face such problems due to non-ideal temperatures.
As 3D printing research and development continues, advanced technology offers even more precise control over higher temperatures, producing high-quality printed products from difficult-to-work materials.
Thermal creep
Heat creep occurs when heat is distributed unevenly through the hot end of the extruder. This happens when the filament cools as it is extruded and heat travels up the thermal barrier tube. This will cause the filament to heat up and swell too early and stick to the walls of the thermal barrier tube. Heat creep can cause clogs that stop printing, and such clogs are difficult to remove.
As a result, thermal barrier tubes are often designed to prevent thermal creep. The teeth or filaments in the pipe help prevent heat from entering places where it is not needed. In addition, there are several preventive measures that can be taken to prevent a negative effect.
- First, ceramic insulation tape must be added around the heater block.
- Second, when the printer is not printing, do not leave it hot.
- Third, avoid using low quality filament that may expand unevenly.
- Finally, if possible, always unload the filament when printing is complete.
Deformation and bending.
Product distortion occurs when the plastic is cooled too quickly after extrusion. Because the plastic shrinks slightly when cooled, rapid cooling can cause the plastic to bend as it solidifies.
Warping can be prevented by keeping the plastic just below its melting point on the print bed. If warping occurs, the temperature of the print engine may need to be increased.
Melted or deformed seal.
Excessive heat is to blame when printed pieces look saggy. FDM printing requires a precise balance between a temperature that allows good flow and a temperature that ensures fast curing.
To fix melted prints, adjust the temperature settings . First, make sure the temperature is within the appropriate parameters for the material. Then try decreasing the nozzle temperature by 5°C at a time.
Cracks on sides of higher prints.
Sometimes when the higher pieces are 3D printed, cracks can appear between some of the higher layers.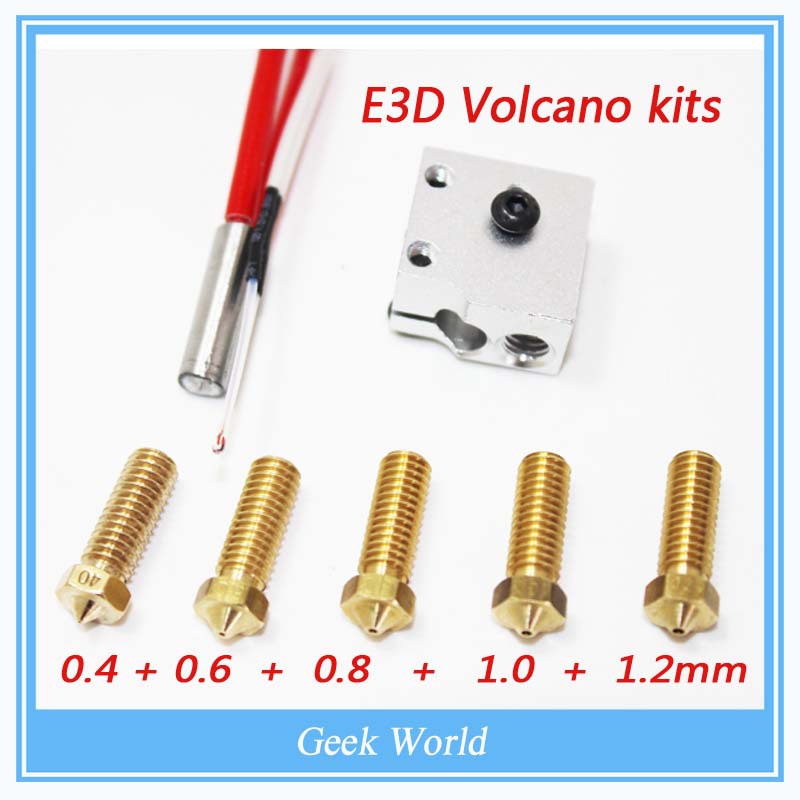 This is because these layers too far away from the heat of the printed layer . After extrusion, the filament cools too quickly and is not as tacky as it should be. This results in small spaces or cracks between the layers.
To prevent the filament from cooling too quickly, try to increase the temperature of the extruder by about 10°C.
Slope or bend at the base.
Bending or warping near the base of printed objects occurs when the weight of the model presses on the lower layers before they cool down properly.
This deformation of the lower layers is eliminated by faster cooling. This can be achieved by lowering the platen temperature by 5°C at a time until the desired results are achieved.
Blurry and undefined first layer.
Sometimes the first layer can be blurry. When this happens, the corners feel vague and the filaments look messy. This usually happens because0048 The print bed is too hot and this causes the plastic to lose its shape.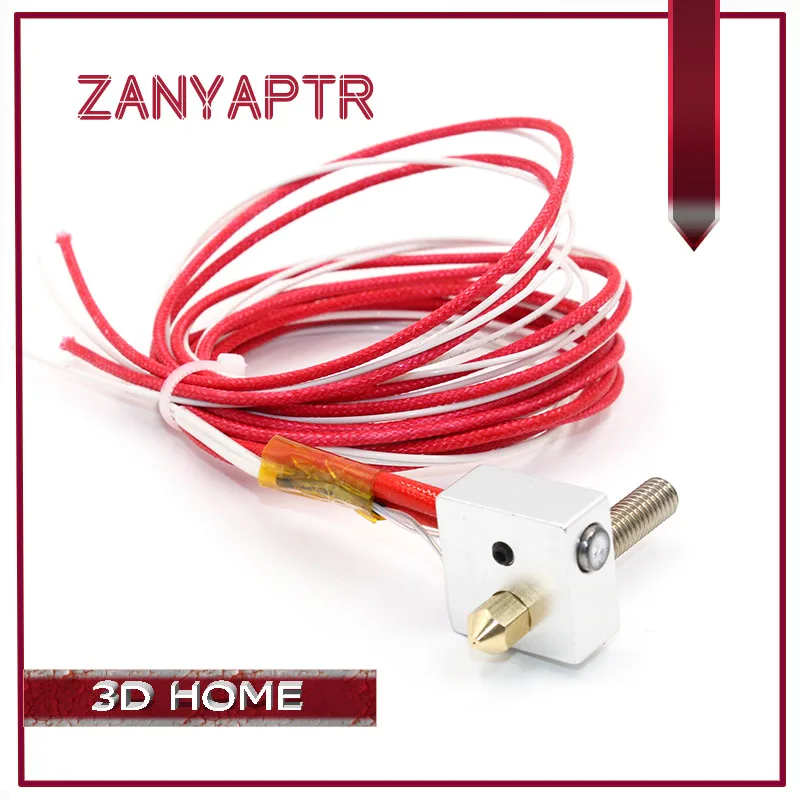
The solution to this problem is probably pretty obvious. It may be necessary for to reduce the temperature of the platen by 5°C at a time until the desired results are achieved.
The threads come in a variety of colors and textures and offer effects ranging from glow in the dark to the look and smell of wood.
Material temperature limits
There are several filament options for . The threads come in a variety of colors, textures and offer effects ranging from glow in the dark to the look and smell of wood. An important part of mastering the use of these different materials is understanding the specific temperature requirements for each material. Failure to comply with these parameters may result in any of the temperature related problems mentioned.
Higher temperatures equals more features . When 3D printers can maintain higher temperatures during production, more filament options become available. However, working at higher temperatures requires special technology in a 3D printer.
For example, it is not uncommon for extruder hot ends to be made up of both metal and polyetheretherketone (PEEK) or polytetrafluoroethylene (PTFE). While PEEK and PTFE provide excellent insulation, they limit the hot end temperature to no more than 240°C. However, when all-metal hot ends are used, temperatures can be effectively maintained above 300°C. This opens the door to the use of a range of different materials.
New developments in FDM technology are paving the way for even higher temperatures during 3D printing. Last year, a 3D printer manufacturer introduced a line of high-temperature printer components that allow the hot ends of an extruder to reach temperatures in excess of 400°C. Printtables on the same devices can reach temperatures in excess of 200°C.
Ideal temperatures for various materials:
Polylactic acid (PLA)
Acrylonitrile Butadiene Styrene (ABS)
Polyamide (nylon)
Polyethylene terephthalate (PET / PETG / PETT)
Acrylonitrile Styrene Acrylate (ASA)
Polypropylene (pp)
Thermoplastic elastomer (TPE)
Thermoplastic polyurethane (TPU)
Wooden Threads
Polycarbonate
Polyvinyl alcohol (PVA)
As 3D printing research and development continues, the improved technology continues to offer even finer control over higher temperatures.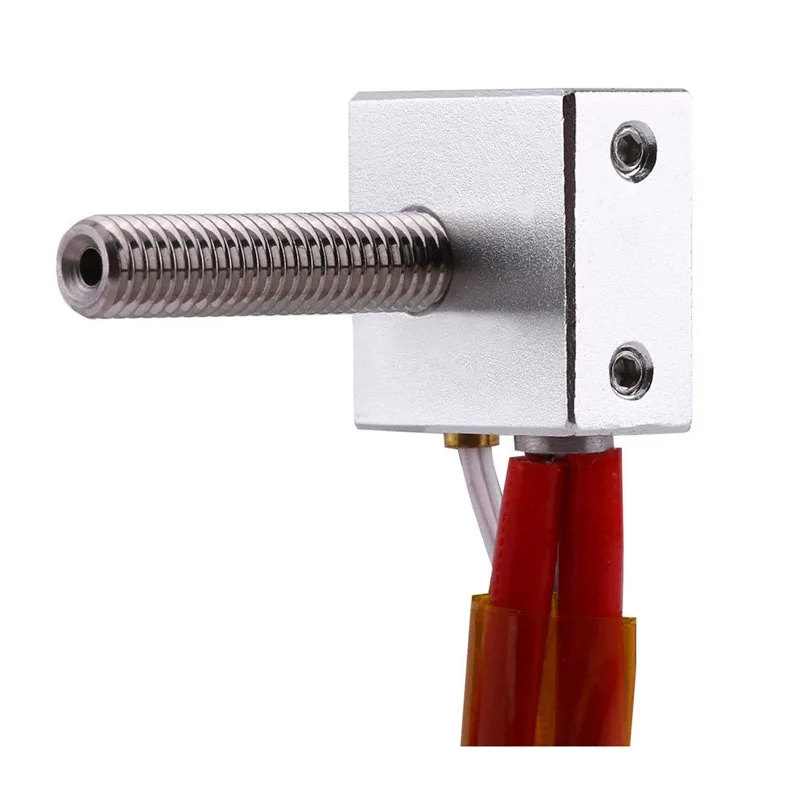 These advances produce high-quality prints with difficult-to-work materials. We are excited to see what the future holds for 3D printing. Who knows what materials we will be able to print in 10 or 20 years?
Heating elements for the printer extruder (mini cartridge heating elements) and for the work table can be purchased from Heathl directly from the manufacturer. Contact us by phone or via the feedback form.
What can cause a 3D printer to catch fire?
safety thermal-runaway
From what I've seen, it's possible to take a typical extruder heater, apply the assigned supply voltage without temperature control. And as long as the heater does not come into contact with something below the ignition temperature that the heater reaches, the heater will not ignite. Thus, unless someone catches a fired filament, it appears that the thermal runaway of the extruder heater will not normally start a fire.
I'm not sure what happens if someone installs the wrong components such as a 12V heater to a 24V power supply.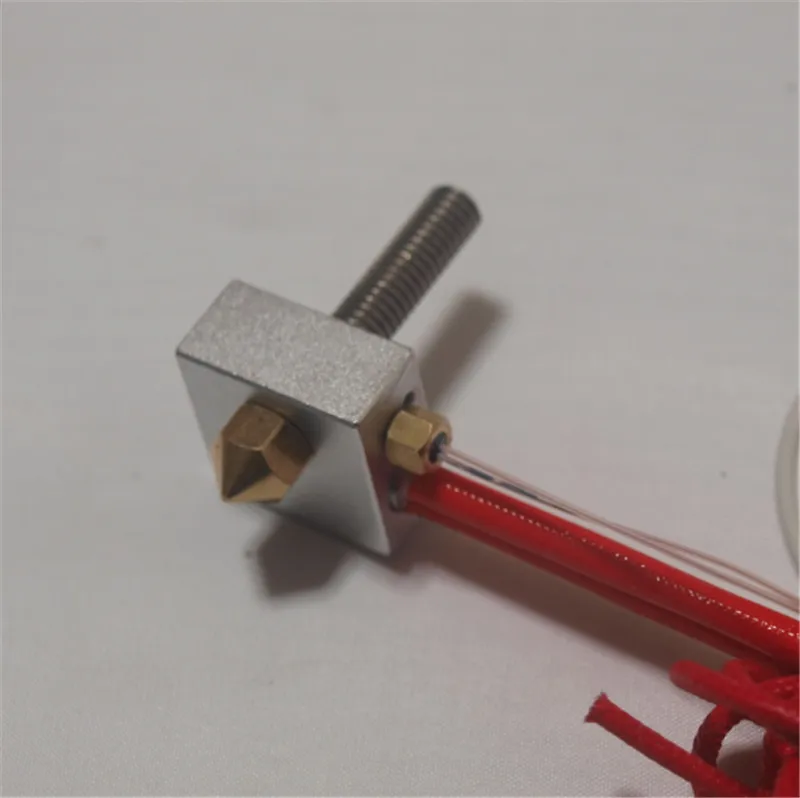 In what situations can 3D printing catch fire?
@Perry Webb, 👍0
Talk
3 replies
▲ 2
A regular hot end won't melt first and won't usually cause fires in the video. However, if the power control unit also fails and a higher voltage is applied (19on a 12V cartridge), this can happen, see the second video.
Fires are most often caused by overheating of wires, especially where joints are present.
Hotend runaway does not cause fires from the hotend itself, but may cause a fire associated with its wiring. In addition, uncontrolled temperatures can cause the hot end fan to fail, worsening the situation.
Problems can also be caused by discoloration on the table and overheated MOSFETs.
, @ FarO
▲ 3
In short:
- Thermal runaway not set on control board
- Hot bed connectors are loose and begin to heat up until wires ignite
- Power supply or its connectors begin to heat up until they light up
- The modifications you made to your printer were not well thought out, resulting in a capacitor explosion (raises hand; this happened to me too).
, @ user77232
▲ 2
Another fire source comes from the connections, not the heaters themselves.
As the joint and connector age, the electrical resistance of the joint increases. Up to a certain point, this is not a problem. Part of the energy goes to heat the joint, and less energy goes to the heated element. They are in closed circuits, so energy is applied longer to compensate.
The connection uses the lost energy for its own heating. This increases the rate of corrosion, and can also cause the plastic to flow in the connector, which weakens the connection pressure, further increasing corrosion, resistance, and heat.
This situation is unstable and ends in one of three ways:
- The extrusion hot end or bed becomes less hot, which affects print quality.
- the connection opens and the heated system simply fails,
- or in the worst case, when the temperature rises to such an extent that the connector housing, wire, heating circuit board, or dust and fur on the connector catch fire.
Learn more