Moon lamp 3d print
BRIGHTWORLD Moon Lamp, 3D Printing Moon Light 4.7IN Night Light Cool Lamp Lunar Lamp with Wooden Stand & Touch Control and USB Rechargeable, Moon Night Light for Kids Girls Boys Friends Lover Women
4.5 out of 5 stars 1,785 ratings
Currently unavailable.
We don't know when or if this item will be back in stock.
Color: Wooden Stand
| Style | Art Deco |
| Brand | BRIGHTWORLD |
| Color | Wooden Stand |
| Product Dimensions | 4. |
| Special Feature | Rechargeable |
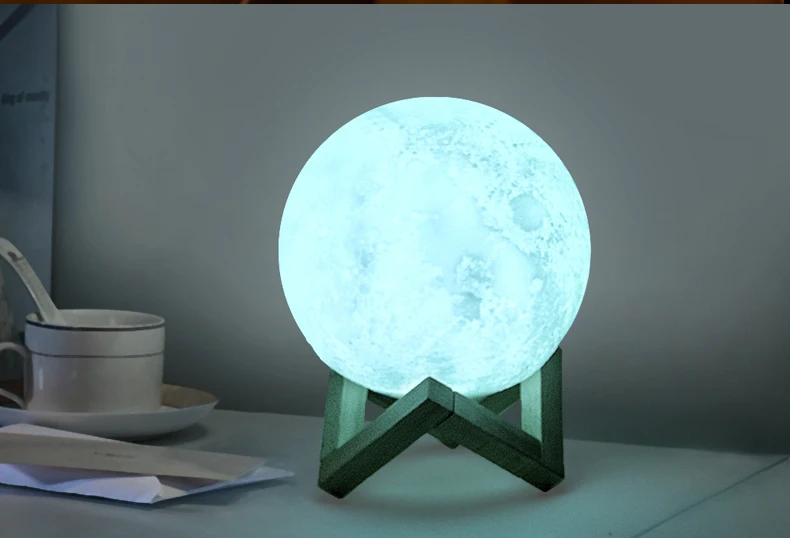
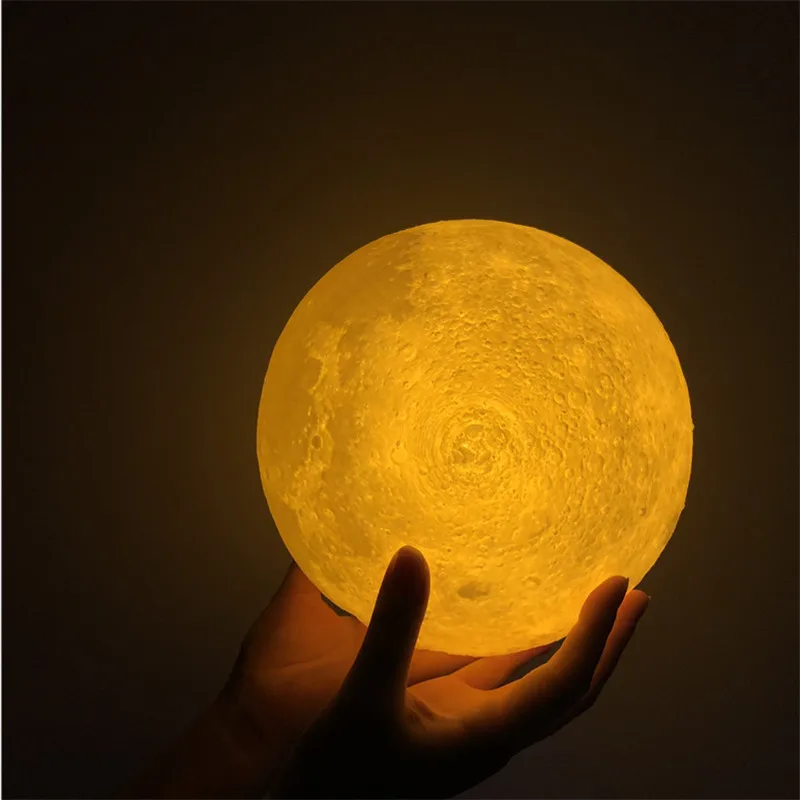
- ✅Superior 3D Printed Technology: Based on astronomical data by NASA satellite, using cutting-edge 3D printing technology, curves and mountains on the sphere has been designed to really portray the moon's surface.
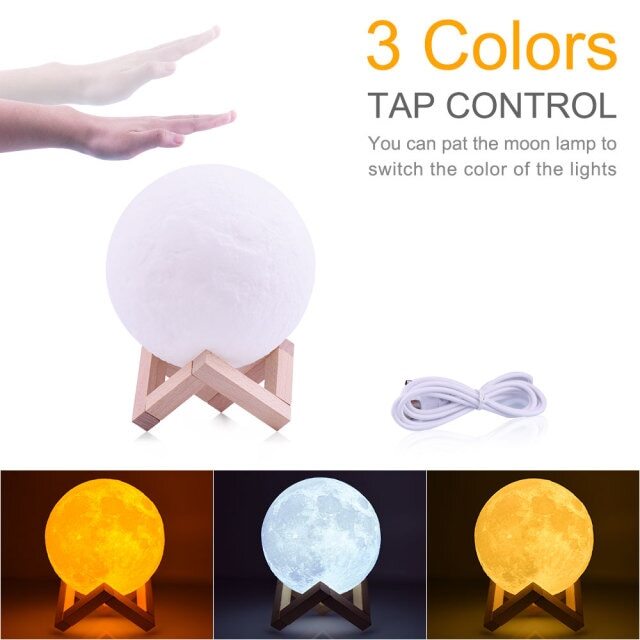
- ✅Sensitive Touch Control: Touch the metal button can change colors of lamp(warm and cool white), and Long press to adjust the brightness of lamp; suitable for decorating room, use as bedside lamp, night light, decorative lamp, to create warm atmosphere.
- ✅Long-lasting Battery: Built-in USB rechargeable battery, this moon night light has strong cycle and duration performance, and can normally use during charging (charging 2-3 hours, can use 6-12 hours, depends on its brightness).
- ✅Sophisticated Design: The bottom interface of the moon lamp is only 0.7 inch. the lamp and the ball are combined perfectly, the touch switch and the charging port are separated, and the touch control is not affected when charging.
- ✅Cool Gift: The moon light come in gift package, it can directly delivery to parents, kids, family members or friends as a gift. Perfect gift for child(kids) woman, friends at holiday or Christmas GIFT, birthday present, housewarming gift.
See more product details
The brand applies a unique Transparency code to each item. We verify this code before shipping. You can verify this code using the Amazon Shopping app to confirm it comes from the brand and view additional product details.
Verified by Transparency
Each item has a unique code that we verify before shipping. Learn more
How to make a 3D printed moon lamp personalized
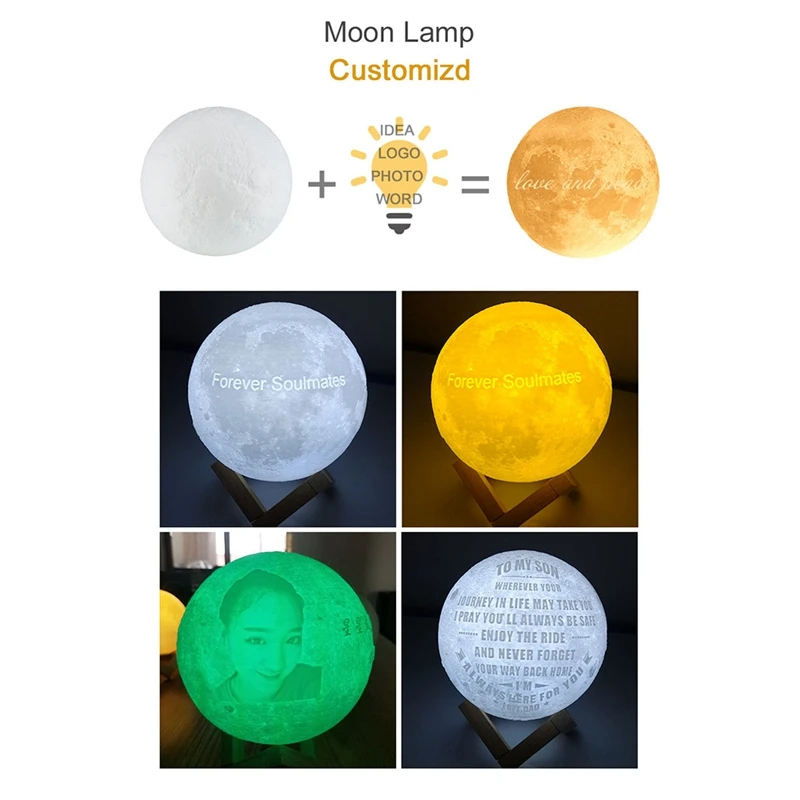
The 3D-printed moon lamp generator is a revolutionary and innovative way of creating amazing home decor that can be customized with your own photo or design. With the help of 3D printing technology, it’s now possible to create unique moon lamps with custom designs such as a realistic full moon, a personalized photo moon lamp, a magnetic levitating 3D moonlight lamp, and more!
In this blog post, we’ll be discussing the best 3D models you can use to create your own custom moon lamps, as well as different types of 3D printed moon lamps such as 16 colors, rechargeable night light, levitating, custom photo moon lamp, 3D printed galaxy moon lamp, etc. With the right materials and designs, you can create your own beautiful 3D-printed moon lamp in no time!
LED Night Light 3D Printing Moon Light - Buy on Amazon
So, let’s get started on making your own 3D-printed moon lamp generator and explore the best 3D models available for you!
Preparation before 3D print moon lamp
Before you can start using the 3D-printed moon lamp generator, there are a few things you should take into consideration.
First of all, it’s important to choose the right material for your 3D model. PLA and ABS are two of the most common materials used in 3D printing and both have their own advantages and disadvantages. PLA filament is more lightweight and versatile but less durable, while ABS is more durable and heat-resistant but heavier. It’s up to you to decide which material is best for your 3D-printed moon lamp.
In addition to the 3D printer, you’ll also need a filament and a lamp kit. If you want your 3D-printed moon lamp to be illuminated, then you'll need a light bulb or smart bulbs like Philips Hue.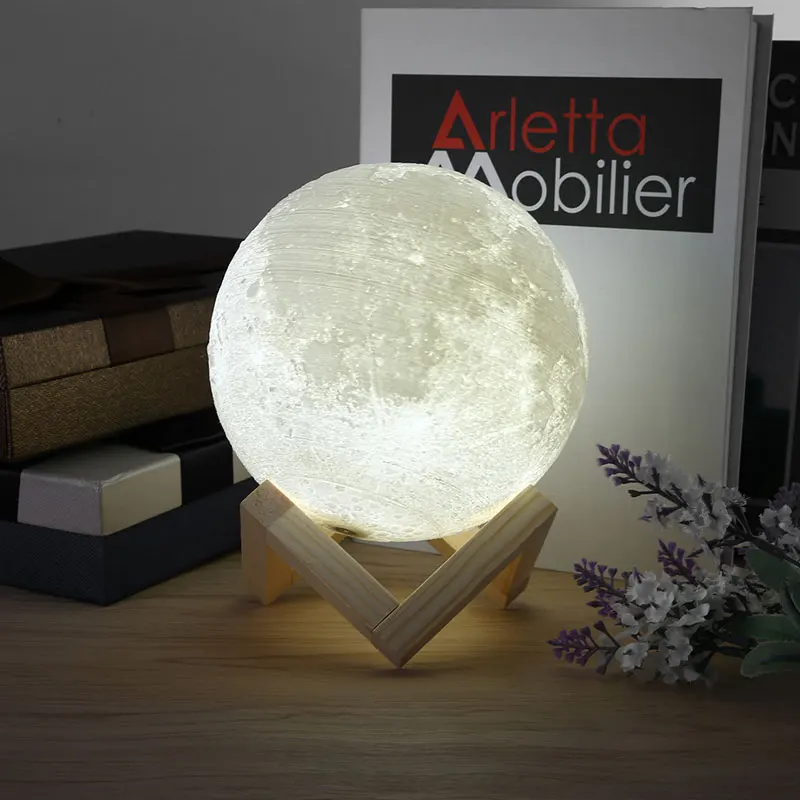 You should also take into account the size of your 3D model. The larger the model, the longer it will take to print, and the more materials you’ll need. There are a variety of sizes available, so make sure to choose one that suits your needs.
Galaxy Lamp 5.9 inch 3D Moon Light - Buy on Amazon
Additionally, consider the level of detail you want in your 3D-printed moon lamp – the higher the resolution, the better. The level of detail you choose will determine the amount of time it takes to print your 3D model and can also affect the cost. Finally, it’s important to pick a design that works with your chosen materials and size.
Now that you’ve got the basics covered, let’s move on to the actual 3D printing process!
Free 3D moon lamp maker: personalized 3D photo moon lamp
Once you have the materials and design for your 3D-printed moon lamp, it’s time to start printing with the 3D printer! One of the easiest ways to 3D print your own moon lamp is with a free 3D moon lamp maker app like Creality Cloud.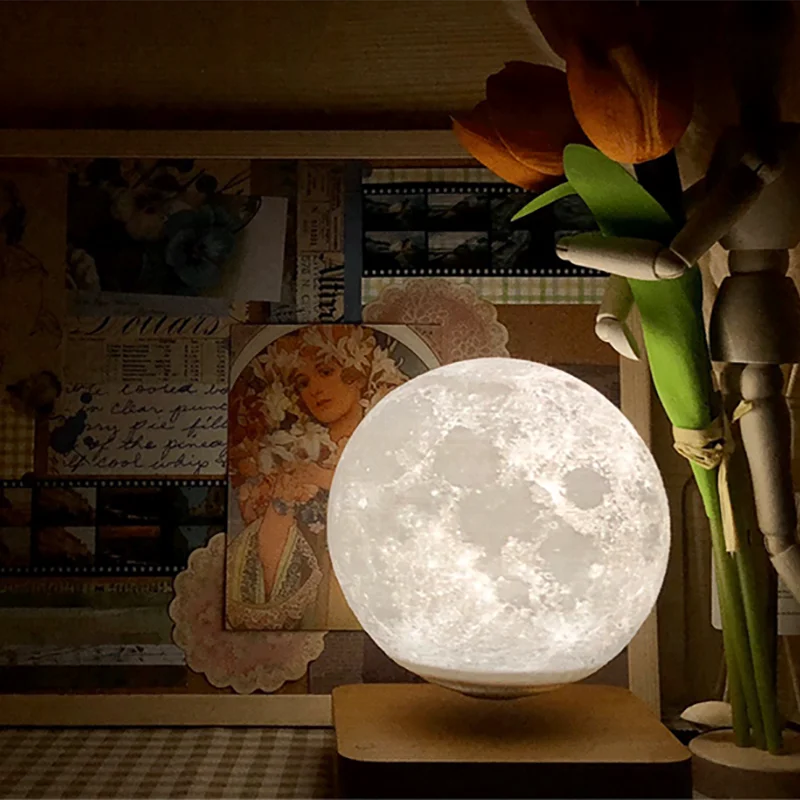 This app is available for both Android and iOS devices, so you can create a personalized 3D photo moon lamp anywhere.
It build-in 4 free maker's tools, like pen holder 3D print, lithophane 3D print, phone number plate, 3D moon lamp maker, etc.
Using Creality Cloud, the 3D printing process is incredibly simple. Here’s a step-by-step guide to help you get started:
Step 1. Download Creality Cloud App
In order to use the app, you’ll first need to download it from either the App Store or Google Play. Now open the app, tap the Maker's Tools button, and then find the Planet Moon Maker, and click on Go.
Step 2. Choose the materials, size, and design
You can start customizing your 3D-printed moon lamp now. Choose a diameter like Small (80mm), Medium (150mm), Large (250mm), or your custom favorite diameter size. It allows you to upload images or add stickers and texts on the planet. There are some pre-made templates available in the app that can help you create a unique and personalized 3D-printed moon lamp.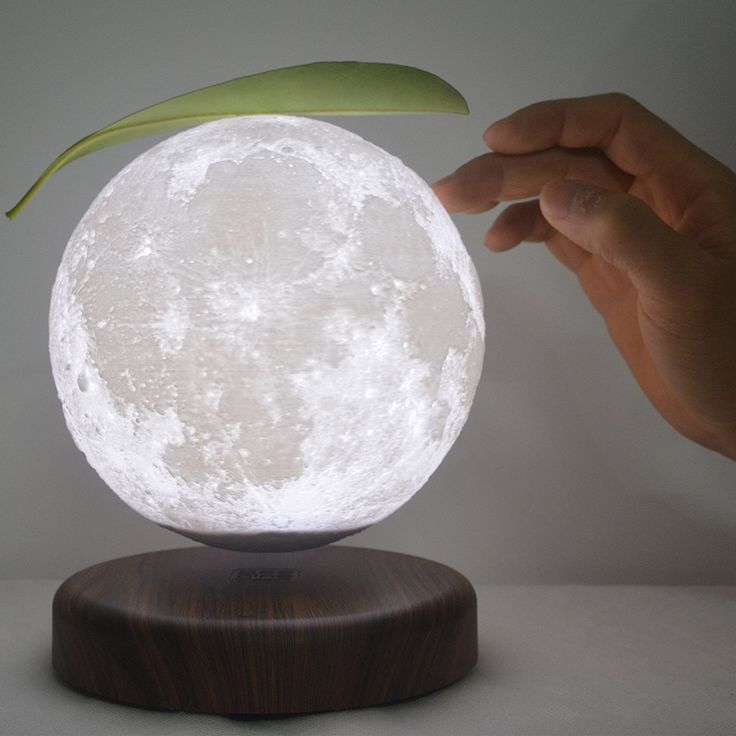
After adding your photos o stickers, click on Preview to see the effect picture to decide create a 3D model or not.
Step 3. Create your 3D moon lamp design
Now, click on Create to create your 3D moon lamp design. Just name your design and wait a few moments to proceed. Your moon lamp design will be exported as an STL file.
Step 4. Start to slice your 3D moon lamp
It's time to slice your 3D moon lamp model, you can use Creality Cloud's built-in slicer, it's easy to use.
Also, you can choose from a wide range of materials such as PLA, ABS, and other plastic filaments, and printers.
Step 5. Finally, Press “Print”
Once you’ve set the printing parameters, you can press the “Print” button and watch as your 3D-printed moon lamp comes to life! After a few hours or days (depending on the size of your model), your personalized 3D-printed moon lamp will be ready.
Moon Lamp, Built-in Music Speaker - Buy on Amazon
Best moon lamp 3D models to 3D Print
If you’re looking for the best 3D models to 3D print your own moon lamp, there are a variety of options available to you.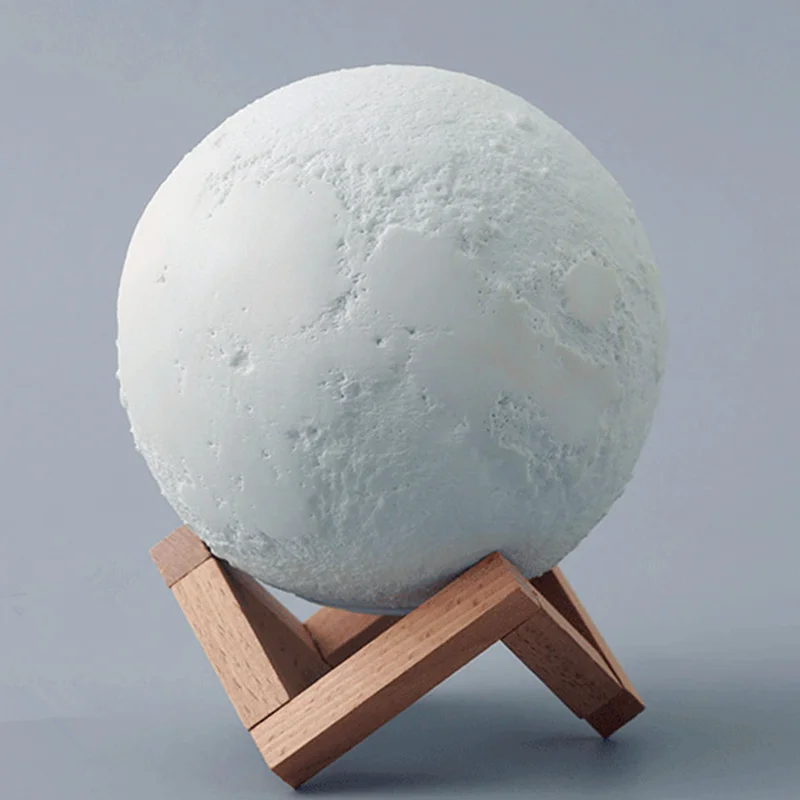 From stunning Man on the Moon models to 3D-printed moon lamps from Thingiverse, here are some of the best 3D models to get you started:
1. Man on the Moon
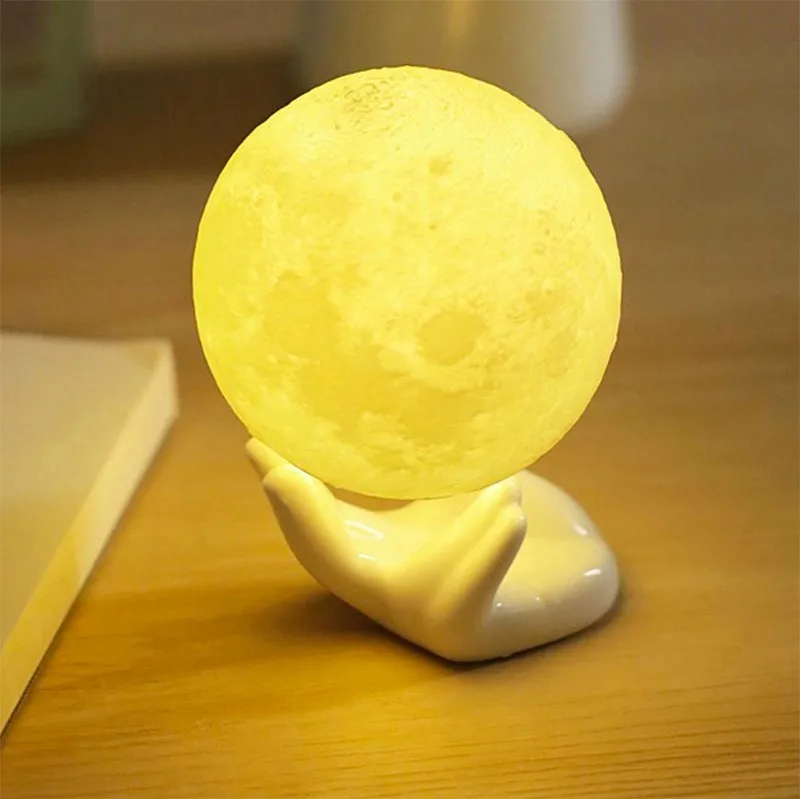
This 3D model features a realistic man standing on the moon, carrying a circular thing and a backpack. The model is available in both greenish and grey colors, giving you plenty of options to choose from. The intricate details are sure to make your 3D-printed moon lamp stand out.
Who made it: DD3D STUDIO
Where to download: Creality Cloud
2. 3D printed moon lamp Thingiverse
If you’re looking for a more intricate 3D model with both surface and glowing details, check out this 3D-printed moon lamp from Thingiverse. It has a beautiful design with a spiral pattern and intricate details that will look amazing when illuminated. It’s a great option for anyone looking to make their own 3D-printed moon lamp.
Who made it: moononournation
Where to download: Thingiverse
3. Lithophane Moon Lamp
This beautiful 3D-printed moon lamp is a great way to add some style and personality to your home.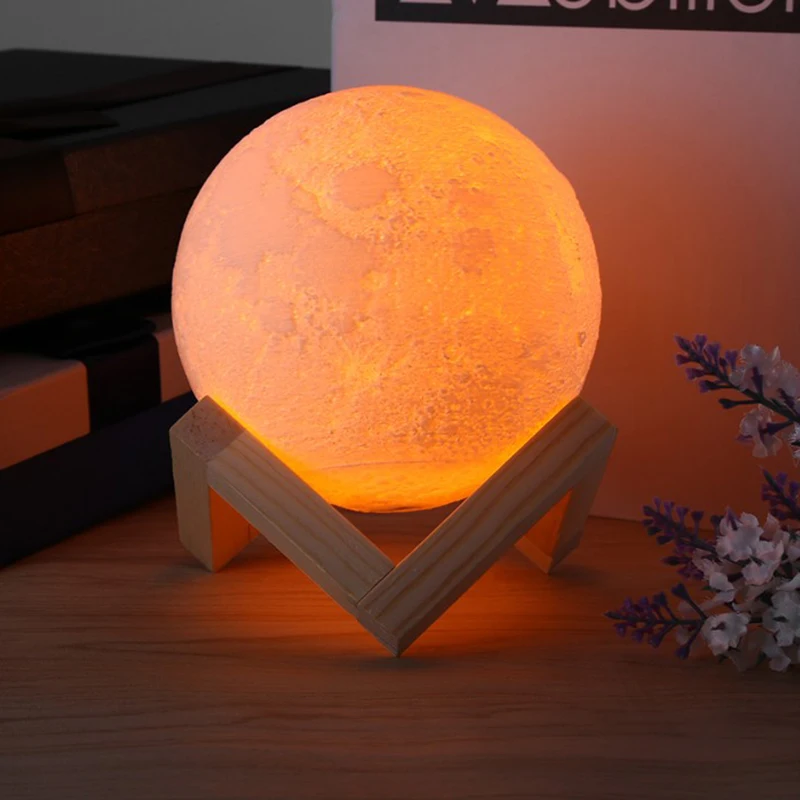 The design is based on the classic lithophane lamp, but with a modern twist. The 3D model is easy to print and takes about two days to complete. It's a great conversation starter and makes for an amazing gift. With its eye-catching design, it’s sure to be the centerpiece of any room.
Who made it: Frank Deschner
Where to download: Printables
4. Spherical Lamp
This 3D-printed moon lamp is perfect for anyone who loves the natural beauty of the night sky. The spherical design features stars, moon, and planets all in one. It’s a great way to add some extra light to your home or office, and it’s sure to make a statement. Also, it’s incredibly easy to print and assemble, so you can start enjoying your new lamp in no time.
Who made it: Team
Where to download: Creality Cloud
5. Lithophane Heart Lamp
Want to show your love for someone special? This 3D-printed moon lamp is the perfect gift. The design includes a heart shape with intricate details that will look amazing when illuminated.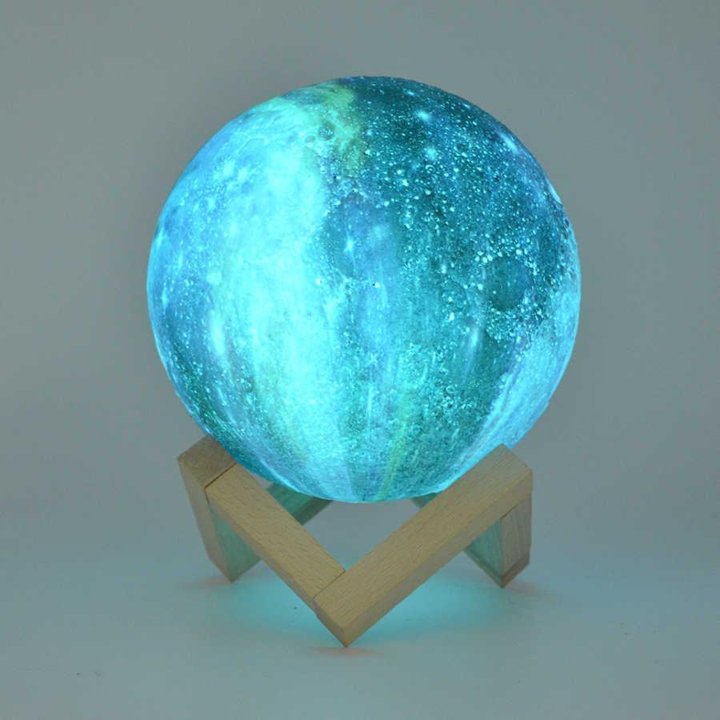 The 3D printing process is simple and easy, so you can get your new lamp ready in no time. With its beautiful design and heartfelt message, this 3D-printed moon lamp will be sure to bring a smile to your loved one’s face. Moreover, it makes for a beautiful and meaningful gift that’s sure to be treasured for years to come.
Who made it: MBPRINT2
Where to download: Cults3d
Conclusion
3D-printed moon lamps are a great way to add some style and personality to your home. From intricate designs to personalized messages, these 3D lamps will make any room look unique and beautiful. With the help of a 3D-printed moon lamp generator, you can create your own design with just a few clicks. And if you’re looking for the best 3D models to help you get started, there are plenty of high-quality options available.
With the right 3D model and a few hours of time, you can create a stunning 3D-printed moon lamp that’s sure to be the centerpiece of any room. So what are you waiting for? Start 3D printing your own moon lamp today!
*Many of the links are affiliate links — which means that Creality Cloud earn a small commission for each purchase — at no extra cost to you.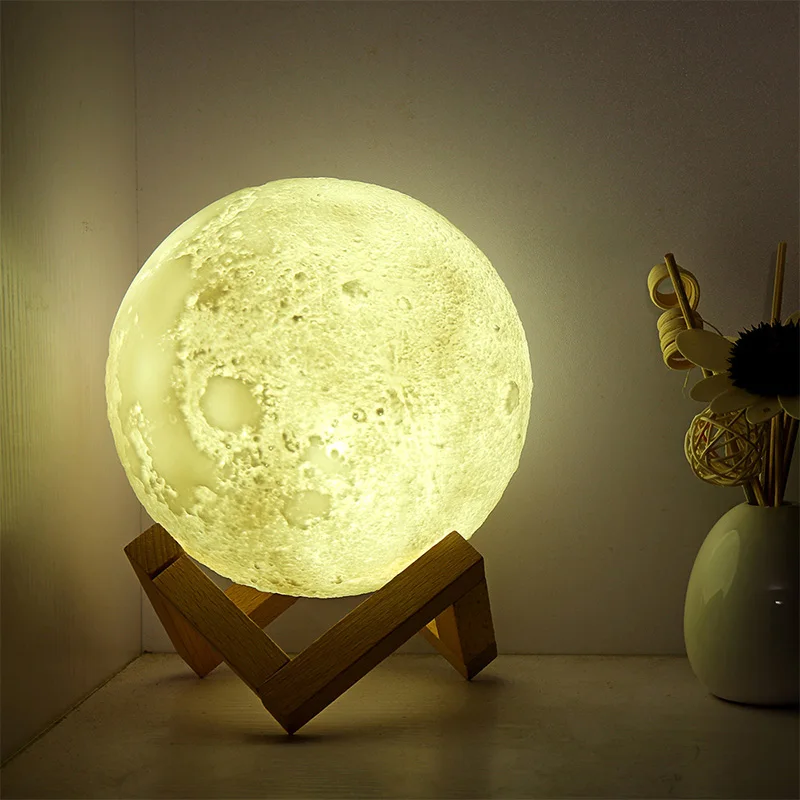
How to create your own Moon / Sudo Null IT News
This article shows you how to make a 3D model of the Moon from scratch. It would seem, Why create a model of the Moon yourself, if you can buy it? If only because when you make a model of the Moon yourself, you can set the desired parameters, for example, the dimensions and thickness of the shell, image resolution, rotation limits, the position of the cutting plane, you can make a hole for the lamp, and so on. Let us proceed to the creation of our own moon.
A variety of 3D models of the Moon can be found on the Internet. Some can be purchased from online stores, others can be downloaded as files and printed on a 3D printer. Finished models can be divided into 2 categories:
-
The surface of the moon is drawn in detail and with high quality, but if a light source is placed in the model, its details are not highlighted from the inside.
-
Surface details are well drawn when illuminated from the inside, but without illumination they are not visible.
Step 1: Draw details
Details do not light up from the inside when a light source is placed insideDetails are drawn well when illuminated from the inside
If you do not have a 3D printer, you can buy a lamp like Moon Lamp on the Internet.
Step 2: Prepare the software
Below is a list of the software involved. After familiarizing yourself with the technique, you will be able to do the same thing as I did with ordinary tools.
Modeling Tools
Download my custom version of Banate CAD from GitHub .
Banate CAD is written in Lua, so install Lua for Windows to run scripts on Windows.
STL Editing Tools
Meshmixer
Step 3 Preparing Materials
Plastic for Printing
The images above show PLA products. Products resulting from 3D printing using different types of white PLA plastic may have different shades.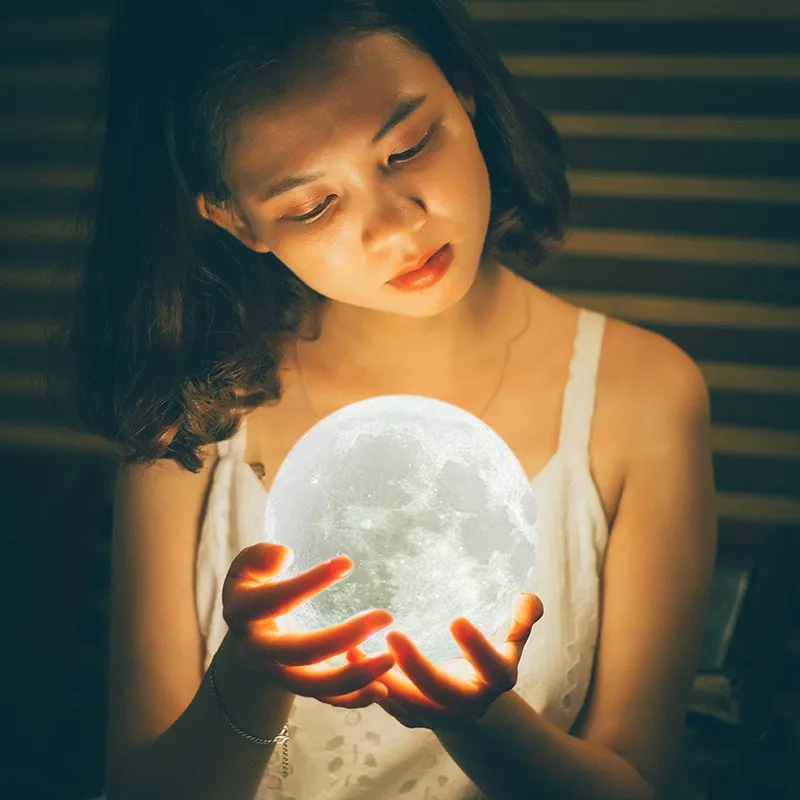 The plastic supplier claims that option B is the best, but that, alas, is stuck in my printer.
Light source
The moon model can be illuminated in different ways, the light source can be powered by batteries, mains, and so on. The size of the model also affects the choice of light source. There are a lot of options, and if we start discussing them here, we will deviate from the topic of printing. It is enough to understand that there are a lot of options. I want to note that the warm white light of the source is more pleasing to the eye.
Matte Spray Paint
Most PLA models are highly reflective, so I recommend a matte finish. Matte spray paint will easily solve the problem.
Step 4. Images of the Moon
Two images of the Moon are required for the simulation. They are located in the BanteCAD/Examples folder. I reduced the resolution to 720x360, it should be enough for the model. If necessary, search for higher resolution images online.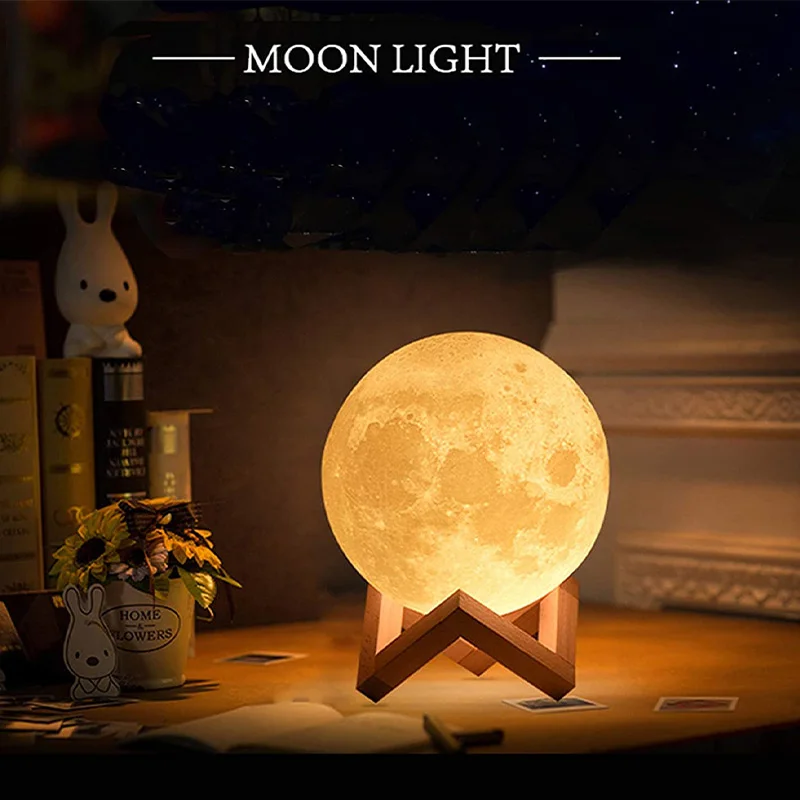
Bump map
There is a special map for surface modeling, usually called a bump map. The shade of gray indicates the height of the corresponding point on the sphere. Having a bump map, you can accurately display all the details of the surface on the model. However, if you compare the bump map with the moon in the sky, you will notice that they are different from each other.
Visual map
Details of the real moon are not only different heights at different points. Color is also important. Naturally, we can instruct the printer to print different colors, but, fortunately, we see the real moon in grayscale. To allow light to pass through the model at different intensities, you can print the model with different wall thicknesses and superimpose a grayscale image on the model. To adjust the wall thickness of the model, we need a visual map of the moon.
Post-processing
-
Lunar surface map is a regular bump map. I need to take into account the internal thickness, so using the Level function (Level) I shift the value to the right (a brighter image will be displayed on the bump map).
-
Inner map of the Moon is the shape of the inner surface of the model. From this map, we determine the thickness at each point of the surface, that is, the desired shade of gray. This map is built from a visual map, which in turn has thickness settings based on a bump map applied to it. Or, to use another calculation method, by subtracting the bump map from the inverted visual map.
Adjustable Parameters
-
If you lower the bump map level, the elevations on the surface will be smaller, and the sag will decrease, but the surface details will have to be distributed differently.
-
If you move the level of the visual map to the left, the shell will become thicker, and vice versa. In this case, it must be remembered that the level should not be shifted too far to the right. The cladding must be at least 0.4 mm thick (if a 0.4 mm extruder nozzle is used), otherwise the cladding must be manually punched.
-
The range of the light gray scale depends on the level range of the visual map.
Attached files: moon.xcf
Step 5: Control the layer thickness higher. If the shell is thinner than it is possible to print, the printer simply will not print anything, holes may even form on the surface in unexpected places. You can fix it like this.
-
Open the STL file generated by BanateCAD with Meshmixer.
-
Delete the inner surface model.
-
Run the Edit command.
-
Select the Hollow command.
-
Set thickness to 0.5mm (for extruder size 0.4mm).
-
Run the Hollow command again.
-
Accept the changes, now the thickness of the shell of the lunar surface is 0.5 mm.
-
Rotation and cutting of the plane are carried out in the same way as in the settings of the lunar shell.
-
Export the STL file.
-
Open the moon shell STL file in Microsoft 3d Builder.
-
Repair any defects.
-
Open the STL file of the lunar surface with a shell thickness of 0.5 mm.
-
Repair object defects.
-
Select the entire object.
-
Accept the changes, now the thickness of the lunar shell is 0.5 mm.
-
Export the STL file.
Step 6 Modeling - BanateCAD
BanateCAD can model a 3D shape from a bump map. In the examples folder, I posted the corresponding script. It reads a map of the surface and an internal map of the moon, and then models both shapes. The following are the steps for modeling with BanateCAD:
-
Open the BanateCAD.wlua file.
-
On the File menu, choose Open.
-
Open the file moonlamp.lua in the Examples folder.
-
Optional: change parameters.
-
From the Compile menu, choose Compile and Render.

-
After a while, the 3D model will appear.
-
From the File menu, choose Export -> Export STL.
-
Enter a name for the STL file and click the save button.
Configurable Parameters
Output sphere diameter in inches, bump map and internal map are generated from this parameter:
local outputSize = 3 -- inches
Surface height factor:
local outputSize = 3 -- inches
The resolution must not be greater than the resolution of the PNG image:
USteps = 720, WSteps = 360,
Step 7: Create a Shell – Meshmixer
Based on the shapes made in BanateCAD, we can create a shell by subtracting the surface of the inner shape from the shape.
The following describes the steps to create a wrapper with Meshmixer:
-
Open the exported STL file with Meshmixer.
-
Wait for the download to complete.
-
Select both models in the Object Browser.
-
On the left toolbar, select Edit, then select Boolean Difference.
-
Wait for the calculation to complete.
-
Select Accept.
-
Wait for the calculation to complete.
-
Leave one model in the Object Browser, this will be the lunar shell.
-
Save the file.
Step 8. Modify and output the model - Meshmixer
Before 3D printing, you can configure any parameters. The options are:
-
If you want to put a model of the moon on your desktop, I suggest that the z-axis rotates from -45 to -60 degrees, so the moon will be directed towards you in its usual direction.
-
If you want to hang the moon model from the ceiling, I suggest that the z-axis rotate 120 to 135 degrees for the same reason as above.
-
If you want to install a backlight inside, do not forget to make a hole for the wire (if you have difficulty printing a hole on a 3D printer, you can, like me, just drill a hole after printing with a drill.
-
90% percent The cutaway moons are flat, so you can hide the seams and print it easily without sagging.0003
When finished, export the STL file for printing.
Step 9: 3D Print
Open the object in the 3D Slicer, make sure there are no holes in the shell, and start printing.
If the moon needs to be perfect, you can skip the previous step with cutting the plane and turn on the support option. But, in my opinion, removing the remnants of the caliper is quite difficult.
If the previous step was difficult for you and you could not print the STL file, use my file.
Assemble the top, light source and bottom together.
Step 10: Coating the Surface with Matte Paint
Most PLA 3D prints are highly reflective, so I recommend coating the resulting surface with Matte Paint. Now I'm trying to print a larger diameter moon lamp - 110mm, which is the largest size that can be printed with the Robo C2 printer. One printout will take tens of hours.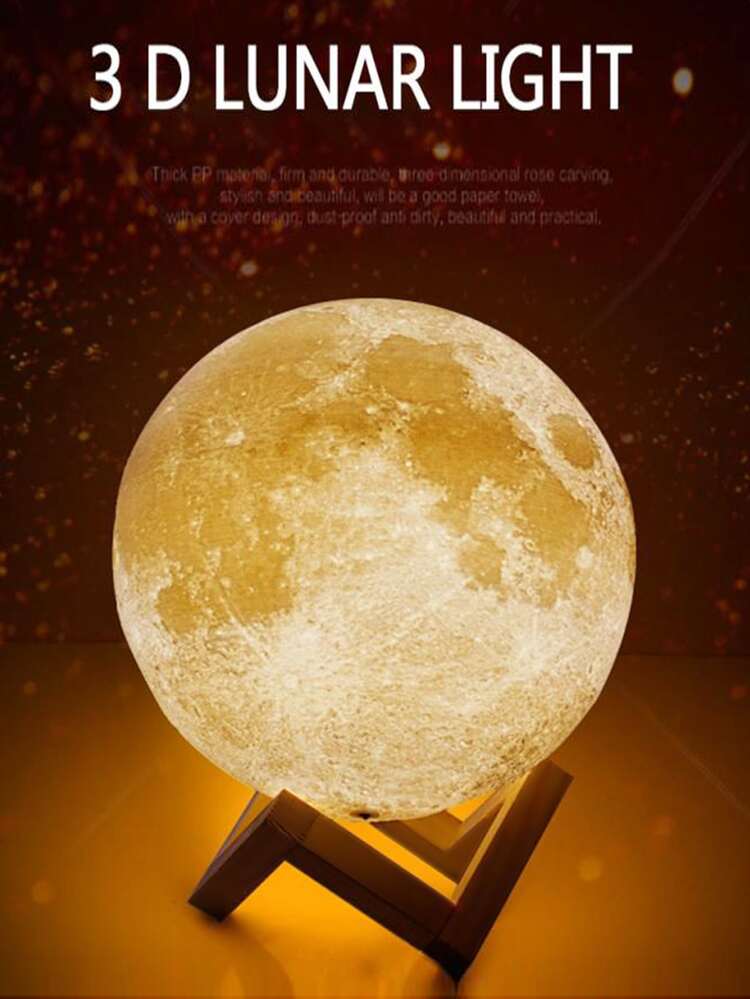 I want a moon with these parameters:
local r = 52 local h = 3
Final!
You did it! Now you can brag to the familiar results of your work or just give the finished model to your friends!
Learn how to pump in other specialties or master them from scratch:
-
Profession Data Scientist
-
Profession Data Analyst
-
Course on Data Engineering
Data Analytics Course
DevOps Course
10cm / 3.94" 3D Print Star Moon Lamp
10cm / 3.94" 3D Print Star Moon Lamp- Smart Life
- Smart home system
-
Description
-
Delivery and payment
-
Warranty
-
Q&A
-
Bulk request
Features:
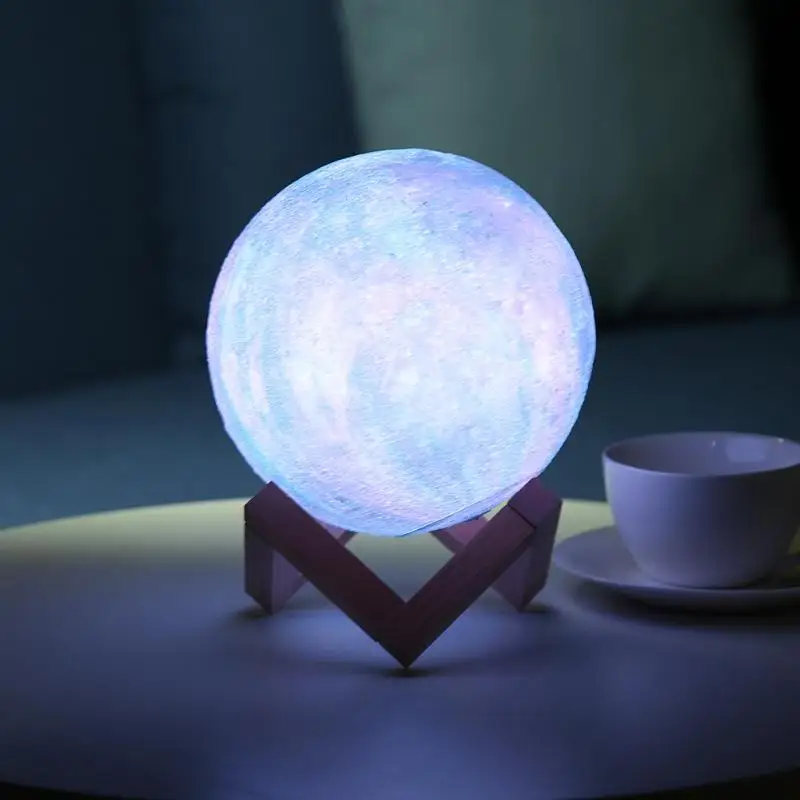
Technology 3D printing technology light Star moonlight, special craft on the surface, printing layer by layer, its perfect 3D printing technology effect restore the real look of the moon.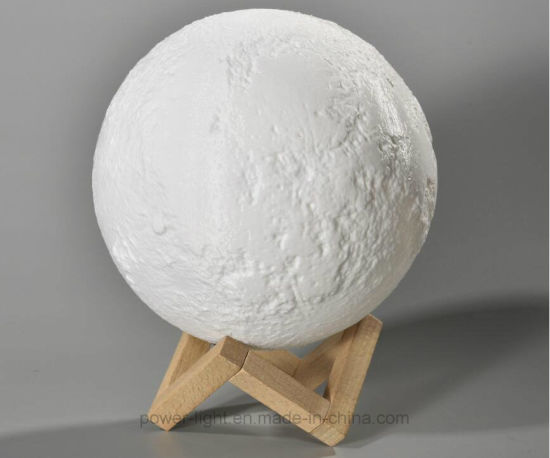 The colorful craft pattern makes the ball colorful and gorgeous, as long as it lights up like a star, it brings you good luck and happiness.
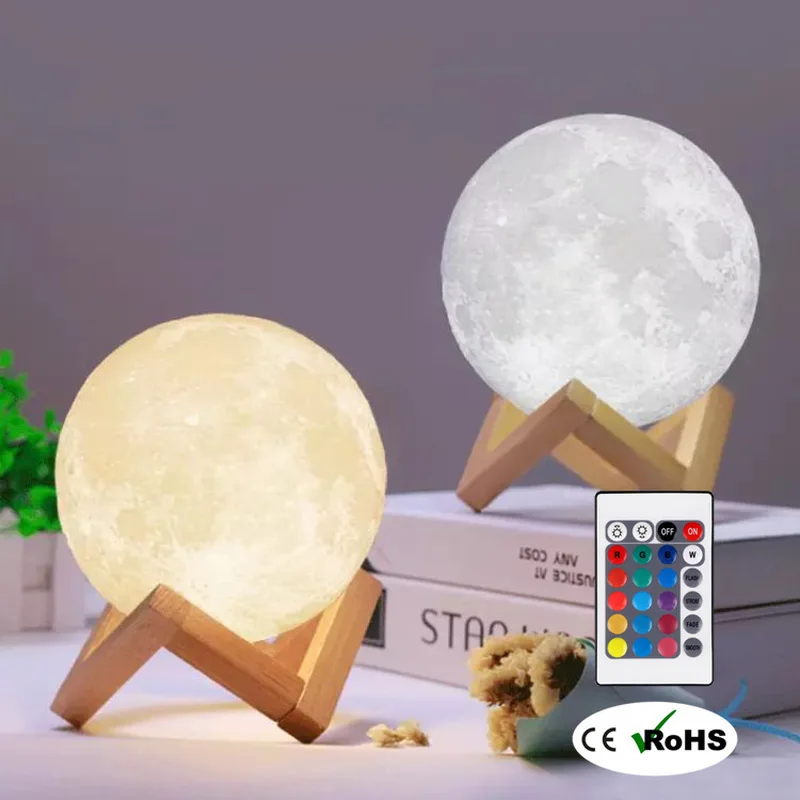
【16 Color RGB Remote Control】 The 3D printed star moon lamp offers an impressively wide 360 degree viewing angle. Easy and simple to operate with touch switch, on/off/changing 7 colors. The remote control turns the lamp on and off / changes 16 colors / brightness / 4 modes (flash / strobe / fade / smooth).
【Long use time】 Built-in 300mAh battery, charging time is about 2 hours, can be used for 6-8 hours. With USB cable, can be charged by computer, charger, USB charger, etc.
【Nice gift and decorative lamp】 Colorful 3D starry sky effect gives people unlimited imagination for the universe or distant galaxies. A great gift for kids and adult friends, perfect decorations for dinner table, parties, cafes, bedrooms to create a charming atmosphere. It can also create the perfect sleeping environment for your baby and families.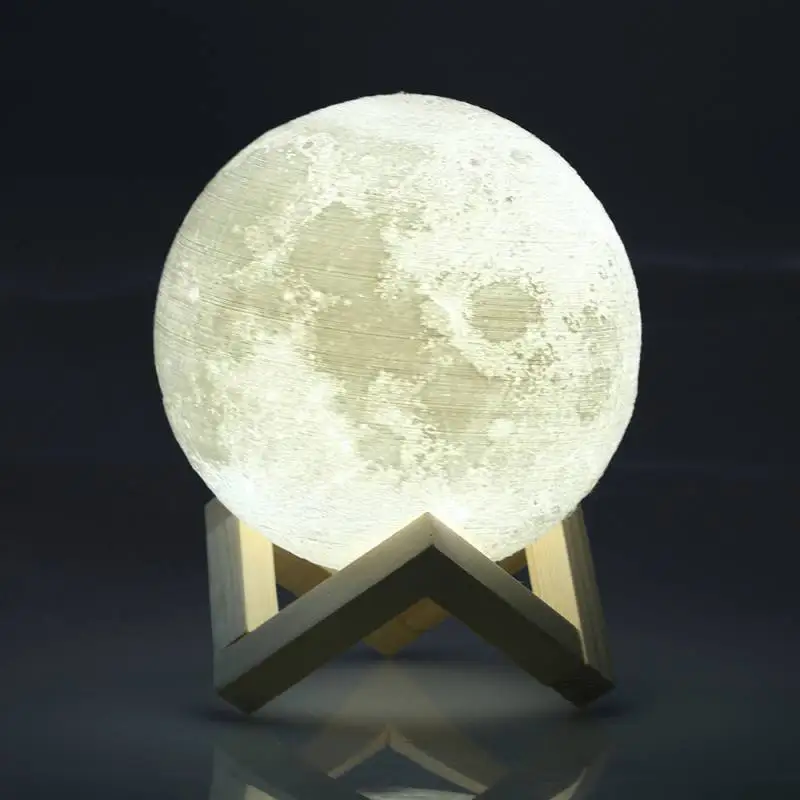 The soft light will not hurt your eyes.
【Safe and environmentally friendly】 PLA material extracted from corn stalks, hard and smooth, non-toxic, odorless, environmentally friendly. 6 moonlight diameters to choose from: 8cm/3.15in, 10cm/3.94 inches, 13 cm/5.12 inches, 15 cm/5.9 inches, 18 cm/7.1 inches, 20 cm/7.9 inches.
Specifications:
Name: 3D printing touch/remote control star moon light
Model type: sea stream nebula
Beam angle: 360°
Light source: LED
Lamp type: 5050RGB mix color SMD lamp
Number of lamp beads : 3
Control mode: touch switch / remote control
Switch type: touch the intelligent touch switch at the bottom to change colors
Color temperature: 4000K
Charging interface: DC2.5
Battery: 300 mAh 602030 lithium battery (built-in)
Input voltage: 3.7V
Power: 1.85W
Charging time: 2 hours
Working time: 6-8 hours (depending on brightness)
Materials: PLA plastic
Remote control battery: 1 * CR2025 (included)
Moon diameter: 8cm/3.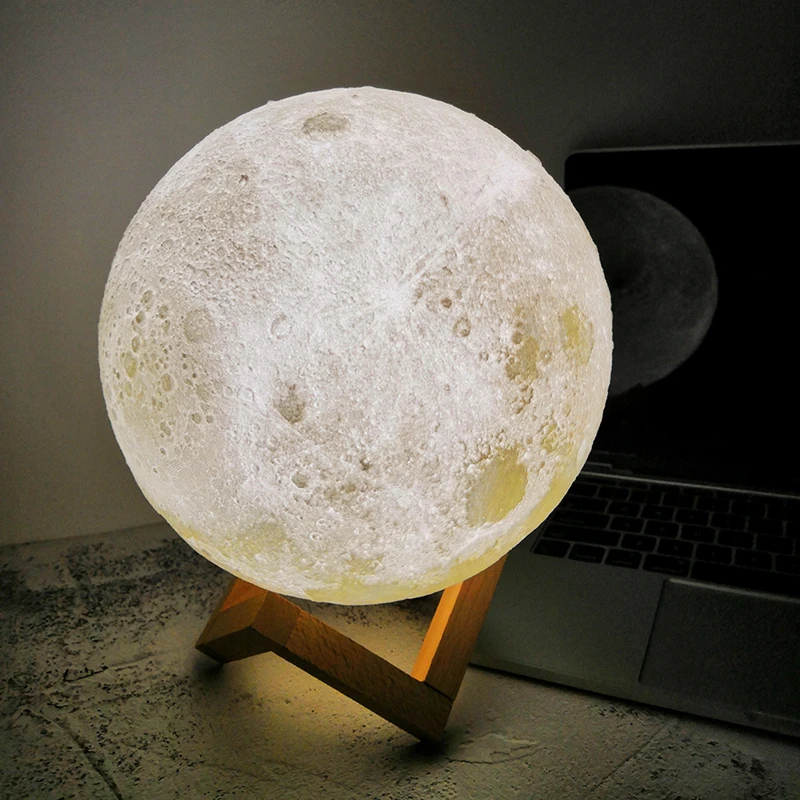 15in, 10cm/3.94in, 13cm/5.12 15 cm / 5.9 inch, 18 cm / 7.1 inch, 20 cm / 7.9 inch optional
Operations:
1. Touch the metal dot at the bottom of the moon lamp to turn on/off the light and change 7 colors.
2. You can also use the remote control to change the 16 colors and adjust the brightness.
3. If your hand is too dry or the temperature is too cold, the light may not work.
4. Plug the DC plug into the DC2.5 charging port at the bottom of the moon lamp to charge, the blue light is always on while charging.
5. The blue light will turn off when fully charged.
Package Information:
Package Size: Approx. 10.5 * 9 * 9cm / 4.1 * 3.5 * 3.5in
Package Weight: Approx. 160g / 5.6 oz
Package List:
1 * 8cm 3D Star Moon Lamp
1 * Remote Control
1 * Wood Mount Set
1 * USB Charging Cable
1 * Rope Gift Box Set
1 * User Manual (English)
Customer reviews
No reviews yet.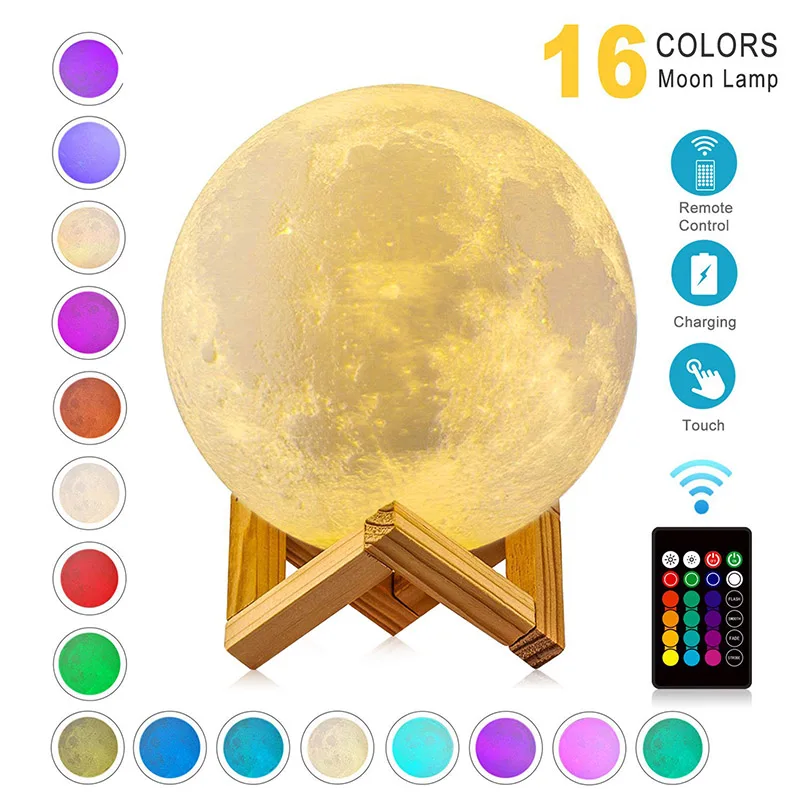
- 5 stars
- 4 stars
- 3 stars
- 2 stars
- 1 stars
Share your thoughts with other customers and get Cafago points, the first 5 reviews get x2 Cafago points!
Write a review
Be the first to review this product
Best Products More
- 51 GOGOBEST GF600 Electric Bike 40V 1000W Max Speed 40km/h
Learn more