3D printer glass bed warped
bed leveling - Will a glass bed warp as it is heated?
Ask Question
Asked
Modified 3 years, 3 months ago
Viewed 16k times
$\begingroup$
I purchased a glass bed to use with my still-in-transit Ender 3. Since the bed came in before the printer, I pulled it out and used a flat edge ruler to see how flat the glass surface is.
It appears the glass is slightly "dished" in the center from one side and "raised" in the center on the other side. I am wondering if this is a sign of a defective glass, or if it is likely that the glass may change shape slightly as it is heated?
If it does change shape, should it be put with the dish side up or down?
Logic would say that if it does change shape, the bottom would probably get hotter since it is against the heater while the top is slightly cooler, so in theory the bottom may expand more "pulling" the center down?
I guess the bottom line is, should I send the glass back as defective or wait until the printer arrives and see what happens when I heat it up?
- heated-bed
- bed-leveling
- glass-bed
$\endgroup$
1
$\begingroup$
Glass will not change its shape you can watch this interesting video: YouTube - Fix Your Bowed Glass Build Surface - CR-10 3D Printer .
Or simply change your glass.
$\endgroup$
2
$\begingroup$
TL;DR
Yes, glass warps when hot. Use a physical touch sensor and calibrate it out, or swap glass if it's "bad".
The further you go into mechanical studies like 3d printing, mills, and lathes, you will find out that nothing is perfectly flat. Everything has a tolerance to it, whether the manufacturer provided it or not. Better manufacturers provide the tolerance data.
As you have or will find out, yes, glass does warp when heated. That is because you are not warming the glass evenly. When hot and cold spots form in glass, the glass tends to warp up or down, depending how the heat travels.
It's common for 0.01 mm warp when a glass bed is brought to printing temps (60-100 °C). If one has a larger format bed, like my Vulcanus at 500x500, 0.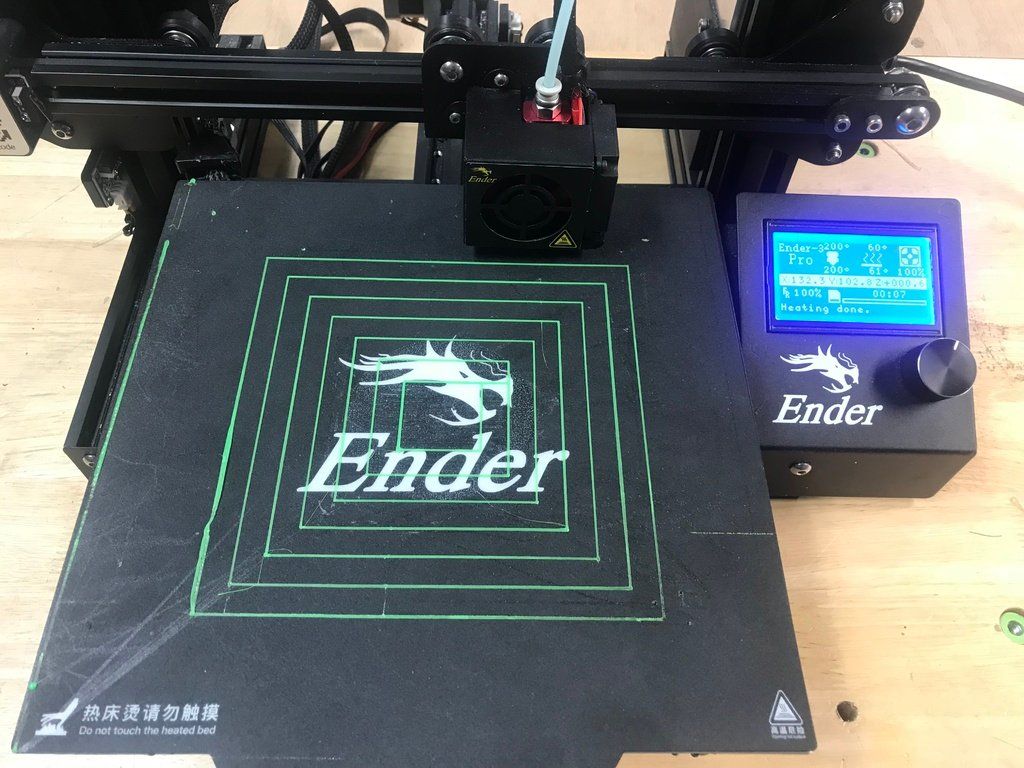 03 mm changes are possible.
One can remediate this warping, as it usually appears in the same place during the heat cycle. So if you calibrate after the bed is heated, you should reduce said errors. Another more comprehensive way to fix this, is with a physical touch sensor and create a grid map of the bed geometry.
$\endgroup$
1
$\begingroup$
Yes, glass will warp. Think about it this way: the edges cannot be as hot as the centre if you use uniform heating, because they lose heat more quickly.
If the edges are colder, they are also shorter than the hotter centre, which expands more.
If the centre is longer than the edges, it will bend to accommodate the extra length.
You can solve it by placing extra heating along the edges. Once you heat the edges more than the centre, the edges will pull apart the centre, which will result in a flat centre.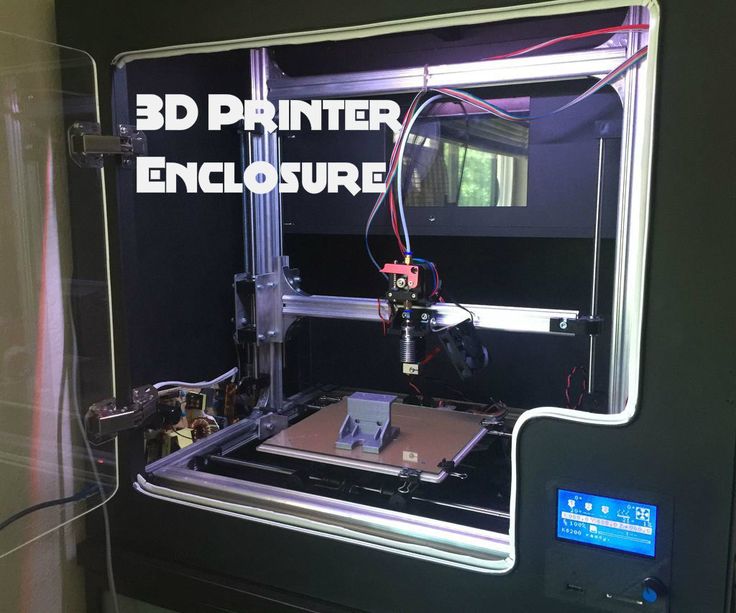 However, the edges will deform as well, you need just a bit of stretch of the centre, but not so much that it pulls the edges back.
$\endgroup$
Learn How to Fix Your Warped 3D Printer Bed – 3D Printerly
Over time, your 3D printer bed can start to warp and bend, resulting in a product that doesn’t work in your favor. A warped 3D printer bed is something that can cause issues and decrease print quality so I decided to look around at the best solutions and put them together in this post.
So how do you fixed a warped 3D printer bed? To fix a warped 3D printer bed you can add an additional glass bed surface on top, add layers of tape or other materials to even out bed levels, tighten and loosen levelling knobs to even out your printer’s surface, use an automated levelling system, or sand down your printer’s bed.
These are the basic fixes but there is more detail within these that you should know before you make a decision on which method you’ll use to fix your warped bed. Keep on reading to find out how you should get it done and some answers as to why it happens in the first place.
If you are interested in seeing some of the best tools and accessories for your 3D printers, you can find them easily by clicking here (Amazon).
Methods to Fix Your Warped Print Bed Issue
Use an Additional Surface on Your Printer
There are a few options you can take when fixing the issue of a warped bed. One of them is using an additional surface on top of your current bed. A good material to go with that works for many people is a glass build surface.
A good glass bed that many users have success with is borosilicate glass. Simply put, it’s a flat, heat-resistant plate which doesn’t warp with long term use.
Now what this product will do for you is ensure that heat is evenly distributed throughout your build surface, make parts easy to separate from the bed when cooling, be resistant to scratches and thermal shock, reduces warping in prints and much more.
Borosilicate glass for the following printers (Amazon links):
- Creality Ender 3/X,Ender 3 Pro, Ender 5, CR- 20, CR-20 Pro, Geeetech A10 – 235 x 235 x 4mm
- Creality CR-10, CR-10S, CRX, Ultimaker S3, Tevo Tornado – 310 x 310 x 3mm (thickness)
- Monoprice Select Mini V1, V2 – 130 x 160 x 3mm
- Prusa i3 MK2, MK3, Anet A8 – 220 x 220 x 4mm
- Monoprice Mini Delta – 120mm round x 3mm
The Ender 3 V2 (Amazon) is a 3D printer that comes with a carborundum glass bed which is mostly immune to warping, and has good adhesion for your 3D prints. You can also get the Ender 3 V2 from BangGood for cheaper!
Many people use tape and other things to get their prints to stick down. With this printer surface, a lot of that isn’t needed depending on what material you are printing with.
If you do have trouble with prints sticking down a bit of hairspray or glue stick usually does the trick with a coat or two.
Simply order the glass surface and clip it into place. You can use the glass at a nice 60°C and you’ll need to adjust the Z-axis limit switch and up and down when installing.
You can also go with PEI or similar types of build mats that are quite thin so you won’t lose much of your build height. A great product that has raving reviews on Amazon is the Gizmo Dork PEI Sheet.
Not only is it made in the USA, it has a very quick install process with bubble-free application. It’s a perfect build surface to reuse for a countless number of prints and it doesn’t need those additional adhesives like tape or glue!
After you let the PEI sheet cool, parts are easy to remove and a quick cleaning with isopropyl alcohol works great.
Using a thick surface on top of your current bed surface will take away from your already limited height to build with so it’s not an ideal choice.
You’ll find it impossible to precisely calibrate your print bed if your heated bed underneath is uneven enough. For example, if the four corners of your heated bed is higher than the sides it is a clear issue.
Some people have flattened the corners of their heated bed by using cable ties to pull them down. It’s not the best solution but it will give you better results than not doing anything.
Level Your Bed Then Use an Automatic Levelling System
Some bigger instances of warping can be solved by levelling the bed as good as you can, then using an automatic levelling system which incorporates the levels it measured into its movements.
The best choice for an automatic levelling system is hands-down, the BL-Touch (Amazon) which works extremely well to balance out any imperfections and uneven levels on your printer bed.
The video below shows the magic of the BL-Touch and it’s ability to compensate for an uneven bed using measurements and a proximity sensor so it can constantly adjust the Z-rod.
So basically if the measurement in one corner was 0. 15mm below another corner, then your print head will be adjusted by 0.15mm to match the proper level.
These can be called bed auto-compensation which is a proximity probe which measures several points of your print bed.
Although it is a fix to keep on getting good prints, it’s more so a quick-fix rather than actually solving the initial problem. If your bed surface warps enough, your printer might start to reveal these issues after some time.
Even after you calibrate and level your bed it will still be uneven and warped so instead of auto-levelling your bed is to manually solve the issue. Here’s an article that details adding bed-levelling hardware to a Printrbot SimpleMetal. It isn’t too difficult to do and requires washers, screws and other tools.
Using Levelling Knobs to Flatten the Printer Bed
When you have a print bed that has one side higher than the other, there is something you can do if you have levelling knobs. You would want to tighten the knobs on the side which is higher up, then loosen the knobs on the side which is lower.
What this will do is rotate the entire bed clockwise slightly and evens out both sides of the bed while making it lower in the middle.
This method works because it decreases the effect of the warping where it is worse, to a good enough point where you can get decent prints around the entirety of the print bed.
Having a warped bed can cause issues with bed adhesion, even when the bed is levelled so this kind of adjustment works quite well, in addition to re-setting your Z-stop.
Balance The Bed Level With Other Materials
When your bed is at a stage where it’s warping enough to translate through to the surface above, you can actually add layers of tape to balance it out. A good recommendation here is to use foil tape because it has good heat transfer properties.
Sometimes a glass bed can be low in the center, but this is usually because the aluminum plate below is not flat. Some users have the opposite issue with the 3D printer bed higher in the middle,
There is an issue that can arise when you add an extra surface to your printer, which is your surfaces heating up unevenly because the top layer won’t be touching the heated bed underneath.
This means where it touches will be warm and where it doesn’t touch will be cooler.
Some people have solved this issue by using a shim, otherwise known as a spacer, which simply is a thin, sometimes tapered or wedge material to fill small gaps or space between objects.
Their main functional uses are to support, adjust for a better fit, or provide a level surface. The good thing is you can pick them up pretty cheap.
If the bed warping is bad enough to transfer through to the mirror (or the mat) you may have to add a few layers of tape (preferably foil tape to better transfer heat).
The bow in the middle of the bed I use most frequently had enough of a bow that adding shims in the center of the bed was the only way to get it level and true without changing out the bed entirely.
You can even use sticky notes under the bed in the right areas to build a higher surface to account for the warped surface.
Sand Your Printer Bed
The user in the video above went through a pretty long process of sanding the actual bed itself and getting it to a point where it’s much more levelled.
He went from having 0.3mm height differences (highest to lowest point) in the bed down to 0.03mm after all the sanding and what not.
It took him 8 hours which is a very long time for this process, but it worked very well in the end. What you could do to cut that time down is go to a machine shop that offer a Blanchard grinding service.
They would be able to do a task like these in just minutes as they have some pretty useful equipment to handle such materials.
After the print bed is level, he got a lot more confidence in his ability to print larger objects for a longer print time so he benefited quite a bit from this process. It’s worth it in the long run to make sure your print bed is adequately levelled and not warped.
Another user done something very similar, outlined in this post and went from a 0.3mm deviation to a 0.08mm deviation which is a difference that your printer will appreciate, rewarding you with better prints.
Rather than the sanding, some people flip their bed surface, heat the bed then apply pressure on the deflected part.
Replace Your Print Bed Altogether
You’ve tried absolutely everything and prints are just failing left, right and center. We both know it’s time for a replacement print bed altogether because your print bed has just gone past the point of saving which isn’t too big of an issue.
As long as you can determine it, it’s a good step in the right direction to get this issue solved.
It’s not the ideal thing to have to do but in many cases it will save you the frustration and hassle of having to worry about things going sideways again. Here though, you want to make sure you get a print bed of quality for your 3D printer.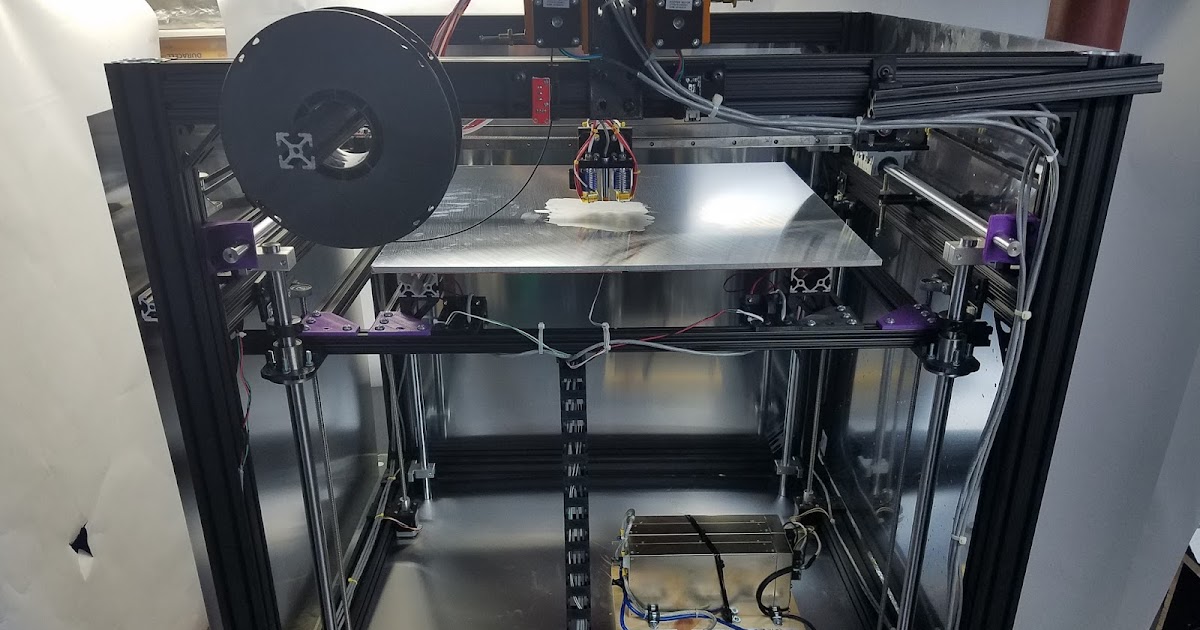
Treat your printer right and you’ll get great prints in return!
You should be able to get something like the Creality Replacement Heated Bed Platform for your 3D printer from Amazon. It comes with the aluminum plate too which should be nice and flat.
How Do I Know if my 3D Print Bed is Warped?
Warping on a print surface for the most part, isn’t very obvious but when it’s measured correctly it will show the significant imbalance that it has.
When you think about your usual layer height of a print, if your bed is warped in comparison to that layer height, it can easily negatively effect your print, and in many cases stop it from sticking down properly.
Warping usually has a height difference of 0.1mm up to 0.5mm which, if looking at it in layer height amounts to 5 layers of a print. Once you identify this you’ll know where you stand.
To check or tell if your bed is warped you can use a strategy of inputting G-Code to instruct your printer to check each point of your print bed in a visual interface. You can find that G-Code script here.
It’s displayed clearly in the video above around 40 seconds in. Once you incorporate this printer bed inspector utility, you can hit a ‘measure every’ button to automatically measure several points on your printer and you can even adjust the spacing.
Conclusion
Once you’ve followed through with the solutions, you should be back up and running again with some amazing prints that you can be proud of. Skip out on the frustrations and not knowing how your prints will turn out.
The difference between a successful 3D printer user and an average one are these small types of fixes that build up to make a consistently high producing machine.
If you want to read some other cool posts check out my post on the 25 Best 3D Printer Upgrades or my Brass vs Stainless Steel vs Hardened Steel Nozzle comparison post.
If you love great quality 3D prints, you’ll love the AMX3d Pro Grade 3D Printer Tool Kit from Amazon. It is a staple set of 3D printing tools that gives you everything you need to remove, clean & finish your 3D prints.
It gives you the ability to:
- Easily clean your 3D prints – 25-piece kit with 13 knife blades and 3 handles, long tweezers, needle nose pliers, and glue stick.
- Simply remove 3D prints – stop damaging your 3D prints by using one of the 3 specialized removal tools.
- Perfectly finish your 3D prints – the 3-piece, 6-tool precision scraper/pick/knife blade combo can get into small crevices to get a great finish.
- Become a 3D printing pro!
For people struggling with various 3D printing issues, you might want have wanted more guidance towards getting ideal 3D printing results. I created a full course that's available to purchase called Filament Printing 101: Beginner's Guide to Filament Printing that takes you through some of the best 3D printing practices early on, so you can avoid those beginner mistakes.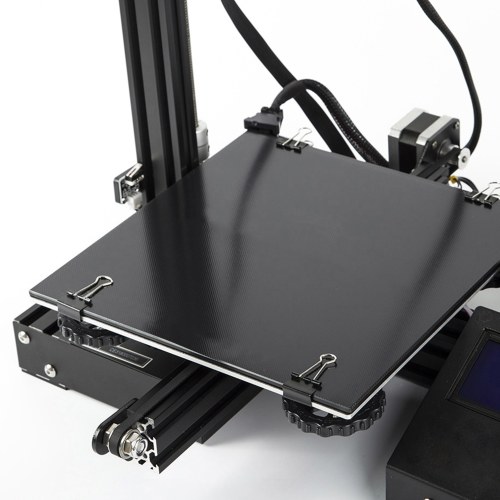
everything you need to know
Many 3D printer owners experience parts coming off the table during 3D printing. Let's take a look at the causes and solutions.
What is adhesion?
The very concept of "adhesion" means the adhesion of surfaces of dissimilar bodies. In 3D printing, platform adhesion is the ability of the plastic that a part is made of to adhere to the surface of the stage during printing.
If the adhesion is insufficient, then the manufactured parts may be deformed or even come off the table. During 3D printing, the part must be firmly attached to the platform, and after completion, it should be easy to remove. Filament manufacturers typically recommend adhesives for their filaments, and 3D printer manufacturers offer worktables in aluminium, glass, stainless steel, or even with specialty coatings. All this helps the plastics stick better during printing, but there are no working surfaces that are equally well suited for all types of plastics.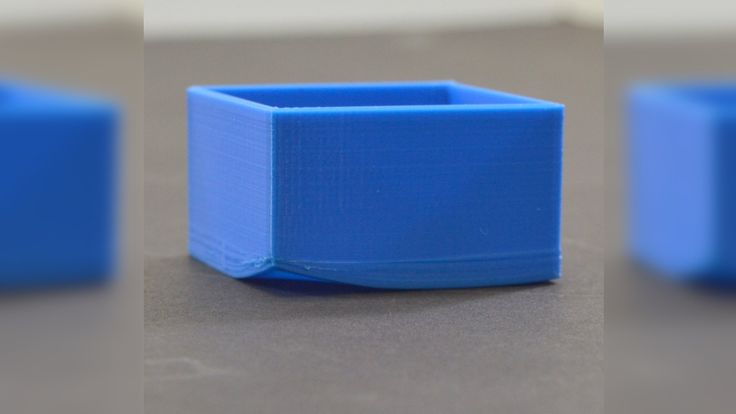
Also, do not forget about thermal expansion, which causes a change in the dimensions of manufactured parts at different temperatures. The difference in temperature between the bottom and top of a part can cause the edges of the part to peel off during 3D printing. This mainly applies to materials such as ABS, which require a heated worktable to work with. When printing with these materials, the layers need to cool down a bit to be able to build a 3D object at all, but not so much as to cause peeling at the edges.
In this article we will look at what affects adhesion and how to solve many problems in terms of adhesion of products to work surfaces.
3D Printer Enclosed Chamber
For printing on materials with high heat shrinkage, the best option is to use 3D printers with an enclosed chamber that prevents drafts and retains heat. Many printers are equipped with an active chamber heater that maintains the desired temperature and does not allow the parts to cool. A uniform background temperature during 3D printing reduces warping and ensures better adhesion.
Owners of open printers are left to come up with various devices (for example, boxes) that cover the 3D printer to keep heat, or build heat-retaining walls around the printed model, which increases printing time and filament consumption.
First coat adhesion
The first thing you should pay attention to is the adhesion of the first layer. This is one of the most common problems faced by almost all printers. If the first layer is laid unevenly, then the percentage of rejects for the rest of the part increases very much, so it is very important to solve the issue of adhesion of the first layer before 3D printing. In most cases, the problem is solved by calibrating the work table and adjusting the distance between the nozzle and the work surface.
It is important to correctly set the distance between the nozzle and the stage surface
Brim and Raft methods
For better adhesion of the product to the working surface of the table, in the print settings it is often necessary to create additional elements - the substrate or the frame of the model, which help to keep the manufactured part on the table. Brim or Raft increase the contact surface of the plastic with the work surface around the lower layers and thereby increase traction.
Underlays or Rafts consist of several layers and are horizontal grids of filament located under the model. The raft is used as a base for the first layers of the product and is designed to increase the level of adhesion. In addition, the raft helps to level the surface of the table: if there are irregularities on the surface, they are leveled to a certain extent by the substrate, and the model is printed already on a flat base. Another advantage of rafting is that it reduces the chance of problems due to too much or too little gap between the nozzle and the table when laying the first layer.
Brim is used to stabilize small patterns or "islands" (separated areas of the printed product). Brims increase the contact area and help the model stay on the table if it comes into contact with the surface in small areas.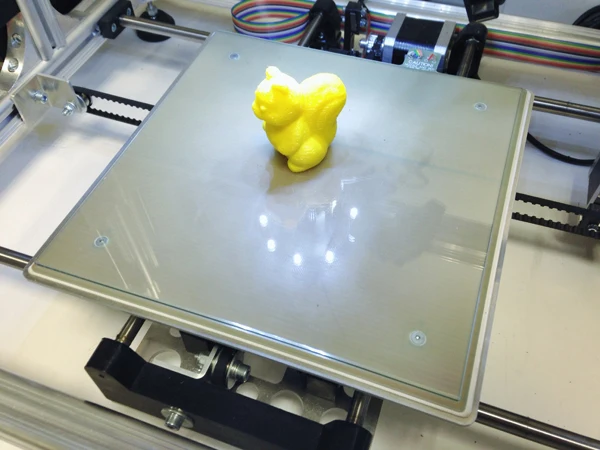
Worktable temperature and adhesion promoters
After calibrating the platform and adjusting the gap between the nozzle and the surface of the table, let's move on to the next question. The next reasons for poor adhesion may be the wrong stage temperature (if the 3D printer has a heating option) and the wrong selection of adhesion promoters for a particular filament.
Working stage temperature selection
One of the common causes of poor adhesion is the wrong stage temperature selection for a particular material. When the molten filament is applied to the table and then cools, deformation occurs. If the temperature of the stage is incorrectly selected, the outer edges of the printed product are compressed, and we get warpage: the edge of the product comes off, clings to the nozzle, and the product completely comes off the platform.
Usually, 3D printing filament manufacturers list the recommended heating temperature for the stage on their website or boxes. For the most common materials, you can use average values.
Examples of worktable temperatures for some materials:
- PLA: 60°C
- ABS: 100-110°C
- PETG: 85°C
- Nylon: 100°C (depending on material composition) )
- Polycarbonate: 110°C (the higher the temperature, the better)
Worktable temperatures for each manufacturer's plastic may vary. You can choose the optimal temperature only empirically.
Adhesion agents
To increase adhesive properties and reduce the risk of damage to the glass surface of the desktop, additional agents are often used, such as varnish or glue for 3D printing, PVA glue, stationery glue stick, dissolved ABS plastic (so-called "ABS juice" ), blue tape, etc. One tool for printing all types of plastics will not be enough. In our article, we will not consider such folk remedies as beer or sugar syrup, but will focus on more traditional methods.
Basic adhesives:
Varnish or adhesive for 3D printing
The days of hair sprays are long gone, and now almost no one uses them due to low efficiency. More effective adhesives for 3D printing have come to replace.
Typically, 3D printing lacquers and adhesives are formulated to take into account the properties of different filaments and allow the first layer of the printed model to be reliably adhered to the worktable. Simply put, these are universal tools suitable for working with multiple types of filaments.
There are already quite a few manufacturers of 3D printing varnishes and adhesives on the market in various volumes and for any budget. It's not worth saving - one bottle will be enough for several months of printing, and you will save your nerves and time spent on reprinting damaged parts.
Easy to use: spray varnish or glue on the platform and spread it evenly over the surface with a clean, soft cloth.
ABS juice
Composition for those who like to save money or who do not have glue or varnish on hand. It is made simply: finely chopped ABS rod or the remnants of a previous printing with ABS plastic are immersed in acetone and after a few hours a thick solution is obtained that can be applied with a brush even on a cold platform.
This method is very reliable as an additional adhesive, but acetone evaporates during 3D printing and creates an unpleasant odor.
PVA glue, stationery glue stick
PVA glue is applied to the work surface with a brush and rubbed until a uniform thin layer is obtained. As a rule, when hardening, the glue becomes transparent. After drying, you can start 3D printing. The method is not bad, but the reliability of such a method is doubtful due to the fact that not all PVAs work well.
Stationery glue stick is mainly used when there is nothing else at hand. The most popular option is Kalyaka-Malyaka glue. The glue is applied in one layer, after the platform cools down, the part is easily separated, and the glue itself is easily washed off the glass and from the printed part.
Kapton film, blue masking tape and Lomond film
Masking tape is more suitable for 3D printers without platform heating. The adhesive tape is carefully glued to the entire area of the table and allows you to print small details without heating the table.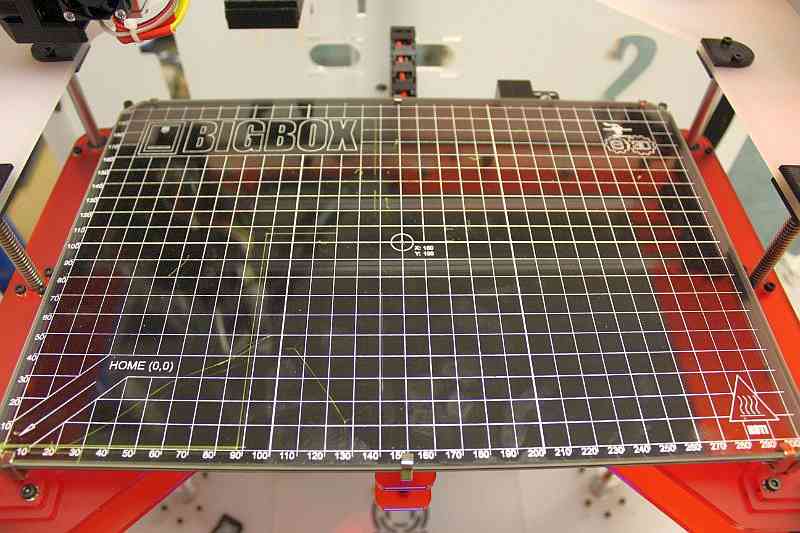 This option is especially suitable when working with PLA plastic, however, with an increase in the area of \u200b\u200bproducts, the edges of the parts can come off along with the adhesive tape, so the relevance of this method is limited. Kapton tape or Lomond film is more commonly used.
On Kapton tape, the lower surface (the sole of the product) is very smooth, the parts are well separated after cooling, but you can’t leave the product on the cooled table, as the plastic pulls the tape together, and air bubbles form under it. When 3D printing on Kapton tape, it is necessary to heat the platform and additionally smear the adhesive tape with glue. Suitable for 3D printing of medium-sized products.
Lomond film was popular until various adhesives appeared. After gluing, the top layer on the film itself must be washed off for better adhesion. Details after printing on such a film are quite difficult to tear off. Over time, bubbles also form under the film, so the film must be changed regularly. Suitable for 3D printing large items.
Additional Points to Remember
PLA is the least demanding polymer. For stable printing with polylactide, it is not necessary to treat the surface of the table with additional adhesives, a clean glass surface is sufficient. A prerequisite is that the platform is heated to 60°C. If the platform is not heated, then it is better to print using adhesive agents - varnish, 3D printing glue or blue tape for small parts.
PLA also loves airflow, so keep the fans on full.
ABS is highly shrinkable and needs help to better adhere to the surface. The main types of additional tools are varnish or glue for 3D printing, ABS glue, stationery glue stick, PVA glue.
When working with ABS, the platform must be heated to 100-110°C. It is advisable to use 3D printers with closed cameras that support high background temperatures. When 3D printing on open printers, it is necessary to use a heat-retaining cocoon around the model.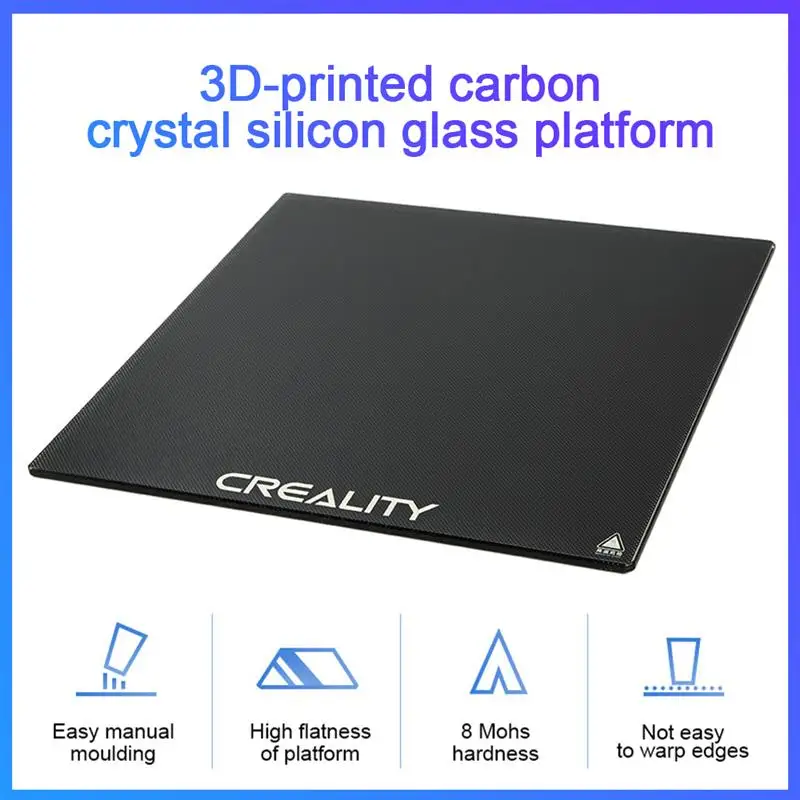 Many slicers already offer this feature. Blowing of products made of ABS plastic is highly undesirable, as cracking of parts in layers and detachment from the working surface due to shrinkage can occur.
PETG is a very easy to work material that does not require high temperatures or fine print settings. Plastic has excellent adhesive properties and adheres very strongly to clean surfaces. On the other hand, high adhesion can lead to separation of pieces from glass tables when products are separated, so it is advisable to apply separating layers on the work surface - the same glue or varnish for 3D printing. This will help both separate products and prevent damage to the glass.
Flex has high adhesive properties, bonding well not only between coats, but also to work surfaces. Again, it is advisable to use 3D printing varnish or glue to avoid damaging the glass. Film coatings are not recommended.
In the case of composite materials , the choice of adhesive agents is mainly determined by the type of material serving as the basis. Usually recommendations for preparing for 3D printing with composites can be found on the manufacturer's website. If not, please contact technical support for advice.
For example, the FormaX composite from the X-line range is based on ABS plastic, but the properties of the composite material differ from pure ABS due to the presence of carbon fiber filler. Formax is not characterized by cracking in layers, but the composite requires the use of additional adhesive agents, so the manufacturer recommends using varnish or glue for 3D printing
Material storage and drying
The effect of moisture on filaments can be both cosmetic and functional. The most innocuous result of high humidity is a change in the textures of 3D printed products, although this is rarely limited to roughness alone (and haze when it comes to transparent plastics) and is usually accompanied by a decrease in interlayer adhesion and adhesion to the substrate. A more serious effect can be an uneven supply of plastic: water in a sufficiently wet filament boils when passing through the hot end, and the resulting steam leads to the appearance of bubbles in the material being laid and even to jerky extrusion with all the ensuing consequences in terms of quality and poor adhesion. Detailed instructions for storing plastics are available at this link, and for drying plastics - here.
That's all for now.
The Wiki on our site has separate, detailed articles about each of the filaments. How to print and with what settings. Come read here.
If you have additions or comments - we are waiting for your answers.
Regards, REC3D team.
Photos from the blogs of Sergey and akdzg are published in the article.
A brief excursion into 3D printing methods / Sudo Null IT News
My previous related posts:
First 3D printing event in the Netherlands
3D printing event (end)
New budget 3D printer
To answer frequently asked questions, I will describe here popular 3D printing technologies - printing with molten plastic, powder, photopolymer, laser sintering. Of course, this information is not the ultimate truth. This is the picture that has developed in my head today from various sources.
Printing with molten material (plastics, chocolate)
This is the most popular method among amateur devices. Its essence is simple. Can you imagine how a glue gun works? A plastic rod is pushed from one end of the gun, and at the other end it is heated to a fluid state and squeezed into the gluing site.
The printer is a machine with 3 axes. The print head is fixed on the machine's coordinate system. When it moves along the X/Y coordinates, the molten plastic is squeezed out of a thin (0.3-0.5mm) nozzle and solidifies. After printing one layer, the printer changes the Z coordinate (lowers platform / raises head) and prints the next layer.
Difference between printers
The main difference between printers is how 3-axis movement is implemented, how the material is fed, whether the table is heated or not, whether printing is supported by 2 materials.
Most printers of the RepRap family move the head only along the X axis.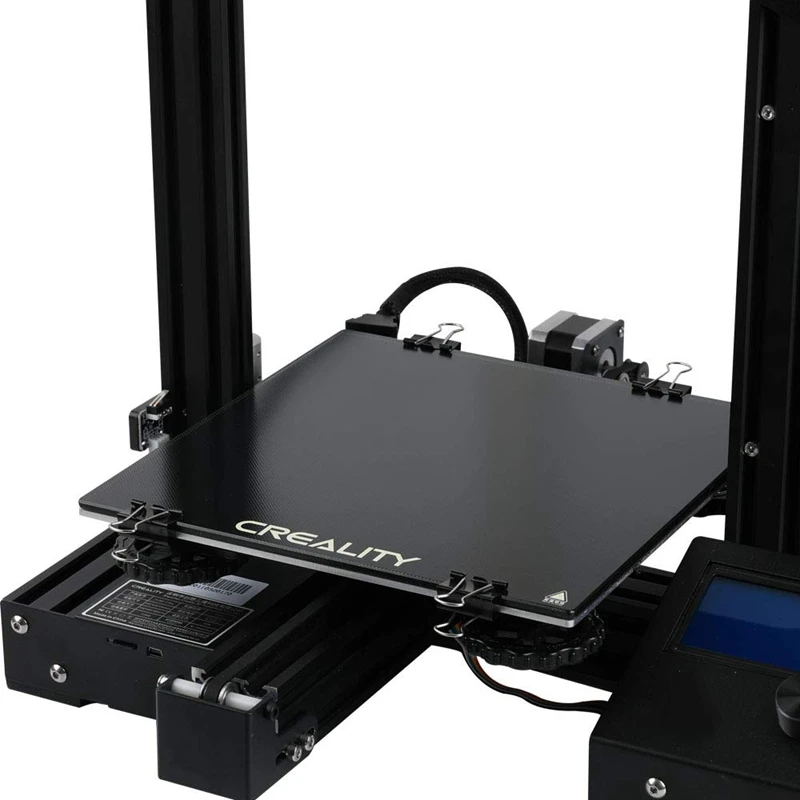 The platform with the object moves along the Y axis. The structure of the print head and the drive along the X axis move along the Z axis. Due to the movement of such a mass, accuracy and print speed suffer.
In Ultimaker and the latest version of Makerbot lit with great fanfare at CES 2012, the print head moves along two axes (X/Y) at the top of the machine, and the platform with the product descends gradually down (along Z). This achieves high quality and print speed, which can be up to 10 times higher than that of Mendel.
In addition to the classic schemes of machine tools inherited from CNC, there are experiments with delta robots.
Plastic
Various plastics are used for printing. The most popular are ABS, from which most toys are made, and PLA, a biodegradable plastic used for packaging and disposable tableware. In addition, special types are used that dissolve in water (PVA) or a special solvent.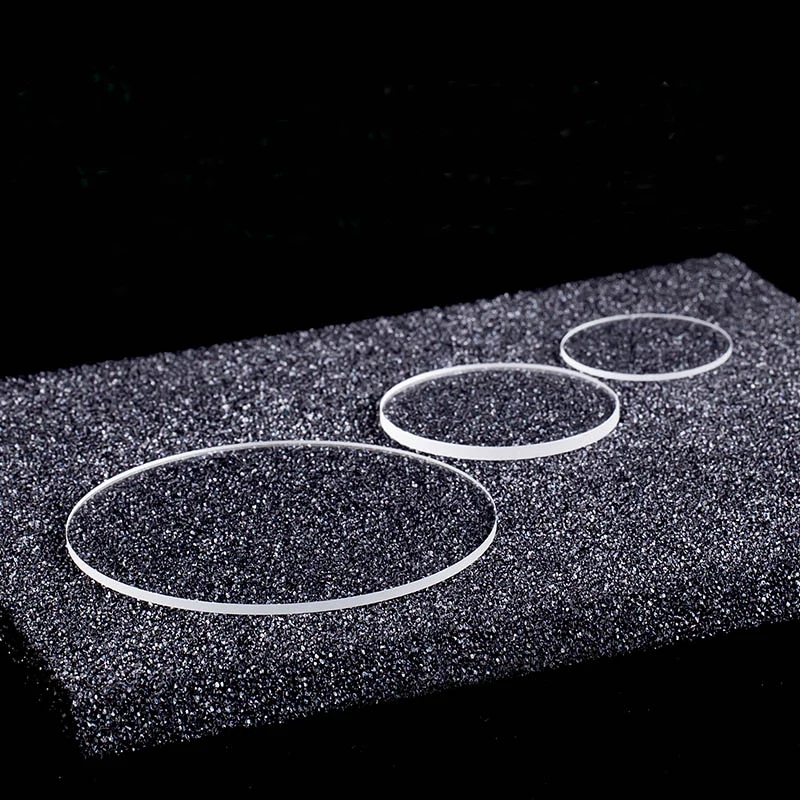 With such plastic, auxiliary structures can be printed, which are removed at the end. The black plastic in the next photo is such an auxiliary material.
Dual-extruder printer is used to print in two colors or single color with support material. To date, this technology has not yet been worked out in amateur printers. The STL format, chosen as the standard by hobbyists, does not support multiple colors. But the devices are already available, so these problems are already in the process of being solved.
Plastic for printing is sold in coils in the form of a rod of various diameters at a price of about $ 40-60 per kg, water-soluble is more expensive (9$0). Different types of plastic (and other materials such as chocolate) have different operating temperature ranges. A temperature sensor is used to maintain the optimum temperature.
To ensure printing accuracy, the part must not move from its place, therefore it is made so that it sticks to the surface of the platform.
Since the plastic part is printed for a long time, it cools unevenly. Layers printed earlier cool earlier. Therefore, the part tends to deform - to bend. On the one hand, the adhesion must be strong enough to prevent the part from tearing off the platform when cooling, on the other hand, it must be weak enough so that it can be torn off by hand at the end of the process without damaging it.
It is for this that the platform for working with ABS plastic is made heated and a thermal tape (kapton tape) is glued onto the platform, and for working with PLA plastic, masking tape is glued onto the platform (blue in the picture above). In professional printers, the process generally takes place in a closed box, where a high temperature is maintained, ensuring slow cooling and better plastic adhesion. So tape is another consumable for 3D printing.
Powder printing
This technology is used in ZCorp's professional printers. It allows you to print with high resolution in several colors at the same time. The essence is simple - a finely dispersed powder is poured in a thin layer, leveled, then the head goes and, like in an inkjet printer, pours the powder with a binder colored in the desired color. Then everything repeats - a layer of powder, alignment, binder. At the end, the remaining powder is blown out and you're done. Additional material to support hanging elements is not required here - its role is played by powder, which evenly fills the container and serves as a support for subsequent layers. Printers cost from $15k (monochrome ZPrinter 150), color ZPrinter 250 - from $25k.
In addition to plastic filler, happy owners play with other materials. I heard about the use of ceramics and metal. After annealing, a ceramic or metal product is obtained, respectively.
Laser sintering
Almost no different from powder printing.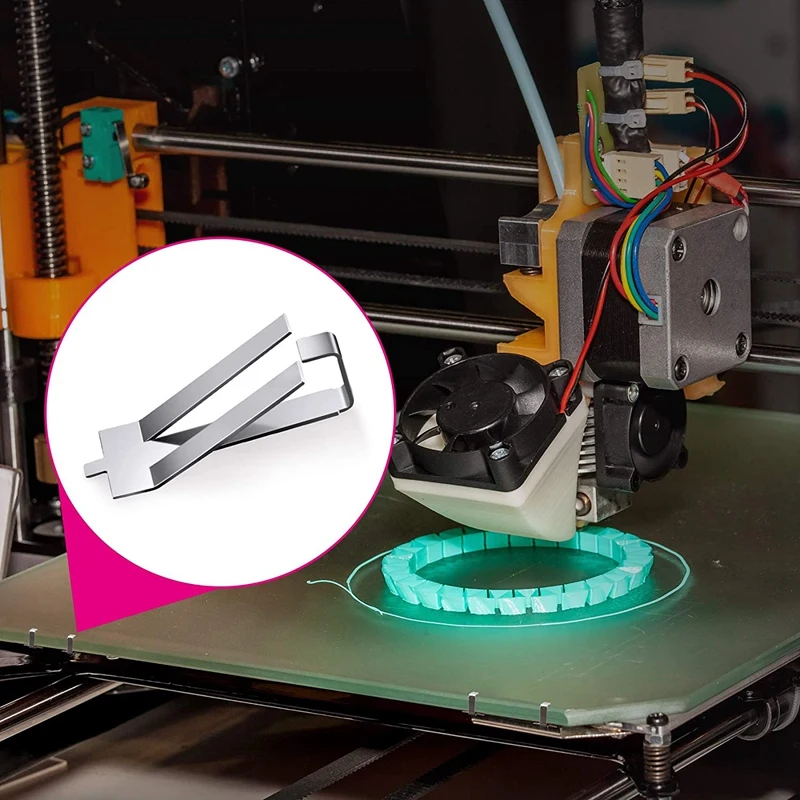 Only instead of a print head, a laser sintering powder is used instead of a binder. They sintered a layer, poured a new one, sintered - poured, etc.
The Bristol branch of the famous aerospace and defense company EADS baked a bicycle using this technology.
These openwork objects are also made using this technology.
In the same way you can make products from refractory materials. Only the laser needs more power.
In 2011, Markus Kaiser made a splash with his solar 3D printer project. Instead of sintered powder, he used sand, which he collected right there in the desert. Instead of laser beams, he used a large Fresnel lens, which concentrated the sun into a point and melted the sand. The author of the project himself acted as a filling and leveling device :) The coordinate system of the printer and the computer were powered by solar batteries. The result is a bowl like this:
The whole process is captured on video:
Photopolymer printing
The principle of operation is simple - we project a slice of the model onto the resin, it freezes where it was lit. Raise the model and add resins, highlight the next cut, and so on.
This printing method is also found among hobbyists and in laboratories due to the simplicity of the device and the accuracy of the result. Here is the diagram of the device:
There is a cuvette with a photopolymer and a glass bottom. On this bottom, the projector projects the image from below. The software switches images on the projector (sections of the object) and gradually raises the glass platform on which the object grows. As the photopolymer is consumed, it is added to the cuvette. From above, the apparatus is usually closed with a cap that does not transmit a certain spectrum in order to avoid parasitic illumination.
Here is the work of such a printer, created at home:
An example of an object printed on such a printer:
There are many different photopolymers. They cost differently, react to different wavelengths of light, and have different activation times.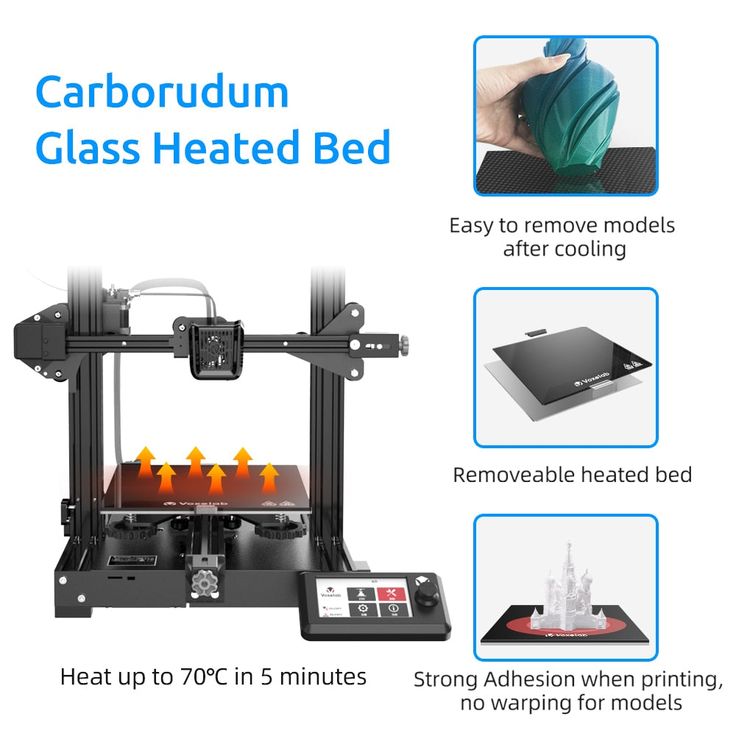 Therefore, when creating a printer, it is necessary to select the material and the lamp for illumination. Instead of a projector, you can use a laser (a flashlight with a narrow beam) and a scanning system. Then the cut will need to be drawn with a laser, as in laser sintering. If I'm not mistaken, then the consumables for the top printer cost about $300 per liter. But the community interested in building such printers also found a cheap option - about $ 20 per liter. Community, various information on photopolymers, projector, printer, etc. can be found here - 3dprinter.wikidot.com
nano-cemms.illinois.edu - here, with the help of a series of videos, the 3D printing process in the laboratory is literally assembled on the knee. The polymer is poured into a glass and a conventional projector illuminates the polymer from above through a mirror. The platform on which the object is grown is attached to a small tripod and lowered into the glass. Manually on the projector, the pictures of the slices change and the platform gradually lowers.