3D printer firmware raspberry pi
▷Klipper - A powerful firmware for your 3D printer - How to install Klipper on Raspberry PI
Klipper is a firmware for high performance 3D printers.
How does Klipper work?
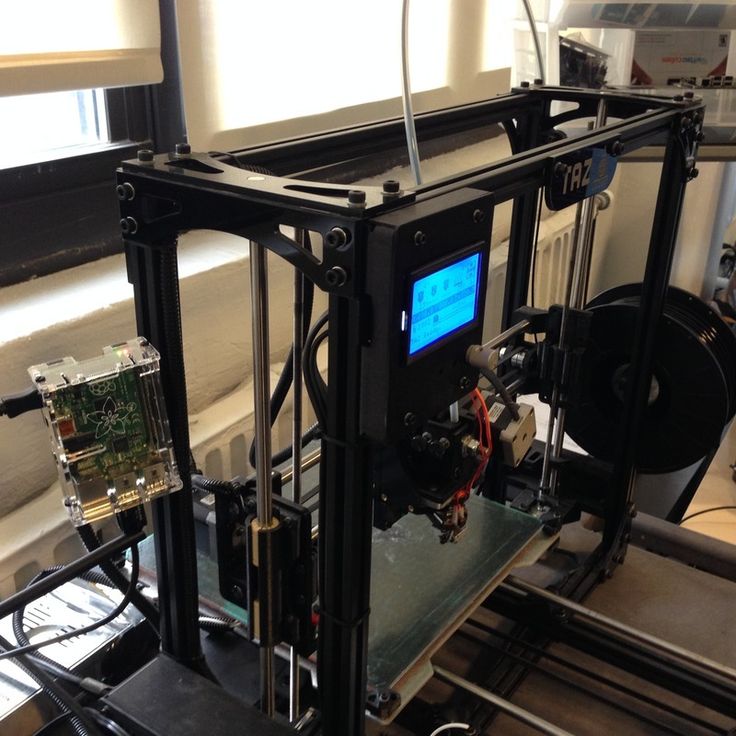
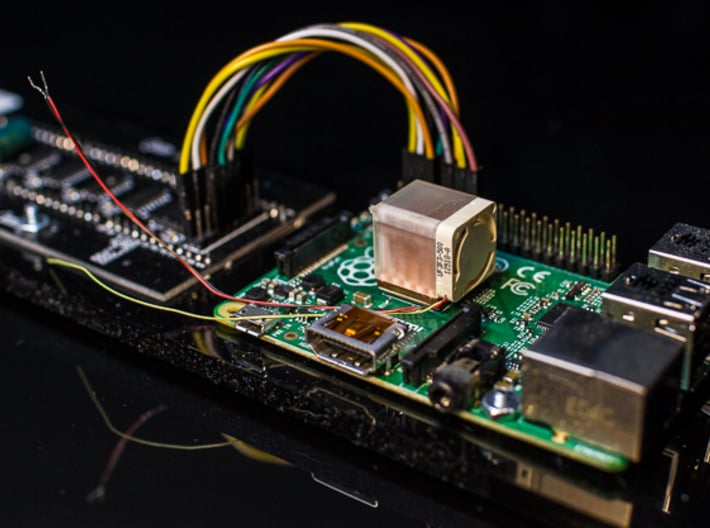
Unlike most firmwares for 3D printers, Klipper is not installed on the 3D printer board, it is installed on a PC or micro-computer, usually on a Raspberry Pi 3, 4 or higher (it can also be installed on other devices).
A small piece of software is installed on the controller board of the 3D printer that acts as an intermediary between the elements of the 3D printer and the computer.
Klipper reads the instructions (Gcode) and transforms them into movements using all the available power of both electronics, planning more movements in a more precise, smooth and efficient way.
In this way we manage to exploit the full potential of micro-computers, much higher than the processing capacity of the controller board of any usual 32-bit 3D printer. Getting better print finishes in less time.
What benefits can Klipper bring us compared to other firmwares?
- High precision movement for stepper motors. The mathematics to calculate the movement are much more precise taking advantage of the extra power that we have.
- Huge improvement in steps per second, even using 8-bit boards, since they don't process Gcode, an 8-bit board can deliver 175.000 steps per second. With more powerful processors you can go up to over 500,000 steps per second.
- More than one board can be used for a printer, for example to use a larger number of stepper motors we can install two boards, as is done fot the Voron 2.4, you can also install a main board and an accessory board, making possible the more complex configurations than you can imagine.
- Everything is configured using a single configuration file, and to update changes you only have to restart the device, there is no recompiling.
- "Smooth Pressure Advance", is an improvement over Pressure Advance, which is smoothed to improve performance, ideal for all printers, but especially useful for Bowden printers where this algorithm significantly improves the result.
- It supports "Imput Shaping", perhaps one of the most striking functions of this firmware, it is a function that compensates for the resonances and oscillations of 3D printers, allowing us to print at higher speeds and accelerations without visible defects in the parts.
- Use Python, a high-level programming language.
- Compatible with programmable macros.
- It incorporates an API server.
- It works with Octoprint, which can be installed on the same Raspberry where Klipper is installed. If you already have a Raspberry you probably don't need additional hardware.
- Supports standard Gcode.
- Etc.
Is this firmware for me?
- If you are looking for simple and straightforward software that just works fine, this is not for you.
- If what you are looking for is a software with infinite configuration and customization options, with which you can get the most out of your 3D printer to print faster and with better finishes, you are in the right place.
Install Klipper
These instructions are written in 2022 as an informative article, it is possible that the instructions change in the coming months and years, so we recommend visiting the official instructions at this link:
https://www.klipper3d.org/Installation.html
Installing Klipper consists of the following steps:
- Prepare the OS image on the SD card.
To do this, the simplest thing is to use "Raspberry Pi Imager":
https://www.raspberrypi.com/software/
- cd ~/klipper/ make menuconfig
- And we will enter a menu where we have to select the board that we are going to use, as well as the ports that we are going to use to communicate, for example USB or UART.
- make
- We command "make" to generate the file that we have to upload to our microcontroller and it will be generated in a few seconds.

- Now that we have the file ready we need to upload it to our board, this can be done using the USB connection with the Raspberry board or the micro SD card reader included on most boards. In this tutorial we will explain the micro SD method.
- To download the klipper.bin file, we can use FileZilla:
https://filezilla-project.org/download.php?platform=win64
And enter the IP as we did with Putty, you have to fill in:
IP= The one you have, in our case 192.168.1.163
User name= pi
Password= raspberry
Port=vacío, 21 o 22.
Once inside, we go to the following path: /home/pi/klipper/out and download the klipper.bin fileWe rename that file as firmware.bin and copy it to the micro SD card, then insert it into the board and turn it on to allow this part of the firmware to load.
The file name will change from firmware.bin to FIRMWARE.CUR indicating that the process has been done.
Once all this is done, we have Klipper correctly installed, but it will not work, since we have to configure it.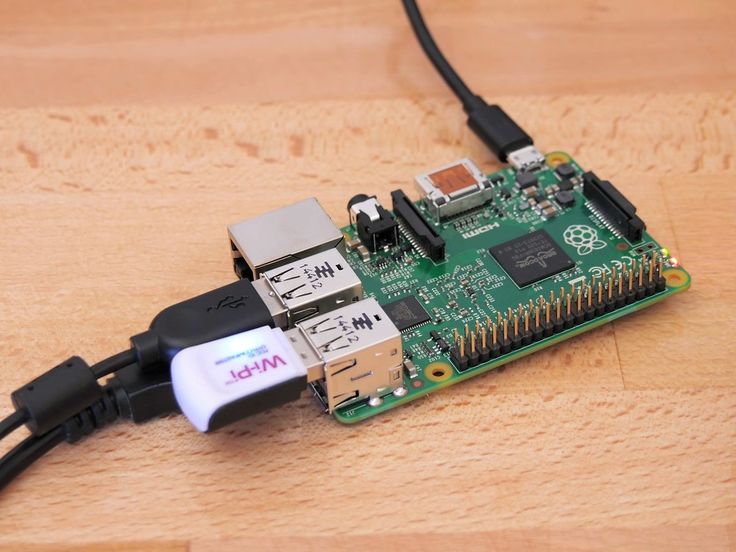
Configuring Klipper
If we have not done it before, now it is necessary to enter Mainsail (or Fluidd for those who prefer it), for this we copy the IP to our computer connected to the same network. In our case we use the IP: 192.168.1.163.
We move to the "Machine" menu and edit. we copy or create the file printer.cfg
Here we find with one of the main advantages, this file is independent of the version in which we are, so we can frequently update our version of Klipper without touching the configuration, in this way we will always have the latest news, without the need to prepare configuration files for each version of the program.
We can also edit this file without having to compile or load anything, simply by editing a few lines of code we can, for example, change the number of leveling points, which in Marlin would necessarily mean recompiling the program.
We can find the Klipper configuration references at this link:
https://www. klipper3d.org/Config_Reference.html
Macros in Klipper
This is one of the functions most desired by advanced users, although it is also more complex for neophytes in the field.
Advantages:
- Infinite versatility, it allows us to create standard orders, which we can then edit:
- For example, we can create a macro to start printing, so that it reads the file with the temperatures we want, so that the same Gcode can be printed with different temperatures depending on the material and brand that we are using, without the need to generate another different Gcode, nor edit it.
- We can define complex commands for multi-head systems, in which at each layer change, do head cleaning or purging commands, only the macro instruction will be in the Gcode, while the detailed instructions will be in the macro file.
Disadvantages:
- Marlin has some guided functions, such as the filament change with M600, which are very convenient, in Klipper they are not by default, so we have to download these macros separately and configure them, although they work well, they are not so "friendly" as in the case of Marlin.

You can download these macros for Klipper, a very useful collection:
https://github.com/Desuuuu/klipper-macros
The author recommends that we create a subfolder called "macros", and then add this simple line to our printer.cfg file:
[include macros/*.cfg]
This way our printer.cfg file is "clean" of macros, and each macro is located in a separate file within this folder, where you can easily edit, add, delete and share each macro individually.
Once we have the macros installed we can use them in two ways:
- From Gcode, such as the M600 command, which will work similar to how it works in Marlin.
- From the macros panel, where we can also edit some arguments by clicking on the dropdown located to the right of each macro, in the case of configurable macros.
Using Klipper
Una vez instalado y configurado Klipper es muy intuitivo de usar, ya que su interfaz web es muy amigable, Este punto casi que nos lo podríamos saltar, pero vamos a mostrar la interfaz para quien no la haya visto aún:
- Printing status, where we can pause and cancel printing.
- Z-offset adjustment, similar to Marlin's "babystepping".
- Shortcut to installed macros.
- Fans and accessories.
- Temperature graph.
- Velocity factor and extrusion factor settings.
- Printer configuration easily editable and very present.
- Console, where we can enter any instruction.
In addition to the main panel, we find:
- Console, where we can enter codes directly for Klipper.
- Height map, where we can see the shape of our bed
- Gcode files.
- Gcode viewer, very good, shown as an example in this image, we can remotely see the line that the print goes through, in addition to analyzing already generated Gcodes.
- History, with statistics.
- Machine, here we can update the version and edit the configuration files.
- Emergency stop.
- Configuration menu, here we can make some adjustments such as updating the colors of the interface.
- Power off and restart button.
 We advise powering off from here before disconnecting our printer from the network, as Raspberry are microcomputers.
64-bit 3D printer,Run marlin on RaspberryPi
www.pandapi3d.com
Software
1.better prints at faster speedsIf you want to do more higher speed or print some short line or corner the higher process speed is very important,otherwise there will be some slight on the surface. so 32 bit MCU is better,but if you want add more function like web camera,HDMI LCD... little space,for friendly easy to use this PandaPi runs on the powerful Raspberry Pi is the best.
2.Octoprint + marlin.the marlin code is very stable and are familiar with us, if we have a good idea or control algorithm, we can change it easily.
3.No arduino, no platformIO.online compile.
Hardware
1.Support mixed use of 3V-24V fans
2.optocoupler for bed proximity sensor
3.Low temperature mosfet at high curre
Details
FAQ:
-
what's the difference from Klipper
PandaPi: use RPi to control 3D printer directly,except the temperature control which is just to maintain the temperature.

Klipper: uses a RPi to parse G-code,map out curves,set accelerations,and then send the motor command to the MCU via uart.
-
Why is there a mcu?
RPi has not enough GPIO pin for handle all the motors,hotend,bed,endstop,LCD,auto bed level,run out sensor.
-
how do this assure the real time control?
about the real-time, I did a test . it is not real time actually,but we guarantee motor coordination. and the RPi is more than fast enough that it is not a problem.and I test it with pi4 the cpu speed is quickly than pi3! BTW I test it with all the function like camera octoprint,they are used a lot of RAM but little CPU.
- there is a great improve to the pandapi software for high speed printing with high pressure cpu loaded. here is the a test.this is the output signal of the one raspberryPI'GPIO,and displayed by the oscilloscope.
pandaPI_sch.pdfPanda Pi sheild circuit schematicAdobe Portable Document Format - 100.91 kB - 08/26/2019 at 02:20 | Preview | Download |
-
New Version V2.
 9 mark • 03/01/2022 at 06:47 • 0 comments
 What's new in V2.9:
1, Stand alone: As normal main board that run Marlin firmware on the stm32 32bit MCU,without RaspberryPi;
2, Add CAN transceivers and CAN connector, support CAN bus extruder PANDA_CAN board -
PandaPi V2.8 /Support Klipper
mark • 03/08/2021 at 08:02 • 0 commentsWhat's new in V2.8:
- Support Klipper printing;
- Support Running marlin firmware in MCU like normal control board,but there is no SD slot,so can not do SD printing in this mode.
- Support resin printing;
- Integrated DC-DC power module;
https://www.pandapi3d.com/
-
64 bit RT kernel
mark • 01/07/2021 at 13:11 • 0 commentsI successfully ported the new 64-bit RT kernel, latest octopi, to the 1G/2G/8G raspberry Pi4b. and did some test
the new Image for PI4 1/2/8GB with latest octopi and RT arm64 kernel. welcome to test. BTW, the samba shared folder server was installed by default. login name and password are "pi" and "raspberry"
https://drive.google.com/file/d/12SVpaWUfYfMcyAgHXftomMzmOi_RGhgE/view?usp=sharing
-
Change the temperature sensor to PT100
mark • 11/01/2020 at 12:57 • 0 comments -
Easy mode for Marlin configure
mark • 07/03/2020 at 11:03 • 0 comments -
Source Syntax Highlighting
mark • 06/28/2020 at 15:04 • 0 commentsHi all, the new web editor has feature of Source Syntax Highlighting just click update Raspbian for that.
-
3D files of Pandapi
mark • 06/06/2020 at 14:10 • 0 comments -
Ready for shipment
mark • 05/03/2020 at 05:35 • 0 comments -
The new v2.
 5,only one for test mark • 04/26/2020 at 15:35 • 0 comments
 https://www.pandapi3d.com/post/the-first-board-of-v2-5
-
Run marlin in real time mode
mark • 04/14/2020 at 10:59 • 0 comments
View all 40 project logs
Enjoy this project?
ShareSmart printer.
 Improving Octoprint / Sudo Null IT News
 While developing an open project for a 4-extruder Z-Bolt printer, we faced the problem of choosing a screen to control the printer. Of the available screens, only the Duet Wifi solution can control more than 2 extruders. The solution, to put it mildly, is not a budget one, and the interface is not for everybody. So we decided to look for an alternative with preference and courtesans. This story is about him…
On the Internet, there is a lot of information about the use of Octoprint. A little more than half a year ago, we became users of this solution, immediately appreciating its advantages. The ability to manage the printer through a web face is really hard to overestimate. Octoprint has a lot of plugins, and the main thing for us is that Octoprint handles well with more than 2 extruders. But there was one more issue to solve.
Many fans of Octoprint confidently assert that they no longer need the screen from the word “absolutely”, that this is an absolutely superfluous part of the printer, which only interferes with them.
However, I am convinced that there is another part of OctoPrint users. Everyone has their own habits and requirements for everyday use of a 3D printer, and there are operations that are more convenient to perform with a screen:
- Filament replacement
- Table level calibration
- Start printing a file that has already been printed before
- Printer preheating on
- Ability to see print status
- …
Now the default screen in Z-Bolt printers is MKS TFT. You can put TFT24, TFT32 or TFT35. These are good screens, but they can't integrate with Octoprint. If Octoprint has started printing, the screen will not know anything about it. They use different file repositories, etc. And the MKS TFT screens don't want to work with 3 or more heads 3D printers.
My goal was to find/make/configure a screen for Octoprint capable of controlling more than 2 extruders.
Googling a bit, I came across the TouchUI plugin.
The first impression was: this is the solution!!!
I immediately installed the plugin and opened Octoprint from my phone. The TouchUI interface was dumb :/. Sometimes the buttons were pressed normally, sometimes they slowed down, and sometimes they didn’t press at all the first time. From the connected screen, TouchUI behaved just as badly as from the phone.
Another solution was found in parallel.
The description was encouraging, unlike TouchUI, this is an independent application that runs without a browser, which means it requires much less computing resources.
Installation and configuration did not cause problems. The interface really worked much more predictably and more responsively.
But even here, not everything turned out smoothly. The application regularly crashed when printing started. There was an issue on github for this error, created almost a year ago and actively discussed, but not closed.
The main problem turned out to be that the author of the application, apparently, has lost interest in it and is no longer developing it at the moment.
Since, in my opinion, the application is written quite well and has potential, it was decided to make a “hard-fork” and take on the project thoroughly.
Here's what we got:
- Optimal screens for project were selected
- Made “hard-fork” from Octoprint-TFT
- Revised view of printer hardware and software architecture
- Created own theme for Octoprint interface
But first things first…
Screen selections
We started with the TFT 3.5 screen, which, to put it mildly, did not stand up to scrutiny. No viewing angles, the picture is faded. Therefore, it was decided to choose a better solution.
The main criteria were:
- IPS matrix
- size 4 - 5"
- capacitive screen (preferred)
- reasonable price
As a result, we settled on two options:
1. The option is simpler. 4'' IPS Resistive Touchscreen
2. Richer option. 4.3” IPS Capacitive Touchscreen
Both screens have a resolution of 800x400. Both have a great picture, color reproduction and viewing angle. Their main difference is the capacitive touchscreen. You get used to it (like everything good) very quickly and it is much more pleasant to use it than resistive ones. However, a resistive touchscreen is also viable.
It's Hard-Fork, baby!
The application has been seriously improved. And almost ceased to resemble his parent. Therefore (and also because the creator of Octoprint-TFT officially froze the development of his offspring), it was decided to make a hard-fork and call the new project Octoscreen.
- First of all, the screen freeze problem that plagued Octoprint-TFT was completely eliminated.
- - Significantly changed design and layout:
- The screen has learned to understand printer states (waiting/printing):
- Added the function of fast preheating / heating off by pressing the icon of the extruder or table, while the screen highlights the status:
- Manual table calibration screen added:
- Item “Menu” moved to a separate screen:
- Added WiFi management function:
- The application itself now supports up to 4 extruders, which is exactly what it was created for:
You can download the application and find a brief installation guide from our GitHub.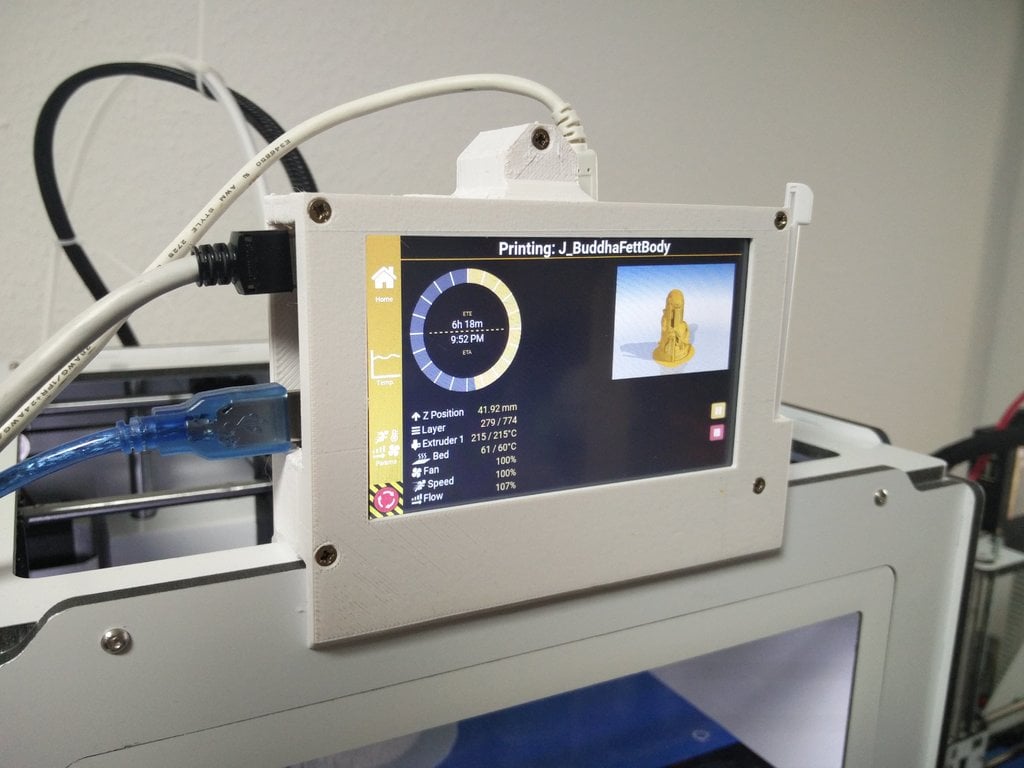
There is also a detailed instruction for screen 3.5, for which special thanks to our colleague Denis (@negativ72rus).
Rethinking printer hardware architecture or changing shoes on the go
Initially, we planned to use Marlin in our multi-extruder printer, but in the end the choice fell on Klipper. There are several reasons:
1. One of the main reasons for us as developers is its flexibility. Marlin and his "pasta" code make it a real challenge to make improvements to it, and even more so to maintain them further.
Klipper is the opposite of Marlin in this respect. Firstly, all Klipper configuration is taken out of the program code. The code itself is well structured. But most importantly, Klipper is modular!!! You can add your own logic to the firmware without making changes to its core, and thus greatly simplify the further support of your code.
2. All firmware settings can be done directly through the OctoPrint web interface. And at the same time, the tuning capabilities are much more powerful than those of Marlin or Smootheiware.
3. How can we not say about beats, which everyone is chasing lately)). The Klipper architecture itself assumes that the computational load falls on the Raspberry PI. The function of the MKS Gen L control board (in the case of Z-Bolt printers) remains to transmit signals to/from peripherals (motors, sensors, heaters, controls).
But the Raspberry Pi 3 Model B+ is equipped with a 64-bit, 4-core Broadcom BCM2837B0 A53 1.4GHz chip.
Essentially Octoprint + Klipper running on Raspberry Pi + the same MKS Gen L -
an order of magnitude more functional and progressive solution than Marlin running on some 32-bit chip.
Configuration files for Klipper for Z-Bolt printers can also be found here.
A small bonus in the end!
We also made our own theme for the Octoprint interface:
The header can be customized with a native color picker in the Appearance section:
You can find instructions on how to install the theme on our GitHub.
Write in the comments what features of the screen you consider the most useful and necessary to be added.
All the best, positive and good blowing of overhanging elements!
Refinement | iOnline
Hello everyone! Oh, and I haven't written anything interesting for a long time. It's time to stretch your fingers and share useful information. This article will focus on the power supply of the Raspberry Pi single-board computer. By and large, the topic is hackneyed. But I dug up something. Not the fact that infa is unique. But I got to the bottom of this myself, I hasten to share with you.
And so. This article will primarily be useful to 3D printers. But smart home lovers will also learn something useful. I won't pull. Who cares, welcome under cat.
Read more »
Hello guys!
I decided to write a small updated article on tuning the Ulti Steel 3D printer. It is for tuning and not in any case not for modifications. Why? The printer is good! Very good and works great right out of the box. And it doesn't need modifications. What I do with it is to adapt it to my needs. You know, street racers buy their own car and finish it off for racing. This does not mean that the car is bad. There is simply no limit to perfection and there is always something to improve. So for me it will be tuning or customization. Call it what you want, but remember that Ulti Steel is a great 3D printer that works out of the box. And so, let's get started!
Read more »
Hello everyone! I'm back in touch. And so, today we have in the menu the replacement of Ultrabase glass on the Anycubic i3 Mega 3D printer, the same instruction will do for Anycubic Mega-S.
Nothing lasts forever under the moon, as one of the classics used to say. After half a year, I started having problems with the ultrabase. After printing the model from PetG plastic, a piece of glass, namely glass and not a black coating, peeled off the table along with the model, thereby ruining many hours of printing. Disappointed and annoyed, I wrote to Anycubic technical support, technical support specialists confirmed that this should not be so, recognized this as a warranty case and sent me a repair kit, which is a heating table and glass.
In the meantime, the point is, I had to print on another whole part of the table. But as they say, a start has been made and the glass on the table continued to flake off. Finally, it's time to change it. So let's figure out how to do it.
Read more »
Hello everyone! I again return to the modifications of the Anycubic i3 mega 3D printer, which has already acquired a bunch of improvements and, in addition, turned into Anycubic Mega-S. As you know, I try to make the printer as quiet as possible, and got to almost all sources of noise, but it's too early to stop. This time it was the turn of linear bearings. They worked for me for more than a year and are already pretty tired. And so, let's get started.
Read more »
Hello again! In the article “Solving the problem with Linear Advanced on TMC2208 stepper motor drivers. Replacement for TMC2209 driver” I announced the imminent release of a new firmware version for the Anycubic 4max 3D printer. Think. that you should not shelve this matter and present the fruits of your labors to the public. In this article I will talk about the changes that I made to the firmware, but then it's up to you to decide whether to use it as it is or modify it for yourself.
I won't pull the cat's trunk. Welcome under cat.
Read more »
Hello everyone! This time I present to you the last article from the trilogy dedicated to 3D printer firmware. As you remember, in previous articles, we considered options for flashing a printer using the Arduino IDE and the firmware source code, as well as using the Cura slicer and a compiled firmware image. A completely logical continuation of this story will be a story on how to create this very file with the firmware image (hex file). We'll talk about this.
Read more »
Hello everyone. This article is the second part of a trilogy about 3D printer firmware. In the first part, we looked at how to flash a 3D printer using the Arduino IDE. This method is possible when there is a source code for the firmware or, as programmers say, when there are sources. However, this option is not always possible, because. often the firmware comes in an already compiled form, i.e. as a single file with *.hex extension. This is a ready-made compiled firmware file with pre-configured parameters. At the same time, it becomes impossible to edit anything.
Naturally, opening this file using the Arduino IDE will no longer work. What to do? This is what we will deal with in this article. And so, let's figure it out.
Read more »
Hello again! And I still struggle with the noise of my Anycubic i3 mega, which has been upgraded to Anycubic Mega-s. One major source of noise in Mega printers is their power supply. And that is not surprising. The power supply is very powerful, gets very hot, and as a result, the cooling system is not very quiet there.