3D printer corners lifting
9 Ways How to Fix 3D Prints Warping/Curling – PLA, ABS, PETG & Nylon – 3D Printerly
Most people who’ve worked with 3D printers are familiar with warping and it’s a problem that plagues many users. You’ll be happy to know there are a series of methods to reduce warping to the point where you can get consistently successful prints without experiencing warping.
This article will show you precisely, how this problem is solved for good.
To fix warping/curling in 3D prints, use an enclosure to control the ambient printing temperature and any rapid cooling that causes shrinkage in your prints. Use a good build plate temperature for your filament, make sure your build plate is clean and use adhesives so the print sticks to the build plate properly.
There’s more detail behind fixing 3D prints that warp so keep on reading for more.
What is Warping/Curling in 3D Prints?
Warping or curling in 3D prints is when the base or bottom of a 3D print starts to curl upwards and lift away from the build plate. It results in 3D prints losing dimensional accuracy and can even ruin the functionality and looks of a 3D model. It occurs due to shrinkage in the material from rapid temperature changes.
What Causes Warping & Lifting in 3D Printing?
The main causes of warping and curling is from temperature changes which causes shrinkage in your thermoplastic filament, along with a lack of adhesion to the build surface.
Below are some specific causes of warping in 3D printing:
- Rapid temperature changes from hot to cold or room temperature too cold
- Bed temperature too low or uneven heating on bed
- Drafts blowing cold air onto model, no enclosure
- Bad adhesion to the build plate
- Cooling settings not optimized
- Build plate not leveled
- Build surface is dirty with grime or dust
Whether your PLA is warping mid-print, warping on a glass bed or heated bed, the causes and fixes will be similar. Many people who have a 3D printer like an Ender 3 or Prusa i3 MKS+ experience warping, so let’s look into how to fix it.
How to Fix Warping in 3D Printing – PLA, ABS, PETG & Nylon
- Use an enclosure to reduce rapid changes in temperature
- Increase or lower your heated bed temperature
- Use adhesives so the model sticks to the build plate
- Ensure cooling is turned off for the first few layers
- Print in a room with a warmer ambient temperature
- Make sure your build plate is properly leveled
- Clean your build surface
- Reduce drafts from windows, doors, and air conditioners
- Use a Brim or Raft
1. Use an Enclosure to Reduce Rapid Changes in Temperature
One of the best methods to fix warping and prevent it happening to your 3D prints is to use an enclosure. This works because it does two things, keeps a warmer ambient temperature so your print doesn’t cool rapidly, and also reduces drafts from cooling your model.
Since warping usually occurs due to temperature changes, an enclosure is a perfect fix to preventing warping happening to your 3D prints. It should fix a lot of the issues but you may still need to implement some other fixes to get rid of warping once and for all.
I’d recommend getting something like the Comgrow Fireproof & Dustproof Enclosure from Amazon. It has plenty of positive reviews from other 3D printer users mentioning just how effective and useful the enclosure is.
One user mentioned that after they started using this enclosure, they no longer has prints warping on the corners, and adherence to their heated glass bed got a lot better. It also even slightly cuts down on noise pollution, so you don’t disturb others or yourself as much.
There are other temperature-related defects that 3D prints go through, so having this enclosure helps with many problems at once. Setup is pretty easy and it looks good overall.
3D prints that warp on one side can be quite annoying, so getting an enclosure can help to solve this issue.
2. Increase or Lower Your Heated Bed Temperature
Usually, increasing your bed temperature helps to reduce warping because it stops that rapid change in temperature since the heat emits nicely on the model. Follow your filament recommendation for bed temperature, but try increasing the bed temperature on the higher end.
Even for a filament like PLA, 60°C can work well even though many people recommend 30-50°C, so give different temperatures a try and see how it works for you. There are many types of 3D printers out there, as well as personal printing environments that can affect these things.
Check out my article on How to Get the Perfect Build Plate Adhesion Settings & Improve Bed Adhesion for more info.
One bed temperature for one user might work well, while it doesn’t work too well for another user, so it’s really down to trial and error.
You can also have a bed temperature that’s too high that can lead to warping due to rapid temperature changes, possibly due to having a cool ambient temperature.
If you have tried increasing your bed temperature, you can also try lowering it to see if it has a positive effect on reducing warping.
3. Use Adhesives so the Model Sticks to the Build Plate
Since warping is a movement that shrinks material, especially corners of your 3D prints, sometimes having a good adhesive on the build plate can stop the material from moving away.
Many people have fixed warping or curling in their 3D prints by simply applying a good adhesive and letting it do its magic.
There are plenty of adhesives out there that work for 3D printer beds. The most popular type of adhesive I’ve seen in the 3D printing community has to be glue sticks.
I’d recommend going with something like FYSETC 3D Printer Glue Sticks from Amazon.
A few coats of glue stick on the bed should give you a lovely foundation for your model to stick to so it doesn’t warp and shrink away from the build plate.
You can also take it to the next level and use a 3D printer specific adhesive like LAYERNEER 3D Printer Adhesive Bed Weld Glue from Amazon.
I wrote an article called Best 3D Printer Bed Adhesives – Sprays, Glue & More.
4. Ensure Cooling is Turned Off for the First Few Layers
Your slicer should have default cooling settings that turn the fans off for the first few layers, but you may want to turn it off for more layers if you are getting warping. I’d usually recommend trying out the other fixes before you do this because cooling contributes to better 3D print quality.
For a material like PLA, they usually recommend your cooling fans being on 100% so you may not want to turn it down for that.
If you are experiencing warping on a material like PETG or Nylon, you want to try adjusting your cooling settings to be lower so the material isn’t cooling too quickly.
You can change the layer height that your 3D printer fans start their regular speed directly in your Cura settings. If you get warping early on, it could be worth delaying where you start the fans.
Check out How to Get the Perfect Print Cooling & Fan Settings for more details.
5. Print in a Room with a Warmer Ambient Temperature
Similar to the fixes above, the main thing is having a better control on your temperature, especially the ambient temperature. If you are printing in a cold garage in the winter, you are a lot more likely to experience warping in your models, compared to printing in a warm office.
Be aware of the general temperature of where your 3D printer is placed so it’s not in an environment that’s too cool.
As mentioned above, an enclosure here can help. Some people have reduced warping by even using a space heater near their 3D printer, or placing the printer close to a radiator.
6. Make Sure Your Build Plate is Properly Leveled
Warping usually happens due to pressure from the rapid cooling and shrinking of material, but this can be countered by making sure your build plate is leveled better.
In addition to using adhesives like a glue stick, when your build plate is leveled nicely, it improves the adhesion of material to the build plate.
If your build plate isn’t leveled very well, the foundation and adhesive is going to be weaker than usual, increasing the chances that you experience warping.
Follow the video below by Uncle Jessy to level your build plate nicely.
For more details, check out my article How to Level Your 3D Printer Bed – Nozzle Height Calibration.
7. Clean Your Build Surface
Just like leveling your build plate is important for adhesion which helps to reduce warping, cleaning your build surface is equally as important.
We want to provide strong adhesion to the material extruded from the nozzle, but when the build plate is dirty or grimy, it doesn’t stick so well to the bed surface, especially with glass beds.
If you want to reduce warping in your 3D prints, make sure your build surface is nice and clean.
Many people would do something like clean it with isopropyl alcohol and a cloth, or even do a full clean with dish soap and warm water. You can also get sterile pads to help clean your beds, it’s really up to you what you do.
I wrote an article How to Clean a Glass 3D Printer Bed – Ender 3 & More that goes into more depth.
The video below shows you how to clean a print surface on the Ender 3 using a sock and some 70% Isopropyl Alcohol.
8. Reduce Drafts From Windows, Doors, and Air Conditioners
If you don’t have an enclosure, you definitely want to stop cool air and drafts from blowing on your 3D printed parts.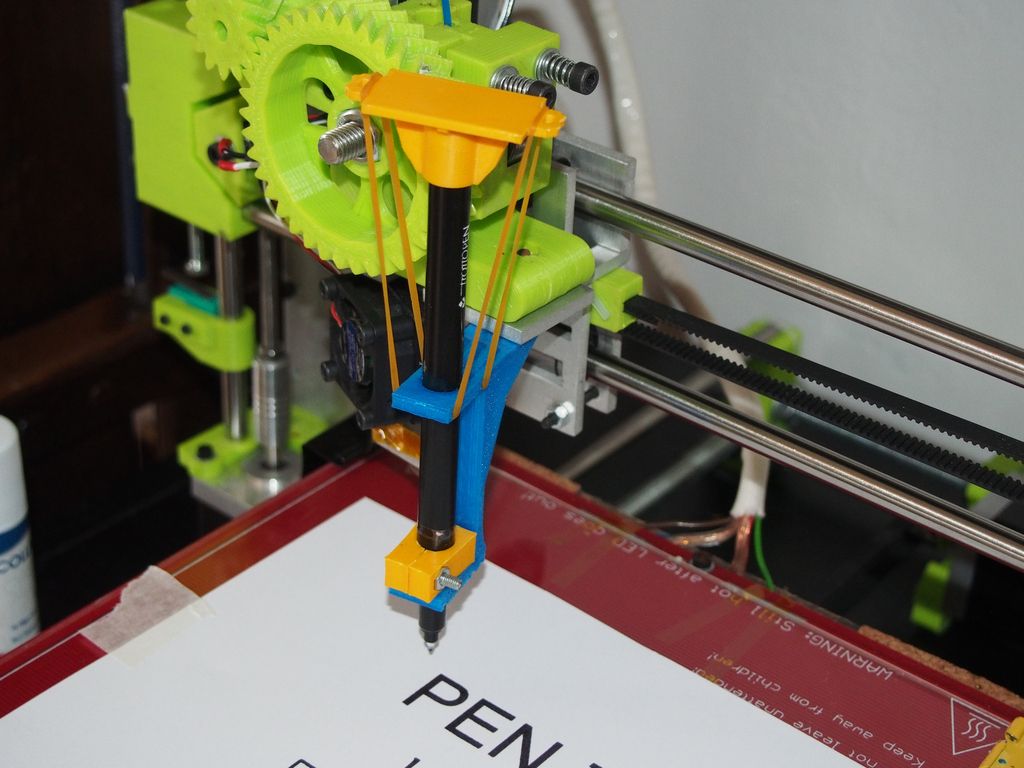 I remember I had a strong draft due to having a window and a door open while 3D printing, and it resulted in really bad warping.
Once I closed the door and stopped the draft from blowing around the room, that warping quickly stopped and I successfully created my 3D model.
Try to identify where any gusts of wind are coming from, even from something like an air conditioner or air purifier, and try to reduce it or the impact on the 3D printer.
9. Use a Brim or Raft
Using a Brim or Raft focuses on the adhesion side of warping. These are simply extra layers of extruded material that provide a foundation around your 3D model.
Here is a Brim around a calibration cube. You can see how the Brim would help reduce warping since the actual model isn’t on the outside, so the Brim would warp first before the warping can reach the actual model.
Here is a Raft around a calibration cube. It looks very similar to the Brim but it is actually placed around and underneath the model, along with being thicker and having more settings to customize.
I usually prefer to use a Raft versus a Brim because it does the job better and you actually have a great foundation to remove your print from, but Brims still work well.
Check out my article about Skirts Vs Brims Vs Rafts – A Quick 3D Printing Guide for more details.
How to Fix a 3D Print That Has Warped – PLA
To fix a 3D print that has warped, try using a method of heat and pressure. Get a large metal surface like a frying pan which your 3D print can fit into the same way it came off the build plate. Take a hair dryer and heat up the 3D model all around evenly for about a minute. Now hold the print down and bend it flat.
The model will need to be held for a few minutes until it cools down, then repeat this process until your print is back to the shape you desire. Remember to heat up the model evenly with the hair dryer each time you do this. It requires you reach the glass transition temperature so it can be molded.
This method from RigidInk has worked well for many users to fix a warped 3D print, so it’s definitely worth a try.
As long as the warping on your model isn’t too bad or your 3D print isn’t too thick, it’s possible to save it.
You can also try this method in the video below with hot water by Make Anything.
How Do You Stop PETG 3D Prints From Warping?
To stop your PETG 3D prints from warping or curling, you should:
- Make sure the active cooling fans are turned off, at least for first layers
- Use a better build surface for adhesion like BuildTak
- Use a good adhesive substance for your build plate – hairspray or glue sticks
- Print slowly on your first layer
- Try decreasing your printing temperature and increasing your bed temperature
- You can also dry your PETG filament to reduce its moisture content
Using a combination of the solutions above should help you with your PETG warping. It can be a fairly stubborn filament to work with, but once you get a good routine going, you’ll start to enjoy plenty of successful PETG prints.
There isn’t necessarily a PETG warping temperature, so you can try different bed temperatures to reduce warping.
How to Keep Nylon Filament From Warping
To keep Nylon filament from warping, get yourself a heated enclosure and try using a smaller layer height. Some people have success by slowing down their print speed to around 30-40mm/s. Make sure your heated bed is hot enough for your specific brand of Nylon filament. PEI build surfaces work well for Nylon.
You can also try 3D printing a raft in a different material like PETG, then switching out for your Nylon filament to help reduce warping. PETG is a good material to use since it shares a similar printing temperature with Nylon.
One user mentioned that they overcame warping by printing a really large brim. Nylon sticks quite well to Blue Painter’s Tape according to some users, so that could work well to reduce warping.
Turning off your cooling fans should help to reduce warping in Nylon filament.
How to Fix PLA Warping on PEI
To fix PLA warping on a PEI bed surface, clean your bed surface with rubbing alcohol. For larger 3D prints, you can try turning on the bed for an extra few minutes so the heat has enough time to travel through the bed, especially if you have glass. Lightly sanding the PEI surface with 2,000 grit sandpaper can work.
how to easily fix it! – 3D Solved
Both novice and experienced 3D printing enthusiasts have to deal with printing issues on a regular basis in order to finally achieve rewarding and good-looking prints. The main difference between both type of users is that the experienced ones typically can look at a print and quickly troubleshoot and determine what went wrong and what should be changed in order to solve it. As we will find out in this article, knowing the root cause of an issue is the hardest and most important step.
Let cut right to the chase and find out how we can solve over extrusion (curling) on the corners!
In order to fix over extrusion or curling on the corners, it is recommended to lower the extrusion temperature, turn on the layer fan to its maximum capacity and increase the time minimum time per layer to around 15 seconds, thus reducing movement speed on smaller layers. Curling on the corners is commonly mistaken with over extrusion, but in contrast to that problem, the issue only occurs on the corners of the object instead and not on the entirety of the outer shell.
By differentiating both issues, it is possible to isolate the problem and determine that the cause of curling on the corners is not caused by over extrusion but by slow cooling down of the deposited thermoplastic.
Due to the nature of this problem, it is very easy to wrongly determine the cause of the issue. This is why I will try to help you differentiate curling on the corners from general over extrusion, and also from warping on the first few layers. Let’s get started!
Table Of Contents
- How to fix curling on corners
- How to fix over extrusion
- Do these problems affect all filament types equally?
Curling only on corners versus over extrusion everywhere
On the left: curling on the corners (Source)On the right: Overextrusion (Source)
The problem of curling in the corners is often associated with over extrusion, although this is not always the cause. Many people try to fix this by modifying the flow parameters, making the printer extrude less material, but while this can sometimes help, it doesn’t eliminate curling entirely.
One way to differentiate in which cases the curling is produced by over extrusion is verifying the size and shape of the vertical walls of the object. When the extruder provides more material than necessary, this defect can be observed throughout the part, not only in the corners.
Now that we know how to differentiate both issues, let’s focus on curling. The biggest difference is that overextrusion occurs throughout the piece, while curling occurs in areas where the object needs a greater supply of material, such as a sharp corner.
Curling consists of a lifting of the last printed layer, which occurs in certain sharp areas. It happens because the material contracts when it cools down, and the areas where there is more material drag the corners in, causing them to rise.
The problem gradually increases on each layer when the extruder passes through the raised area again, since the contact of the hotend with the bent corner produces undesirable deformations in the perimeters of the part.
Worst of all, if the plastic curled and cooled down before the next layer, the nozzle could hit that corner and unstick the entire part. Also, the stepper motor could lose steps and displace the next layers of the print. There is no way to fix this problem since 3d printers don’t have a closed-loop control system.
Curling on corners vs warping
Warping. Different to curling on the edges because it only occurs on the bottom layers. Source
It is easy to confuse curling with warping, and although they have points in common, their causes and ways of solving them are different.
Warping only occurs at the base of the part, because it is a problem of adhesion to the heated bed. It is similar to curling because both happen in corners, and the sharper they are, the more noticeable this defect will be.
The chances of the part coming off the bed are much higher when warping occurs and starts lifting one of the object’s corners. The solution to warping is rather straightforward: raise the temperature of the heated bed, or enclose your 3d printer. Cold air currents are also very harmful and lead to warping issues.
Curling, on the other hand, also occurs in the upper layers, so the temperature of the heated bed has little or no influence on this problem. In order to fix it, you’ll have to consider other things, such as lowering nozzle temperature, installing a layer fan, or reducing printing speed.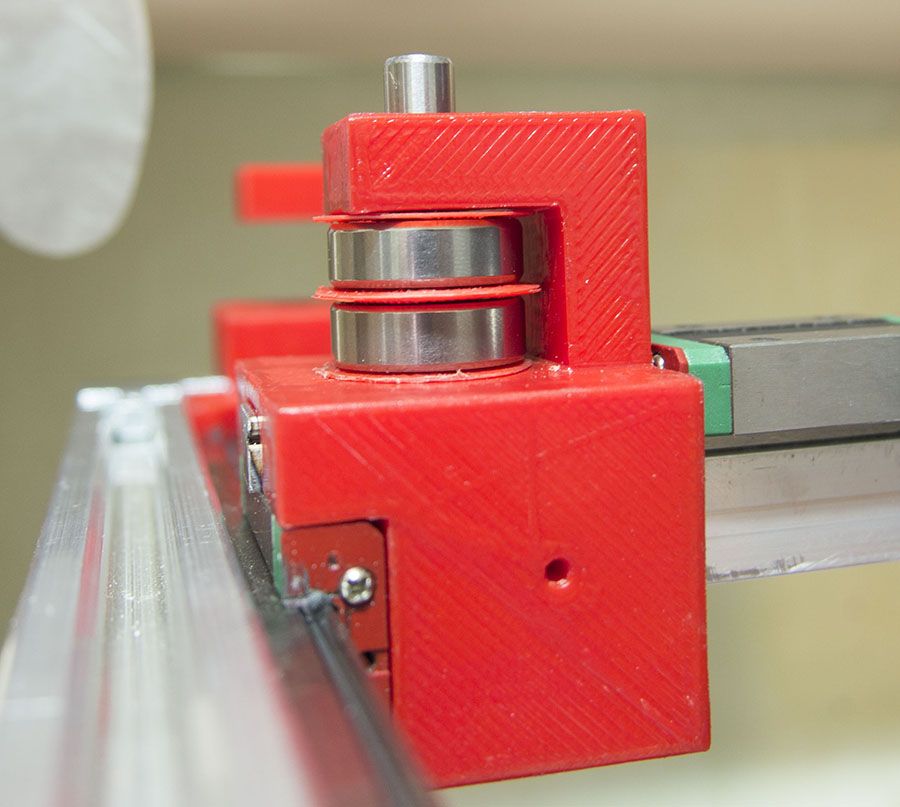
How to fix curling on corners
We could say that curling is mainly produced by excessive extrusion temperatures of the filament. As the material comes out of the nozzle very hot, it stays limp for a longer time. This excessive time, combined with the shrinkage of the material, causes the corners to lift up.
For this reason, we will focus on the temperature parameters of the hotend in order to solve it definitively. To prevent curling, we are going to modify the following parameters on our slicer software:
Nozzle temperature
Many times, when we have problems with jams or underextrusion, some people recommend raising the printing temperature. This action sometimes improves our prints but does not solve the original problem. Although the filament flows better, the extruder may have another problem and we´re only hiding the problem under a rug by raising the temperature.
In the long run, raising the printing temperature too much comes along with other defects such as curling or burning the inner PTFE tube. To avoid this, we will try to use the lowest possible temperature, and thus give less time for the material to shrink. This test will help assist us in determining the optimal temperature of our printer for a specific filament type.
Another way to know if you are setting too high of a temperature when printing with PLA is paying attention to your prints’ brightness. The object gets brighter as the temperature is higher. Reduce it if the piece looks too shiny.
Cooling
A dual blower model for improving layer fan performance. SourceIf your printer doesn’t have a layer fan installed, it’s time to install one. This fan dramatically decreases material cooldown times, preventing corners from having time to bend up. You just have to be careful not to activate it during the first layers, as it could lead to warping.
These fans can change their speed during printing, as they are controlled by PWM (pulse with modulation). This feature allows you to turn them on whenever you need, and at a precise speed.
One of the things to keep in mind when using a layer fan is its orientation. It may be incorrectly positioned, which would cool down the nozzle, causing temperature errors and printing stops.
It may also happen that, due to the orientation of the object, the layer fan only cools down one side of the object. You can tell if this is the case when the curling always occurs on the opposite side of the layer fan. There are radial ducts that blow air evenly in all directions. On the off chance that you own a GeeTech i3 Pro B, you should definitely print and install this Air Duct. Here is another one that is compatible with the Tevo Tarantula
Printing speed
In some small pieces, a new layer might start printing on top of one that is still hot, so it never fully solidifies. To help prevent this, slicers come with an option to determine the minimum time it should take to produce each layer. By doing so, the printing speed is decreased during smaller layers. A typical value is about 15 seconds per layer.
If you still have issues related to curling, lower the printing speed by 10 mm/s until you get better results.
How to fix over extrusion
An extreme case of overextrusion. SourceIf the walls look “squirted”, as if the material is falling out of the object, then you will most likely have to set the extrusion parameters correctly.
This configuration mainly includes calibrating the extruder steps, so that the exact amount of material required is provided. The procedure is very simple, and there are several tutorials on the web on how to do it.
One easy test you can do consists of drawing marks along the filament before it gets extruded. The hotend is then heated and the 3d printer is commanded to extrude 10 cm of material. If the steps are correct, the next mark drawn on the filament should be located exactly at the entrance of the extruder (at the same point the previous mark was located).
If this mark ends up inside the extruder, it means that the printer thinks it is extruding 10 cm but is actually extruding more material (over extrusion).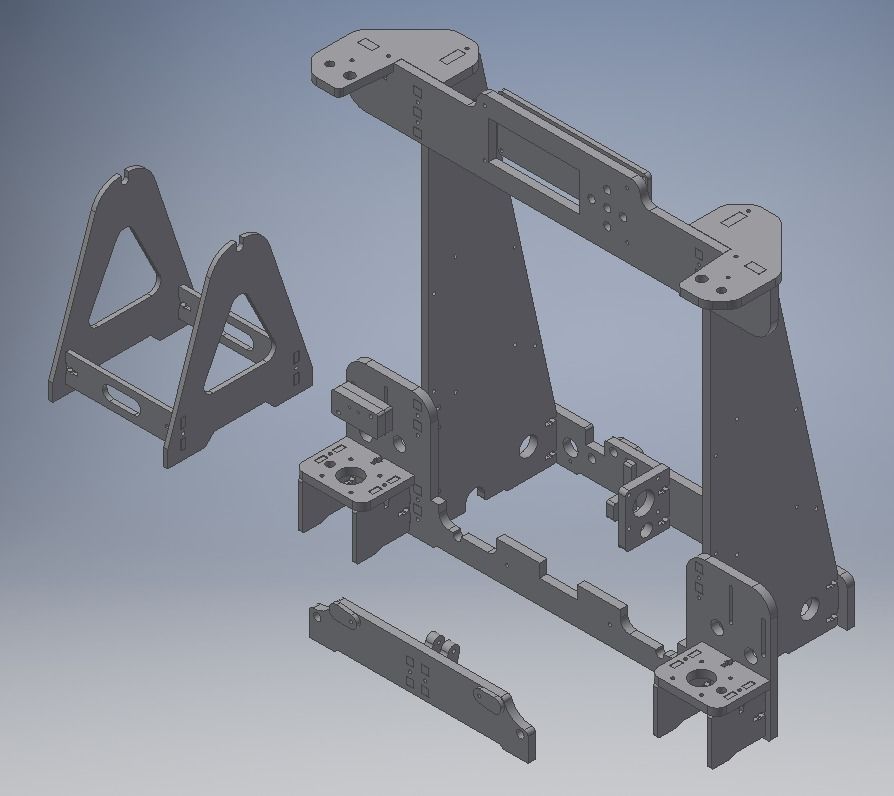 When this happens, the excess material deposited will squash against the previous layer and drip down to the sides of the object’s outer shell, leaving an unsightly finish.
Another parameter to check, after calibrating the extruder steps, is the flow rate. This allows you to multiply or reduce the volume of filament supplied. It is a more direct way of controlling the flow provided by the extruder, depending on the different densities of each material. Unlike step calibration, this parameter is variable. It is not the same to use ABS, PLA or TPU in your printer, so it is advisable to vary the flow rate according to the material used. You can use this test to quickly adjust the flow rate.
It contains instructions for performing the test using a caliper or micrometer. Be sure to read them before starting the test.
Do these problems affect all filament types equally?
There is a property that is common to all materials used in 3d printing: they expand when heated and contract when cooled. So technically any filament can present warping or curling problems. The difference is that not all materials expand and contract at the same rate or at the same speed.
PLA is the most widely used material nowadays because, in addition to being cheap, its shrinkage ratio is one of the lowest, making it is easier to print in broader conditions than most filaments. PETG also features a low shrinkage ratio, but it needs a heated bed to be printed.
Other plastics (like nylon or ABS) shrink a lot, so the use of an enclosed printer is practically mandatory if you want to get acceptable results.
Why does ABS need a heated bed?
ABS is a thermoplastic that definitely shrinks a lot when it cools down. Without the presence of a heated bed to keep the first layers warm at 90°C, the difference in temperatures along the piece will lead to a contraction that lifts up the corners of the piece.
ABS warping is very common and difficult to eliminate. You can minimize the risk by properly leveling your bed and enclosing your printer. Additionally, when ABS curls and cools down, it becomes harder than PLA, increasing the risk of losing the entire print if the nozzle hits the object.
Keep in mind that, unless there is a technical aspect that requires the print to be produced in ABS, most of your problems can automagically disappear by switching to PLA!
We created a recommended products section that will allow you to remove the guesswork and reduce the time spent researching what printer, filament, or upgrades to get, since we know that this can be a very daunting task and which generally leads to a lot of confusion.
We have selected just a handful of 3D printers that we consider to be good for beginners as well as intermediates, and even experts, making the decision easier, and the filaments, as well as the upgrades listed, were all tested by us and carefully selected, so you know that whichever one you choose will work as intended.
Introduction to Resin 3D Printing and Overview Anycubic Photon S
Table of Contents
1. Introduction
2. Printer Description
2.1. Specifications Anycubic Photon S
2.2. Delivery set
2.3. Design description and comparison with the first generation
3. Operation
3.1. Starting the printer
3.2. Slicing programs
3.3. Photopolymer printing in general
3.4. Features of operation of photopolymer printer
3.5. Features of operation of Photon S
4. Conclusion and examples of printing
1. Introduction Your obedient entered / got into 3D printing (underline as necessary) back in 2014. After looking and reading well on almost the only forum at that time, Roboforum.ru, the topic of choosing and buying a printer and seeing that almost every first one there buys a kit of self-assembled Pryusha of a Chinese spill, after assembling which he begins to print parts on it for a new 3D printer, I made the only possible decision: in order not to fall into this inevitable vicious circle, I bought an already assembled clone of the second Makerbot - FlashForge Creator, which I have already mentioned more than once in my articles on 3D printing technologies (blowing dust).
But the topic of photopolymer printing, which gives a completely different potential for the quality of the print, albeit at the price of a smaller size of the latter, inevitably “tickled the nostrils”, enticing the opportunity to get the result already without reservations “well, what do you want, this is 3D printing, not casting”. But the projector photopolymers that were available for purchase at that time did not attract at all with an exorbitant price.
Therefore, the first acquaintance with this technology took place on a self-made printer built on 15 mm rails and ball screws with a FullHD projector. It would seem that this is it - the brightness (light speed), the size of the tray for printing 192x120, the presence of a “nod” in the design, serious mechanics. But alas, all castles in the air stumbled over the harsh reality, as often happens: large size, fragile acrylic bath, dust on the projector optics, a milled platform and its bracket that do not provide for normal cleaning of the photopolymer, let's say politely, the unpleasant smell of Chinese photopolymer, which also turned out to be practically non-working (did not freeze even in the sun), and, as a control, poor sharpness at the corners of the used Acer P1500 projector at the required short focusing distances. As a result, one (ONE in capital letters) successful printout with FunToDo Castable photopolymer was made on this printer, which was later put into experiments. And the main reason why I completely closed the topic of a home-made projector printer for myself is the actual change during this time of technology from a cumbersome and expensive projector to LCD technology that has almost completely captured the market today, when it became clear that a photopolymer, especially a home one, simply must be much more compact, simpler and uniquely to have a closed print chamber. Moreover, the cost of a projector printer and an LCD are completely incomparable, not to mention the intricacies of calibrating the coaxiality of the optics of the projector of the Z axis of the printer.0004
Thus, the real entry into the photopolymer occurred already on the first generation Anycubic Photon bought a little later. This printer had an excellent film tension system, a durable aluminum tray and a platform well adapted for cleaning, but at the same time, due to the cheaper design, it had problems with the stability of the Z axis, so a year later I was already unpacking the Anycubic Photon S bought on occasion and at a discount, which will be discussed further (hereinafter I will call it Photon, indicating the first or second, which is S, generation if necessary).
What is the point of doing a review in any form of an already morally obsolete printer, except, I confess, it’s a sin, participating in a printer review contest, when there are already more promising technologies for using monochrome matrices, and indeed, something, and even video reviews on YouTube on Is this printer enough? Firstly, it is still a very good and quite budgetary photopolymer, sold and relevant in terms of aggregate, secondly, “what we have from the goose” after a year and a half of operation are pitfalls that are difficult to stumble upon during the initial review, features of work, wear, etc. Thirdly, this is an opportunity, based on a review of this printer, to create, along with this, an article on an introduction to photopolymer 3D printing for beginners [the author wipes his hands first with isopropyl alcohol, then with a damp cloth, swearing quietly under his breath]. But I must say that this article reflects my own experience with photopolymer and therefore may be somewhat subjective.
2. Description of the printer
money change?
2.1. Characteristics of Anycubic Photon S For those who are not familiar with this printer, first I will give the main characteristics:
- a 5.5 "RGB matrix typical for photopolymers of this class with a resolution of 2560x1440, giving a dot pitch of 47 microns
- LED UV matrix, which gives better illumination uniformity and thus removes the problem of geometric distortion in the corners
- aluminum tray with groove for pouring out the photopolymer
- platform calibration system with one fixing screw - exhaust air filtering system with two charcoal filters
- Z-axis on two roller guides - ABS housing white versions, I chose black. I will give a photo from the official site, because. after a year and a half of operation, the printer no longer looks like it did when the box was first opened.
2.2. Scope of delivery
The printer itself is delivered in a cardboard box, padded around the perimeter with a sufficient amount of sealant, the print platform and tray are placed inside the case itself and individually packed in a sealant.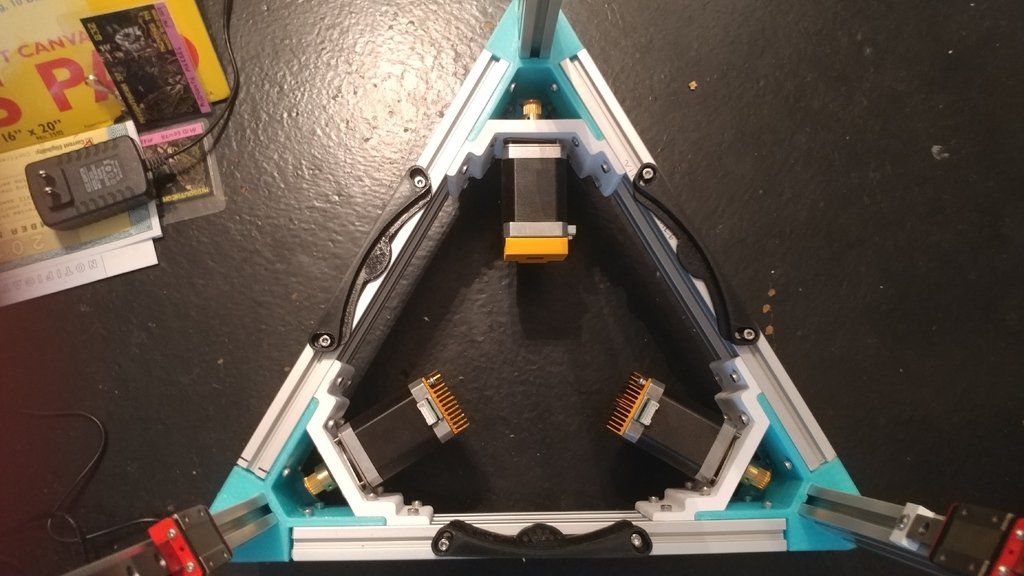 The printer also comes with a set of disposable paper filters for filtering the polymer (you can buy them at auto enamel stores), a plastic spatula, which I personally use to clean the walls of the bath from the photopolymer when draining it back into the container, a pair of gloves, a flash drive with test files and screwdriver. Also, the kit should include half a liter or a liter of branded Ekubikov photopolymer, but this already depends on the configuration of the printer.
2.3. Description of the design and comparison with the first generation
Now let's dwell on the design in more detail and conduct a comparative analysis of it with respect to the first generation, whether the printer has become a predecessor in everything. The first striking difference between the Photons of two generations is the case material. Those who were interested in these models, of course, know about it, but this article is primarily intended not for gurus who know all this, and have already eaten more than one dog on their own construction of 3D printers, but for people relatively distant . .. So, the case of the first generation Anycubic Photon is made of steel, the second one is made of ABS plastic. In a sense, this is even funny, because. this plastic is easily degraded, more precisely, it gradually dissolves upon contact with the photopolymer. If, in the case of a steel case with acrylic windows, it was clear that nothing would happen to him, then there are even doubts whether the walls will lead over time and whether, for example, the door will close with difficulty and stick it to body with this same photopolymer. And it's not that the metal case is a clear advantage, but for Photon, given the peculiarities of its design, unfortunately, yes. More on that below.
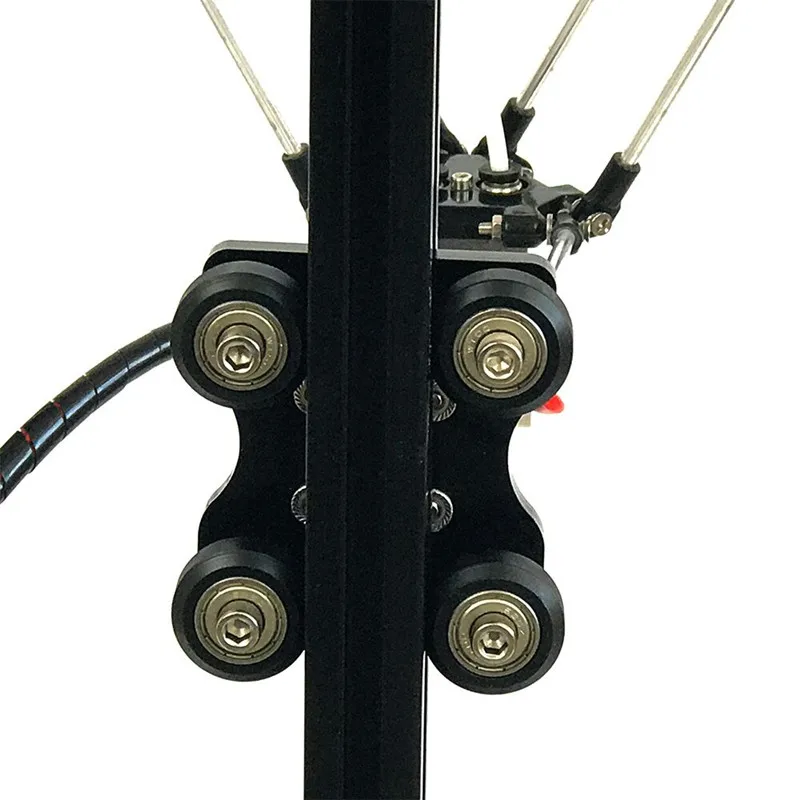
The second feature that, looking ahead a little, was decisive for me when buying, is the replacement of a single Z-axis roller guide with a double one. In the world of harsh homemade products, recognizing only the option with rail guides, when in every second homemade product you can see red-green ones similar to HIWIN (yes, in most cases they are similar, because they are ordered mainly from China, and the percentage of fakes of this fashionable home-made manufacturers, very high) rail carriages, the use of roller guides is not even bad manners, this is an excuse to lead a naked printer designer through a crowd of home-made workers, throwing rotten vegetables at him. Yes, yes, and someone's voice, periodically repeating "Shame!".
Indeed, the first generation with a Z-axis roller guide was very prone to wobble depending on how lucky the owner was with a particular instance. For those unfamiliar with the terminology, this means that the carriage, when lifting and lowering, “walked” horizontally by several tens of microns and deviated by small fractions of a degree. “And how many are these several tens of microns, these are pennies!”. Believe me, no. On all more or less even vertical surfaces or close to them, unpleasant and easily noticeable “waves” appeared, with which nothing could be done. Yes, these carriages have an adjustable tightness, but an attempt to adjust the print quality on the first generation of the Photon did not lead to significant changes. On the other hand, wobbles really catch your eye only on flat surfaces with a large angle of inclination. Why, even without trying this second generation in print, I immediately decided for myself that this was almost the main reason for replacing it? It's very simple: even two such "imperfect" rollers on individual guides, separated by a long distance, despite the seemingly simple solution, wobble removes almost completely.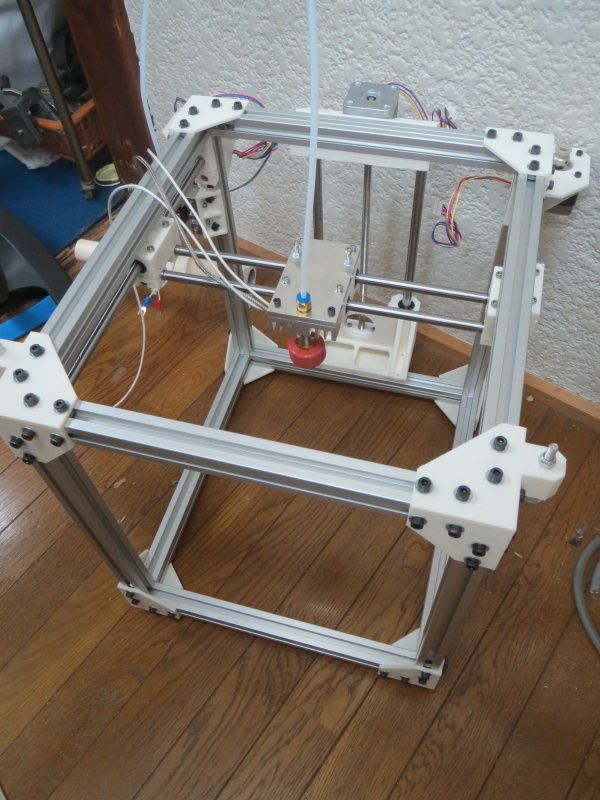 This solution is in the “simple, blocky and works” category, and elementary geometry from high school guarantees “workability” here. These double guides are clearly visible here, as well as the Z-axis close to them (ideally, the location of this axis should be close to plane formed by vertical guides):
The third difference from the first generation of Anycubic Photon S is the use of a backlight LED array. I repeat that, unlike the "bell"-diffuser and a single powerful LED of the previous generation of LCD photopolymers, this design makes the illumination of the entire screen somewhat more uniform, and also eliminates the geometry problems of the printout in the corners of the platform. As a nice bonus, this reduces the exposure time of the layer by approximately 15-20% due to the greater total backlight power. In this not very representative photo, I tried to show how such a block of individual LEDs, usually called “paraled”, shines through the matrix
Another feature that frankly surprised me, which is common to both generations of Foton, is the presence of a carbon filter with an exhaust fan (two fans and two filters in the second generation) of air from the printing chamber. As conceived by the developers, this was to remove the inevitable smell of photopolymer during printing by absorbing it with a carbon filter. Namely, the air extraction from the chamber is necessary so that through the leaks of the body, mainly the doors, the air does not leak out, bypassing the filters, taking with it the smell of the photopolymer. At this point, I want to pause, look thoughtfully at the ceiling and say “Mdaa”. On paper, it might have looked good. But in practice, in my experience, it turned out something like ... Imagine the situation: you work in an office building, and on your floor, sorry, the sewer broke through in the toilet. And so that this toilet does not smell so much, for a while, until everything is repaired, at the exit of it, the “kind” administration put a large fan to blow air from the toilet into the common corridor along which people walk. I agree, the analogy is a little "smelly" in every sense, and not too "literary" for such an article, but it describes the printer's ventilation system well.
 The fact is that the carbon filter does not retain the smell of the photopolymer, and when the fan in the structure actively blows air out of the working chamber, the effect is much more pronounced than if this fan is simply turned off. On the first version, I, hesitantly, turned it off after a while, having previously asked technical support if something would “fall off” there, on the second version, I turned off the blowing fans even before the first turn on.
Here you can see the filter blocks located at the corners
The screen for controlling the printer itself has a small diagonal and is made a little smaller than on the first generation. It is sufficient to manage all the functions, when entering the print menu, each file carries an icon from the slicer, how the printouts will look, but the print icons are very small, smaller than on the first generation, and as a result, it is difficult to see them, what exactly will be printed there, basically you still have to focus on the file name.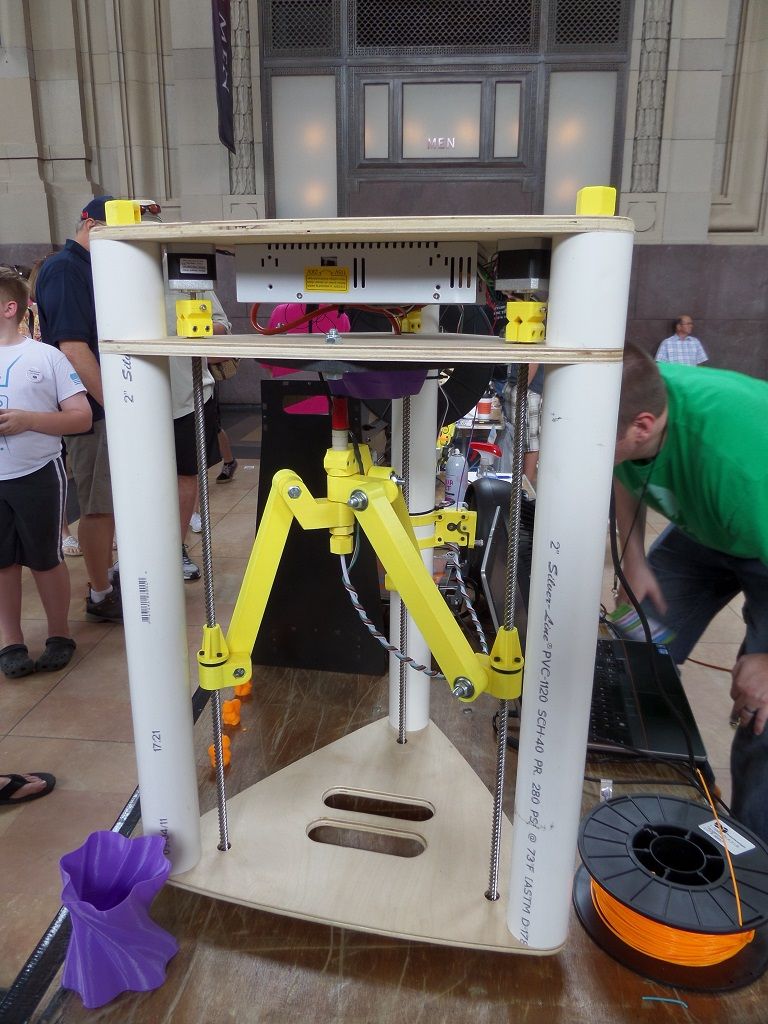
As you can see, in the file selection menu, the legibility of icons leaves much to be desired. When you select the desired file, the preview will open in full screen, but believe me, it will not get much better.
The lifting mechanism is powered by a NEMA 17 stepper motor, as in a large percentage of 3D printers, on a trapezoidal screw and the two roller guides already mentioned above. Engine noise during operation is very low. In general, the printer can be described as quiet.
The printer has only one optical limit switch at the bottom, so keep this in mind when working: in the first generation there was not even a software upper limit, so it was easy to mechanically rest against the upper limit by pressing the platform lift. On the second generation, I personally did not check for this limitation. But in any case, when you turn on the printer, it may not know how high the platform is, so be careful.
3. Operation
3.1. Starting the Printer Starting up the printer is quite simple: 1. We check the tension of the fluoroplastic (hereinafter referred to as Teflon, since this is already an established term) film2. We remove dust from the screen and from the film on the back of the bath and put the bath in place, fixing it with the screws3 intended for this. We install the printing platform in the right place with a loosened screw that fixes the platform in the hinge4. We connect the printer to the network, turn it on and perform a zero and horizontal calibration of the platform, followed by fixing the hinge fixing screw - the calibration video is easy to find on YouTube5. Shake to mix and pour in the photopolymer. That's it, you can print the test "enicubic" that comes on the flash drive.
This turns on the cooling system of the LED (the LED block in the case of Photon S), the platform lowers until the optical zero limit switch is triggered, after which it drops to logical zero (when calibrating the printer, this same logical zero can easily be a millimeter below the limit switch), after which already turns on the illumination of the first layer.
The general rule for printing photopolymer printers is reduced to a long (30-120 seconds) first few layers to compensate for the unevenness of the platform and to ensure that these very first layers “hook” well on it, the subsequent layers are printed with a regular exposure time (about 3 -12 seconds on average depending on printer, resin and selected layer thickness). After the layer is illuminated, the platform is raised to a certain selected height (usually around 4 mm) to tear off the Teflon film from the illuminated layer, after which the platform is lowered back by the same value minus the layer thickness, then a pause is made in the region of one second to “calm down” the photopolymer , after which the illumination of the next layer is turned on. After printing is completed, the platform rises to a height close to the maximum, after which the printer remains in standby mode with an inscription on the screen about the end of printing, and the backlight cooling fan turns off.
3.2. Programs for slicing
“So how to slice on a computer?”. Download the branded Photon Slicer, which already generates printable files in the proprietary Enikubika format. But from my point of view, it is better to use ChiTuBox, which, in fact, Photon Slicer is based on. ChiToo is updated more often than the Enikubik branded slicer, so the possibilities in it will be higher. In general, I can universally recommend this slicer to a novice owner of any photopolymer.
This is how the ChiTuBox interface looks like
And this is a preview of the already cut model, on which it is good to monitor the adequacy of the spaced calipers
3.3. Photopolymer printing in general
1. This has been said by everyone and everywhere, but I cannot but repeat it. The most accurate description is the English word "messy", i.e. dirty and tedious. This is the transfusion of the photopolymer that easily blurs the surroundings, the washing of hands, which are almost impossible to protect even with gloves due to some work features, the transfusion of the photopolymer again, draining the bath, cleaning it, isopropyl alcohol, acetone, conservatory, court, Siberia . .. um ... sorry, carried away . But the general meaning, I think, is clear. Unfortunately, this is not FDM printing, in which everything is much simpler in terms of work.
2. Low predictability of printing results, if you have everything in openwork or even not very calipers. Black box effect: you sent it to print, after which it’s hard to say what happens or not until you take the platform out of the printer and look at it point-blank. Yes, you can look into the windows, yes, you can see if nothing at all has appeared above the surface except for the platform itself, when you can unambiguously cancel printing, yes, you can pause with the simultaneous lifting of the platform, but the essence still remains: you are looking on the platform in the printer, and everything seems fine, but when you remove it and look at point-blank range, critical flaws are often visible there that could not be seen during printing.
3. In the same way, the required shamanism with the calibration of the exposure time and the thickness of supports for various cases, as well as the selection of scales, gaps and supports in FDM printing. This requires experience when you understand that here and here the calipers automatically set by the same ChiTu are superfluous, which will require subsequent excessive cleaning of the surface, but here and here they must be put, otherwise the output will be a marriage.
4. Corresponding to point 1. The processing cycle of the finished printout includes removal of the printout, washing in dirty isopropyl, washing in pure isopropyl, backlight-drying, preferably in an ultraviolet chamber, and washing in acetone. The latter removes that part of the photopolymer that remains even after washes with isopropyl and backlight. Some people use acetone directly instead of isopropyl, but personally I look at this approach with doubt: acetone destroys underexposed fragments more, which can lead to cracks in the model. But this is a debatable issue. In other words, post-processing of the model after printing is a separate procedure that requires time and effort.
5. Cheap photopolymers often smell. .. to be honest, especially during operation, when heating occurs as a result of the exothermic reaction during polymerization. For example, some Chinese, though not all. Our manufacturers (such as HarzLabs, but not only) initially tried to make the photopolymer not have a pronounced unpleasant odor, but now the Chinese have begun to pay attention to this, so it’s already possible to buy a photopolymer that will not carry some mixture of chemistry and fish, even Ali.
6. Most photopolymers are brittle. There are those that have some elasticity and do not prick when trying, for example, drilling, but they usually cost significantly more, at least at the moment. That is, despite the fact that these are essentially cast parts, they can often be inferior in strength to printed parts made using FDM technology.
7. Most prints require rubbing alcohol except for water washable photopolymers. Isopropyl alcohol is usually used because it evaporates faster. First, washing is done with already dirty isopropyl, after which a second washing is done in pure alcohol. Further, the printouts should be illuminated, for this you can use a special illumination camera, the sun, or even the printer's camera itself in the case of printers that have this function. After that, I would recommend doing another wash in acetone to remove the remnants of the photopolymer left after backlighting. Acetone is more aggressive to the photopolymer, but it is not dangerous for an already fully polymerized printout.
8. Can photopolymer printing already provide unconditional quality when the printout is almost indistinguishable from the cast part? Unfortunately, not always. Just like with FDM printing, there are problems with the bottom surface of the printouts, the photopolymer has the same problems. Yes, it allows you to print with large overhang angles, does not create frank porridge in the area of \u200b\u200bcalipers, but still, the printout needs to be finalized in these areas. And even after that, it is not always possible to get a level surface “like a real one”.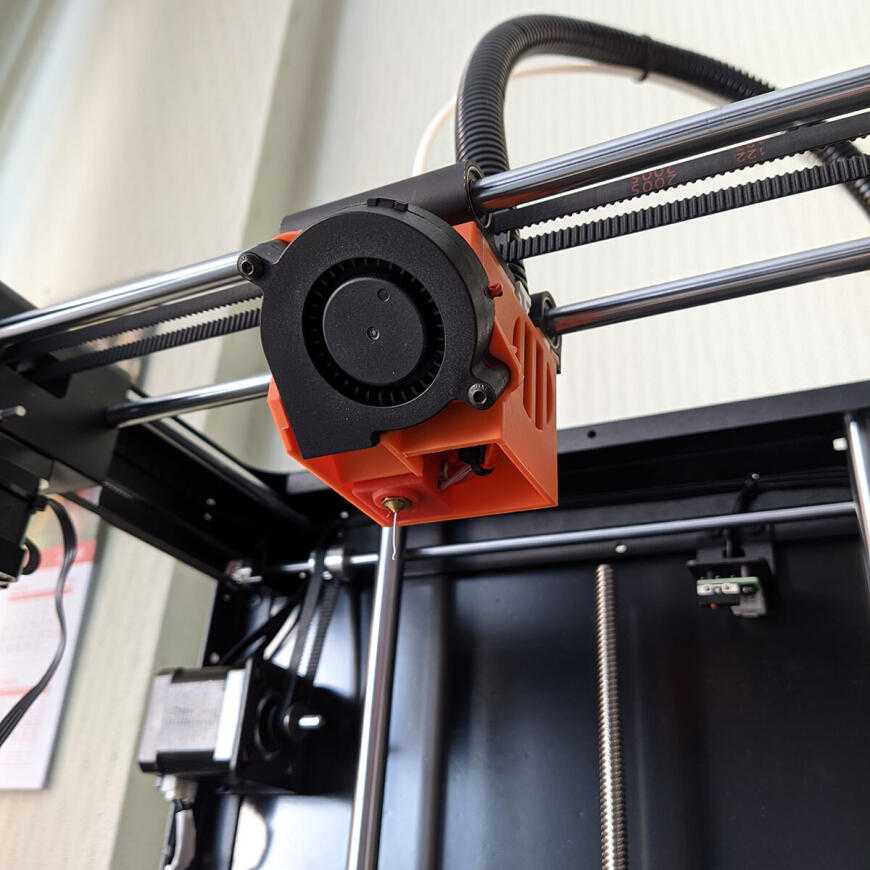 Also, photopolymers, like ABS plastic, have shrinkage, which must be taken into account both during printing and during subsequent exposure - in the absence of calipers, a thin part can simply be bent. But if there are no extreme angles and a large number of calipers, then it is realistic to achieve the quality “almost like casting”.
3.4. Features of operation of photopolymer printer
Here I will give the features of operation of photopolymer printers themselves, i. what applies to printers in general and which are relevant not only for Photon C, but also for any photopolymer built on a similar technology:
without additional manipulations. The duration of problem-free storage of the photopolymer without refilling depends on the specific brand of photopolymer.
2. Once every 10-30 hours of printing, although it is difficult to give an exact figure here, this is individual, and it also depends on the photopolymer used, it must be drained through the filter back into its original storage container.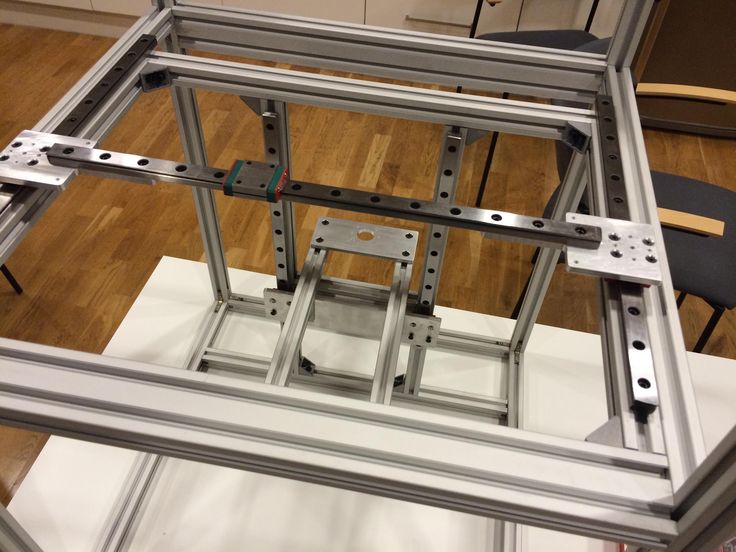 This is not related to the photopolymer itself, but is required to clean the Teflon film, which is the bottom of the bath. It could be said that during operation the Teflon film becomes contaminated, etc., but what exactly happens there, whether the film is contaminated, the photopolymer residue, or some other factors are to blame, but, simply put, the printer stops printing. Yes, something that a couple of seals ago was perfectly printed with this photopolymer and this very file is already coming out with a marriage. And yes, you just need to wipe the bottom of the bath with isopropyl alcohol, pour the photopolymer back in, and everything works fine further. I will illustrate this phenomenon with a specific example, where on the left (on the left photo), the first printout, one or two calipers were missing, as a result which part of the frame came off during printing, and on the second one there was enough of everything, but the tray that was not cleaned in time ruined the print in the bud, when not only the frame, but even the radiator was not printed.
 At the same time, after cleaning the bath, the printing was already without problems.
3. If it is suspected that part of the light remains at the bottom of the bath, during a failed print, it is also necessary to drain the photopolymer and clean the bottom. Best of all, the “blots” of the polymer smeared along the bottom are removed by simply pressing a finger on the film from the back. This "blot" is easily peeled off from the film, and the film itself is not damaged. It is necessary to do this cleaning so that when you start the next print you do not damage the film, or even the printer screen by pressing this “jellyfish” with the platform from above, especially since most likely printing in the presence of such an illuminated piece of photopolymer on the film you most likely still won't work.
4. Film needs to be changed periodically. This procedure is simple, but rather painstaking, plus you must have a supply of film. The film does not have a direct "timer" of life, its wear depends on the duration of exposure of the layers, the shape of the printouts and mechanical damage during cleaning.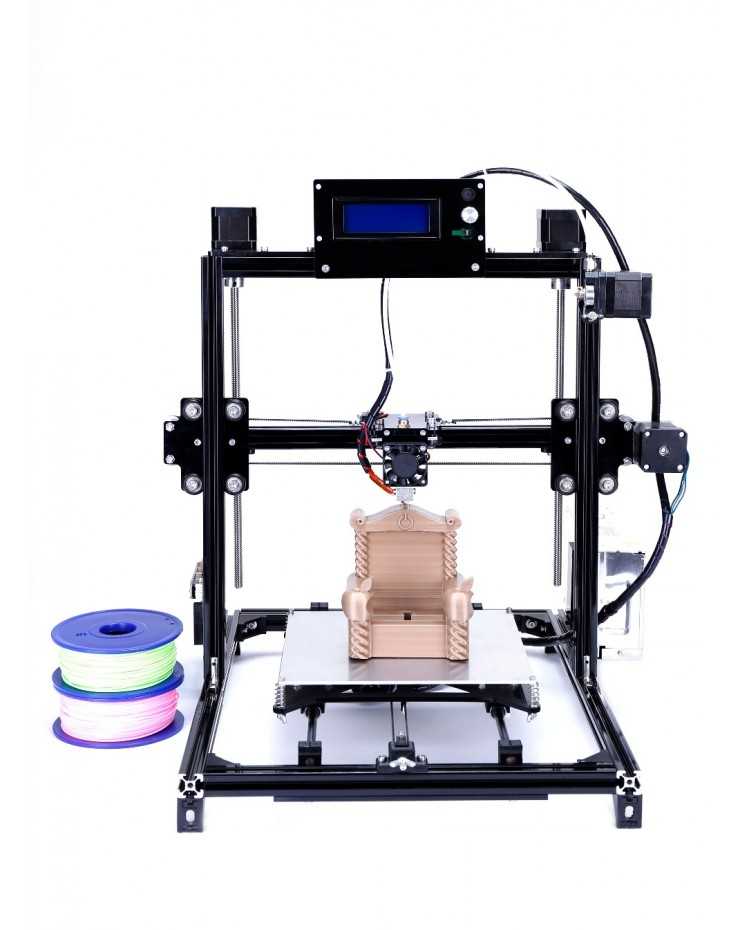 It can work for a very long time, and require replacement if mishandled and after 2-3 prints.
This is the process of replacing the film, shown by the manufacturer himself - an excellent and understandable video, in which, in particular, you can appreciate the genius of the bath design. Yes, it is difficult to establish who invented it first, but the fact itself does not negate it
5. Teflon film is strong, but even a careless swipe of an angle with a plastic spatula during cleaning can easily leave an indelible mark on it in every sense. Moral: clean the film carefully, it is better to let the photopolymer drain from it without external influences and then clean it with isopropyl alcohol in the bath already put in place.
6. The film on the side of the screen and the screen itself must be clean. Free of dust and grease. You can clean it with the same isopropyl and blow it with a "pear". Do not allow photopolymer to get on the screen. And, moreover, do not turn on the backlight if there are at least small traces of photopolymer on the screen, otherwise you will change the screen.
7. Do not print hard and thick parts directly on the platform itself without supports. Then you will remove such a "bar" from the platform with a hammer and a chisel, and not with a metal blade.
8. My experience is that it is easier to remove parts from the platform, for example with a knife, rather than a plastic spatula - the latter is more likely to break itself than to actually remove any part.
9. An important question that a person who has had a glimpse of photopolymer printing might ask is: "Is it possible to get a print that feels tactile like a molded part, without any signs of stickiness, slipperiness and other residual effects" I once was goo"? Yes, you can: obligatory illumination and washing in acetone after. There are still a couple of minor reservations here, but in general the answer is positive.
this greatly increases the wear of the Teflon film. The rate of its wear can be indirectly heard by the sound of a layer tearing away from it when the platform is raised. Ideally, this should be almost inaudible.
11. To select the exposure time specifically on Photon C, it is possible to use the r_e_r_f.pws file located on the flash drive, in which the printed surface is divided into fragments horizontally, each fragment is illuminated for one second more than the previous one. Thus, a sufficient exposure time can be selected. Also, on the sites of photopolymer manufacturers often publish tables of exposure time settings for different layer thicknesses, as well as rise speeds and delay times before printing.
This is how the standard Enikubik calibration model looks like. There are four elements printed at the same time with different exposure times.
3.5. Features of operation of Photon S
The main feature and, frankly, the disadvantage is the use of a one-piece body with a door, in contrast to the use of a "hood" in most printers (also in newer Enikubik printers). Thus, you do not have an insulated sealed hood with work area seals. Those. your printable area is leaking. And this means that all the same, when printing, you will get the smell of photopolymer around. Not too strong, but anyone will notice it. The fact is that the design of the door is made unsuccessfully and does not provide for seals that would hold back the evaporation of the photopolymer through leaks. Structurally, this seems to me the biggest miscalculation of the Foton developers. The lack of a normal handle is added to the disadvantages of the door already described, as a result of which the door sometimes becomes difficult to open without fear of simply breaking it. In addition, the entire top of the printer would benefit from a resin-resistant material. In this regard, even the same unsuccessful design of the upper part of the first-generation Photon printer was better, because. there was steel, plus a handle to open the door.
When printing, a small amount of photopolymer drops falls on the bottom of the door, so I would recommend immediately tape it with black tape from the inside - the standard width of the tape just fits the width of the grooves needed for pasting - if you look at the door from the inside, you will immediately understand , "about where" I'm talking about. This will reduce the chance that your door will just start to stick when you miss the photopolymer drops on it.
In addition, I did not notice any other noticeable flaws that would complicate the operation of the printer. Oddly enough, it is difficult for me to describe any specific shortcomings of this printer that affect its operation, which would not be on others. Aside from the questionable case design and the rather odd chamber purge solution, this printer is a perfectly normal workhorse, printing fairly consistently within the limitations of technology and design. Such limitations, for example, include the missing easy layer separation mechanism that FormLabs Form 3 has, but such technologies rarely wander into budget and extra-budget solutions, to which Photon S belongs.
Double roller guide mechanism avoids wobble - please note that wobble is a very likely evil for all printers with a single guide, which is often found in budget solutions.
RGB screen, unlike monochrome ones specially released for photopolymer printers, has slightly less detail for equal screen resolution and longer exposure time of the layer, but do not forget that the total time per layer is the sum of the exposure time, rise time, fall and pause before turning on the illumination of the next, i. e. even a 100x increase in flash speed will not give you even a 10x increase in print time.
The LED matrix cooling fan is quite quiet, it is noticeably quieter than on the first version, it will not even interfere with sleep if it turns out that the printer is in your room, because the sound of the lifting and lowering of the platform is even a little louder than the cooling system. The only caveat: because. I immediately turned off the chamber purge fans, I can’t say about the noise of their work. But, remembering the design of the case, I would not recommend sleeping in a room with a working photopolymer without good ventilation.
i.e. the only limitation, but quite important for a certain number of potential buyers of the printer, is the leakage of the case during operation. So, to reiterate, when working, you cannot completely avoid the smell of photopolymer in a room, unless the room is large enough and well ventilated.
4. Conclusion and printing examples
Can you recommend buying Anycubic Photon S as a budget solution? Yes. It gives quite good print quality, and at the same time it is very inexpensive by today's standards. When choosing, you should pay attention to how critical the absence of a conditionally sealed print chamber will be for you, which other printers can boast of, in particular in the budget segment, but which the Photon lacks. On the other hand, I recommend paying attention to the double roller guide and the close-mounted lifting axle, which eliminates wobble, which is often not found in many other budget photopolymers. Also, the use of a matrix of LEDs can be attributed to the pluses, which is also not available for all budget solutions. This makes, with the reservations already indicated, this printer quite successful, and I can recommend it for purchase and operation.
And as for the question posed at the beginning of the article, was the game worth the candle, was it worth changing one printer for another that is so different from it? Yes ... The fact is that the quality of printing on the first Photon, unfortunately, did not suit me. Yes, it was possible to replace the standard Z-axis with a double rail guide, but the replacement kit at that time cost the same as the cost of an “upgrade” by replacing the entire printer with a second generation, taking into account the sale of the old one. Therefore, for me personally, the choice was obvious.
At the end of the article, I will give examples of what can be obtained on this printer, so to speak, from personal stocks.
Feed augers made for testing in slightly different configurations
Models of pumps made from a photograph
Made for a co-worker a plinth for the head of a character from Warhammer.
Pay attention to the print direction. Printing on calipers allows you to easily separate the printouts from the platform later, and the slope of the surface reduces the wear of the bath film by changing the position of the boundary in layers. You can see that the calipers on the first layers still moved away, this required subsequent grinding of the base.
Cartridge cover and platform. The second one was also made for the already mentioned comrade.
One of the teeth had to be removed and placed separately for subsequent gluing, because. it just didn't fit in the printable area.
A gift for the 8th of March - a simple but quite nice one
A couple of playful medals
And finally, a couple of frames from one rather long project to create a truck model.
Thank you for reading
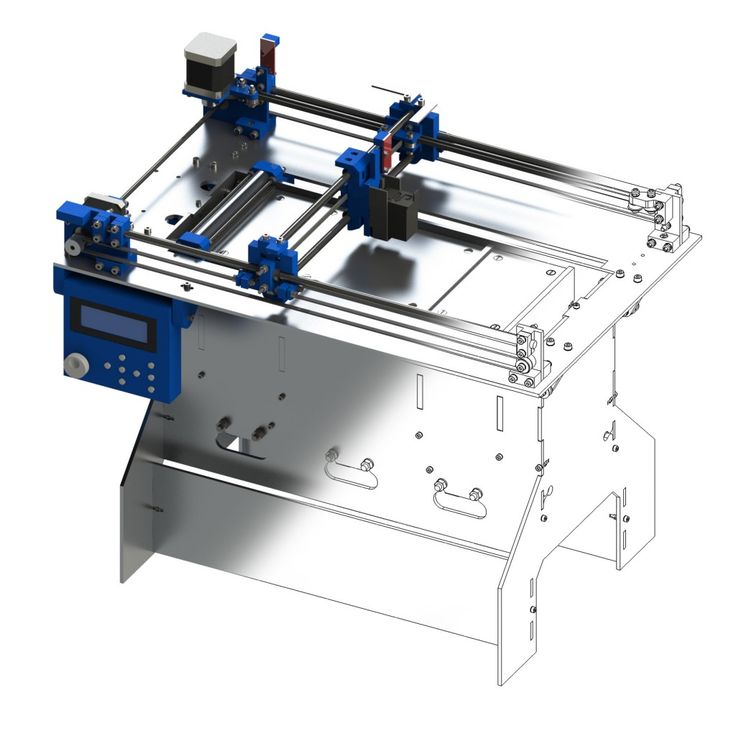
Aluminum Angle Printer
Since the competition has already been announced, it is necessary to overcome laziness and write your own success story of entering the mysterious world of 3D printers. I warn you - open this post with caution, there will be really a lot of pictures :)
The desire to have a printer has been there for a long time, but somehow abstract, not insistent. Sometimes I looked at Ali or Girbest for all sorts of promotions with their underprinters, sometimes I was even ready to take a chance and buy a set, but something held me back.
The turning point happened one fine winter day, I can even give the exact date and time. But Giktimese read an article about self-assembly of a printer from components from Aliexpress. On that day, I discovered that in addition to the kinematics of the tableshops, there are also funny H-Bot and CoreXY.
The desire to make a printer has gone from a 'maybe someday' phase to a 'why not?' phase.
I started to climb on Ali, choose a kit, plus read specialized forums.
The next push was a topic on the robo-forum.
At that moment the engineering thought began to work, I began to figure out on a piece of paper what went where and how. Immediately comes the understanding that I won’t design much with a piece of paper, I need to install some kind of specialized software.
I put myself a SketchUp. Cool, convenient, a lot of learning resources, I even drew something. But all the time there is some kind of latent feeling of a toy software, as if you are trying to write a serious program in BASIC.
OK, no one is chasing me, you can figure it out slowly, I take a pint of rum, sing along, put on over the knee boots and a black eye patch, put a parrot on my shoulder and yell 'Piastres!' I download pirated SolidWorks from torrents.
Well, it's already a completely different feeling. I've been stupid for several days, trying to figure it out, going through all sorts of tutorials with varying success, until at one fine moment I reach enlightenment.
First attempt to draw a printer. I am laying on laser cutting of aluminum, because local prices for a machine tool profile are just beyond the garni of good and evil.
After a while it dawns on me that I will have to bend the cut plates myself, I can’t do without corners, and then I find a shop where they sell cheap aluminum profiles of any size, plus cutting for a penny.
The old project goes into the trash. We start a new one, but we approach it with all seriousness and start a repository on github. By this time, the first parcels from aliexpress begin to arrive. There is nowhere to retreat.
A sensible (as it seemed to me at that time) project was created in a couple of weeks: H-Bot kinematics, MGN9 rails250mm for the head and 300mm for the table, while the top rails are upside down, which, in theory, should reduce the ingress of dirt and dust on them.
The frame is assembled from aluminum corners of various sizes with rivets. This design turned out to be surprisingly successful and technologically advanced, I took the corners 30x30x2, but in fact it turned out that even 20x20x1.5 provide quite acceptable strength. Separately, I bought a 22mm cutter, NEMA17 sat in a corner like a glove.
True, it was not without a rake. The package of the ordered corner comes to me:
Remarkably packaged, everything is neat, but something confuses me. I'm looking at the ends.
Well, nifiga, they promised 0.1 cutting accuracy. Well, okay, 'cheap fish - rotten yushka', if there is no stamp, then we write on the toilet. We start the assembly, experiencing a periodic engineering orgasm:
There were even fewer fakapov than I expected, almost everywhere everything coincided, except that a couple of times I had to adjust the holes or ends with a needle file.
Kolkhozim temporary fastening of the hot end, designed to be printed later, normal, with airflow, made of ABS:
Turning on the hot table for the first time. By the way, all electronics are powered by a 24 volt power supply, and fans are also bought for 24 volts. And the Arduino power is soldered to DCDC instead of a linear regulator.
Everything is almost ready. In anticipation of undelivered parcels from China, I do all sorts of garbage, stuff wires into braids, make legs for the printer. In short, like a cat that licks eggs when he has nothing to do.
Finally, almost all the parcels have arrived, there are a few non-critical little things left. We start to connect the wires, earn the achievement 'the first burned microcircuit'
Calibrating the table, catching all sorts of bugs along the way:
A little more alterations, and here it is, the first test cube:
Then I tried to print all sorts of toys for the child, plus I thought about a serious alteration of the printer, because a bunch of all sorts of funny jambs got out:
I was surprised to find that another toy tore out a piece of borosilicate glass 8-)
Now the printer is slightly disassembled, the kinematics on CoreXY is being redone, because the M3 screws are not strong enough to hold the tension of the belts with H-Bot:
I will also change the table for a silicone heating pad, put a two-headed hot end, etc.