3D printing backgrounds
500+ 3D Printing Pictures [HD]
500+ 3D Printing Pictures [HD] | Download Free Images on Unsplash- A photoPhotos 8k
- A stack of photosCollections 10k
- A group of peopleUsers 7
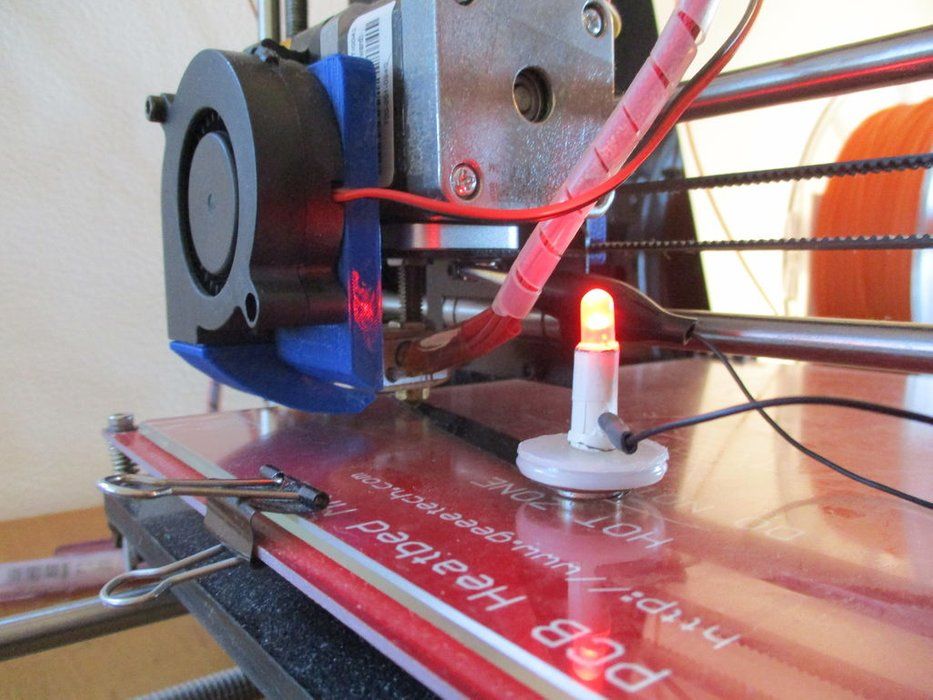
3d printer
machine
person
electronic
computer
technology
keyboard
hardware
computer keyboard
Unsplash logoUnsplash+
In collaboration with Getty Images
Unsplash+
Unlock
Hd computer wallpapersemployment and laborukraine
Gavin Allanwood
ukenglandnophead
–––– –––– –––– – –––– – –––– –– – –– –––– – – –– ––– –– –––– – –.
Minku Kang
대한민국seoulfactory
Opt Lasers
laser cutterwood engravinglaser
Kadir Celep
technologyberlinprusa mini
ZMorph All-in-One 3D Printers
stemcnc milling3d print
Unsplash logoUnsplash+
In collaboration with Getty Images
Unsplash+
Unlock
Hd modern wallpapersmenequipment
Karl Hörnfeldt
malmöswedenplastic
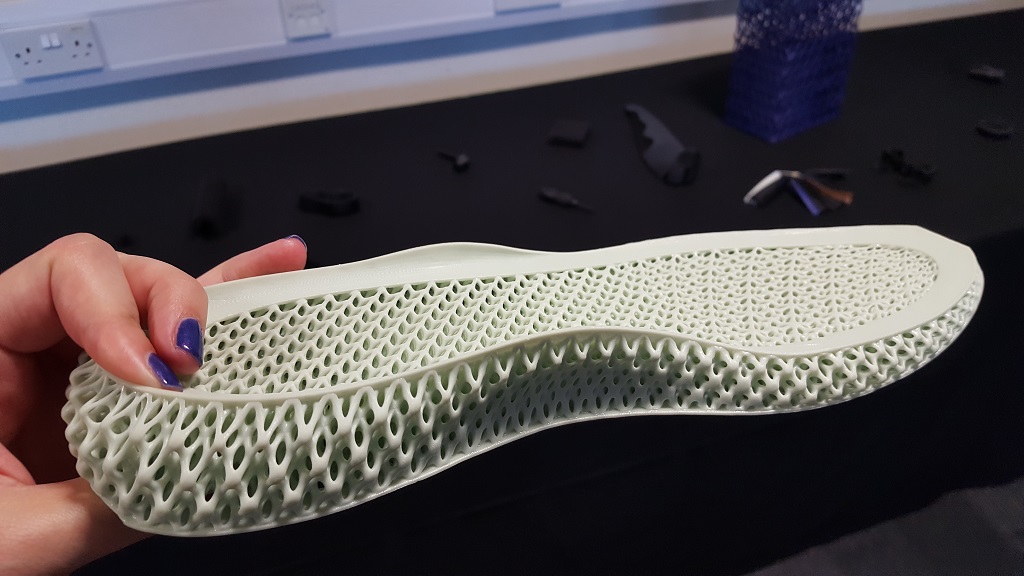
Tom Claes
orthoticscast
Rob Wingate
Hd design wallpapersengineeringadditive manufacture
Andrea G
barcelonaespanyaarchitecture
Tom Claes
orthopedicscustom-madewellbeing
NEW DATA SERVICES
deutschlandoldenburgwork in progress
Osman Talha Dikyar
3d printerchessfilament
Tom Claes
Hd grey wallpapersbracecasts
SIMON LEE
digital imagerenderHd 3d wallpapers
ZMorph All-in-One 3D Printers
machinemachiningprototyping
Kadir Celep
germanymakersprusa
Tom Claes
orthosesultimakerneck
eMotion Tech
francetoulousetechnical parts
Hd computer wallpapersemployment and laborukraine
대한민국seoulfactory
technologyberlinprusa mini
Hd modern wallpapersmenequipment
orthoticscast
barcelonaespanyaarchitecture
deutschlandoldenburgwork in progress
Hd grey wallpapersbracecasts
orthosesultimakerneck
francetoulousetechnical parts
–––– –––– –––– – –––– – –––– –– – –– –––– – – –– ––– –– –––– – –.
ukenglandnophead
laser cutterwood engravinglaser
stemcnc milling3d print
malmöswedenplastic
Hd design wallpapersengineeringadditive manufacture
orthopedicscustom-madewellbeing
3d printerchessfilament
digital imagerenderHd 3d wallpapers
machinemachiningprototyping
Related collections
3D Printing
9 photos · Curated by Marc Hartkopf3D printing
12 photos · Curated by Gaëlle Dufour3D Printing
7 photos · Curated by Sonja Perduegermanymakersprusa
Hd computer wallpapersemployment and laborukraine
technologyberlinprusa mini
orthoticscast
orthopedicscustom-madewellbeing
Hd grey wallpapersbracecasts
francetoulousetechnical parts
ukenglandnophead
stemcnc milling3d print
malmöswedenplastic
barcelonaespanyaarchitecture
3d printerchessfilament
digital imagerenderHd 3d wallpapers
germanymakersprusa
–––– –––– –––– – –––– – –––– –– – –– –––– – – –– ––– –– –––– – –.
대한민국seoulfactory
laser cutterwood engravinglaser
Hd modern wallpapersmenequipment
Hd design wallpapersengineeringadditive manufacture
Related collections
3D Printing
9 photos · Curated by Marc Hartkopf3D printing
12 photos · Curated by Gaëlle Dufour3D Printing
7 photos · Curated by Sonja Perduedeutschlandoldenburgwork in progress
machinemachiningprototyping
orthosesultimakerneck
Unsplash logoMake something awesome
3D Printing Background :: 3D Printed Parts
What is 3D printing?
3D printing is also known as rapid prototyping fabrication or additive manufacturing, it is a low volume production and prototyping process whereby a real object is created from a 3D design. The digital 3D-model is saved in STL format and then sent to a 3D printer. The 3D printer then print the design layer by layer and form a real object.
What is a 3D printable design or model?
Designs or models are 3D printable when they can be sent directly to a 3D printer. A 3D printer needs files in the industry standard file format STL. Most 3D design software can export to STL. 3D printable designs must be watertight, meaning that the design has only closed solids, and no open surfaces. All planes must have an internal and external thickenss.
What can you make with 3D printing?
In 3D printing area, people say "If You Can Draw It, You Can Make It". Many items can be made with a 3D printer. However complicated objects can only be made by professional 3D printers, they are not yet affortable for common family.
What 3D Printers aren't?
3D printers do not:
- Print 3D images (like on 3D TVs) on paper, brochures or name cards; 3D printers create real tangible objects out of real materials
- Magically transform photos into sculptures; objects must first be design or draw in CAD software, then exported to STL before they can be printed
- Substitute traditional manufacturing methods; 3D printers are used to prototype and make limited productions of a new design
What are the materials used to print 3D objects?
Many different materials can be used for 3D printing, such as ABS plastic, PLA, Selective Laser Sintering (SLS) materials such as polymides and other sintering powders, stereolithography (SLA) materials such as Acrylic resins and photopolymers wax.
At Maxxeshop, we are able to fabricate 3D objects with ABS, PLA, Flexible rubber-like plastic, dissolvable plastic such as HIPS and PVA, and unique to Inventadore only - SLS polymides composite materials such as PA12 & 11 nylons, ABS and glass or carbon fibre composites and alumide.
Interested to fabricate your 3D objects in metal? Talk to us and let us help you to realise your idea in metal 3D object.
What are ABS and PLA?
ABS (Acrylonitrile Butadiene Styrene) is a common thermoplastic well known in the injection molding industry. It is used for applications such as LEGO, electronic housings and automotive bumper parts.
PLA (Polylactic Acid) is a biodegradable (under the correct conditions) thermoplastic derived from renewable resources such as corn starch or sugarcane. It is one of the most popular bioplastics, used for many applications ranging from plastic cups to medical implants.
- ABS, ASA and PLA can be used to create dimensionally accurate parts, printing details down to 0.
 8mm and minimum features down to 1.2mm. For connecting or interlocking parts, a tolerance of 0.5mm is recommended and using a minimum wall thickness of 1 - 2 mm will ensure adequate strength in wall elements.
 - Due to its lower printing temperature, PLA, when properly cooled, is less likely to warp (making it easier to print with) and can print sharper corners and features compared to ABS.
- With similar tensile strengths, ABS and PLA are both adequate for many prototyping applications. ABS and ASA are often preferred due to its improved ductility over PLA. With a higher flexural strength and better elongation before breaking, 3D printed ABS can be employed for end use applications whereas PLA remains popular for rapid prototyping when form is more critical than function.
- For high temperature applications, ABS or ASA (glass transition temperature of 105°C) is more suitable than PLA (glass transition temperature of 60°C). PLA can rapidly lose its structural integrity and can begin to droop and deform, particularly if under load, as it approaches 60°C.
- PLA is stable in general atmospheric conditions and will biodegrade within 50 days in industrial composters and 48 months in water. ABS and ASA iare not biodegradable, however it is recyclable. PLA is regularly used for the production of food related items.
How long does a 3D print take?
It depends on the size and complexity of the print, and also on your chosen layer height. A finer, higher resolution print will take much longer, but will look very much smoother.
How much will it cost to print?
This is a very common question, however is it impossible to provide you with an answer remotely close to the actual price you would pay to print your part.
Unlike other 3D printing service centers we charge by amount of material consumed, and not by the outer dimensions of the object, as such objects of the same size may have different prices due to their geometry or shape.
To illustrate the complexity of quoting a price without seeing the corresponding STL file, lets consider three 10cm cubes:
- a solid block;
- a hollow box with 5mm walls, and
- a wireframe with 5x5mm vertices.
Although these three cubes have the identical outer dimensions, they differ completely on every other aspects, as shown in this table.
| Effective Volume | Weight Consumed | Support Material Consumed | Time | |
|---|---|---|---|---|
| Solid Block | 1000 ㎤ | 1999 g | 35 g | 22:45 h |
| Hollow Box | 271 ㎤ | 560 g | 48 g | 22:45 h |
| Wireframe | 28 ㎤ | 153 g | 239 g | 22:45 h |
Which comes down to a 600% price difference between the Solid Block and the Wire Frame cubes.
For objects other than cubes, the price difference is also highly correlated with the quality and capabilities of a 3D modeler, and his or her abilities to design for a specific manufacturing technology.
As design rules are different for each 3D printing or manufacturing technologies, printing something that is designed for one technology while using another might be possible, or might be super expensive.
About fragile and delicate parts
Designs often require the inclusion of fine, delicate and fragile features; features which push the limit of today's 3D printing technology.
We fully understand the need for these features and do our best to ensure they are printed successfully and accurately.
Whenever possible we will identify such fragile and delicate features and provide you with advice and assistance on how to modify your design for a successful print.
However, if you do choose to print parts which we feel are too fragile and delicate, we cannot be held liable for them breaking as we manipulate the parts post-print. In which case the client remains responsible for the cost of printing these parts.
Alternatively, we can deliver you as-out-of-the-printer parts, to which support material remains attached.
Material density
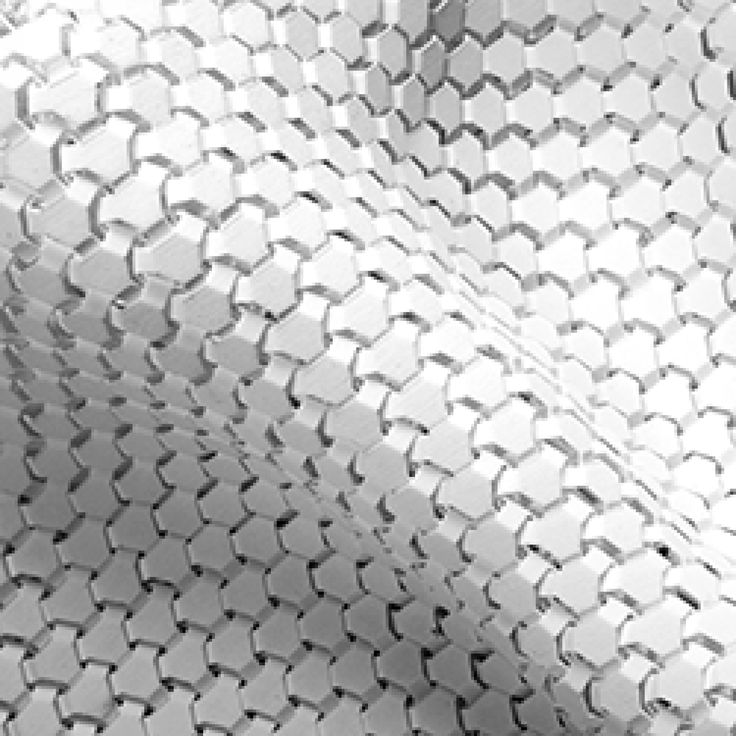
Varying the material density will effectively reduce costs of a 3D print. It is to note that varying a models' material density will significantly impact its mechanical properties.
Cost saving through material density variations in FDM 3D prints can be achieved by varying the width of the internal honeycomb scaffolding structure, which will in turn drastically reduces the printing time. The images below show possible honeycomb widths.
In both cases, the shape or external appearance of a model is unaffected.
Print Definition
Our printers feature selectable print resolution choices for a balance of speed and quality, from Ultra-High definition 50 micron layers (about the thickness of a piece of normal printer paper), a middle 100 micron layer, a large 200 micron layer and a larger 300 micron layer setting where speed and turnaround is the biggest priority.
Designing for 3D printing
To successfully 3D print your design please take the following considerations into account:
- Design to scale. Design using real world measurements: to the size, specifications and orientations your design should be 3D printed.
- Consider printer resolution. To ensure a successful 3D print, design the smallest feature to be no less than twice the printers' resolution.
- Designing moving parts. When designing assemblies with moving parts, provide an allowance of at least 100 microns between any contacting surfaces.
- Design single solids. Designs composed of multiple stacked and juxtaposed solids will 3D print as multiple stacked and juxtaposed solids instead of forming a single unified solid. Before exporting your design to STL, ensure that all stacked or juxtaposed solids are merged into a single solid.
- Design closed/watertight objects. Designs with surface gaps cannot be 3D printed. After exporting your design to STL, use Netfabb to ensure that your designs' surfaces are both closed and oriented. If they are not, use the repair functions to close and orient them.
3D printers have a few mechanical limitations preventing them from creating certain geometries, as such certain considerations must be taken into account during the design process.
- Floating Surfaces
For the same reasons, floating surfaces are particularly difficult to print, these include structures such as the bar in the letter 'H' or the arch in the letters 'D', 'O' or 'Q'. We recommend designing floating surfaces using parabolic or pyramidal scaffolds.
- Unbalanced structures
For the same reasons, unbalanced structures are particularly difficult to print as they often keel over under the weight, as such we recommend designing parts for their centre of gravity to be above their base.
- Small Details
All FDM 3D printers over-extrude slightly during sharp direction change, as such small details such as holes and saw teeth or points tend to not be as sharp as the design prescribes. These defects can either be fixed by filing or sanding the over extrusion or by designing larger features and by using rounded corners, which effectively dampens the speed of the direction change.
- Plan for the print
We recommend designing your part following two simple rules:
(1) the base of the part should be no less than 80% of the largest area and
(2) orient the part so that all its features point upwards (as opposed to downwards or sideways).
Software recommendation
We prefer, and recommend, designing with Siemens Solid Edge, Autodesk Inventor or Solidworks, however if commercial software is not an option, there are excellent free software you can use to do 3D modelling:
- SketchUp.
A suite of applications for professional design, visualisation and communication.
- Blender. Blender is the open source, cross platform suite of tools for 3D creation.
- Autodesk Fusion 360. A powerful, yet simple 3D creation and editing tool which supports many 3D printers.
To validate, analyse, edit and repair STL meshes, we recommend Autodesk Meshmixer or Netfabb Studio Basic.
Download backgrounds - online presentation
Review
Level 3
Lesson 5
www.technoschool.club
[email protected]
b
+7 (495) 150-17-12
Checking homework
150.90 Homework
Load the Endgame_1, Endgame_2 and Endgame_3 backgrounds from
of the DZ folder
Homework
2. Add conditions that will display background
Endgame_1 if the second player wins, background
Game_2_2 if there is a draw, and Game_End_3 background if
the victory of the second player
Homework
3. Add sounds and music to your project
Today we will
Learn what types of effects
are when working with images in
Scratch
Today we will
Review how
variables work, loops and
get acquainted with block
"If ... then ... else"
Today we:
Let's start creating
game Brawl Stars and
create a level
"Capture of crystals"
Review
Review:
• What is cloning in Scratch
• What is cloning used for in
Scratch and what was it for in our
project?
• Describe the operation of the commands shown on the slide
Repetition:
and
or
• Name the logical operators
• What are logical operators used for?
• How is the "or" operator different from the "and" operator?
• What is the operator not for?
Programming
Let's get to work!
Open Scratch
Open Scratch
To do this, you need to double-click the left
by clicking on the shortcut of the program
x2
+
Load backgrounds
• Go to the "Scene"
• Open the "Backgrounds" tab
• Load all the necessary
backgrounds from the folder "Backgrounds" in
blanks for the lesson by clicking
on the button " Load background
from a file»
To load several
files at once, use
a combination of the left mouse button
and the Shift key
Load backgrounds
• Set the correct order of the scene backgrounds
• Remove the extra background
• At the beginning of the game we will
see the "Screensaver" background
• Next, randomly
any of the "Menu" backgrounds will be selected
• Well, after the start of the game
the background will have to change to "Game"
Load the sounds
• Go to the "Sounds" tab
Scenes
• Load the files "Menu"
and "Game" from folder
"Music and Sounds" folder
blanks for the lesson
is useful to us in this
project, so we can delete it
• Instead, we need to add
sprites Brock,
Colt, Shelly and Button
from the blank folder for
lesson
Check the result
Add characters
• Add each
character its own replica of
• To do this, open the
character sprite,
go to the tab
"Sounds"
• Load the sound from the file
for each brawler
• Pop sounds for
each sprite can be
delete
Add characters
• We can hide all
extra sprites
that we don't need yet
• To do this, right-click
on the sprite and select
"Hide"
• The action of this button
is comparable to the action of this button
"Hide" commands
from the "Appearance" tab
Program the backgrounds
Build the scene script so that when you click on the green flag
the background changes to the splash screen, and after a random
time interval from 2 to 5 seconds the script transmits
"Menu" message
Let's check the result
• Upon completion of the download,
the transmitted message
"Menu" will inform the game about
that it is necessary
to load the game character selection window
Program the backgrounds
• Program the scene
so that when messages
"Menu" stopped
execution of all scripts
scene, and the background changed
to a random menu background
• Add infinite sound
playback
"Menu"
Check the result
Let's program the menu
• Message "Menu"
will not only allow us to change the background
, but also of course
display all sprites
characters and the button
"Play"
• Write a script for sprites
Colt, Shelley, Brock and Button
in this way so that when
the green flag is pressed
the sprites are hidden, and when the message
is received
"Menu" on the contrary
are shown on the screen
Program the menu
• Add to the scripts that
start their work at0003 receiving message
"Menu" of the command "Go
to X: . .. Y: ..." in order for
sprites Colt, Shelley,
Brock and Button to accept
the correct location of
on the screen
• To change the size of
, you can use the
command " Set
size … %”
Check the result
Program the menu
• Characters added to
our menu is not just
so, when you click on
character sprites, we
will be able to select
“brawler”, for which
we will play
• In order to select a character
we need to create a
character variable
Repetition: variable
• What is a variable?
• What are they
used for in games?
• Which
commands are used to
work with variables?
• What is the difference between the
commands "Set ...
value" and "Change
... to ..." ?
Let's program the menu
• The Character variable will
store inside itself the name of the
character we are
will be selected by clicking on the sprite
• To do this, add the command “When
sprite is pressed” from the “Events” tab
for the sprite
Colt
• Add the command “Set . ..
value”, set the
variable Character
to the value “Colt”
Program the menu
• Duplicate this
script for all of our
characters
• Don't forget to change
the value that the
variable will take and
the name of the sound that
will play when sprite 9 is touched
0003 Program the menu
• Add a script for the sprite
"Button", in which
when you click on the sprite
the message "Game" is transmitted, and
the sprite itself is hidden
Check the result
Program the menu
• The message "Game" will lead us to the game itself in
Capture the Crystals mode, but to start
we need to hide the character sprites
• To do this, add the command
"When I get ..." from the
tab "Events", select the message "Game"
• Add command
"Hide"
• Duplicate this script
Program menu
• Return to scene scripts and
hide variable
"Character" by clicking on
green flag
• Also add command
"Set . .. value" to
script that starts its execution upon receiving
the "Menu" message, set the
variable "Character"
to "Colt", in order to start the game
even without selecting
Program the menu
• Add one more script for the scene
, in which
when the message “Game”
is received
all scripts of the scene will stop, the background
will change to “Game”, and
after that the sound will always play
“Game”
Let's check result
See result
Let's program the game
• It's time
to program
the game itself, for this
add the sprite
"Colt" from the folder
"Characters" of blanks
for lesson
• Add for this
sprite costumes
other characters
from the "Characters" folder
Let's program the game
• Rename the sprite,
click on the
sign "Info" in the upper left corner
sprite
• Change the name of the sprite
to "Character"
Repeat0:03 coordinates commands and movement of the sprite along the coordinates:
A)
4)
3)
2)
1)
B)
C)
D)
What command will help the sprite instantly move to the desired
coordinates?
Program game
• When the message
"Game" is received, the sprite "Character"
will have to start
moving around the scene
• For this we will use
multiple conditions
check keystrokes
WASD
• Build the script as it is
shown on the slide and
add commands to it
Check the result
Program the game
• Add a script to sprite
"Character" in which
when you click on the green flag
the sprite
will be hidden
• At the end of the game we
we will return to the menu,
therefore it is important that when
receives the message
"Menu" sprite
stops all scripts
of the sprite and hides
Let's program the game
will appear • To do this, add another
command "When I get . ..",
select the message "Game",
rotate the sprite in the
direction 180 and move
it to coordinates X: 0 Y: -160
• Change the sprite's costume to the one
which corresponds to
Seeing the result
Break
Let's have a little rest and have a snack
Program the game
• At the moment
the control created by
is not in our game
assumes
the ability to
aim, and also
allows the character to enter the scene
greatly complicates the game
Let's program the game
• To solve this problem
, we will add a script
with a loop
"Always" inside
which we will place
commands "If at the edge,
push off" and
"Turn to..." from the
tab "Movement"
• Let's turn
character towards the mouse pointer
See the result
we need to add sprites
"Trolley", "Rails",
"Mine" from the folder
"Game World" of blanks
to the lesson, as well as
each sprite
"Stone" and "Bushes"
game with objects
• All sprites added to our
project for the "Capture
Crystals" mode should behave
as follows:
*trolley, stone, bush
• Hide when clicking on the green flag
• Hide when receiving a
"Menu" message
• Go to the upper layer at
the desired coordinates (except for
Mines and Rails, they should
*mine, rails
go 1 layer back) and
Program the trolley
• After the sprite
"trolley" is displayed in the game
we will add the ability to
move around the map, causing
damage to players
• To do this, add the command
"Always" and inside it
we will place the command "Swim . ..
seconds to the point X: ... Y: ...",
which will help our
seconds for the sprite to move from its current position
to a point,
Repetition: Loops
• What type of command
is the "Always" command?
• What are cycles?
• Give an example of a cycle
• Is the task:
"run 10 laps in
stadium" in a loop?
Program the trolley
• Having reached the end of the track
the trolley will stop there without
the opportunity to go back
• In order to fix this,
add a second command
“Sail … seconds to the point X:… Y:
…”, in order for the trolley
returned to the beginning of the path
• You can diversify its movement
by adding commands
waiting for a random time
before the start of the movement and
itself Check the result
Watching the result
Programming the bush
• In Brawl Stars the bushes, when
the player enters them, become translucent
, allowing
to see the enemies that
hide in them
• Scratch allows us
to use the transparency of
sprites, however, in order to do this, we will have to
get acquainted with
effects
Program the hive
Effects in Scratch are the ability of appearance commands
to change the appearance of a sprite without changing the costume
the sprite itself
Let's program the bush
There are several types of effects - these include:
"Color" - changes the color of the sprite
"Fisheye" - distorts the appearance of the sprite
"Swirl" - twists the sprite
"Pixel Enlargement" - increases each pixel sprite
"Mosaic" - creates a repeating mosaic from the sprite
"Brightness" - changes the brightness of the sprite
"Ghost" - changes the transparency of the sprite (from 0 -
opaque to 100 - completely transparent) 9
Let's program the hive
• Now that we know how
the effects of
sprites are arranged in Scratch, we can
start creating hives
• To begin with, we will supplement the
script with an “Always” loop,
inside which we will
perform a touch test
with character
• Let's also add the command
"If . .. then ... otherwise" from
Condition "If ... then ... else"
In contrast to the condition "If ... then", the condition "If ... then ... otherwise"
provides for a situation in which the main condition not
has been executed, in this case the actions
after the word “otherwise” will be performed
Condition
Basic actions
Alternative actions
Let's program the bush
• Return to the “Bush” sprite
and supplement its condition
by touching the sprite
“Character”
• If the character
touched the "Bush" sprite,
then set the effect
ghost to 70
• If the character does not
touch the bushes, then again
return the sprite value to
transparency 0
Look at the result
Let's repeat
passed
Let's remember everything we learned in the lesson.
Effects
• What are effects and
what are they for in Scratch?
• Which tab are they
in?
• What effects do you remember?
• What is the
"Ghost" effect for?
• How to set the maximum
transparency for a sprite?
If…then…else
• What is a condition?
• What kinds of conditions do you
know?
• How command 9 works0003 "If. ..then...otherwise?"
• Give an example of the condition
Saving projects
Saving
• To save
a project, you must
click on the button
"File" in the menu
• Select item
"Save as"
• Select the location where you want to save
project
• Enter name of the project and
press the button
"Save"
Free time
Now you can improve your game!
Improvement level
• Duplicate or add
new sprites from folder
"Game world"
• Add scripts for new
sprites,
which will allow
sprites to be shown
only in the message
"Game" and shown in
correct coordinates
Improvement of the level
• Collect the level by specifying
coordinates or set03 from the image 900 items at
coordinates
Homework
Homework
1. Add new backgrounds for
game loading. Find
backgrounds you want on the internet or add from
sprite library
2. Add sounds for
button presses,
cart movements, etc.
3. Make another level
in your game by adding
a second button to the menu
Saving projects
Thanks for the activity!
STL file Seamless background stand
Ender 3 v2 - cable bracket for metal extruder
1,25 €
Watering can with thumb - Bonsai
€2.50
Display with record sleeves - vinyl
2,50 €
Sieve for sifting plant seeds
3.74 €
Helper with chopsticks
3.49 €
Vacuum cleaner attachment (diameter 35 mm)
1.25 €
Grid of levitating pots (3, 5 or 7 pots)
3. 75 €
Hand fishing - Cuban yo-yo
2.99 €
Best 3D Printer Files in the Gadget Category
Screen Accurate R2D2 Alexa Echo Dot 3 Dock
Free
Make your own business card embosser - Fusion 360 files
10 €
Nidoran M Pokemon EDLI3D
Free
Arduino Arcade Bartop
Free
anti-fogging mask shell
Free
4-Piece-Swimbait fishing lure 14cm (easy print and build!)
€2.50
BONG HOOKAH MOUTHPIECE / Bong shisha mouthpiece
2,50 €
Bestsellers in the Gadget category
Mount for GoPro DJI AVATA
2,50 €
FLEXI GIRAFFE
0. 93 €
Penis valve cap (Schrader valve)
1 € -50% 0.50 €
Survival pistol with arrows
6.29 €
JEEP GLADIATOR business cards / pen holder
1,49 €
VALENTINE'S DAY FLEXIBLE DUCK HEART GIFT BOX
€2.80
Double text illusion app
3.50 €
Renewed bone finger
6.33 €
Car air vent phone holder PRINT-IN-PLACE
2,50 €
Hexagon reducer Printed in place
€2.99
Gear box Seal in place
€3. -25% 2.62 € 50
Bambu AMS Color 2 tier stand (for 2 AMS units 1 top 1 bottom)
2.25 €
Mechanical swivel top dice box
€3.70
Program for creating Christmas balls and other lithophany
3,50 €
Owl - wall key holder
1,90 €
JEEP WRANGLER PEN HOLDER - 3-IN-1
1,85 €
💖 Do you want to support Cults?
Do you like Cults and want to help us continue our journey on our own ? Please note that we are a small team of 3 people, so it is very easy to support us in maintaining activities and creating future developments of .