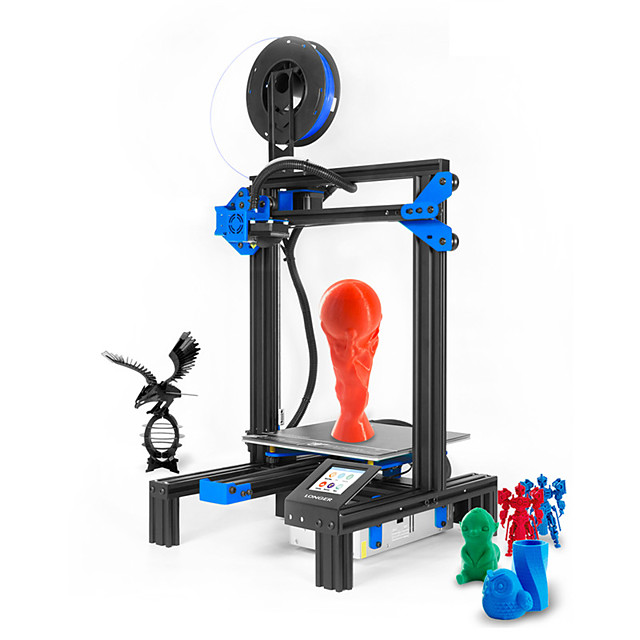
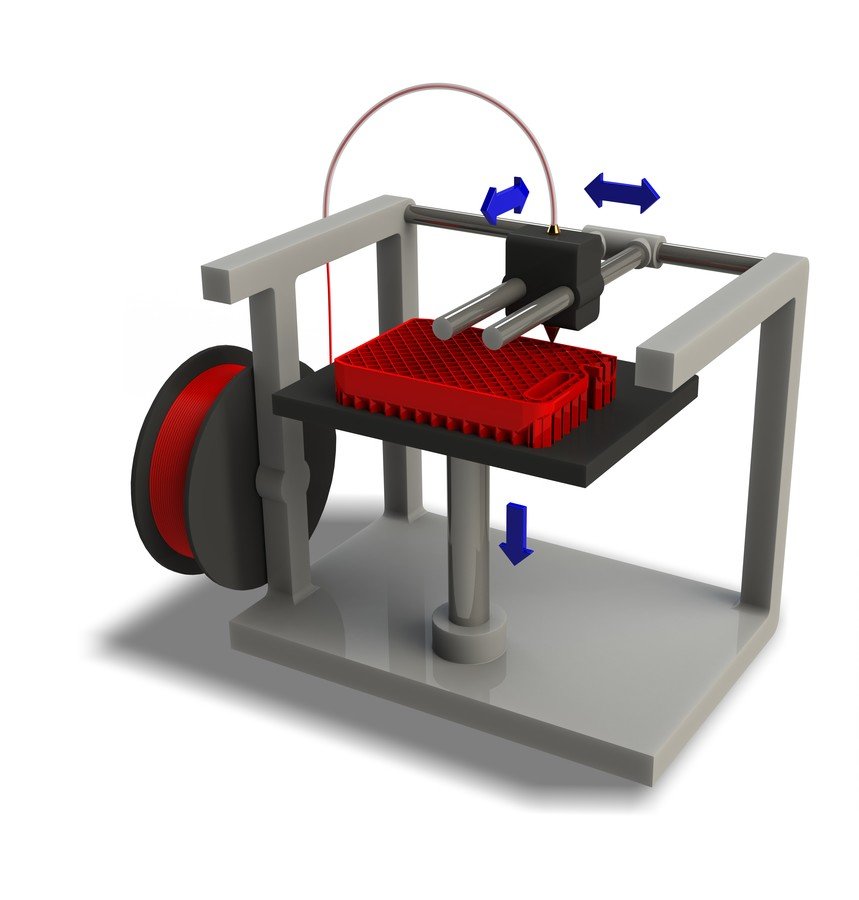
3D printer build size
How to Choose a Large Format 3D Printer
Large format 3D printers is one of the fastest-growing sectors of the 3D printing market. While some might think large format 3D printers are inaccessible—only a few years ago, prices would start around $100,000—the truth is that today’s large format 3D printing options are much more accessible.
There are three different 3D printing processes on the market today in an accessible, benchtop format, ranging from $5,000 to less than $20,000. Given the high cost of outsourcing large parts and prototypes, this means that investing in a large 3D printer can have a positive return on investment in months.
As the options for large format 3D printers are constantly expanding, how can businesses choose the right one?
This buyer's guide will explain how to choose the best large format 3D printer that’s right for any price point and application.
In essence, large format 3D printing today means build volumes beyond the 15-20 cm (5. 9-7.9 in) cube dimensions common in desktop 3D printers.
The sweet spot for most large 3D printers today is around 30 cm (11.8 in) in one of the dimensions and around 15-30 cm (5.9-11.8 in) in the remaining two. These accessible benchtop large format 3D printing can create full-scale prototypes, models, and production parts for a wide variety of applications, including consumer products, healthcare, manufacturing, and more.
There are also 3D printers on the market that go well beyond this size and can print 50-100 cm (19.5-39 in) parts, but this often means that options are limited to industrial 3D printers, where prices skyrocket, complexity increases, and facility requirements become stringent.
The three large format 3D printing processes available at accessible prices are the following: fused deposition modeling (FDM), stereolithography (SLA), and selective laser sintering (SLS). Let’s take a closer look at each technology.
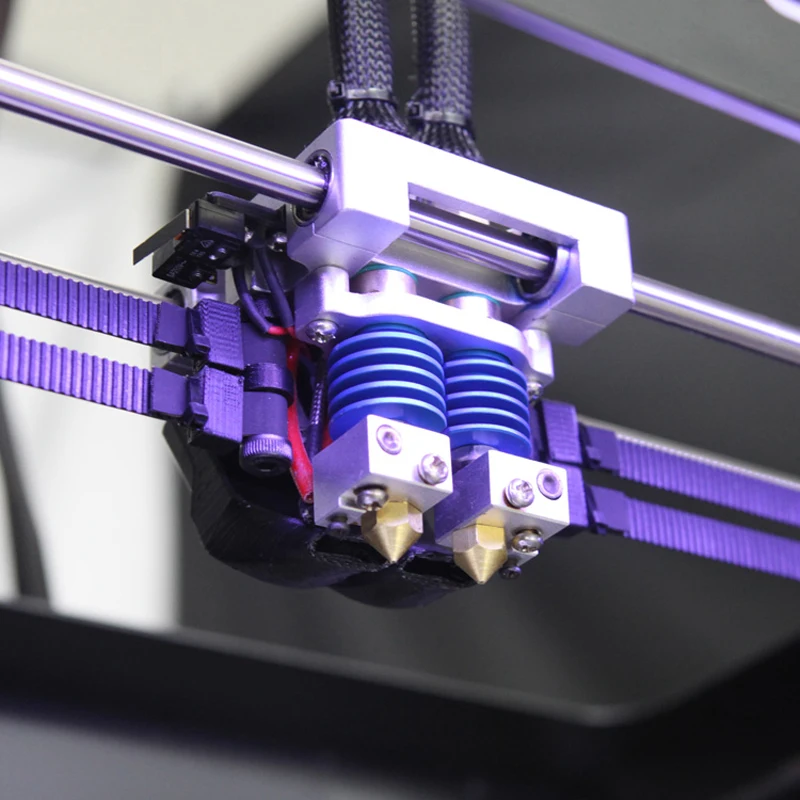
Fused deposition modeling (FDM), also known as fused filament fabrication (FFF), builds parts by melting and extruding thermoplastic filament, which a printer nozzle deposits layer by layer in the build area. FDM is the most widely used form of 3D printing at the consumer level, fueled by the emergence of hobbyist 3D printers.
Mid-range large format FDM printers are available from $4,000 and can typically print objects up to about 30 x 25 x 30 cm in size, while larger systems that can create up to 60 cm tall parts start around $6,000.
FDM works with a range of standard thermoplastics, such as ABS, PLA, and their various blends. The technique is well suited for basic proof-of-concept models, as well as low-cost prototyping of simple parts, such as parts that might typically be machined.
FDM has the lowest resolution and accuracy when compared to SLA or SLS and is not the best option for printing complex designs or parts with intricate features. Higher-quality finishes require labor-intensive and lengthy chemical and mechanical polishing processes. Some large-format FDM 3D printers use soluble supports to mitigate some of these issues and offer a wider range of engineering thermoplastics, but they also come at a steep price. With large parts, FDM printing also tends to be slower than SLA or SLS.
White Paper
Want to learn more about the Form 3L and Form 3BL ecosystem, and how they compare to other methods of creating large prints?
In this free report, we look at how in-house large-format 3D printing with the Form 3L stacks up against other methods of production, chiefly outsourcing and using FDM printers.
Download Now
Stereolithography (SLA) printers use a laser to cure liquid resin into hardened plastic in a process called photopolymerization. SLA is one of the most popular processes among professionals due to its high resolution, precision, and material versatility.
While SLA used to be available only in smaller desktop printers or large industrial printers that cost more than $200,000, with Formlabs’s Form 3L printer, businesses now have access to industrial-quality SLA for just $11,000, offering a large build volume of 30 x 33. 5 x 20 cm.
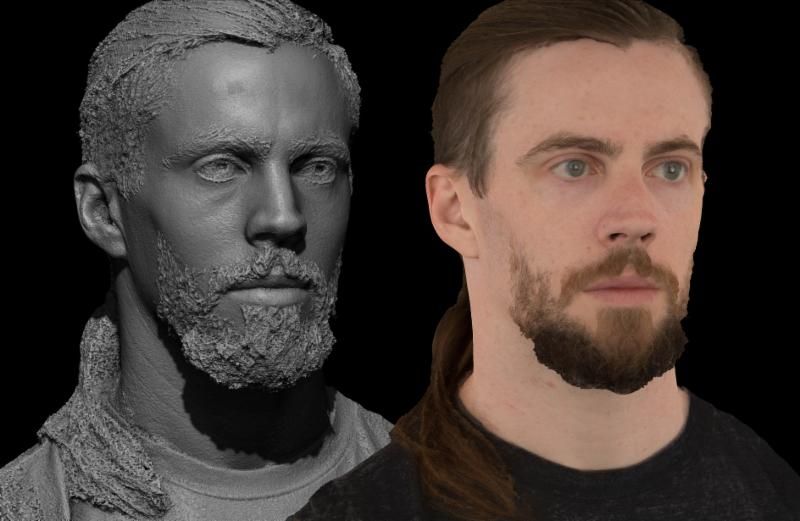
The Form 3L is capable of 3D printing large prototypes the size of a full-scale helmet.
SLA parts have the highest resolution and accuracy, the clearest details, and the smoothest surface finish of all plastic 3D printing technologies, but the main benefit of SLA lies in its versatility. SLA resin formulations offer a wide range of optical, mechanical, and thermal properties to match those of standard, engineering, and industrial thermoplastics.
SLA is a great option for large, highly detailed prototypes requiring tight tolerances and smooth surfaces, as well as molds, tooling, patterns, medical models, and functional parts. It also offers the material with the highest heat deflection temperature of 238 degrees Celsius—which makes it an ideal choice for certain engineering and manufacturing applications—as well as the widest selection of biocompatible materials for dental and medical applications. With Draft Resin, the Form 3L is also the fastest option for 3D printing large parts, up to 10X faster than FDM.
SLA’s wide versatility comes with a slightly higher price tag. SLA resin parts also require post-processing after printing, which includes washing the parts and post-curing.
Here are some examples of large 3D printed parts manufactured on the Form 3L:
Some examples of large 3D printed parts manufactured on the Form 3L.
Sample part
See and feel Formlabs quality firsthand. We’ll ship a free sample part to your office.
Request a Free Sample Part
Webinar
Formlabs 3D Model Manager Evan Fisher walks the viewers through CAD and PreForm tips for larger parts and introduces Form Wash L and Form Cure L for post-processing.
Watch the Webinar Now
Selective laser sintering (SLS) printers use a high-powered laser to fuse small particles of polymer powder. The unfused powder supports the part during printing and eliminates the need for dedicated support structures, which makes SLS an especially effective choice for complex mechanical parts.
Because of its ability to produce parts with excellent mechanical capabilities, SLS is the most common additive manufacturing technology for industrial applications.
Just like SLA, SLS used to be only available in industrial machines starting at about $200,000. With Formlabs’s Fuse 1 SLS printer, businesses can now access industrial SLS starting from $18,500 with a 30 x 16.5 x 16.5 cm build volume.
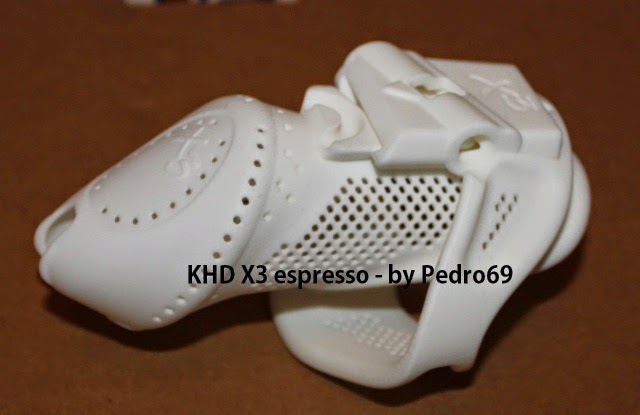
Parts printed on the Fuse 1 SLS 3D printer.
Since SLS printing doesn’t require dedicated support structures, it’s ideal for complex geometries, including interior features, undercuts, thin walls, and negative features. Parts produced with SLS printing have excellent mechanical characteristics, with strength resembling that of injection-molded parts.
The most common material for SLS is nylon, a popular engineering thermoplastic with excellent mechanical properties. Nylon is lightweight, strong, and flexible, as well as stable against impact, chemicals, heat, UV light, water, and dirt.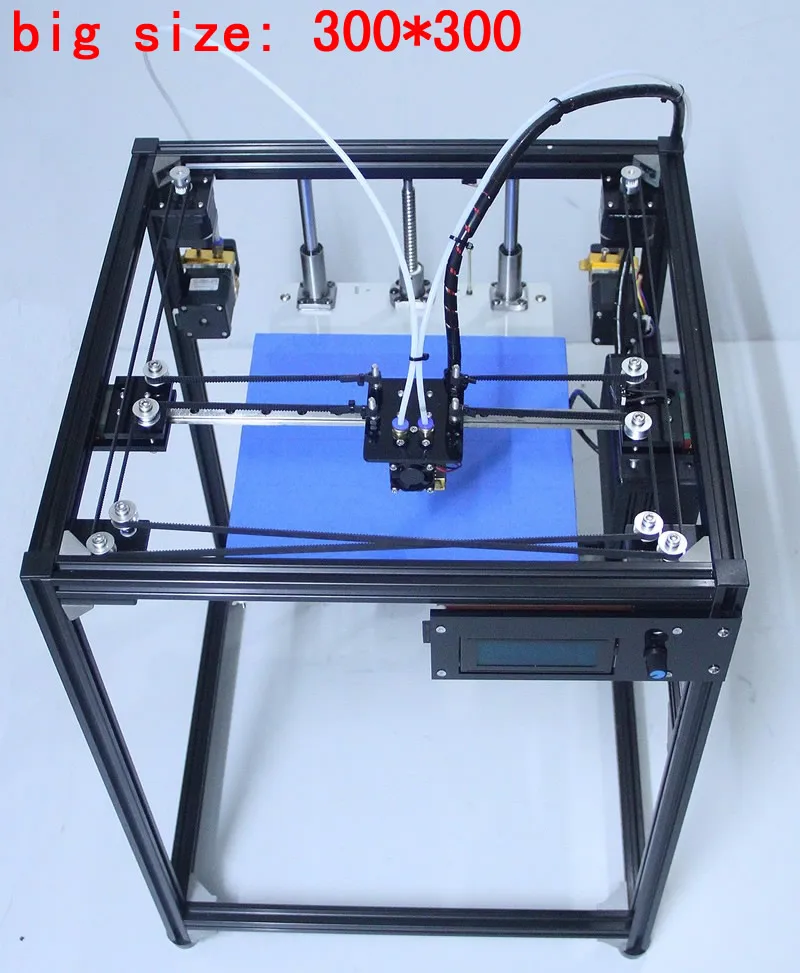
The combination of low cost per part, high productivity, and established materials make SLS a popular choice among engineers for functional prototyping, and a cost-effective alternative to injection molding for limited-run or bridge manufacturing.
SLS has the highest entry price of the three technologies. While nylon is a great all-rounder material, material selection for SLS is more limited than for FDM and SLA. Parts come out of the printer with a slightly rough surface finish and require media blasting for a smooth finish.
Sample part
See and feel Formlabs SLS quality firsthand. We’ll ship a free sample part to your office.
Request a Free Sample Part
Large format 3D printing technologies aren’t interchangeable—the technologies all have distinct advantages and disadvantages that make them suitable for different applications.
| Fused Deposition Modeling (FDM) | Stereolithography (SLA) | Selective Laser Sintering (SLS) | |
|---|---|---|---|
| Resolution | ★★☆☆☆ | ★★★★★ | ★★★★☆ |
| Accuracy | ★★★★☆ | ★★★★★ | ★★★★★ |
| Surface Finish | ★★☆☆☆ | ★★★★★ | ★★★★☆ |
| Throughput | ★★★★☆ | ★★★★☆ | ★★★★★ |
| Complex Designs | ★★★☆☆ | ★★★★☆ | ★★★★★ |
| Ease of Use | ★★★★★ | ★★★★★ | ★★★★☆ |
| Build Volume | 30 x 25 x 30 cm (12 x 9,8 x 11. 8 in) and larger 8 in) and larger | 30 x 33.5 x 20 cm (13.2 × 7.9 × 11.8 in) | 32 x 16.5 x 16.5 x cm (12.6 × 6.3 × 6.3 in) |
| Price range | Starting from $4,000 | Starting from $11,000 | Starting from $18,500 |
| Materials | Standard thermoplastics, such as ABS, PLA, and their various blends. | Varieties of resin (thermosetting plastics). Standard, engineering (ABS-like, PP-like, silicone-like, flexible, heat-resistant, rigid), castable, dental, and medical (biocompatible). | Engineering thermoplastics, typically nylon and its composites. |
| Ideal applications | Basic proof-of-concept models, low-cost prototyping of simple parts. | Highly detailed prototypes requiring tight tolerances and smooth surfaces, molds, tooling, patterns, medical models, and functional parts. | Complex geometries, functional prototypes, short-run or bridge manufacturing. |
| Disadvantages | Lowest resolution and accuracy; not ideal for complex designs or parts with intricate features. The slowest form of large format 3D printing. The slowest form of large format 3D printing. | Parts require post-processing after printing. | Material selection is limited; parts require media blasting for a smooth surface finish. |
Video Guide
Having trouble finding the best 3D printing technology for your needs? In this video guide, we compare FDM, SLA, and SLS technologies across popular buying considerations.
Watch the Videos
A large format 3D printer represents a significant initial investment, but it can often recoup the initial investment even faster than smaller machines.
Outsourcing production to service bureaus is recommended when your business requires 3D printing only occasionally. Bureaus generally have several 3D printing processes in-house such as SLA, SLS, FDM, and metal 3D printers. They can also provide advice on various materials and offer value-added services such as design or advanced finishing.
The main downsides of outsourcing are cost and lead time. One of the greatest benefits of 3D printing is its speed compared to traditional manufacturing methods, which quickly diminishes when an outsourced part takes a week or even multiple weeks to arrive.
Outsourcing large 3D printed parts is also often very expensive. Depending on the number of parts and printing volume, investing in a large format 3D printer can break even within merely a few months.
For example, climbing and skiing gear manufacturer Black Diamond added a large format Form 3L SLA printer to their fleet to create full-scale prototypes in-house.
“We have reduced our costs on full-size prototypes from $425 a print to $70 a print. With that savings, Form 3L would pay for itself in only three months, said R&D technician Matt Tetzl.
| Outsourcing | In-House | |
|---|---|---|
| Time | 7 Days | 3 Days |
| Cost | ~$425 | ~$70 |
By 3D printing full-scale prototypes in house on a Form 3L, Black Diamond reduced their prototyping costs by 80-90%.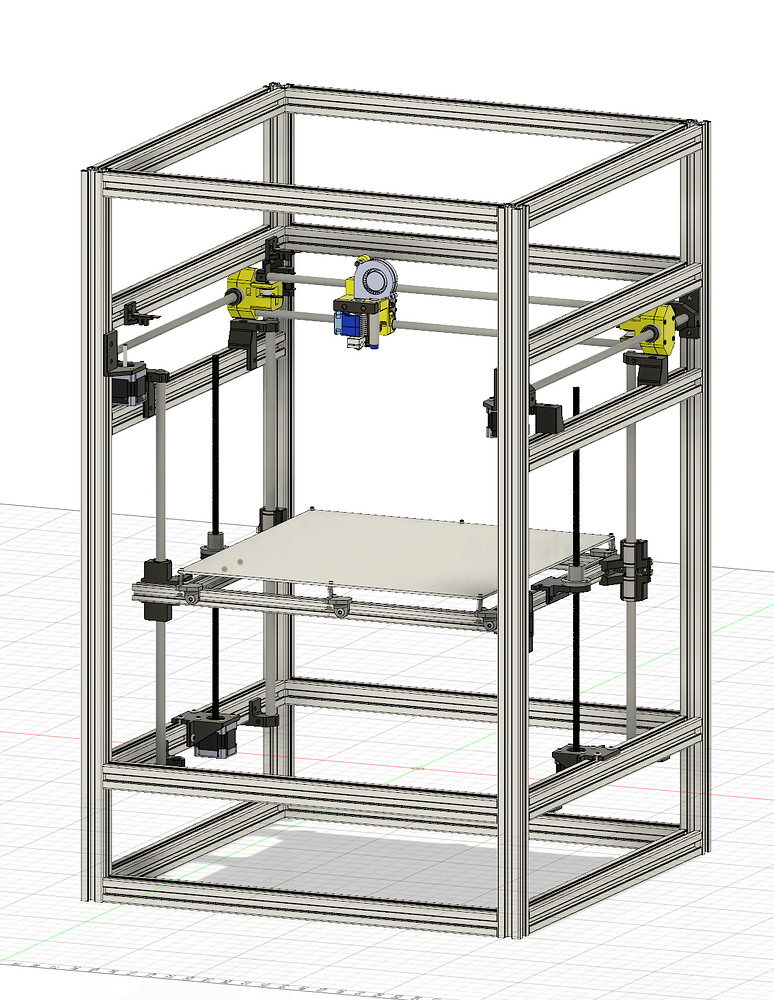
Interactive
Try our interactive ROI tool to see how much time and cost you can save when 3D printing on Formlabs 3D printers.
Calculate Your Savings
The latest generation of large format 3D printers have made manufacturing large prototypes and parts faster and much more affordable, opening the doors for almost any company to use 3D printing to improve product development and production.
With the Form 3L and the Fuse 1, the first accessible large format SLA and SLS 3D printers, Formlabs strives to revolutionize professional 3D printing. If you’re ready to leverage 3D printing in your business, find the right Formlabs 3D printer for your needs today.
See the Form 3LSee the Fuse 1
3D Printing Volume: Build size
The 3D printing volume of a printer gives the maximum size that one object can have in order to be printed.
EOS 3D printerThe size of the printing volume depends on the chosen material which in turns determinates the type of printer used. The maximum size also depends on the chosen finishing process (e.g. coloring, polishing). There are printers of many different sizes, big and small. For example the Stratasys objet1000 printer has a maximum size of 1000x800x500mm.
Size limitations for each material on Sculpteo
The following table summarizes the size limitations for each material onSculpteo :
Plastic
White/unpolished
677 x 368 x 565 mm
Colored
180 x 220 x 220 mm
Polished
300 x 220 x 200 mm X + Y + Z ≤ 540 mm
Silver/Brass
Maximum size
60 x 80 x 100 mm
Minimum size
2.4 x 2.4 x 0.8 mm
Maximum size
290 x 190 x 147 mm
Alumide
Maximum size
300 x 300 x 500 mm
Ceramic
Maximum size
250 x 350 x 200 mm X + Y + Z ≤ 400 mm
Minimum size
6 x 6 x 6 mm
X + Y + Z ≥ 120 mm and minimum fill volume > 5. 0%
0%
Multicolor
Maximum size
254 x 381 x 203 mm
For a complete list of supported materials and their properties and limitations please refer to the main Materials page.
3D Printing volume and speed
One of the most frequently posed questions is how long the 3D printing lasts. This is mainly determined by the size of the object, and to a smaller extend the fill volume. Another important factor is the positioning of the object in the printing batch. Due to the layered printing process, the time to print 1cm height is much greater than printing the same size in width and depth. Therefore in order to speedup the printing process it is important to position the object optimally in the printer.
However, printing one object at a time is not optimal. One advantage of the layer printing process is that objects can be placed one on top of another, or even interleaved without interfering in their printing. This leads to one of the important jobs done at Sculpteo, optimization of the positioning of the objects. In consequence this allows Sculpteo to provide a fast service while offering the best price.
3D Printing volume and price
When printing an object the machine uses material (e.g. plastic) to build the object. Therefore we can imagine that the price of the object depends on the amount of material used. However this is not exactly true. For example, in the case of SLS, the laser that sinters the material is also being used. Furthermore, the work done to optimize the positioning of the objects in the printing process influences the price significantly. For example, there are object that have specific geometric properties that impede this optimization. These object will have their price influenced more by the placing in the batch than the real physical volume.
Price optimization
Having many pricing parameters allows to devise different optimization on the model in order to reduce its price. Some of these optimizations available on Sculpteo are hollowing and batch control.
Hollowing
The Hollowing tool removes the interior of the object and adds holes for powder extraction. This reduces the amount of material used as well as the time the machine spends on that object. The reduction of these two parameters leads to reduction of its price.
Example of the hollowing toolBatch control
Another optimization is provided by the Batch control tool . It is available only when ordering bigger quantities (more than 20) of the same object. Batch control allows the user to optimize the printing volume while getting a better price which can be up to 80% cheaper.
Example of the batch control toolYou can use these tools for free by uploading your object.
Related glossary pages
How to create models that are larger than the print volume of a 3D printer
Don't have a large format 3D printer yet? When evaluating the capabilities of a compact desktop 3D printer, do not limit yourself to print volume. Many objects, like your smartphone or a bridge over a river, are made up of many individual components. Therefore, splitting the model into smaller parts that can be aligned after printing is a great solution for 3D printing large objects that do not fit on the platform.
Also, splitting the model can be a great way to get a high quality result, even if the whole model fits on the platform. This makes sense when multiple or opposing surfaces must be free from support structures, when the model has complex ledges, or contains cavities where liquid polymer can remain.
3D printing of various parts opens up new possibilities, for example, the creation of prefabricated structures from various materials or the combination of rigid and flexible parts to simulate the overmolding method.
When choosing a gluing method, it is necessary first of all to take into account the required degree of strength of the glued joints, which depends on the purpose of the models:
-
chemical: use adhesive on artwork, scale models, and complex shapes that are not intended for functional use and should not be impacted;
-
Mechanical: Provide threaded holes or sockets for attaching parts that require a secure mechanical connection, or repeatedly detaching and attaching components as needed.
This tutorial focuses on building large, prefabricated 3D stereolithographic (SLA) printed models with chemically bonded components. Read on to learn all the steps in this process, from model separation to post-processing for a professional finish.
Formlabs Form 3L is the first affordable, easy-to-use large format 3D printer optimized for reliable production of industrial-quality models. The Form 3L stereolithographic 3D printer features a huge print volume of 30 x 33.5 x 20 cm and unrivaled cost-effectiveness.
Meet the Form 3L
We recommend two ways to separate models: adding features to the design that will allow the parts to fit together, or separating the model with straight lines, which will require them to fit together properly during the bonding process.
Regardless of which method you choose, if you have a lot of parts, it's helpful to add a unique identifier (letters/numbers) for each one to make assembly easier.

Use CAD software to split a 3D model and add basic centering components such as slots, pins, slots, notches, and tabs, or more complex features such as dovetails and slots to match model folds.
Adding centering components to the design makes it easier to assemble parts.
Ideally, these components should make it easier to align and assemble parts, but can cause problems if they differ even slightly from your 3D models, preventing perfect centering. Therefore, it is best to use centering components only when the printer can print parts with accurate dimensions that are not subject to deformation.
Splitting a 3D model along straight lines requires less effort than adding components to center it. With this separation method, there are also fewer problems if the parts are slightly deformed or differ in size.
Adding IDs for each part makes the assembly process easier.
On the other hand, parts separated by straight lines can be time consuming to assemble, as each part must be manually centered and ensured that they all remain in the correct position until the adhesive is completely dry.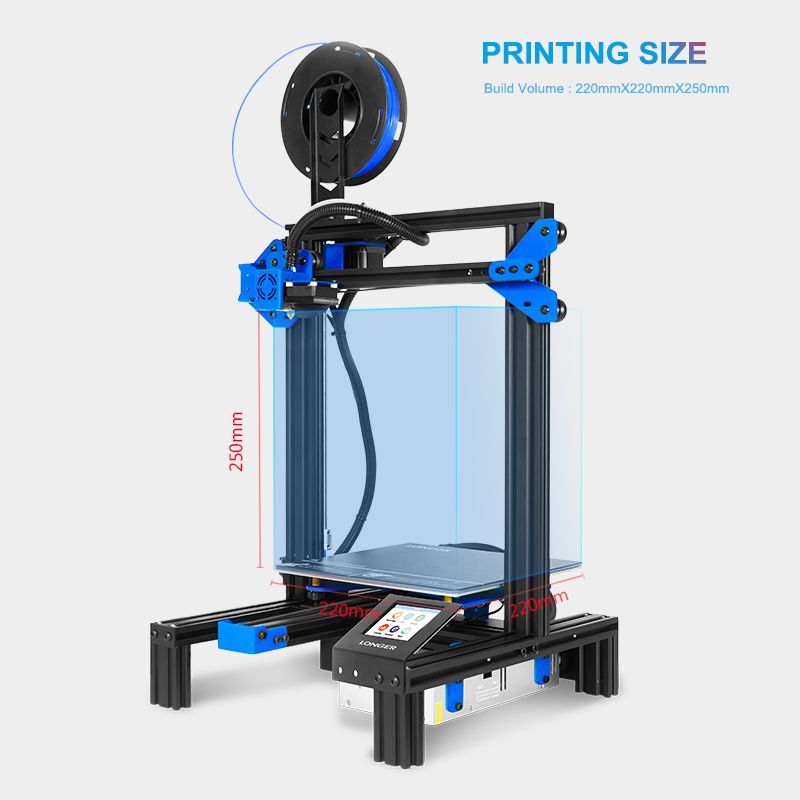
By default, when printing on a stereolithographic 3D printer, solid models without voids are obtained. Depending on the design, different requirements may apply to the manufacture of large items. In such cases, 3D printing the outer shell or converting the structure into a hollow is a great way to save a lot of material and time. When printing hollow models on a stereolithographic 3D printer, be sure to add ventilation holes to avoid creating cavities filled with air and pressurized resin.
SAMPLE PART
Experience Formlabs print quality first hand. We will send a free sample of the printed model directly to your office.
Request a free print sample
Converting a model design to a hollow saves a lot of time and material because the printer only needs to print the outer shell.
Learn more about how to save materials and time by hollowing out 3D models.
Depending on the size of the details and the purpose of the model, we recommend three mounting methods:
| Epoxy glue (5-30 min) | cyanoacrylate (CCA, Supercolla) | Resin | ||||
|---|---|---|---|---|---|---|
| Square | Large | Small/Medium | Small | |||
| Paintable | Yes | Yes | Yes | 9006 70072Medium | Low | Low |
For large parts and maximum adhesion, use 5-30 minute dry epoxy.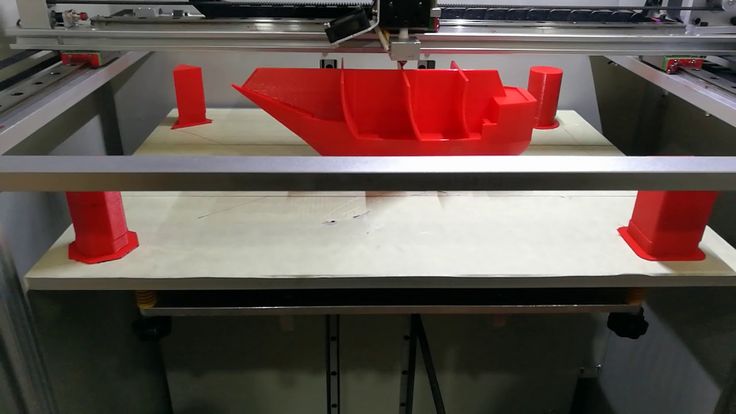 It takes longer to dry than other adhesives, allowing you to fit large 3D printed parts but slows down the assembly process. Most 5-minute epoxy adhesives stop changing shape in as little as five minutes and cure by about 75% in less than an hour.
For large parts and maximum adhesion we recommend using epoxy adhesive.
The next option is cyanoacrylate (CA or superglue), which quickly forms a strong bond, ideal for small to medium sized parts. Thoroughly clean the part before applying CA to the surface, because contaminants adversely affect the quality of the connection. CA has a moderate impact strength, but is not recommended for models that require high strength.
For small models, you can simply use liquid resin from a stereolithographic 3D printer. Pour a small amount of resin into a tray from a bottle or cartridge, pick it up with a pipette or syringe, and place it on the surface to be bonded. Connect the parts and wipe off excess resin that may spill around the edges. Aim a 5mW (405µm wavelength) UV laser pointer at the contact area to cure the resin and bond the parts.
This method produces a chemical bond similar to 3D stereolithography printing, but is only suitable for bonding small surfaces as a low power light pointer cannot penetrate the model deep enough to create a strong bond.
Note. Protective equipment must be worn when working with polymers, including proper eye protection and gloves.
Download PDF
Don't have time to read the article now? Download it in PDF format.
Download as PDF
After assembling the model, it's time to move on to post-processing. This step includes geometric correction of the model to provide a smooth surface that matches the original 3D model, and aesthetic finishing to obtain a uniformly colored surface.
Depending on the precision of the printer and the size of the printed parts, there will almost always be slight voids or mismatches at the contact points. Automotive sealant (e.g. Bondo 907) adheres well to polymers, therefore, to eliminate such inconsistencies, it is recommended to apply it in a thin layer on the surface. Lightly sand the surface after each coat has dried to bring the model to its final shape.
Sealing models with automotive sealant (red area in image) will help eliminate small gaps and inconsistencies between parts.
Sanding helps remove traces of support structures and remaining inconsistencies in the model. Gently start sanding the surface with 150-grit sandpaper to remove traces of support structures and smooth edges where parts meet. Once the surface is smooth, sand it wet using 320 grit sandpaper to remove any remaining layer lines. Sand the surface in random motions so as not to leave marks. In most cases, these two methods will produce a fairly smooth surface, but you can continue to increase the grit of the sandpaper up to 2 times and, after wetting it, sand the entire model until the surface is reasonably smooth.
Power sanding is great for large flat surfaces, but can ruin fine details. Grinding of small models is recommended to be done by hand, and for large ones, a combination of manual and mechanical grinding is recommended.
Machining large parts with mechanical and manual grinding saves a lot of time. Power sanding is great for large, flat surfaces, but can ruin the fine details, sharp corners, and subtle contours that are typical of stereolithography. As a result of mechanical grinding, a lot of dust is also generated, so before starting processing, it is necessary to prepare the working area.
Note. The use of power tools requires full attention and the use of protective equipment. The surface can be damaged very quickly without even realizing it, just by leaving the sander without moving.
When finished sanding the model, rinse it in soapy water to remove dust and debris and dry thoroughly before proceeding to the last step.
The primer helps the paint adhere to the surface and can indicate areas where additional sanding is needed or removal of traces of supports that you may have missed. The Universal Matte Gray Plastic Primer shows these spots exceptionally well. For best results, apply it to the surface in several thin coats. Sand critical areas and reapply a thin coat of primer. Repeat this process until the entire surface of the model is level.
Note. Use protective equipment during priming and painting, including a respirator to protect against paint fumes.
All-purpose matt gray primer for plastics is exceptionally good at showing fine details and helping to identify areas that need to be sanded down.
Find out more about sanding and priming in our detailed guide.
When painting with multiple colors, protect the model with a temporary coat. First, plan the order in which you will paint the model, depending on the color, transparency, and size of the area of a particular color. Start with small details so that fewer of them can be protected when painting with the main color. Apply painter's tape to the edges and corners. To quickly cover large areas, attach sheets of paper to them. Ribbon guides (laser cut) can also be useful for creating straight lines, circles and complex shapes.
When it comes to masking, figuring out the correct order is your first priority. In our case, the parts were first painted silver and the sections that would remain silver on the final part were then covered with painter's tape to hide them from the next l
painting. In our case, we first painted the parts silver and put masking tape on the areas that should remain silver in the finished model so that they do not get paint of a different color.
As with primer, several thin coats of paint should be applied for optimal results rather than one thick coat. Most spray paints will achieve the best color in warm and slightly damp conditions in the absence of wind. In this case, you must always follow the manufacturer's recommendations, which can be given on the paint container or in the technical documentation.
Consider the time the paint needs to dry: Allow layers to settle before applying the same color and allow the paint to dry completely before applying a new color.
The area where we applied masking tape is still silver.
Become an expert in painting 3D models with our detailed guide
Already wondering what your finished model will look like?
"Sorry sir, that R2-D2 over there is in excellent condition and inexpensive."
Formlabs optics designer Adrien Tanner created this R2-D2 model from 105 parts printed on a Formlabs stereolithographic 3D printer. It even has working electronics borrowed from the Form 2 printer - a galvanometer drive for sound reproduction, a cartridge dispenser for lamps, and a Z-axis drive for dome rotation. 9The 0003
Form 3L is the first large-format 30 x 33. 5 x 20 cm 3D printer for producing massive, industrial-quality models.
Reduce order processing time when outsourcing or manual work when assembling large-scale 3D models. Now you can print large 3D models in their entirety on the Form 3L, the first affordable large format SLA printer.
Want to see how stereolithographic parts work? Explore our resources to learn more about stereolithographic resins, or request a free sample to evaluate print quality for yourself.
Request a Free Print Sample
Creality 3D® CR-10 V2 3D Printer DIY Kit Print Size 300*300*400mm with TMC2208 Power Resume/ Super Quiet Driver Support
Delivery options and delivery speed may vary by location.
Sign in to manage addresses
OR
City Frankfurt Am MainAach B TrierAach, HegauAachenAalenAarbergenAasbuettelAbbenrodeAbenbergAbensbergAbentheuerAbrahamAbsbergAbstattAbtsbessingenAbtsgmuendAbtsteinachAbtswindAbtweilerAchbergAchernAchimAchslachAchstettenAchtAchtelsbachAchterwehrAchtrupAckendorfAddebuellAdelbergAdelebsenAdelheidsdorfAdelmannsfeldenAdelschlagAdelsdorfAdelsheimAdelshofen, Kr FuerstenfeldbruckAdelshofen, MittelfrAdelsriedAdelzhausenAdenauAdenbachAdenbuettelAdendorfAderstedtAdlersteigeAdligstadtAdlkofenAdmannshagen-BargeshagenAdorf/Vogtl.