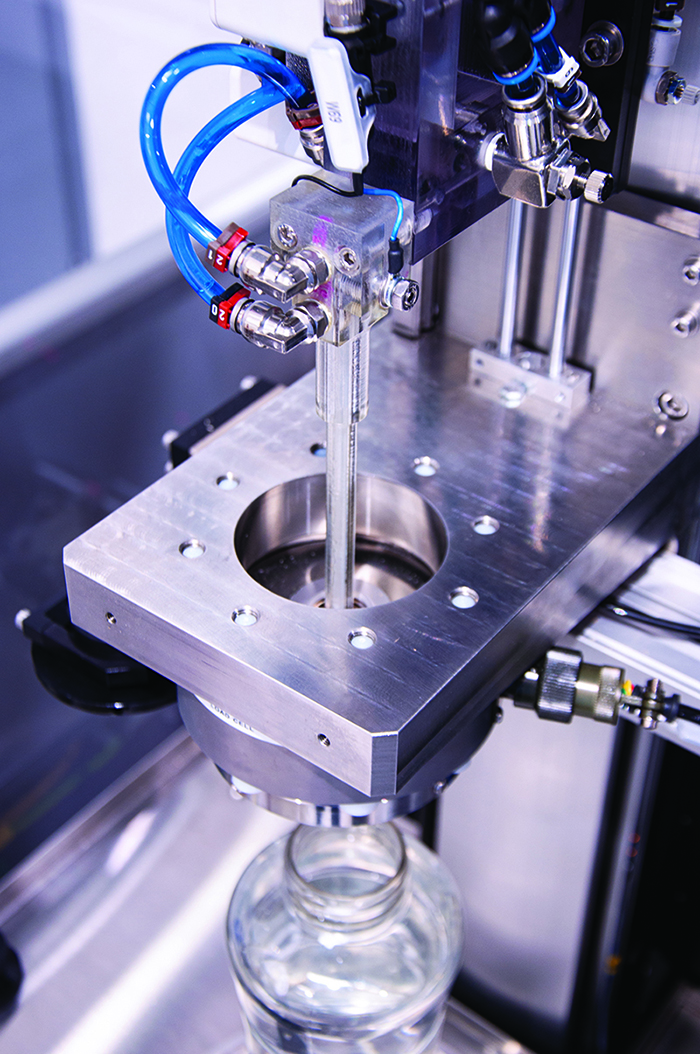
3D printer bubbles
6 Ways How to Fix Bubbles & Popping on Your 3D Printer Filament – 3D Printerly
There are many issues that can happen with 3D prints due to various issues. One of those issues is a phenomenon called bubbling or popping, which negatively affects the 3D print quality of your pieces and could result in failures altogether. This article will quickly outline how to fix this problem.
The best way to fix bubbles and popping sounds on your 3D printer is to extract moisture out of your filament before printing. When filament with moisture is heated to high temperatures, the reaction causes bubbles and popping sounds. Prevent this by using high-quality filament and proper storage.
The rest of this article will go into some useful details about this issue and give you practical ways to prevent it from happening in the future.
What Causes Bubbles in Extruded Filament?
During the printing process, it is obvious that filament contains air bubbles, which is practically unstable for 3D printing.
Basically, this can mess up the whole printing process, especially your first and print quality layers.
Moreover, the bubbles in the filaments can make it look non-uniform as the filament diameter will be affected. There are many causes, and I will be discussing the major ones with you.
One of the most common causes of these bubbles is the moisture content, which can affect the first layer and lower 3D printing quality.
The best solution available for this is drying the material before extrusion. However, the possible causes are as follows:
- Moisture content of filament
- Incorrect slicer settings
- Ineffective filament cooling
- Incorrect flow rate
- Printing at height temperature
- Low-quality filament
- Nozzle quality
How to Fix 3D Printer Bubbles in Filament
- Reduce Moisture Content of Filament
- Adjust the Relevant Slicer Settings
- Fix Ineffective Filament Cooling Systems
- Adjust an Incorrect Flow Rate
- Stop Printing at Temperature Too High
- Stop Using Low-Quality Filament
Bubbles occur when air pockets get trapped in print, and this is caused by the temperature of the extruder being too high, resulting in the hot end boiling the plastic.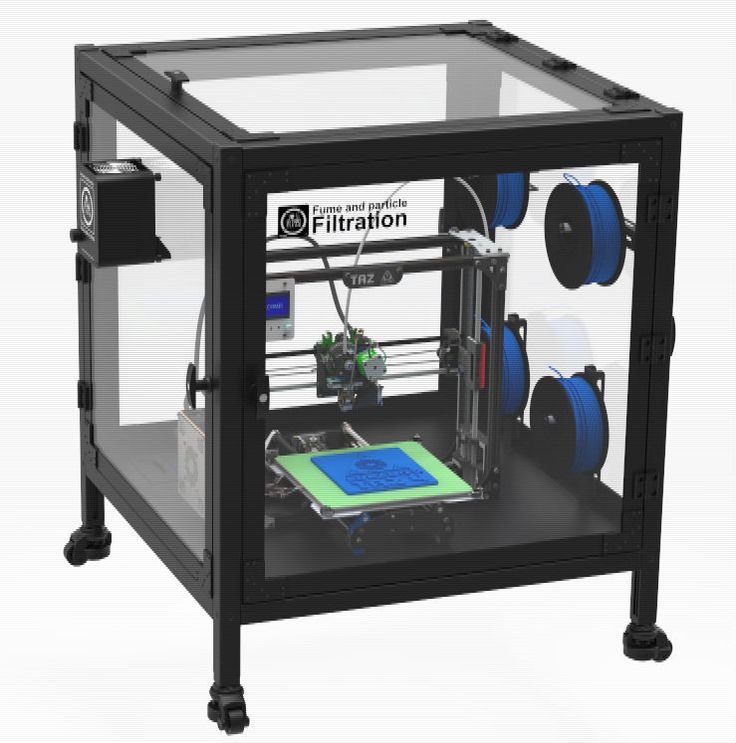
When it starts cooling, the air bubbles can get trapped in print, and you can notice that it will become a permanent part of the final model. So, let’s start to fix these causes.
Reduce Moisture Content of Filament
Moisture content is one of the main causes that creates bubbles in the filament, which can ultimately be seen in the 3D printing process.
This is because in the filament extrusion process, the moisture content present inside the polymer reaches its boiling temperature and turns into steam. This steam becomes the cause of bubbles, which are seen then on the 3D print model.
Drying before the extrusion process is the best solution for such a problem. It can be done using a special filament dryer or a conventional hot air oven, though ovens aren’t usually calibrated very well for lower temperature.
I’d recommend using something like the SUNLU Filament Dryer from Amazon. It has an adjustable temperature from 35-55° and timer of 0-24 hours. Many users who got this product say that it helped their 3D print quality significantly and stopped those popping and bubbling sounds.
If you get a nozzle popping sound, this could be your solution.
But remember, you must maintain the temperature according to the material you are drying. Almost all filaments absorb moisture content, so it is always a healthy practice to dry them before the extrusion process.
If you are hearing a PETG popping noise for example, you want to dry out the filament, especially because PETG is known to love moisture in the environment.
Adjust the Relevant Slicer Settings
There are a group of settings that I’d advise you adjust to get rid of these bubbles on your 3D prints. The ones that seem to work best are the following:
- Retraction settings
- Coasting setting
- Wiping settings
- Resolution settings
Once you start to adjust these settings, you can see significant differences in your print quality, improving them a lot more than you may have seen in the past.
With retraction settings, you can build up too much filament pressure in your extrusion pathway, leading to filament that actually leaks out the nozzle during movements. When you set optimal retraction settings, it can reduce these bubbles in your 3D prints.
Check out my article on How to Get the Best Retraction Length & Speed Settings, it describes in more detail about these settings and how to get it right.
My article on How to Fix Blobs and Zits on 3D Prints goes over many of these key settings also.
Stefan from CNC Kitchen did a lovely video which goes over the resolution settings, and has received praise from many 3D printer users stating how much it helped them.
Fix Ineffective Filament Cooling Systems
3D print blistering results from an ineffective filament cooling system because if you do not have a proper and fast cooling system, it will take more time to cool down.
Thus, when it takes more time to cool down, the print’s shape’s deformation is noticed, even more so with materials that have a lot of shrinkage.
Add more cooling systems in the printer so that the material is cooled in the required time when it hits the bed. This way, you can avoid any kind of bubbles and blisters.
Something like the Hero Me Fanduct from Thingiverse is a great addition for better cooling.
Adjust an Incorrect Flow Rate
If your flow rates are too slow, the filament spends more time under that hot temperature from the nozzle. It’s a good idea to adjust your flow rate, especially the ‘Outer Wall Flow’ and see whether that clears the issue of bubbles on your filament.
Small 5% increments should be enough to tell whether it helps fix the problem.
Stop Printing at Temperature Too High
Printing at too high a temperature can result in bubbles, especially first layer bubbles because the first layer is slowed down, with less cooling, which compounds the issues of high heat and time under that heat.
When you also have too much moisture in your filament, from absorbing it in the surrounding environment, these high temperatures are even worse in resulting in popping filament and bubbles in your prints.
Try to 3D print at as low heat as you possibly can while the flow of filament remains satisfactory. That is usually the best formula for the optimal printing temperature.
Using a temperature tower is a great way of finding your optimal temperature settings, and can even be done with speed as well. The video below takes you through the process.
Stop Using Low-Quality Filament
In addition to the rest of these factors, low quality filament that doesn’t have the best quality control can contribute to these bubbles and popping of your filament. You are a lot less likely to experience this from high quality filament.
I’d look for a brand that has a great reputation and top reviews for a good period of time. Many on Amazon, even though they are cheap, really are manufactured with care in mind.
You don’t want to waste time, effort and money trying to make a cheap roll of filament work for your 3D printing desires. You’ll save more money in the long run and be happier with the results by using some great filament.
You can avoid PLA or ABS popping sounds by using good filament.
Make Sure to Use a Good Nozzle Material
The material of your nozzle could also have an impact on bubbles and popping of your filament. Brass is a superb conductor of heat, allowing it to transfer the heat easier from the heating block to the nozzle.
If you are using a material such as hardened steel, it doesn’t transfer heat as well as brass, so you’d need to make adjustments in the printing temperature to compensate for that.
An example could be switching from hardened steel back to brass, and not lowering the printing temperature. This could result in you printing at a temperature which is too high, similar to the cause listed above.
Conclusion for Fixing Bubbles & Popping in Filament
The best solution to get rid of the popping and bubbles from filament is a combination of the points above, so to summarize:
- Store your filament properly and dry before using if it has been left out for a while
- Adjust your retraction, coasting, wiping & resolution settings in your slicer
- Implement an improved cooling system using something like the Petsfang Duct or Hero Me Fanduct
- Adjust your flow rates, especially for the outer wall and see if it fixes the issue
- Decrease your printing temperature and find the optimal temperature with a temperature tower
- Use higher quality filament with a good reputation
- Take note of your nozzle material, brass is recommended due to its great thermal conductivity
Print bubbling on heated bed during print - 3D Printers - Talk Manufacturing
Scott_Jenkins
#1
I have printed this base for the last 2 days now trying to get it right. I have taken the temp all the way down to 185 degrees it still does this… I am currently printing at 205 degrees I upped the temp during printing because it was doing it at 200 degrees. Any suggestions?
1 Like
3dpGeek
#2
A. What type of filament
B. What type of bed? Heated glass?
C. What type of products so you use for adhesion to the bed?
I had this problem on my da vinci a couple of times when I first got it back in the day and it was because the glue I was using wasn’t strong enough to hold the print on the build surface.
1 Like
Scott_Jenkins
#3
PLA wood filament
Heated aluminumn with build tak
no adhesion products
jamesarmstrong
#4
Clean lightly with sandpaper then wipe with alcohol. Sometimes it gets a buildup and has to be refinished.
amorton12
#5
This can also happen if you are overextruding too much. Check your filament diameter with good calipers, and check the extrusion multiplier setting in your slicer as well.
luc1dni9htmare
#6
Try to level your bed again and add more distance between your nozzle and bed. I normally use 0.15mm to get a nice first layer. Yours like its way too close to the bed.
bbogner
#7
First layer is too smooshed. The heat isn’t bubbling it, but rather the next line of filament is pushing it up. Either you are over-extruding, or your bed leveling put your nozzle too close. Both can be handled in Simplify3d if you are using that. In S3D, bump your first layer height up. For instance, if it’s set at the default(85% i believe), then set it to 95% and try again. You can go over 100% if needed. This basically tells the printer to extrude 100% filament in a space that’s 85% of normal. Check out S3D’s FAQ for more info. Might play with your first layer extrusion width as well. In the future, when bed leveling, make sure the bed is hot when you do it. Seems to work for me to help alleviate this issue.
gomezjj3
#8
Is that bed actually flat?
Looks almost like it has bulges.
Only seen it happen once. It was under extrusion on first layer. Either bed leveling off or profile settings on slicer. Filaments can be a pain in the butt also, they get moisture in them. Check out the same print with another Filament or even different material. They each have their own challenges. Obtaining the right temperature takes patience and lots of runs until you get the perfect one. I just ran a set of gears with Bridge Nylon on the Duplicator i3V2 and so far I have 4 sets of not so good prints until the right temp hit… Tweaking and preparation is time consuming but it pays off. Take a look at your profiles for that material, see if something doesn’t look right. Good luck.
Scott_Jenkins
#9
Thank you…I have left this filament on the printer while I used it so it could be moist. As far as the bed…it should be I’ve only had the printer for 2 weeks. I’m noticing that there are lots of tweaks…I just got a beautiful print the night before with the same filament…I’m printing a dice towed and it came out great…I have over piece left and I can’t get it to sick to the bed…It’s so frustrating
Scott_Jenkins
#10
I have never been so frustrated with a piece of equipment in my life, every time I fix one problem another crops up. This one though is going to be the death of me… Last night I couldn’t get a first layer to stick to the print bed. A problem that just started happening. I followed some advice on here and lightly sanded the bed and wiped with alcohol. Didn’t work, tried hairspray, didn’t work. I just don’t get it my last print was the best one yet but now I cant get another to print… By the time its printing the 3rd layer the bottom layer has detached and it starts sliding all over the bed and messing up. Please give me some advice as to when your leveling the bed how should the paper feel when your testing it. Should I barely feel the pull or should it be tighter? I thought I had this 2 days ago. when I printed the tower of my dice tower, (I had to press the first layer to the build plate then too, but it stuck and didnt curl up too much) Ive tried the nozzle closer Ive tried the nozzle farther away, Ive tried the bed temp up, Ive tried the bed temp low, Ive tried the nozzle tem up and Ive tried it lower nothing seems to work, Please Help.
gomezjj3
#11
hi,
It going to be all right, don’t worry everyone goes through the same frustrations. Listen you know how when you drink coffee that is hot you tend to blow on it so that it cools right! Check that your print is not being overcooled. Example: ABS, Nylon etc needs to have the fan off when printing, because otherwise it will cool the parts too quick thus warping and non sticking. You can change those settings on the profile and inclusive on the Wanhao Duplicator i3 while printing. By turning fan On or Off. Take a look at the profile and see what it say in the Cooling section concerning your fan.
Adhesion to printing platform is going to be a challenge regardless. There are so many factors involved. 1st layer width, bed leveling, fan status, and so on. Keep playing with it. Once I get the temp and all is going well on a big print like the one you are doing. I usually will go in and Place blue painters tape along the edges of the Brim to help it stay in place, especially if it is a long job. Try using a Brim of about 5-6 lines or even a Raft to aid in adhesion.
As far as your bed leveling and how the paper should slide. A rule of thumb I use is I go into the gap not from the back, I dont put any pressure on the bed, so if the paper doesnt go into the gap freely, My extruder is too low. Adjust and try again. The paper slide is almost like a bite as I pull the paper away. But the bite is soft enough to allow the paper to move freely. I do this with a hot bed. after all the oozing of filament has completed. Or if you have not loaded the filament yet, Level your hot bed before loading filament. Glue, Hairspray, ABS juice, Painters tape and a few others are adhesion aides, but none of them will work if your temperature and printing profiles are not correct. Wanhao has a tips and trick site where they have some printing profiles, experiment with those and see what happens. Test with small prints that are wide, this will give you a better idea of how your prints come out before going into big jobs.
Lastly make an enclosure for your printer, this helps with wind drafts. Use PVC board it is cheap and easy to cut. The front you can make a door with Plexi glass. As far as hardware, I use duct tape, no screws. and the door open upward when done printing and lays on top of enclosure.
Keep going at it, Been there done that, and still wearing the T-shirt
gomezjj3
#12
Hi Scott, Have you printed the gcode files that came with printer? Make sure that the material used is the same for the gcode. So example if you use ABS on a gcode for PLA your print will have issues. Check temperature on gcode, particularly the bed temp. PLA is gonna have a lower temp than ABS. I don’t know what you print with, but try to keep your filament dry. If when you print you hear popping it could be moisture on filament. Yeah so check that the filament matches profiles. Key in on bed temps. If you want I can send you some example temps for filament I use and even profiles for specific filament that work for me.
Scott_Jenkins
#13
Thank you, I think I did mess with the fan settings a few prints ago because someone said to have the fan on low on the first layer, will change that.
Scott_Jenkins
#14
That would be great thank you
gomezjj3
#15
Scott,
So check it out. Make sure your bed is leveled the best you can. Take a measurement of the Z axis on both sides make sure they are even. Use a level on your bed to make sure it is even both X and Y axis orientation. Then level using the paper with a hot bed. Once all is good, give it a shot at printing. Here are some example I use for printing.
1.75mm filament on a .4 nozzle FLOW 100%
PLA
Layer Height .16
Shell Thickness 1.2
Enable Retraction True
Bottom Top Thickness 1. 2
2
Fill Density (your preference)
Print speed 40 (yeah its slow but it produces nice prints)
Printing Temp 200
Bed Temp 60
Fan speed 100%
1.75mm filament on a .4 nozzle FLOW 100%
ABS
Layer Height .32
Shell Thickness 1.2
Enable Retraction True
Bottom Top Thickness 1.2
Fill Density (your preference)
Print speed 40 (yeah its slow but it produces nice prints)
Printing Temp 240
Bed Temp 100
Fan speed OFF
1.75mm filament on a .4 nozzle FLOW 100%
HIPS
Layer Height .16
Shell Thickness 1.2
Enable Retraction True
Bottom Top Thickness 1.2
Fill Density (your preference)
Print speed 40 (yeah its slow but it produces nice prints)
Printing Temp 220
Bed Temp 105
Fan speed 40%-50%
BRIM or RAFT is user preference. If using brim it is easier to use 5-6 lines vice 15-20, it will give you same results. The bigger the project the more lines can be added. A Raft in my opinion is usually best used on smaller items. But do you really need to use these. Folks tend to say that it is a waste of filament. TRUE. But whatever works for you stick with it.
Also once you get a Profile to work save it on your desktop, Name it I3PLA for example. That way you know it works and you can open it up on the Slicer you use and it gives you a peace of mind once you start. Always stay close to the printer, On its first layers it is key to determining whether a print will work or not.
gomezjj3
#16
Scott, I forgot to tell you that I use a glass bed so your temps may be a bit lower. Use increment of 5 degrees when testing on yours.
Scott_Jenkins
#17
ok thank you, I have all the stuff to put a glass bed with PEI on but I keep procrastinating because I dont want to mess up my printer lol
Scott_Jenkins
#18
Im home Trying a new print added a raft, fiddled with a few settings leveled the printer hot and increased the bed temp to 80c looking good so far crossing my fingers
gomezjj3
#19
Awesome, let us know how the print did.
Scott_Jenkins
#20
I will post pictures after work but this is how it went, the Raft laid down like a dream it looked perfect, then when the print started… I curled and bubbled just like when there was no raft, it makes not sense, but the difference being, it stuck to the raft, mainly because I pushed down on the curls as it did the first layer. In the end the print came out ok and my Dice tower is finally done.
next page →
is an excellent toy for creating a festive atmosphere / Gadgets / iXBT Live
A festive mood is made up of many little things. One of the components of a good mood can be the following device - a device for creating and generating soap bubbles. The device is made in the form of the famous Gatling light machine gun. Despite the formidable imitation, this toy can be an excellent solution for children and adults, which will drag them into the game for a long time. In the publication below, you can get a brief overview of the device and its principle of operation, as well as look at it in operation.
Contents
- Packaging and contents
- Appearance
- Power supply
- Function and use
- Output
with batteries, a special sprayer, a bath for a special soap solution. Also for the initial test, the kit includes a small container with soapy water.
Appearance
And here it is worth mentioning the low cost of the toy, so taking into account this fact, I will treat it condescendingly in the review. The toy is made of extremely cheap plastic, to be honest, I was hoping for a more presentable appearance and more detailed workmanship. However, looking ahead, I will say that the appearance does not affect the functionality of the device.
The handle of the toy is perfect for a child's hand, and an adult can hold it with three fingers. A start button is installed at the end of the handle, or, maintaining the entourage of the device, we can say that this is a trigger mechanism.
A special fan is installed on the front, the rotation of the blades of which creates an air flow. Actually, this air flow creates soap bubbles.
It is worth noting here that during transportation the case was a little crushed, and when the fan rotated, the blades caught a little on the body of the toy, but this can be easily fixed with a couple of gentle clicks on the device case in the right place. I think this should not be paid attention to and attributed to isolated cases.
Power
The battery compartment is located at the bottom of the device. The toy requires three AA batteries to operate, but they are inserted into the device quite tightly, and the terminals with springs are quite long. Therefore, if necessary, you can use AAA batteries. Which I did by installing two AA batteries and one AAA. To be honest, this is the first time I see this, but apparently the Chinese can do “miracles”.
It is also worth noting that the cover from the battery compartment must be fixed with a special screw, but I did not have it on the toy.
Function and use
After installing the batteries in the toy, it remains to install the atomizer on the fan. After that, in principle, the toy is ready for use, it remains only to collect the soap solution in the bath and dip the sprayer into it.
The device is “charged”, and press the start button, the fan starts to rotate and blow soap bubbles. Conventionally, one charge is enough for about 5-6 seconds of generating bubbles, while they fly out by about 1-1.2 meters.
Buy here
Reserve
Conclusion
After unboxing, I already expected a worse end result. But in practice, it turned out that the toy met all expectations, it can be purchased for both children and adults, and to decorate any holiday. The device, in my opinion, fully justifies its cost and will definitely add positive emotions. Now I'm looking for a similar toy with automatic soap solution supply. If I find it, I will definitely buy it and tell you about it.
Soap Bubbles Set
Soap Bubbles Set- Description
- Reviews (0)
Educational kit "Soap bubbles" for children and adults is intended for the study of soap films and bubbles. Despite the apparent simplicity of the subject being studied, the phenomena that you learn about are unusual and amazing.
A book with a detailed description of the experiments is included.
Recommended age: from 5 years old.
Purpose:
Together with your child you will learn how soap bubbles are used in architecture, physics and chemistry, how they help to solve deep mathematical problems, and also what practical applications they can find.
The set is suitable for extracurricular activities at school and at home.
What will the child learn?
Soap Bubbles Science Experiment Set is not only positive fun, it can be used to create a Mobius strip, a foam bridge and paint an original picture with bubbles. Well, giant soap bubbles have not left anyone indifferent!
List of experiments:
Preparation of a soap solution.
Bubbles, films and properties of the water surface: blowing bubbles with a sheet of paper, trick with coins, film on the water.
Water and surface tension: drop formation, ball on water, films on flat frames.
Amazing bubble experiments: bubble chain, bubble inside bubble, soap frame, soap film crossing, soap trampoline, giant and tiny bubbles.
Atmospheric pressure in bubbles: pressure in a bubble and its dimensions, connect bubbles, soap dome, huge soap film.
Longevity of soap films: soap bubble lose hat, bubble life path, soap film and charged objects, soap bubble in the refrigerator.