3D printer belt tension spring
6MM GT Belt Tension Spring
PB Select™
- SKU:
- PBX-SPRNG-BLT-6MM
- Condition:
- New
Now: $3. 99
- Description
Description
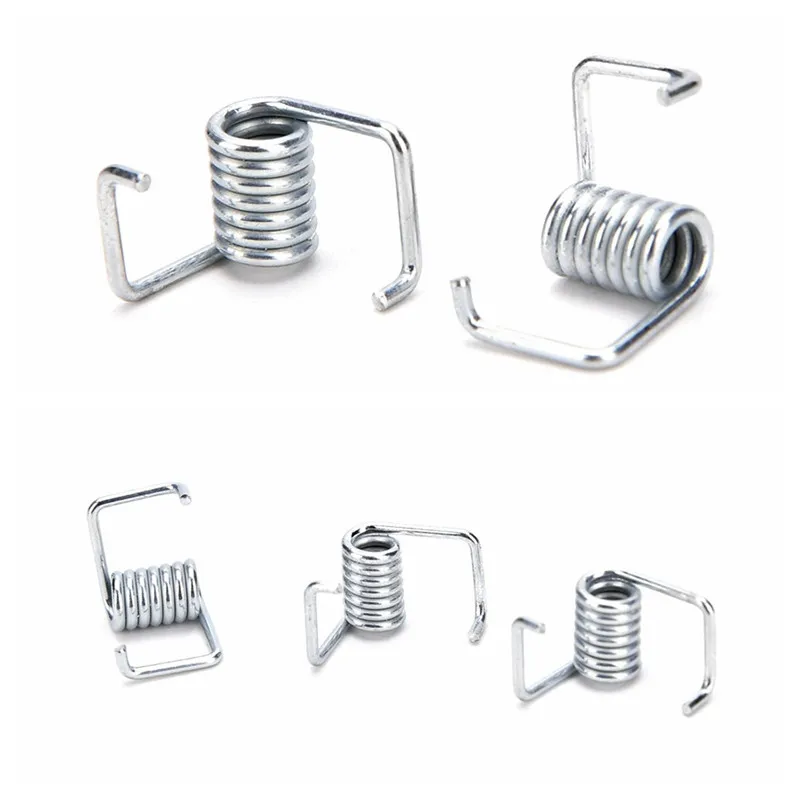
Timing Belt Tensioner Spring
Universal belt tensioner spring for 3D printer 6mm drive belts
Fits: 6mm Timing GT Belts
View AllClose
- Related Products
- Customers Also Viewed
Related Products
Customers Also Viewed
Add to Cart
Ball Bearing | Bondtech
Bondtech
Now: $2.49
Bondtech Ball Bearing - 5×8x2.5
High precision ball bearing used in the Bondtech BMG and dual/single direct extruders for Raise3D.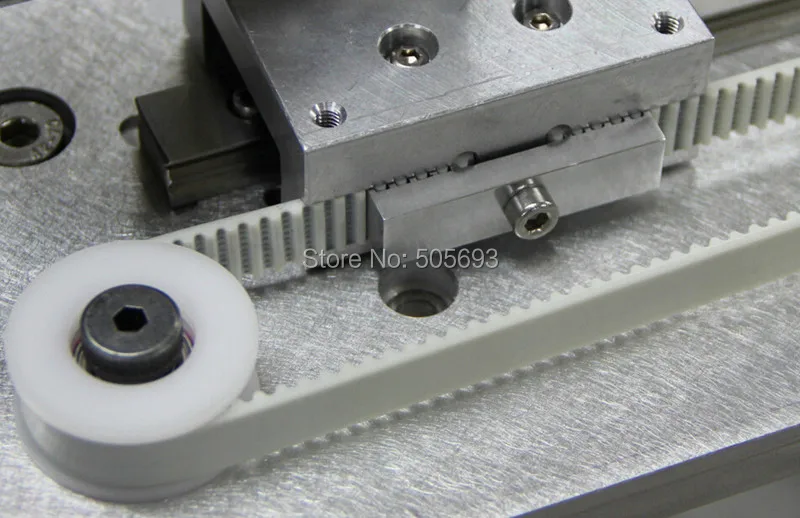 Sold in units of 1
Add to Cart
DimaFix Pen Print Bed Glue - 90ml
Dima3D
Now: $24.95
DimaFix Pen (100 ml) The DimaFix Pen provides an easy way to obtain the print bed adhesion you need. When heated above 60ºC, DimaFix provides a strong bond between your first layer and...
Add to Cart
Cable for BLTouch - 1.5 Meter
PB Select™
Now: $7.99
Universal BLTouch Cable - 1.5 Meter This is one long cable that plugs directly into the BLTouch and eliminates the additional joints created when using other BLTouch extension cables. Comes...
Add to Cart
CR-10S Pro Brass Nozzle | 0.
 80mm
80mm PB Select™
Now: $8.95
Brass Nozzle for CR10S Pro Size: 0.80mm .75mm thread pitch for CR-10S Pro. These nozzles are only for the Pro version and will not work on a standard CR10/S hotend. Fits: CR-10S Pro
Add to Cart
BLTouch Smart v3.1 | ANTCLABS
ANTCLABS
Now: $34.95
Genuine Genuine BLTouch v3.1 Bed Leveling Probe BLTouch is an auto leveling sensor for 3D printers that can precisely measure the tilt of bed surface. It works with...
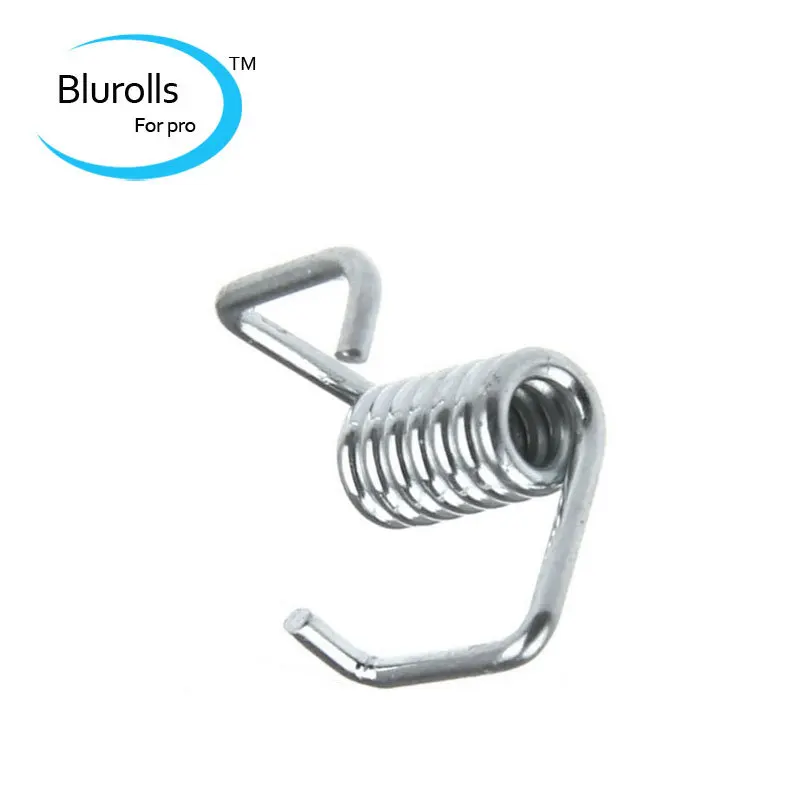
Timing Belt Tension Torsion Spring
(No reviews yet) Write a Review
Timing Belt Tension Torsion Spring
Rating Required Select Rating1 star (worst)2 stars3 stars (average)4 stars5 stars (best)
Name
Email Required
Review Subject Required
Comments Required
- SKU:
- 75
Now: $0. 89
89
Frequently bought together:
- Description
Description
These Belt Tension Torsion Springs ensure belt slack is reduced by applying tension on the belt.
Product Features
- Fit belts up to 7mm
- Fix loose belt fast
What is Included
- (1) Timing Belt Tension Torsion Spring
Product Specifications
- Aluminum
- Color: Silver
Assembly/Support/Documentation/3D Models
Easy follow along assembly video - top notch awesome community support - open source files and documentation and examples.
All registered Trademarks, Logos and other Intellectual Property found on the Site or mentioned herein belong to their respective owners.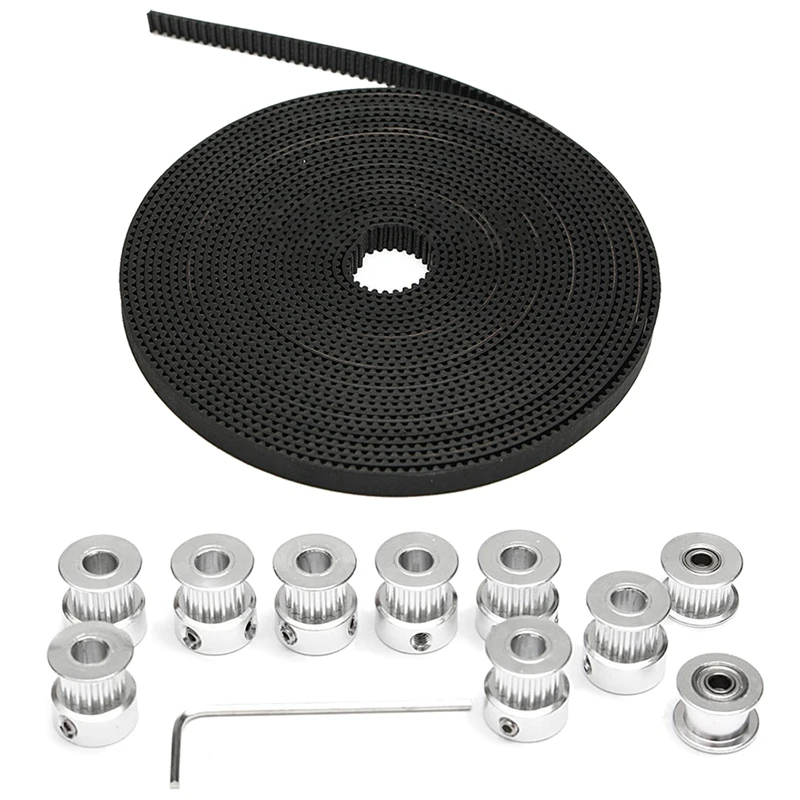
View AllClose
- Related Products
- Customers Also Viewed
Related Products
Add to Cart
GT2-2M Timing Belt - By the Foot
Now: $2.49
There is no limit to the types of linear motion you can create by making an actuator based on one of these GT2-2M Timing Belts. They a
Add to Cart
GT2-2M Timing Belt Spool
Now: $379.99
There is no limit to the types of linear motion you can create by making an actuator based on one of this GT2-2M Belts, popular for fast and lightweight movement.
Add to Cart
3GT (GT2-3M) Timing Belt - By the Foot
Now: $3.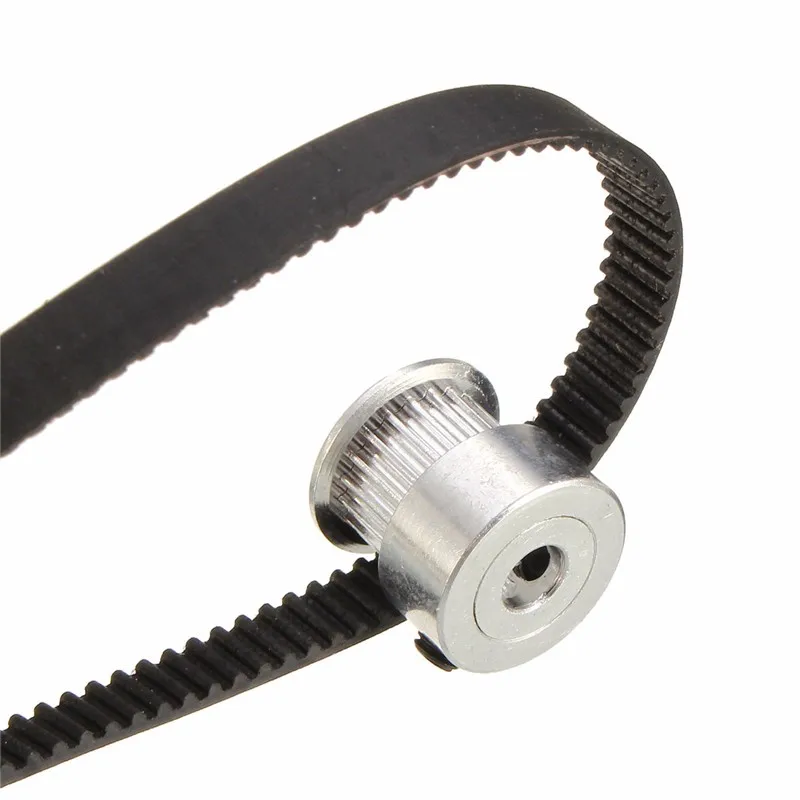 49
49
3GT Timing Belts are thick and robust with deep teeth grooves that provide a high torque for those large builds that require more power transmission.
Customers Also Viewed
Add to Cart
Belt Clamp Crimp Style
Now: $0.59
Create a solid and secure belt loop with one of our Belt Clamp Crimp. Product Features Metal for a strong bind Pre-Bent for Easier Install What is Included (1) Belt Clamp Crimp Style ...
Add to Cart
GT2-2M Timing Belt - By the Foot
Now: $2.49
There is no limit to the types of linear motion you can create by making an actuator based on one of these GT2-2M Timing Belts. They are popular for fast and lightweight movement. Product...
Choose Options
Low Profile Screws M5 (10 Pack)
OpenBuilds®
Now: $0. 89
89
These are the screws you need to secure all your components in your build, and we carry different lengths to match your need. Product Features Low profile means great clearance Strong to...
Choose Options
8mm Metric Acme Lead Screw
OpenBuilds®
Now: $10.99
These precision trapezoidal 8mm metric lead screws are a perfect combination of high torque and speed. Product Features Large diameter helps eliminate whipping High...
Choose Options
NEMA 17 Stepper Motor
OpenBuilds®
Now: $17.98
This custom Openbuilds NEMA 17 Stepper Motor is a great choice for your lighter duty high precision CNC projects. Product Features Plug and Play Xtension connector for easy and.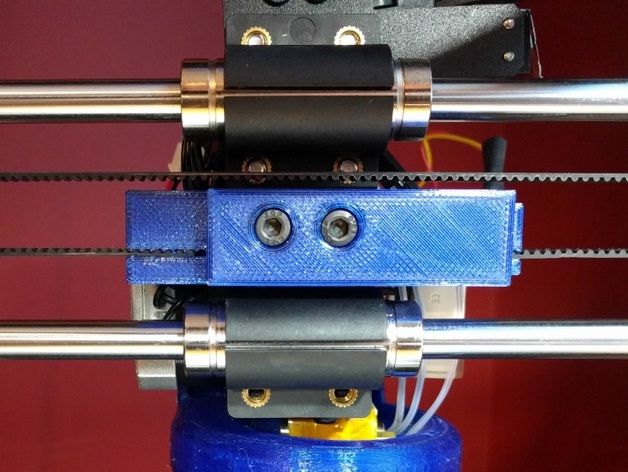 ..
..
features, photos and customer reviews
158.67 ₽The product is not available now, look similar
Go to the storeThe product is no longer for sale, look similar
The link is copied, share it
Or send via social networks
- 9015 9011
- On the site for more than 4 years
- High overall rating (5136)
- Customers satisfied with communication
- Items as described
- 3 Fast shipping
- 3 dissatisfied for the last 3 months
- Product type: Spring
- Brand name: Funssor
-
Layer shifting - Belts, Motor current, Guides
-
Ringing - Guides, Speed
-
Incorrect model geometry - Guides, Motor steps, belts
-
Set the caret to zero coordinates (Autohome or G28)
-
Move the carriage some distance
-
We measure how far the carriage has traveled
-
We calculate the correct number of steps per millimeter using the formula:
-
Inserting plastic into the extruder
-
Cut it right at the outlet
-
We give the printer a command to stretch the plastic a certain distance (at least 100 millimeters)
-
Cutting plastic again
-
We measure the length of the resulting piece of plastic
-
We use the formula from the previous algorithm
-
Cut a model of a standard test cube with a wall thickness equal to one nozzle diameter, without filling and top layers, bottom 2-3 layers;
-
Open GCODE file in notepad;
-
Find the G28 command at the very beginning and insert the line data after it:
-
Save the changes, print the model according to the received GCODE and note at what parameters P and T it was printed;
-
Open the same GCODE file and change the P and T values on the second line, adding 500 to each;
-
Repeat steps 4-5 at least 3 times;
-
Cut a model of a standard test cube with a wall thickness equal to one nozzle diameter, without filling and top layers, bottom 2-3 layers.
-
Open GCODE file in notepad
-
Find the G28 command at the very beginning and insert the line data after it:
-
Save the changes, print the model according to the received GCODE and note at what X and Y parameters it was printed
-
Open the same GCODE file and change the X and Y values on the second line, adding 2 to each
-
Repeat steps 4-5 at least 3 times
This product is currently not available, but there are similar ones
The price increased by 4.15 ₽
More than average, slightlyReliable seller - 100%
Buy with confidence, AriMall Store
Prices from other sellers from 55.
 43 ₽
43 ₽ 55.43 ₽
10pcs/lot 3D printer belt, GT2 2GT torsion spring, Timing belt, 3D printer torsion spring, Rerapp 9 parts0003
1 Accessi
1 order
Reliability-66%
Seller Creative 3dprinter Store
In the store in the store
208.56 ₽ 9000 Reprap parts, inner diameter 5mm
2ratings
0orders
Reliability - 100%
Seller aimsoar Official Store
Go to StoreGo to Store
361.69 ₽
10 pcs./Lot belt tensioner timing spring spinning spring belt tightening for Reprap 3D printer Ultimaker Mendelmax PREASA
1 COSCURATION
Reliability - 100%
Salespecker Sales Rapficial shop
Found 45 similar items
-0.6
%
111. 56 ₽
56 ₽
reprap gt2 timing belts for 3d printer, 20 pcs/lot, torsion spring
0
0
The reliability of the seller is 89%
112.94 ₽
Sales leader, Front REPRAP GT2 for a 3D printer, 20 pcs/lot, torsion spring
1
0
The reliability of the seller 85%
-4
%
33.95 ₽
Accessories for the 3D printer GT2, 10 pcs./Lot, timing belt, Torsion spring for Reprap
1
1
The reliability of the seller 89 %
114.33 ₽
9000 9000 9000 9000 9000 9000 20pcs/lot tension springs reprap gt2 3d printer torsion spring0
0
The reliability of the seller is 89 %
9000 -2 -2 9000 % 29.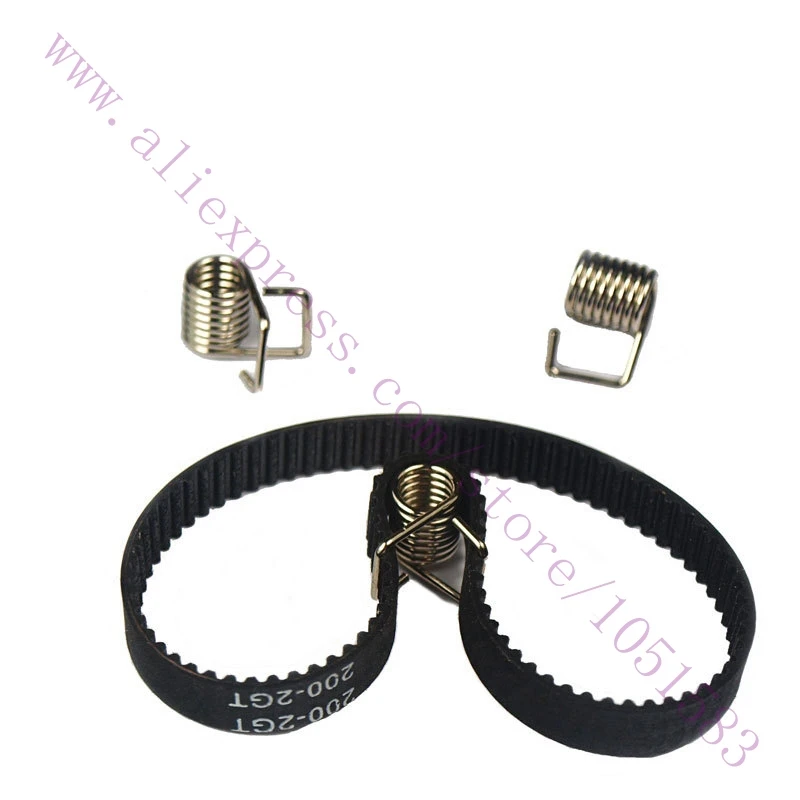 79 ₽
79 ₽
10 pcs GT2 Cleaning Treasure Relax for 3D printer Makerbot Prusa I3 Repraper 2 Printer.
2
5
Reliability of the seller 100%
timing belt tensioner fixing spring for 3d printer 6mm width belts stainless steel extruder spring
0
0
The reliability of the seller 68%
408.81 ₽
10 pcs., 3D UltiChoil 2, sliding block Ultimaker2, stretch belt, spring fixator, torsion spring
0
0
Sellers of Salespan %
-0.6
9000 %112.94 ₽
Fronts REPRAP GT2 for a 3D printer, 20 pcs/lot
0
0
The seller’s reliability 89 % 9000 -4
9000 % 9000 % 9000 % 9000 %000345.04 ₽
Safety belt for a 3D printer, 10 pcs. /Lot, GT2 2GT
1
1
The seller’s reliability 66%
124.72 ₽
10 pcs. mm gt2, synchronous belt twist spring, 3d printer part, pull spring
1
2
belt, 3d printer part, pull spring
1
1
The reliability of the seller is 83 %
-46
9000 %60.28 ₽
1 pcs., 3D printer, fixing spring tension tape for MXL and GT2, GRM, GT2, GRM
spring0
0
The reliability of the seller is 85 %
9000 -4%
38.80-109.48 ₽
Parts for a 3D printer, a spring heated platform 10*25 mm, accessories for a 3D printer, imported reprame for Ender. 3 cr10 mk2b mk2a
1
1
The reliability of the seller is 100 %
9000 -8%
189. 85 ₽
85 ₽
GRM GT2 20 mm + 2 m, belt timing GT2 5 mm for 3D printer reprap, accessories, 2 pcs.
0
0
The reliability of the seller is 100 %
-0.7
9000 %460.08 ₽
3D parts of the replace Ultimaker 2 Table D2150 SPRINGS REPRAP Sprinking Slotrend 3D0003
0
1
Reliable Seller 100%
21.48 ₽
Timing belt gt2, 10pcs/lot, torsion spring, carbon steel timing belt, lock springs for accessories 6d-printer 6.5 mm
1
1
The reliability of the seller 72%
1 177 ₽
Holder Y-shaped belt from an aluminum alloy belt for the 3D printer REPRAP PREPA I3 Mendel
0
0
Reliability of the seller 100%
-6
%
248. 75 ₽
75 ₽
10 pcs. ultimaker2 slider Spring Street Synchronized belt with a torsion spring for 3D accessories for printer,
1
0
Reliability of the seller 100 %
9000 -06 -0.3 9000 %83.84 -218.96 ₽
Parts for 3D gt2, belt clip, suitable for fixing the timing belt for 3d printer, reprap, for 3d printer
2
2
The reliability of the seller is 100 %
9000 -2 -2%
44.35 -90.08 ₽
belt for a 3D printer, a stretch spring with a strong spring for a belt of 6 mm/10 mm, 10 pcs. Lot
5
14
The reliability of the seller 100%713.68 ₽
Improved SWMAKER belt from aluminum alloy, GRM belt tensioner DIY REPRAP PRASA I3 Mendel
9000 1 9000 1 9000 1 9000 1 9000 1 9000 1 9000 1 9000 1006 0
The reliability of the seller is 100 %
-3
9000 % 872. 36 ₽
36 ₽
Novelty, fully metal y-reptile, timing belt tensioner for 3D printer Reprap Mendel Prusa i3, synchronous clamping clamp
0
0
The reliability of the seller 100 %
9000 -2 -2 9000 % 9000 %108.09 -200.94 ₽
9000 GT2 Aluminum pulley belt, 20 teeth for a 3D printer, timing belt for a 3D printer, 3D printer Reprap1
1
The reliability of the seller is 100%
Parabated data
226.58 ₽
2020 injection tensioner Version Tenpers Tenperster for Ender 3ender 3 Pro, details of the 3D printer CR-10/S
0
6 0
Reliable seller 0%
-4
%
0003
0
0
Reliability of the seller 100%
69. 98 ₽
98 ₽
Torsion spring tape fixing form 3D printer Tender pressure
0
1
The reliability of the seller is 85 %
9000 -2 -2 9000 %373.47 ₽
spare parts for the 3D printer Reprima Lulzbot Taz, the spring 6 mm OD, 9, 9, 9, 9, 9, 9, 9, 9, 9, 9, 9, 9, 9, 9, 9, 9, 9, 9, 9, 9, 9, 9, 9, 9, 9, 9, 9, 9, 9th 7mm fl
0
0
Seller Reliability 100%
642.32 ₽
Funssor creality cr-10s y-axis belt tensioner, fixed tensioner, stretcher for φ 3 cloned printer, φ 10s cloned part0003
0
0
The reliability of the seller is 89 %
9000 -7%
22.17 -27.72 ₽
10 pcs., 3D spring Printer UM2 + GT2
1
The reliability of the seller 6666 %
-0.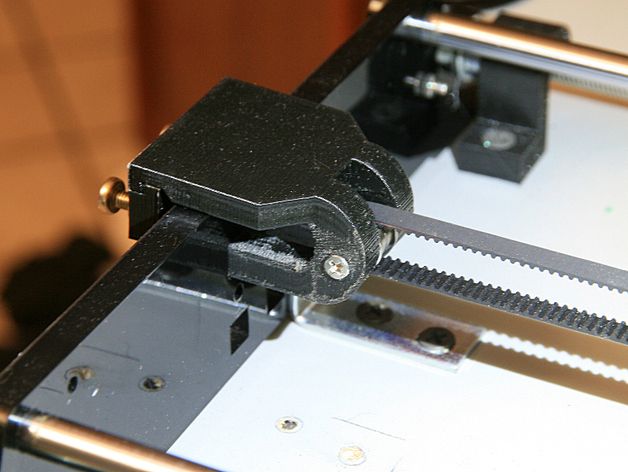 6
6
%
241.13 ₽
Timing pulley gt2, 16 teeth, 16 t, hole 5 mm + 3 meters gt2, timing belt 6 mm wide for reprap 3d printer, 2 pcs.
0
0
Reliability of the seller 100%
-0.4
%
186.39 ₽
10 pcs. ultimaker2 slider belt tension spring synchronous belt torsion spring 3d printer parts inner diameter 5mm
1
0
6mm reprap timing wrench 3d printer parts
1
9
100% Seller Reliable
-2
%
186.39 ₽
10 pcs. Ultimaker2 slider belt tension Spring Synchron belt Tearing a spring 3D printer of part diameter 5 mm
0
0
The seller’s reliability is 100 % 9000 -2 -2
9000 % 9000 % 221.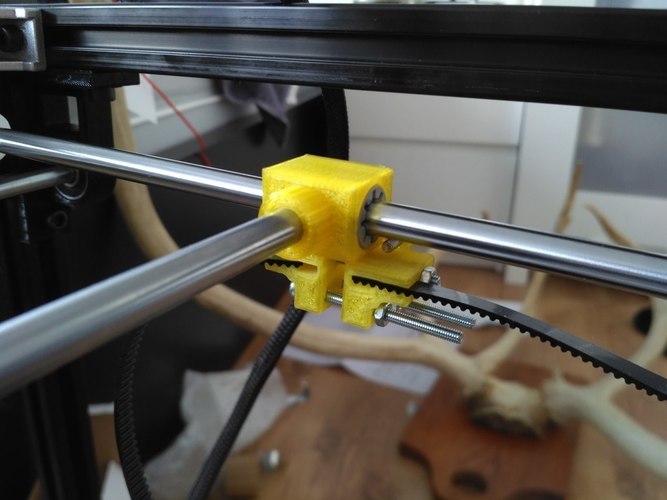 73 ₽
73 ₽
15 pcs. compression spring for 3d printer for extruder tension/bed alignment-reprap
0
0
Reliable seller 100%
-4
%
724.08 ₽
parts for a 3D printer, accessory, 10 meters, timing belt, width 6 mm GT2
0
0
The reliability of the seller 100 %
155.39 ₽
4 pcs. M3/m4 Leveling nut for the thumb for Reprap 3D Spring for a printer with heating
1
0
The seller’s reliability 100 %
-3 9000 % 9000 %
467.71 ₽
20 pcs damping spring for reprap kossel delta rostock 3d printer accessories
0
0
The reliability of the seller 100 %
9000 -11 9000 % 67. 90 ₽
90 ₽
XCR3D 10 pcs/lot, 3D printer GT2, synchronous belt, twisting spring 6 mm, 2 GT, synchronous tension tension belt, spring
2
1
Reliability of the seller 100%
-7
%
61.67 ₽
3 pcs. 3d printer spring reprap delta kossel rostock tension spring spring carbon steel rebound spring od 5.98 mm 36 mm
0
2
The seller’s reliability 100 %
-0.7
%
318.04 -775.35 ₽
The last part for the BIIQU GT2 3D printer, black, aluminum timing belt, pulp, 20 Toughs for timing belt, timing belt, Reprap 3D printer
1
6 9000 round hole, strict timing belt clip, fixed clip, brass clip for 3d printer
0
0
The reliability of the seller 100 %
9000 -2%
112. 25 ₽
25 ₽
20 pcs/lot 3D printer REPRAP GT2 fixing denture Trushing high quality
9000 0 9000 0 9000EXTRECTION OF ALL seller 100%
-12
%
112.94 ₽
20pcs/lot high quality torsion spring lock 3d printer reprap gt2 timing belt
0 reliability
3%
0 OTO TELE
0 PrOS
photos from buyers not yet
Descriptions of goods
02 Show all
,Instructions for configuring all 3D-printing mechanics: from belt-toe: from belt to the belt: speeds
The quality of the printed models directly depends on the mechanics of the printer, namely on its correct settings. Any elements of the printer wear out over time, so the printer must be set up at least once every 5-6 kg of printed filament.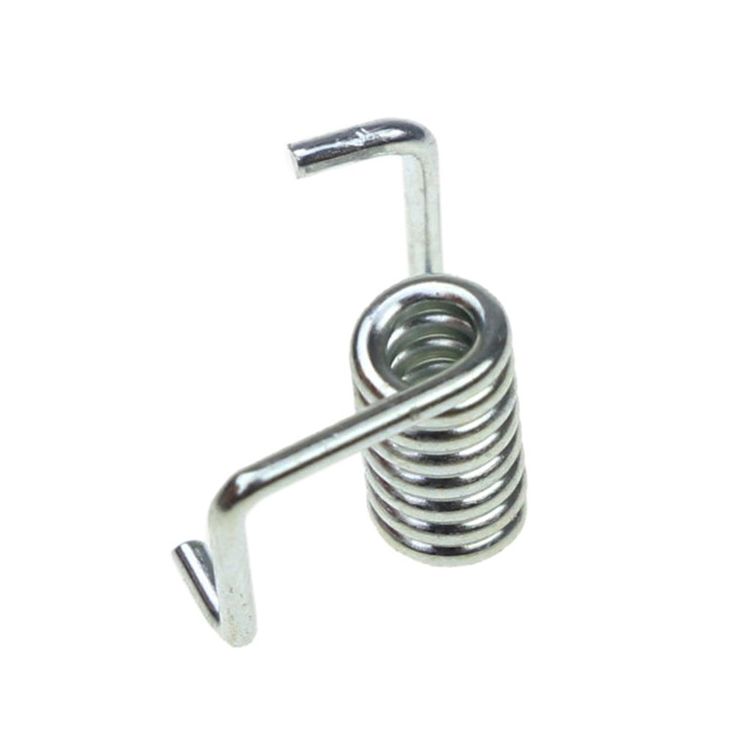 With the help of the short instructions described in this guide, you can quickly and easily set up the mechanics of your printer: belt tension, motor current, motor steps, acceleration, jerk and speed.
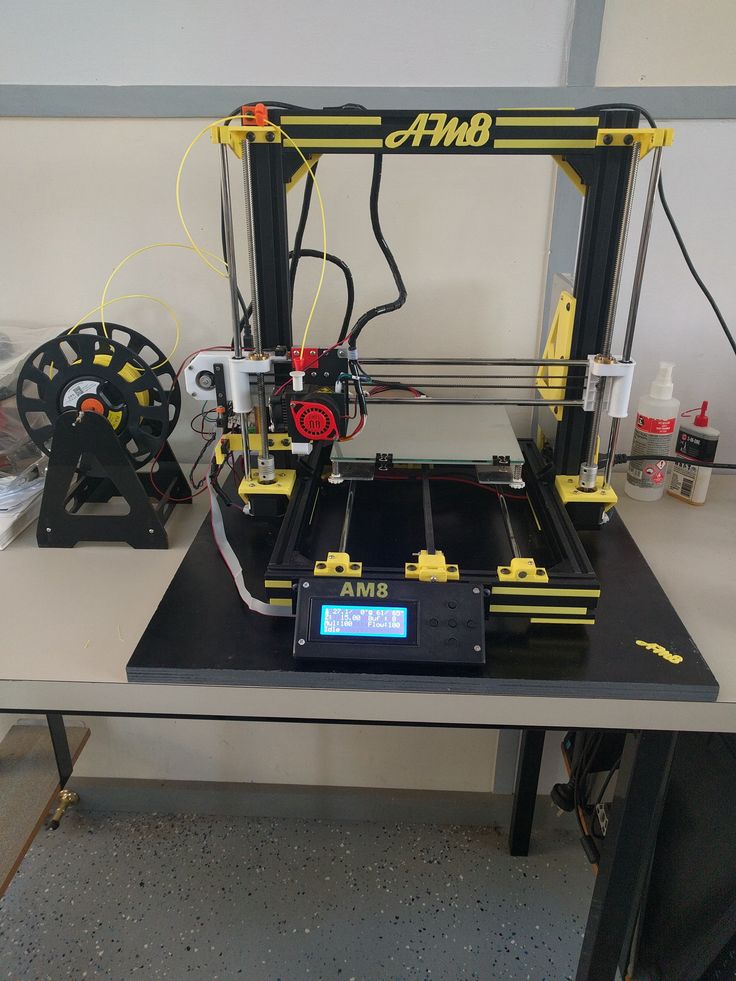
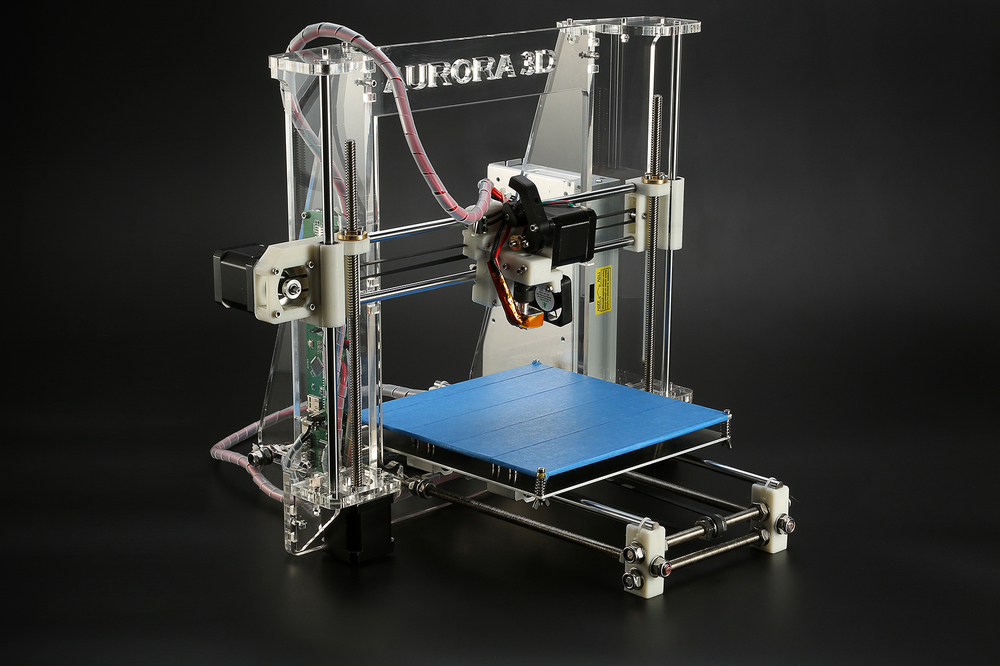
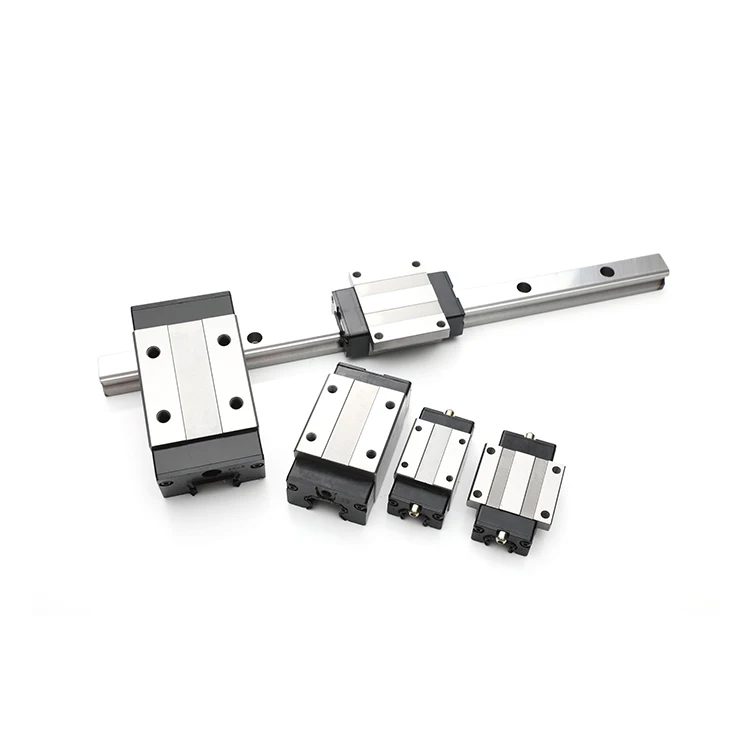
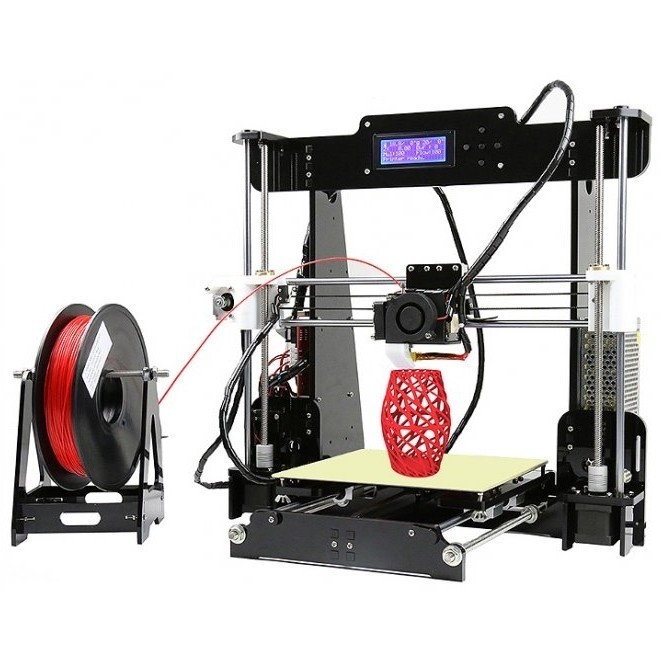
Mechanics includes
3D printers of any design always contain the same things: Axes and rails along which the elements of the printer move and motors with belts that set these elements in motion. In a classic printer design, there are at least 3 motors (one for each axis), 3 rails (one for each axis) and an electronics board that controls the motors. The latter can hardly be called part of the mechanics, but since it controls the engines, it also indirectly affects the quality of the model.
Printing defects due to mechanical problems
Before changing anything in the printer, you need to decide what exactly needs to be configured. Often defects are visible visually. Our blog has an article about most printing defects, which details the reasons for their occurrence. The following is a list of defects and what element of mechanics they are associated with:
As you can see, all the above problems do not interfere with the printing process itself, but the result leaves much to be desired. Sometimes mechanical errors can completely stop the printer from working. Therefore, it is better not to take the situation to extremes and, if any problems arise, immediately start checking and configuring the 3D printer.
How to save settings
To fix some defects, you need to change the printer software settings. Therefore, before adjusting the mechanics, it is necessary to understand how to properly store the settings inside the printer. There are 3 ways to do this:
All settings are located in the corresponding menu of the printer
Depending on your firmware, this manual will indicate code sections for MARLIN firmware in the configuration. h file
We first enter the parameters into the printer and then store them in EEPROM - the internal memory of the microcontroller. Or paste all the necessary settings at the beginning of GCODE. To learn how to do this, read our article on working with GCODE and creating macros.
To save to EEPROM, you need to send the printer a command to change some value (which can also be inserted into the initial GCODE), and then send the M500 command (save the current settings to permanent memory). The EEPROM function must be enabled in the firmware, for this you need to remove two slashes in the line:
//#define EEPROM_SETTINGS
Whichever option you choose, you should be careful when using any commands. You will not be able to harm the printer in any way when changing the settings, but if you make a mistake, you will have to look for the cause of possible further problems for a long time.
Setting Instructions
Now you can start setting up the printer itself.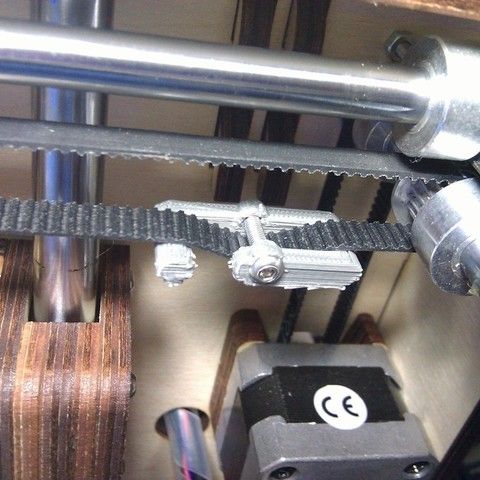 If you decide to set several parameters at once, then it is better to use the order of adjustments as in the article, since some of the settings are related to each other and if you use the wrong order, adjusting one element of the mechanics will override the settings of another element. For example, you should not adjust the motor steps before tightening the belts, as changing the length of the belts will change the "true" steps per millimeter of the motors. Also, before setting up, you must make sure that there are no backlashes in the printer frame, tighten all belts.
Belts
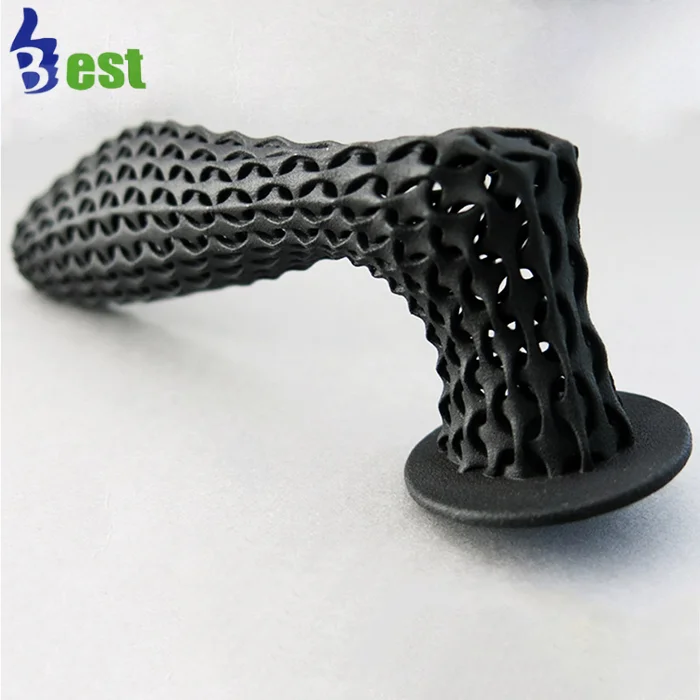
The first thing to start setting up the printer is the belts. They directly affect the geometry of the model and, when pulled too much, they cause a lot of problems: displacement of layers, changes in geometry, ripples. First you need to make sure the belt is intact. To do this, look at the entire belt, especially the areas where the belts bend. If the belt has outlived its usefulness, then you can see a section of the belt where the distance between the teeth has greatly increased and a metal wire (cord) is visible between them.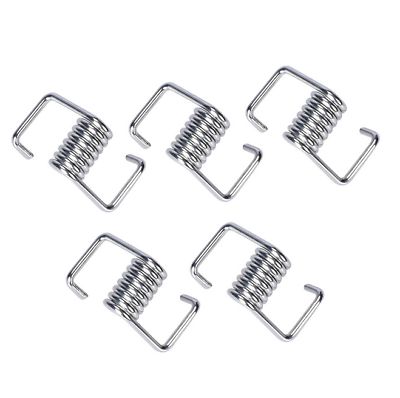 This means that it's time to completely change the belt.
Broken belt with broken cords
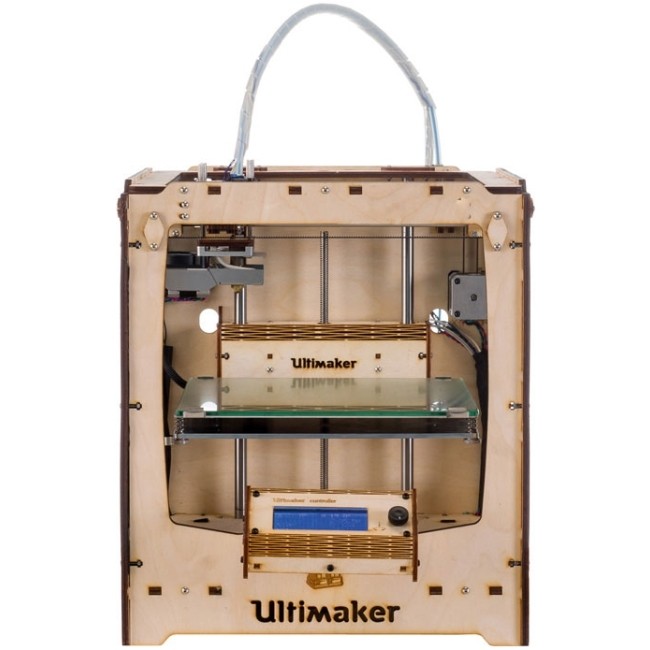
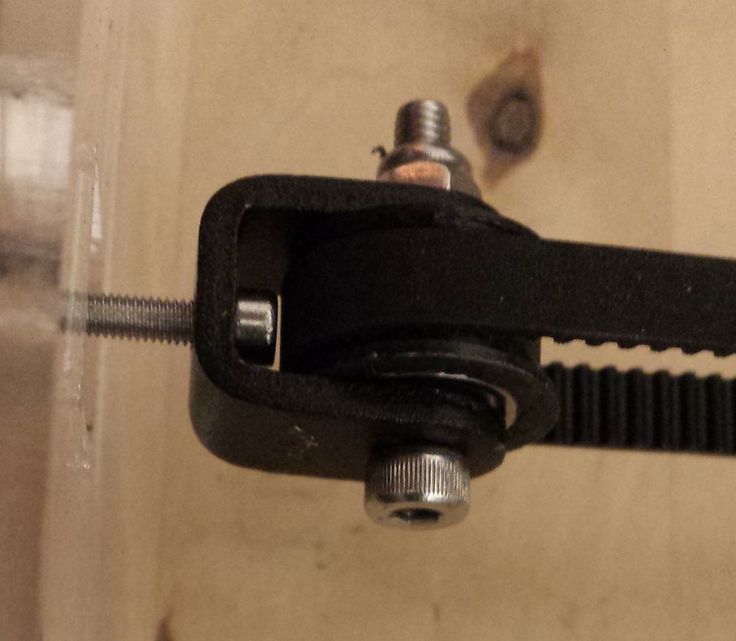
If the belt is intact or you have already replaced it, then you can proceed to the next step. Depending on the design of your printer, you need to move the roller through which the belt passes. The tension should be such that the carriage or table moves effortlessly, but at the same time, when moving quickly, the belt should not slip the teeth on the motor gear. Adjust the tension of the belts on each axis of the printer using this method.
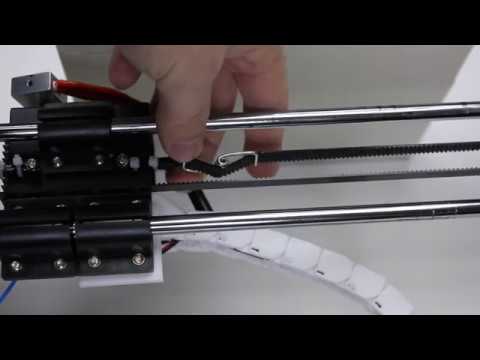
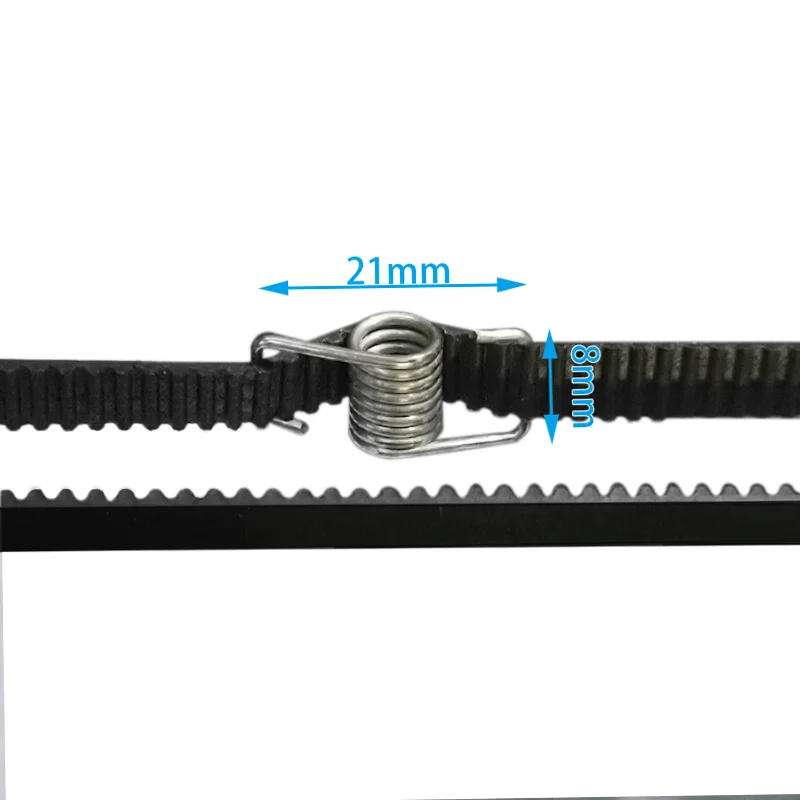
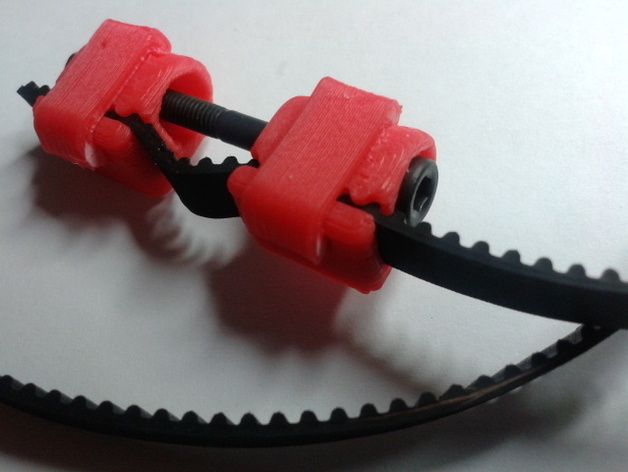
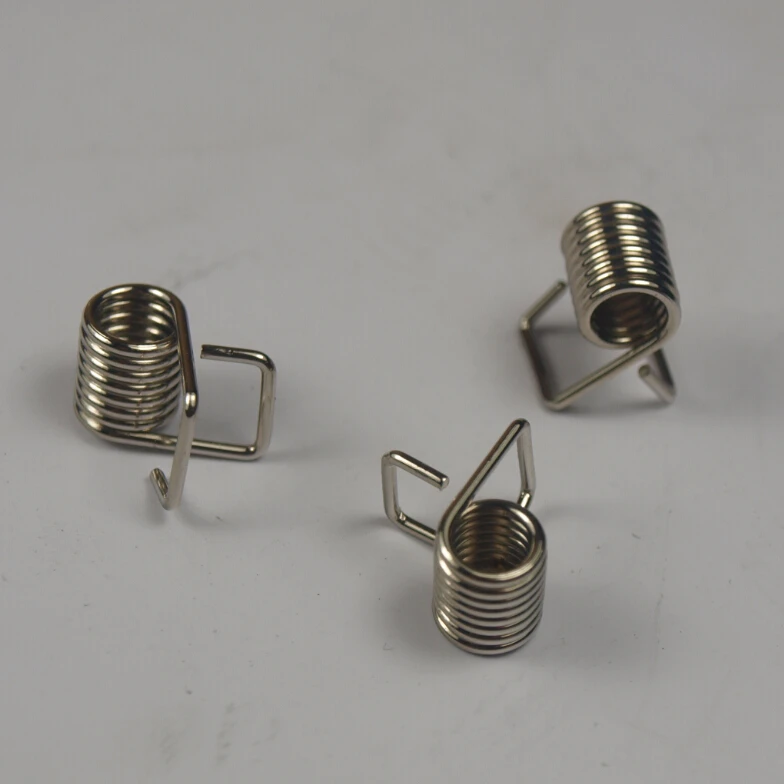
Tip: if your printer came with a belt tensioner in the form of a spring attached to the belt itself, remove it. Due to the flexibility of this tensioner, printing defects will occur, such as protruding corners on the model. It is better to adjust the belt without using this tensioner.
Belt tensioner
Current motors
As we know from the school physics course, the power of the engine depends on the voltage and current strength.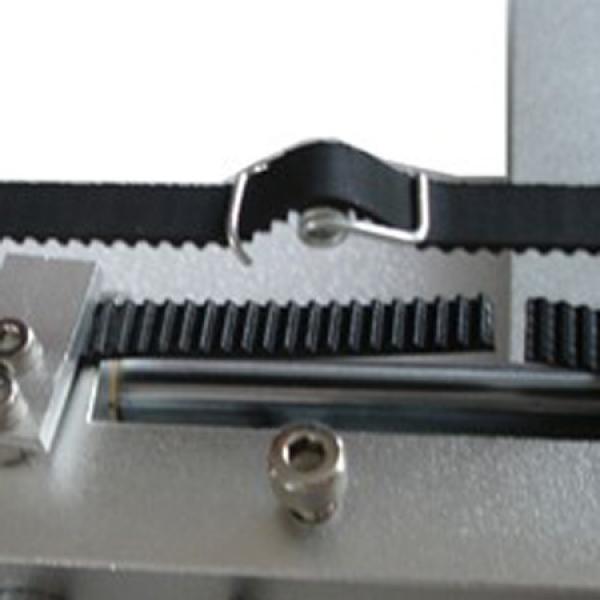 Since the voltage on all printer electronics is the same everywhere, the only thing that can be changed is the current on the motor. More precisely, it should be said the maximum current that the driver will supply to the motors. To change this limit, you need to climb inside the case and find the printer board. On it you will see the printer driver. We are interested in a small potentiometer on the driver itself (in the picture below it is indicated as a tuning resistor).
Example of potentiometer location on driver
For adjustment, you will need a voltmeter and a small Phillips or flathead screwdriver. Before proceeding further, it is necessary to calculate the maximum current supplied to the motors. Different formulas are used for different drivers, the most popular ones will be listed in the table below:
| Driver name | Formula | Explanations |
| A4988 | Vref = Imax * 1. | To understand which formula to use, you need to find a resistor with the signature R100 or R050 on the driver. They are located next to the driver chip. |
| DRV8825 | Vref = Imax / 2 | |
| LV8729 | Vref = Imax / 2 | |
| TMC2208 TMC2100 TMC2130 | Vref = Imax * 1.41 | One formula for all drivers |
 25 for R100
 The value of the maximum current (Imax) depends on the motor controlled by the driver. This can be found in the engine specification or on the sticker on it. The following are the currents for the most popular motor models:
17HS4401 - current 1.7 A
17HS8401 - current 1.8 A
17HS4402 - current 1.3 A
Substituting the value into the formula, we get the Vref value for the maximum current supplied to the motor. But at this value, the engine will get very hot, so the resulting Vref value must be multiplied by 0.7. For example, for a motor with a maximum current of 1.5 A and a TMC 2208 driver:
Vref=1.5*1.41*0.7=1.48V
Now the resulting value can be used when configuring on the printer itself. To do this, disconnect the wires going to the motors, turn on the printer and place one voltmeter probe in the center of the trimmer, and the second probe to the negative terminal on the power supply (you can also use the negative terminal on the printer board and the contact on the driver, labeled as GND). You will see some value on the voltmeter screen. Turn the trimmer clockwise to decrease the Vref value and counterclockwise to increase it.
Attention: you should not specify a Vref value higher than the maximum calculated for your engine! Otherwise, the engine will soon break down!
Once you have adjusted the value on the drivers, you can turn off the power to the printer, connect the motor wires, and put the case back together.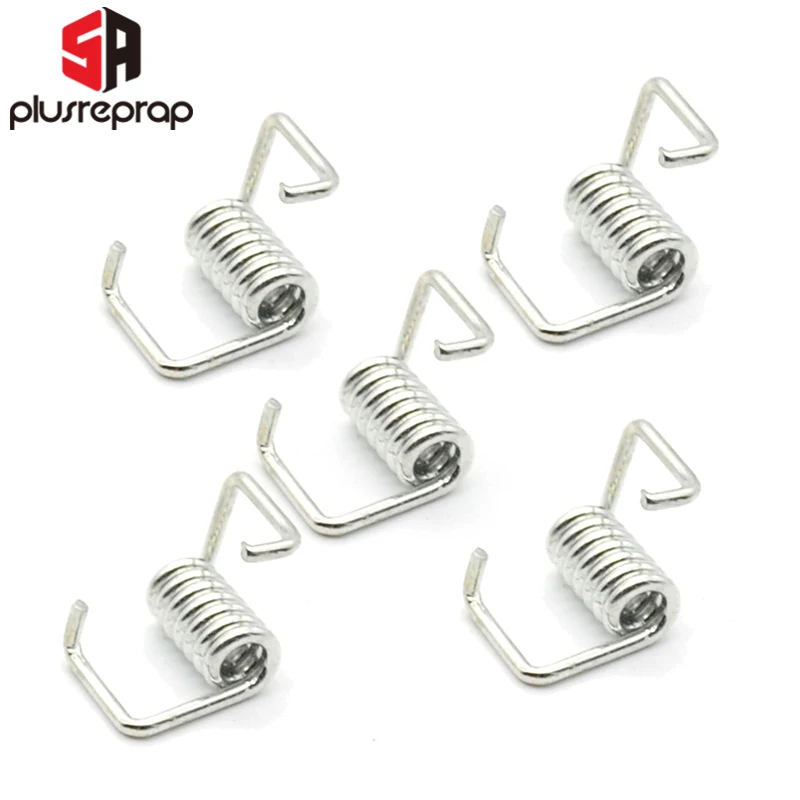 This completes the driver setup.
Motor steps
When setting up motor steps, you will need a ruler. For convenience, you can use the program Repetier-Host. The adjustment for each of the three axes occurs according to the same algorithm:
True steps per millimeter = current steps per millimeter * reported distance / distance traveled
For example, if the printer was set to 100 steps/mm, we tell the printer to move 80mm and the printer travels 87.5mm. Then the correct steps per millimeter would be 100 * 80 / 87.5 = 91.42 steps/mm. For the convenience of measurements, you can fix a ruler on the table, and a thin object, such as a needle or pin, on the carriage. Then it will be possible to accurately measure the distance traveled. The extruder uses a partially different algorithm to measure distance:
Next, the settings data must be inserted into the firmware in the line:
#define DEFAULT_AXIS_STEPS_PER_UNIT {X,Y,Z,E0}
X,Y,Z and E0 should be replaced by the steps per millimeter for each of the axes, respectively. Otherwise, you need to insert this line into the initial GCODE:
M92 Ennn Xnnn Ynnn Znnn
Instead of nnn in each of the parameters, you must substitute the steps per millimeter for each axis.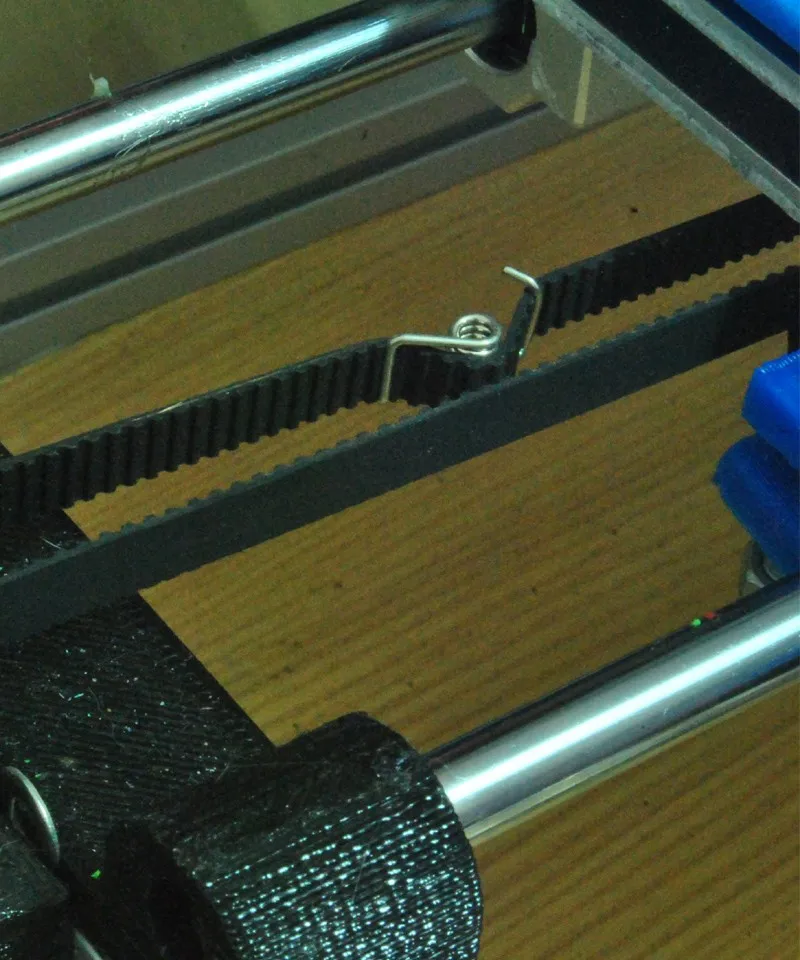 If you want to adjust the steps only for not all axes, then you can remove unnecessary parameters.
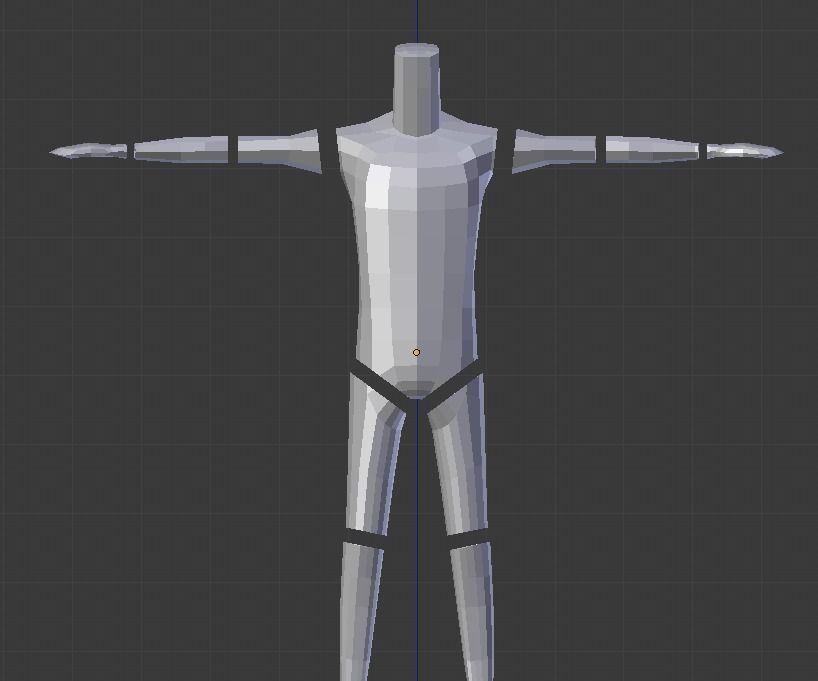
Acceleration
This parameter is responsible for the rate of change of speed. That is, how fast the printer will change its speed. This affects the nature of the movement of the hot end relative to the table. If the acceleration is too small, then the printer will print slowly, if it is too large, then the outer surface of the model will have visual defects: fading waves will be visible near each of the corners, as in the picture below.
To set up acceleration, you need to follow simple steps:
M201 X5000 Y5000
M204 P500 T500
As a result, you will get several test cubes, some of which will show waves at the corners. Choose the cube that is printed with the highest P and T parameters, but that no waves can be seen on it. The number in parameter P will be the desired acceleration value. To save this value, you need to find 2 lines in the firmware:
#define DEFAULT_MAX_ACCELERATION {X,Y,Z,E0}
#define DEFAULT_ACCELERATION {nnn}
Instead of X and Y, you should put an acceleration twice as high as found earlier. And instead of nnn, you need to put the acceleration value found earlier. Otherwise, you need to insert a line in the initial GCODE:
M204 Pnnn Tnnn
In the parameters P and T, you need to put the value of the found acceleration. After that, the acceleration setting can be considered complete.
Jerk
A jerk indicates the speed with which to start accelerating. It affects the model in a similar way as acceleration: it creates ripples around the corners of the model. But it also increases the protrusion of the corners if the jerk is too small.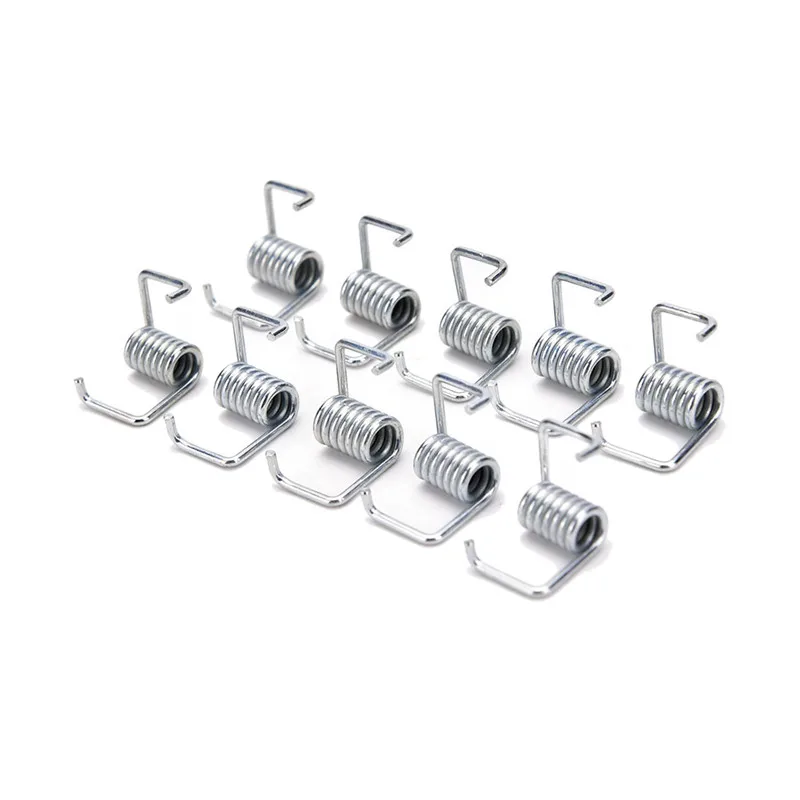 The jerk setting is also similar to the acceleration setting:
M205 X5 Y5
As a result, you will get several cubes. Find a non-rippled cube printed at the highest X and Y settings. This will be the jerk value for your printer. To save them, you need to find the line in the firmware:
#define DEFAULT_XJERKnnn
#define DEFAULT_YJERKnnn
It is necessary to substitute the jerk values for the X and Y axes, respectively.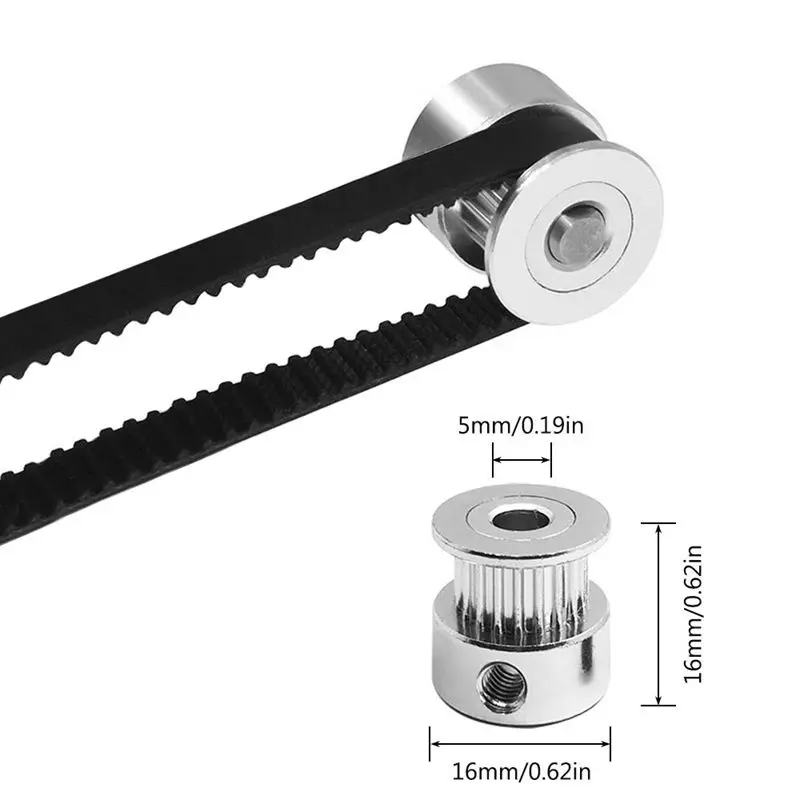 Otherwise, you need to substitute the command in the starting GCODE:
M205
Instead of nnn, you need to substitute the jerk value found earlier. This completes the jerk setting.
Speed
In fact, there are many different speed parameters, the values \u200b\u200bof which vary greatly. Let's take a look at the main ones:
This parameter is responsible for moving the nozzle without extruding plastic. The value is in the range from 80 to 120 mm/s. Limited only by the maximum speed at which the motors can rotate. Does not affect the model
This speed is important because it indirectly affects the adhesion of the model to the table. Usually lies between 15 and 30 mm/s
-Print speed of inner walls
Usually set to about 60 mm/s, it only affects the strength of the model. Depends on the maximum amount of plastic that the extruder can push through the nozzle
-Speed of printing outer walls
Usually about half the printing speed of the inner walls (30 mm / s).