Raspberry pi for 3d printer
OctoPrint.org - Download & Setup OctoPrint
Guy Sheffer maintains “OctoPi”, a Raspbian (and thus Debian) based SD card image for the Raspberry Pi that already includes OctoPrint plus everything you need to run it:
- OctoPrint plus its dependencies
- MJPG-Streamer for live viewing of prints and timelapse video creation, compatible with various USB webcams and the Raspberry Pi camera
Recommended hardware: Raspberry Pi 3B, 3B+, 4B or Zero 2. Expect print artifacts and long loading times with other options, especially when adding a webcam or installing third party plugins. Setups not using recommended hardware are not officially supported.
Please note that the Raspberry Pi Zero and Zero W are not recommended explicitly since severe performance issues were observed, caused by the WiFi interface when bandwidth is utilized (e. g. the webcam is streamed), negatively impacting printing quality. See also here. The Zero 2 however is recommended.
Installing OctoPi
OctoPi is available through the Raspberry Pi Imager, which you can use to download and setup OctoPi. You can install it yourself, or alternatively simply buy one of the available
Installing OctoPi using the Raspberry Pi Imager
🤚 Before you begin
Read and follow these instructions precisely. Most importantly, leave the system username as “pi”, do not change it to anything else or OctoPrint won’t work!
-
If you haven’t already, download and install Raspberry Pi Imager on your computer
-
Find the OctoPi image under “Choose OS”, by selecting “Other Specific Purpose OS” > “3D printing” > “OctoPi” and then the “stable” version.
-
Open advanced options by clicking on the button with the gear, or by using the keyboard shortcut
ctrl+shift+xand then:-
Configure your wifi options: Set your SSID, password and WiFi country:
-
Change the system password in “Set username and password” by entering a new password to use for the system user “pi”.
 This is not the password you’ll use for logging into OctoPrint but one that you’ll have to use to log into your Pi via SSH should you ever need to. Leave the username as “pi”, do not change it to anything else!
 -
Optionally: Change the configured timezone in “Set locale settings”
-
Optionally: Change the hostname in “Set hostname”
-
-
Install the image to your SD card, then plug everything in to your Raspberry Pi and boot it up. Do not format the SD card after installing, even if prompted to do so. This will break the installation and you will have to start over!
-
Access OctoPrint from your browser via
http://octopi.localor the hostname you chose (if your computer supports bonjour) orhttp://<your pi's ip address>.httpsis available too, with a self-signed certificate (which means your browser will warn you about it being invalid - it isn’t, it’s just not recognized by your browser).
Please also refer to OctoPi’s README, especially the “How to use it” section.
Alternative Initial Setup
If you decide against using the Raspberry Pi Imager, here are some alternative steps to get started:
-
Flash the image to your SD card through whatever alternative means you’ve chosen.
-
With the SD card still attached to your computer, set up the Wifi connection using the
octopi-wpa-supplicant.txtfile on the root of the installed card when using it like a thumb drive. Important: Do not use WordPad (Windows) or TextEdit (MacOS X) for this, those editors are known to mangle the file, making configuration fail. Use something like Notepad++, Atom or VSCode instead or at the very least heed the warnings in the file. If your computer doesn’t see the card right away after flashing, try ejecting and inserting it again. Do not format the SD card after installing, even if prompted to do so. This will break the installation and you will have to start over!
Please also refer take a look at the full WiFi setup guide in the FAQ that also includes troubleshooting tips.
-
Plug everything into your Raspberry Pi and boot it up
-
Log into your Pi via SSH (it is located at
octopi.localif your computer supports bonjour or the IP address assigned by your router), default username ispi, default password israspberry. Runsudo raspi-config. Once that is open:- Change the password via “Change User Password”
- Optionally: Change the configured timezone via “Localization Options” > “Timezone”.
- Optionally: Change the hostname via “Network Options” > “Hostname”. Your OctoPi instance will then no longer be reachable under
octopi.localbut rather the hostname you chose postfixed with., so keep that in mind. local
local
You can navigate in the menus using the arrow keys and Enter. To switch to selecting the buttons at the bottom use Tab.
You do not need to expand the filesystem, current versions of OctoPi do this automatically.
You also do not need to manually enable the RaspiCam if you have one, that is already taken care of on the image as well.
-
Access OctoPrint through
http://octopi.local(if your computer supports bonjour) orhttp://<your pi's ip address>.httpsis available too, with a self-signed certificate (which means your browser will warn you about it being invalid - it isn’t, it’s just not recognized by your browser).
Please also refer to OctoPi’s README, especially the “How to use it” section.
Image Downloads
Raspberry Pi Imager will download the latest version of OctoPi for you, but if you want to download the images yourself you can do so here.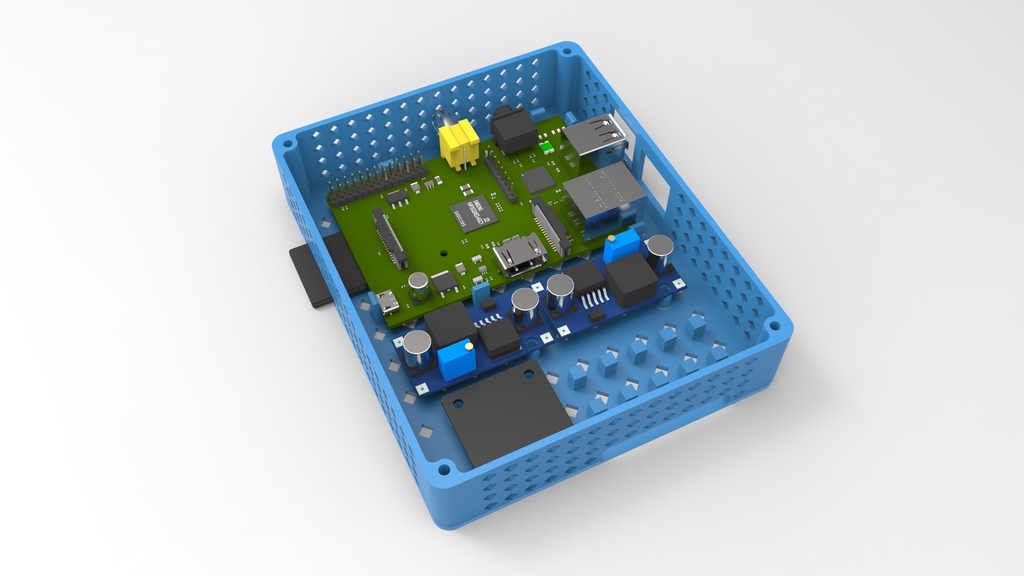
Stable OctoPi
OctoPi 0.18.0 & OctoPrint 1.8.6 SHA256: 851573629147ec5385b9168a78377b8ed51af0a1d76c2174fe0e4ccb4f637a9d
Raspberry Pi 3B, 3B+, 4B or Zero 2 strongly recommended, Raspberry Pi Zero/Zero W not officially supported!
Image compatible with Raspberry Pi A, B, A+, B+, 2B, 3A+, 3B, 3B+, 4B 1/2/4/8GB, 400, Zero, Zero W and Zero 2.
OctoPi Release Candidate
The current OctoPi Release Candidate 1.0.0rc2 can be found here:
OctoPi 1.0.0rc2 & OctoPrint 1.8.1 Raspberry Pi 3B, 3B+, 4B or Zero 2 strongly recommended, Raspberry Pi Zero/Zero W not officially supported!
Image compatible with Raspberry Pi A, B, A+, B+, 2B, 3A+, 3B, 3B+, 4B 1/2/4/8GB, 400, Zero, Zero W and Zero 2.
OctoPi Nightlies
You can also get the 32bit nightlies here or the highly experimental 64bit nightlies here.
Further resources
- For customizing OctoPi, take a look at CustoPiZer.
- Scripts to build the image yourself can be found in OctoPi’s Github repository.
Filip Grzywok maintains “Octo4a”, an Android app that allows you to use an Android based smart phone as an OctoPrint host. Root is not required!
Check out the Octo4a README for information on how to obtain the app, install and run it.
Video
There’s also a video guide on how to get Octo4a up and running by Thomas Sanladerer.
There’s also an official OctoPrint Docker image, octoprint/octoprint. It is maintained by Brian Vanderbush and team on GitHub.
Please refer to its entry on dockerhub for more details on usage and configuration.
octoprint_deploy is a guided script for creating multiple OctoPrint instances. This enables control of multiple printers on a single piece of hardware. It is compatible with OctoPi and also functions as a general Linux installer for OctoPrint, video streamers, haproxy, etc.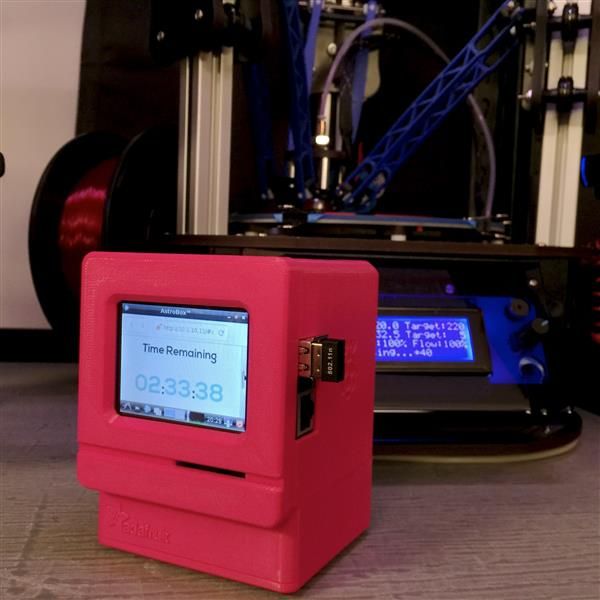
The related octoprint_install serves as a single instance Linux installer.
Both are maintained by Paul Paukstelis.
The generic setup instructions boil down to
- Installing Python 3, including pip.
- Creating a virtual environment somewhere:
python -m venv OctoPrint - Installing OctoPrint into that virtual environment:
OctoPrint/bin/pip install OctoPrint - OctoPrint may then be started through
./OctoPrint/bin/octoprint serveor with an absolute path/path/to/OctoPrint/bin/octoprint serve
More specific setup instructions for the most common runtime environments can be found below.
Linux
For installing OctoPrint on Linux, please take a look at the setup instructions for Raspbian on the forum. They should be pretty much identical on other Linux distributions.
Windows
For installing the OctoPrint server on a Windows system, please take a look at the setup instructions for Windows on the forum.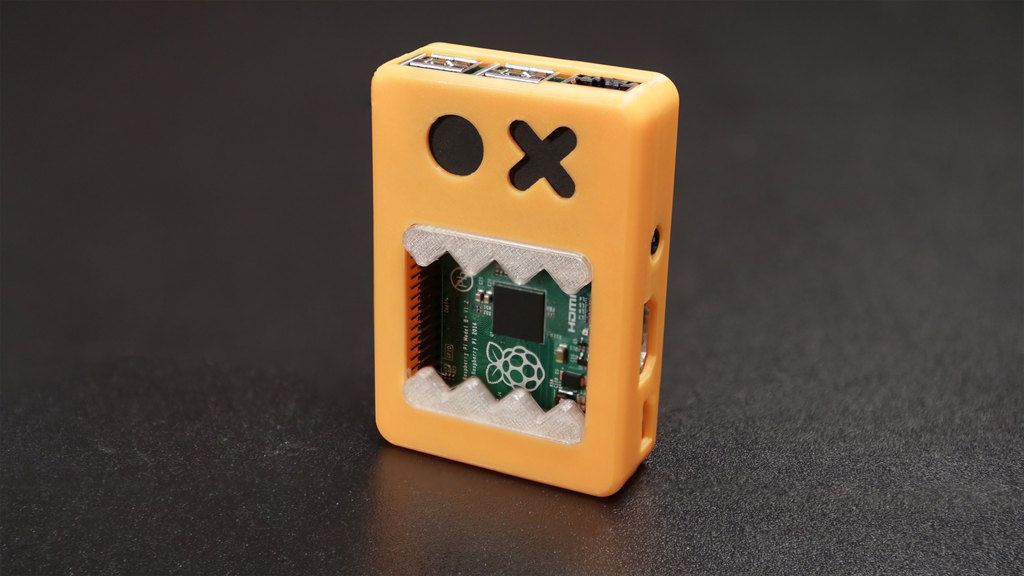
Mac
For installing the OctoPrint server on a Mac, please take a look at the setup instructions for MacOS on the forum.
Top 3D Printing Projects With Your Raspberry Pi
Published on February 18, 2021 by Amelia H.
A Raspberry Pi is a credit card sized computer that can be bought for as a little as $30. The device was invented in an endeavor to encourage people to learn how to program computers. A Raspberry Pi can run on an SD card like those used by cameras and can be charged using a USB phone charger. By combining the accessibility and freedom of manufacturing with 3D printing and programming with Raspberry Pi, the maker community has come up with several innovative projects that you can try out at home! From ventilators, to tablets and telescopes, we’ve compiled a list of some of our favorite 3D printing x Raspberry Pi projects.
Covid-19 Ventilator
In response to the prospective, and later confirmed, shortage of ventilators in countries across the world stemming from the pandemic, MakAir developed a mass-producible open-source Covid-19 ARDS ventilator. The ventilator itself can be 3D printed with either an SLS, SLA, or FDM 3D printer. MakAir recommend using an SLS 3D printer such as the HP Multi Jet Fusion. The ventilator’s control unit comprises a Raspberry Pi 4 computer, plugged to a Raspberry Pi Touch Display. You can find the full instructions HERE.
Wouldn’t it be amazing if there was a robot meant for space that could be built with a simple 3D printer? Well that’s exactly what Maximilian Ehrhardt and Miro Voellmy from the Planetary Robotics Laboratory of the European Space Agency wanted to create. Named ExoMy, the Martian rover can be 3D printed for only $250. It is composed of 3D printable parts, servomotors, screws as well as a Raspberry Pi 4 and a v2 camera module. Thanks to the affordability and accessibility of 3D printing technology and Raspberry Pi, this project makes space robotics more widely available.
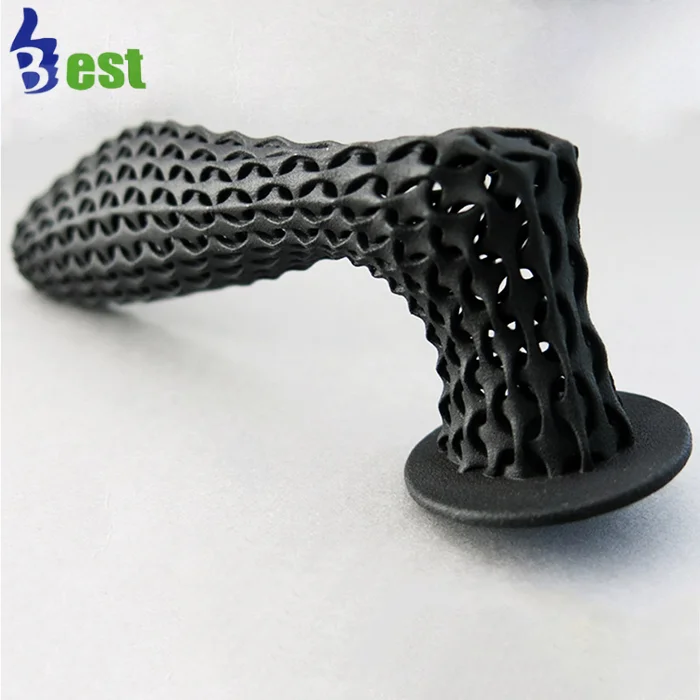
The Wave SpeakerThe speaker, named The Wave because of its shape, was first designed as part of an engineering and design course at the Technical University of Denmark.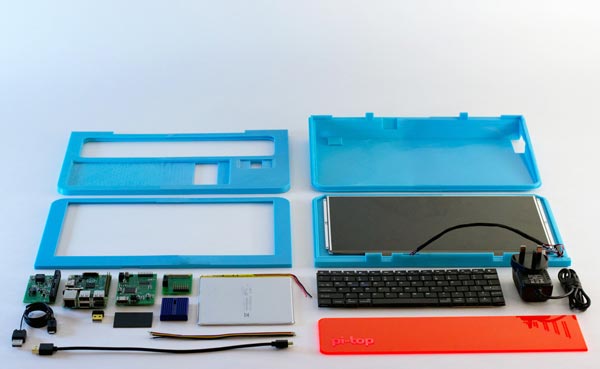 The course offers students the opportunity to develop and design new prototypes, such as this speaker with its unusual geometry, using additive manufacturing. Printed in 3D, The Wave is powered by a Raspberry PI and connects WIFI, allowing music to be played on the speaker directly from the user’s phone. For those who wish to use additive manufacturing to create their own speaker you can find the instructions on Thingiverse!
This telescope is a fusion of Raspberry Pi and Icon. The PiKon is the result of a collaboration between the University of Sheffield and Alternative Photonics. Designed for the Festival of the Mind, PiKon aims to demonstrate what citizens are able to do with new, low-cost technologies (3D printing and a Raspberry Pi). Apart from the primary and secondary mirrors, all the components of the telescope were 3D printed. The telescope prototype is connected to a Raspberry Pi with a 3D printed adapter. The Raspberry Pi is equipped with an infrared camera, making it possible to photograph the night sky, but also to record the shots. If you are passionate about astrophotography and new technologies, do not hesitate to find all the information necessary to build your own PiKon HERE.
If you have a Raspberry Pi and a 3D printer, you can create your own laptop with this Thingiverse file. As you can imagine, this is not an easy project and basic knowledge in electronics is needed. You’ll also need screwdrivers, wire cutters and a soldering iron in order to build the laptop. After you get all the tools, you will need to follow the instructions to assemble the laptop step by step. To achieve this, the author specifies that he used the Prusa Steel 3D printer to create the parts, with a resolution of 0.2 and a filling of 20%.
A 3D Printed TabletSimilarly, our next project is complex but equally impressive. In order to build this tablet, you will of course need a 3D printer and a Raspberry Pi as main elements. The project requires a few other parts which the author details on the website.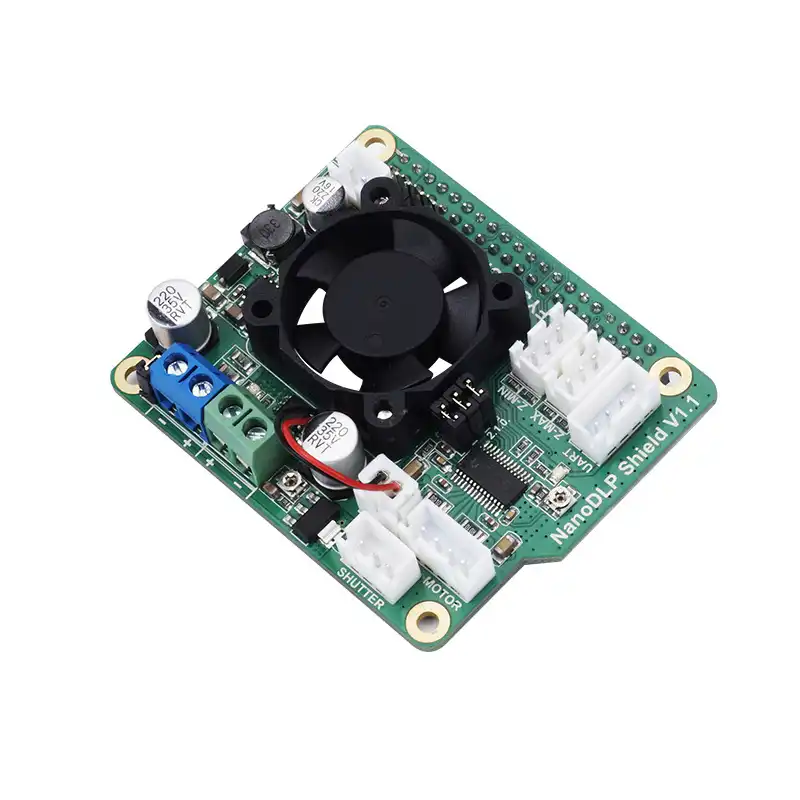 If you want to get started with this printing project, keep in mind that the commitment is fairly long term. Nonetheless, we encourage you to try to create your own tablet and share the result with us! You can find the website with all the assembly instructions, as well as a video explaining all the steps you need to follow HERE.
Dual Redundant CubeSat Flight Computer
Our next model is a dual redundant CubeSat flight computer. Redundancy increases the reliability of hardware in space so the idea is that if one system breaks down or no longer responds, another can take over and continue its task. Student Alex Pirie has been working on this project since 2014, and decided to turn to the Raspberry Pi for its low cost and compact size. You can find more information HERE.
Video Glasses
With this project you can turn any pair of glasses into a wearable mounted computer powered by Raspberry Pi. You’ll need a few things to get you started: NTSC/PAL video glasses; a Raspberry Pi; miniature wireless usb keyboard with touchpad; 3d printer; flat pliers; 30awg wire wrap; a heat shrink pack; screwdriver set; and a composite video cable.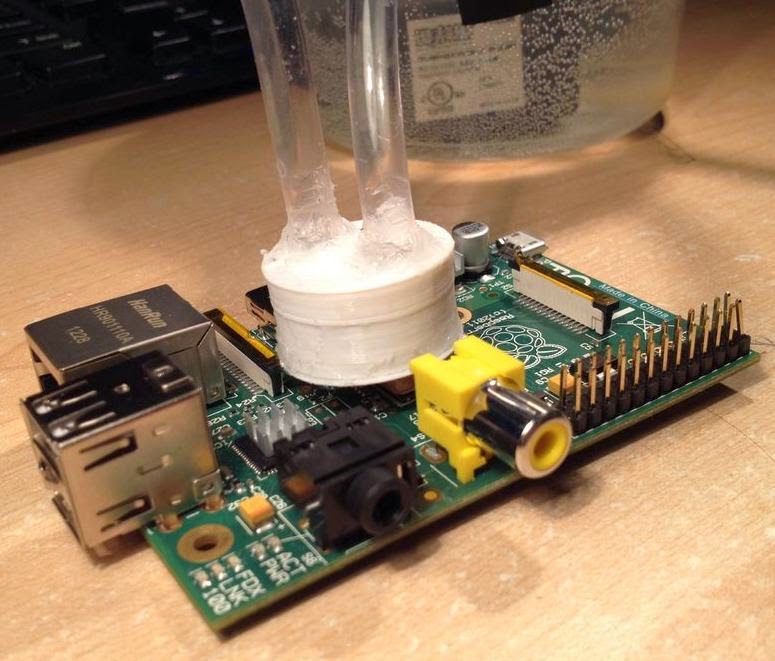 For the 3D printing aspect, there are just eight parts that can be printed and assembled in about two hours. The final part acts as a snap-fit enclosure that houses the components inside the NTSC/PAL video glasses. You can download the STL files and instructions HERE.
Build your own 3D Scanner
This project is a little different in that it does not necessarily need to be made with a 3D printer (though it can be!) but it will definitely come in handy for any 3D printing projects. In this step-by-step guide, users can learn how to make their own 3D scanner, with the updated versions even large enough to scan an entire adult person (up to 2m tall). To get started you’ll just need Raspberry Pis, PI cameras, SD cards, Led Strips and powerful power supplies, though the mounts, tripods and other parts could be 3D printed. There is assembly required and some coding (the owner provides python script that can be downloaded), but once you’re done you can make your own 3D scans of your loved ones which you can then 3D print! If you’re interested, the guide and the files can be found HERE.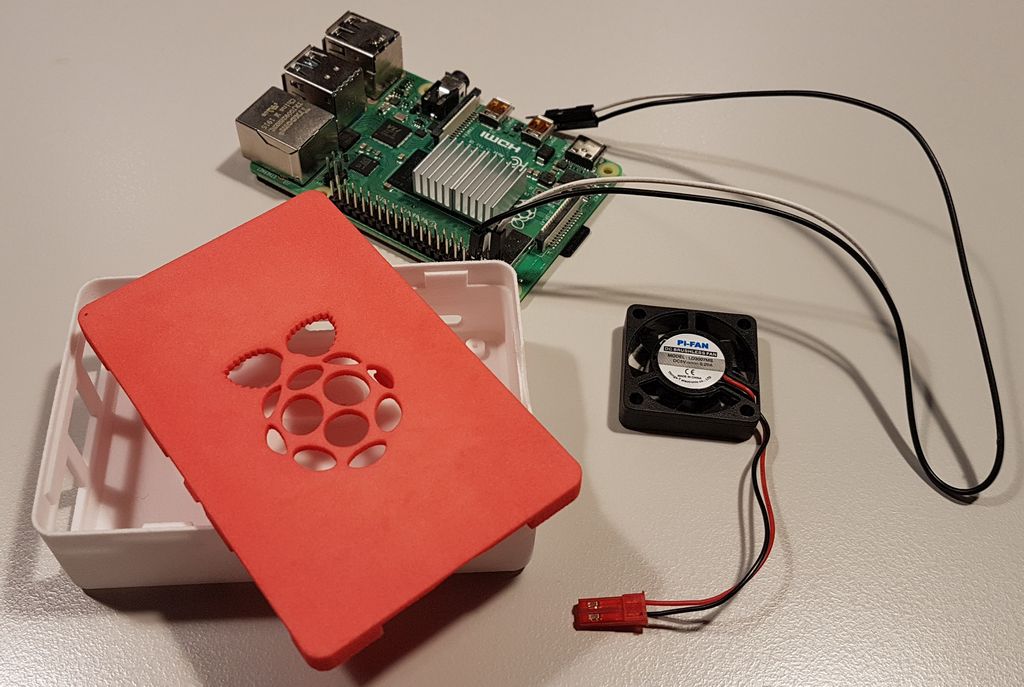
DIY desktop laser cutter and engraver
According to the page on Thingiverse, FABOOL Laser Mini is an open-source, ready-to-assemble desktop laser cutter and engraver. You will need a hex wrench and spanner, but assembly itself will only take about two hours. The end product has a work area of 300x230mm. Raspberry Pi is one of the compatible software, though others are also supported, including Windows, Mac OS X, and Linux. This updated version has improved usability, a stylish design and about ¼ of the previous assembly time. You can find the files HERE.
What do you think of these 3D printing and Raspberry Pi projects? Let us know in a comment below or on our Linkedin, Facebook and Twitter pages! Sign up for our free weekly Newsletter here, the latest 3D printing news straight to your inbox!
Raspberry Pi 3 and Raspberry Pi 4 power module. We feed the raspberries from the power supply of the 3D printer.
Hello everyone! Oh, and I haven't written anything interesting for a long time.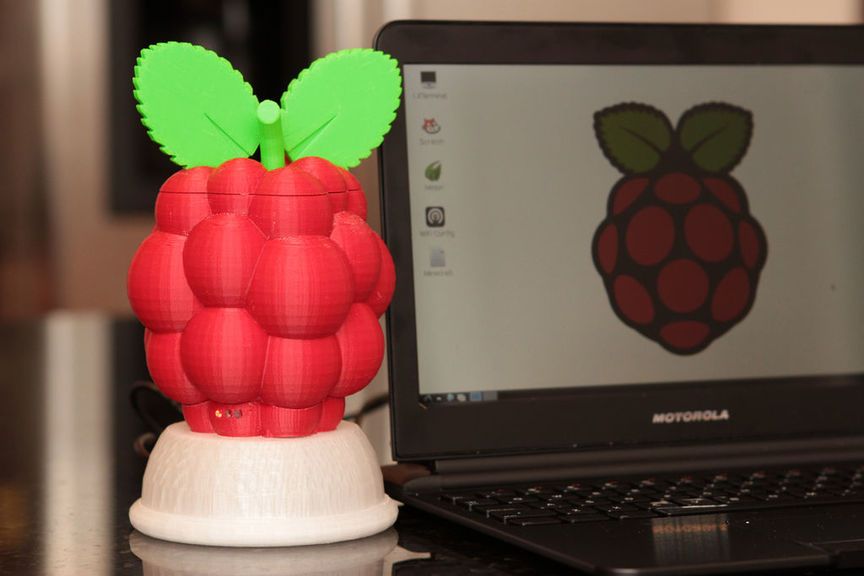 It's time to stretch your fingers and share useful information. This article will focus on the power supply of the Raspberry Pi single-board computer. By and large, the topic is hackneyed. But I dug up something. Not the fact that infa is unique. But I got to the bottom of this myself, I hasten to share with you.
And so. This article will primarily be useful to 3D printers. But smart home lovers will also learn something useful. I won't pull. Who cares, welcome under cat.
Those who have been interested in the Ulti Steel 3D printer are most likely aware that it has a place to install a Raspberry Pi single board computer. What for? Well, here everyone decides for himself. Someone needs a print server, for example, based on Octoprint or Astroprint, so as not to rush from the printer to the computer and back with a flash drive. And someone is not satisfied with the functionality of the marlin and he wants a clipper. Anyway. In order for this feature to work, you need a single-payer.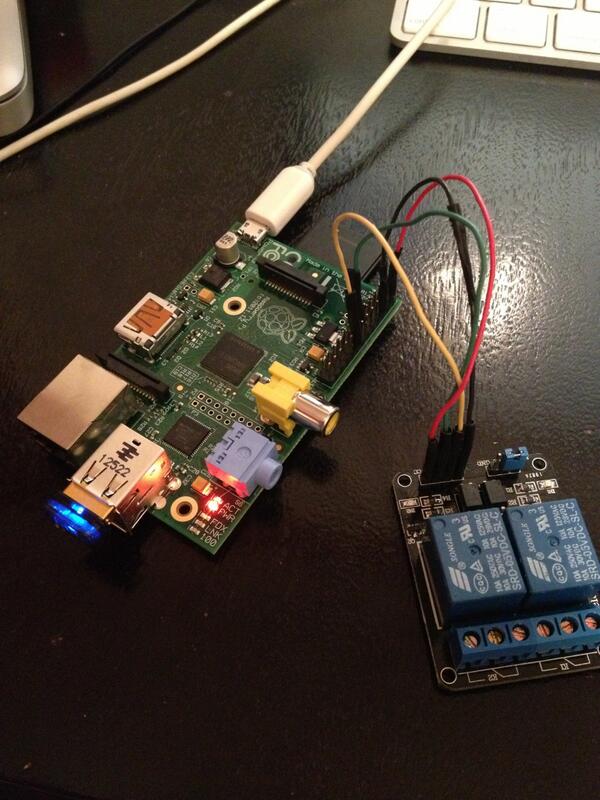 Well, since there is a place for it in the case, it is quite logical to put it there. But the question arises, how to organize food for a single-payer?
There are several options:
- Separate power supply
- DC-DC converter
- Expansion board
So, let's look at each of the options. Let's start in order
Hotel power supply, perhaps one of the most obvious options. But, as we know, 3 and 4 raspberries are very voracious and require powerful power supplies of at least 5 V 3A for stable, and if for good, then 5V 5A is better. Agree, not a lot. But among other things, the power supply must be of very high quality, because. if raspberries feel that the food is not organized enough for it, it will start complaining about it in the logs, and in some cases it may turn off.
A good option for organizing such a power supply would be the Mean Well RS-25-5 power supply, however, here you may encounter a wiring and connection problem. Somewhere you will have to look for the appropriate connector (Miniusb or usb type-c) to connect this power supply to the Raspberry pi, or crimp the wires and power the raspberry through the GPIO comb. In addition, it is necessary to supply 220 volts (attention! dangerous voltage) to this power supply. you will have to fiddle around with the wires. Yes, and solve the issue of placing this power supply inside the 3D printer itself, because. fasteners for the second power supply is not provided.
DC-DC Converter. The Ulti Steel power supply has a solid power reserve and, in principle, nothing prevents you from installing a DC-DC converter and powering the raspberries through it. BUT! I have never seen a Chinese lower that can satisfy the exquisite nutritional tastes of the Raspberry Pi. Not a fact, maybe there are such, but I did not come across them. In this case, you will also have to tinker with the wires and the placement of additional modules inside the case.
Well, the third option is a power shield for Raspberry pi 3/4. The Chinese have enough of these shields, but not all of them are of good quality. The advantage of this solution is the ease of assembly and a minimum of wires. Because As a rule, such shields are installed directly on raspberries.
Not so long ago, while studying the issue of connecting hard drives to the Raspberry Pi, I came across an interesting seller of various expansion boards for raspberries. The store is called GeekBord (mda .. apparently their marketer is not very competent, who named the store with an error). Among the huge range of expansion boards for Raspberry Pi, the RasPi X710 board caught my attention.
The great thing about the RasPi X710 board is that it allows you to power your Raspberry Pi 3 or Raspberry Pi 4 with voltages from 6 to 36 volts! This range of supply voltages intersects with the output voltages of the power supplies of a very large number of 3D printers! Well, in my case, through it you can easily power the Raspberry Pi from the Ulti Steel power supply.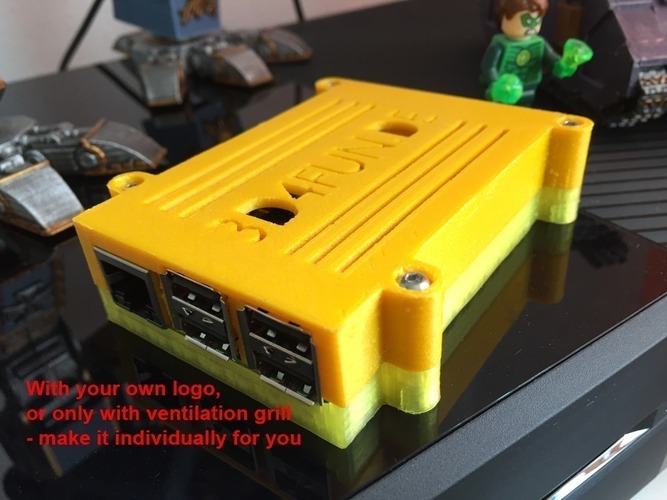 (Output voltage b/p Ulti Steel 12 Volts).
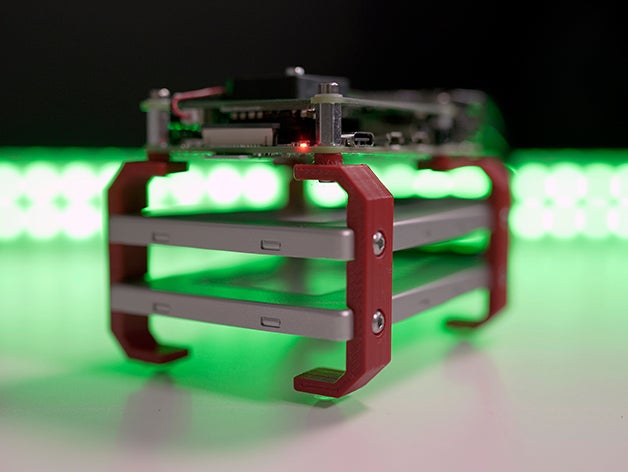
In addition, the board comes in a shield form factor, which allows you to assemble a “sandwich” from RasPi X710 and Raspberry 3 B+. Well, of course, install this assembly on regular mounts.
All that remains is to remove the wire from the power supply and connect it to this board.
For those who are unsure or in doubt, this "sandwich" will work with both Ender 3 and Anycubic i3 mega. It remains only to solve the issue of its placement inside the case.
Well, as a cherry on the cake - the module has a fan that is installed like this. to cool the Raspberry Pi processor. Attention! The fan is specific - it works from 5 volts. But if desired, it can be turned off and generally dismantled.
The first impression of the board is positive! Good workmanship. Great build and soldering. There are no traces of flux. Works good. As long as I'm happy with everything. Let's see how it will show itself with long-term operation.
For those who are interested in the parameters of this power module, here is a link to the wiki with a description of all the characteristics and connection diagrams: http://raspberrypiwiki.com/X710
I ordered the module itself from the link RasPi X710
I hope this information was useful to you.
If you like the article and want to support the site and receive notifications of new materials, join our Vkontakte group: https://vk.com/ionline_by
If you want to be notified when new articles are released, connect yourself to PUSH notifications link: https://ionlineby.pushassist.com/
How I made friends with a raspberry octopus
Why crimson when the octopus is green on the official OctoPrint logo? Yes, everything is simple - he loves to eat raspberries and oranges, and because. I got hooked on raspberries, so I acquired the appropriate color :)
There is quite a lot of information about OctoPrint on the site, but it is scattered - you need to collect everything in separate articles, but I want to tell my little way from the beginning to the present moment.
So, I have already read a lot about OctoPrint, but somehow this information always passed by and was not put aside in my head, I was more interested in simple issues of establishing stable printing and getting rid of jambs. But over time, I realized that it was already necessary to somehow automate and simplify the printing process.
I first attached an existing Axis IP camera to monitor the printer when I was away. Already good, but in which case it was not possible to influence the process in any way. Then I installed the GCodePrintr application on an Android tablet to be able to more conveniently manage a 3D printer, but these were all half measures, but I wanted a comprehensive solution.
What questions would you like to solve:
- Not to run to the printer for every reason, but to be able to remotely turn on the printer, start heating the table and extruder, monitor the temperature, etc.
- Auto power off the printer after printing is complete.

- Get rid of the memory card as a carrier of models between the computer and the printer.
- Ability to monitor printing via webcam and automatic recording of time-lapses for subsequent analysis of the print progress.
- More convenient axis control for quick adjustment of the table level. And in general, simpler control. Navigating through the Marlin menus with the encoder is still a pleasure.
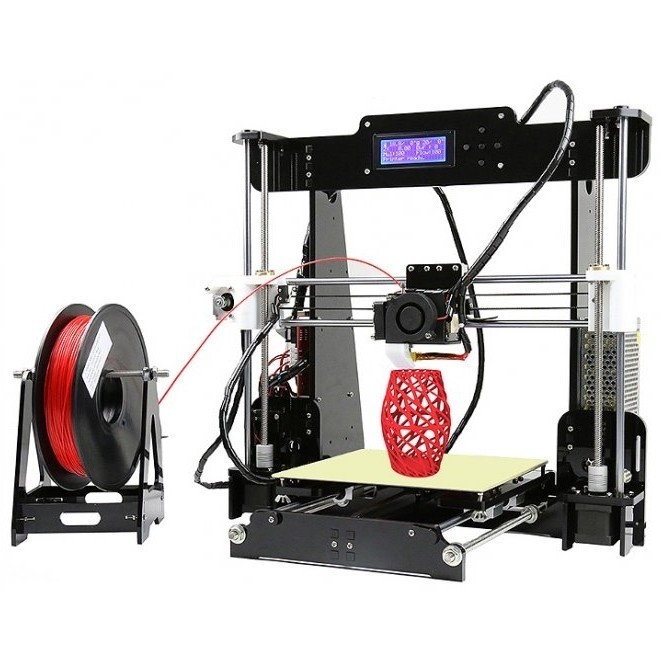
After reading a dozen articles on OctoPrint, I realized that I need to run for Raspberry Pi 3 or Orange Pi. The second option is cheaper, but requires a deeper dive into the topic. The first option should work 'out of the box' and Wi-Fi and 4 USB slots are already on board. Because there was no question of making it as cheap as possible and it was easy to buy Raspberry Pi 3 in neighboring stores, then I settled on this particular board.
The second task is to buy a webcam. There is very little information here. There is information about compatible cameras, but it is not clear which is better and why. Somewhere in the subconscious, information has settled that you need to choose Logitech. I don’t remember where I got this from, but after analyzing the compatibility table and the availability of cameras in the store, I settled on the C270 model. Then I already found out that it is also sold as a bundle from the official site. We managed to find everything in one place near the house, which pleased us with the quick solution of the task.
I was very pleased with the box of the original Raspberry Pi - a trifle, but nice :)
I already prepared a card with OctoPint for Raspberry in advance - I found a microSD for 2 Gigabytes and, following a simple instruction, installed everything in 10 minutes. There is also a detailed video on the download page.
To install, you will need to download the OctoPrint image and Etcher. Unzip the zip file, launch Etcher and transfer the image to the memory card.
The second step is to set up access to the Wi-Fi network (not required if an Ethernet cable connection will be used). To configure, you need to uncomment the lines with the settings in the octopi-network.txt file (marked in red) and enter your Wi-Fi network access data (marked in green).
Now you can insert the card from the back of the raspberry, find a microUSB charger in the household, connect the cable from the webcam and printer. At the same time, I bought a case for a raspberry in the store, although then I thought that for this money I could take half a kilo of FDplast plastic and print a lot of cases :)
Then it is recommended to connect using Putty and change the default password, but this can be done later. Now it’s enough to look at the router which IP address the raspberry received, drive it into the browser and get a welcome window for entering a new user.
After creating a user, the system offers to update to the latest version - we agree, reboot and get a ready-made system for remote work with a 3D printer. It remains to make a small number of settings and you can print the first model.
Webcam picked up automatically. But the quality of the picture at first did not make me very happy - the near objects were out of focus, the angle of the lens captured only part of the table, and the mount is more likely to be placed on the monitor. We had to solve two problems - to deal with the focus and print a more convenient camera attachment to the printer.
With the focus, the issue was resolved quite quickly - praise to Logitech engineers that their camera is disassembled without the use of swear words and is also simply assembled back. After removing the top cover and unscrewing three screws, the board with the installed matrix and lens becomes available. The lens is already adjusted and fixed with a drop of glue. By twisting the ring and tearing the fixation further, you can already adjust the focus to the desired distance.
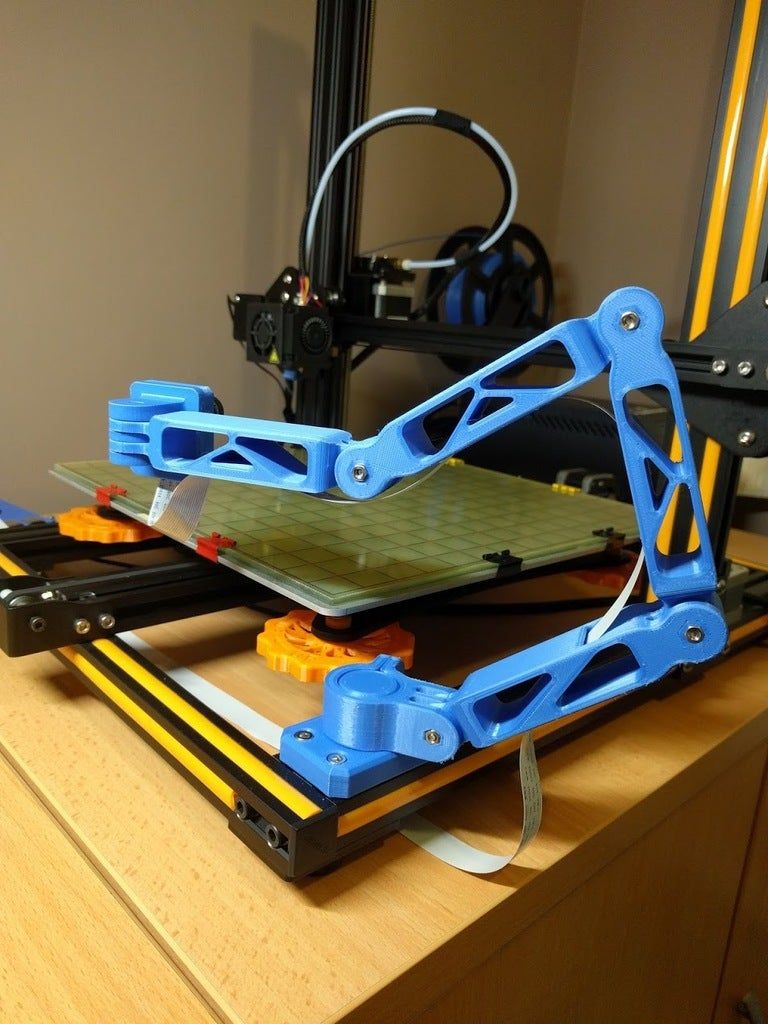
Next, it was necessary to close the issue with the mount. On thingiverse.com there were quite a few models for this camera, but none of them fit 100%.
' Another opportunity to practice SOLIDWORKS ' - I thought, and started modeling the mount for my printer. I did not know the exact distance by how much the camera should be moved outside the perimeter and how much lowered to see the nozzle under the blowing system, so I had to make a custom mount. After modeling, this model came out:
Again, thanks to Logitech engineers for the fact that the standard mount can be carefully removed and the eye can be used at your discretion. It took some more time to print, and then the camera took its place:
Adjusted the desired position according to the image and tightened all the screws.
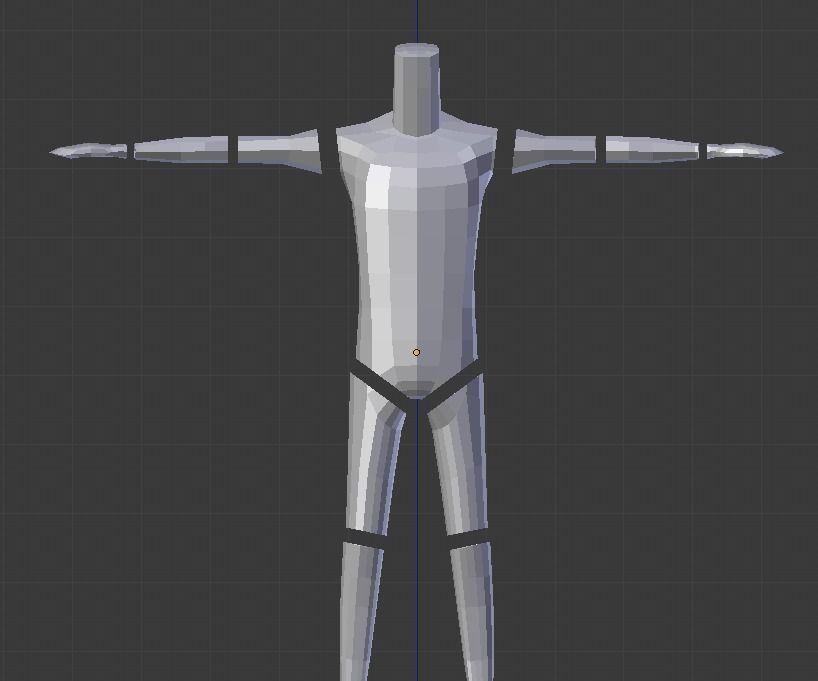
Mounting model can be downloaded here. When I started uploading STL files, I realized that during the modeling process I got carried away and did not optimally position the model in space - when printing, the 'front' view is used, and the models were located in other planes and did not lie optimally on the table.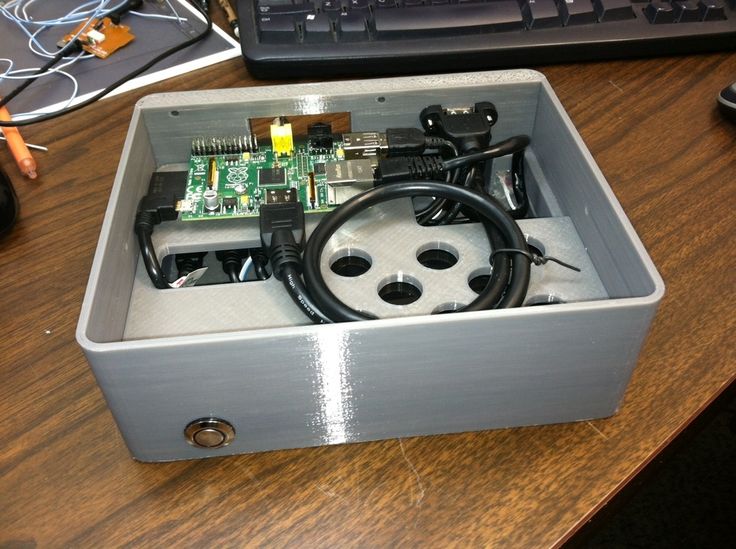 Of course, you can rotate everything before printing, but it's not good to force people to make unnecessary movements.
I began to study how to fix this, spent another hour, but did not find a solution. All videos on solid said that you can redefine the planes. Yes, it works for inside position, but STL files were still saved with XY coordinates in the 'front' plane. Studying the file saving options, I came across the concept of 'active coordinate system'.
Having promoted this topic, I was able to save the STL file in the correct orientation. To do this, go to 'Reference Geometry' - 'Coordinate System'. We indicate the edges that lie in the desired direction and then save the file with the new coordinate system.
I got distracted. We return to our octopus. The camera is fixed, everything is set. I decided to run the test model for printing without approaching the printer at all. The table is calibrated and smeared with glue stick, white ABS filled. I turn on the heating of the table and then I start the model for printing, observing the rule - we don’t approach the printer :)
Surprisingly everything went smoothly. At the beginning of the print there were 'snot', which I usually remove with tweezers, but then they smeared themselves with the nozzle.
The output turned out to be a normal box, even though the printer was not suitable :)
Having understood at what distance I need to fix the camera, I decided to simplify the holder and transfer the mount to a vertical profile.
Great, the camera works. But it works on basic settings - with a resolution of 640x480 and 10 frames per second. The C270 is capable of 1280x720 HD resolution. We take the card, find the octopi.txt file in the root and edit the USB camera settings:
Now the picture is more familiar to 16:9 monitors
One task was successfully completed. Next was the task of managing the power of the printer. I had already begun to study the experience of my colleagues, when I suddenly remembered that my Z-Wave smart home system has one controlled socket module, which I have not been able to find a use for for a long time. I connected the printer to it and at least got the opportunity to manage power remotely through the smart home system.
But for automation, it was necessary to train OctoPrint to control this relay. One of the control options is using http requests to the smart home server. The PSU Control plugin helped me with this task. Chose control through System Command. By writing command
curl 'http://192.168.2.10:3480/data_request?id=lu_action&DeviceNum=57&serviceId=urn:upnp-org:serviceId:SwitchPower1&action=SetTarget&newTargetValue=1' turn off the power at the end.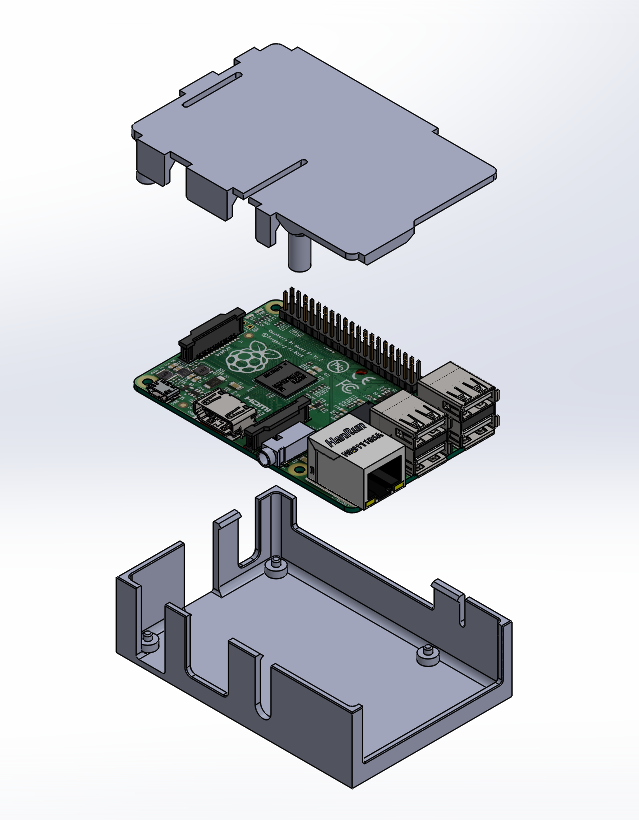
Now the printer turns itself on when sending commands to warm up the table or move the motors and turns itself off after printing is finished. Well, you can always manually enable/disable using the button in the OctoPrint interface. The consumption of Raspberry powered by the webcam and Mega via USB is only about 4W, which means you can safely leave it always on and be able to start the printer remotely at any time.
The system has become smarter, but that's not all ;)
The next plugin was Touch UI. It offers a more user-friendly interface for smartphones and tablets. With it, you can quickly move the motors while near the printer with a tablet, as well as perform all other actions, including monitoring the printing process.
The following plug-ins were also installed:
- Fullscreen Webcam - allows you to double-click to enlarge the image from the camera or even switch to full screen mode.
- Pushover - sending Push notifications to the smartphone about all events (printing completion, unsuccessful printing, stops to change plastic, etc.
 )
) - DisplayZ - adds the output of the Z coordinate to the print progress.
- Printer Statistics - detailed printing statistics
- DisplayProgress - displaying printing progress on the printer screen (nothing is displayed by default)
- Custom Control Editor - the ability to add custom buttons to the interface. For example, I added a plastic change button with the command M600
- OctoPrint-Tempsgraph - improved temperature graph
On a 2 GB card, a little less than 400 megabytes remain for model and timelapse files. This is quite enough, but I thought that it would limit, so I bought a 16 GB card (I wanted 8, but they were more expensive!) Class 10 and deployed everything again. As a bonus, I got a faster assembly of time-lapses due to the higher speed of reading / writing the card.
In summary, a typical use of OctoPrint can be summarized as follows:
- We sit at the computer and watch something interesting on thingiverse.
 com or create our own in the editor.
 - Suddenly we understand that it is already necessary to prepare the printer for printing - open the Octo interface and turn on the table heating - the power supply automatically turns on and warming up begins.
- We look at the temperature of the table on the chart and after it warms up, we also turn on the heating of the hotend.
- Slice the model, save the G-code and load it into the octopus.
- When everything is warmed up, or we immediately start printing remotely, or we still approach the printer, we check everything, stretch out some plastic, check the table calibration, and only then start printing.
- We control the first layer and calmly leave to do our business, periodically glancing at the picture from the webcam. If necessary, we go for a walk with the dog / to work / shopping.
- At the end of printing, a push notification is sent to the phone, and after cooling down, the power is automatically turned off.

- If we observe during the printing process that the edges have moved away or some other trouble has happened, then we stop printing, turn off the power and think about what happened ...
- If you wish, download the print time lapse and see how everything happened.
I am satisfied with the new thing, but there are always unresolved tasks and wishes.
So far I have written the following for myself:
- It is desirable to have a second camera with a general view, where you could see the entire printer, the spool of plastic and the position of the head in any part of the table. I will solve the issue simply with an additional IP camera, or should the C270 be taken out a little further, or maybe find a lens with a wider viewing angle for it.
- I would like to connect a physical keyboard to control the printer not only through the tablet, but also quickly using the physical keys when you are nearby. There is an option to use Arduino and a matrix keyboard, but it will probably be easier to connect a regular small USB keyboard.
Learn more