3D printer accuracy comparison
FDM vs. SLA vs. SLS
Additive manufacturing, or 3D printing, lowers costs, saves time, and transcends the limits of fabrication processes for product development. From concept models and functional prototypes in rapid prototyping to jigs, fixtures, or even end-use parts in manufacturing, 3D printing technologies offer versatile solutions in a wide variety of applications.
Over the last few years, high-resolution 3D printers have become more affordable, easier to use, and more reliable. As a result, 3D printing technology is now accessible to more businesses, but choosing between the various competing 3D printing solutions can be difficult.
Which technology is suitable for your particular application? What materials are available? What equipment and training do you need to get started? How about costs and return on investment?
In this article, we’ll take a closer look at the three most established plastic 3D printing processes today: fused deposition modeling (FDM), stereolithography (SLA), and selective laser sintering (SLS).
Trying to decide between FDM and SLA 3D printers? Check out our in-depth FDM vs. SLA comparison.
Video Guide
Having trouble finding the best 3D printing technology for your needs? In this video guide, we compare FDM, SLA, and SLS technologies across popular buying considerations.
Watch the Videos
Download the high-resolution version of this infographic here.
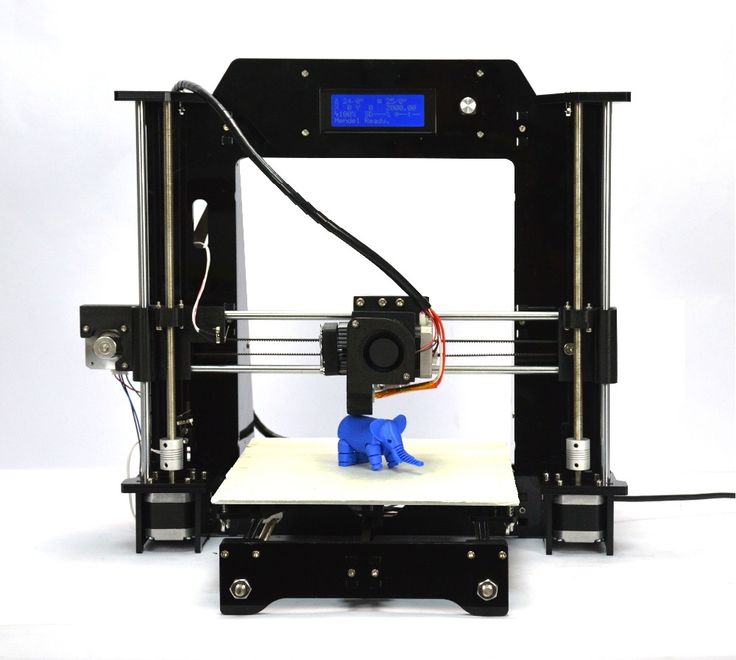
Fused deposition modeling (FDM), also known as fused filament fabrication (FFF), is the most widely used form of 3D printing at the consumer level, fueled by the emergence of hobbyist 3D printers. FDM 3D printers build parts by melting and extruding thermoplastic filament, which a printer nozzle deposits layer by layer in the build area.
FDM works with a range of standard thermoplastics, such as ABS, PLA, and their various blends. The technique is well-suited for basic proof-of-concept models, as well as quick and low-cost prototyping of simple parts, such as parts that might typically be machined.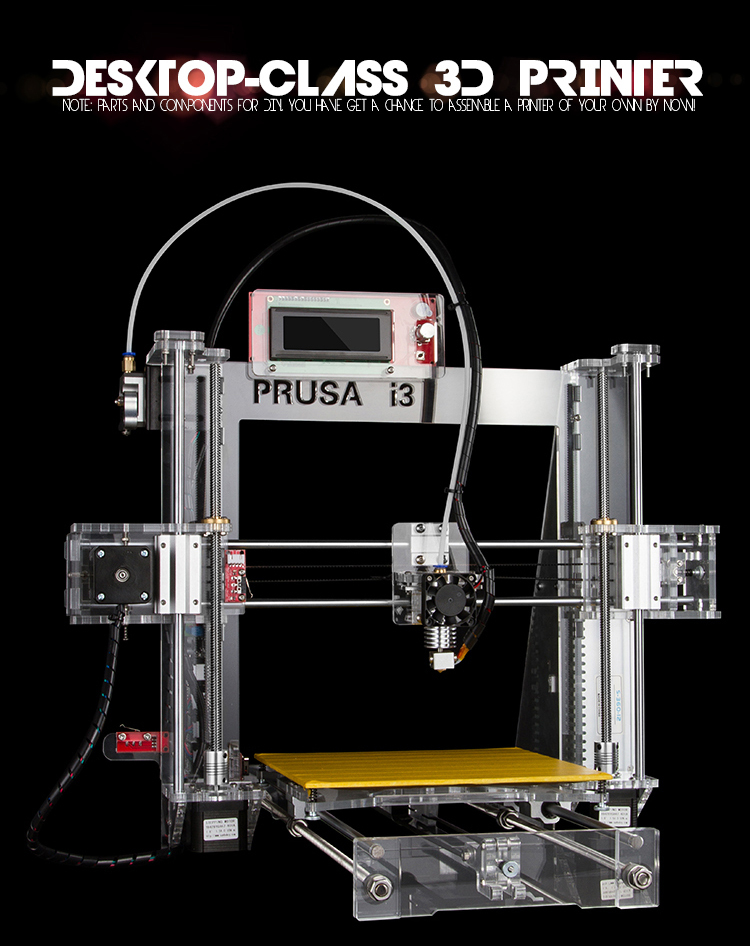
FDM parts tend to have visible layer lines and might show inaccuracies around complex features. This example was printed on a Stratasys uPrint industrial FDM 3D printer with soluble supports (machine starting at $15,900).
FDM has the lowest resolution and accuracy when compared to SLA or SLS and is not the best option for printing complex designs or parts with intricate features. Higher-quality finishes may be obtained through chemical and mechanical polishing processes. Industrial FDM 3D printers use soluble supports to mitigate some of these issues and offer a wider range of engineering thermoplastics, but they also come at a steep price.
FDM printers struggle with complex designs or parts with intricate features (left), compared to SLA printers (right).
Stereolithography was the world’s first 3D printing technology, invented in the 1980s, and is still one of the most popular technologies for professionals. SLA resin 3D printers use a laser to cure liquid resin into hardened plastic in a process called photopolymerization.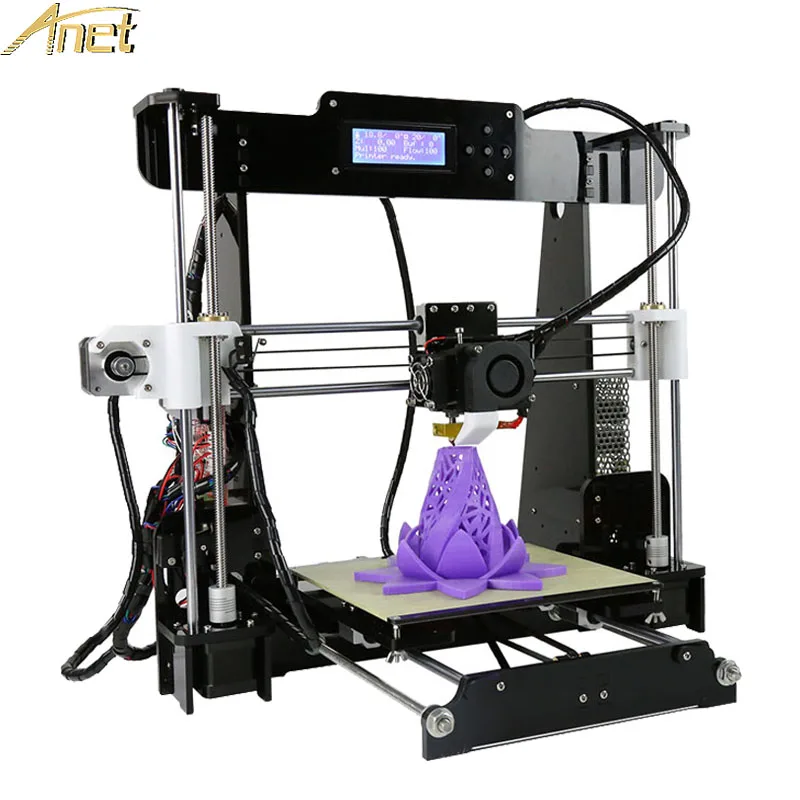
See how stereolithography works.
SLA parts have the highest resolution and accuracy, the clearest details, and the smoothest surface finish of all plastic 3D printing technologies, but the main benefit of SLA lies in its versatility. Material manufacturers have created innovative SLA photopolymer resin formulations with a wide range of optical, mechanical, and thermal properties to match those of standard, engineering, and industrial thermoplastics.
SLA parts have sharp edges, a smooth surface finish, and minimal visible layer lines. This example part was printed on a Formlabs Form 3 desktop SLA 3D printer (machine starting at $3,750).
SLA is a great option for highly detailed prototypes requiring tight tolerances and smooth surfaces, such as molds, patterns, and functional parts. SLA is widely used in a range of industries from engineering and product design to manufacturing, dentistry, jewelry, model making, and education.
White Paper
Looking for a 3D printer to realize your 3D models in high resolution? Download our white paper to learn how SLA printing works and why it's the most popular 3D printing process for creating models with incredible details.
Download the White Paper
Sample part
See and feel Formlabs quality firsthand. We’ll ship a free sample part to your office.
Request a Free Sample Part
Selective laser sintering is the most common additive manufacturing technology for industrial applications, trusted by engineers and manufacturers across different industries for its ability to produce strong, functional parts.
See how selective laser sintering works.
SLS 3D printers use a high-powered laser to fuse small particles of polymer powder. The unfused powder supports the part during printing and eliminates the need for dedicated support structures. This makes SLS ideal for complex geometries, including interior features, undercuts, thin walls, and negative features. Parts produced with SLS printing have excellent mechanical characteristics, with strength resembling that of injection-molded parts.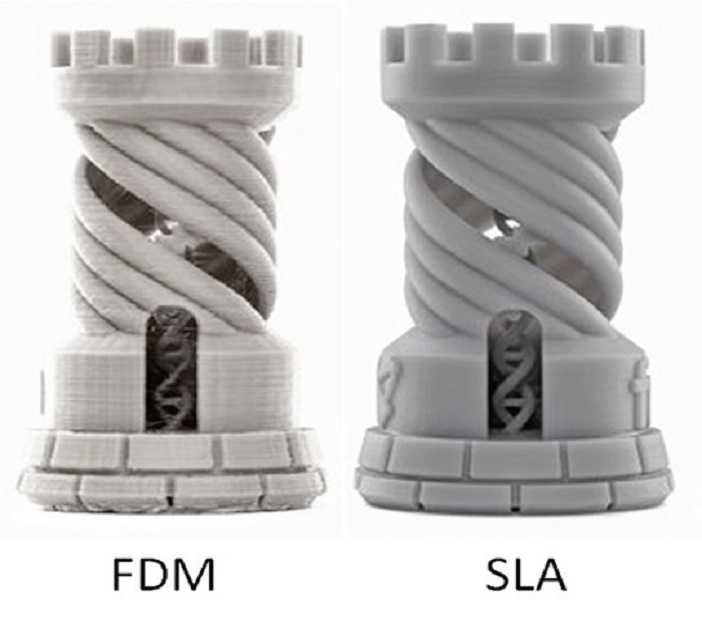
SLS parts have a slightly rough surface finish, but almost no visible layer lines. This example part was printed on a Formlabs Fuse 1 benchtop SLS 3D printer (machine starting at $18,500).
The most common material for selective laser sintering is nylon, a popular engineering thermoplastic with excellent mechanical properties. Nylon is lightweight, strong, and flexible, as well as stable against impact, chemicals, heat, UV light, water, and dirt.
The combination of low cost per part, high productivity, and established materials make SLS a popular choice among engineers for functional prototyping, and a cost-effective alternative to injection molding for limited-run or bridge manufacturing.
White Paper
Looking for a 3D printer to create strong, functional parts? Download our white paper to learn how SLS printing works and why it's a popular 3D printing process for functional prototyping and end-use production.
Download the White Paper
Sample part
See and feel Formlabs SLS quality firsthand. We’ll ship a free sample part to your office.
Request a Free Sample Part
Each 3D printing technology has its own strengths, weaknesses, and requirements, and is suitable for different applications and businesses. The following table summarizes some key characteristics and considerations.
| Fused Deposition Modeling (FDM) | Stereolithography (SLA) | Selective Laser Sintering (SLS) | |
|---|---|---|---|
| Resolution | ★★☆☆☆ | ★★★★★ | ★★★★☆ |
| Accuracy | ★★★★☆ | ★★★★★ | ★★★★★ |
| Surface Finish | ★★☆☆☆ | ★★★★★ | ★★★★☆ |
| Throughput | ★★★☆☆ | ★★★★☆ | ★★★★★ |
| Complex Designs | ★★★☆☆ | ★★★★☆ | ★★★★★ |
| Ease of Use | ★★★★★ | ★★★★★ | ★★★★☆ |
| Pros | Low-cost consumer machines and materials Fast and easy for simple, small parts | Great value High accuracy Smooth surface finish Fast printing speeds Range of functional applications | Strong functional parts Design freedom No need for support structures |
| Cons | Low accuracy Low details Limited design compatibility | Sensitive to long exposure to UV light | Rough surface finish Limited material options |
| Applications | Low-cost rapid prototyping Basic proof-of-concept models | Functional prototyping Patterns, molds, and tooling Dental applications Jewelry prototyping and casting Modelmaking | Functional prototyping Short-run, bridge, or custom manufacturing |
| Print Volume | Up to 300 x 300 x 600 mm (desktop and benchtop 3D printers) | Up to 300 x 335 x 200 mm (desktop and benchtop 3D printers) | Up to 165 x 165 x 300 mm (benchtop industrial 3D printers) |
| Materials | Standard thermoplastics, such as ABS, PLA, and their various blends. | Varieties of resin (thermosetting plastics). Standard, engineering (ABS-like, PP-like, flexible, heat-resistant), castable, dental, and medical (biocompatible). | Engineering thermoplastics. Nylon 11, Nylon 12, and their composites. |
| Training | Minor training on build setup, machine operation, and finishing; moderate training on maintenance. | Plug and play. Minor training on build setup, maintenance, machine operation, and finishing. | Moderate training on build setup, maintenance, machine operation, and finishing. |
| Facility Requirements | Air-conditioned environment or preferably custom ventilation for desktop machines. | Desktop machines are suitable for an office environment. | Workshop environment with moderate space requirements for benchtop systems. |
| Ancillary Equipment | Support removal system for machines with soluble supports (optionally automated), finishing tools. | Washing station and post-curing station (both can be automated), finishing tools. | Post-processing station for part cleaning and material recovery. |
Ultimately, you should choose the technology that makes the most sense for your business. Prices have dropped significantly in recent years, and today, all three technologies are available in compact, affordable systems.
Calculating 3D printing costs does not end with upfront equipment costs. 3D printing material and labor costs have a significant influence on cost per part, depending on the application and your production needs.
Here’s a detailed breakdown by technology:
| Fused Deposition Modeling (FDM) | Stereolithography (SLA) | Selective Laser Sintering (SLS) | |
|---|---|---|---|
| Equipment Costs | Budget printers and 3D printer kits start at a few hundred dollars. Higher quality mid-range desktop printers start around $2,000, and industrial systems are available from $15,000. | Professional desktop printers start at $3,750, large-format benchtop printers at $11,000, and large-scale industrial machines are available from $80,000. | Benchtop industrial systems start at $18,500, and traditional industrial printers are available from $100,000. |
| Material Costs | $50-$150/kg for most standard and engineering filaments, and $100-200/kg for support materials. | $149-$200/L for most standard and engineering resins. | $100/kg for nylon. SLS requires no support structures, and unfused powder can be reused, which lowers material costs. |
| Labor Needs | Manual support removal (can be mostly automated for industrial systems with soluble supports). Lengthy post-processing is required for a high-quality finish. | Washing and post-curing (both can be mostly automated). Simple post-processing to remove support marks. | Simple cleaning to remove excess powder. |
Interactive
Try our interactive ROI tool to see how much time and cost you can save when 3D printing on Formlabs 3D printers.
Calculate Your Savings
Prototypes of a ski goggles' frame printed with FDM, SLA and SLS technology (from left to right).
We hope this article has helped you focus your search for the best 3D printing technology for your application.
Explore our additional resources to master the intricacies of 3D printing, and dive deeper into each technology to learn more about specific 3D printing systems.
Learn More About 3D Printing
Guide to 3D Printing Tolerances, Accuracy, and Precision
Just because a 3D printer has "high resolution” in the printer specifications doesn’t mean your 3D printed parts will be accurate or precise.
Understanding the meaning of accuracy, precision, and tolerance is imperative for achieving meaningful 3D print performance for any application. In this post, we’ll parse through what these terms mean and how to think about them in the context of 3D printing. Then, we'll compare the tolerance ranges you can expect from different 3D printing processes and provide a detailed overview for tolerancing 3D printed assemblies.
Download our free white paper for a breakdown of how to measure and apply tolerances for each type of fit, with specific recommendations for Formlabs Engineering Resins.
White Paper
Tolerance and fit are essential concepts that engineers use to optimize the functionality of mechanical assemblies and the cost of production. Use this white paper as a resource when designing functional 3D printed assemblies, or as a starting point when designing the fit between parts printed.
Download the White Paper
Let’s start with definitions: What’s the difference between accuracy, precision, and tolerance? For each term, we’ll use a target—a common example for unpacking these concepts—to help visualize meaning.
Accuracy is how close a measurement is to true value. In the case of a target, true value is the bullseye. The closer you are to hitting the bullseye, the more accurate your shot. In the world of 3D printing, true value equals the dimensions you design in CAD. How closely does the 3D print line up to the digital design?
Precision measures the repeatability of a measurement—how consistent are your shots at the target? Precision measures this consistency only; your shots could be hitting near the same spot every time, but that spot doesn’t have to be the bullseye. In 3D printing, this ultimately translates to reliability; can you rely on your machine to produce your expected results for every print?
Exactly how precise do you need to be? That’s defined by tolerance, and tolerance is defined by you. How much wiggle room do you have in your application? What’s an acceptable variance in the closeness to the measurement that precision is hitting? That will depend on your project, for example, a component with a dynamic mechanical assembly will require tighter tolerances than something like a simple plastic enclosure.
If you’re defining a tolerance, you’ll likely want accuracy too, so let’s assume we’re measuring precision of shooting at the bullseye. Earlier, we defined the shots on the target pictured on the right as not precise.
However, if your tolerance range is fairly wide, it may be okay. The shots aren’t as close to each other as in the target on the left, but if the acceptable range of precision is the distance of ±2.5 rings, then you’re within spec.
Generally, achieving and holding tighter tolerances means higher manufacturing costs and quality assurance.
Webinar
Watch our webinar for a walk through the SLA 3D printing workflow, material options, and expert tips to optimize the part-to-print workflow to get the most value out of 3D printing.
Watch the Webinar Now
There are a variety of factors to consider when thinking about accuracy and precision in 3D printing. Knowing that the printer will consistently work as promised and produce the quality expected from it, within the tolerances the user is used to, could be crucial to a successful experience.
Here are four big factors at play in determining the accuracy and precision of 3D printing:
3D printing is an additive process, so parts are built layer by layer. Each layer introduces an opportunity for inaccuracy, and the process by which layers are formed affects the level of precision, or repeatability, of the accuracy of each layer. Let's look at the typical 3D printer tolerances for the most common plastic 3D printing processes:
- Stereolithography (SLA) and digital light processing (DLP): ± 0.2% (lower limit: ± 0.1 mm)
In resin 3D printing, liquid resin material is selectively exposed to a light source—SLA a laser, DLP a projector—to form very thin solid layers of plastic that stack up to create a solid object. Thanks to the highly-precise light sources, these processes can achieve fine details and can consistently produce high quality results. Depending on the model geometry, resin 3D printed parts require support structures, which can be essential to achieve dimensional accuracy, especially with complex geometries or large and thin walls.
- Selective laser sintering (SLS) and multi jet fusion (MJF): ± 0.3% (lower limit: ± 0.3 mm)
Powder bed fusion 3D printers also rely on the precision of a light source—SLS a laser, MJF a fusing lamp—to fuse powder materials into solid parts. As the unfused powder supports the part during printing, there’s no need for dedicated support structures. This makes SLS ideal for complex geometries, including interior features, undercuts, thin walls, and negative features. - Fused deposition modeling (FDM): ± 0.5% (lower limit: ± 0.5 mm)
- In FDM 3D printing, layers of thermoplastic filaments are extruded by a nozzle, which lacks the control and ability to achieve intricate details that other 3D printing processes can offer. FDM parts are also prone to warping or shrinkage, as the printed part cools at different rates and the internal stress cause the print to deform. Higher-end professional systems mitigate these issues, but they also come at a higher cost.
Because layers are extruded, FDM parts might show inaccuracies around complex features. (FDM part on the left, SLA part on the right).
3D printer specs alone do not represent final dimensional accuracy. One common misrepresentation of accuracy for various 3D printing technologies is the descriptions of XY resolution or Z resolution (layer thickness) as dimensional accuracy.
However, this data has no implications for how accurate a printed part will be. There are many sources of error that still have an impact on accuracy, which we'll cover next.
Ultimately, the best way to evaluate a 3D printer is to inspect real parts.
Sample part
See and feel Formlabs quality firsthand. We’ll ship a free sample part to your office.
Request a Free Sample Part
White Paper
Download this report for an internal test that Formlabs created to determine the dimensional accuracy of the Form 3 and Form 3B.
Download the White Paper
Accuracy may also vary depending on which materials you use to print, and the mechanical properties of those materials, which can also affect how likely a print is to warp.
Formlabs Rigid 10K Resin for SLA 3D printing has high green modulus, or stiffness, which enables successful printing of thin, intricate features.
Due to the lack of support structures and great mechnical properties, Nylon Powders used in SLS 3D printing are also ideal for printing complex parts with demanding tolerance requirements.
With resin 3D printers, when a material has a high green modulus (modulus before post-curing), that means it’s possible to print very thin parts with precision and a lower chance of failure.
For FDM 3D printers, materials extruded at higher tempetatures are generally more prone to warping than others. For example, ABS is known to be more susceptible to warping than PLA as the printed parts shrink more during cooldown.
Most 3D printed parts require some form of post-processing after printing:
- SLA and DLP: Washing, post-curing (optional), removal of support structures (if needed), sanding (optional)
- SLS and MJF: Removal of excess powder, media blasting or media tumbling
- FDM: Removal of support structures (if needed), sanding (optional)
Some of these post-processing steps have an influence on the dimensions and the surface of the parts, which in turn influence accuracy and tolerances. Some of these are easy to account for during design and print preparation, but others can vary print to print.
For example, in resin 3D printing, parts often need to be post-cured after 3D printing, and post-curing causes shrinkage. This is normal for any parts produced with resin-based SLA or DLP 3D printing processes, and may need to be considered in designs depending on the printer. PreForm, Formlabs’ free print file preparation software, automatically compensates for this shrinkage to ensure post-cured prints are dimensionally accurate to the original CAD designs.
On the other hand, FDM printed parts often require sanding to improve the surface quality by removing support marks and layer lines, but this process changes the dimensions of the parts slightly, increasing the variation between the original design and the finished part.
Producing accurate and precise 3D prints requires attention to more than the printer itself, and consideration for the entire process.
The print preparation software, printing technology, quality and calibration of the printer and its components, quality of 3D printing materials, and post-processing tools and methods can all contribute to final results.
Overall, integrated systems that are designed to work together generally produce more reliable results. For example, each new SLA and SLS 3D printing material from Formlabs goes through a series of validation tests on each compatible printer model before release to ensure reliability, consistency, and accuracy. That's not to say that generic printers and off the shelf materials can't produce good results—they might just have a steeper learning curve and require more experimentation and calibration from the users.
An air-powered, functional scale model of a flat two-cylinder internal combustion engine printed in Tough and Durable Resins and lubricated with mineral oil.
In traditional machining, tighter tolerances are exponentially related to increased cost. Tighter tolerances require additional and slower machining steps than wider tolerances, so machined parts are designed with the widest tolerances allowable for a given application.
Unlike machining, 3D printing has a single automated production step. Tighter 3D printing tolerances may require more effort in the design stage, but can yield significant savings in time and costs in prototyping and production.
Also, while complex surfacing adds costs to a process like CNC milling, complexity in 3D printing is essentially free, though the tolerances of a 3D printed part can't be automatically refined beyond what the printer can produce without resorting to subtractive methods. 3D printing is great option if you have gross complexity like undercuts and complex surfaces, and don't necessarily need higher surface precision than ±0. 005 in (standard machining). Tolerances beyond standard machining have to be reached subtractively, either through hand finishing or machining, in both 3D printed parts and CNC parts.
Overall, resin 3D printing (SLA and DLP) and powder bed fusion 3D printing (SLS and MJF) have the highest tolerance of commercially available plastic 3D printing technologies. Compared to machined accuracy, resin and powder 3D printing tolerance is somewhere between standard machining and fine machining.
Tolerance is the predicted range of possible dimensions for parts at the time of manufacture.
Tolerance and fit are essential concepts for any engineer designing mechanical assemblies. Accounting for tolerances ultimately optimizes both the prototyping and production processes, reducing the material cost of iteration, lowering post-processing time, and mitigating the risk of accidentally broken parts. The static cost-per-part for 3D printing makes it a cost-effective method for prototyping and low volume manufacturing, especially for custom parts that would otherwise require significant investment in molds.
Generally, more compliant 3D printing materials will have a wider tolerance zone than more rigid materials. When printing parts for assemblies specifically, designing for proper tolerance and fit lowers post-processing time and ease of assembly, and reduces the material cost of iteration.
Post-processing steps for 3D printed parts assemblies commonly include cleaning, sanding supports, and lubrication. Sanding an active surface is a reasonable method for achieving the correct fit if the part is a one-off, because less tolerancing work is required in the design phase. With larger assemblies, or when producing multiples of something, proper dimensional tolerancing quickly becomes worthwhile.
In this section we’ll walk through the different engineering fits to describe the basics of clearance, transition, and interference fits and when it makes sense to choose each for an assembly design.
In order to understand and design the optimal 3D printing tolerances, it’s important to determine which type of fit works best for your assembly.
The functional needs of your assembly define how parts should fit together.
Engineering fit can be divided into three types: clearance, transition, and interference. Each of the these types of fit can then be broken down into two major subcategories.
There will always be some variation in tolerances for different manufacturing methods and depending on the 3D printing process, which means that fit is a continuum rather than completely separate stages. For example, larger clearance fits trade precision for freedom of movement. Tighter transition fits are stronger, but cause more wear on the connection. An interference fit that requires more force to join will be more challenging to disassemble.
Free movement of a component requires clearance, or space between the active surfaces. Achieve clearance by ensuring that the tolerance zones of the active surfaces do not overlap.
An active surface is a model region where two surfaces touch and either move against each other or have a static fit.
Subcategories:
- A sliding fit has some lateral play, while a running fit has almost no play.
- A running fit has slightly more friction, but more accurate motion.
Play is the amount of space for movement in an unintended direction within a mechanism.
If no motion between parts is needed, a transition fit allows for easy assembly and disassembly. A transition fit has partially overlapping tolerance zones.
Subcategories:
- With a keying fit, a component accurately inserts into or around another part, with only a light force needed to install and remove it.
- A push fit requires more force to join and remove the parts, but they can be connected by hand.
An interference fit provides a rigid, strong connection, but requires much more force applied in assembly. Tolerance zones fully intersect in interference fits.
Subcategories:
- A force fit requires substantial force to install, likely with additional hand tools like a hammer, and is intended to be permanently joined.
- A press fit needs much more force to install, applied by an arbor press or similar tool.
Fit ranges for common geometries can be broadly applied to many designs. Once you know the best fit, you'll need to select materials and design tolerances for your application. Our white paper, “Engineering Fit: Optimizing Design for Functional 3D Printed Assemblies,” was written to help guide these decisions.
Download the white paper for a breakdown of how to measure and apply tolerances for each type of fit, with specific recommendations for Formlabs Tough Resin and Durable Resin. The resource also includes links to downloadable test models and suggestions for lubricants, bonded components, and machining.
Download the White Paper
There are tons of other attributes to consider when evaluating 3D printers–do your parts need to be isotropic? What mechanical properties do your parts (and therefore, materials) require? One of the best ways to get started is to see real printed parts. Choose a free sample from Formlabs in a variety of materials to see SLA quality for yourself.
Request a Free Sample 3D Print
Clarity, Accuracy & Tolerances in 3D Printing
Just because your 3D printer says it has "high resolution" does not mean it will produce accurate or sharp prints.
Understanding the meaning of the terms precision, clarity, and tolerance is a prerequisite for achieving quality 3D printing results, regardless of industry. In this article, we will analyze what these terms mean in the context of 3D printing.
Webinar
Want to learn how to use 3D printing for design? Watch our webinar and learn about the stereolithography (SLA) 3D printing process, different types of materials, and tips from experts on how to optimize your printing process to make it as efficient as possible.
Watch the webinar now
Let's start with some definitions: what is the difference between precision, clarity and tolerance? For each term, we will use a target - a common example for understanding these concepts, helping to visualize them.
Precision determines how close the measured value is to the true value. In the target example, the true value is the bullseye. The closer you are to the bullseye, the more accurate your throw. In the world of 3D printing, the true value is the dimensions of your CAD model. To what extent does a product made on a 3D printer correspond to a digital model?
Clarity corresponds to measurement reproducibility - how consistent are your hits on the target? Clarity only measures this reproducibility. You can always hit the same spot, but it doesn't have to be the bullseye. In 3D printing, this ultimately leads to reliability. Are you sure that you will get the expected results for each model produced by your printer?
In engineering terms, "clarity" is used to measure the reproducibility of results. Applied to materials for 3D printing, “clear” can mean the ability to manufacture complex geometries. For example, Formlabs Gray Pro Resin and Rigid Resin resins have a high "green modulus", or modulus of elasticity, that can successfully print thin and intricate details.
What accuracy is required in this case? This is determined by tolerances , which you define. How much wiggle room do you have based on the purpose of the model? What is the allowable variability in the closeness of the measurements to the exact ones? It depends on the specifics of your project. For example, a component with a dynamic mechanical assembly needs tighter tolerances than a conventional plastic housing.
If you're specifying tolerance, you'll probably need precision as well, so let's assume we're measuring bullseye accuracy. Earlier we called the shots in the picture with the target on the right fuzzy.
But if you have wide tolerances, this may not be a problem. The shots are not as close to each other as they are on the target on the left, but if the acceptable range of sharpness is ±2.5 hoops, then you are not out of range.
As a rule, achieving and maintaining tighter tolerances entails higher production and quality control costs.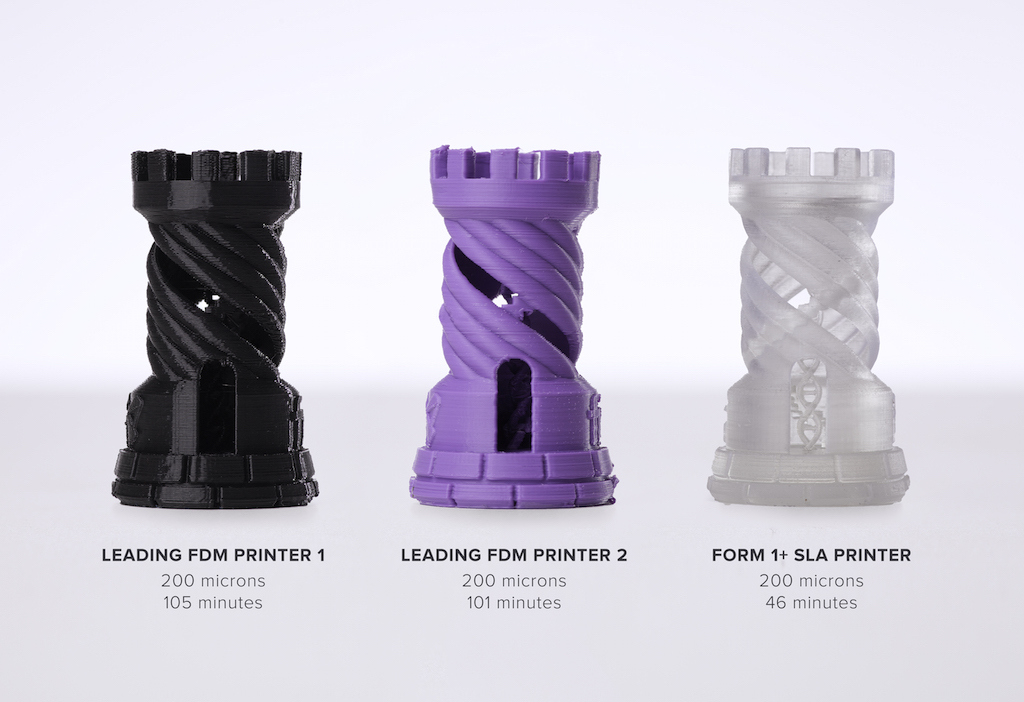
White Paper
Tolerance and fit are important concepts that engineers use to optimize mechanical functionality and manufacturing cost. Use this white paper when designing 3D printed workpieces or as a starting point when designing a fit between parts printed with Formlabs Tough Resin or Durable Resin.
Download white paper
There are many factors to consider when thinking about precision and clarity in 3D printing, but it's also important to get your needs right.
For example, a sharp but inaccurate 3D printer may be optimal for some applications. An inexpensive Fused Deposition Modeling (FDM) machine will produce less accurate parts, but for a teacher teaching students 3D printing for the first time, the exact fit of the student's CAD model doesn't matter as much.
But if the printer performs to specifications and delivers the quality expected of it within the tolerances the user is accustomed to, this may be sufficient for successful operation.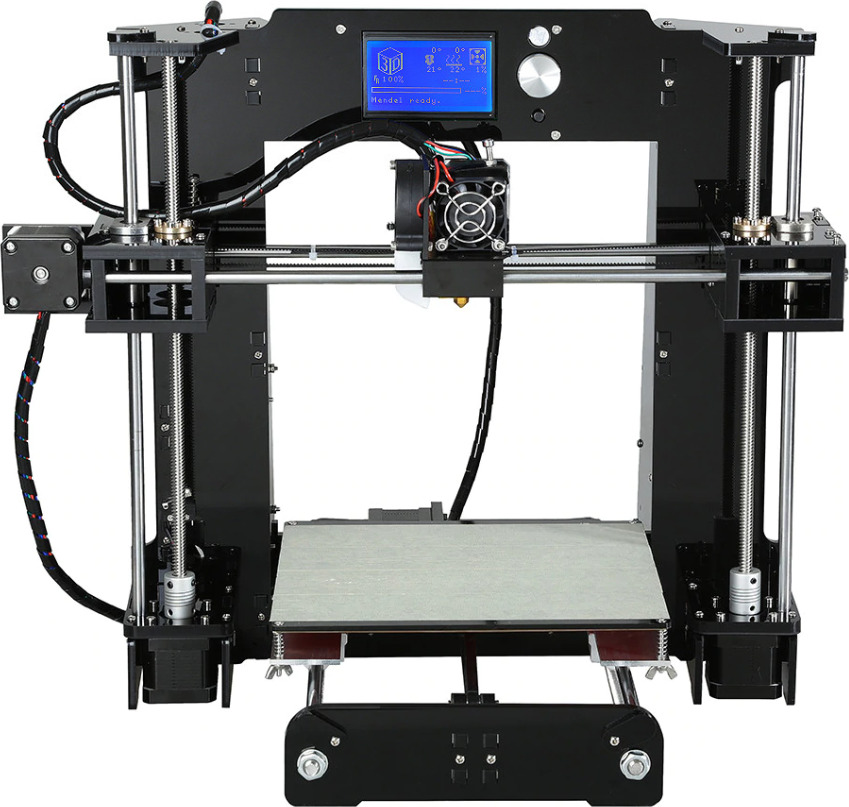
Check out our detailed guide comparing FDM vs. SLA 3D printers to see how they differ in terms of print quality, materials, application, workflow, speed, cost, and more.
There are four main factors that affect the accuracy and clarity of a 3D printer:
3D printing is a type of additive manufacturing where models are made layer by layer. Violations can potentially occur in every layer. The layering process affects the level of clarity (or reproducibility) of each layer's accuracy. For example, when printing on an FDM printer, layers are formed using a nozzle, which cannot provide the same accuracy for obtaining complex parts as other 3D printing technologies.
Because layers are extruded, FDM models often show layer lines and inaccuracies around complex features. (Left is an FDM printed part, right is a SLA printed part.)
In stereolithography (SLA) 3D printing, each layer is formed by curing a liquid polymer with a high-precision laser, resulting in more detailed models and achieve high quality on a consistent basis.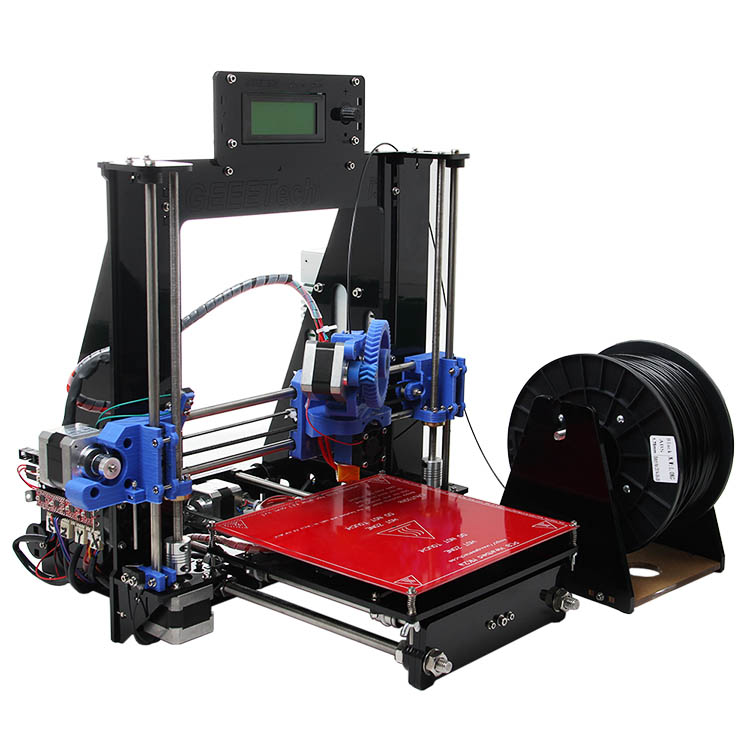
Selective Laser Sintering (SLS) also uses a laser to accurately convert nylon powder into lightweight, durable parts.
The specifications of a 3D printer alone do not give an idea of the accuracy of the models produced. One of the common misconceptions about the accuracy of various 3D printing technologies is describing XY resolution as dimensional accuracy.
For digital light processing (DLP) printers, the XY resolution corresponds to the projected pixel size. Many 3D printer systems use this projected pixel size, or XY resolution, as a general measure of accuracy, such as stating that with a projected pixel size of 75 µm, the accuracy of the device is ±75 µm.
Check out our guide to SLA and DLP 3D printing, where we talk about the features of the two processes and how they differ.
But this data does not affect the accuracy of the printed model. There are many other sources of error that affect accuracy, from components and calibration to materials and post-processing.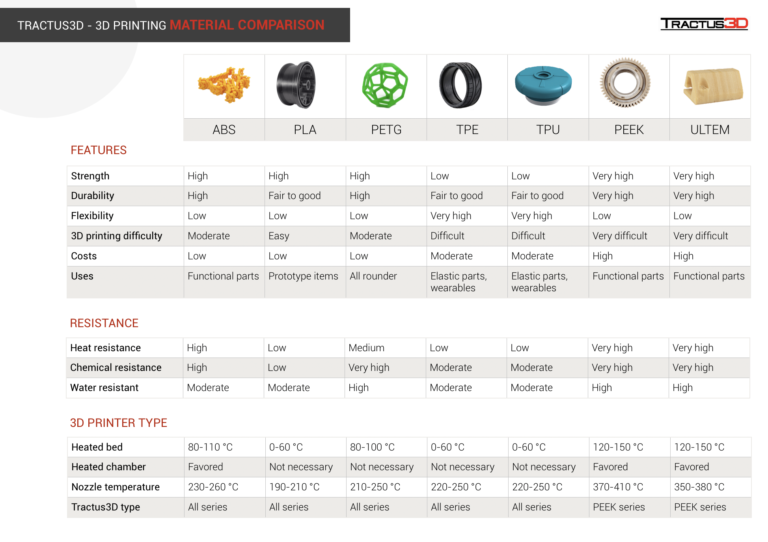 We will consider the last two factors in more detail.
The best way to appreciate a 3D printer is to study the models printed on it.
Accuracy may also vary depending on the media you are printing on and the mechanical properties of those media, which can also affect the likelihood of model warping.
Formlabs Rigid Resin has a high "green modulus", or modulus of elasticity before final polymerization, which allows you to print very thin models with high definition and reliability.
But, again, it all depends on your goals. For example, in dentistry, the accuracy of 3D printed models is critical. But if you're printing a concept model, chances are you just want to get a general idea of the physical product, and accuracy won't be that important.
Margins, mold surfaces, and contact surfaces printed with Formlabs Model Resin are accurate to within ±35 µm of the digital model at over 80% of surface points when printed at 25 µm settings.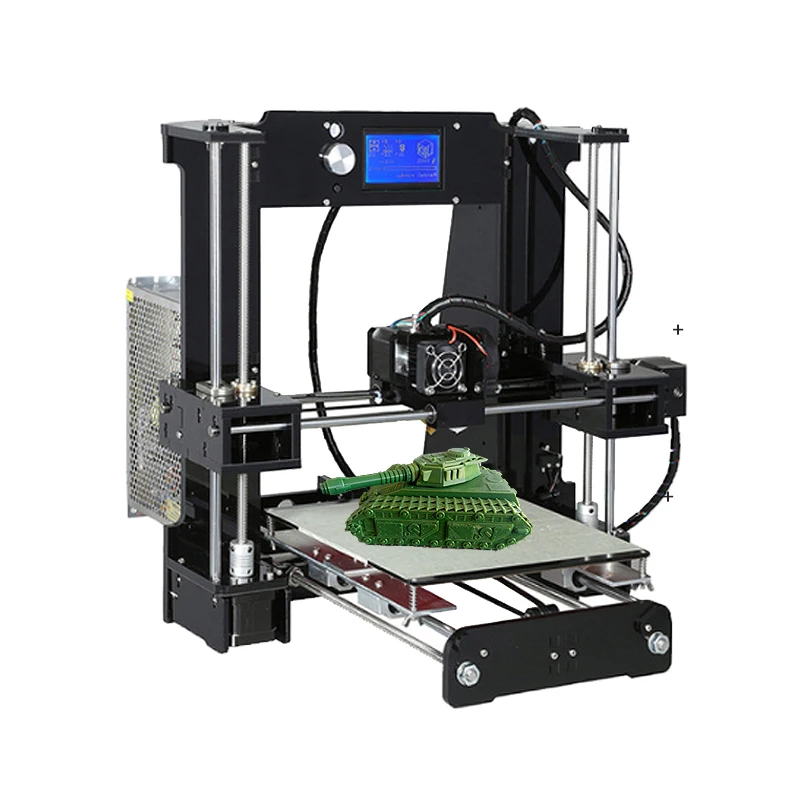 The overall accuracy across the entire arc is within ±100 µm on 80% of surfaces when printed with settings of 25 or 50 µm.
3D printed models often need to be cured, which in turn often leads to shrinkage. This is normal for any part made using SLA or DLP 3D printing. Depending on the printer, this phenomenon may need to be considered in the design. PreForm, Formlabs' free file preparation software, automatically compensates for this shrinkage, ensuring that the final cured models are the same dimensions as the original CAD model.
How does the final polymerization work? Learn more about the theory behind the process and see efficient ways to successfully finish curing 3D printed models.
Producing quality models on a 3D printer requires attention not only to the printer itself, but to the entire production process.
The final result may be affected by the print preparation software, post-processing materials and tools used.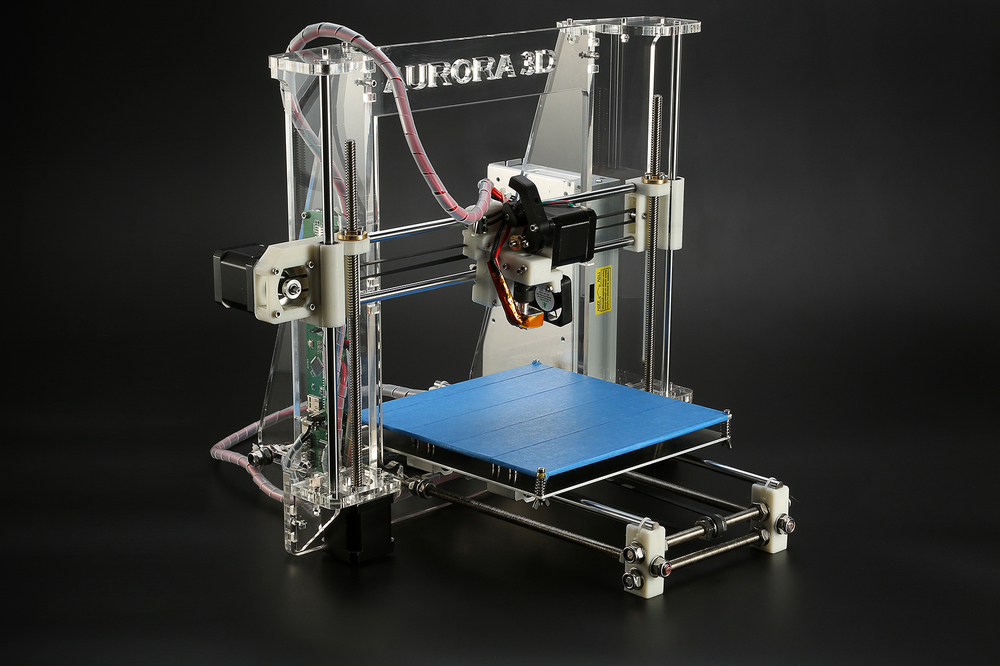 In general, integrated systems designed to work together produce more reliable results.
Unlike machining, where parts are progressively improved to tighter tolerances, 3D printing has only one automated manufacturing step. While complex coating adds cost to processes such as CNC milling, creating complex features with 3D printing is essentially free, although the tolerances of a 3D printed model cannot be automatically improved beyond the capabilities of the printer. without resorting to subtractive methods.
3D printing is a great option if you have rough, complex features such as undercuts and complex surfaces, and don't necessarily need surface accuracy better than ±0.125mm (standard machining). Tolerances beyond standard machining must be achieved using subtractive methods, either through manual or machine processing, for both 3D printed and CNC models.
SLA has the highest tolerance compared to other commercial 3D printing technologies. The tolerances for stereolithographic 3D printing are somewhere between standard and precision machining.
In general, more malleable stereolithography materials will have a wider tolerance zone than more rigid materials. Designing subassembly parts for tolerance and fit reduces post-processing time and simplifies assembly, as well as reduces material costs per iteration.
There are many other factors to consider when evaluating 3D printers. Should your models be isotropic? What mechanical properties should your models (and, accordingly, the materials from which they are made) have? The best place to start is to get familiar with the physical models printed on a 3D printer. Order a free material sample from Formlabs of your choice and see for yourself the quality of your stereolithography print.
Request a sample 3D model
Comparison of 3D printing technologies: FDM, SLA and SLS
Additive manufacturing or 3D printing reduces costs, saves time and expands the technological possibilities in product development. 3D printing technologies offer versatile solutions for a wide range of applications, from rapid concept and functional prototypes in prototyping to fixtures and clamps or even final parts in manufacturing.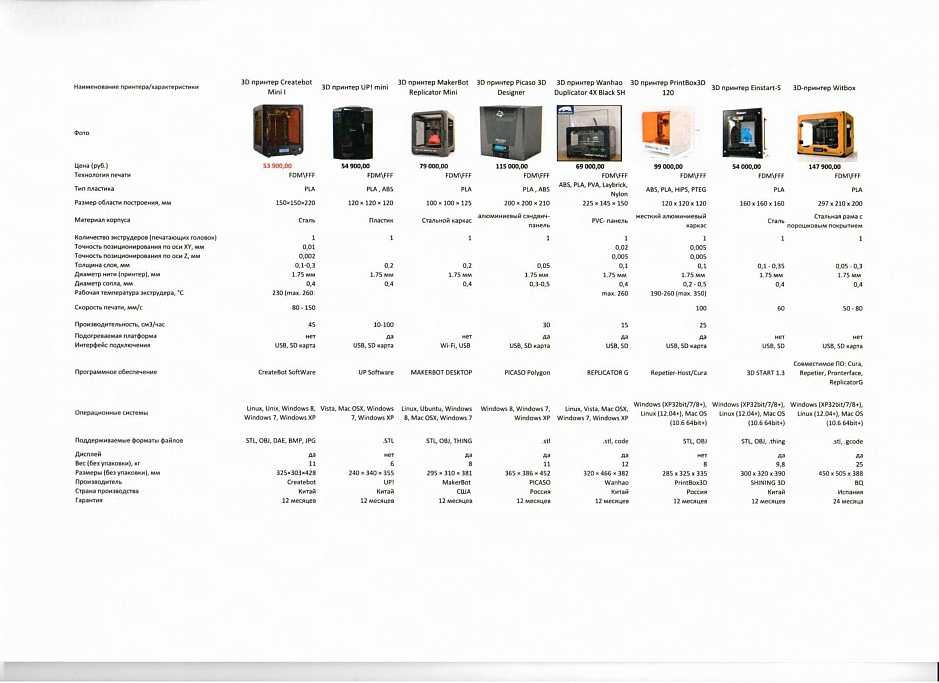
Over the past few years, high resolution 3D printers have become more affordable, more reliable and easier to use. As a result, more companies have been able to use 3D printing technology, but choosing between different competing 3D printing solutions can be difficult.
Which technology is right for your needs? What materials are available for her? What equipment and training is needed to get started? What are the costs and payback?
In this article, we take a closer look at three of today's most well-known plastic 3D printing technologies: Fused Deposition Modeling (FDM), Stereolithography (SLA), and Selective Laser Sintering (SLS).
Choosing between FDM and SLA 3D printer? Check out our detailed comparison of FDM and SLA technologies.
Download this high resolution infographic here.
VIDEO MANUAL
Can't find the 3D printing technology that best suits your needs? In this video tutorial, we compare Fused Deposition Modeling (FDM), Stereolithography (SLA), and Selective Laser Sintering (SLS) technologies in terms of the top factors to consider when purchasing.
Watch Video
Fused Deposition Modeling (FDM), also known as Fused Filament Manufacturing (FFF), is the most widely used form of 3D printing at the consumer level, fueled by the rise of consumer 3D printers. On FDM printers, models are made by melting and extruding a thermoplastic filament, which the printer's nozzle applies layer by layer to the model being built.
The FDM method uses a range of standard plastics such as ABS, PLA and their various blends. It is well suited for making basic experimental models, as well as for quickly and inexpensively prototyping simple parts, such as parts that are usually machined.
FDM models often show layer lines and may have inaccuracies around complex features. This sample was printed on a Stratasys uPrint FDM industrial 3D printer with soluble support structures (printer price starting at $15,900).
FDM printers have the lowest resolution and accuracy of SLA or SLS and are not the best option for printing complex designs or parts with complex features.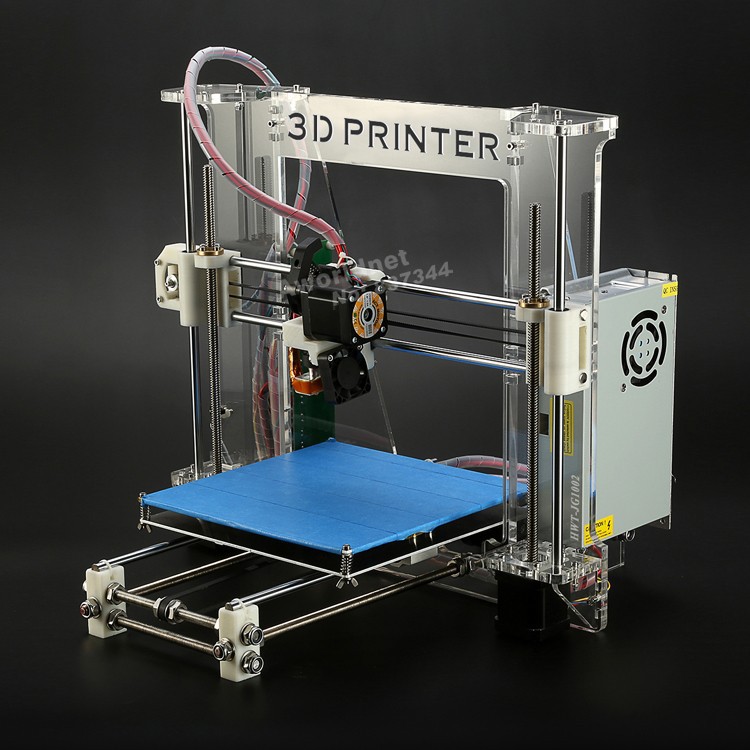 Surface quality can be improved by chemical and mechanical polishing processes. To address these issues, industrial FDM 3D printers use soluble support structures and offer a wider range of engineering thermoplastics, but they are also expensive.
FDM printers do not handle complex designs or parts with complex features well (left) compared to SLA printers (right).
Invented in the 1980s, stereolithography is the world's first 3D printing technology and is still one of the most popular technologies among professionals today. SLA printers use a process called photopolymerization, which is the conversion of liquid polymers into hardened plastic using a laser.
See stereolithography in action.
Models printed on SLA printers have the highest resolution and accuracy, the sharpest detail and the smoothest surface of all plastic 3D printing technologies, but the main advantage of the SLA method is its versatility. Materials manufacturers have developed innovative formulas for SLA polymers with a wide range of optical, mechanical and thermal properties that match those of standard, engineering and industrial thermoplastics.
Models created using SLA technology have sharp edges, a smooth surface and almost invisible layer lines. This sample was printed on a Formlabs Form 3 Desktop Stereolithographic 3D Printer (price starting at $3499).
SLA is an excellent option for making highly detailed prototypes that require close tolerances and smooth surfaces such as molds, templates and functional parts. SLA technology is widely used in industries ranging from engineering and design to manufacturing, dentistry, jewelry, modeling, and education.
White Paper
Download our in-depth white paper to learn how SLA printing works, why thousands of professionals use it today, and how this 3D printing technology can be useful in your work.
Download white paper
free sample
Experience Formlabs print quality firsthand. We will send a free 3D printing sample directly to your office.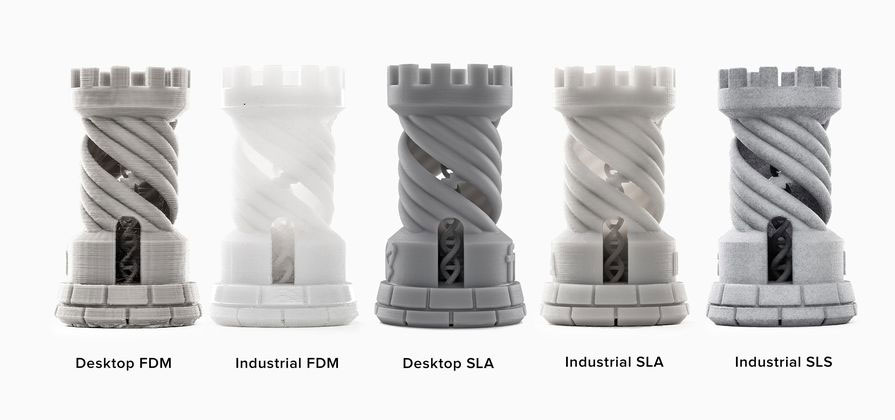
Request a free sample
Selective laser sintering is the most common additive manufacturing technology used in industry.
Selective Laser Sintering (SLS) 3D printers use a high power laser to sinter fine polymer powder particles. The unsprayed powder supports the model during printing and eliminates the need for special support structures. This makes SLS ideal for complex geometries, including internal features, grooves, thin walls, and negative taper. Models produced using SLS printing have excellent mechanical characteristics: their strength can be compared with the strength of injection molded parts.
Models created with SLS technology have a slightly rough surface, but almost no visible layer lines. This sample was printed on the Formlabs Fuse 1 SLS workshop 3D printer (price starting at $18,500).
The most common selective laser sintering material is nylon, a popular engineering thermoplastic with excellent mechanical properties. Nylon is light, strong and flexible, resistant to impact, heat, chemicals, UV radiation, water and dirt.
The combination of low part cost, high productivity and widely used materials makes SLS a popular method for engineering functional prototyping and a cost-effective alternative to injection molding in cases where production runs are limited.
White Paper
Looking for a 3D printer to create durable, functional models? Download our white paper to learn how selective laser sintering (SLS) works and why it's popular in 3D printing for functional prototypes and end-use products.
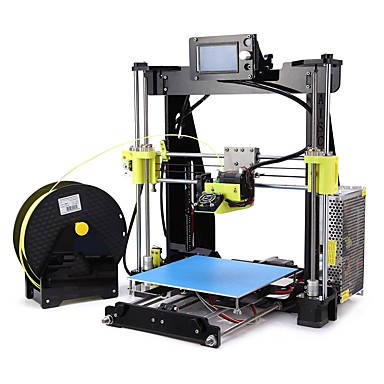
Either way, you should choose the technology that best suits your business. Prices have dropped significantly in recent years, and today all three technologies are offered in compact and affordable systems.
3D printing costing doesn't end with initial equipment costs. Material and labor costs have a significant impact on the cost of each part, depending on the application and production needs.
INTERACTIVE
Try our interactive ROI tool to see how much time and money you can save by printing with Formlabs 3D printers.
Calculate savings
FDM, SLA and SLS printed ski goggle frame prototypes (left to right).
We hope this article has helped you narrow down your search for the 3D printing technology best suited to your needs.


