3D printed traxxas slash parts
▷ traxxas slash 3d models 【 STLFinder 】
traxxas slash alternator fan
thingiverse
traxxas slash accessory
Traxxas Slash battery cover
thingiverse
Battery cover for traxxas slash. ...
traxxas slash arm
thingiverse
a-arm for a traxxas slash
Dual Battery Traxxas Slash
myminifactory
Dual 7 cell baterry adapter for traxxas slash
Traxxas Slash 86T Gear
grabcad
86 tooth pinion gear for Traxxas Slash 2wd and 4wd models.
traxxas slash rear carrier
pinshape
SummaryEDIT: updated with newer design rear carrier for the 1/10 scale 4x4 traxxas slash
traxxas slash battery adapter
youmagine
this is the traxxas slash 1/10 scale battery adapter post. ...fits fine in the chassis.
traxxas slash battery adapter
thingiverse
this is the traxxas slash 1/10 scale battery adapter post. ...fits fine in the chassis.
traxxas slash rear carrier
thingiverse
EDIT: updated with newer design rear carrier for the 1/10 scale 4x4 traxxas slash
traxxas slash shock support
youmagine
the lower shock spring support for the suspension on the 1/10 scale traxxas slash.version of this with an integrated guard platehttps://www.youmagine.com/designs/traxxas-slash-shock-guard-81b09451-49bd-4154-8d65-b13669b0461c
traxxas slash rear carrier
youmagine
EDIT: model has been updated with tighter dimensionsrear carrier for the 1/10 scale 4x4 traxxas slash
traxxas slash bumper arm
youmagine
the 2 holes in the middle of the part are for attaching an additional center brace for extra support. brace for mounting between the bumper armshttps://www.youmagine.com/designs/traxxas-slash-bumper-arm-bracerear bumper...
traxxas slash shock support
thingiverse
the lower shock spring support for the suspension on the 1/10 scale traxxas slash. ...version with shieldhttp://www.thingiverse.com/thing:1175692
Traxxas Slash GoPro Mount
thingiverse
This is a GoPro mount I modeled for the Traxxas Slash. ...It has a support piece that helps keep the GoPro from rolling forward and back.
traxxas slash front
thingiverse
the front to the traxxas slash 2wd model. ...i haven't printed it yet so please tell me if it works Instructions print with 100% infill
traxxas slash steering block
youmagine
EDIT: model has been updated with tighter dimensionsfront steering block for the traxxas slash 1/10 scale 4x4 RC car. ...bearings fit perfectly
Traxxas slash body posts
thingiverse
These are extended body posts for the traxxas slash or other vehicles that use posts that have a screw hole on the bottom of the post
traxxas slash front bumper
youmagine
a front bumper for the traxxas slash 1/10 scale 4x4 RC car uses the mount from the RPM aftermarket front bumper. ...has holes for 10 LEDs
traxxas slash rear bumper
youmagine
EDIT: part has been updated with tighter dimensionsa rear bumper for the 1/10 scale traxxas slashbumper arms can be found here https://www.youmagine.com/designs/traxxas-slash-bumper-arm-bracesupport brace for the rear bumper...
traxxas slash shock guard
youmagine
this is a lower spring support for the suspension with a shock guard added to it, it fits the stock springs, not sure about big bores.version with a shorter shieldhttps://www.youmagine.com/designs/traxxas-slash-shock-support-and-guard-shortversion...
traxxas slash parts
youmagine
a bunch of 3d modelling i did for the traxxas slash. all parts have been heavily tested and abused on a few slashes. some parts are better printed in certain materials, the shock guards and bumper work very well in nylon for example.**some of these...
traxxas slash battery adapter
prusaprinters
this is the traxxas slash 1/10 scale battery adapter post. ...fits fine in the chassis.</p> <h4>Print instructions</h4><p>Unassociated tags: r/c<br/> Category: R/C Vehicles</p>
Traxxas Slash Tow Hook
thingiverse
This is just a fun decorative addition to my Traxxas Slash. Instructions Print both pieces with 100% infill with no rafts or supports. ...Place pieces on the front bumper and hot glue together.
Traxxas Slash 2wd Bellcrank
thingiverse
Printed for a Traxxas Slash 2wd. (The 4x4 setup is different) This one doesn't use bushings or bearings, so it might wear out quickly. Seems to hold up pretty well though. Thanks, Enjoy! ...
Traxxas Slash Roll Bars
thingiverse
Traxxas SLASH RC truck roll bars. These are cosmetic and really improves the look of the truck. ...I fastened them to the body by drilling holes and using little screws.
Traxxas Slash 2WD Stand
thingiverse
All of the stands I have found are for the Traxxas Slash 4x4, so I took it upon myself to design a simple stand for my Slash to keep the wheels off the ground when in storage on the shelf. For assembly, you need the following:
(8) M3x10-12mm...
For assembly, you need the following:
(8) M3x10-12mm...
traxxas slash bumper
prusaprinters
EDIT: updated with newer design a rear bumper for the 1/10 scale traxxas slash use with my printable bumper arm http://www.thingiverse.com/thing:1175688 and printable bumper arm brace for extra support http://www.thingiverse.com/thing:1175687 Print...
traxxas slash bumper arm
prusaprinters
the 2 holes in the middle of the part are for attaching an additional center brace for extra support. use with my printable bumper http://www.thingiverse.com/thing:1175690 use with my printable bumper arm brace for extra support. ..
..
traxxas slash bumper arm
pinshape
SummaryEDIT: updated with newer design a bumper arm for the 1/10 scale traxxas slash. the 2 holes in the middle of the part are for attaching an additional center brace for extra support. ...use with my printable bumper...
Traxxas Slash Burnout Bar
thingiverse
Burnout bar to use on a Traxxas Slash based No Prep car. Fits a standard RPM style Wheelie bar mount and depending on your body, should be completely hidden underneath. I used this mount and designed this Burnout Bar to fit it perfectly.
▷ traxxas slash 4x4 parts 3d models 【 STLFinder 】
Traxxas Slash 4x4 Stand
thingiverse
RC Stand for Traxxas Slash 4x4.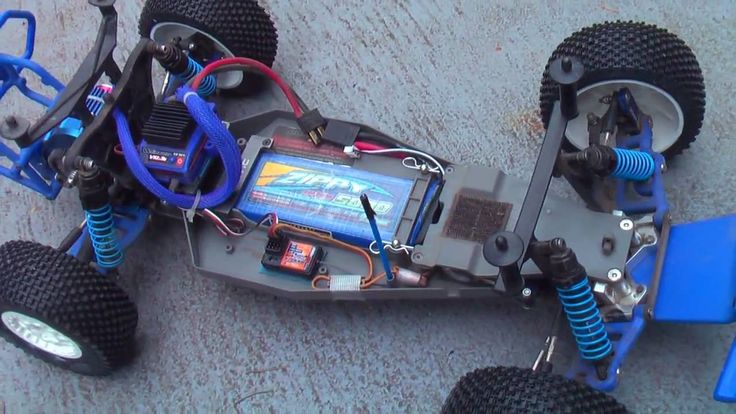 Included are both HCG & LCG Chassis Stands. HCG is still a work in progress. LCG is complete and the bay has room for the Traxxas EZ Peak+ ID Charger.
Support are required for the front opening. Supports for...
Included are both HCG & LCG Chassis Stands. HCG is still a work in progress. LCG is complete and the bay has room for the Traxxas EZ Peak+ ID Charger.
Support are required for the front opening. Supports for...
Traxxas Slash 4X4 GoPro Mount
thingiverse
GoPro style mount designed to bolt to the chassis of a Traxxas Slash 4X4 (Not sure on 2WD) with recess under the mount to allow for a chassis protector / dust cover.
Traxxas Slash 4x4 Drift Wheel
thingiverse
This is a Drift wheel I created for my 4x4 Traxxas Slash. I've been wanting to mess around with drifting, and really didn't want a whole new vehicle.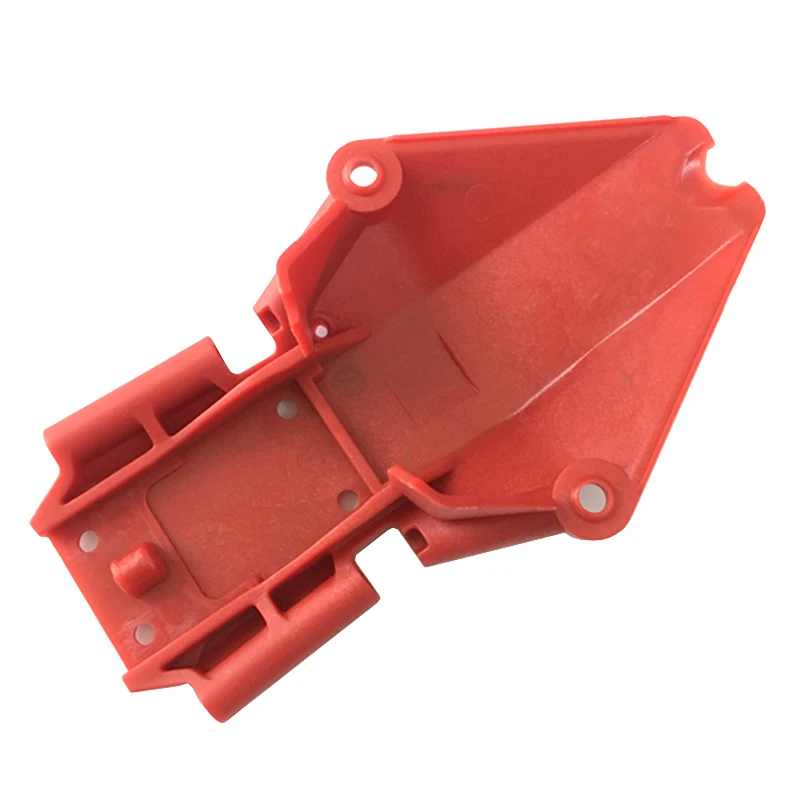 I made the face flush for easy printing. I also added a version with a 17mm hex, for those silly...
Traxxas Slash 4x4 Drift Wheel
thingiverse
This design is for use with 12mm hexes, which the Slash 4x4 comes stock with. These should also fit in the rear of 2wd Slash models. I printed these in PLA with .25 layer height with only 2 walls and 10% infill. I tested them out on somewhat...
Traxxas Slash 4x4 Roll Cage
thingiverse
Roll cage I designed for the Slash 4x4. I designed it to mount to the holes used to attach the body mounts to the truck.
I have only printed this once with Hatchbox Blue PLA.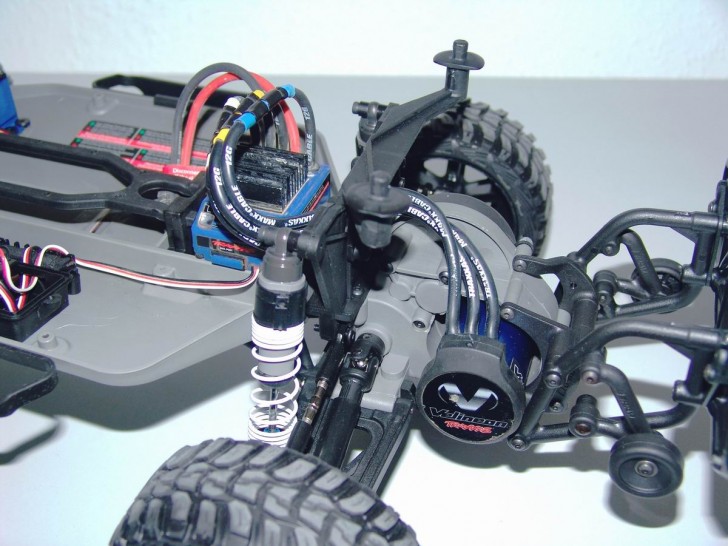 I have not thrashed it yet. I expect it to break as I used PLA. I...
Traxxas Slash Cover LCG 4x4
thingiverse
This is a Cover for Traxxas Slash LCG Chassi. You can print without support. ...
Traxxas Slash 4x4 Stub axle rear
grabcad
Internal-splined half shaft for Traxxas Slash 4x4.MODEL# 6853A.
Traxxas Slash 4X4 Left Hand A-Arm
grabcad
Left a-arm for my Traxxas slash 4x4.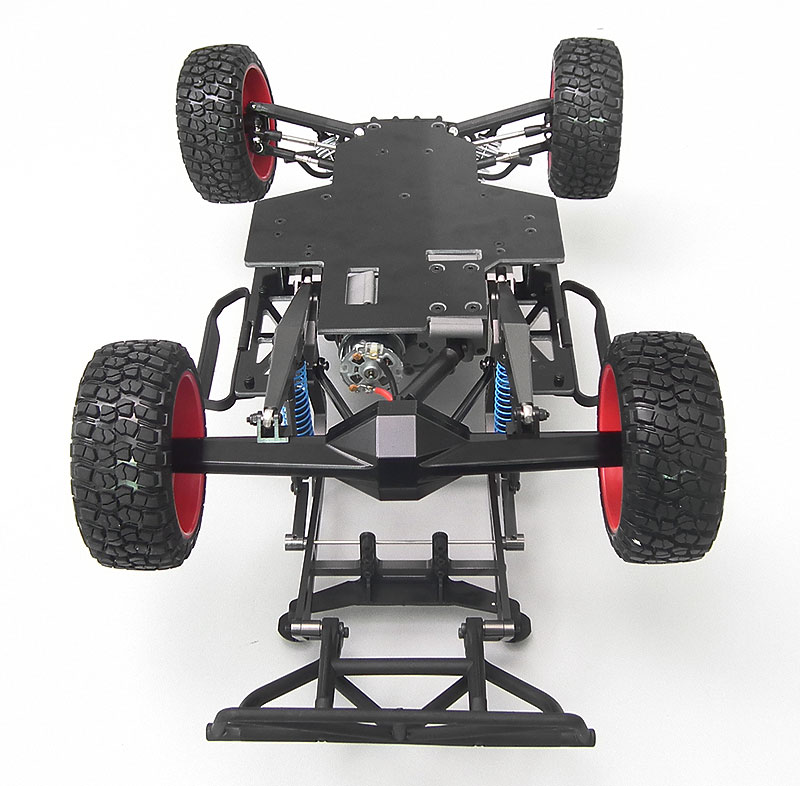 ... Front and rear arms are the same on the 4x4.
Traxxas Slash 4x4 Stub axle rear
thingiverse
It's the measurement from the original part. ... Internal-splined half shaft for Traxxas Slash 4x4. ... MODEL# 6853A.
Traxxas ESC Universal Mount Slash 4x4
thingiverse
Adapter plate to mount any esc to a traxxas Slash 4x4. ... Use double side tape to glue the ESC to the plate.
Traxxas Slash 4x4 LCG slipper clutch fan
thingiverse
30mm fan mount for slash 4x4 slipper clutch.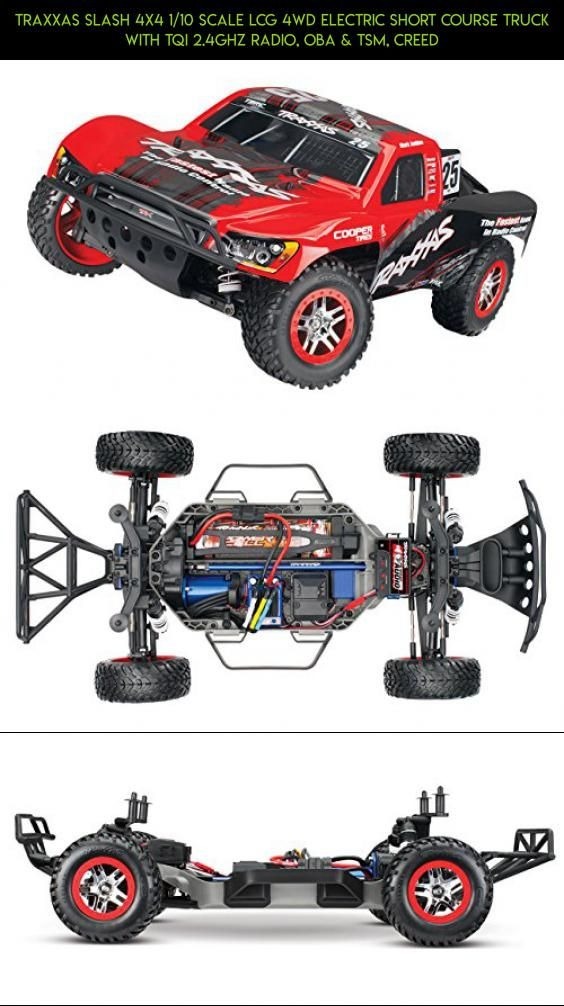 ...
Goes on the right side of the vehicle mounts on upper right engine mount.
...
Goes on the right side of the vehicle mounts on upper right engine mount.
Traxxas Slash 4x4 Body Mount (Extended)
thingiverse
Bought an new pre-painted body for my Traxxas Slash 4x4 put didn't fit correctly so I needed to change the height of the body mounts. ...After a couple designs I came up with these 3 different sizes.
Traxxas Slash 4x4 LCG - Accu Holder Remix
thingiverse
This is a remix of "Akku Träger Slash 4x4 LCG" by Sani007 https://www.thingiverse.com/thing:3740043 The stock battery holders are not flexible enough.
With this battery holder I can mount a big 4S pack. I added holes
Version 2 : made it more...
I added holes
Version 2 : made it more...
Traxxas Slash 4x4 Body Mount Spacers
thingiverse
I made the Traxxas Slash 4x4 extended body mounts first and then I found that making spacers for the body mount bracket has more strength than the mounts that I 3D printed. ... These spacers help raise the body over the chassis for a better custom fit.
traxxas slash parts
youmagine
a bunch of 3d modelling i did for the traxxas slash. all parts have been heavily tested and abused on a few slashes. some parts are better printed in certain materials, the shock guards and bumper work very well in nylon for example.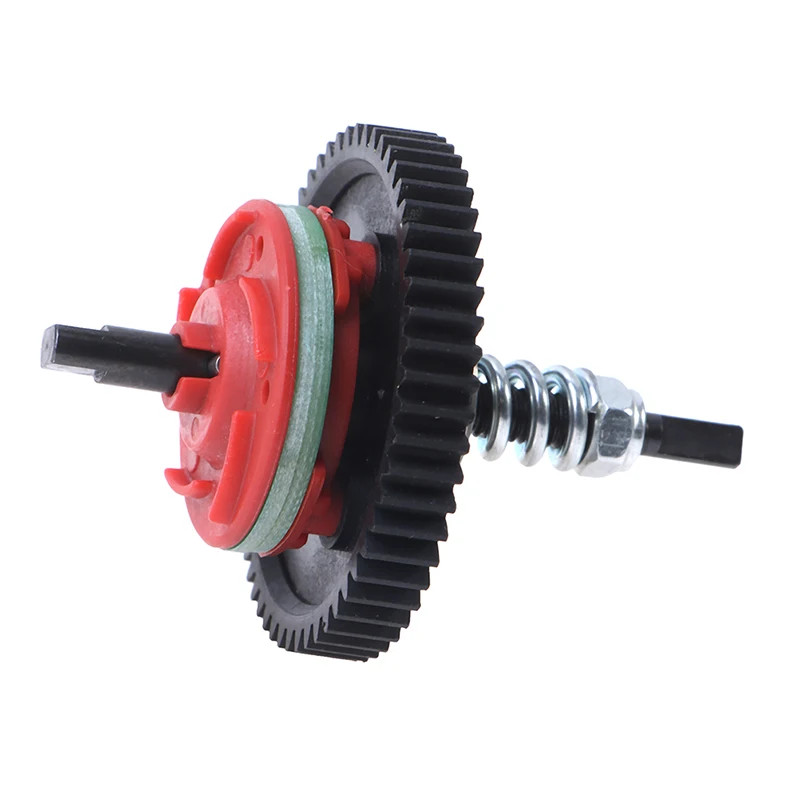 **some of these...
Traxxas Slash 4x4 LCG Gear Cover
thingiverse
...I lost the gear cover of my Traxxas Slash 4x4 LCG... :( So I designed my own. It's nearly as perfect as the original piece... but different... Several testprints & model iterations later, I had something that fits ok :) This one you could...
Battery Spacer for the Traxxas Slash 4x4
thingiverse
So I have designed this battery spacer for the Slash 4x4 for the purposes of addressing the issue with the foam battery spacers that this particular RC vehicle comes with but the foam spacers usually make the RC vehicle look a bit worn out over time. ..
..
Traxxas Slash 4x4 LCG Gear Cover
prusaprinters
...I lost the gear cover of my Traxxas Slash 4x4 LCG... :(</p> <p>So I designed my own. It's nearly as perfect as the original piece... but different...</p> <p>Several testprints & model iterations later, I had something that fits ok :)</p>...
Switch mount for Traxxas Slash 4x4 HCG
thingiverse
I have designed this 3D printed switch mount for my Traxxas Slash 4x4 HCG for the purposes of putting the switch of a brushless motor system there it must be installed somewhere if you wish to download this file you will need a screw about 3x12mm or. ..
..
Traxxas Slash 4x4 Stand 1:10 Scale
thingiverse
I designed this stand for my son's traxxas slash 4x4 1:10 scale so he could store it and keep the wheels off the ground. Keeping it this way is apparently supposed to help maintain the round shape of the wheels and preserve the shocks and springs. ...
Traxxas Slash 4x4 LCG - Accu Holder Remix
prusaprinters
This is a remix of "Akku Träger Slash 4x4 LCG" by Sani007 https://www.thingiverse.com/thing:3740043 The stock battery holders are not flexible enough. With this battery holder I can mount a big 4S pack.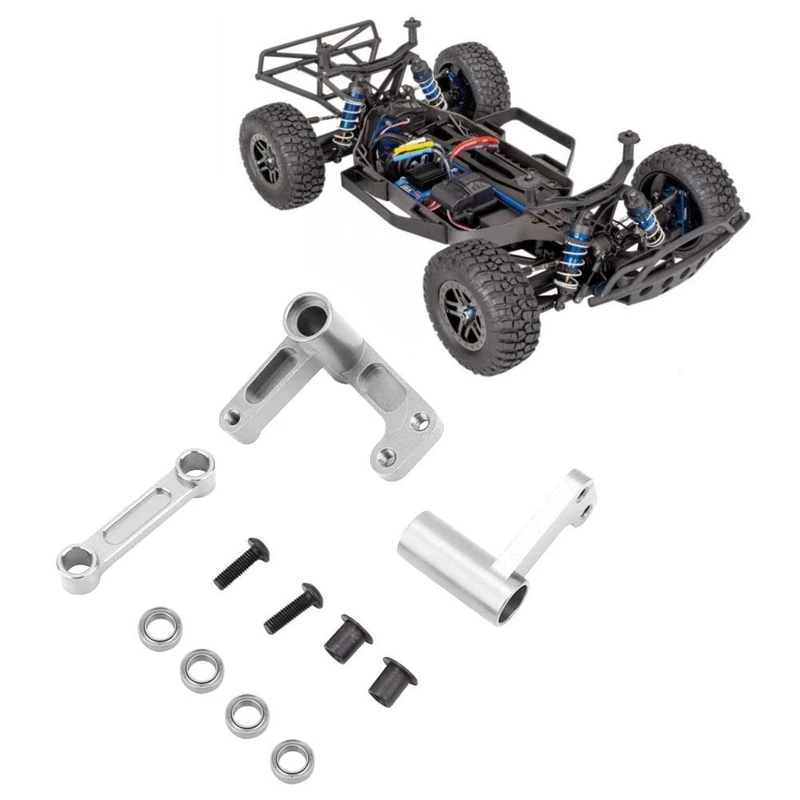 I added holes Version 2 : made it more flush...
Body Mount Spacers for Traxxas Slash 4x4
thingiverse
The reason why I have to design the body mount spacers is because I needed to adjust the front and rear stock body mounts because they are almost none adjustable and I needed to adjust the body that I originally install onto my Traxxas Slash 4x4...
Traxxas Slash 4x4 LCG Battery trays
thingiverse
I didn't feel like spending money on metal ones for my slash speed run project. These are also much lighter and can be easily be printed to be more than strong enough. ... Happy Printing!
Traxxas slash 4x4 bumper
thingiverse
for backslash
Traxxas Slash 4X4 LCG Mamba-X ESC-Receiver plate
thingiverse
For the Traxxas Slash 4X4 LCG Chassis: Needed a way to secure the Castle Creations Mamba-X ESC to the Traxxas Slash 4X4 LCG and to relocate the Receiver. I plan to use a chassis brace so i could not relocate the receiver to the front center of the...
traxxas 1:16 slash 4x4 rc car body support
thingiverse
my traxxas slash 4x4 took Quite a beating and it damaged the body's mounting plate.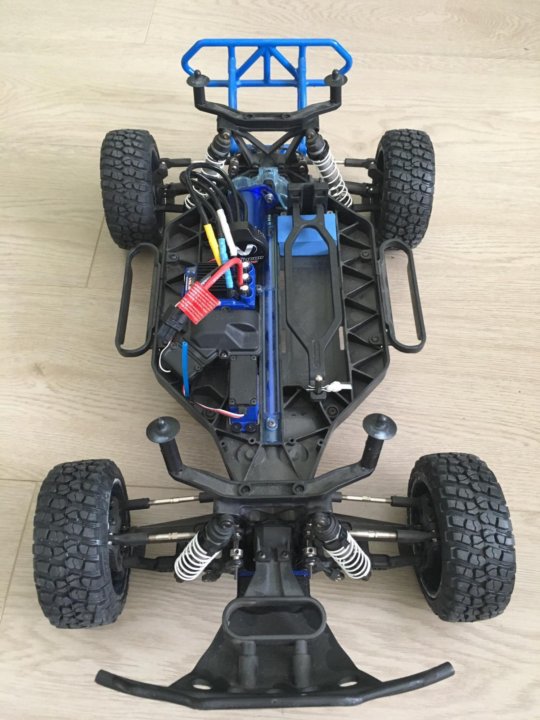 .. i decided to design a shell for around the part to support the body.
...
not tested yet.
.. i decided to design a shell for around the part to support the body.
...
not tested yet.
54T TRAXXAS Slash 4x4 spurgear NOT WORKING YET
thingiverse
TRAXXAS Slash 4x4 54 Tooth Spur Gear for 3d Printers, which is NOT WORKING yet. ...If I get some time I will fix it someday, when my Slash is broken again (but I've bought plenty of theese parts so for the first time, there will be no need of a fix for...
traxxas slash 4x4 fpv cam and vtx mount
thingiverse
This fpv system mount will make your slash 4x4 even more fun then it is.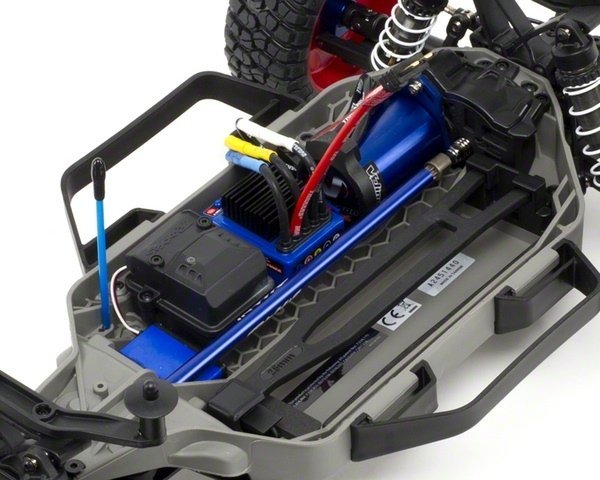 The camera pops out the windshield so the hole will need to be cut in the body. Also the bottom should be heated up with a heat gun to bend with the frame of the slash as you...
Mamba-X ESC Holder for Traxxas Slash 4X4
thingiverse
This two part design has the main holder and clamp and uses mounting holes that are already part of the Traxxas Slash 4X4's chassis so there is no drilling required to the main chassis. The main holder has accommodations for the Castle Creation...
Mount for any receiver box for Traxxas Slash 4x4
thingiverse
I designed this receiver mount from my Slash 4x4 because I need a solid base so I can install a receiver box or you can use this to install the receiver itself. ...If you choose the download this file you need to look at the photos and it should give...
3D printed radio-controlled aircraft model
Personal diaries
Subscribe to the author
Subscribe
Don't want
17
Hello everyone! While I'm on vacation, I decided to implement some kind of project. Having two 3D printers, I decided to fulfill my old dream - to make a radio-controlled aircraft. And somehow I wandered into one site http://rc-plans.com (not advertising), there is a section "3D Printed RC Airplane Plans", where aircraft models are provided that can be printed, assembled and launched into open flight). I chose a model from Eclipson - Model Z (not advertising). This is a free model and anyone can download it.
I printed it for a total of 4 days. I especially had to fiddle with printing in one layer - for some reason there was under-extrusion on the direct extruder when printing at the beginning of the perimeter, but I overcame this problem by looking for a solution to the problem on this site.
And here's what happened - fuselage parts:
Everything was printed with a 0.4 mm nozzle with PLA plastic. According to the instructions, screws are used everywhere, I used M3 bolts (fastening the motor mount to the body and hooks for fixing the wing). The first three sections were printed with filling the walls, since after printing the first section in one perimeter it seemed that it was not strong.
Wing details:
I printed in one perimeter as per the instructions, but I printed all parts with a bottom in two layers for the rigidity of the wing and it was more convenient to glue them together, but I had to cut holes for the guides with a clerical knife heated on fire.
Tail:
I printed everything in one perimeter, but all the details with the bottom as part of the wing.
Servo Mounts:
The red mounts had to be redrawn to fit my servos as they were a bit wider and wouldn't fit in the existing mounts, and the mount itself was made slightly thicker.
General photo of all parts of the aircraft:
The most difficult thing for me was to glue all the parts together. I bought cyanoacrylate glue, so it glues instantly, you don’t even have time to fit it butt a little. Therefore, I bought another epoxy glue, which dries in 2-4 minutes, the bottle is made in the form of a syringe. So I glued the fuselage and tail unit to them:
I hung all the rudders on reinforced tape. The color of the adhesive tape accidentally coincided with the color of the plastic, I was lucky))
The most difficult thing, of course, was to glue the wing, it is a little V-shaped, one part was re-glued three times. There were a lot of mats)
Wing assembly:
The final step is to place the electronics inside the fuselage.
I'll try to record a video of the first flight and be sure to post it).
I also think I can draw and print the chassis for it, since they are not in the models, or still let it go by hand ???
Thank you all for your attention!!! Write, ask, maybe something needs to be improved, do not hesitate to criticize).
Follow the author
Subscribe
Don't want
17
More interesting articles
eight
Subscribe to the author
Subscribe to the author
Don't want
This order was made for Western colleagues who are engaged in small-scale 3D printing, to use...
Read more
6
Subscribe to the author
Subscribe
Don't want to
Always terrorize material sellers and manufacturers for more information...
Read more
68
Subscribe to the author
Subscribe
Don't want
Getting ready for the New Year 2022. We draw tigers slowly.
Read more
Post-processing of 3D printed parts (PLA, ABS, SBS, PETG)
Contents
- Remove supports
- Remove Soluble Supports
- Sanding
- Cold welding
- Filling voids
- Polishing
- Priming and painting
- Steam smoothing
- Epoxy coating
- Metallization
Introduction
FDM technology is best suited for fast, low-budget prototyping. Layer lines are usually visible in FDM prints, so post-processing is essential if a smooth surface is to be achieved. Some post-processing techniques can also make a print more durable by changing the degree of its elastic properties, density, structural and textural features.
In this article, we will discuss the most common post-processing techniques in FDM.
Post-processed FDM prints (left to right): cold welded, void filled, raw, sanded, polished, painted and epoxy coated. Photo 3dhubs.com
Removing supports
Removing supports is usually the first step in post-processing for any 3D printing technology that uses them. In general, props can be divided into two categories: standard and soluble. Unlike other post-processing methods discussed in this article, the removal of props is mandatory and does not result in improved surface quality.
Initial printout with props, poor prop removal, good prop removal. photo 3dhubs.com
Removal of standard props
Tools
- Wire cutters, needle nose pliers, tongs
- Toothbrush, brush
| Finishing | ★ ☆ ☆ ☆ ☆ |
| Approvals | ★ ★ ☆ ☆ ☆ |
| Speed | ★ ★ ★ ★ ☆ |
| Suitable for | all thermoplastics FDM |
Process
Normally, the backups come off the printout without problems, and hard-to-reach places (such as holes or cavities) can be removed from the backup material with an old toothbrush. Proper placement of support structures and correct print orientation can significantly reduce the negative impact of supports on how the final printout will look.
Pluses
- Does not change the overall geometry of the part.
- The process is very fast.
Cons
- Does not remove layer lines, scratches or other surface defects.
- If excess material or marks remain from the support structure, print accuracy and appearance suffer.
Soluble Support Removal
Instrumentation
- Solvent resistant container
- Thinner
- Ultrasonic cleaner (optional)
| Finishing | ★ ★ ★ ☆ ☆ |
| Approvals | ★ ★ ☆ ☆ ☆ |
| Speed | ★ ★ ★ ★ ☆ |
| Suitable for | all thermoplastics FDM |
Process
Soluble support standard materials are removed from the printout by immersing it in a reservoir of the appropriate solvent. Supports are usually printed:
- HIPS (usually with ABS)
- PVA (usually with PLA)
A glass container like a preservation jar is fine. Any non-porous vessel is suitable for water treatment. To quickly remove props from HIPS/ABS printouts, you will need a solution of equal parts D-limonene and isopropyl alcohol. Many other support structure materials such as PVA (with PLA) dissolve in normal water.
Pro Tricks
Use an ultrasonic cleaner to shorten the solution time and change the solvent as it becomes saturated. A warm (not hot) solution works faster - heating is useful if there is no cleaner.
Pluses
- Complex geometry is allowed for which the standard method of removing props is not possible.
- Smooth surface at the support points.
Cons
- Improper dissolution of the supports can cause discoloration and skewed printouts.
- Does not remove layer lines, scratches or other surface imperfections.
- May cause small holes or holes if soluble material seeps into the object during printing.
Cleaning with a skin
SHID SHIP SHIP ABS ABS ABS PROBECTION
Instrumentation
- ENLACTION PERENCE with grain
on 150, 220, 400, 600, 1000 and 2000 - Wiping cloth
- Toothbrush
- Soap
- Face mask
| Finishing | ★ ★ ★ ★ ☆ |
| Approvals | ★ ★ ★ ☆ ☆ |
| Speed | ★ ★ ☆ ☆ ☆ |
| Suitable for | all thermoplastics FDM |
Process
Once the props have been removed or dissolved, sanding can be done to smooth the part and remove any obvious defects such as smudges or prop marks. Which sandpaper to start with depends on the thickness of the layer and the quality of the print: for layers of 200 microns or less, or for prints without blotches, you can start with sandpaper at P150. If there are blobs visible to the naked eye, or the object is printed with a layer thickness of 300 microns or more, stripping should begin with P100.
The process can be continued up to P2000 grit (one approach is to go to 220, then 400, 600, 1000 and finally 2000). Wet sanding is recommended from the very beginning to the very end - this will avoid excessive friction, which can lead to an increase in temperature and damage the object, as well as contaminate the sandpaper itself. Between sanding, the printout should be cleaned with a toothbrush and washed with soapy water, then wiped with a cloth to remove dust and prevent it from sticking together. Even P5000 can be sanded to achieve a smooth, shiny FDM part.
Pro Tricks
Always sand in small circular motions - evenly over the entire surface of the part. It may be tempting to sand perpendicular to the layers, or even parallel, but this can lead to gouges. If the part is discolored or has a lot of scratches after sanding, it can be heated a little to soften the surface and allow some defects to smooth out.
Pros
- An exceptionally smooth surface is obtained.
- Further post-processing (painting, polishing, smoothing and epoxy coating) is greatly facilitated.
Cons
- Not recommended for double or single shell parts as sanding may damage the printout.
- The process is difficult in the case of sophisticated surfaces and the presence of small details in the object.
- Grinding too aggressively and removing too much material can affect the appearance of the part. Acetone for ABS. Dichloromethane for PLA, ABS
- Sponge Applicator
| Finishing | ★ ★ ☆ ☆ ☆ |
| Approvals | ★ ★ ☆ ☆ ☆ |
| Speed | ★ ★ ★ ★ ★ |
| Suitable for | all thermoplastics FDM |
Process
If the size of the object exceeds the capacity of the printer, the object is printed in parts and then assembled. In the case of PLA and some other materials, assembly can be done with Dichloromethane or a suitable adhesive (the choice of adhesive depends on the plastic). In the case of ABS, it is possible to "weld" with acetone. The mating surfaces should be slightly moistened with acetone and squeezed tightly or clamped and held until most of the acetone has evaporated. So the parts will be held together by chemical bonds.
Pro Tricks
Increasing the surface area of the acetone contact increases bond strength. Tongue-and-groove to help.
Pros
- Acetone does not change surface color as much as most adhesives.
- After drying, the compound acquires the properties of ABS, which makes further processing easier and more uniform.
Cons
- The bonding of ABS parts by cold acetone "welding" is not as strong as if the part were printed as a whole.
- Excessive use of acetone can dissolve the part and affect final appearance and tolerances.
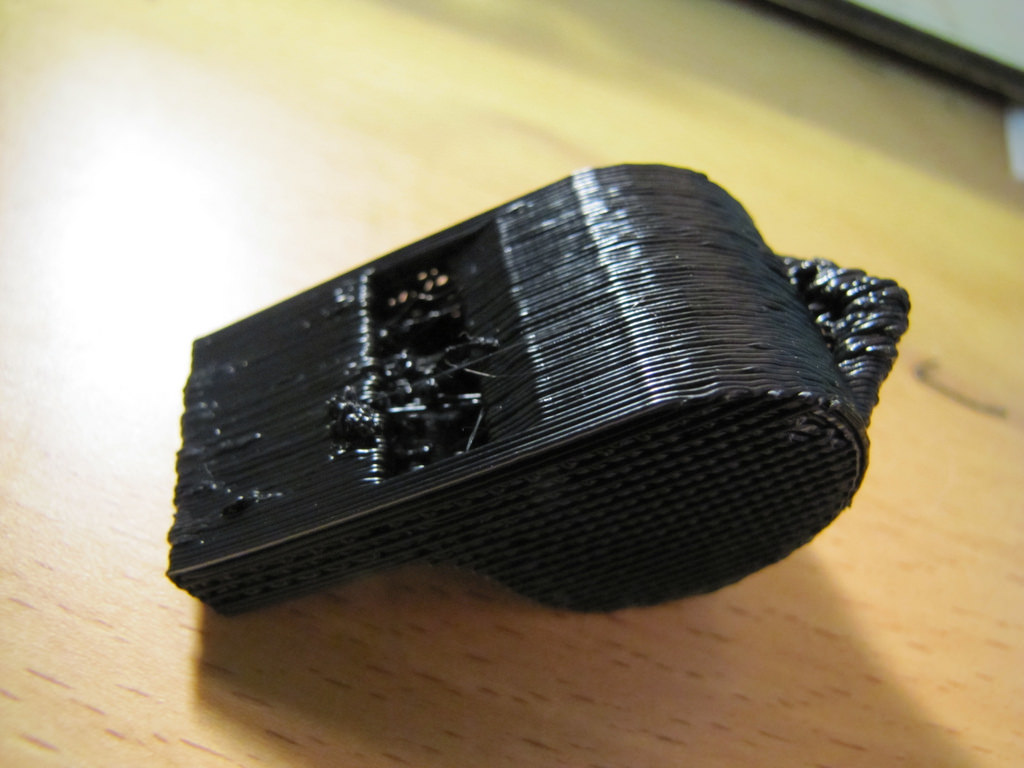
Void Fill
Black ABS Print, Filled and Sanded
Tool Kit
- Epoxy (for small voids only)
- Automotive body filler (for large voids and joints)
- ABS filament and acetone (only for small voids in ABS printouts)
| Finishing | ★ ★ ☆ ☆ ☆ |
| Approvals | ★ ★ ★ ☆ ☆ |
| Speed | ★ ★ ★ ☆ ☆ |
| Suitable for | all thermoplastics FDM |
Process
Unusual voids may come out after the part has been ground or dissolved. These voids are formed during printing when the layers are incomplete due to any restrictions on the trajectory of the print head, which is often inevitable. Small gaps and voids can be easily filled with epoxy and no additional treatment is required in this case. Larger gaps or voids left by assembling a multi-part object can be filled with automotive bodywork filler, but the printout will then need to be re-sanded. Putty works great, is easy to process with sandpaper and can be painted. Moreover, the parts connected by such a filler, or voids filled with it, turn out to be stronger than the original plastic.
Slots in ABS printouts can also be filled with ABS thinned with acetone, which reacts chemically with the ABS object and seeps into existing voids. It is recommended to make such a putty from 1 part ABS and 2 parts acetone, then it will not spoil the surface if used correctly.
Dichloromethane works on all plastics: ABS, PLA, HIPS, SBS, etc.
Epoxy is also useful if you want to make your 3D printed part more durable
Pros
- Epoxy filler is easy to sand and prime, resulting in an excellent surface for painting.
- An ABS solution of the same filament will give the same color so nothing will show up on the surface.
Cons
- Auto body filler or other polyester epoxy adhesive is opaque when dry and will leave discolored areas on the printout.
- Additional processing is required to achieve a uniform surface.
- Grinding too aggressively and removing too much material can affect the appearance of the part.
Polished
PLA model, polished. Photo rigid.ink
Tools
- Plastic Polishing Compound
- Sandpaper for P2000
- Wiping cloth
- Toothbrush
- Polishing pad or microfiber cloth
| Finishing | ★ ★ ★ ★ ★ |
| Approvals | ★ ★ ★ ☆ ☆ |
| Speed | ★ ★ ☆ ☆ ☆ |
| Suitable for | all thermoplastics FDM |
Process
Once the part has been cleaned, a plastic polish can be applied to the part to give a standard ABS or PLA object a mirror finish. After the part has been sanded for 2000, it is necessary to remove dust from the printout with a cloth and rinse the printout under warm water using a toothbrush. When the object is completely dry, buff it on a buffing pad or microfiber cloth, adding a polishing compound as you go, such as polishing jewelry. They are designed specifically for plastics and synthetics and give a long-lasting shine. Other plastic polishes, such as those used to polish car headlights, also work well, but some of them contain chemicals that can damage the printout.
Pro Tricks
To polish small parts, place the polishing wheel on your Dremel (or other rotary tool such as a power drill). For larger and stronger parts, you can use a grinder, just make sure that the part does not stay in one place for too long, otherwise the plastic may melt from friction.
Pros
- The part is polished without solvents that can warp it or change its tolerances.
- When properly ground and polished, a mirror-smooth surface is obtained, very similar to cast.
- Polishing and deburring plastics is extremely economical, making this a very cost-effective method of achieving a quality finish.
Cons
- If you want to achieve a mirror-smooth surface, the part must be carefully ground before polishing, which may affect tolerances.
- After polishing, the primer or paint no longer sticks.
Primer and paint
Gray PLA FDM print spray painted black. 3dhubs.com
Tools
- Cleaning cloth
- Toothbrush
- 150, 220, 400 and 600 grit sandpaper
- Aerosol Primer for Plastics
- Finish paint
- Polishing sticks
- Polishing paper
- Masking tape (only if multiple colors are expected)
- Nitrile gloves and matching face mask
| Finishing | ★ ★ ★ ★ ★ |
| Approvals | ★ ★ ★ ☆ ☆ |
| Speed | ★ ☆ ☆ ☆ ☆ |
| Suitable for | all thermoplastics FDM |
Process
After the printout has been properly sanded (it is sufficient to reach P600 when painting), it can be primed. Aerosol plastic primer should be applied in two coats. This primer is intended for subsequent painting of models, provides an even coating and at the same time thin enough not to hide small elements. Thick primer, which is sold in hardware stores, can clump, and then you have to seriously work with sandpaper. Apply the first spray coat with short pressures from a distance of 15-20 cm from the object, trying to do it evenly. Let the primer dry and smooth out the unevenness with 600 grit sandpaper. Apply a second coat of spray with light, quick pressures, also very gently and evenly.
When the priming is completed, you can start painting. You can paint with artistic acrylic paints and brushes, but a spray gun will provide a smoother surface. Hardware store spray paints are thick and viscous and difficult to control, so use paints that are designed specifically for modeling. The primed surface must be sanded and polished (sanding and polishing sticks, which are used in nail salons, can be purchased online, they are great for our task), and then wiped with a cloth. The paint should be applied to the model in very thin layers, the first layers should be transparent. When the paint finish becomes opaque (usually 2-4 coats), let the model rest for 30 minutes to allow the paint to dry completely. Carefully polish the paint layer with manicure sticks, repeat the procedure for each of the colors (between each applied paint).
Separate parts of the model can be covered with masking tape so that the colors, if there are several, do not mix. When painting is complete, remove the masking tape and polish the object with polishing paper. Polishing paper, such as 3M or Zona, comes in a variety of grits and is a relatively new product. It is sold in packs in various online stores, and after processing with this paper, the ink layer or topcoat will literally shine - and nothing else can achieve this effect. Apply 1-2 coats of top coat to protect the paint and let it dry completely. The top coat is selected in accordance with the recommendations of the paint manufacturer. If the topcoat and paint are incompatible, it can render your entire painting job meaningless, so compatibility is very important here.
Pro Tips
Don't shake the can when spraying! It is important not to mix the pigment or primer with the propellant (propellant gas), which will cause bubbles to form in the spray. Instead, the can must be rotated for 2-3 minutes so that the mixing ball rolls like a pearl, and does not strum.
Pros
- An excellent result, if you take into account all the nuances of the process and practice.
- You can do anything with the final look of the object, no matter what material it is printed on.
Cons
- Primer and paint increase the volume of the model, which affects the tolerances and can be a problem when it comes to a part of a larger object.
- A high quality spray paint or spray gun increases costs.
Vapor smoothed
Vapor smoothed black ABS printed hemisphere
Tools
- Cleaning cloth
- Solvent resistant sealed container
- Thinner
- Paper towels
- Aluminum foil (or other solvent resistant material)
- Face mask and chemical resistant gloves
| Finishing | ★ ★ ★ ★ ☆ |
| Approvals | ★ ★ ☆ ☆ ☆ |
| Speed | ★ ★ ★ ☆ ☆ |
| Suitable for | all thermoplastics FDM |
Process
Line the bottom of the container with paper towels, if possible along the sides. It is critical that the vapors cannot damage the container and that the container itself is sealed. It is recommended to use a glass or metal container. Apply enough thinner to the paper towels so that they are wet but not soaked - this will also help them adhere better to the walls. Acetone is famous for its ability to smooth out ABS. PLA can be smoothed with a variety of other solvents (dichloromethane works well), but this plastic tends to be much harder to smooth than ABS. When working with any solvents, please follow the safety precautions for handling chemicals and always take appropriate precautions. Place a small "raft" of aluminum foil or other solvent-resistant material in the center of the paper towel-lined container. Place the printout on the "raft" (either side of your choice) and close the lid of the container. Steam polishing can take varying amounts of time, so check your printout periodically. To increase the speed of polishing, the container can be heated, but this must be done carefully so as not to cause an explosion.
When removing the printout from the container, try not to touch it in any way, leave it on the “raft”, take them out together. In all those places where the printout has come into contact with something, there will be defects, since the outer layer will be under-dissolved. Before working with it, let the printout completely “breathe” so that all solvent vapors have evaporated.
Many aerosols and/or solvent sprays are flammable or explosive and their vapors can be harmful to humans. Be extremely careful when heating solvents, always handle them and store them in a well ventilated area.
Pluses
- Many small blotches, as well as many layer lines, are smoothed out without additional processing.
- The printout surface becomes exceptionally smooth.
- The procedure is very fast and can be done using commonly available materials.
Cons
- Does not “heal” cracks, does not completely hide layer lines.
- During the smoothing process, the outer layer of the printout dissolves, which greatly affects the tolerances.
- Negatively affects the strength of the printout due to changes in the properties of its material.
Immersion
PLA model immersed in dichloromethane. Photo 3dpt.ru
Tools
- Solvent resistant container
- Thinner
- Eye hook or cog
- Heavy wire for sculpture or landscaping
- Dryer or drying frame
- Face mask and chemical resistant gloves
| Finishing | ★ ★ ★ ★ ☆ |
| Approvals | ★ ☆ ☆ ☆ ☆ |
| Speed | ★ ★ ★ ★ ☆ |
| Suitable for | all thermoplastics FDM |
Process
Make sure the container you are using is wide and deep enough to completely submerge the printout in the solution. Fill the container with the appropriate amount of solvent - be careful not to splash. As with vapor smoothing, ABS dip smoothing can be done with acetone, which is easy to find in the store, and for PLA, dichloromethane can also work well with ABS, HIPS, SBS, PETG, and many other materials. PLA is quite resistant to solvent smoothing, so it may take several passes to achieve the desired result. Prepare the printout for dipping by screwing a hook or eye screw into it in an inconspicuous place. Pass the wire through the eyelet or wrap the wire around the screw so that the printout can be immersed in the solvent. If the wire is too thin, it will not be able to withstand the buoyant force on the printout, and it will be difficult to sink the object.
Once the printout is ready, use a wire to completely immerse it in the solvent for a few seconds. Remove the printout and hang it by the wire in a dryer or on a drying frame to allow the solvent to completely evaporate from the surface. After ejection, the printout can be gently shaken to facilitate the drying process and ensure that no solvent has accumulated in the depressions.
Pro Tricks
If an opaque whitish coating appears on the printout after drying, this can be corrected by holding the object over a solvent bath for a while so that its vapor slightly dissolves the surface. This restores the original color of the printout and achieves a shiny outer layer.
Pros
- The surface of the print is smoothed much faster than steam polishing.
- Significantly less fumes are generated than other solvent polishing methods, so this method is less hazardous.
Cons
- The surface is smoothed very aggressively, so you can forget about tolerances.
- Immersion for too long can result in complete deformation of the object and a significant change in material properties.
Epoxy
Black ABS printout, half epoxy coated, half uncoated
Tools
- two part epoxy
- Sponge Applicator
- Mixing container
- Sandpaper P1000 or finer
| Finishing | ★ ★ ★ ★ ☆ |
| Approvals | ★ ☆ ☆ ☆ ☆ |
| Speed | ★ ★ ★ ★ ☆ |
| Suitable for | all thermoplastics FDM |
Process
After the printout has been cleaned (preliminary cleaning gives the best end result), wipe it thoroughly with a cloth. Mix the resin and hardener in the proportion indicated in the instructions, accurately measuring all volumes. The curing process of epoxy resin is exothermic, so glass containers and containers made of materials with a low melting point should be avoided. It is recommended to use containers that are specifically designed for mixing epoxy resins. Incorrect ratio of resin and hardener can result in longer curing time or no curing at all and result in a permanently sticky substance. Mix the resin and thinner as directed in the instructions - carefully, in smooth movements to minimize the amount of air bubbles remaining inside the mixture. Very little epoxy is needed, and most of these resins only work for 10-15 minutes, so plan accordingly.
Apply the first coat of epoxy with a sponge applicator, being careful not to build up in crevices and small parts. When the printout is sufficiently coated, allow the resin to fully cure - as described in the instructions that came with it. One coat may be sufficient, but for optimum results it is best to lightly sand the printout with fine sandpaper (on P1000 and above) to eliminate any imperfections. Wipe off the dust with a cloth and, in the same way as before, apply a second layer of epoxy.
Pros
- A very thin coat of epoxy won't affect tolerance too much (unless the printout has been sanded too hard beforehand).
- A protective shell forms around the object.
Cons
- The layer lines will remain visible, they will only be covered by a smooth shell.
- If too much epoxy is used, it can flood parts and edges, and the surface can appear greasy.
Metallization
FDM printed structural element nickel plated with Repliform RepliKote technology
Tools (for home use)
- A galvanizing solution can be obtained by mixing a metal salt, acid and water, but if the proportions are inaccurate and the substances are of insufficient quality, one cannot count on a professional result.
| Finishing | ★ ★ ★ ★ ☆ |
| Approvals | ★ ★ ★ ☆ ☆ |
| Speed | ★ ★ ★ ★ ☆ |
| Suitable for | all thermoplastics FDM |
Process
Electroplating can be carried out at home or in a professional workshop. To do everything right, you need to be well versed in the materials, in what is actually happening - and at home these opportunities are usually limited. In order to achieve excellent surface quality and to have more plating options, including chrome plating, it is best to use the services of professional workshops. The copper galvanization process will be described below as an example.
At home, you can galvanize with copper or nickel, and this coating will then serve as the basis for galvanizing with other metals. It is critically important that the printout surface be as smooth as possible before it is galvanized. Any bumps and lines in the layers will be enhanced as a result of the process. Prepare the sanded and cleaned object for plating by coating the plastic with a thin coat of high quality conductive paint, or with a graphite and acetone solution for ABS printouts. Allow the conductive coating to dry completely, sand if necessary to ensure a smooth surface. At this stage, it is extremely important not to touch the printout with bare hands or to wear gloves, because sweat marks on the object will certainly affect the quality of the galvanization.
Insert a screw or eyelet in an inconspicuous place on the printout and connect it to the negative terminal of the rectifier. This will be the cathode. Connect the copper anode to the positive contact of the rectifier. Fill the container with enough copper plating solution so that the printout is completely covered with it. Immerse the anode in the container and turn on the power. After the rectifier is turned on, immerse the printout in the container, making sure that it does not touch the anode anywhere. Beware! When the object is already in the bath, the galvanization system is active, and contact with the solution, cathode or anode can be traumatic. Set the voltage on the rectifier to 1-3 Volts, and the process will go to full metallization. To speed things up, the voltage can be increased, but not more than 5 volts. When enough metal has deposited on the printout, simply turn off the power and dry the object with microfiber towels. When it's dry, varnish the object to protect it from corrosion.